
Mr. Fix-It's World of Home Improvement--IV
Hard Wood Floor Sanding

If you are going to refinish your hardwood floors, then you need to learn how to do some sanding. The reason for this is that sanding is the first major step in hardwood floor restoration, and is also the step that takes the longest to complete.
Keep in mind that while it isn't all that difficult (as long as you have the right tools) it can take a few days to get everything done right.
Materials needed:
Deck brooms
Wide brooms
Dust pan
Dust mask
Gloves (rubber or polyurethane your choice)
Safety goggles
Floor sander (Drum sanders are quick, but need high control. Orbital sanders take longer, but allow easier control.)
Floor edger
Shop vacuum
2 large fans
Sand paper (36, 60, 80, and 100 grit)
Procedure:
1. Remove everything.
The first step in sanding wood floors is to remove everything from the room. Not only does this make it a little easier to move around, it helps protect your furniture, electronics, and other knickknacks from getting covered in wood dust that can be a pain in the rear to remove.
At this time you will also want to hang some plastic sheets over any doorways into or out of the room so that the dust doesn't spread throughout the house.
You will also want to close off any vents that you may have in your room as well.
2. Inspect your floor.
Once you have your floor cleared of all rugs, furniture, and other items, it is time to do a thorough inspection.
When you are inspecting your floor take time to seriously look at it.
You are looking for any nails that may have come loose (if you find any, replace with a screw instead; they last longer) or cracks that need to be repaired.
Fix any problems that you have, but be aware that if a crack is too large you may need to replace that piece of wood.
3. Clean your floor.
After you have inspected your floor and repaired any problems you may have found, it is time to do a little cleaning.
Go over the floor with a deck broom, then a wide broom, and sweep up everything that you can find.
This will help remove any dirt or debris that could damage the floor as you are sanding it.
4. Prepare to sand.
Place a large box fan near one door, and the other in a semi-open window.
This will help create a breeze that should help clear out any free-floating dust that will get kicked up when you start sanding.
Make sure that the breeze is going from the door out the window, or you could end up spreading some wood dust throughout your home.
Be sure that you are also wearing your gloves and dust mask when sanding, it is also a good idea to wear some eye protection as well.
5. Sand the floor.
Using your preferred type of sander, clip on the heaviest grit sand paper, which is 36 grit, and begin sanding.
Make sure that you are continually moving the sander in a steady motion, and that you cover the entire floor.
You will need to periodically change the sand paper.
Whenever you need to switch the sand paper, use your shop vacuum to clear out as much of the dust as you can.
6. Sweep and inspect the floor.
Clean off your floor as much as you possibly can using the deck brooms, wide brooms, and shop vacuum.
This will allow you to clearly see any areas of your floor that you may have missed, as well as getting it ready for the next stage of sanding.
7. Repeat as necessary.
Repeat steps two through six using increasingly finer sandpaper until you have a perfectly smooth floor.
Once you have finished sanding, make sure that you do a thorough job cleaning up, or you will have some serious problems staining or sealing the flooring.
There you have it...and...as usual, we have some videos.
Mr. Fix-It
_______________________________
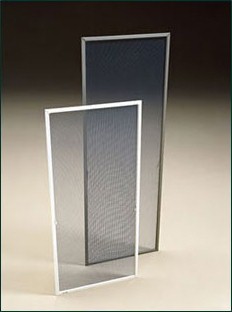
Repairs to Window Screens
It's spring and before you know it, summer's heat will arrive, but between now and then, the weather can best be described as "glorious".
Many of us in our living rooms at dusk will be enjoying a cool breeze gently fluttering the white sheers at the open windows.
We'll also enjoy leaving the windows open at night, anticipating feeling the cool air in the morning.
At the beginning of spring each year, normally it's still cold enough to leave the windows shut, but now is the time to take advantage of the nice weather and check all of the window screens in your home to see if they need repairs.
Repairing a window screen is easier and less expensive than replacing the entire screen, and there are different methods you can try to solve your problem.
The only time it's really necessary to replace an entire screen is when the tear or hole is at the frame of the window, or if the screen has been entirely ruined by an impact, creating a hole nearly as large as the entire screen.
Follow these guidelines when you need to repair your window screens:
1. At your local home improvement store, purchase the same type and color screen as your existing screen, and a bottle of clear fabric glue from a craft store.
2. Remove the screen from the window and lay it on a flat surface, or you can try to make the repair with the screen in place.
3. Cut a piece of screen leaving one-inch margins larger than the hole or tear.
4. Using quilting thread the same color as the screen, and a large needle, sew the patch onto the screen, using small stitches, going through both layers of screen.
5. Flatten the screen every few stitches to ensure there are no gaps, and then finish the repair with a strong knot, knotting at least three times.
6. Apply fabric glue to the edges of the patch, then turn the screen over and apply the glue directly along the line of thread.
7. Once you've finished the repair, replace the screen into the window frame.
You can also repair very small holes with just fabric glue, with the screen still in place at the window.
If you choose to use fabric glue instead of thread, glue the patch in place, apply a piece of waxed paper to both sides of the screen over the patch, and then use a magnet on either side of the screen on top of the waxed paper to hold the patch in place until it dries—usually about twenty minutes—and then gently remove the magnets and the waxed paper.
Anyone can do it !
Here are some helpful videos.
Mr. Fix-It
____________________________________
The Attic Air Cycler
A Waste That's Easy to Disconnect
SAVE ON ELECTRIC BILLS
SAVE ON HVAC (HEATING, VENTALATION AND AIR CONDITIONING)REPAIRS
REDUCE DUST BUILD UP IN YOUR HOME
About 50% of our Sun City Anthem homes (mostly phase two homes) built by Pulte have a device in the attic called an “Air Cycler.”

This little gadget is mounted on an horizontal forced air unit (HVAC) to control the blower fan when the HVAC is not in operation providing heating or cooling.
The Air Cycler was installed to circulate the air in your house for 10 minutes, every 20 minutes, 24 hours a day to eliminate stale air, expel new construction chemical odors from carpets, wood products, paint, etc.
To be perfectly honest...my opinion is simply...
...this was a gimmick installed by the builder to add to the features to sell homes.
THE DISADVANTAGE WITH THE AIR CYCLER
Operates intermittently 8 hours daily independently of heating and air conditioning.
Increases electric bill.
Excessive wear and tear on the HVAC fan motor and other parts.
Allows poorly filtered outside air (vented through roof) to enter the closed HVAC system behind the return air filters. This means whatever is in the air on your roof is drawn into you system and deposited throughout your house...AS IN DUST, POLLEN, ODORS.
Draws in cold air in the winter when you want heat.
Draws in hot air in the summer when you need cooling.
MY ADVICE...
TURN IT OFF FOREVER...IT IS NOT NECESSARY NOW THAT THE THREAT OF CHEMICAL ODORS ARE GONE.
IT'S SIMPLE TO DISABLE THE AIR CYCLER
Climb into the attic and look for a white plastic box (similar to a thermostat) mounted on the HVAC.
Remove the Air Cycler cover after cutting the black band.
Remove the red wires from the terminal and twist together with a small wire nut.
Remove the two green wires from both terminals and twist together with a small wire nut.
Replace cover and your done.
NEXT...BLOCK OFF THE OUTSIDE AIR INLET
Open and remove HVAC return air filters.
Locate and remove green 12” filter.
Install duct tape to cover 5” opening.
Reinstall green and regular filter, close the grill, and your done.
Questions?
Forrest
Mr Fix-It
(702) 823-5580
______________________________
Did You Receive a Post Card Regarding
a Class Action Lawsuit in Reference to Your
Heating Ventilation Air Conditioning
(HVAC) Unit ?

I have received several calls regarding the Class Action Law Suit against HVAC Aspen Evaporator Coils.
York HVAC units were installed by the builder in Sun City Anthem and surrounding communities.
Residents received a yellow post card notifying of the Aspen Class Action Law Suit.
I was informed by York that some HVAC units were installed with Aspen Evaporator Coils due to a shortage of coils.
York could not give me a time period when the Aspens were used.
However, York HVAC units with Aspen coils can be identified by looking at the serial number of the HVAC unit in the attic.
If the serial number begins with "S" you have Aspen, if it begins with "W" you do not.
Residents can file a response to the post card and someone will check the serial number for you to see if you qualify for the $220 rebate.
You can learn more about this action by clicking on this link:
You can obtain a claim form and file in online by clicking on this link:
You may also contact the Claims Administrator by calling toll-free:
1 (855) 684-6180
Mr. Fix-It
___________________________
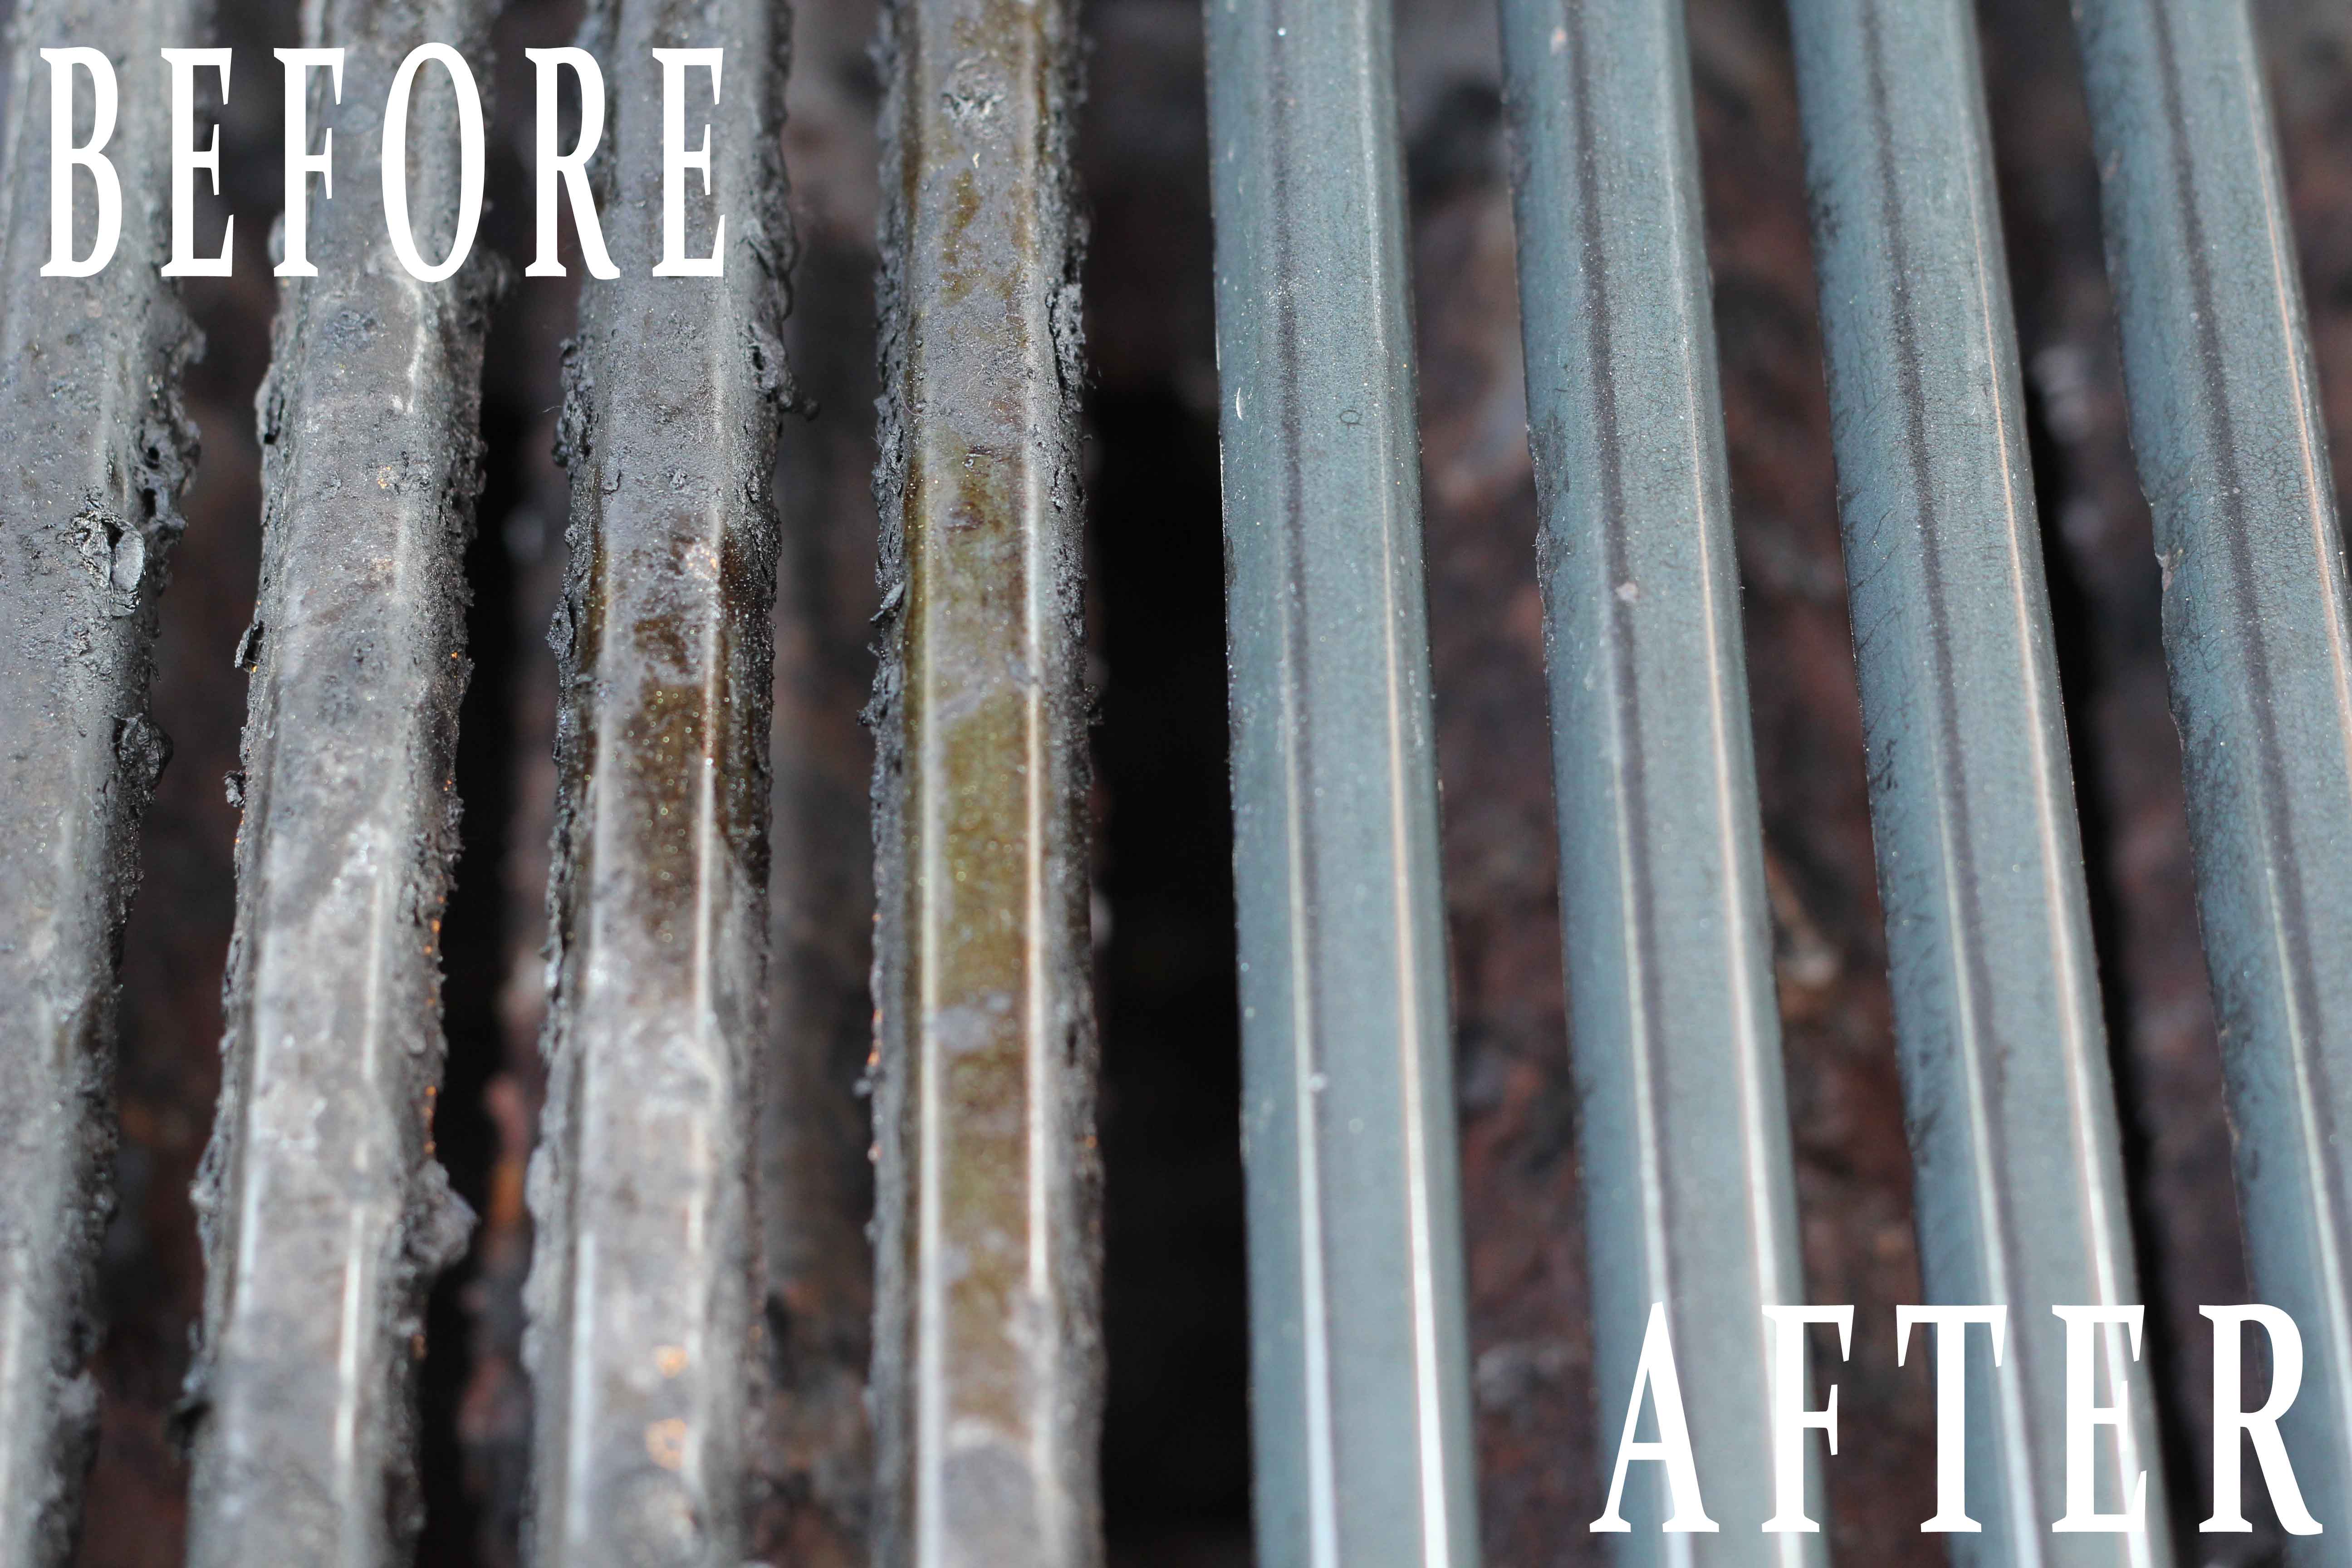
Got a Gas BBQ Grill ?
It Probably Needs a Good Cleaning
..and...
Here's How

Gas barbecues are extremely useful cooking implements, and are particularly popular during the summer months; however, just because something is popular doesn't mean that most people know how to take care of that item like they should.
One of the best, and easiest, methods for taking care of a gas grill is by cleaning it properly.
Cleaning a gas grill is actually fairly easy, though you can be pretty sure that you will be getting more than a little dirty yourself depending on how long it has been since the last time you did any cleaning.
What's the best way to clean it? Follow these steps.
Get the right tools
Cleaning a gas grill requires that you use certain tools. Most of these tools you should already possess, but others you may need to purchase from your local department store, home improvement store, or even grocery store.
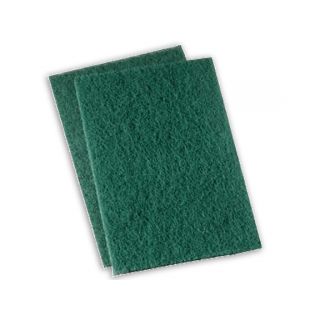
The tools that you need are a grill brush (typically one of those that have metallic bristles on one side, and scouring pad on the other), a few green scrub pads, some rubber gloves (to keep the dirt and grime off your hands), a good degreasing dish soap, hot water, and a bucket.


For particularly difficult or dirty grills you may want to purchase some oven cleaner and a few large trash bags.
Start with the grates
Remove the grates from the grill, and get started on cleaning them with the grill brush. This should remove most of the nasty junk from the grates, but won't get them perfectly clean.
Fill up a large bucket with some hot, soapy water, and then dunk the grates into the bucket.
Remove one, and begin scrubbing away at the grates.
Simply wash and scrub them like you would most dishes or cooking implements.
In the event that you cannot get it as clean as you would like, spray the grates with some oven cleaner and set them into a trash bag for 24 hours.
Remove them after that time has elapsed and wash them as you normally would.
Work on the heat shields
Most gas grills have some kind of a heat shield that covers the burners, and as such helps protect them from most of the dirt and grime that can get into a grill through normal wear and tear.

Remove these heat shields and then wash and clean them as you did with the grates.
Keep in mind that you may want to change the water before you begin working on the heat shields.
If you run into stains that you can't really remove that easily then you can use the same methods with the heat shields that you did with the grates.
Clean the cover and bottom
Once you have either finished cleaning the grates and shields, or set them aside for the day to soak in the oven cleaner, you can begin cleaning the rest of the grill.
Typically all you will need to do is wash down the inside of the cover with some warm soapy water and a green scrubbie, as well as the bottom.
You may need to use a bit of elbow grease to really cut through anything that is caked on, but you shouldn't have too much trouble.
If you can't get it as clean as you would like by simply washing it, then spray some oven cleaner on the interior of the grill...

... allow it to sit overnight, and then wash out the interior the next day.
Put it all together
After you have finished cleaning, all you need to do is simply put it all together.
Once you have replaced the heat shields and the grates, your gas grill is now ready to be used again.
Before you begin cleaning a gas grill, there is one thing that you need to remember.
Cleaning a grill regularly isn't just about allowing it to look nice, and keeping it in good working order for as long as possible.
There is another reason that you need to consider, and that is the health of everyone that will end up eating any food that is cooked on it.
By keeping your gas grill as clean as possible you will be removing one potential hazard that you really don't need to face.
Need some video help?
Mr. Fix-It
_____________________________
Before You Refinish Wood
You Have to Identify the Existing Finish

The steps to refinishing wood are fairly well established.
In order to properly refinish wood you have to remove the old finish, and in order to do that it is absolutely essential to know what type of finish is currently on the wood.
How to identify wood finish is that single problem which can simply cause many people to throw up their hands in despair and give up.
Wood finish comes in different types, and there are some rather simple tests for each of the more common types of finish.
1. Varnish/Shellac
These are the most common types of furniture finishes, flooring that was laid prior to the mid 1960's as well as to some cabinets.
To identify this type of finish do a simple scratch test.
In a small, or easily hidden area of the wood and attempt to scratch off a small portion of the finish.
If you notice that the finish comes up in small flake like patches then you know you have a varnish or shellac type of finish.
2. Wax
Next to the urethane/polyurethane forms of finish, wax is the most common that is used today.
In order to determine if something has a wax finish, all that you need to do is apply a small drop of mineral oil to the finish, and wait about three minutes.
Use a clean white cloth or rag to wipe it up.
If the cloth has a yellowish brown stain that feels waxy, well that is because it is a wax finish.
3. Urethane/Polyurethane
Urethane and polyurethane are some of the most common flooring finishes that are used today.
As such, there is a really simple test you can use to determine if this is the type of finish on your wood.
Go to a small corner of the wood, and take a small knife or coin and try to scrape up a little bit. If it crumbles as you scrape it up then you can easily tell that you have a urethane/polyurethane finish.
3. Lacquer
To know if you have a lacquer finish, just simply rub a little bit of denatured alcohol onto the wood.
If it causes to partially dissolve it is more than likely a combination of shellac and lacquer.
4. Penetrating sealers
Penetrating sealers are more easily identified by what there isn't rather than what there is !
If there is not a high gloss, or if it just simply feels like wood to the touch then you can tell rather simply that you are dealing with a penetrating sealer.
We have some helpful videos on finishing various types of wood.
Here are some ideas as to how to finish various types.
Mr. Fix-It
______________________________
Does Your Toilet Sweat ?

We can fix that !
If you are finding a bunch of water lining your toilet, but can't find a leak, then chances are you have a sweating toilet.
In severe cases this rather common problem will appear as a leak, luckily it isn't all that difficult to fix.
Usually the problem is due to condensation from the water being a dramatically different temperature from the air that surrounds it.
To stop your toilet from sweating, all you need to do is follow these simple directions.
Materials Needed
1. Tank insulating kit
2. Several large towels
3. Tape measure
4. Large sponge
5. Utility knife
6. Adhesive if required
Procedure
1. Drain your tank.
The very first thing that you need to do when trying to stop your toilet from sweating is to drain the tank.
Turn the water shutoff valve until it stops feeding water to the tank.
With the water shut off, flush your toilet several times until you have removed as much of the water as you possibly can. There will be a little bit of water left at the bottom, but you can easily remove this by using a large sponge.
2. Measure.
Once you have removed all the water, you need to get a measurement of the tank.
You can do this by using a tape measure.
Write this measurements down (depth, width, length) on a piece of paper and head towards your local home improvement store.
3. Find insulation kit.
With the measurements in hand, look around the home improvement store to find a tank insulation kit that will fit.
At this time if you don't already have one, you should purchase a utility knife.
4. Become familiar with the instructions.
Open your insulation kit and see if you can find any instructions. If you can, then become as familiar with the instructions as is possible since this will tell you the manufacturer's recommendations for installation.
5. Install.
You need to begin cutting the insulating foam to the measurements of your toilet tank that you took earlier.
Once you have the foam to the proper measurements you may need to apply some adhesive on the exterior edges of the foam to help keep it stuck to the interior of the tank.
6. Test and clean.
Once you have installed the insulation, you need to refill the water tank of your toilet.
When the tank if full, test flushing a couple of times. You should notice no change in the performance of your toilet, and the condensation problem should now be a thing of the past.
Clean up your tools and supplies, and enjoy your new condensation free toilet.
Here's a helpful video:
Mr. Fix-It
_____________________________
Carpet Stains...A Mess
but
Don't Panic

Having clean and spotless carpet makes a big difference in the overall appearance of a house; however, carpet is expensive and a big pain to replace. The best thing to do is to keep it looking nice by cleaning spots as soon as they appear.
Just to help you keep the definitions straight when you are looking at cleaners or talking to manufacturers, spots and stains are often defined differently.
Spots are removable, while stains are permanent.
Stains can be diminished by products and cleaning, even if they cannot be completely removed.
It is not essential to know the differences between these two, but it can often help in a choice of cleaner or removal technique.
Liquids
It is very important to remember to only blot liquids—if you rub too hard you could rub the liquid further into the carpet, resulting in a stain.
Use a cloth or paper towels to blot.
After you have soaked up the liquid, pour a small amount of water on it to rinse it off.
Blot the stain or spot again.
Sometimes it is beneficial to repeat.
Whatever you do, do not rub the carpet too hard. You could damage the carpet, even if you do get the spot out.
Semi-solids
Substances like peanut butter, mud, or puddingshould not be blotted immediately, or the spot will be forced further into the carpet.
Instead, scoop up as much of the substance as you can with a spoon.
After you have removed most of it, rinse it with water and then use a cloth or paper towel to blot it dry.
Dried solids
Pick up the pieces and vacuum.
If there is still a spot remaining, rinse it with water and then use a cloth or paper towel to blot it dry.
Using a cleaning solvent
If you are using a carpet cleaner, first apply some to a hidden area to make sure that it will not ruin your carpet.
Follow manufacturer's instructions on the container.
Usually you will apply a small amount of the cleaner to a cloth, and then you gently blot it into the spot, working from the outside in to the middle.
After, you rinse with water, blot dry, and then repeat until the spot is gone.
If you are still not able to remove a spot or a stain, call a professional carpet cleaner.
We have some helpful videos.
Mr. Fix-it
____________________________
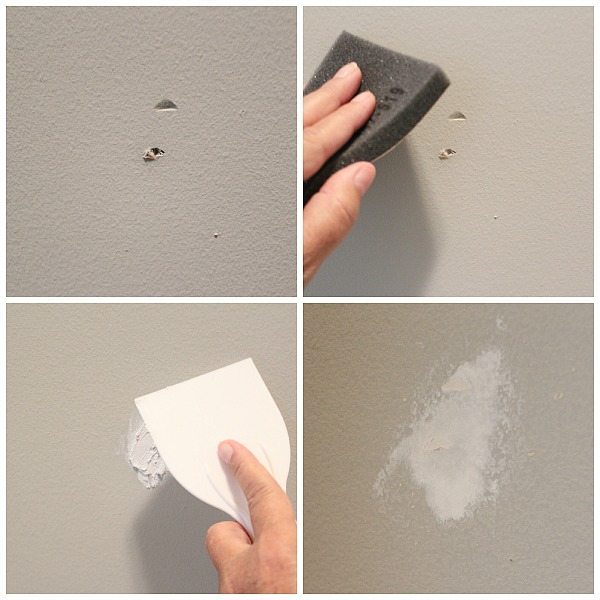
Getting Ready to Paint..."Prepping a Wall"
When you are getting ready to repaint a room, you simply can't slap some new paint on the old stuff.
The first step to painting your room like a pro lies in prepping walls for painting.
While this may be a time consuming, and and often ignored, step one in painting a room, it is still a vital one.
If you need to prep your walls for painting, all you need to do is follow these simple guidelines, and you will soon have a blank canvas that is ready for you to freshen up that room before you give it a new coast of paint.
1. Clean.
Just as with many other projects, the very first thing that you will need to do is clean the walls.
Properly cleaning, dusting, and even (if necessary) washing the walls will give you a good idea of the other work that needs to be done.
In addition to giving you a clear picture of what other work needs to be done to your walls, this will also remove the dust, grime, oils, and other general crud that will prevent the paint from adhering to the walls properly.
2. Repair.
After you have cleaned your walls, take stock for a moment, and see if there is anything that needs to be fixed or repaired.
This step in prepping for walls will go a long way to helping ensure that you have your walls look the best it possibly can.
Look for any water damage, cracks, gashes, or other types of damage, and repair them if necessary.
3. Painter's tape.
Once you have your walls properly cleaned and repaired, it is time to lay down the painter's tape.
This will help protect those elements on your wall that you do not want painted.
For example, if you have a light switch, window frames, chair rails, or wainscoting that you don't want painted then you need to lay down some painter's tape.
After you have placed some painter's tape down, lay down a few drop cloths, sheets, and newspapers to protect the other things you don't want to have any paint on.
4. Prime it.
After you have cleaned, repaired, and the painter's tape laid out it is time to prime your walls.
This step is absolutely necessary to ensure that you get the color that you want, as well as ensuring that the paint sticks to the wall.
For example, if the new color you are going to be painting your wall is lighter than your old one, you need to prime the wall to help get the proper shade.
This is due to the darker underlying paint "coloring" the lighter top coat.
Now that you have finished priming, you have completed prepping your walls for painting.
All that you have left to do is allow the primer to dry completely, and then to begin painting.
Remember to take your time, and to have fun.
These steps will help ensure that you get exactly the results that you want.
Here are some helpful videos.
Mr. Fix-It
________________________________
Fixing Scratched Plexiglas

One of the most versatile items used around the home is Plexiglas.
Whether we know it or not, this stuff is used in everything from the home entertainment centers that are in our living rooms, to our laundry rooms and kitchens or the windows throughout our homes.
This material is used because of the inexpensive cost, durability and versatility that is inherent in such materials.
Unfortunately when the material gets damaged or scratched, then it becomes cloudy and difficult to see out of.
When this happens, many people think that when this happens all that a person can do is throw out the damaged glass and replace it with a new piece.
What many people may not have realized is that it is entirely possible to clean and repair the damaged Plexiglas, therefore saving some money for better use elsewhere.
To begin your reclamation project, you are going to need to gather a few items and supplies.
You should gather together:
1. A rotary polisher (which can be rented from any hardware store).
2. Foam pads for buffing a fine clear coat .
3. Some type of a protectant / cleaner.
Some examples of such a cleaner/protectant would be 303 Aerospace Protectant or Plexi-Clear.

Once you have gathered all of your materials and equipment you now need to choose where you are going to conduct the cleaning process.
If possible, then you want to work in an area that is well ventilated, while also making sure that there is an adequate power source for your buffer.
Begin the actual process of reclamation by applying some of the cleaner/protectant to the damaged area.
Use only enough of the cleaning material as you are going to need, you are going to want to immediately begin the polishing process.
Do not let the cleaner dry first, as this creates a hazing effect, and makes it more difficult to se through.
As you are polishing the material, you are initially going to want to use a lower setting on the initial pass.
Using the lower settings is going to allow the protectant to be evenly and properly distributed where it needs to go.
After you have done this, you are ready to begin buffing it out. You can buff the area by simply changing the pad and switching to a higher RPM setting.
If the pads that you are using are double sided or reversible, then simply use that other side.
In the case that they are not, then just use a new pad.
When you are finished, you should be able to see through the Plexiglas with little or no discoloration or evidence that there was any problem.
Here are some videos to assist you.
Here's another idea...using a whitening toothpaste !
Mr. Fix-It
___________________________
The "Art"
of
Picture Hanging

If you wish to hang your personal artwork, display family photos, or show off beautiful family heirlooms, you should be able to successfully hang frames so that your decorating job looks professional and successful.
Poorly hung pictures frames appear tacky and thoughtless.
After you have picked out your frames, you will want to pick up some materials at the hardware store.
You will need a level, nails, raptor anchors, a drill with drill bits, and a hammer.
You'll also find your task easier if you ask for some help from a friend, neighbor or family member.
It is now time to start your project!
The first task is to consider placement of your frames.
When considering placement you will want to keep in mind your furniture, windows, and the function of the room. You will want to hang your frame a little bit above eye level or right about eye level for optimal viewing and placement on the wall.
Have your assistant hold your frame in the intended area and step back to so you can see properly and evaluate where you are considering putting the frame.
Once you are satisfied with your placement, put the frame aside in a safe place while you ready your hardware.
1. Choose the proper size drill bit and drill your hole.
If you have drywall you will need to use raptor anchors to properly secure your frames.
2. If you are not planning on using a drill, choose the proper size nail and hammer your nail into the wall.
Now you can properly position your frame on the nail or screw.
3. If you are planning on hanging multiple frames you will want to use a level to make sure that they are properly hung in relation to each other.
Some important tips to remember include using gloves so that artwork is not smudged and keeping artwork or family heirlooms covered until you are ready to hang them permanently.
If an heirloom or picture is extremely expensive, you should really consider the function of the room; if you intend on using the room as a family room you should consider not placing that type of artwork in the room.
It may sound easy, but a little planning can create an elegant and well balanced room.
Some videos ?
__________________________
Knowing How Deep
to
Drill a Hole
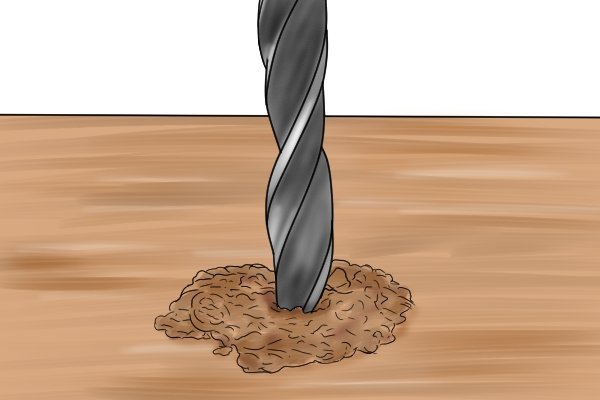
Next time you are asked to drill a hole or need to for a personal project, you may wonder how to drill the hole to a desired depth.
Before beginning your project there are a variety of tools you may need.
Necessary tools for drilling include: drilling bits, a measuring tape or ruler, a pencil or marking tool, a center punch, a rubber band, goggles, and a clamp.
All these items can be found at your local hardware store and grocery store.
Before beginning your big project, make sure that you are drilling in the proper place.
Be confident about the placement of frames and the like prior to beginning your project.
If you are hanging an item, check to make sure that you are not near electrical wiring or a cement wall.
Knock on the wall you wish to drill into and listen for a slightly hollow sound.
If you are concerned about hitting electrical wires you may speak to a contractor or a home improvement guru.
Drilling a hole to a desired depth is dependent on the length of your drill bit.
When selecting the drill bit you intend to use for your particular project, keep in mind its length.
The length of your drill bit will be the size, or depth, of your drilled hole.
With a wax writing utensil or a pencil, mark the spot you intend to drill your hole.
Using a center punch or nail, lightly tap an indent in the middle of your mark with a hammer.
Having an indent will help you to secure the drill bit in the right place when you begin drilling.
When drilling a hole into small items use a clamp to properly secure or fasten the item you are drilling or hanging in front of your marked area.
By using a clamp, you reduce your risk of injury.
If you do not use a clamp, you run the risk of the item falling during installation.
You may now begin drilling.
If you are drilling for the first time, or feel nervous about your project, you may want to use a smaller drill bit to make an initial hole.
Small drilling bits are easier to use and handle and can help you drill to the right depth.
If you start with a large drill bit you may be frustrated when you find that you do not want your hole that deep.
If you wish to continue drilling the hole deeper, select the next size drill bit until you reach your desired depth.
By applying a light pressure, you reduce your risk of losing control of the drill and drilling too deeply.
Another great method for drilling a hole to the desired depth is to use a rubber band.
Place a rubber band on the drill bit to mark the depth of the hole you wish to make.
Advance the bit slowly as you drill, and stop drilling when the rubber band has reached the surface.
Be sure that you use both hands, one to steady the drill and regulate the speed of advancement, and the other to keep the drill working.
When you are done, admire your final project!
Here's a couple of greats video to help out !
Mr. Fix-It
_____________________________
House Too Noisy?

Part of reducing interior noise levels lies in understanding where these noise levels come from.
While it may be easy to say that they come from the television, radio, or even the kids, this isn't entirely correct. In large part, the design of the home plays a huge role in how noisy it is.
The shapes, sizes, ceiling heights, and arrangement of the room and their contents can all greatly affect the way that noise acts in a home.
Typically, there is little that can be done in this particular area to help in reducing interior noise other than rebuilding or substantially modifying the house.
It's not just the way that the house is designed though that can be blamed for interior noise levels, the other reason is actually sound.
Simply put, sound can either be absorbed or reflected.
In the cases of a home that is an echo chamber, there is little absorption, which in turn reduces interior noise levels.
With homes that have large amounts of hard floors, or are designed in certain ways, there is generally a lot of reflection.
This means that the sound persists and is echoed and transmitted throughout the home, room to room. Hence, a noise that is generated in one room, can easily be heard in all of the others.
If you have the money, a good engineer or contract or even an interior designer can take a look at such situations, appraise it, and deliver some recommendations. These recommendations can help to mitigate the problem, or even eliminate it; however, this option is generally very expensive, and one that should only be relied upon as a last resort.
For those that are faced with a home that has a lot of hard surfaces, and not a whole lot of money, there are a few options that you can use.
The first thing to do is remember that angles and hard surfaces can often act like the cushions on a billiard table, which tends to "reflect" a billiard ball that hits them.
The simplest solution is to therefore break up these hard, reflective surfaces by adding soft, cushiony surfaces that will help absorb the sound and kill the echoes and transmission of the sound. Just by doing this you will be able to greatly reduce the interior noise level of your home.
Carpets, rugs, cushions, velvety cloth wallpapers, corkboard, acoustic ceiling tiles, heavy folded cloth drapes and curtains, and insulated walls can all help an awful lot in reducing interior noise.
Typically small rooms reflect noise less, while the opposite is true for larger rooms.
This means that larger rooms may need to be "broken up."
This can be done in a variety of ways, for instance you could use cloth screens to help create more "rooms" out of the single larger room.
Using tapestries hung on the back of bookcases can also do the same thing. In the end, simply rearranging the furniture and appliances can have a huge impact.
Try rearranging a few of the items in your home and see if that works in reducing interior noise levels.
Here are some helpful videos.
Mr. Fix-It
_______________________
Tired of Tile Floors?
We Have Some Ideas on Choosing
Discount Hardwood Flooring

While many people may like to tell you that there is a trick to choosing discount hardwood floors, the answer is actually quite different. In order to choose the best possible flooring for your home, all you need to do is follow a few simple guidelines.
As you read through these guidelines, take some time to jot down a few answers to the questions, and think about what they say.
By the time you are finished, you will be able to know exactly how to go about choosing the best possible discount hardwood floors.
1. Get an idea of what you can spend.
Before you can actually find a great deal on your hardwood floors, you need to know how much you have to spend. Just like with any home improvement project, you want to be able to complete the job once you have started it.
This means that you need to take time to sit down and figure out the finances available to you. This will allow you to know the maximum amount of money that you can spend for the new hardwood floors that you plan on installing.
2. Go with what makes sense.
One great source of discount hardwood floors is to use what is termed as reclaimed wood.
This is usually wood floors that have been salvaged from other homes our businesses, and been restored for future use.
Another great source for discount "hardwood" floors is to actually go with a laminate that just looks like the real thing.
Whatever method you end up using though, be sure that you go with what makes sense.
3. Does the flooring match your taste?
Will the flooring that you have in mind match the rest of your home?
Keep in mind that the floors are more than something to walk around on; rather they are an integral part of your home decorating scheme.
Make sure that the flooring style that you choose will work with the decorating scheme you have in that particular room.
4. Will it work with your lifestyle?
When choosing discount hardwood flooring, be sure to keep in mind how much use it will be getting.
Kitchens and entry ways tend to get a lot of use, and should be able to stand up to whatever is thrown at them.
You don't want to spend money that you can't afford replacing some "discount" hardwood floors in a few months, when you could have gone with a more durable alternative from the outset.
5. Who will be doing the installation?
Often the most expensive part of any flooring is the installation; however, don't think that you can simply save a few dollars by doing the work yourself.
Often by going with a professional installation, you can get a guaranteed level of work that you will not be able to match yourself.
Here are some videos on a bunch of discount hardwood flooring ideas.
Mr. Fix-It
______________________
Compact Fluorescent Lights
Most, if not all, compact fluorescent lights (CFLs) are now equipped with a screw-in feature, so that replacing incandescent bulbs with CFLs is entirely possible.
Yet, sometimes it's confusing as to which type of CFL to purchase for home use, since it seems as if there are many from which to choose.
There are four main characteristics to consider when choosing CFLs for your home lamps.
Wattage
If you are satisfied with that 60-watt incandescent bulb in your living room lamp, and the 75-watt incandescent bulb in your reading lamp, then use the following simple equivalents to choose the correct CFL wattage for your current wattages:
Trade a 40-watt incandescent for 9- to 11-watts of CFL.
Trade a 60-watt incandescent for 13 to 16 watts of CFL.
Trade a 75-watt incandescent for 18- to 20-watts of CFL.
Light Output
The ratio of CFL to incandescent light output is 1 to 3.
For example, that 60-watt incandescent bulb is replaced by a 13- to 15-watt CFL.
These ratios are typically listed on CFL packages now.
Type
For use in regular light sockets in your home, you will need to purchase standard screw-in type CFLs with integral ballasts.
There are many online sites dedicated to the types of CFLs you can choose for your home, based on your individual preferences and needs.
Color Quality
CFLs can mimic the colors of incandescent bulbs, in that you may choose from natural or daylight, cool or bright, and warm or soft white lighting.
The overall quality of light is measured in Kelvin degrees (K).
When it comes to choosing the color for your CFLs, follow this short guide to choose the correct color temperature to suit your needs:
Bright or Cool Light
Choose 4,100K or higher color temperatures.
Their descriptions may be bright white, cool, or natural.
Warm or Soft White
Choose 2,700K to 3,000K for a warm glow such as that of an incandescent bulb.
These are sometimes described as soft white.
Natural, Daylight, or Very Light
Choose full spectrum bulbs since they tend to mimic full sunlight, such as what you would want for a reading lamp.
Speak with a qualified professional at your local home improvement or hardware store, and he can point you in the right direction when it comes to choosing the correct CFL.
Make sure that you describe your preferences in lumens and color, so that you attain the desired outcome.
Here are a few videos covering compact fluorescent lighting.

Mr. Fix-It
____________________________
Are You a Mr. Fix-It?

We owe so much of the success of Anthem Opinions because of the diversity we bring our readers; and our "Mr. Fix-It's World of Home Improvement" Information Page with articles brought to you by our own "Mr. Fix-It"...
 Forrest Fetherolf
... has been one of the most popular features we've brought you over the past 5 years.
Are you a "Mr. or Ms. Fix-It" who might also be a military veteran?
Until January 5, 2018, Lowe's has offered a 10% discount to all Vets; however, that will be altered on that date.
PRIOR to January 5, 2018, to receive or in order to continue to receive the 10% veteran discount, you must REGISTER with Lowe's.
Here's the notice recently received:


Click on this link to sign up prior to the January 5th date.
___________________________
Using a "Snake"

For particularly difficult clogs, there is one thing that you should try before calling a plumber.
That is to try using a hand auger.
Hand augers, also known more commonly as snakes, are smaller versions of the tools used by a professional plumber to get rid of nasty clogs.
These tools are really effective on clogs that result from grease and hair buildup.
Before you begin using a hand auger you need to make sure that you know what you are doing. If you do it the wrong way, you could potentially damage one of the pipes.
Simply follow these steps, and you should have no problem.
1. Disconnect the trap.
Place a large bucket underneath the sink, directly underneath your drain trap. This bucket will catch the water that will come out when you disconnect and remove the trap (it helps to reduce the mess).
Loosen the slip nut couplings by using a pair of water-pump pliers, and then remove the trap.
Take the time to remove any gunk from the trap.
Set aside for later.
2. Loosen the setscrew.
Near the front of the hand auger, you should see a small key screw.
This screw is called the setscrew, and it needs to be loosened so that you can remove some of the snake.
Pull out the snake cord about a foot, and begin to feed it into the pipe. Be careful that you don't push too hard, since you may run into a bend in the wall.
Continue to gently push until you cannot push any more.
3. Tighten the setscrew.
Re-tighten the setscrew, and then turn the handle on the auger clockwise.
This should help make the cable move forward again as it works its way through the clog.
When the cable stops again, loosen the setscrew again.
Repeat the process, until you are sure that there is no more blockage.
Remove the cable and discard the gunk that is on the tip.
4. Replace the trap and test.
Replace the trap that you removed earlier. When it is in place, turn the water on and test your work.
You should notice a dramatic increase in the ability of the water to drain. If you do not, then you will need to try it again.
If you notice no significant changes after your second attempt, then you may have a clog in the main drain line.
In the event that you do, that is when you should call a professional.
Here are some handy videos.
Mr. Fix-It
__________________________
A resident wished to share a not so pleasant experience with a home warranty insurers.
Note this is one example...many individuals have had very good experiences.
Do You Need a Home Warranty Insurance Plan?
An Actual Claim Experience
(Part Two of Two)

Let’s now follow an actual claim that we are in process of making as we write this article.
My air conditioner stopped working. It was in the mid 90’s that day.
Day 1 called the home warranty insurance company.
They said a vendor would call me. I did not want to wait so I was able to get the phone number of the vendor. I made the appointment for the next day.
Day 2 The service provider (Air conditioning company) arrived and said the compressor was broken and needed replacement.
I asked how quickly can I get the replacement condenser and was told that the insurance company had to order and ship it to Henderson.
That would take 4-6 days.
I called the insurance company and they said the condenser was unavailable in Las Vegas area.
There was no option but to wait for the unit or take a CASH OUT and hire my own people to replace the condenser.
They said I would get the same amount of money that they would pay the local company which was the cost of the condenser, labor and $10 per pound for the 9 pounds of Freon that was required. They said the insurance company would call me back with the final number.
Day 3. I hired a local company to pick up a compressor that was a factory match (rather than a contractor replacement) and had the unit installed and running that day.
I guess the compressor was available in Las Vegas. I paid for the replacement out of my own pocket.
Day 4. No communication from the insurance company.
Day 5. No communication from the insurance company.
Day 6. They called and told me the amount that they would pay to have their vendor do the work.
They also said the vendor will charge more for Freon than their allowance of $10 per pound. Most often they charge $35-$45 per pound over the allowance.
I would have to pay $350+ for Freon.
They they said there was duct work that they do not cover but I would have to pay.
That is a sham as the condenser is self contained outside the house and there is no duct work to be done.
The bottom line is that to get the job done by the insurance company, I would have had to pay about $500over the insurance company’s subsidy.
I told them to send me the check and I would have the work done myself.
Just send me an emailed quote or written quote to justify the reimbursement amount which they said was $1280.
They said they would follow up in a day.
Day 7. No communication from the insurance company.
Day 8. I called and they said the person emailing things was out for the day…I could get it tomorrow.
My net result.
The homeowner warrantee for this claim was not adequate to replace and get the air conditioner repaired.
The wait time to get the repair was excessive. I will gladly take the money and when my policy expires, I will put the money that I would have paid into a house repair account and use it accordingly.
In this case, I paid less in premiums than the claim amount, but not having air-conditioning for 10 days when we had out of town company was unacceptable.
I have heard similar stories when hot water heaters, heating units, dishwashers and refrigerators were replaced. Some items like broken windows and clear cut claims could be satisfactory.
Tread carefully when you look at home warranty companies.
Most, if not all, compact fluorescent lights (CFLs) are now equipped with a screw-in feature, so that replacing incandescent bulbs with CFLs is entirely possible.
Yet, sometimes it's confusing as to which type of CFL to purchase for home use, since it seems as if there are many from which to choose.
There are four main characteristics to consider when choosing CFLs for your home lamps.
Wattage
If you are satisfied with that 60-watt incandescent bulb in your living room lamp, and the 75-watt incandescent bulb in your reading lamp, then use the following simple equivalents to choose the correct CFL wattage for your current wattages:
Trade a 40-watt incandescent for 9- to 11-watts of CFL.
Trade a 60-watt incandescent for 13 to 16 watts of CFL.
Trade a 75-watt incandescent for 18- to 20-watts of CFL.
Light Output
The ratio of CFL to incandescent light output is 1 to 3.
For example, that 60-watt incandescent bulb is replaced by a 13- to 15-watt CFL.
These ratios are typically listed on CFL packages now.
Type
For use in regular light sockets in your home, you will need to purchase standard screw-in type CFLs with integral ballasts.
There are many online sites dedicated to the types of CFLs you can choose for your home, based on your individual preferences and needs.
Color Quality
CFLs can mimic the colors of incandescent bulbs, in that you may choose from natural or daylight, cool or bright, and warm or soft white lighting.
The overall quality of light is measured in Kelvin degrees (K).
When it comes to choosing the color for your CFLs, follow this short guide to choose the correct color temperature to suit your needs:
Bright or Cool Light
Choose 4,100K or higher color temperatures.
Their descriptions may be bright white, cool, or natural.
Warm or Soft White
Choose 2,700K to 3,000K for a warm glow such as that of an incandescent bulb.
These are sometimes described as soft white.
Natural, Daylight, or Very Light
Choose full spectrum bulbs since they tend to mimic full sunlight, such as what you would want for a reading lamp.
Speak with a qualified professional at your local home improvement or hardware store, and he can point you in the right direction when it comes to choosing the correct CFL.
Make sure that you describe your preferences in lumens and color, so that you attain the desired outcome.
Here are a few videos covering compact fluorescent lighting.
Mr. Fix-It
____________________________
We owe so much of the success of Anthem Opinions because of the diversity we bring our readers; and our "Mr. Fix-It's World of Home Improvement" Information Page with articles brought to you by our own "Mr. Fix-It"...

Forrest Fetherolf
... has been one of the most popular features we've brought you over the past 5 years.
Are you a "Mr. or Ms. Fix-It" who might also be a military veteran?
Until January 5, 2018, Lowe's has offered a 10% discount to all Vets; however, that will be altered on that date.
PRIOR to January 5, 2018, to receive or in order to continue to receive the 10% veteran discount, you must REGISTER with Lowe's.
Here's the notice recently received:

Click on this link to sign up prior to the January 5th date.
___________________________
Using a "Snake"
For particularly difficult clogs, there is one thing that you should try before calling a plumber.
That is to try using a hand auger.
Hand augers, also known more commonly as snakes, are smaller versions of the tools used by a professional plumber to get rid of nasty clogs.
These tools are really effective on clogs that result from grease and hair buildup.
Before you begin using a hand auger you need to make sure that you know what you are doing. If you do it the wrong way, you could potentially damage one of the pipes.
Simply follow these steps, and you should have no problem.
1. Disconnect the trap.
Place a large bucket underneath the sink, directly underneath your drain trap. This bucket will catch the water that will come out when you disconnect and remove the trap (it helps to reduce the mess).
Loosen the slip nut couplings by using a pair of water-pump pliers, and then remove the trap.
Take the time to remove any gunk from the trap.
Set aside for later.
2. Loosen the setscrew.
Near the front of the hand auger, you should see a small key screw.
This screw is called the setscrew, and it needs to be loosened so that you can remove some of the snake.
Pull out the snake cord about a foot, and begin to feed it into the pipe. Be careful that you don't push too hard, since you may run into a bend in the wall.
Continue to gently push until you cannot push any more.
3. Tighten the setscrew.
Re-tighten the setscrew, and then turn the handle on the auger clockwise.
This should help make the cable move forward again as it works its way through the clog.
When the cable stops again, loosen the setscrew again.
Repeat the process, until you are sure that there is no more blockage.
Remove the cable and discard the gunk that is on the tip.
Remove the cable and discard the gunk that is on the tip.
4. Replace the trap and test.
Replace the trap that you removed earlier. When it is in place, turn the water on and test your work.
You should notice a dramatic increase in the ability of the water to drain. If you do not, then you will need to try it again.
If you notice no significant changes after your second attempt, then you may have a clog in the main drain line.
In the event that you do, that is when you should call a professional.
Here are some handy videos.
Mr. Fix-It
__________________________
A resident wished to share a not so pleasant experience with a home warranty insurers.
Note this is one example...many individuals have had very good experiences.
Do You Need a Home Warranty Insurance Plan?
An Actual Claim Experience
(Part Two of Two)
Let’s now follow an actual claim that we are in process of making as we write this article.
My air conditioner stopped working. It was in the mid 90’s that day.
Day 1 called the home warranty insurance company.
They said a vendor would call me. I did not want to wait so I was able to get the phone number of the vendor. I made the appointment for the next day.
Day 2 The service provider (Air conditioning company) arrived and said the compressor was broken and needed replacement.
I asked how quickly can I get the replacement condenser and was told that the insurance company had to order and ship it to Henderson.
That would take 4-6 days.
I called the insurance company and they said the condenser was unavailable in Las Vegas area.
There was no option but to wait for the unit or take a CASH OUT and hire my own people to replace the condenser.
They said I would get the same amount of money that they would pay the local company which was the cost of the condenser, labor and $10 per pound for the 9 pounds of Freon that was required. They said the insurance company would call me back with the final number.
Day 3. I hired a local company to pick up a compressor that was a factory match (rather than a contractor replacement) and had the unit installed and running that day.
I guess the compressor was available in Las Vegas. I paid for the replacement out of my own pocket.
Day 4. No communication from the insurance company.
Day 5. No communication from the insurance company.
Day 6. They called and told me the amount that they would pay to have their vendor do the work.
They also said the vendor will charge more for Freon than their allowance of $10 per pound. Most often they charge $35-$45 per pound over the allowance.
I would have to pay $350+ for Freon.
They they said there was duct work that they do not cover but I would have to pay.
That is a sham as the condenser is self contained outside the house and there is no duct work to be done.
The bottom line is that to get the job done by the insurance company, I would have had to pay about $500over the insurance company’s subsidy.
I told them to send me the check and I would have the work done myself.
Just send me an emailed quote or written quote to justify the reimbursement amount which they said was $1280.
They said they would follow up in a day.
Day 7. No communication from the insurance company.
Day 8. I called and they said the person emailing things was out for the day…I could get it tomorrow.
My net result.
The homeowner warrantee for this claim was not adequate to replace and get the air conditioner repaired.
The wait time to get the repair was excessive. I will gladly take the money and when my policy expires, I will put the money that I would have paid into a house repair account and use it accordingly.
In this case, I paid less in premiums than the claim amount, but not having air-conditioning for 10 days when we had out of town company was unacceptable.
I have heard similar stories when hot water heaters, heating units, dishwashers and refrigerators were replaced. Some items like broken windows and clear cut claims could be satisfactory.
Tread carefully when you look at home warranty companies.
___________________________
___________________________
Do You Need a Home Warranty Insurance Plan?
(Part One of Two)

What Is a Home Warranty?
A home warranty is not the same thing as homeowners insurance, nor is it a replacement for homeowners insurance.
Homeowners Insurance covers major perils such as fires, hail, property crimes and certain types of water damage that could affect the entire structure and/or the homeowner's personal possessions.
A home warranty does not cover these perils.
Rather, it covers specific components of the home.
A home warranty is a contract between a homeowner and a home warranty company that provides for discounted repair and replacement service on a home's major components, such as the furnace, air conditioning, plumbing and electrical system.
A home warranty may also cover major appliances such as washers and dryers, refrigerators and swimming pools.
Most plans have a basic component that provides all homeowners who purchase a policy with certain coverages.
Homeowners can also purchase one or more optional components that provide additional coverage at additional cost.
Home warranty companies have agreements with approved service providers. When something that is covered by a home warranty breaks down, the homeowner calls the home warranty company, and the home warranty company sends one of its service providers to examine the problem.
If the provider determines that the needed repair or replacement is covered by the warranty, he completes the work.
The homeowner only pays a small service fee, plus the money she has already spent to purchase the warranty.
What Does It Cost?
A home warranty costs a $500 to $700 per year, paid up front.
The plan's cost varies depending on the property type and whether the homeowner purchases a basic or extended plan.
The cost usually does not vary with the property's age, unless the home is brand new, which increases the cost of coverage.
The home's square footage also does not affect the price in most cases, unless the property is more than 5,000 square feet.
Separate structures, such as guest houses, usually are not covered by the basic policy, but can be covered for an additional fee.
However, garages should be covered by the basic policy.
In addition to an annual premium, home warranties charge a service call fee (also called a trade call fee) of around $75-$125 every time the warranty holder requests that a service provider come out to the house to examine a problem.
If the problem requires more than one type of contractor to visit (e.g., a plumber and an electrician), the homeowner may have to pay the service fee for each contractor.
Having a home warranty doesn't mean the homeowner will never have to spend a penny on home repairs. Some problems won't be covered by the warranty, whether because the homeowner didn't purchase coverage for that item or because the warranty company doesn't offer coverage for that item.
Also, home warranties usually don't cover components that haven't been properly maintained.
Furthermore, if the warranty company denies a claim, the homeowner will still have to pay the service fee and will also be responsible for repair costs.
The Benefits of a Home Warranty
Like all warranties, a home warranty is supposed to protect against expensive, unforeseen repair bills and provide peace of mind.
For a homeowner who doesn't have an emergency fund or who wants to protect their emergency fund, a home warranty can act as a buffer.
Home warranties also make sense for people who aren't handy or who don't want to worry about tracking down a contractor when they have a problem.
Home Warranties Have Drawbacks
If home warranties were perfect, everyone would have one. But they don't.
Why is that?
One major problem with a home warranty is that it will not cover items that have not been properly maintained.
What is considered proper maintenance can be a significant gray area and is the source of many disagreements between home warranty companies and warranty holders.
In a worst-case scenario, unscrupulous warranty companies may use the improper maintenance clause as an excuse to deny valid claims.
In another scenario, the homeowner and the contractor who makes the house call may simply disagree over what constitutes proper maintenance.
Another common problem is that when a homeowner purchases a used home, it might come with a 10-year-old furnace that the previous owner did not maintain.
At that point, no matter how well the new homeowner tries to care for the furnace going forward, he can't correct the previous lack of maintenance.
In addition, warranties have numerous exclusions, as well as dollar limits per repair and per year.
Home warranties aren't expensive compared to the cost of repairing or replacing most of a home's important components, and this fact is one of a warranty's major selling points.
However, there may be many years when nothing at all breaks down or wears out in the home. In these years, the homeowner gets nothing (except, perhaps, peace of mind) in exchange for his premium.
That money could be put into an emergency fund for making the same repairs and replacements that the home warranty would cover.
Also, if the homeowner tries to use the warranty and the claim is denied, he will probably feel like the money spent on the premium and the service call fee was wasted.
Home warranties do eliminate the need to find a contractor when something breaks. However, they also eliminate the freedom to choose your own independent contractor if you want the warranty to pay for the repair or replacement.
If you don't like the contractor or the work they do, you may be stuck with them.
Furthermore, repairs may be more complicated with a third party (the home warranty company) involved in the process than a direct negotiation between a homeowner and a contractor might be.
Also, the homeowner may have little or no say in the model or brand of a replacement component - though the warranty contract should provide for a similar- or equivalent-quality replacement.
The Bottom Line
A home warranty is not a perfect solution to the risks homeowners face. Before purchasing one, homeowners should read the fine print in the home warranty contract and carefully consider whether the warranty is likely to pay off.
Home sellers who want to offer a warranty to buyers and homeowners/buyers who would feel more comfortable having a home warranty should also do careful research to find a reputable home warranty company that will actually pay for legitimate repairs when they are needed.
The home warrantee company usually replaces appliances with a lower contractor grade appliance or part when they have to be replaced.
The insurance company pays the service people a MINIMUM fee for the service call.
The reason that the service company is willing to work on the very low margin is that they often can convert the homeowner into a new and hopefully repeating customer.
The service provider often has to report the findings of the service call back to the insurance company (for the larger claims that require purchasing replacement parts).
This creates extra time for a repair to be done. Also, very often the local service company add fees for items they say they need over an above the insurance coverage.
Tomorrow...An Actual Claim Experience
Mr. Fix-It
Do You Need a Home Warranty Insurance Plan?
(Part One of Two)
What Is a Home Warranty?
A home warranty is not the same thing as homeowners insurance, nor is it a replacement for homeowners insurance.
Homeowners Insurance covers major perils such as fires, hail, property crimes and certain types of water damage that could affect the entire structure and/or the homeowner's personal possessions.
A home warranty does not cover these perils.
Rather, it covers specific components of the home.
A home warranty is a contract between a homeowner and a home warranty company that provides for discounted repair and replacement service on a home's major components, such as the furnace, air conditioning, plumbing and electrical system.
A home warranty may also cover major appliances such as washers and dryers, refrigerators and swimming pools.
Most plans have a basic component that provides all homeowners who purchase a policy with certain coverages.
Homeowners can also purchase one or more optional components that provide additional coverage at additional cost.
Home warranty companies have agreements with approved service providers. When something that is covered by a home warranty breaks down, the homeowner calls the home warranty company, and the home warranty company sends one of its service providers to examine the problem.
If the provider determines that the needed repair or replacement is covered by the warranty, he completes the work.
The homeowner only pays a small service fee, plus the money she has already spent to purchase the warranty.
What Does It Cost?
A home warranty costs a $500 to $700 per year, paid up front.
The plan's cost varies depending on the property type and whether the homeowner purchases a basic or extended plan.
The cost usually does not vary with the property's age, unless the home is brand new, which increases the cost of coverage.
The home's square footage also does not affect the price in most cases, unless the property is more than 5,000 square feet.
Separate structures, such as guest houses, usually are not covered by the basic policy, but can be covered for an additional fee.
However, garages should be covered by the basic policy.
In addition to an annual premium, home warranties charge a service call fee (also called a trade call fee) of around $75-$125 every time the warranty holder requests that a service provider come out to the house to examine a problem.
If the problem requires more than one type of contractor to visit (e.g., a plumber and an electrician), the homeowner may have to pay the service fee for each contractor.
Having a home warranty doesn't mean the homeowner will never have to spend a penny on home repairs. Some problems won't be covered by the warranty, whether because the homeowner didn't purchase coverage for that item or because the warranty company doesn't offer coverage for that item.
Also, home warranties usually don't cover components that haven't been properly maintained.
Furthermore, if the warranty company denies a claim, the homeowner will still have to pay the service fee and will also be responsible for repair costs.
The Benefits of a Home Warranty
Like all warranties, a home warranty is supposed to protect against expensive, unforeseen repair bills and provide peace of mind.
For a homeowner who doesn't have an emergency fund or who wants to protect their emergency fund, a home warranty can act as a buffer.
Home warranties also make sense for people who aren't handy or who don't want to worry about tracking down a contractor when they have a problem.
Home Warranties Have Drawbacks
If home warranties were perfect, everyone would have one. But they don't.
Why is that?
One major problem with a home warranty is that it will not cover items that have not been properly maintained.
What is considered proper maintenance can be a significant gray area and is the source of many disagreements between home warranty companies and warranty holders.
In a worst-case scenario, unscrupulous warranty companies may use the improper maintenance clause as an excuse to deny valid claims.
In another scenario, the homeowner and the contractor who makes the house call may simply disagree over what constitutes proper maintenance.
Another common problem is that when a homeowner purchases a used home, it might come with a 10-year-old furnace that the previous owner did not maintain.
At that point, no matter how well the new homeowner tries to care for the furnace going forward, he can't correct the previous lack of maintenance.
In addition, warranties have numerous exclusions, as well as dollar limits per repair and per year.
Home warranties aren't expensive compared to the cost of repairing or replacing most of a home's important components, and this fact is one of a warranty's major selling points.
However, there may be many years when nothing at all breaks down or wears out in the home. In these years, the homeowner gets nothing (except, perhaps, peace of mind) in exchange for his premium.
That money could be put into an emergency fund for making the same repairs and replacements that the home warranty would cover.
Also, if the homeowner tries to use the warranty and the claim is denied, he will probably feel like the money spent on the premium and the service call fee was wasted.
Home warranties do eliminate the need to find a contractor when something breaks. However, they also eliminate the freedom to choose your own independent contractor if you want the warranty to pay for the repair or replacement.
If you don't like the contractor or the work they do, you may be stuck with them.
Furthermore, repairs may be more complicated with a third party (the home warranty company) involved in the process than a direct negotiation between a homeowner and a contractor might be.
Also, the homeowner may have little or no say in the model or brand of a replacement component - though the warranty contract should provide for a similar- or equivalent-quality replacement.
The Bottom Line
A home warranty is not a perfect solution to the risks homeowners face. Before purchasing one, homeowners should read the fine print in the home warranty contract and carefully consider whether the warranty is likely to pay off.
Home sellers who want to offer a warranty to buyers and homeowners/buyers who would feel more comfortable having a home warranty should also do careful research to find a reputable home warranty company that will actually pay for legitimate repairs when they are needed.
The home warrantee company usually replaces appliances with a lower contractor grade appliance or part when they have to be replaced.
The insurance company pays the service people a MINIMUM fee for the service call.
The reason that the service company is willing to work on the very low margin is that they often can convert the homeowner into a new and hopefully repeating customer.
The service provider often has to report the findings of the service call back to the insurance company (for the larger claims that require purchasing replacement parts).
This creates extra time for a repair to be done. Also, very often the local service company add fees for items they say they need over an above the insurance coverage.
Tomorrow...An Actual Claim Experience
Mr. Fix-It
-
From Robert Nusser...to...Anthem Opinions
Another Home Warranty draw-back: the repair person will generally try to use the cheapest way to repair your problem......and you get what you pay for.
__________________________
How to Replace
an
Electrical Outlet
 Here is how you can do your own electrical work, and save a bundle in both time and money...by doing it yourself.
Just follow these steps.
1. Prior to doing any work, make sure that power is turned off to the electrical outlet that you are going to be working on.
This is a fairly simple thing to do, since all that you need to do is go down to your circuit breaker box, and trip the outlet's breaker.
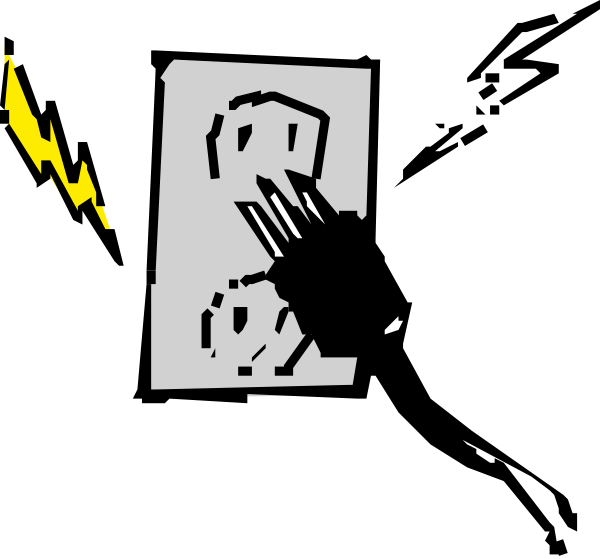
When you have done that, make sure that you mark the box, so that no one comes along later on and turns it back on.
That would be a "shocking" experience to say the least.
2. Check the outlet to make sure that it is turned off.
You can do this with either a circuit tester, or you can use the inexpensive alternative of a radio.
If either the lights of the tester come on, or the radio works, then you know the power is still on.
Go back and try the first step again, till you make sure that there is no power.
3. Remove the cover plate to the outlet and set it aside.
4. Remove the screws to the outlet, and then gently pull on the outlet.
It should come out of the wall no more than three inches.
Make sure that you set the screws off to the side so that you don't lose them or get them mixed up with other screws.
5. Make sure that you note wear each wire is attached to the outlet.
A good suggestion would be to take some colored pens or tape and use that to mark where each wire was located.
Each of the wires and screws should be color coded, so simply take note of where they are attached.
Now, go ahead and loosen the screws that hold those wires in place, and completely remove the outlet form the wall.
6. Replace the old outlet with your new one.
Attach those color coded wires to the new outlet, using the old outlet as a "map."
Basically, from here on out, just do all the previous steps in reverse until you have completed your task.
Just be sure to test your work prior to actually using the outlet on a regular basis.
Here are some helpful videos.
Mr. Fix-It
___________________________
The Right Way
of Painting a Room

There is a method to being able to get your newly painted room looking as good as possible.
In fact, if you don't want to potentially spend an arm and a leg to have a professional do the job, you need to know what these methods are.
And...they're not that difficult to learn !
In fact, many of the methods are fairly common sense, though they can be a bit time consuming.
Here's are a few suggestions for this do-it-yourself project.
1. Choose the right tools.
The biggest thing that you need to remember for properly painting a room is that you need to choose the right tools.
When working in tight areas you will need to have some smaller paint brushes to do the work.
For large areas such as walls, you need to have some decent quality paint rollers, or even a paint sprayer.
In the event that you are going for specific paint effects (such as most faux painting styles) you'll also need to have the proper tools to achieve that effect.
2. Prepare the room properly.
When you are ready to begin painting, make sure that you prepare the room properly.
That means that you need to use items like drop cloths, painting tape, and even newspapers to help protect the floors, windows, and electrical outlets.
You should keep in mind is that you want to have as few pieces of furniture in the room as possible so that you don't accidentally spill paint on them. It also allows you more space to get the job done.
3. Take your time.
Many times people will rush through their paint job.
Haste makes waste as well as messes, so take as much time as you may need to complete the job correctly.
While it may be tedious, by taking the proper amount of time you can ensure that you don't accidentally get paint on something that you don't want painted !
4. Clean up thoroughly.
When you are finished painting, make sure that you take the time to completely, and thoroughly clean up the mess.
Don't leave anything out when you are doing your cleaning.
You would be amazed at how easy it is for a paint stain to show up simply because you forgot to pick something up and put it away.
5. Inspect and repeat as necessary.
Once you have finished painting your room, wait a couple of days and then closely examine your work again.
Make note of any mistakes, missed spots, or other painting problems that may have cropped up you missed during the first go around.
After inspecting the room, paint it again....not the entire room, merely do some spot painting to the areas that needed a touch up.
Need a video or two...or more?
Mr. Fix-It
____________________________
How to Remove an Existing Toilet

You come home one day, and go in to use the bathroom. Before you "get down to business", you notice that there is a major crack in the tank.
As you know, this means that you need to replace the toilet prior to using it.
Don't worry though, this is not as difficult of a task as you may have thought.
This is actually a fairly easy task, and one that anyone can do.
In order to complete this task though, you are going to need a few items. Gather these items prior to beginning, and you are going to be ready to go:
Wrenches
Bucket
Several sponges or towels
Screwdriver
(either Philips or straight edge, check your toilet first)
After assembling your material you are ready to begin.
In order to complete this home improvement task, you are can simply use this checklist and you are going to be able to have your old and faulty toilet removed, and you are going to be able to proceed to install your new toilet.
1. Before doing anything, you need to shut off the water to the toilet.
Do this by looking to either the side of the toilet, or behind and looking for a small pipe and turning the valve to the shut off position. This is usually done by turning it to the right.
2. After you have shut off the water, flush the toilet to get rid of most, if not all, of the water in the tank.
Flush the toilet as often as necessary so that this water is gone. If you are lucky, you may even be able to get all of the water in the bowl removed as well.
If there is any water left in the tank, or in the bowl, you are going to have to remove it by using the bucket and sponges or towels.
3. After removing the water, disconnect the water supply line from the toilet.
As you are doing this make sure that you put the bucket underneath the water supply valve to make sure that you catch as much of the water as you can, so that there is a little of a mess as possible.
4. You now need to remove the bolts that hold the tank onto the toilet so that you can lift off the tank and remove it.
After you have done that remove the decorative trim caps so that you can undo and remove the bolts (also called the flange bolts).
If they are corroded then you just might have to cut them off with a hacksaw or some other type of rotary cutting tools.
5. Once you have removed the bolts, gently rock the toilet base so that you can break the watertight seal that is at the base of the toilet.
After that is done, just make sure that you remove the toilet out of the way.
6. All that you have left to do is to clean up the wax residue from around the hole.
After you have done this you are ready to go and install your new toilet.
Some helpful videos? Of course !
_____________________________
Using a Vacuum Cleaner
for
Unclogging a Bathroom Sink

A bathroom sink can be more difficult to unclog than a kitchen sink.
Why? The layout is a little different from that of your kitchen sink, not to mention the layout of the bathroom itself being different from that of a kitchen.
Set up your wet/dry vacuum in the bathroom if you can.
If you cannot, then set it up as close as you possibly can.
Be sure that you have set up the vacuum as directed by the instructions that came with the vacuum or as told by the rental agent.
You want to make sure, whenever you use any type of power tool that you follow all the instructions. This is for your safety, as well as ensuring that you do not damage the tool so that you can get your deposit back.
Also, ensure that you have some old towels or sheets that you can use for cleanup if you need them. It may be a good idea to lay some sheets or drop cloths under the vacuum to catch any blowback if it happens.
Before actually trying to unclog the bathroom sink, you'll need to make sure that you remove the drain stopper from the sink.
Different types of sinks have different types of drain stoppers.
Some of them lift right out while others may need to be unscrewed.
Examine your sink and figure out how to remove the stopper.
If you don't, you won't be able to unclog the drain as easily.
You'll also want to see if your bathroom sink has an overflow outlet.
Usually this type of outlet is near the front of the sink and is used as a "spillway" in case you try to overfill the sink.
This overflow goes directly to the drain, so you are going to need to block it in some way.
Try using some duct tape to cover the overflow. You can apply a couple of pieces, as long as the sink to which you are applying the tape is clean and dry.
You are now ready to unclog the sink by following these steps.
1. Hook the hose of the vacuum into the "blow" or "exhaust" position and stick the hose into the drain, forming as tight of a seal as you can.
You are going to use the positive air pressure from the vacuum in an attempt to break up the clog in the drain.
You are going to initially hear a high-pitched hum or whine from the vacuum as the air pressure is generated to break up the clog.
When the blockage has been broken up, you are going to hear a distinct change in the sound generated by the vacuum's motor.
2. There may be blowback from the air pressure, which can lead to a mess, so be prepared to clean up any dirt and gunk with old towels.
3. If there doesn't seem to be any change in the drain's water flow, then you are going to want to switch the air hose to the suck position.
By switching the position of the hose back and forth several times, you simulate the action of a plunger, but with greater force.
4. Another benefit from using the suck position is that all of the mess gets sucked up into the holding canister of the vacuum.
This leads to less mess and a much easier clean up, as long as you do not spill the canister.
5. When the drain is unclogged, remove any tape you placed on the overflow and replace your sink stopper.
Your bathroom sink should now drain as good as new.
Watch how its done !
Mr. Fix-It
_________________________
-
From Robert Nusser...to...Anthem Opinions
Another Home Warranty draw-back: the repair person will generally try to use the cheapest way to repair your problem......and you get what you pay for.

__________________________
How to Replace
an
Electrical Outlet
Here is how you can do your own electrical work, and save a bundle in both time and money...by doing it yourself.
Just follow these steps.
1. Prior to doing any work, make sure that power is turned off to the electrical outlet that you are going to be working on.
This is a fairly simple thing to do, since all that you need to do is go down to your circuit breaker box, and trip the outlet's breaker.
When you have done that, make sure that you mark the box, so that no one comes along later on and turns it back on.
That would be a "shocking" experience to say the least.
2. Check the outlet to make sure that it is turned off.
You can do this with either a circuit tester, or you can use the inexpensive alternative of a radio.
If either the lights of the tester come on, or the radio works, then you know the power is still on.
Go back and try the first step again, till you make sure that there is no power.
3. Remove the cover plate to the outlet and set it aside.
4. Remove the screws to the outlet, and then gently pull on the outlet.
It should come out of the wall no more than three inches.
Make sure that you set the screws off to the side so that you don't lose them or get them mixed up with other screws.
5. Make sure that you note wear each wire is attached to the outlet.
A good suggestion would be to take some colored pens or tape and use that to mark where each wire was located.
Each of the wires and screws should be color coded, so simply take note of where they are attached.
Now, go ahead and loosen the screws that hold those wires in place, and completely remove the outlet form the wall.
6. Replace the old outlet with your new one.
Attach those color coded wires to the new outlet, using the old outlet as a "map."
Basically, from here on out, just do all the previous steps in reverse until you have completed your task.
Just be sure to test your work prior to actually using the outlet on a regular basis.
Here are some helpful videos.
Mr. Fix-It
___________________________
The Right Way
of Painting a Room
There is a method to being able to get your newly painted room looking as good as possible.
In fact, if you don't want to potentially spend an arm and a leg to have a professional do the job, you need to know what these methods are.
And...they're not that difficult to learn !
In fact, many of the methods are fairly common sense, though they can be a bit time consuming.
Here's are a few suggestions for this do-it-yourself project.
1. Choose the right tools.
The biggest thing that you need to remember for properly painting a room is that you need to choose the right tools.
When working in tight areas you will need to have some smaller paint brushes to do the work.
For large areas such as walls, you need to have some decent quality paint rollers, or even a paint sprayer.
In the event that you are going for specific paint effects (such as most faux painting styles) you'll also need to have the proper tools to achieve that effect.
2. Prepare the room properly.
When you are ready to begin painting, make sure that you prepare the room properly.
That means that you need to use items like drop cloths, painting tape, and even newspapers to help protect the floors, windows, and electrical outlets.
You should keep in mind is that you want to have as few pieces of furniture in the room as possible so that you don't accidentally spill paint on them. It also allows you more space to get the job done.
3. Take your time.
Many times people will rush through their paint job.
Haste makes waste as well as messes, so take as much time as you may need to complete the job correctly.
While it may be tedious, by taking the proper amount of time you can ensure that you don't accidentally get paint on something that you don't want painted !
4. Clean up thoroughly.
When you are finished painting, make sure that you take the time to completely, and thoroughly clean up the mess.
Don't leave anything out when you are doing your cleaning.
You would be amazed at how easy it is for a paint stain to show up simply because you forgot to pick something up and put it away.
5. Inspect and repeat as necessary.
Once you have finished painting your room, wait a couple of days and then closely examine your work again.
Make note of any mistakes, missed spots, or other painting problems that may have cropped up you missed during the first go around.
After inspecting the room, paint it again....not the entire room, merely do some spot painting to the areas that needed a touch up.
Need a video or two...or more?
Mr. Fix-It
____________________________
How to Remove an Existing Toilet
You come home one day, and go in to use the bathroom. Before you "get down to business", you notice that there is a major crack in the tank.
As you know, this means that you need to replace the toilet prior to using it.
Don't worry though, this is not as difficult of a task as you may have thought.
This is actually a fairly easy task, and one that anyone can do.
In order to complete this task though, you are going to need a few items. Gather these items prior to beginning, and you are going to be ready to go:
Wrenches
Bucket
Several sponges or towels
Screwdriver
(either Philips or straight edge, check your toilet first)
After assembling your material you are ready to begin.
In order to complete this home improvement task, you are can simply use this checklist and you are going to be able to have your old and faulty toilet removed, and you are going to be able to proceed to install your new toilet.
1. Before doing anything, you need to shut off the water to the toilet.
Do this by looking to either the side of the toilet, or behind and looking for a small pipe and turning the valve to the shut off position. This is usually done by turning it to the right.
2. After you have shut off the water, flush the toilet to get rid of most, if not all, of the water in the tank.
Flush the toilet as often as necessary so that this water is gone. If you are lucky, you may even be able to get all of the water in the bowl removed as well.
If there is any water left in the tank, or in the bowl, you are going to have to remove it by using the bucket and sponges or towels.
3. After removing the water, disconnect the water supply line from the toilet.
As you are doing this make sure that you put the bucket underneath the water supply valve to make sure that you catch as much of the water as you can, so that there is a little of a mess as possible.
4. You now need to remove the bolts that hold the tank onto the toilet so that you can lift off the tank and remove it.
After you have done that remove the decorative trim caps so that you can undo and remove the bolts (also called the flange bolts).
If they are corroded then you just might have to cut them off with a hacksaw or some other type of rotary cutting tools.
5. Once you have removed the bolts, gently rock the toilet base so that you can break the watertight seal that is at the base of the toilet.
After that is done, just make sure that you remove the toilet out of the way.
6. All that you have left to do is to clean up the wax residue from around the hole.
After you have done this you are ready to go and install your new toilet.
After you have done this you are ready to go and install your new toilet.
Some helpful videos? Of course !
_____________________________
for
Unclogging a Bathroom Sink
A bathroom sink can be more difficult to unclog than a kitchen sink.
Why? The layout is a little different from that of your kitchen sink, not to mention the layout of the bathroom itself being different from that of a kitchen.
Set up your wet/dry vacuum in the bathroom if you can.
If you cannot, then set it up as close as you possibly can.
Be sure that you have set up the vacuum as directed by the instructions that came with the vacuum or as told by the rental agent.
You want to make sure, whenever you use any type of power tool that you follow all the instructions. This is for your safety, as well as ensuring that you do not damage the tool so that you can get your deposit back.
Also, ensure that you have some old towels or sheets that you can use for cleanup if you need them. It may be a good idea to lay some sheets or drop cloths under the vacuum to catch any blowback if it happens.
Before actually trying to unclog the bathroom sink, you'll need to make sure that you remove the drain stopper from the sink.
Different types of sinks have different types of drain stoppers.
Some of them lift right out while others may need to be unscrewed.
Examine your sink and figure out how to remove the stopper.
If you don't, you won't be able to unclog the drain as easily.
You'll also want to see if your bathroom sink has an overflow outlet.
Usually this type of outlet is near the front of the sink and is used as a "spillway" in case you try to overfill the sink.
This overflow goes directly to the drain, so you are going to need to block it in some way.
Try using some duct tape to cover the overflow. You can apply a couple of pieces, as long as the sink to which you are applying the tape is clean and dry.
You are now ready to unclog the sink by following these steps.
1. Hook the hose of the vacuum into the "blow" or "exhaust" position and stick the hose into the drain, forming as tight of a seal as you can.
You are going to use the positive air pressure from the vacuum in an attempt to break up the clog in the drain.
You are going to initially hear a high-pitched hum or whine from the vacuum as the air pressure is generated to break up the clog.
When the blockage has been broken up, you are going to hear a distinct change in the sound generated by the vacuum's motor.
2. There may be blowback from the air pressure, which can lead to a mess, so be prepared to clean up any dirt and gunk with old towels.
3. If there doesn't seem to be any change in the drain's water flow, then you are going to want to switch the air hose to the suck position.
By switching the position of the hose back and forth several times, you simulate the action of a plunger, but with greater force.
4. Another benefit from using the suck position is that all of the mess gets sucked up into the holding canister of the vacuum.
This leads to less mess and a much easier clean up, as long as you do not spill the canister.
5. When the drain is unclogged, remove any tape you placed on the overflow and replace your sink stopper.
Your bathroom sink should now drain as good as new.
Watch how its done !
Mr. Fix-It
_________________________
The Great Space Saver
Customized Shelving

A common issue in many homes is a lack of storage space.
If you live in a somewhat small or oddly-shaped space, you have probably realized that you don't have a place to put something at one time or another.
In this situation, items can pile up and create a cluttered, disorganized appearance.
What else can you do if you don't exactly have enough space in the room to fit a normal set of shelves?
One easy way to create more storage space in a tight area is to use custom shelving.
By customizing your shelf situation, you can build shelves to fit the space that you have to work with.

You can add custom shelving to closets, pantries, cupboards, corners, walls, or wherever you can make them work.
Shelves add storage space and accessibility to items in your home and can prevent messes and lost things.
Custom shelves can be made with various materials.
You can use different kinds of wood, metal, glass, or whatever works best for you.

You can either build your shelves from scratch or use existing shelves, renovating them to suit your needs.
The first step in the process of putting in custom shelving is to assess the situation.
How much storage do you need? How much space do you have to work with? What materials will work in the area?
Take measurements and notes before you get into the project.
Next, collect your materials.
You may need tools for the job like a drill, a sander, and a saw, plus other supplies like boards and screws.
You can buy new supplies, or even recycle from old shelving units or pieces of wood or other materials left over from past projects.
If you are building a fairly small shelf, for instance, you could recycle bits and pieces from other old pieces of furniture.
You can come up with a very unique look for your custom shelves, or simply go with something traditional that will fit the area just right.
Part of the process may call for re-finishing or painting your custom shelving.
Choose colors that go well with the decor in the area where you will be placing the shelves.
Paint and finish can give new life and an exciting look to a room or an old shelving unit.
By putting in custom shelving, you can create storage space that will fit perfectly in any area of your home.
Here are a couple helpful videos.
Mr. Fix-It
____________________________
Got a Cracked Floor Tile?
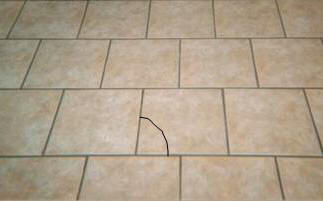
Do you have broken or worn-out located somewhere in your home? If so, then chances are you wish to have the tiles replaced and are considering whether or not to hire someone to complete this task in yourself instead.
Before allowing any work to be started by any contractor, you may wish to consider doing the job yourself.
Since this task only takes about 45 minutes of actual work to accomplish, but about three hours for work and material preparation, this is a perfect afternoon home improvement project.
Use this step by step list and you are soon going to have replacement tile that looks like it was set by a professional.
Tools:
Scoring tool or glass cutter
Tile chisel
Hammer
Drill with 1/4" ceramic bit, or a nail
Small notched trowel
Safety glasses
Materials:
Replacement tile
Painter's tape
Grout
One you have the right tools, follow this step by step guide.
1. Safety glasses.
Thoughout this process, you are going to want to wear your safety glasses.
The reason for this is simple; you don't want to have any flying tile chips or dust get into your eyes and irritate them.
2. Grout.
Using your scoring tool or glass cutter, begin to remove the old grout from around the damaged tile.
Apply just enough pressure that the grout is going to be removed, but not enough that is going to cause a slip and damage the other, neighboring tiles.
3. Apply tape.
Use the painter's tape and "edge" the surrounding tiles. This is going to help protect those tiles from being damaged in the next step.
As you are applying the tape, make sure that you completely encircle the tile that you are going to replace.
4. Score the tile.
Using your glass cutter or scoring tool, make an "x" in the center of the tile.
This creates "fault lines" for the pressures of the next step to dissipate along, and not damage the surrounding tile.
5. Holes.
Using either the drill or the nail, create evenly spaced holes in each of the sections of the tile. This is going to help free the tiles from the floor, and easier to chisel out.
As you are doing this, make sure that you do not dig into the floor beneath the tile, or you are going to create more problems for yourself.
6. Remove Tile.
Working outwards from the center of the tile, tap out each of the pieces of broken tile. Be gentle as you are doing this because, once again, you do not want to break the surrounding tiles nor dig into the materials underneath.
7. Remove old grout.
After you have removed all of the pieces of tile, take your chisel and remove or scrape off the old grout or cementing material that was underneath.
8. Set new tile.
Use the small notched trowel to set a little of the thinset into the place that the tile is going to go.
For the best possible adhesive chances, make sure that you apply the cementing material onto the back of the tile as well as to the floor or wall.
Setting the tile into the center of the space, make sure that you have an even amount of space on all sides, and that you provide gentle and firm pressure.
9. Fill the joints.
You are going to need to wait for at least two hours for the grout to cure, as you are waiting, go ahead and mix a batch of grout.
Using your trowel, or a rubber grout float, swipe some of the grout into the joints, and wait around 15 minutes for the material to harden. Once it has dried to the point that it no longer feels sticky to the touch, clean off the excess material with a damp cloth or sponge.
10. Allow drying time.
Do not walk or use the tile for 24 hours. This will ensure that the grout and thinset have dried properly.
Once this has been done, you are finished with your tile replacement project.
As always, we have some videos to help you out.
And...we have an idea how to fix a broken tile WITHOUT replacing it !
Mr. Fix-It
___________________________
Tile Flooring Needs Protection

Anyone that has tile floors can tell you how useful they are. It's great to be able to simply sweep up any dirt and dust that has fallen, while not having to worry about any damage from spilled liquids.
However, just because tile floors are easy to clean, and relatively easy to maintain, doesn't mean that they don't needs some protection.
Protecting tile floors is an important part of maintaining your tile floors.
Tile floors, though pretty strong, are easily susceptible to damage if the right circumstances are met.
One of the most common ways to damage tile floors is by placing exceptionally large or heavy appliances and furniture on it.
It shouldn't come as a surprise if you ever move your refrigerator, and find that one or more of the tiles has been cracked. The damage can be even more dramatic with a freezer, couch, or if you are lucky enough to be able to afford one, a grand piano.
Protecting tile floors is something that can be easy to do, as long as you use a little creativity.
Wood
Often simply placing a small, about one foot by one foot, piece of one inch plywood under the corners of the furniture can help immensely.
 The principle behind this is that the pieces of wood will be underneath each leg of the furniture or appliance, and act in much the same way that a coaster does for glasses.
The pieces of ply wood will help spread the weight around, and ensure that it is evenly distributed so that there is not too much pressure or weight placed on any single spot of the tiles.
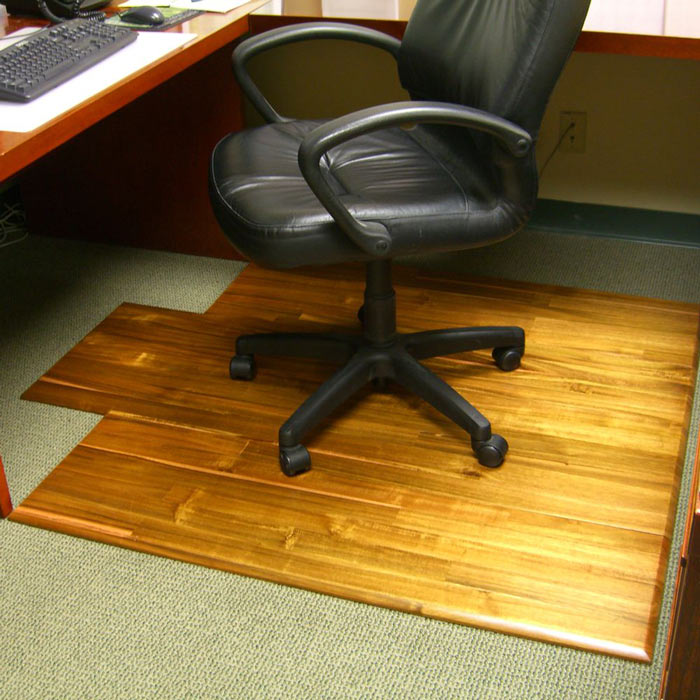
If you are looking to have the wood match the rest of the decor in your room, simply make sure that you paint it in colors that are similar to the rest of the room.
Platforms

It's easy to have a plywood platform made that is about two or three inches high.
Cover the platform in carpet, wood parquet, or some other material so that it can properly match with your decor.
This platform would be in contact with the tile floor all along its perimeter, instead of on just a few of the tiles. Better yet, when used in conjunction with furniture or music equipment (such as pianos) this can help add a touch of elegance to the room by creating a "dais," which would place that piece of furniture in a much more prominent position within the room.
Protectors

There are commercially available "protectors" that will act in much the same was as the options listed above.
They are professionally manufactured, and usually come along with some kind of a guarantee.
These items can usually be found at most major home improvement, furniture, and department stores.
Do you have ceramic or porcelain tile? Here's the difference between the two.
Here are a some video ideas to protect your tile flooring.
Mr. Fix-It
_________________________
Using Chemical Cleaners to Unclog a Kitchen Sink

There are almost as many different ways to unclog a kitchen sink as there are to clog one.
Before attempting to clear any clogged kitchen sink, there are some things that the amateur plumber needs to keep in mind.
First of all before using any chemical cleaners, be sure that you fully read the instructions and only use the cleaner as instructed.
Chemical cleaners are highly caustic materials that can easily cause chemical burns and other forms of damage to your body.
Secondly, be sure that you do not use something that is too strong for your specific pipes or that you try using a plunger after pouring the material into the sink, as this could also lead to potential harm as well.
1. Determine if the clog is a total blockage or just a slow drain.
If the drain is totally blocked and there is absolutely no draining at all, then do not use any type of liquid drain cleaner.
This is because the cleaner will not remove the blockage, and you are going to be faced with a bigger problem of how to remove the now stagnant caustic water from the sink.
2. If your clogged sink has a garbage disposal, do not use any chemical cleaner.
The chemical tends to react poorly with the disposal units.
If you do have a clogged disposal unit, then you will need to use a different method to remove the blockage.
3. When choosing the type of cleanser that you are going to use, keep in mind the different types of clogs that you might be faced with.
If you are faced with a clog that is made of primarily biological materials then use a cleaner that is more acidic.
If the clog is something that is made up of grease, then use an alkaline cleaner.
4. Before using the cleaner, read the label totally and follow the instructions closely.
You never want to mix different types of cleaners, as it can cause an adverse chemical reaction that can be harmful to people.
5. After pouring the cleanser into the drain wait for a minimum of five minutes before flushing some regular water down the drain.
The blockage should now be cleared up, and if the drain is not working properly still, you may have to take more drastic measures to remove the blockage....namely, calling a professional plumber.
We have some helpful videos.
Before you go the chemical route...try this first !
________________________
How to Remove a Stripped Screw
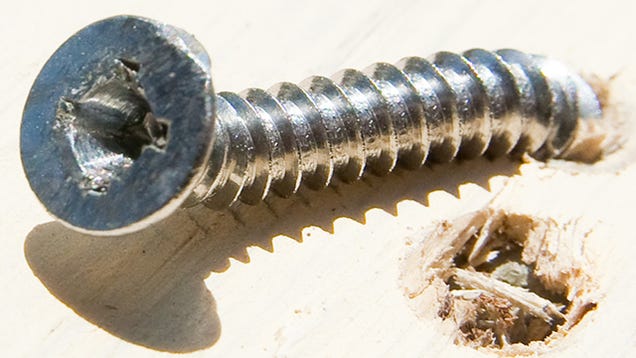
Have you ever been faced with the problem of trying to repair something, and when you go to screw or unscrew a screw find out that you can't?
Looking closely when this happens, chances are you are going to notice that the screw is stripped.
It means that the screwdriver you're trying to use is not going to work at all, no matter what I do.
At least, that is what it used to mean....
Here's how to replace it.
Materials Needed
1. Screwdrivers—as many sizes as you can get (both flathead and Philips, if possible)
2. Metal saw or cut-off tool such as a Dremel
3. Standard drill bit
4. Safety glasses
5. Screw extractor, or left-handed drill bit
6. Standard drill bit
Once you have collected all of these materials, you are ready to begin.
The first thing that you need to do is that you apply a Philips screwdriver that is larger in size than what is usually used. (This assumes that the screw is a Philips head.)
Push down really hard, using a slight angle, and try to slowly remove the screw.
In the event that the stripping worsens, you need to stop immediately.
If that doesn't work, then you can try removing the screw with a large flathead screwdriver.
If the slits are centered on the stripped head, then use the largest flathead screwdriver that is going to fit the slot.
Using pressure on the screw, try to turn the screw counter-clockwise. This might be able to remove the screw.
You can, if necessary, use the Dremel tool or the metal saw to create a slit in the in the screw.
When you are doing this you pretty much want to make sure that you wear the safety glasses so that you do not get any metal slivers or dust thrown into your eyes.
After you have created that notch into the screw, then try using theflat-blade screwdriver to get the screw out.
Next, use your drill to create a hole that is smaller than the head of the screw.
This hole should be approximately 1/3 the size of the head and extend into the screw itself about 1/4 of an inch.
Insert a very small Philips screwdriver into the hole and attempt to remove the screw.
A handy tool to have in these situations is a screw extractor or a left-handed drill bit.
You need to push down on the stripped screw head and slowly try to remove the screw. Be sure that you are careful not to push too hard, or the screw may break.
If any of the foregoing methods fail, then as a last resort you can always drill the screw out.
In order to do this you just need to have a drill bit that is either the same size or slightly smaller than the shank of the screw.
If you don't know the size of the screw, simply take another one of the screws and compare it to a drill bit in order to find the proper fit.
Here are a few "how to" videos for you.
Mr. Fix-It
_____________________________
Home Maintenance Includes Taking Care of Your Doors

When doors are not working properly, it can cause angst and frustration.
There are a few things, however, that you can do to maintain the quality of your doors.
Whether you have sliding doors, car doors, or regular swinging doors, you will find this article helpful.
The first thing you can do to keep your doors working properly is to maintain the quality of your hinges.
Hinges get a lot of wear and tear and need to be replaced more frequently than any other part of the door.
Maintenance of door hinges is the same whether you have steel hinges or brass hinges.
Apply a lubricating product like WD-40 (found in your local hardware store) a couple times a year (or as needed) to limit how much the metal rubs against itself.
Once a year, tighten the screws in your door hinges.
Screws that tighten easily do not need to be replaced.
If you find that the screws do not tighten and simply swivel in place, cover the end of a matchstick or toothpick in wood glue (available in your local hardware store) and twist into the hole.
The idea is to fill the hole with glue, all the way to the bottom, and then allow the glue to dry fully.
The glue will properly fill in the hole so that the screws can securely hold the hinge in place.
Sometimes when traditional swinging doors are installed the frame of the door is not quite the right size.
If you find your door sticking to the frame, you may need to sand the top of the door slightly to fit it properly to the size of the door frame.
Use traditional sandpaper for this project; avoid using a sander.
Sliding doors have a tendency to stick or get off their tracks.
When sliding doors get off their tracks, it is usually because the base of the door is stuck.
Taking regular beeswax bars (found at your local farmer's market or in the auto aisle in your local grocery store)...
...and rubbing them on the track of the door every month will help your door slide easily and stay on track.
Some videos on "How To?"
Mr. Fix-It
___________________________
Cleaning a Hardwood Floor
The Right Way
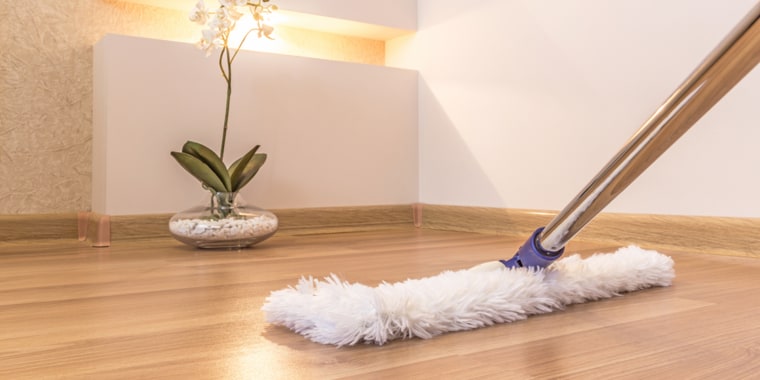
Although you might not think about it often, the flooring on your home can make a big impact on the overall look and feel in an area of your home.
How you choose to cover your floors says a lot about your personality and decorating style. Whether it's elegant, comfortable, casual, or unique, your floors help bring out style in every room.
Over the years, one of the most loved types of flooring is hardwood. This material has managed to withstand the test of time, and is still widely used and enjoyed today. Indeed, hardwood is a beautiful and versatile flooring type, although not necessarily the easiest to maintain.
Hardwood floors don't have to be complicated to take care of, but you can't clean them the way you might clean other flooring types.
Hardwood floors require certain care to ensure that they stay looking their best. To avoid damaging your hardwood floors, be sure you know how to clean them correctly first.
As long as you have the right tools to clean your hardwood floors, your task should go smoothly.
Consider these ideas before you clean your hardwood floor:
1. Before you begin cleaning your wood floors, do a thorough sweeping or vacuuming job first.
This will remove any loose dirt, dust, and debris and will bring about the best overall results.
2. Don't let water or other liquids remain on the floor for long.
Because liquids can damage your floor, don't use a normal mopping method to clean your hardwood floors. Wipe up spills as soon as they happen. If your hardwood floor has been sealed, you may be able to mop safely.
3. Find a high-quality commercial hardwood cleaner and apply it to your floor according to the bottle's instructions.
This is the safest way to clean your hardwood floors.
4. Consult the floor manufacturer's information about cleaning to find out the safest and most effective cleaner and cleaning method for your particular flooring.
Although most commercial cleaners should be safe, it is best to be certain.
5. Consider waxing and buffing the floor after cleaning.
Although this is not necessary, it will add a lovely shine to the surface.
By cleaning your hardwood floor correctly, you can keep it looking beautiful for a long time to come.
If you are unsure about a certain hardwood floor cleaner, it is important that you consult the manufacturer for help to ensure you don't accidentally ruin the floor.
We have some helpful videos:
Mr. Fix-It
_______________________________
An Acrylic Sink Needs Caulking
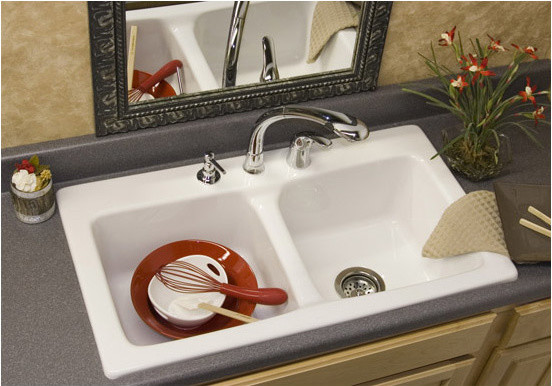 Everyone has experienced some kind of plumbing problem around the home. In fact, the most common types of plumbing problems around the home stems from problems with the caulking.
While it is nice to think that caulking lasts forever, and that all the different kinds of sinks available are caulked the same way, this couldn't really be further from the truth.
One of the more common types sinks used around the home is theacrylic sink.
Caulking acrylic sinks is remarkably easy, as long as you keep in mind a few simple things.
1. Remove existing caulk.
Whether you are installing new acrylic sinks, or you are simply recaulking existing sinks, you will need to ensure that the area is completely clear of any preexisting caulk.
If it is not, then you will need to remove, and clean any of the existing caulk prior to laying the new caulking down.
You can remove the old caulk by using some pliers, or even a knife.
Scrape up all the caulk that you can, and then scrub it clean with a damp cloth.
2. Choose the caulk.
Once you have your work area clear of preexisting caulk, you should choose the replacement caulk.
Typically, most caulks will work well with just about all kinds of sinks; however, you should carefully read the manufacturers directions to ensure that the caulking will work well with your acrylic sink.
Be sure that you have done this prior to purchasing your caulk, since you do not want to end up wasting any money.
3. Place the sink in place.
(if installing a new sink)
Before you can begin applying the caulk, you will need to fit the sink into place.
It should go without saying that you have already checked to make sure that your sink will fit into the existing hole; however, it never hurts to double check.
If the sink does not fit, then you will need to do one of two things.
Return the sink you have, and purchase a new one, or you can expand the hole to fit.
Keep in mind though, that if the hole is too big, then you will have no choice but to purchase a new sink (it is easier to make a hole bigger, than it is to make one smaller).
4. Apply the caulk.
The easiest way to apply any caulk is to use a caulking gun.
Insert the calking material into the gun, and then begin applying.
Start squeezing on the gun, and apply a steady even bead of material all the way around the sink.
Keep the caulk as smooth and even as possible to ensure an even application, as well as an even drying time.
Once you have applied the caulk around the sink, clean up any mess with a damp wash cloth.
And...we have some videos.
Mr. Fix-It
_________________________
The Great Space Saver
Customized Shelving
A common issue in many homes is a lack of storage space.
If you live in a somewhat small or oddly-shaped space, you have probably realized that you don't have a place to put something at one time or another.
In this situation, items can pile up and create a cluttered, disorganized appearance.
What else can you do if you don't exactly have enough space in the room to fit a normal set of shelves?
One easy way to create more storage space in a tight area is to use custom shelving.
By customizing your shelf situation, you can build shelves to fit the space that you have to work with.
You can add custom shelving to closets, pantries, cupboards, corners, walls, or wherever you can make them work.
Shelves add storage space and accessibility to items in your home and can prevent messes and lost things.
Custom shelves can be made with various materials.
You can use different kinds of wood, metal, glass, or whatever works best for you.
You can either build your shelves from scratch or use existing shelves, renovating them to suit your needs.
The first step in the process of putting in custom shelving is to assess the situation.
How much storage do you need? How much space do you have to work with? What materials will work in the area?
Take measurements and notes before you get into the project.
Next, collect your materials.
You may need tools for the job like a drill, a sander, and a saw, plus other supplies like boards and screws.
You can buy new supplies, or even recycle from old shelving units or pieces of wood or other materials left over from past projects.
If you are building a fairly small shelf, for instance, you could recycle bits and pieces from other old pieces of furniture.
You can come up with a very unique look for your custom shelves, or simply go with something traditional that will fit the area just right.
Part of the process may call for re-finishing or painting your custom shelving.
Choose colors that go well with the decor in the area where you will be placing the shelves.
Paint and finish can give new life and an exciting look to a room or an old shelving unit.
By putting in custom shelving, you can create storage space that will fit perfectly in any area of your home.
Here are a couple helpful videos.
Mr. Fix-It
____________________________
Got a Cracked Floor Tile?
Do you have broken or worn-out located somewhere in your home? If so, then chances are you wish to have the tiles replaced and are considering whether or not to hire someone to complete this task in yourself instead.
Before allowing any work to be started by any contractor, you may wish to consider doing the job yourself.
Since this task only takes about 45 minutes of actual work to accomplish, but about three hours for work and material preparation, this is a perfect afternoon home improvement project.
Use this step by step list and you are soon going to have replacement tile that looks like it was set by a professional.
Tools:
Scoring tool or glass cutter
Tile chisel
Hammer
Drill with 1/4" ceramic bit, or a nail
Small notched trowel
Safety glasses
Materials:
Replacement tile
Painter's tape
Grout
One you have the right tools, follow this step by step guide.
1. Safety glasses.
Thoughout this process, you are going to want to wear your safety glasses.
The reason for this is simple; you don't want to have any flying tile chips or dust get into your eyes and irritate them.
2. Grout.
Using your scoring tool or glass cutter, begin to remove the old grout from around the damaged tile.
Apply just enough pressure that the grout is going to be removed, but not enough that is going to cause a slip and damage the other, neighboring tiles.
3. Apply tape.
Use the painter's tape and "edge" the surrounding tiles. This is going to help protect those tiles from being damaged in the next step.
As you are applying the tape, make sure that you completely encircle the tile that you are going to replace.
4. Score the tile.
Using your glass cutter or scoring tool, make an "x" in the center of the tile.
This creates "fault lines" for the pressures of the next step to dissipate along, and not damage the surrounding tile.
5. Holes.
Using either the drill or the nail, create evenly spaced holes in each of the sections of the tile. This is going to help free the tiles from the floor, and easier to chisel out.
As you are doing this, make sure that you do not dig into the floor beneath the tile, or you are going to create more problems for yourself.
6. Remove Tile.
Working outwards from the center of the tile, tap out each of the pieces of broken tile. Be gentle as you are doing this because, once again, you do not want to break the surrounding tiles nor dig into the materials underneath.
7. Remove old grout.
After you have removed all of the pieces of tile, take your chisel and remove or scrape off the old grout or cementing material that was underneath.
8. Set new tile.
Use the small notched trowel to set a little of the thinset into the place that the tile is going to go.
For the best possible adhesive chances, make sure that you apply the cementing material onto the back of the tile as well as to the floor or wall.
Setting the tile into the center of the space, make sure that you have an even amount of space on all sides, and that you provide gentle and firm pressure.
9. Fill the joints.
You are going to need to wait for at least two hours for the grout to cure, as you are waiting, go ahead and mix a batch of grout.
Using your trowel, or a rubber grout float, swipe some of the grout into the joints, and wait around 15 minutes for the material to harden. Once it has dried to the point that it no longer feels sticky to the touch, clean off the excess material with a damp cloth or sponge.
10. Allow drying time.
Do not walk or use the tile for 24 hours. This will ensure that the grout and thinset have dried properly.
Once this has been done, you are finished with your tile replacement project.
As always, we have some videos to help you out.
And...we have an idea how to fix a broken tile WITHOUT replacing it !
Mr. Fix-It
___________________________
Tile Flooring Needs Protection
Anyone that has tile floors can tell you how useful they are. It's great to be able to simply sweep up any dirt and dust that has fallen, while not having to worry about any damage from spilled liquids.
However, just because tile floors are easy to clean, and relatively easy to maintain, doesn't mean that they don't needs some protection.
Protecting tile floors is an important part of maintaining your tile floors.
Tile floors, though pretty strong, are easily susceptible to damage if the right circumstances are met.
One of the most common ways to damage tile floors is by placing exceptionally large or heavy appliances and furniture on it.
It shouldn't come as a surprise if you ever move your refrigerator, and find that one or more of the tiles has been cracked. The damage can be even more dramatic with a freezer, couch, or if you are lucky enough to be able to afford one, a grand piano.
Protecting tile floors is something that can be easy to do, as long as you use a little creativity.
Wood
Often simply placing a small, about one foot by one foot, piece of one inch plywood under the corners of the furniture can help immensely.
The principle behind this is that the pieces of wood will be underneath each leg of the furniture or appliance, and act in much the same way that a coaster does for glasses.
The pieces of ply wood will help spread the weight around, and ensure that it is evenly distributed so that there is not too much pressure or weight placed on any single spot of the tiles.
If you are looking to have the wood match the rest of the decor in your room, simply make sure that you paint it in colors that are similar to the rest of the room.
Platforms
It's easy to have a plywood platform made that is about two or three inches high.
Cover the platform in carpet, wood parquet, or some other material so that it can properly match with your decor.
Cover the platform in carpet, wood parquet, or some other material so that it can properly match with your decor.
This platform would be in contact with the tile floor all along its perimeter, instead of on just a few of the tiles. Better yet, when used in conjunction with furniture or music equipment (such as pianos) this can help add a touch of elegance to the room by creating a "dais," which would place that piece of furniture in a much more prominent position within the room.
Protectors
There are commercially available "protectors" that will act in much the same was as the options listed above.
They are professionally manufactured, and usually come along with some kind of a guarantee.
These items can usually be found at most major home improvement, furniture, and department stores.
Do you have ceramic or porcelain tile? Here's the difference between the two.
Here are a some video ideas to protect your tile flooring.
Mr. Fix-It
_________________________
Using Chemical Cleaners to Unclog a Kitchen Sink
There are almost as many different ways to unclog a kitchen sink as there are to clog one.
Before attempting to clear any clogged kitchen sink, there are some things that the amateur plumber needs to keep in mind.
First of all before using any chemical cleaners, be sure that you fully read the instructions and only use the cleaner as instructed.
Chemical cleaners are highly caustic materials that can easily cause chemical burns and other forms of damage to your body.
Secondly, be sure that you do not use something that is too strong for your specific pipes or that you try using a plunger after pouring the material into the sink, as this could also lead to potential harm as well.
1. Determine if the clog is a total blockage or just a slow drain.
If the drain is totally blocked and there is absolutely no draining at all, then do not use any type of liquid drain cleaner.
This is because the cleaner will not remove the blockage, and you are going to be faced with a bigger problem of how to remove the now stagnant caustic water from the sink.
2. If your clogged sink has a garbage disposal, do not use any chemical cleaner.
The chemical tends to react poorly with the disposal units.
If you do have a clogged disposal unit, then you will need to use a different method to remove the blockage.
3. When choosing the type of cleanser that you are going to use, keep in mind the different types of clogs that you might be faced with.
If you are faced with a clog that is made of primarily biological materials then use a cleaner that is more acidic.
If the clog is something that is made up of grease, then use an alkaline cleaner.
4. Before using the cleaner, read the label totally and follow the instructions closely.
You never want to mix different types of cleaners, as it can cause an adverse chemical reaction that can be harmful to people.
5. After pouring the cleanser into the drain wait for a minimum of five minutes before flushing some regular water down the drain.
The blockage should now be cleared up, and if the drain is not working properly still, you may have to take more drastic measures to remove the blockage....namely, calling a professional plumber.
We have some helpful videos.
Before you go the chemical route...try this first !
________________________
How to Remove a Stripped Screw
Have you ever been faced with the problem of trying to repair something, and when you go to screw or unscrew a screw find out that you can't?
Looking closely when this happens, chances are you are going to notice that the screw is stripped.
It means that the screwdriver you're trying to use is not going to work at all, no matter what I do.
At least, that is what it used to mean....
Here's how to replace it.
Materials Needed
1. Screwdrivers—as many sizes as you can get (both flathead and Philips, if possible)
2. Metal saw or cut-off tool such as a Dremel
3. Standard drill bit
4. Safety glasses
5. Screw extractor, or left-handed drill bit
6. Standard drill bit
Once you have collected all of these materials, you are ready to begin.
The first thing that you need to do is that you apply a Philips screwdriver that is larger in size than what is usually used. (This assumes that the screw is a Philips head.)
Push down really hard, using a slight angle, and try to slowly remove the screw.
In the event that the stripping worsens, you need to stop immediately.
If that doesn't work, then you can try removing the screw with a large flathead screwdriver.
If the slits are centered on the stripped head, then use the largest flathead screwdriver that is going to fit the slot.
Using pressure on the screw, try to turn the screw counter-clockwise. This might be able to remove the screw.
You can, if necessary, use the Dremel tool or the metal saw to create a slit in the in the screw.
When you are doing this you pretty much want to make sure that you wear the safety glasses so that you do not get any metal slivers or dust thrown into your eyes.
After you have created that notch into the screw, then try using theflat-blade screwdriver to get the screw out.
Next, use your drill to create a hole that is smaller than the head of the screw.
This hole should be approximately 1/3 the size of the head and extend into the screw itself about 1/4 of an inch.
Insert a very small Philips screwdriver into the hole and attempt to remove the screw.
A handy tool to have in these situations is a screw extractor or a left-handed drill bit.
You need to push down on the stripped screw head and slowly try to remove the screw. Be sure that you are careful not to push too hard, or the screw may break.
If any of the foregoing methods fail, then as a last resort you can always drill the screw out.
In order to do this you just need to have a drill bit that is either the same size or slightly smaller than the shank of the screw.
If you don't know the size of the screw, simply take another one of the screws and compare it to a drill bit in order to find the proper fit.
Here are a few "how to" videos for you.
Mr. Fix-It
_____________________________
Home Maintenance Includes Taking Care of Your Doors
When doors are not working properly, it can cause angst and frustration.
There are a few things, however, that you can do to maintain the quality of your doors.
Whether you have sliding doors, car doors, or regular swinging doors, you will find this article helpful.
The first thing you can do to keep your doors working properly is to maintain the quality of your hinges.
Hinges get a lot of wear and tear and need to be replaced more frequently than any other part of the door.
Maintenance of door hinges is the same whether you have steel hinges or brass hinges.
Apply a lubricating product like WD-40 (found in your local hardware store) a couple times a year (or as needed) to limit how much the metal rubs against itself.
Once a year, tighten the screws in your door hinges.
Screws that tighten easily do not need to be replaced.
If you find that the screws do not tighten and simply swivel in place, cover the end of a matchstick or toothpick in wood glue (available in your local hardware store) and twist into the hole.
The idea is to fill the hole with glue, all the way to the bottom, and then allow the glue to dry fully.
The glue will properly fill in the hole so that the screws can securely hold the hinge in place.
Sometimes when traditional swinging doors are installed the frame of the door is not quite the right size.
If you find your door sticking to the frame, you may need to sand the top of the door slightly to fit it properly to the size of the door frame.
Use traditional sandpaper for this project; avoid using a sander.
Sliding doors have a tendency to stick or get off their tracks.
When sliding doors get off their tracks, it is usually because the base of the door is stuck.
Taking regular beeswax bars (found at your local farmer's market or in the auto aisle in your local grocery store)...
...and rubbing them on the track of the door every month will help your door slide easily and stay on track.
Some videos on "How To?"
Mr. Fix-It
___________________________
Cleaning a Hardwood Floor
The Right Way
Although you might not think about it often, the flooring on your home can make a big impact on the overall look and feel in an area of your home.
How you choose to cover your floors says a lot about your personality and decorating style. Whether it's elegant, comfortable, casual, or unique, your floors help bring out style in every room.
Over the years, one of the most loved types of flooring is hardwood. This material has managed to withstand the test of time, and is still widely used and enjoyed today. Indeed, hardwood is a beautiful and versatile flooring type, although not necessarily the easiest to maintain.
Hardwood floors don't have to be complicated to take care of, but you can't clean them the way you might clean other flooring types.
Hardwood floors require certain care to ensure that they stay looking their best. To avoid damaging your hardwood floors, be sure you know how to clean them correctly first.
As long as you have the right tools to clean your hardwood floors, your task should go smoothly.
Consider these ideas before you clean your hardwood floor:
1. Before you begin cleaning your wood floors, do a thorough sweeping or vacuuming job first.
This will remove any loose dirt, dust, and debris and will bring about the best overall results.
2. Don't let water or other liquids remain on the floor for long.
Because liquids can damage your floor, don't use a normal mopping method to clean your hardwood floors. Wipe up spills as soon as they happen. If your hardwood floor has been sealed, you may be able to mop safely.
3. Find a high-quality commercial hardwood cleaner and apply it to your floor according to the bottle's instructions.
This is the safest way to clean your hardwood floors.
4. Consult the floor manufacturer's information about cleaning to find out the safest and most effective cleaner and cleaning method for your particular flooring.
Although most commercial cleaners should be safe, it is best to be certain.
5. Consider waxing and buffing the floor after cleaning.
Although this is not necessary, it will add a lovely shine to the surface.
By cleaning your hardwood floor correctly, you can keep it looking beautiful for a long time to come.
If you are unsure about a certain hardwood floor cleaner, it is important that you consult the manufacturer for help to ensure you don't accidentally ruin the floor.
If you are unsure about a certain hardwood floor cleaner, it is important that you consult the manufacturer for help to ensure you don't accidentally ruin the floor.
We have some helpful videos:
Mr. Fix-It
_______________________________
An Acrylic Sink Needs Caulking
Everyone has experienced some kind of plumbing problem around the home. In fact, the most common types of plumbing problems around the home stems from problems with the caulking.
While it is nice to think that caulking lasts forever, and that all the different kinds of sinks available are caulked the same way, this couldn't really be further from the truth.
One of the more common types sinks used around the home is theacrylic sink.
Caulking acrylic sinks is remarkably easy, as long as you keep in mind a few simple things.
1. Remove existing caulk.
Whether you are installing new acrylic sinks, or you are simply recaulking existing sinks, you will need to ensure that the area is completely clear of any preexisting caulk.
If it is not, then you will need to remove, and clean any of the existing caulk prior to laying the new caulking down.
You can remove the old caulk by using some pliers, or even a knife.
Scrape up all the caulk that you can, and then scrub it clean with a damp cloth.
2. Choose the caulk.
Once you have your work area clear of preexisting caulk, you should choose the replacement caulk.
Typically, most caulks will work well with just about all kinds of sinks; however, you should carefully read the manufacturers directions to ensure that the caulking will work well with your acrylic sink.
Be sure that you have done this prior to purchasing your caulk, since you do not want to end up wasting any money.
3. Place the sink in place.
(if installing a new sink)
Before you can begin applying the caulk, you will need to fit the sink into place.
It should go without saying that you have already checked to make sure that your sink will fit into the existing hole; however, it never hurts to double check.
If the sink does not fit, then you will need to do one of two things.
Return the sink you have, and purchase a new one, or you can expand the hole to fit.
Keep in mind though, that if the hole is too big, then you will have no choice but to purchase a new sink (it is easier to make a hole bigger, than it is to make one smaller).
4. Apply the caulk.
The easiest way to apply any caulk is to use a caulking gun.
Insert the calking material into the gun, and then begin applying.
Start squeezing on the gun, and apply a steady even bead of material all the way around the sink.
Keep the caulk as smooth and even as possible to ensure an even application, as well as an even drying time.
Once you have applied the caulk around the sink, clean up any mess with a damp wash cloth.
And...we have some videos.
Mr. Fix-It
_________________________
HVAC Advice
(Heating Ventilating & Air Conditioning)
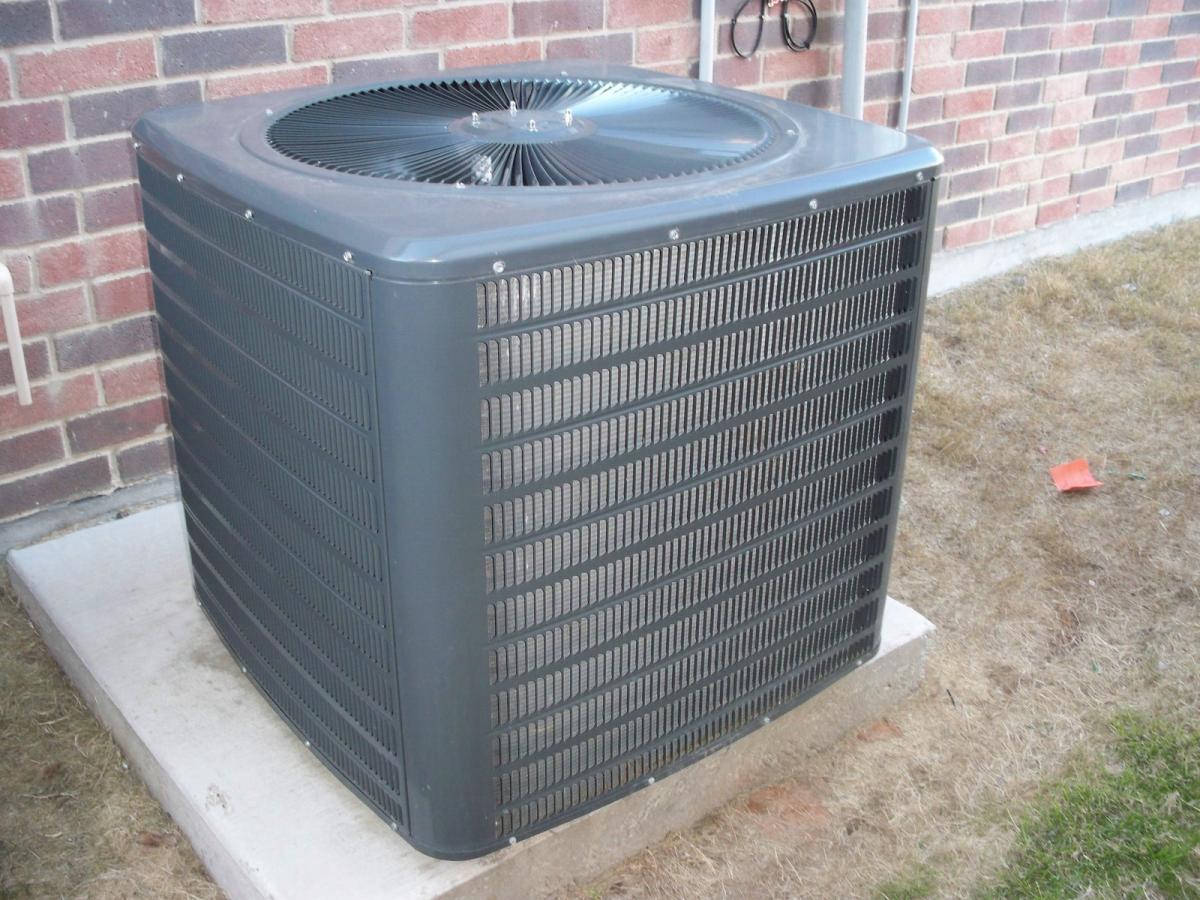
Residents should be aware of HVAC issues.
Now that our home HVAC units are aging…10 to 17 years old…they do have problems from time to time.
Owners are being confronted with Heating and Air Conditioning companies using a common scare tactic:
The unit is dead or nearly dead and you could spend $12,000 or more for replacement.
Don't be fooled by a propaganda sales pitch telling you the unit must be upgraded to a higher "seer" value (more than 14 seer) by completely replacing the entire heating and air conditioning system, including removal and replacement of the duct system.
For those who ask me about their HVAC systems, the first thing I say to them is: "The HVAC unit is merely a metal box with several replaceable parts inside it."
Let's compare an HVAC unit to the brakes in the car.
If they required replacement, would you buy a new car?
Of course not, you'd simply have the brakes replaced.
The same applies to your HVAC system.
Many HVAC companies offer a free or charge a small fee ($50 to $80) to inspect you HVAC. This a perfect opportunity for the company to get their foot in the door and give you their sales pitch costing thousands of unnecessary $$$ to replace everything.
BEWARE !!!
Simply put…
“If HVAC keeps you cool in the summer, warm in the winter, and not making any unusual noise…then leave it alone."
They DO NOT require regular service like vehicles.
Obviously, no one can predetermine when they will fail, but HVAC units can last more than twenty years with only minor repairs, if any.
A Replacement HVAC unit costs the average company less than $4000.
I know, I owned a Construction Company in Southern California for years, and currently own a number of homes in the Las Vegas valley, nine in Sun City Anthem alone.
Any $$$ over that is labor, profit and overhead.
Do the math…If you pay $12000…that relates to $8000 over and above the cost of material and often, less than two days with two men….NOT A BAD DAYS PAY!
A reasonable replacement cost would be about $8000 to $9000.
My advice is to shop around for competitive pricing and make sure the contract spells out what work will be done.
Check out the companies reviews online and ask your friends and neighbors for referrals.
 Forrest Fetherolf
Mr. Fix-It
_____________________________
Forrest Fetherolf
Mr. Fix-It
_____________________________
Unclogging a Clog
 When you notice that the water in your tub is not draining quickly, you probably have a clog of some sort.
Clogs generally build up rather slowly so the problem may be extremely severe when you first notice it.
You have a variety of options for fixing a slow-draining tub; you can either choose over the counter products or use natural home made methods to fix your problem.
Before you can begin treating your clogged drain you must remove hair or other obvious items inhibiting the draining of your tub.
Once you have removed such items, it is time to choose which method you will use.
Your first choice is to take a quick trip to your local grocer and purchase and item like Drain-O or another liquid pipe cleanser (Liquid Plumber).
 If you choose to purchase a liquid pipe cleanser you will also needa sink plunger, wire hanger, gloves (if you so desire) and potentiallya screwdriver.
Begin by putting on your rubber or latex gloves.
The gloves can protect you from a variety of unappealing items or gunk that might appear during the process of unclogging your drain.
You will now need to use the screwdriver to properly remove the covering of the drain.
You may wish to wash off the cover with steel wool in case items attached are contributing to how slowly the tub is draining.
Next you should straighten the wire hanger and form a hook the size of your thumb at the end.
Stick the wire hanger into the drain to remove hair.
Once you have retrieved any hair or items from the drain you should use the sink plunger to clear the drain of any fluids that are inhibiting the flow.
Lastly, you should poor about a quarter cup of the liquid pipe cleaner down the drain, closely follow the instructions on the back of the bottle.
If you wish to unclog your drain using natural and homemade products you will need a few different items like vinegar, baking soda and a sink plunger.

 After removing hair or other items surrounding sink drain, pour a quarter cup of distilled vinegar down the drain. If you wish to use baking soda, add a few tablespoons before pouring down the vinegar.
The reaction between the baking soda and vinegar will help to safely clear your drain.
After the concoction has had time to work (fifteen to twenty minutes) use the sink plunger to clear any major obstructions.
Lastly, pour water down the drain to clear away the vinegar and baking soda.
Whichever method you use, remember to open or window or have some type of proper ventilation so that you avoiding becoming ill from breathing in liquid pipe cleanser or vinegar.
Here are some helpful videos.
Mr. Fix-It
_______________________________
Considering Hard Wood Flooring ?
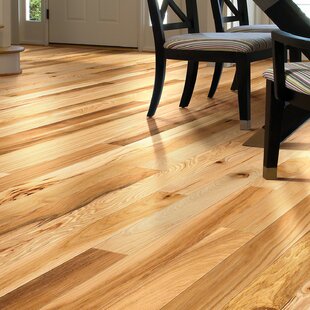
Have you ever wanted to improve the look of your home, but found that you didn't know how to do it?
One of the best ways that you can do this is through the use of hardwood flooring.
Hardwood flooring is a beautiful and wonderful option that you can use to enhance the look of your home, and walnut wood flooring has to be one of the top choices among all the various kinds of wood flooring has got to be walnut wood flooring.
Before you go out and make your purchase of flooring, you should always fully consider your options.
Here are some simple guidelines that are designed to help you make an informed decision about what type of flooring you may wish to use in your home.
As you read through the information presented here, see if walnut wood flooring is actually something that you want to use in your home.
1. Look
As with any kind of wood flooring, walnut typically comes in many different kinds or species. Each of these different species have a slightly different look, each of which can be exquisitely beautiful if prepared and taken care of properly.
One of the more popular choices among walnut flooring is black walnut flooring.
Black walnut flooring is a little of a misnomer though since the wood is not actually black. Rather this type of walnut flooring is a beautiful warm golden brown color that almost seems to glow with an inner light.
 2. Durability
Just like with most kinds of hardwood flooring, walnut wood flooring has the potential to be around for a very long time. All that you need to do is make sure that you are taking care of it properly.
With walnut wood floors, you will need to make sure that you regularly sweep the floors, so that you can keep any dirt and grime from getting worked into the seams of the wood.
For a deeper clean, you should dust mop your floor once a week, and polish the floor once a month.
Avoid any damage to your floors by cleaning up any spilled fluids quickly, and refrain from dragging anything across the floor.
3. What makes it a good choice?
Compared to many other kinds of wood flooring, walnut is a good choice since it can typically take a little more damage, and requires a little less care than other kinds of wood flooring.
If you are going for a warm and homey feel for your home, and must have wood flooring then walnut is one of the best possible choices for you to make.
4. What are the draw backs of this choice?
When compared to other flooring options (such as laminate, or carpeting) walnut wood flooring will require more time and effort to maintain.
If you still like the look of walnut wood though, keep in mind that you can always get some laminate walnut wood flooring.
Here are a few hard wood flooring "looks".
2. Durability
Just like with most kinds of hardwood flooring, walnut wood flooring has the potential to be around for a very long time. All that you need to do is make sure that you are taking care of it properly.
With walnut wood floors, you will need to make sure that you regularly sweep the floors, so that you can keep any dirt and grime from getting worked into the seams of the wood.
For a deeper clean, you should dust mop your floor once a week, and polish the floor once a month.
Avoid any damage to your floors by cleaning up any spilled fluids quickly, and refrain from dragging anything across the floor.
3. What makes it a good choice?
Compared to many other kinds of wood flooring, walnut is a good choice since it can typically take a little more damage, and requires a little less care than other kinds of wood flooring.
If you are going for a warm and homey feel for your home, and must have wood flooring then walnut is one of the best possible choices for you to make.
4. What are the draw backs of this choice?
When compared to other flooring options (such as laminate, or carpeting) walnut wood flooring will require more time and effort to maintain.
If you still like the look of walnut wood though, keep in mind that you can always get some laminate walnut wood flooring.
Here are a few hard wood flooring "looks".
Mr. Fix-It
__________________________
HVAC Advice
(Heating Ventilating & Air Conditioning)
Residents should be aware of HVAC issues.
Now that our home HVAC units are aging…10 to 17 years old…they do have problems from time to time.
Owners are being confronted with Heating and Air Conditioning companies using a common scare tactic:
The unit is dead or nearly dead and you could spend $12,000 or more for replacement.
Don't be fooled by a propaganda sales pitch telling you the unit must be upgraded to a higher "seer" value (more than 14 seer) by completely replacing the entire heating and air conditioning system, including removal and replacement of the duct system.
For those who ask me about their HVAC systems, the first thing I say to them is: "The HVAC unit is merely a metal box with several replaceable parts inside it."
Let's compare an HVAC unit to the brakes in the car.
If they required replacement, would you buy a new car?
Of course not, you'd simply have the brakes replaced.
The same applies to your HVAC system.
Many HVAC companies offer a free or charge a small fee ($50 to $80) to inspect you HVAC. This a perfect opportunity for the company to get their foot in the door and give you their sales pitch costing thousands of unnecessary $$$ to replace everything.
BEWARE !!!
Simply put…
“If HVAC keeps you cool in the summer, warm in the winter, and not making any unusual noise…then leave it alone."
They DO NOT require regular service like vehicles.
Obviously, no one can predetermine when they will fail, but HVAC units can last more than twenty years with only minor repairs, if any.
A Replacement HVAC unit costs the average company less than $4000.
I know, I owned a Construction Company in Southern California for years, and currently own a number of homes in the Las Vegas valley, nine in Sun City Anthem alone.
Any $$$ over that is labor, profit and overhead.
Do the math…If you pay $12000…that relates to $8000 over and above the cost of material and often, less than two days with two men….NOT A BAD DAYS PAY!
A reasonable replacement cost would be about $8000 to $9000.
My advice is to shop around for competitive pricing and make sure the contract spells out what work will be done.
Check out the companies reviews online and ask your friends and neighbors for referrals.
Forrest Fetherolf
Mr. Fix-It
_____________________________
Unclogging a Clog
When you notice that the water in your tub is not draining quickly, you probably have a clog of some sort.
Clogs generally build up rather slowly so the problem may be extremely severe when you first notice it.
You have a variety of options for fixing a slow-draining tub; you can either choose over the counter products or use natural home made methods to fix your problem.
Before you can begin treating your clogged drain you must remove hair or other obvious items inhibiting the draining of your tub.
Once you have removed such items, it is time to choose which method you will use.
Your first choice is to take a quick trip to your local grocer and purchase and item like Drain-O or another liquid pipe cleanser (Liquid Plumber).
If you choose to purchase a liquid pipe cleanser you will also needa sink plunger, wire hanger, gloves (if you so desire) and potentiallya screwdriver.
Begin by putting on your rubber or latex gloves.
The gloves can protect you from a variety of unappealing items or gunk that might appear during the process of unclogging your drain.
You will now need to use the screwdriver to properly remove the covering of the drain.
You may wish to wash off the cover with steel wool in case items attached are contributing to how slowly the tub is draining.
Next you should straighten the wire hanger and form a hook the size of your thumb at the end.
Stick the wire hanger into the drain to remove hair.
Once you have retrieved any hair or items from the drain you should use the sink plunger to clear the drain of any fluids that are inhibiting the flow.
Lastly, you should poor about a quarter cup of the liquid pipe cleaner down the drain, closely follow the instructions on the back of the bottle.
If you wish to unclog your drain using natural and homemade products you will need a few different items like vinegar, baking soda and a sink plunger.
After removing hair or other items surrounding sink drain, pour a quarter cup of distilled vinegar down the drain. If you wish to use baking soda, add a few tablespoons before pouring down the vinegar.
The reaction between the baking soda and vinegar will help to safely clear your drain.
After the concoction has had time to work (fifteen to twenty minutes) use the sink plunger to clear any major obstructions.
Lastly, pour water down the drain to clear away the vinegar and baking soda.
Whichever method you use, remember to open or window or have some type of proper ventilation so that you avoiding becoming ill from breathing in liquid pipe cleanser or vinegar.
Here are some helpful videos.
Mr. Fix-It
_______________________________
Considering Hard Wood Flooring ?
Have you ever wanted to improve the look of your home, but found that you didn't know how to do it?
One of the best ways that you can do this is through the use of hardwood flooring.
Hardwood flooring is a beautiful and wonderful option that you can use to enhance the look of your home, and walnut wood flooring has to be one of the top choices among all the various kinds of wood flooring has got to be walnut wood flooring.
Mr. Fix-It
__________________________
Installing Solar Panels
 A collection of individual silicon cells that generate electricity from sunlight, solar panels are comprised of those individual cells housed within a frame.
The cells are wired together and connected electrically, framed by metal, and backed with either plastic, metal, or fiberglass.
The entire unit, or panel. is covered by glass to protect it from the elements.
Solar panels are pre-manufactured in many sizes, and can be mounted on a rooftop, on the side of a structure, or as a stand-alone unit.
There are basically three types of solar panels:

Monocrystalline Solar Panels

...are manufactured using monocrystals, also called single crystals.
Monocrystalline solarcells combine unpolluted silicon and monocrystals to form their solar cells.
Thus, this type of solar panel is the most efficient, yet also the most expensive, of the three types of panels.
The individual cells are processed from thin wafers of monocrystals, and then wired together into a solar panel.
Polycrystalline Solar Panels

...sometimes called multi-crystalline, also use crystals in their construction, but the crystals are slightly less efficient than monocrystals because they aren't as pure.
Polycrystals are grown in a large block of many crystals, giving them a shattered glass appearance, and are less expensive than monocrystals.
Amorphous Solar Panels

...do not use crystals in their construction.
Instead, a thin layer of silicon is distributed on metal or glass to create a solar panel.
Although they are much less expensive than crystal solar panels, their energy efficiency is also mush less, requiring additional square footage to produce the same amount of power as crystal solar panels.
There are also three types of panel arrays to choose from; fixed,adjustable, or tracking.
Tracking panels follow the sun's path continuously.
Fixed panels are completely stationary.
Adjustable panels are able to be adjusted a few times each year.
Typically, you can run a microwave, refrigerator, computer, several lights, a color television, and an air conditioner using about five 100-watt solar panels.
We have some great videos to explain the different types of solar panels.
What are the types available and what's best for you?
https://www.youtube.com/watch?v=Ji-wdnYtWWU
Here's a test on solar panels as to their energy output.
__________________________
A collection of individual silicon cells that generate electricity from sunlight, solar panels are comprised of those individual cells housed within a frame.
The cells are wired together and connected electrically, framed by metal, and backed with either plastic, metal, or fiberglass.
The entire unit, or panel. is covered by glass to protect it from the elements.
The cells are wired together and connected electrically, framed by metal, and backed with either plastic, metal, or fiberglass.
The entire unit, or panel. is covered by glass to protect it from the elements.
Solar panels are pre-manufactured in many sizes, and can be mounted on a rooftop, on the side of a structure, or as a stand-alone unit.
There are basically three types of solar panels:
Monocrystalline Solar Panels
...are manufactured using monocrystals, also called single crystals.
Monocrystalline solarcells combine unpolluted silicon and monocrystals to form their solar cells.
Thus, this type of solar panel is the most efficient, yet also the most expensive, of the three types of panels.
The individual cells are processed from thin wafers of monocrystals, and then wired together into a solar panel.
Polycrystalline Solar Panels
...sometimes called multi-crystalline, also use crystals in their construction, but the crystals are slightly less efficient than monocrystals because they aren't as pure.
Polycrystals are grown in a large block of many crystals, giving them a shattered glass appearance, and are less expensive than monocrystals.
Amorphous Solar Panels
...do not use crystals in their construction.
Instead, a thin layer of silicon is distributed on metal or glass to create a solar panel.
Although they are much less expensive than crystal solar panels, their energy efficiency is also mush less, requiring additional square footage to produce the same amount of power as crystal solar panels.
There are also three types of panel arrays to choose from; fixed,adjustable, or tracking.
Tracking panels follow the sun's path continuously.
Fixed panels are completely stationary.
Adjustable panels are able to be adjusted a few times each year.
Typically, you can run a microwave, refrigerator, computer, several lights, a color television, and an air conditioner using about five 100-watt solar panels.
We have some great videos to explain the different types of solar panels.
What are the types available and what's best for you?
https://www.youtube.com/watch?v=Ji-wdnYtWWU
Here's a test on solar panels as to their energy output.
__________________________
Wall Crack...Let's Patch It Up !
Wall Crack...Let's Patch It Up !
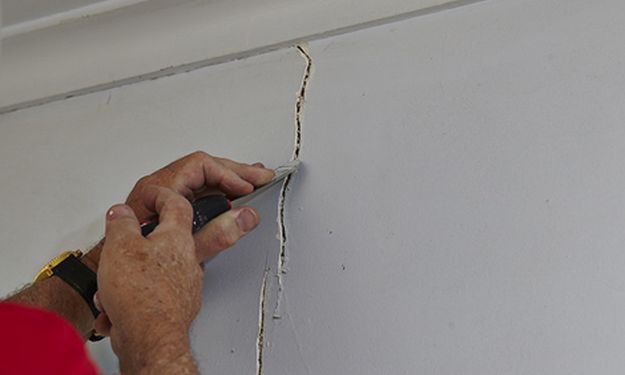
Whether your home is new or older, your walls may be calling out for a little tender loving care.
Walls can be damaged from extreme weather, pin holes, drilling mistakes or from a few too many incidents with the visiting grandkids.
Patching cracked walls is an easy fix and will only require a few tools and a little time.
The first thing you need to do in order to fix any crack in your wall is take a trip to your local hardware store.
Speak to a sales associate about wall putty (sometimes referred to as mud) and scrapers.
You may also want to purchase paint, paint brushes and somecotton swabs.
If you need to purchase paint, remember to test the color on a small, hidden area prior to performing your paint job.
If you or your contractor happened to have thought ahead you may have an old paint can that was used when initially painting your walls.
Remember that paint chips (which are free!) can always be used to try and properly match colors.
Keep in mind that if your wall has not been painted in several years, color will probably have faded or become dirtied.
You may want to repaint the entire room for the best results.
Before taking on the crack or hole in your wall you will want to carefully clean the exposed area.
Using a little water or isopropyl alcohol and a toothbrush or cotton swab, gently clean the area. If you leave dirt, debris or dust in the crack it may make your fix-up slightly less aesthetically appealing.
It is now time to whip out your wall putty.
Using a putty tool (or even your fingers), fill in the hole.
When filling the crack or hole with putty, don't worry too much about how it appears with the paint or how well it blends with paint.
Once you have completely filled the crack or hole, use a scraper to smooth and remove putty from the surface of the wall.
Your putty should not be thicker than your paint.
Let the putty dry properly and get ready to do a small paint job.
Gently paint over the puttied area; you may need to do two layers to properly cover and blend paint.
Some videos ?
Here's a 5 part set of videos to get you through the project.
https://www.youtube.com/watch?v=Yzr0Uhc56ac
Mr. Fix-It
_____________________________
Walls can be damaged from extreme weather, pin holes, drilling mistakes or from a few too many incidents with the visiting grandkids.
The first thing you need to do in order to fix any crack in your wall is take a trip to your local hardware store.
Speak to a sales associate about wall putty (sometimes referred to as mud) and scrapers.
You may also want to purchase paint, paint brushes and somecotton swabs.
Adding Air Conditioning Ideas
Anyone who has ever sat through a summer without air conditioning can tell you just how quickly you stop thinking about energy savings...and begin thinking about comfort.
Here are some options about cooling your home.
Central Air Conditioning Replacement
All of our homes are centrally air conditioned...but for many...they are getting old, and may need replacement.
If you replace the unit(s), we have some advice.
First, get a number of bids...but...an additional suggestion....get them from people you know or have had experience with the firms you are getting the quotes.
Referrals are ALWAYS the best idea.
Here's some other helpful advice:
Top questions to ask an HVAC contractor
Do you offer any maintenance programs or incentives?
When working with a heating and cooling professional, ask if their company offers pricing incentives to encourage you to hire them on a regular basis. It's common to have your equipment inspected and serviced at least once a year. Your HVAC company may also offer special pricing on filters, ventilation cleaning or energy assessments.
What can I do to prepare for this project?
Regardless of the scope of your project, find out what you need to do to prepare your home for their visit. For example, the HVAC professional will need access to the areas in question and may need access to other mechanical or ventilation points. Make sure pets and children are kept out of the way. Ask if your project will involve removing dry wall or making any other structural changes – you may need to hire a professional drywall contractor to patch up HVAC work. If you are adding a unit that may contribute to carbon monoxide within the home, find out if you need to purchase a carbon monoxide detector.
Ceiling fans
One of the more inexpensive options, and one that any home improvement enthusiast (no matter their skill level) can do themselves is to installing a ceiling fan.
While these units are not particularly effective on their own, they can add a nice bit of relief when it is needed.
In addition, they use the least amount of energy when compared to the other types of air conditioning that you could be adding to your home.
Window Units
Another common solution, particularly for smaller homes or apartments, is to add a window unit.
Typically these are simply a small type of fan or possibly an actual air conditioning unit that fits within a window.
It then draws out the hot air inside your home, and replaces it with the potentially cooler air that is outside.
At the very least, this unit will help create a breeze within the home which can help to cool things off a bit.
Evaporative Units
Another traditional method for adding air conditioning to your home is to use what is known as an evaporative unit.
These types of air conditioners are also known as a swamp cooler.
Typically these air conditioning units can either fit in a window, or work with an existing air duct system to help get the cooler air throughout the house.
The way that these units work is by having a pad continually saturated with water, through which air is sucked into the home.
The temperature difference (and the moisture) that is sucked into the house is typically cooler than the air inside.
Be aware that this type of system not only can add to your electric bill, but to your water bill as well.
Summary
When thinking of adding air conditioning, you need to stop and think about a few things.
The first and foremost should be how much are you willing to spend to achieve the level of comfort that you want.
Shortly after that, will usually follow something along the lines of how much this will set you back on your monthly energy bills.
Once you decide on which way you want to add your air conditioning, then you need to figure out the procedure to use to do it.
If you are going to go with central air replacement, then you really should contact a professional.
Look for HVAC (heating, ventilation, and air conditioning) contractors in your area; they can do the job for you and they should guarantee their work...and ask the questions we previously noted.
If you choose a different method of air conditioning (ceiling fans, window units, or evaporative units), you may be able to do the installation work yourself.
Check with your local hardware store or outlet; they will be able to provide detailed information on installation.
Here are some helpful videos:
Ceiling fans:
Swamp Coolers or Air Conditioning:
Swamp Coolers:
Stay cool in the summer....and warmer in the winter !
Mr. Fix-It
_________________________
Air Conditioning
"On the Cheap"

Materials
Buy a cheap Styrofoam ice chest, a couple of dryer vents or PVC joints, and a small fan.
Construction
1. Put the vents toward one end of the ice chest lid and trace around them.
2. Do the same on the other end with the fan.
3. Take a serrated knife and cut the vent holes, cutting inside the fan.
Assembly
1. Fit the vents in snugly.
2. Place the fan so it rests on top is such a way that it won't fall in.
3. Fill the cooler with ice.
(Keep a few water filled milk jugs in your freezer. That way you'll always have a fresh supply of cold water.)
Operation
1. Turn it on.
As the fan forces air over the ice and out the vents, you get cold air...
...about the same temperature as an air conditioner...
...until the ice melts.
Technically this isn't really an "air conditioner", it's more of an "air cooler. There is no condenser or coils.
It's not really an "air evaporator either. An evaporative cooler works in arid, but not humid regions by blowing air over water at you.
But...
...it works in cooling down a room and you won't perspire.
You might want to have one of these gadgets around whether you use one or not. Air conditioners in our desert summer heat often "bite the dust" on the hottest of days or when a blackout occurs....
...and as long as you have some ice, it will keep you nice and cool until the repairman gets to your home.
Need a few videos?
Mr. Fix-It
_________________________
Ceiling fans
One of the more inexpensive options, and one that any home improvement enthusiast (no matter their skill level) can do themselves is to installing a ceiling fan.
While these units are not particularly effective on their own, they can add a nice bit of relief when it is needed.
In addition, they use the least amount of energy when compared to the other types of air conditioning that you could be adding to your home.
Window Units
Another common solution, particularly for smaller homes or apartments, is to add a window unit.
Typically these are simply a small type of fan or possibly an actual air conditioning unit that fits within a window.
It then draws out the hot air inside your home, and replaces it with the potentially cooler air that is outside.
At the very least, this unit will help create a breeze within the home which can help to cool things off a bit.
Evaporative Units
Another traditional method for adding air conditioning to your home is to use what is known as an evaporative unit.
These types of air conditioners are also known as a swamp cooler.
Typically these air conditioning units can either fit in a window, or work with an existing air duct system to help get the cooler air throughout the house.
The way that these units work is by having a pad continually saturated with water, through which air is sucked into the home.
The temperature difference (and the moisture) that is sucked into the house is typically cooler than the air inside.
Be aware that this type of system not only can add to your electric bill, but to your water bill as well.
Summary
When thinking of adding air conditioning, you need to stop and think about a few things.
The first and foremost should be how much are you willing to spend to achieve the level of comfort that you want.
Shortly after that, will usually follow something along the lines of how much this will set you back on your monthly energy bills.
Once you decide on which way you want to add your air conditioning, then you need to figure out the procedure to use to do it.
If you are going to go with central air replacement, then you really should contact a professional.
Look for HVAC (heating, ventilation, and air conditioning) contractors in your area; they can do the job for you and they should guarantee their work...and ask the questions we previously noted.
If you choose a different method of air conditioning (ceiling fans, window units, or evaporative units), you may be able to do the installation work yourself.
Check with your local hardware store or outlet; they will be able to provide detailed information on installation.
Here are some helpful videos:
Ceiling fans:
Swamp Coolers or Air Conditioning:
Swamp Coolers:
Stay cool in the summer....and warmer in the winter !
Mr. Fix-It
_________________________
Air Conditioning
"On the Cheap"
Materials
Buy a cheap Styrofoam ice chest, a couple of dryer vents or PVC joints, and a small fan.
Construction
1. Put the vents toward one end of the ice chest lid and trace around them.
2. Do the same on the other end with the fan.
3. Take a serrated knife and cut the vent holes, cutting inside the fan.
Assembly
1. Fit the vents in snugly.
2. Place the fan so it rests on top is such a way that it won't fall in.
3. Fill the cooler with ice.
(Keep a few water filled milk jugs in your freezer. That way you'll always have a fresh supply of cold water.)
Operation
1. Turn it on.
As the fan forces air over the ice and out the vents, you get cold air...
As the fan forces air over the ice and out the vents, you get cold air...
...about the same temperature as an air conditioner...
...until the ice melts.
Technically this isn't really an "air conditioner", it's more of an "air cooler. There is no condenser or coils.
It's not really an "air evaporator either. An evaporative cooler works in arid, but not humid regions by blowing air over water at you.
But...
...it works in cooling down a room and you won't perspire.
You might want to have one of these gadgets around whether you use one or not. Air conditioners in our desert summer heat often "bite the dust" on the hottest of days or when a blackout occurs....
...and as long as you have some ice, it will keep you nice and cool until the repairman gets to your home.
Need a few videos?
Mr. Fix-It
_________________________
Problem with Your Circuit Breaker?
Let's Fix It

Circuit breakers have one purpose and one purpose only:
To interrupt electrical currents in your home when there is a sudden surge in the electrical lines.
This safety feature is necessary to help protect your wiring, and therefore the costly electrical equipment in your home, like your television or computer.
It also helps prevent fires that could be caused by overheated electrical lines.
Before replacing a circuit breaker you need to determine whether or not the circuit breaker actually needs replacing....it could just be tripped.
To check this out, take a look at the breaker box, which is usually located in the garage in most Sun City Anthem homes.
Locate the breaker that is giving you problems.
Firmly move the breaker switch towards the off position to reset it, then over to the on position.
If it trips again immediately, then you probably have a bad circuit breaker that needs to be replaced.
Write down any identifying information about the problem breaker. If it has a manufacturer's name on it or any numbers, jot them down on a piece of paper and head off to your local hardware or home improvement store.
Use the information to find a matching replacement breaker and then take it home.
Here's how you then proceed:
1. Turn off the power to the breaker box, which probably means turning off the power to the whole house. This is a prudent safety precaution.
2. Carefully remove the cover from the breaker box by unscrewing the face plate.
3. Pay close attention to the wires that feed into the breaker and where they are located.
If you don't remember this, then you may end up reconnecting them in the wrong position, which would not be good at all. (In fact, you might want to take a picture of the breaker and wires so you can refer back to the picture, if need be.)
4. Loosen the screws holding down the white wire first, but only enough to get the wire out.Put a wire nut on the end of the wire, and bend it out of your way. Then repeat this with the other, colored wire.
5. Remove the old, bad circuit breaker and replace it with the new one. Make sure that the breaker is firmly seated in the breaker box.
6. Reconnect the wires to the new breaker as they had been connected to the old.
(This is where you can refer to the photo you took in step 3, if desired.)
Make the connections in the reverse order that you removed them—colored one first, then the white.
7. Replace the covering plate for the breaker box.
8. Turn on the power to the breaker box.
How about some videos to help you out? If the breaker trips again, then you may have a more serious proble. In such a case, it's a good idea to immediately call an electrician.
You might have a short in your wiring, which could be dangerous and cause a fire or other type of damage to your home.
Mr. Fix-It
______________________________
Creating Your Home Theatre

There are more to home theatres than just purchasing a whole bunch of audiovisual equipment and hooking it all up.
There is also an element of design to it as well.
Many people might think that you have to be an expert at interior design in order to achieve the best home theater design possible.Those people would be wrong.
There are actually only a few (about 4) things that are absolute essentials when it comes to home theater design, and if you know those then you are going to have the best possible home theater, whatever your budget.
Area
Despite what the salesman down at the local electronics store says.... size does matter.
Simply put, you are going to need to know how large the room is that you are planning to use.
There are several reasons for this, some of which may surprise you.
The size, or area, of your room is going to impact such things asfurniture layout, how many items you can have in the room and specifically what type of equipment you are going to need.
Different components are going to act differently in different sized rooms.
For example, if you have a component that works great in a large showroom, but you are going to be placing it in a small bedroom, they are not going to react the same way.
Know the area you are working with !
Acoustics
Whether you are designing a room that is going to be dedicated to use as a home theater, or you are working in a multipurpose room (such as a bedroom) you need to know about acoustics.
In layman's terms acoustics are the way that your TV or stereo is going to sound in any given area.
In home theater design you are looking for that perfect balance between echo and absorption.
Try to use such things as carpeting, acoustical wall paneling (or curtains for the financially challenged), soft furnishings and a hard ceiling.
Try to shoot for about 50% of your room to be covered, or utilizing some form of absorptive material.
Lighting
Have you ever noticed that when you go to an actual theater they always turn down the main lights, but at the same time there is some type of ambient lighting still in existence?
This is because neither too much and too little light is wanted when viewing a movie.
This is going to be just as true when you are designing your home theater as well.
There are several different ways that you can control the lighting in your room.
The first is to have any windows covered by curtains (be sure that you consider how this is going to affect the acoustics) and using something as simple as a dimmer switch.
There are more expensive methods available, but why use them, when you can get similar results for less money?
Placement
Placement of items such as the TV, speakers, projector (if your using one), furniture, and so on all interact with each other to affect your viewing experience.
For the placement of the TV or projector and furniture, it is going to be largely up to your personal preference.
If you have ever gone to a theater, you probably noticed how everyone is always sitting in different locations depending on their preference.
Mostly, the placement of the different items in your home theater is going to be a matter of trial and error, but it's recommended that you try drawing out what you have in mind prior to implementing it. This way you can move things around to your heart's content without putting yourself through too much.
And...of course, we have some videos to assist you in design.
Mr. Fix-It
___________________________
Caulking Your Sink

Sinks seem to have a nasty habit of leaking when you don't want it to. While there are numerous possible causes for any leak in the kitchen, one of the most common is that offaulty caulking.
It should be on any homeowners' list of annual home improvement projects to check the caulking around the joints, seams or pipes of any plumbing fixture in the home.
Many people would be surprised to find out that this is one of the easiest home improvement projects that a homeowner could do.
Prior to starting your home plumbing venture, you are going to need to gather the materials and tools that are necessary to completing your project.
There are just a few materials that are needed, the necessary tools are a multi-purpose tool (or a knife and some pliers), damp cloths or rags, and a caulking gun.
The materials that are going to be needed are simple, all that you need to get is a tube or two of caulking that can be obtained at any
home improvement department of any department, or hardware store.
The first step to re-caulking your sink would be to remove the old caulking.
Removing the old caulking is simple, if maybe a little time consuming.
Begin by using the knife, or knife attachment of the multi-tool to slice into the caulking.
Try pulling up the caulking by hand, but feel free to use the pliers attached to the multi-tool, or other pliers if you have are having any problems removing the caulking.
When you have removed as much caulking as possible, take the damp cloth and use it to scrub off the remaining caulking. This both cleans off the area, as well as prepares it for the next step.
Next, you need to take the caulking gun and caulk and administer the substance to the area that you just cleaned off.
A caulking gun is the best way of applying the caulk in a continuous and steady stream, ensuring that it is smooth and even, you can do it without if you don't have one, but it is strongly suggested that you use one if you can get one.
Finally, use one of the damp cloths that you have waiting to wipe up any mess you may have, so that there is a professional appearance to your work.
This also ensures that no mold or mildew grows in any cracks or seams you may have inadvertently left.
One last word of advice, once you have completed this project, you really want to let the caulking material dry.
Before exposing the material to water, it needs to be dried out, or you are going to be redoing all of your hard work.
We have some helpful videos for you.
Mr. Fix-It
__________________________
Problem with Your Circuit Breaker?
Let's Fix It
Circuit breakers have one purpose and one purpose only:
This safety feature is necessary to help protect your wiring, and therefore the costly electrical equipment in your home, like your television or computer.
It also helps prevent fires that could be caused by overheated electrical lines.
To check this out, take a look at the breaker box, which is usually located in the garage in most Sun City Anthem homes.
Locate the breaker that is giving you problems.
Firmly move the breaker switch towards the off position to reset it, then over to the on position.
If it trips again immediately, then you probably have a bad circuit breaker that needs to be replaced.
Write down any identifying information about the problem breaker. If it has a manufacturer's name on it or any numbers, jot them down on a piece of paper and head off to your local hardware or home improvement store.
Use the information to find a matching replacement breaker and then take it home.
Here's how you then proceed:
1. Turn off the power to the breaker box, which probably means turning off the power to the whole house. This is a prudent safety precaution.
2. Carefully remove the cover from the breaker box by unscrewing the face plate.
3. Pay close attention to the wires that feed into the breaker and where they are located.
If you don't remember this, then you may end up reconnecting them in the wrong position, which would not be good at all. (In fact, you might want to take a picture of the breaker and wires so you can refer back to the picture, if need be.)
4. Loosen the screws holding down the white wire first, but only enough to get the wire out.Put a wire nut on the end of the wire, and bend it out of your way. Then repeat this with the other, colored wire.
5. Remove the old, bad circuit breaker and replace it with the new one. Make sure that the breaker is firmly seated in the breaker box.
5. Remove the old, bad circuit breaker and replace it with the new one. Make sure that the breaker is firmly seated in the breaker box.
6. Reconnect the wires to the new breaker as they had been connected to the old.
(This is where you can refer to the photo you took in step 3, if desired.)
Make the connections in the reverse order that you removed them—colored one first, then the white.
7. Replace the covering plate for the breaker box.
8. Turn on the power to the breaker box.
How about some videos to help you out? If the breaker trips again, then you may have a more serious proble. In such a case, it's a good idea to immediately call an electrician.
How about some videos to help you out? If the breaker trips again, then you may have a more serious proble. In such a case, it's a good idea to immediately call an electrician.
You might have a short in your wiring, which could be dangerous and cause a fire or other type of damage to your home.
Mr. Fix-It
______________________________
Creating Your Home Theatre
There are more to home theatres than just purchasing a whole bunch of audiovisual equipment and hooking it all up.
There is also an element of design to it as well.
Many people might think that you have to be an expert at interior design in order to achieve the best home theater design possible.Those people would be wrong.
There are actually only a few (about 4) things that are absolute essentials when it comes to home theater design, and if you know those then you are going to have the best possible home theater, whatever your budget.
Area
Despite what the salesman down at the local electronics store says.... size does matter.
Simply put, you are going to need to know how large the room is that you are planning to use.
There are several reasons for this, some of which may surprise you.
The size, or area, of your room is going to impact such things asfurniture layout, how many items you can have in the room and specifically what type of equipment you are going to need.
Different components are going to act differently in different sized rooms.
For example, if you have a component that works great in a large showroom, but you are going to be placing it in a small bedroom, they are not going to react the same way.
Know the area you are working with !
Acoustics
Whether you are designing a room that is going to be dedicated to use as a home theater, or you are working in a multipurpose room (such as a bedroom) you need to know about acoustics.
In layman's terms acoustics are the way that your TV or stereo is going to sound in any given area.
In home theater design you are looking for that perfect balance between echo and absorption.
Try to use such things as carpeting, acoustical wall paneling (or curtains for the financially challenged), soft furnishings and a hard ceiling.
Try to shoot for about 50% of your room to be covered, or utilizing some form of absorptive material.
Lighting
Have you ever noticed that when you go to an actual theater they always turn down the main lights, but at the same time there is some type of ambient lighting still in existence?
This is because neither too much and too little light is wanted when viewing a movie.
This is going to be just as true when you are designing your home theater as well.
There are several different ways that you can control the lighting in your room.
The first is to have any windows covered by curtains (be sure that you consider how this is going to affect the acoustics) and using something as simple as a dimmer switch.
There are more expensive methods available, but why use them, when you can get similar results for less money?
Placement
Placement of items such as the TV, speakers, projector (if your using one), furniture, and so on all interact with each other to affect your viewing experience.
For the placement of the TV or projector and furniture, it is going to be largely up to your personal preference.
If you have ever gone to a theater, you probably noticed how everyone is always sitting in different locations depending on their preference.
Mostly, the placement of the different items in your home theater is going to be a matter of trial and error, but it's recommended that you try drawing out what you have in mind prior to implementing it. This way you can move things around to your heart's content without putting yourself through too much.
And...of course, we have some videos to assist you in design.
Mr. Fix-It
___________________________
Caulking Your Sink
Sinks seem to have a nasty habit of leaking when you don't want it to. While there are numerous possible causes for any leak in the kitchen, one of the most common is that offaulty caulking.
home improvement department of any department, or hardware store.
Simple Door Repairs

Have you ever noticed just how often it seems like the doors in your home have some kind of a problem?
Whether the problem is a squeak that won't go away, or door that won't open the right way, or even a loose hinge, door problems can really make your home a little less enjoyable.
Instead of replacing the door, or hiring a handyman to do the work for you, why not learn how to do a some simple door repairs?
Not only is it easy, it will also help you to take a little more pride in your home as well.
Tightening hinges
One of the more common problems that you can face with an interior door is a sagging due to loose hinge screws.
Typically, this problem is the result of the screws working their way out of their holes for whatever reason.
There are a couple of ways that you can fix this problem, and all of them are relatively easy.
First remove the screws from the holes, and use them as a guide for some new screws.
Choose screws that are the same diameter of the old screws, but that are longer.
The longer length screws will allow you to tighten the wood again by biting into some "new" wood.
Conversely, you can also replace the screws that are slightly wider in diameter, but which will still fit through the holes in the hinges.
Finally, the most drastic method would be to drill out the holes to a diameter of 1/4 inch, and then fill the hole with a 1/4 inch glue covered dowel.
Once the glue has dried, replace the door and drive the screws into the dowel filled holes.
Unbinding a door
When repairing a binding door, you need to first check to see where the door is getting stuck.
If you find that the door is sticking along the length then you will need to double check to ensure that the hinges aren't loose. If they are, repair according to the information above.
However, if the door is binding along the top or the bottom then you may want to try removing some wood.
The easiest way to do this is by simply marking where the door is binding, and then sand that part of the door down.
Repeat as necessary until the door opens and closes freely.
Stopping squeaks
Often a squeaky door is due to the hinges being tight, and not being able to move easily.
You can fix this by simply removing the door hinge pins enough so that you can work some lubricant (WD-40 or a light oil) into the barrel portion of the hinge.
Usually all you will need to remove the hinge pin is about 1/4 inch.
There may be a chance that there is still a problem with squeaking, and if so you will need to actually remove the pin completely and check for any rust.
If you find some rust, either clean the rust completely or replace the pin.
Once the pin has been cleaned, be sure that you replace it only after you have lightly oiled it.
We have some helpful videos for you.
Mr. Fix-It
_________________________
Centralized Air Conditioning
Take Care of It !

During the heat of the summer, a working central air system can make life much more enjoyable, and in Las Vegas, BEARABLE !
But...it needs to be checked.
Actually it's extremely easy to tell when such a system begins to go on the "fritz", and properly maintaining a central air system can go a long way to help prevent any unwanted difficulties from arising.
While exceptionally easy, maintaining a central air system will also help protect the valuable piece of equipment that is also an investment.
You'll need the right materials:
Screwdrivers
Trash bags
Blower
Fin comb
4-foot level
Open-end wrench
Allen wrench set
Electric machine oil, or all-purpose oil
Wood shims
Replacement fan (if necessary)
Rags
Gloves
Once the proper materials have been obtained, what do you do with them?
Merely follow this step-by-step procedure.
1. Check for noisy operation.
One of the easiest ways to begin maintaining a central air system is to simply listen. Periodically go outside and listen to your fan, and see if it seems to be operating too noisily.
The most common cause for a noisy air conditioner fan is that one of the blades somehow became bent.
When a fan blade gets bent, it throws the balance of the unit out of whack, and causes the motor to work much harder than it normally would need to.
2. Clear intake fins and coil.
Make sure that the area around the intake fins and coil are free of any dirt and debris.
This area of your air conditioner will often attract such messes, and make it much more difficult for the unit to work properly.
Use a brush, and a garden hose to remove this mess.
3. Shut off all power.
Before opening your air conditioner to do any interior maintenance, make sure that you shut off the power. The simplest way to do this to simply unplug the unit, but you can also disconnect the power at the junction box by throwing the breaker.
Be sure that you leave a note saying not to turn the power back on, to ensure that no one accidentally does that.
4. Remove the fan assembly.
In order to repair a bent fan blade, or even to inspect the interior of the air conditioner, you will need to remove the fan assembly.
Often times, this can be done by loosening the bolts that are found around the edge of the fan assembly, and setting them aside.
Remember where you put them so you don't loose them.
Once the assembly has been removed, clean out any dirt and debris that may have gotten inside the unit, as well as repairing any bent fan blades.
It is always best to take a fan blade into the shop to have it fixed properly.
5. Check the fins.
With the fan assembly removed, take a look at the fins to ensure that they are not bent or out of shape.
These fins often look like a bunch of black, metal paper stacked vertically.
Clean these fins, and straighten any bent ones at the same time, by using a fin comb.
6. Lubricate the fan motor.
Take a look at fan motor by removing the blades from the assembly.
Unloosen the setscrew that is holding the fan in place, and set them both aside.
Use either multipurpose oil or machine oil that has been formulated for electric motors, and lubricate all the moving parts.
Often there are oil ports that you can use to apply the oil to areas of the air conditioner that you may not normally be able to reach.
7. Reassemble, and ensure unit is level.
Reassemble everything, and then check to ensure that it is level.
Use a 4-foot level, set on top of the unit, to make sure that everything is level.
Make sure that you quarter the unit when checking it to see that it is actually level in the cardinal directions.
Use either shims, or adjust the feet of the unit to ensure that everything is level again.
There you have it....seven easy steps to make sure you stay cool during the summer.
How about some videos?
Mr. Fix-It
______________________________
Garage door openers are a wonderful thing that can save you a lot of time and effort, and generally make life easier; however, there are times when this isn't the case, such as when a garage door doesn't work like it should.
When you are faced with such as situation, then you need to begin checking a few things.
"Troubleshooting" a garage door is a fairly easy task, as long as you follow these suggestions:
1. Test your batteries.
Use a normal battery tester that you can pick up from places like Home Depot or Lowe's for a relatively small amount of money. This will help you to not only test the battery strength, but also the strength of the signal of the beam.
2. Check the remote.
If your battery life is still good, check the "dip switch" settings on your remote against those of the wall unit.
People love to play around with these things for some reason, so there is always the chance that this could have been changed.
Record the new settings in your owner's manual.
3. Check for interference.
If steps one and two check out as good-to-go, look for any equipment items that may have been stored near the opener unit.
Such items as electronic pest repelling plug-in units, bug zappers, old home electronic units and so on can all interfere with the remote signal.
Change the "dip switch" to match what they should be if they were out of whack.
4. Check the lens.
Take a look at the lens on the motion activated unit that is near the floor by the door. Some units are designed to set off a rapid blinking off the ceiling unit as an error code that will ignore your remote.
Clean off the lens by using glass cleaner and paper towels, verify the alignment, and then test using the wall mounted unit.
5. Check the tracks.
Verify the solidity of your door tracks, one side at a time, for proper alignment.
Secure any ceiling mounts that may need tightening down, and ensure that all fasteners are properly tightened.
Slight twisting or wobbling is enough to cause the ceiling unit to react to an error code that ignores the remote signal and forces the door to close down.
6. Check your wiring.
Disconnect the power to the ceiling unit, and verify that all the wiring to the ceiling unit has not corroded, and that a solid connection exists.
Frequently a slight wiggle of each individual wire will reveal a wire that has broken.
If necessary, strip the wire and reconnect.
Most people fail to realize that the vibration of most door opener units will cause the wires to break.
Reconnect the power, and test from the wall mounted unit.
7. Grease tracks, if necessary.
Sparingly use automotive "white grease" on the tracks and roller axis to prevent binding.
A door that cannot travel freely can cause an error message to be generated, and force the door to stop responding to your remote.
Again, test from the wall mounted unit.
We have some videos to assist you.
Mr. Fix-It
To Mr Fix-It,
I also had an awful experience with Home Warranty company called Choice.
It seemed they could not get the coils for my air conditioner in the summer and after 4 weeks of waiting for the part from Goodman, we were told the part can only be sent if the air conditioner was under warranty and so I had to buy an entire new unit for up in the attic.
Well Choice refused to pay and the bottom line was that they would only pay for the repair that never took place, and I had to pay $1850 for this debacle.
They claimed I did not do proper maintenance and when I supplied them with 6 receipts showing twice a year maintenance for over 5 years from Silver State A/C they then said maybe I should get another company for maintenance.
I looked up the complaints on the internet and there were thousands against this company and many other companies.
They will pay for a small repair, but be forewarned that they will not pay for a large repair.
I hope this does not happen to another resident.