
Losing
an Election Doesn't Mean
Losing
Love for His Community

Forrest
Fetherolf…aka…Mr. Fix-It may not have captured enough votes during the 2016 SCA
BOD election…
...but he wishes the new board the best under the new
self-management of Sandy Seddon and her
staff. Forrest
Fetherolf
(702)
823-5580
ForrestF@cox.net
Forrest
Fetherolf
(702)
823-5580
ForrestF@cox.net
___________________________
Losing
an Election Doesn't Mean
Losing
Love for His Community
Forrest
Fetherolf…aka…Mr. Fix-It may not have captured enough votes during the 2016 SCA
BOD election…
...but he wishes the new board the best under the new
self-management of Sandy Seddon and her
staff.
Forrest was willing to give up two years of his time and using his
40 years of construction management in an attempt to get wasteful spending under
control and prevent tragedies like five failed restaurants, construction
defects, closure of Liberty Center, and oversee how the new facilities
department conducts business maintaining our
facilities.
On a
brighter side…
Mr.
Fix-It has not given up on doing what he does best for the last eight years
living in SCA…
...spending many hours weekly receiving phone calls, emails, and
conversation with residents answering their questions and making suggestion on
how to maintain their homes in a cost effective
manner.
Forrest has made available a list of home repair and maintenance
specialists he has personal knowledge of their work and cost saving
measures.
His phone number and email address remains open for your
access.
All
you have to do is call or email him for free
advice.
Forrest
Fetherolf
(702)
823-5580
ForrestF@cox.net
Fixing Leaky Pipes
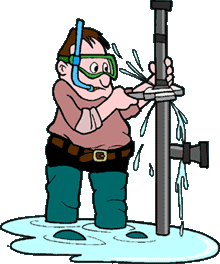 If you have leaky pipes, follow these steps for fixing them:
1. Turn off the water supply.
You will find the shut-off valve near plumbing fixtures.
2. Completely wipe dry the pipe that is leaking.
3. Determine if the leak is caused by a loose joint.
If it is, simply tighten the joint, turn the water back on, and observe if the leak has stopped.
If the leak has stopped, your chore is finished.
If you still see water spewing, that means you have a crack or a hole in the pipe.
To patch the crack or hole, follow these steps:
1. Turn the water off at the shut-off valve and dry the pipe completely.
2. Determine the position of the crack or hole and cover it thickly and completely with epoxy.
3. Wrap electrical tape or white thread tape around the pipe, covering the crack or hole, and then cover the tape with a thick layer of epoxy.
4. Cut a section of rubber and wrap it around the pipe. Hold the rubber in place until it adheres to the pipe.
5. Affix several metal pipe clamps or plastic wire-ties to the rubber and tighten them as tight as you can against the pipe.
If you are working with PVC pipe, take care not to over-tighten, as you can crush or crack the pipe further.
6. Allow the project to cure for at least an hour.
After you've allowed the pipe to cure, turn the water back on and check for leaks.
If you still see water leaking, then you might need to call a plumber.
Here as some helpful videos:
Good Luck !
Mr. Fix-It
If you have leaky pipes, follow these steps for fixing them:
1. Turn off the water supply.
You will find the shut-off valve near plumbing fixtures.
2. Completely wipe dry the pipe that is leaking.
3. Determine if the leak is caused by a loose joint.
If it is, simply tighten the joint, turn the water back on, and observe if the leak has stopped.
If the leak has stopped, your chore is finished.
If you still see water spewing, that means you have a crack or a hole in the pipe.
To patch the crack or hole, follow these steps:
1. Turn the water off at the shut-off valve and dry the pipe completely.
2. Determine the position of the crack or hole and cover it thickly and completely with epoxy.
3. Wrap electrical tape or white thread tape around the pipe, covering the crack or hole, and then cover the tape with a thick layer of epoxy.
4. Cut a section of rubber and wrap it around the pipe. Hold the rubber in place until it adheres to the pipe.
5. Affix several metal pipe clamps or plastic wire-ties to the rubber and tighten them as tight as you can against the pipe.
If you are working with PVC pipe, take care not to over-tighten, as you can crush or crack the pipe further.
6. Allow the project to cure for at least an hour.
After you've allowed the pipe to cure, turn the water back on and check for leaks.
If you still see water leaking, then you might need to call a plumber.
Here as some helpful videos:
Good Luck !
Mr. Fix-It
_________________________
Replacing Your Dishwasher
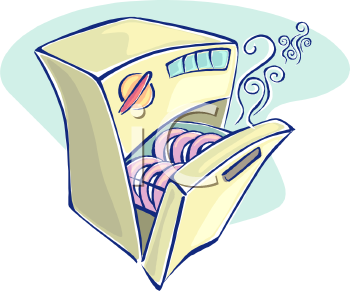
A modern kitchen simply is not truly complete without a dishwasher.
With the goal of finding a replacement unit in mind, I found that there are really only a few things that we needed to keep in mind while my wife and I were looking to get a replacement.
Very briefly and simply, those things cover such areas as the unit's size, sound level, interior design and exterior style.
All of these items play a role in the final cost that a consumer pays.
Be sure that, as you are looking for a new dishwashing unit, you keep in mind the role that each of these are going to play.
Size
Interestingly enough, all of the dishwashing units designed to go under a counter that are made in the United States typically share the same overall dimensions.
The benefit of this is that they are all around 24 inches in width, not to mention that they are also similar in their height as well.
Due to this, there rarely any remodeling of spatial configuration for the dishwasher, which is a good thing since it helps to reduce the cost of putting in new equipment.
Unfortunately, the same cannot be said about the European models on the market, so you should take the time to, at the very least make sure where the model is from, if not the actual dimensions themselves.
Sound
The quieter a dishwasher is, well typically the more expensive it is.
Many people may not realize this, but newer models are on average quieter than the older models, but to be truly considered quiet, you are going to be paying about $200.00 to $300.00 more than you would be paying otherwise.
Interior/Exterior Design
One of the most important factors in choosing a dishwasher is it's design.
The interior design, meaning the way things look on the inside of the dishwasher is important simply for the fact that this directly affects how well, and the number of things that can get cleaned.
Exterior design is more than just how pretty something looks or if it matches the decorations of the rest of your kitchen, but the basic shape of the unit as well.
One of the new innovations that are becoming more common is the creation of "multi-drawer" dishwashers.
These types of units can be used as both storage and washing units, thereby increasing both cleaning and storage capabilities.
We have a couple of videos to help you out in replacing and installing a new diswasher.
Part One
Part Two
Mr. Fix-It
______________________________
Ground Fault Circuit Interrupters
Get Old...and...Need Replacing

I have received many calls from residents in SCA their GFCI (Ground Fault Circuit Interrupter) Receptacles are tripping frequently.
I suspect there are two reasons for the increase tripping of the
GFCI Receptacles....
1. GFCI Receptacles have a useful life just like any other electrical device (smoke detectors, light bulbs, light switches, etc.), usually five to ten years.
2. GFCI will either fail completely (unable to reset) or trip on a daily or weekly basis after you reset the device.
Frequent tripping is usually caused by aging and sensitivity increase, and during summer months with high electrical usage in demand for air conditioners, that high electrical demand will cause power surges, causing the GFCI to trip.
The only cure is to replace the GFCI.
The cost varies between different makes and models anywhere from $10 online to about $20 in retail stores.
If you are up to the challenge...changing the GFCI is not difficult and can be done with a screwdriver and needle nose pliers.
Or...
...call someone to do the job for you.
I have heard some electricians charging as much as $80 per GFCI... a rip-off as far as I am concerned.
Someone with any experience should be able to change a GFCI in merely 15 minutes.
A reasonable price to pay for multiple GFCI replacements should be around $30 to $40 each.
Another tip...
...you should consider changing all GFCIs at the same time if frequent tripping occurs.
Here are some helpful videos for you "do it yourselfers":
First...a two part explanation for inside GFCI replacement:
Second...for an outside GFCI replacement:
If you need assistance...give me a call.
Mr. Fix-It
Forrest Fetherolf
702 823-5580
_________________________________________
A modern kitchen simply is not truly complete without a dishwasher.
With the goal of finding a replacement unit in mind, I found that there are really only a few things that we needed to keep in mind while my wife and I were looking to get a replacement.
Very briefly and simply, those things cover such areas as the unit's size, sound level, interior design and exterior style.
All of these items play a role in the final cost that a consumer pays.
Be sure that, as you are looking for a new dishwashing unit, you keep in mind the role that each of these are going to play.
Size
Interestingly enough, all of the dishwashing units designed to go under a counter that are made in the United States typically share the same overall dimensions.
The benefit of this is that they are all around 24 inches in width, not to mention that they are also similar in their height as well.
Due to this, there rarely any remodeling of spatial configuration for the dishwasher, which is a good thing since it helps to reduce the cost of putting in new equipment.
Unfortunately, the same cannot be said about the European models on the market, so you should take the time to, at the very least make sure where the model is from, if not the actual dimensions themselves.
Sound
The quieter a dishwasher is, well typically the more expensive it is.
Many people may not realize this, but newer models are on average quieter than the older models, but to be truly considered quiet, you are going to be paying about $200.00 to $300.00 more than you would be paying otherwise.
Interior/Exterior Design
One of the most important factors in choosing a dishwasher is it's design.
The interior design, meaning the way things look on the inside of the dishwasher is important simply for the fact that this directly affects how well, and the number of things that can get cleaned.
Exterior design is more than just how pretty something looks or if it matches the decorations of the rest of your kitchen, but the basic shape of the unit as well.
One of the new innovations that are becoming more common is the creation of "multi-drawer" dishwashers.
These types of units can be used as both storage and washing units, thereby increasing both cleaning and storage capabilities.
We have a couple of videos to help you out in replacing and installing a new diswasher.
Part One
Part Two
Mr. Fix-It
______________________________
Ground Fault Circuit Interrupters
Get Old...and...Need Replacing
I have received many calls from residents in SCA their GFCI (Ground Fault Circuit Interrupter) Receptacles are tripping frequently.
I suspect there are two reasons for the increase tripping of the
GFCI Receptacles....
1. GFCI Receptacles have a useful life just like any other electrical device (smoke detectors, light bulbs, light switches, etc.), usually five to ten years.
2. GFCI will either fail completely (unable to reset) or trip on a daily or weekly basis after you reset the device.
Frequent tripping is usually caused by aging and sensitivity increase, and during summer months with high electrical usage in demand for air conditioners, that high electrical demand will cause power surges, causing the GFCI to trip.
The only cure is to replace the GFCI.
The cost varies between different makes and models anywhere from $10 online to about $20 in retail stores.
If you are up to the challenge...changing the GFCI is not difficult and can be done with a screwdriver and needle nose pliers.
Or...
...call someone to do the job for you.
I have heard some electricians charging as much as $80 per GFCI... a rip-off as far as I am concerned.
Someone with any experience should be able to change a GFCI in merely 15 minutes.
A reasonable price to pay for multiple GFCI replacements should be around $30 to $40 each.
Another tip...
...you should consider changing all GFCIs at the same time if frequent tripping occurs.
Here are some helpful videos for you "do it yourselfers":
First...a two part explanation for inside GFCI replacement:
Second...for an outside GFCI replacement:
If you need assistance...give me a call.
Mr. Fix-It
Forrest Fetherolf
702 823-5580
_________________________________________
Ever Consider Natural Rugs ?

Today, more than ever,
Earth's inhabitants are striving to become eco-friendly and looking for ways to
help the environment, reduce, reuse, recycle, and curb energy expenditures,
while reducing the cash outlay for home
improvements.
A simple way to be
eco-friendly is to use natural rugs and carpets in your home,
instead of their synthetic counterparts.
The use of "green" home
decor products and techniques has made a niche for such products in the
marketplace.
While jute rugs and bamboo
window shades have been available in the past, they are now more sophisticated
pieces of home decor, catering to the generation trying to make a difference
environmentally.
Just some of the types of
natural rugs available are:
Seagrass

The least expensive—and most
versatile—of the natural floor coverings, seagrass rugs are woven from seagrass into a latex-backed
floor covering.
The seagrass is grown in
India and coastal China in paddies, where the fields receive a cyclical flooding
of seawater to encourage growth.
While most seagrass rugs have
a green hue, the colors range from sage to olive
green.
Seagrass rugs have a scent
resembling hay, but the odor dissipates over
time.
Seagrass rugs are strong,
non-absorbent, stain resistant, rigid, anti-static, and can withstand heavy
traffic.
Mountain
grass

Because the grass is grown in
the mountains, the rugs made from the grass are called mountain grass
rugs.
Typically, mountain grass
rugs are brown-hued, running the gamut of Earth tones in the color
range.
Mountain grass rugs are rigid
and hard, have definitive textures and thicknesses, and various weave
patterns.
Sisal

Sisal plants produce a very
strong fiber, stronger than hemp, jute, or
flax.
Most often, sisal fibers are
not dyed, so the rugs appear with the same colors as the natural plants from
which they are woven.
Sisal fibers can be bleached,
but they can also be dyed, proving a versatile decor
item.
There are many other types of
natural rugs, and some are fashioned from jute, hemp, bamboo, and
wool.
If the rug is made from 100% natural
fibers, it is considered a natural
rug.
Keep in mind that most
natural rugs have latex backing to prevent
slippage.
Also, most natural rugs do
not perform well in a humid or moist environment, since they tend to grow mildew
and mold.
You can prevent mold and
mildew buildup by spraying with an antibacterial spray, and keeping the rugs
clean.
Want more
information on natural rugs?
You might
wish to view these videos.
Mr.
Fix-It
______________________

Today, more than ever,
Earth's inhabitants are striving to become eco-friendly and looking for ways to
help the environment, reduce, reuse, recycle, and curb energy expenditures,
while reducing the cash outlay for home
improvements.
A simple way to be
eco-friendly is to use natural rugs and carpets in your home,
instead of their synthetic counterparts.
The use of "green" home
decor products and techniques has made a niche for such products in the
marketplace.
While jute rugs and bamboo
window shades have been available in the past, they are now more sophisticated
pieces of home decor, catering to the generation trying to make a difference
environmentally.
Just some of the types of
natural rugs available are:
Seagrass
The least expensive—and most
versatile—of the natural floor coverings, seagrass rugs are woven from seagrass into a latex-backed
floor covering.
The seagrass is grown in
India and coastal China in paddies, where the fields receive a cyclical flooding
of seawater to encourage growth.
While most seagrass rugs have
a green hue, the colors range from sage to olive
green.
Seagrass rugs have a scent
resembling hay, but the odor dissipates over
time.
Seagrass rugs are strong,
non-absorbent, stain resistant, rigid, anti-static, and can withstand heavy
traffic.
Mountain
grass
Because the grass is grown in
the mountains, the rugs made from the grass are called mountain grass
rugs.
Typically, mountain grass
rugs are brown-hued, running the gamut of Earth tones in the color
range.
Mountain grass rugs are rigid
and hard, have definitive textures and thicknesses, and various weave
patterns.
Sisal

Sisal plants produce a very
strong fiber, stronger than hemp, jute, or
flax.
Most often, sisal fibers are
not dyed, so the rugs appear with the same colors as the natural plants from
which they are woven.
Sisal fibers can be bleached,
but they can also be dyed, proving a versatile decor
item.
There are many other types of
natural rugs, and some are fashioned from jute, hemp, bamboo, and
wool.
If the rug is made from 100% natural
fibers, it is considered a natural
rug.
Keep in mind that most
natural rugs have latex backing to prevent
slippage.
Also, most natural rugs do
not perform well in a humid or moist environment, since they tend to grow mildew
and mold.
You can prevent mold and
mildew buildup by spraying with an antibacterial spray, and keeping the rugs
clean.
Want more
information on natural rugs?
You might
wish to view these videos.
Mr.
Fix-It
______________________
Consider Cafe Curtains

There are many ways to add class
and elegance to your home while keeping it a bright, comfortable
place.
A lot of things can contribute
to the atmosphere of your home, including your furniture selections, color
schemes, carpeting, decorating theme, and
more.
Making a fun change to your
home's interior doesn't need to be a huge project, or an endeavor that ends up
costing you a lot of money to achieve.
One good example of a way to try a new
look without going overboard is by installing new curtains in your
home.

Curtains and other window
treatments come in a wide variety,
and the style you choose for your windows can really make a
statement.
The curtains you use can either
compliment your decorating scheme, distract from other areas of your home, or
blend in without being easily noticed.
Sometimes, making a bold
statement with curtains is a simple but effective way to decorate with
style.

To create a fun look for your
windows that is both stylish and functional, try creating the cafe curtain
style.
Cafe curtains are like half
curtains that don't cover the entire window, just the
bottom.

This means that the curtains
give you privacy, but won't block out very much natural
light.
This lets you enjoy extra light
in your home while retaining privacy.
To get this look (which is
especially popular for kitchen windows, you only need a few
things.
First, you will need a curtain rod for
each window you will be covering.
These could be adjustable if you
prefer so you don't have to install them, or you can use the kind that you will
need to screw into the wall.
Next, get some fabric to use for the
curtains.
You can either buy pre-made
curtains or, if you're especially crafty, you can sew them
yourself.
Make sure that you choose your
fabric carefully, however. Different materials vary in how sheer or opaque they
are, and this can affect how much light will get through the
fabric.
Also, find a pattern or color
that will suit the room's color scheme well.
Start by measuring
your windows, and decide exactly where you will want to hang the cafe
curtains.
Record measurements so you will
know what length of curtains to get.
Next, install the
curtain rods and the curtains in the middle of the window so the bottom half is
covered by the fabric.
Now you have beautiful and
stylish cafe curtains!
Cafe curtains create a unique
look in your home, and they are quite easy to
install.
Simply adding new curtains in an
area can make a big difference to the look of the
room.
Add...you
can even make them yourself !
Mr.
Fix-It
__________________________


Removing Tint from Windows

If you are one of those individuals who don't particularly like bright lights, then chances are you may be interested in putting some tinted film on your windows.
Over time window tinting film can (and will) come off.
When it does, the film doesn't really do all that much and can often become a distraction rather than the help it was meant to be.
In such situations removing tint from windows is about the only real option that you have.
There are several options that you could use to begin removing tint from your windows.
Unfortunately some will require a bit more work on your part than others.
Listed below are two of the most effective, and easiest methods available for removing the window tint film.
Keep in mind that even though these methods are particularly easy, they will require that you work with hot items so be careful.
With Heat
1. Use a steam iron.
Carefully hold a steam iron about 1-1/2 inches away from one of the corners of the window film. Hold it there while it is emitting steam until you can begin to lift up the corner.
2. Peel and steam.
Begin to slowly lift up the corner of the film that you just steamed loose.
As you are lifting up the corner, apply more steam to help loosen up the glue.
If you pull up too hard or to quickly you may break the tint or only pull up the first layer or two of the tint.
If this happens you may end up leaving behind the glue which can be even more difficult to remove.
Continue to do this until you have completely removed the section of the window tint.
3. Press a towel and steam again.
Once you have removed as much of the film as you can you will find that there are still areas that have a sticky residue left behind.
Place a clean, old towel onto the window, and the glue should hold it up.
Carefully ironing the windows should help to remove the last bits of the glue.
4. Clean as normal.
Once you have finished removing the last of the glue you can begin to clean the window.
Simply clean the window as you normally do, and you will then be finished.
You can either replace the film, or leave the window as it is. The choice is up to you.
With a Steamer
1. Steam the film.
Utilize a fabric or clothes steamer and turn it on.
Before you turn it on make sure that you have carefully read the instructions and that you fill up the water reservoir completely.
Place a towel at the bottom of the window to help catch any loose glue.
2. Focus on a single section.
The extreme heat and steam from the clothing steamer will significantly cut down the work that you have to do; however, while you are utilizing this method be sure that you focus primarily on a single section before you proceed to the next.
3. Allow the heat to work.
By focusing the heat and steam on a single section you will be able to help heat up the glue and work the film loose.
After a while, the glue will begin to run down the window and should be able to be collected with the towel you placed down earlier.
Carefully lift up the section that you have been working on and proceed to the next.
4. Finish cleaning up glue.
Once you have finished removing all the film, you may find that there is a little bit of glue still on the windows.
Use a razor blade, the steamer, or even a chemical cleaner to remove the remaining glue.
Clean up your window as you normally would, you are now finished.
Here are a few videos to help you out !
Mr. Fix-It
________________________
1. Use a steam iron.
1. Steam the film.
Installing Sheet Vinyl

Installing sheet vinyl can be one of the easiest possible methods for installing new floors in your home. The reason for this is actually pretty simple.
Most manufacturers make their sheet vinyl in widths of 6 and 12 feet, which you can then simply lay down, and attach to the floor.
To make sure that you do the job right though, you should follow these simple steps.
Before you begin, a word of caution.
Some types of vinyl sheeting will require a different method for installation than is described here.
Be sure that you are familiar with the instructions from your manufacturer before you begin.
If there is any difference between the two methods of installation, follow the instructions of your manufacturer instead of those listed here.
Here are the materials you will need:
Adhesive
Primer
6d ringshank nails
Hammer
Ready-mix underlayment
Pry bar
Butcher paper
Safety goggles
Utility knife
Flooring knife
Hand roller
Compass
Tape measure
Handsaw
Trowel
Procedure
Remove some baseboard and molding.
Place a scrap piece of flooring, or even a small piece of cardboard against the molding of your doors, and against he molding of your walls.
Use a small hacksaw or handsaw, and trim the molding where the flooring or cardboard rests against it. This will allow you to insert the vinyl sheeting underneath the molding with no problem.
Make sure that the floor is level.
Look over your sub-floor, and make sure that it is level, and that there are no dips, depressions, gaps, or knotholes.
If you find any, patch and fill those problem areas using wood filler, or concrete, or other material as the manufacturer suggests.
Make sure that the floor is as smooth as possible before you go on to the next step.
Create a pattern to follow.
Begin laying down butcher paper across your sub-floor.
This butcher paper will act as a template for your vinyl.
Cut out the paper so that it will fit appropriately around any corners, cabinets, pipes, or other items that you may need to work around.
Tape each section of the paper together so that you have one continuous and piece of paper.
Once you have finished making the template, begin rolling it up.
Cut the vinyl according to the pattern.
Unroll the vinyl, and then lay out the template you created on top of it.
Begin cutting the vinyl according to the template.
Be careful as you do this so that you do not make any mistakes. If necessary, use small sections of the template at a time, and cut each piece of vinyl so that it will match appropriately.
This may mean that you have more seams, but it will make the vinyl a little wieldier.
Once you have finished cutting the vinyl, either roll them up, or stack the pieces so that you know which section will go where.
Lay the vinyl.
If you are using one large piece of vinyl, begin laying it all out.
Unroll everything, and make any minute adjustments that you may need to.
For those small pieces of vinyl, then begin laying everything out in the appropriate location.
Apply the adhesive.
For a single large piece of vinyl, roll up half of the vinyl.
Use a trowel to apply the adhesive onto the sub-floor, and then unroll the vinyl.
Repeat the process with the other side of the room.
If you are using small pieces of vinyl, then simply lift up a piece and apply the adhesive. Replace the vinyl, and then repeat the process with each of the other pieces of vinyl.
Smooth out the air bubbles.
Once you have applied the adhesive, use a hand roller to begin smoothing out any air bubbles, and ensuring that you have a tight seal.
Start in the middle of your floor, and work your way out towards the edges.
Clean up.
Clean up any dirt and debris from the installation.

What to learn something about what sheet vinyl is, and how it's made? Check out this video.
How about the installation process? Watch this !
What about installing it over existing vinyl and concrete?
Mr. Fix-It
_______________________
Selecting a Low Voltage Lighting System
Installing sheet vinyl can be one of the easiest possible methods for installing new floors in your home. The reason for this is actually pretty simple.
Most manufacturers make their sheet vinyl in widths of 6 and 12 feet, which you can then simply lay down, and attach to the floor.
Most manufacturers make their sheet vinyl in widths of 6 and 12 feet, which you can then simply lay down, and attach to the floor.
To make sure that you do the job right though, you should follow these simple steps.
Before you begin, a word of caution.
Some types of vinyl sheeting will require a different method for installation than is described here.
Be sure that you are familiar with the instructions from your manufacturer before you begin.
If there is any difference between the two methods of installation, follow the instructions of your manufacturer instead of those listed here.
If there is any difference between the two methods of installation, follow the instructions of your manufacturer instead of those listed here.
Here are the materials you will need:
Adhesive
Adhesive
Primer
6d ringshank nails
Hammer
Ready-mix underlayment
Pry bar
Butcher paper
Safety goggles
Utility knife
Flooring knife
Hand roller
Compass
Tape measure
Handsaw
Trowel
Procedure
Remove some baseboard and molding.
Place a scrap piece of flooring, or even a small piece of cardboard against the molding of your doors, and against he molding of your walls.
Use a small hacksaw or handsaw, and trim the molding where the flooring or cardboard rests against it. This will allow you to insert the vinyl sheeting underneath the molding with no problem.
Use a small hacksaw or handsaw, and trim the molding where the flooring or cardboard rests against it. This will allow you to insert the vinyl sheeting underneath the molding with no problem.
Make sure that the floor is level.
Look over your sub-floor, and make sure that it is level, and that there are no dips, depressions, gaps, or knotholes.
If you find any, patch and fill those problem areas using wood filler, or concrete, or other material as the manufacturer suggests.
Make sure that the floor is as smooth as possible before you go on to the next step.
Create a pattern to follow.
Begin laying down butcher paper across your sub-floor.
This butcher paper will act as a template for your vinyl.
Cut out the paper so that it will fit appropriately around any corners, cabinets, pipes, or other items that you may need to work around.
Tape each section of the paper together so that you have one continuous and piece of paper.
Once you have finished making the template, begin rolling it up.
Cut the vinyl according to the pattern.
Unroll the vinyl, and then lay out the template you created on top of it.
Begin cutting the vinyl according to the template.
Be careful as you do this so that you do not make any mistakes. If necessary, use small sections of the template at a time, and cut each piece of vinyl so that it will match appropriately.
This may mean that you have more seams, but it will make the vinyl a little wieldier.
Once you have finished cutting the vinyl, either roll them up, or stack the pieces so that you know which section will go where.
Lay the vinyl.
If you are using one large piece of vinyl, begin laying it all out.
Unroll everything, and make any minute adjustments that you may need to.
For those small pieces of vinyl, then begin laying everything out in the appropriate location.
Apply the adhesive.
For a single large piece of vinyl, roll up half of the vinyl.
Use a trowel to apply the adhesive onto the sub-floor, and then unroll the vinyl.
Repeat the process with the other side of the room.
If you are using small pieces of vinyl, then simply lift up a piece and apply the adhesive. Replace the vinyl, and then repeat the process with each of the other pieces of vinyl.
Smooth out the air bubbles.
Once you have applied the adhesive, use a hand roller to begin smoothing out any air bubbles, and ensuring that you have a tight seal.
Start in the middle of your floor, and work your way out towards the edges.
Clean up.
Clean up any dirt and debris from the installation.
What to learn something about what sheet vinyl is, and how it's made? Check out this video.
How about the installation process? Watch this !
What about installing it over existing vinyl and concrete?
Mr. Fix-It
_______________________
Selecting a Low Voltage Lighting System
_______________________
Selecting a Low Voltage Lighting System

A low voltage lighting system is a great method that you can use to not only add some accent lighting, but also provide a little bit of added security.
While there are all kinds of systems that you could always use, there are a few things that you really need to keep in mind when deciding on what you will be using.
Selecting a low voltage lighting system is a bit more involved than simply picking out a few parts; however, by keeping a few simple guidelines in mind you will be able to get a good system that will fulfill your needs.
Keep in mind that when selecting a low voltage lighting system, you will be selecting a system that uses around 12 volts.
This means that you will be using a lower powered system than what most homes generally receive.
Make sure that you follow all codes when installing your system, and if you are hesitant at all about working with electricity then do not hesitate at all to talk to a professional electrician.
What are you lighting?
This means that you need to think about the general mood that you will be striving for, and where you want to place the lights.
Are you looking for security (one type of system) or are you looking for accent lighting (still another type of system) or even one that does both (yet another one).
Types of fixtures
Not all fixtures will work effectively with a low voltage lighting system.
Make sure that you choose a fixture that can handle not only a low voltage system but also work well with your landscape design.
A decent rule of thumb would be to use several fixtures at lower wattage, rather than a single or a couple fixtures, that provide a lot of light.
Choose the right transformer
Considering that homes generally receive about 120 volts, you will need to select a transformer that will reduce the volts down to the 12 volts the system will be operating from.
The easiest way to choose the right transformer is to add up the wattages of all the lamps you will be using.
The transformer that you will be using will need to match as closely as possible to this number.
If you have the total wattage of your lights too high, then you need to either purchase a more powerful transformer, or utilize two different transformers.
Reduce voltage drop
Voltage drop is what your system will experience the further you place your fixtures from the transformer.
There are ways that you can combat this, and they are actually fairly easy to do this.
These methods can include:
1. Using a heavier gauge cable.
2. Multiple transformers.
3. Shorter cable lengths.
4. Reducing the total number of fixtures on a single line.
Check out these helpful videos.
Good Luck !
Mr. Fix-It
-
Leslie LimJuly 7, 2016 at 10:48 PMIt is great to have the opportunity to read a good quality article with useful information on topics that plenty are interested on.

___________________________
Removing Grout

Grout is the stuff that holds your ceramic tiles together and can be difficult to remove once it has hardened.
Whether you have "specks" or "flecks" of leftover grout on your tiles after completing a grouting job, or you want to remove all of the grout entirely because it's old and stained, you'll want to take it easy and not chip, scratch or break the expensive tile.
If you've completed the grout job and have cured, hardened specks and flecks of grout to remove from tile, follow these steps.
If the grout is less than one day old, you can soften the grout with water and then wipe it away with a wet sponge.
Grout cures in 24 hours, so if the grout has cured, you need to scrape it away.
Use a flat plastic putty knife, rigid plastic dish scrapper, or an old credit card to scrape away beads of hardened grout.
If the plastic tools don't remove the grout, use metal tools, taking care not to scratch the tile.
Hold the tools as flat as possible while scraping until all of the grout is removed.
Some stubborn grout flecks may need to be softened with chemicals, such as muratic acid. Follow the directions on the label of the product to remove the grout from the tile.
Once you've removed the grout, thoroughly clean the area with clear water and then allow the area to dry.
Sometimes you may need to remove entire sections of the grout so that you can re-tile the section. If so, you may want to consider using grout removal tools, since they make the tedious job of grout removal less tiring.
Rent or buy a grout tool with a carbide tip, and ask for instructions in using it. Make sure you don't turn it on until all of the attachments are tightened, and then work one small area at a time.
Or...rent or buy a grout grabber kit. This kit includes a reciprocating saw with carbide blades, capable of cutting through grout without touching the adjacent tile.
Then there is the old fashioned way to remove grout.
Use a flat blade screwdriver to remove grout by placing the blade on the grout, angling the tool to 45 degrees, and then tapping the head of the screwdriver with a hammer to chip away at the grout.
Make sure you don't tap too hard, as you may make the blade of the tool jump and then chip, scratch, or break the tile.
Once you've loosened the grout, use a scraper brush to scrape the grout away.
Here are some helpful videos to get you through this messy ordeal !
Mr. Fix-It
________________________
Grout is the stuff that holds your ceramic tiles together and can be difficult to remove once it has hardened.
Mr. Fix-It Has a Warning | ||


_______________________
Adding Air Conditioning Ideas

Anyone who has ever sat through a summer without air conditioning can tell you just how quickly you stop thinking about energy savings...and begin thinking about comfort.
Here are some options about cooling your home.
Central Air Conditioning Replacement
All of our homes are centrally air conditioned...but for many...they are getting old, and may need replacement.
If you replace the unit(s), we have some advice.
First, get a number of bids...but...an additional suggestion....get them from people you know or have had experience with the firms you are getting the quotes.
Referrals are ALWAYS the best idea.
Here's some other helpful advice:
Top questions to ask an HVAC contractor
Do you offer any maintenance programs or incentives?
When working with a heating and cooling professional, ask if their company offers pricing incentives to encourage you to hire them on a regular basis. It's common to have your equipment inspected and serviced at least once a year. Your HVAC company may also offer special pricing on filters, ventilation cleaning or energy assessments.
What can I do to prepare for this project?
Regardless of the scope of your project, find out what you need to do to prepare your home for their visit.
For example, the HVAC professional will need access to the areas in question and may need access to other mechanical or ventilation points.
Make sure pets and children are kept out of the way.
Ask if your project will involve removing dry wall or making any other structural changes – you may need to hire a professional drywall contractor to patch up HVAC work.
If you are adding a unit that may contribute to carbon monoxide within the home, find out if you need to purchase a carbon monoxide detector.
Ceiling fans
One of the more inexpensive options, and one that any home improvement enthusiast (no matter their skill level) can do themselves is to install a ceiling fan.
While these units are not particularly effective on their own, they can add a nice bit of relief when it is needed.
In addition, they use the least amount of energy when compared to the other types of air conditioning that you could be adding to your home.
Window Units
Another common solution, particularly for smaller homes or apartments, is to add a window unit.
Typically these are simply a small type of fan or possibly an actual air conditioning unit that fits within a window.
It then draws out the hot air inside your home, and replaces it with the potentially cooler air that is outside.
At the very least, this unit will help create a breeze within the home which can help to cool things off a bit.
Evaporative Units
Another traditional method for adding air conditioning to your home is to use what is known as an evaporative unit.
These types of air conditioners are also known as a swamp cooler.
Typically these air conditioning units can either fit in a window, or work with an existing air duct system to help get the cooler air throughout the house.
The way that these units work is by having a pad continually saturated with water, through which air is sucked into the home.
The temperature difference (and the moisture) that is sucked into the house is typically cooler than the air inside.
Be aware that this type of system not only can add to your electric bill, but to your water bill as well.
Summary
When thinking of adding air conditioning, you need to stop and think about a few things.
The first and foremost should be how much are you willing to spend to achieve the level of comfort that you want.
Shortly after that, will usually follow something along the lines of how much this will set you back on your monthly energy bills.
Once you decide on which way you want to add your air conditioning, then you need to figure out the procedure to use to do it.
If you are going to go with central air replacement, then you really should contact a professional.
Look for HVAC (heating, ventilation, and air conditioning) contractors in your area; they can do the job for you and they should guarantee their work...and ask the questions we previously noted.
If you choose a different method of air conditioning (ceiling fans, window units, or evaporative units), you may be able to do the installation work yourself.
Check with your local hardware store or outlet; they will be able to provide detailed information on installation.
Here are some helpful videos:
Ceiling fans:
Swamp Coolers or Air Conditioning:
Swamp Coolers:
Stay cool in the summer....and warmer in the winter !
Mr. Fix-It
_________________________________
Pool Heat Pumps

What are pool heat pumps, and what are they designed to do?
Why would you even want one?
These are questions that you may have asked your self as you where wandering around the pool supply store.
The answer to these rather simple questions is that a pool heat pump is one of the most efficient and cost effective methods available for heating your pool.
A pool heat pump will simply help circulate the water in the pool, while heating it at the same time.
Before you rush out and purchase one however, there are a few questions that you need to ask yourself.
The answers to these questions will help you determine which of the available models is best possible pool heat pump is for you, and if you even need one at all.
What is the unit size?
Knowing the size of your pool will help you determine the size of unit that you need.
Each heat pump will work best for different size of pools. When you're picking out your pool heat pump, keep in mind that every pool is different, and that you choose one that is the proper size for your pool.
How efficient is the unit?
Just like with cars, each available pool heat pump is going to vary slightly when it comes to efficiency.
In general, pool heat pumps are much more efficient than their cousins, the gas pool heater.
Look around at the different units available, and don't be afraid to ask the professional opinion of the clerks at the pool supply store as to which particular brand, or unit within the brand, is the most efficient.
What will the unit cost upfront?
If you can find a good deal, then a pool heat pump will cost you about $1,500; however, the typical cost of one of these units will cost you between $2,000 and $5,000 depending on the unit or model that you purchase. Make sure that you choose one that you can afford.
What is the maintenance cost?
Just as with most anything, pool heat pumps will have some associated maintenance costs.
On average, a pool heat pump is going to be on the lower end of the cost spectrum when compared to other pool heating options.
Typically, a pool heat pump will last between five and ten years.
Usually you can get a warranty that will last the entire life of the unit.
The specific annual maintenance cost for a pool heat pump will be less than $500.
We have some videos for you.
Mr. Fix-It
_____________________________
FIRE EXTINGUISHERS
 Fire extinguishers are a valuable home safety tool; they give you the ability to put out small fires before they spread or control a fire while you and other family members escape.
Extinguishers will not work effectively if they are not properly charged, so you must check them regularly to ensure they are full and at the right pressure.
Extinguishers require recharging or replacement after every use.
Fire extinguishers for home use are rated for use on certain fire types and come in easy-to-handle sizes.
“A”-rated extinguishers are made for common combustible materials.
“B”-rated models are appropriate for flammable liquids.
“C”-rated models work on electrical fires.
Many home extinguishers are multipurpose and work on all three-fire types (ABC Rating).
Some are disposable and meant to be discarded after use, while others are rechargeable.
Reusable extinguishers are recognizable by their metal valves.
Disposables have plastic valves.
Larger units are often rechargeable, while smaller extinguishers are typically disposable.
Unused fire extinguishers periodically need to be recharged even if you do not use them.
Extinguishers have a red and green pressure dial to alert you to their status at a glance.
Your extinguisher is properly pressurized if the dial's needle is in the green area, but it needs recharging or replacement if the needle slips into the red area.
Extinguishers last between three and 12 years, and the replacement information are typically marked on the unit or its label.
Get a new extinguisher when your old one expires, even if it still appears to be in good shape.
Here's a VITAL fire extinguisher training video that EVERYONE in our household should view. It could save a life.
How do you use a fire extinguisher?
Stay safe.
Mr. Fix-It
_________________________
Window Screen "Sewing" Repairs
Ceiling fans
One of the more inexpensive options, and one that any home improvement enthusiast (no matter their skill level) can do themselves is to install a ceiling fan.
While these units are not particularly effective on their own, they can add a nice bit of relief when it is needed.
In addition, they use the least amount of energy when compared to the other types of air conditioning that you could be adding to your home.
Window Units
Another common solution, particularly for smaller homes or apartments, is to add a window unit.
Typically these are simply a small type of fan or possibly an actual air conditioning unit that fits within a window.
It then draws out the hot air inside your home, and replaces it with the potentially cooler air that is outside.
At the very least, this unit will help create a breeze within the home which can help to cool things off a bit.
Evaporative Units
Another traditional method for adding air conditioning to your home is to use what is known as an evaporative unit.
These types of air conditioners are also known as a swamp cooler.
Typically these air conditioning units can either fit in a window, or work with an existing air duct system to help get the cooler air throughout the house.
The way that these units work is by having a pad continually saturated with water, through which air is sucked into the home.
The temperature difference (and the moisture) that is sucked into the house is typically cooler than the air inside.
Be aware that this type of system not only can add to your electric bill, but to your water bill as well.
Summary
When thinking of adding air conditioning, you need to stop and think about a few things.
The first and foremost should be how much are you willing to spend to achieve the level of comfort that you want.
Shortly after that, will usually follow something along the lines of how much this will set you back on your monthly energy bills.
Once you decide on which way you want to add your air conditioning, then you need to figure out the procedure to use to do it.
If you are going to go with central air replacement, then you really should contact a professional.
Look for HVAC (heating, ventilation, and air conditioning) contractors in your area; they can do the job for you and they should guarantee their work...and ask the questions we previously noted.
If you choose a different method of air conditioning (ceiling fans, window units, or evaporative units), you may be able to do the installation work yourself.
Check with your local hardware store or outlet; they will be able to provide detailed information on installation.
Here are some helpful videos:
Ceiling fans:
Swamp Coolers or Air Conditioning:
Swamp Coolers:
Stay cool in the summer....and warmer in the winter !
Mr. Fix-It
_________________________________
Pool Heat Pumps
What are pool heat pumps, and what are they designed to do?
Why would you even want one?
These are questions that you may have asked your self as you where wandering around the pool supply store.
The answer to these rather simple questions is that a pool heat pump is one of the most efficient and cost effective methods available for heating your pool.
A pool heat pump will simply help circulate the water in the pool, while heating it at the same time.
Before you rush out and purchase one however, there are a few questions that you need to ask yourself.
The answers to these questions will help you determine which of the available models is best possible pool heat pump is for you, and if you even need one at all.
What is the unit size?
Knowing the size of your pool will help you determine the size of unit that you need.
Each heat pump will work best for different size of pools. When you're picking out your pool heat pump, keep in mind that every pool is different, and that you choose one that is the proper size for your pool.
How efficient is the unit?
Just like with cars, each available pool heat pump is going to vary slightly when it comes to efficiency.
In general, pool heat pumps are much more efficient than their cousins, the gas pool heater.
Look around at the different units available, and don't be afraid to ask the professional opinion of the clerks at the pool supply store as to which particular brand, or unit within the brand, is the most efficient.
What will the unit cost upfront?
If you can find a good deal, then a pool heat pump will cost you about $1,500; however, the typical cost of one of these units will cost you between $2,000 and $5,000 depending on the unit or model that you purchase. Make sure that you choose one that you can afford.
What is the maintenance cost?
Just as with most anything, pool heat pumps will have some associated maintenance costs.
On average, a pool heat pump is going to be on the lower end of the cost spectrum when compared to other pool heating options.
Typically, a pool heat pump will last between five and ten years.
Usually you can get a warranty that will last the entire life of the unit.
The specific annual maintenance cost for a pool heat pump will be less than $500.
We have some videos for you.
Mr. Fix-It
_____________________________
FIRE EXTINGUISHERS
Fire extinguishers are a valuable home safety tool; they give you the ability to put out small fires before they spread or control a fire while you and other family members escape.
Extinguishers will not work effectively if they are not properly charged, so you must check them regularly to ensure they are full and at the right pressure.
Extinguishers require recharging or replacement after every use.
Fire extinguishers for home use are rated for use on certain fire types and come in easy-to-handle sizes.
“A”-rated extinguishers are made for common combustible materials.
“B”-rated models are appropriate for flammable liquids.
“C”-rated models work on electrical fires.
Many home extinguishers are multipurpose and work on all three-fire types (ABC Rating).
Some are disposable and meant to be discarded after use, while others are rechargeable.
Reusable extinguishers are recognizable by their metal valves.
Disposables have plastic valves.
Larger units are often rechargeable, while smaller extinguishers are typically disposable.
Unused fire extinguishers periodically need to be recharged even if you do not use them.
Extinguishers have a red and green pressure dial to alert you to their status at a glance.
Your extinguisher is properly pressurized if the dial's needle is in the green area, but it needs recharging or replacement if the needle slips into the red area.
Extinguishers last between three and 12 years, and the replacement information are typically marked on the unit or its label.
Get a new extinguisher when your old one expires, even if it still appears to be in good shape.
Here's a VITAL fire extinguisher training video that EVERYONE in our household should view. It could save a life.
How do you use a fire extinguisher?
Stay safe.
Mr. Fix-It
_________________________
Window Screen "Sewing" Repairs
 So many of us remember growing up without benefit of air conditioning.
When it was hot outside, it was hot inside.
So many of us remember growing up without benefit of air conditioning.
When it was hot outside, it was hot inside.
We'd open the doors and windows, and prevent flying insects from getting inside by using screened doors and framed screens at the windows.
During the cooler months, we'd store the screens inside of the detached garage, or in an attic or basement, and then place them inside of the window frames when the weather turned warm.
Invariably, we'd find holes in some of the screens when we retrieved them from winter storage.
Dad sometimes would do some window screen repair, and other times he'd replace the entire screen, but replacing screens was expensive back then, so most times he'd patch them.
Things haven't changed too much since then.
People still open their windows when the weather gets warm, and they still use screens to keep the insects out.
It only makes sense that the art of window screen repair, or at least learning how to replace a window screen, is still a valuable tool.
If you find that your screens are torn, and you need to repair them, here are some great inexpensive suggestions and tips for doing so:
Screen tears
If the screen has a rip or tear, you can simply sew the screen back together.
Using high test fishing line, thread a large needle with an eye large enough to accommodate the fishing line.
Take the fishing line into the first hole of screen, and then go across the tear to its opposite hole and take the line through that hole.
Go back across the tear, going through the next highest hole along the tear.
Zigzag your way up the tear until you've closed the gap.
By tying off the ends, and reinstalling your window, you have finished your window screen repair.
Small screen holes
If your screen has a hole in it, then you can patch it.
Cut two identical square pieces of screen at least 1/4-inch larger than the hole.
Sew one square over the hole, using an over-and-under stitch, and then turn the screen over and sew the other square over the hole.
Large screen holes
If you have a large hole, or several close to each other, then cut the existing screen, making one large square cutout.
Measure and cut one piece of screen exactly the same size as the large square cutout in the existing screen.
Using fishing line or twine and a needle with a large eye, whipstitch the four corners of the square into the four corners of the cutout.
Finally, whipstitch all four sides of the square into the cutout, pulling the screen taut as you go.
Keep in mind that window screen repair doesn't have to be boring.
If you have tiny holes in your screens, just large enough to allow gnats or fruit flies to enter, you can creatively stop up the holes with trinkets, nail polish, colored glue, or glitter glue.
Simply use glue to glue faux gems in place to both sides of the screen, or fill tiny holes with colored or glitter glue.
Use fingernail polish and glue to decorate tiny sun catcher's and glue them over holes in your screen.
No one will ever be able to tell that there are holes in your screen.
They will simply think that you are creative enough to decorate your screens!
Don't want to "sew" the repair ?
Of course, there are other options; namely patch kits that can be purchased at any home improvement store.
We have a couple of valuable videos for you if you choose to either completely replace the entire window screen....
or...patch the existing screen that needs repair.
Hope this is helpful.
Mr. Fix-It
_________________________
Screen tears
or...patch the existing screen that needs repair.
Hope this is helpful.
Mr. Fix-It
Security Cameras...Safety and Security

Security cameras are becoming more valuable and used today more than ever before. Cameras are used both inside and outside of the home.
Inside the home, they can tell you what is happening in your home. If for example, you have an elderly parent and just want to see activity in the home, the interior camera can be the answer.
If you want to verify that a cleaning service is in your home, a camera can do so.
Many cameras can be live (see what is happening as it occurs) and can have a record function to see what has happened in the past.
Many of them have motion sensors, which trigger the record function when the sensor indicates that there is movement.
Some systems will actually send you an alert on your smart phone or computer when the system identifies motion.
Again, we do not recommend any specific product but do share a website to help you to learn about offerings.
One such internal camera is...
http://shop.us.dlink.com/shop.html
This Komfy switch is a light switch that is actually a camera for interior usage.

Exterior cameras can be focused on any entrance to your home or any area behind or on the sides of your home. One of the more popular areas is to view both front and rear doors.
Some systems will allow you to talk thru your mobile device to talk with whom ever rings your doorbell. They can also talk to you thru the system. There may be many brands that have different features that you can evaluate.
Though we do not recommend any specific products, but you many want to examine www.ring.com. Their website explains all the benefits and option of their particular system.
Most of these systems work off the Wi-Fi in your home.
Some are wireless and some require wiring inside your home. We encourage everyone to look at what is available and decide if they may be right for you.
Let us know if you have a system that you are using.
Here are a couple of videos using the Komfy Switch.
__________________________
Nothing Like a Ceiling Fan in the Summer
...and Not Tough to Install !

Installing one isn't as tough as you might think.
When faced with the possibility of installing a ceiling fan, many homeowners get a little nervous. Often times this is because of working with electricity.
Luckily, installing a ceiling fan is one of the easiest home electrical jobs that you can do. If you are thinking about installing a ceiling fan yourself, never fear. All you need to do is follow these simple directions, and you will have a perfectly installed ceiling fan.
1. Shut off the power.
Prior to doing any type of electrical work, you need to first shut off the power to that room. Shutting off the power at the circuit breaker will help ensure that the room is completely power-free.
Just be sure that you leave a note at the breaker box saying that you have turned it off for maintenance, so no one comes along and accidentally turns it back on.
2. Remove the old box and wiring.
If you are replacing an old ceiling fan or an old light, then you are going to want to remove the old box; however, if you are installing a completely brand-new ceiling fan with no existing box in place, then you need to install an electrical outlet first.
That is not discussed here.
To remove the old ceiling box, you may need to cut away a bit of the plaster or drywall that surrounds the box.
Check to see if the box is nailed to a joist.
If so, cut away or remove the nails that are holding it in place.
Be careful as you do this so that you do not accidentally cut any wiring at this time.
Once you have removed the old box, remove the wiring from it and allow it to hang.
3. Add and tighten the new brace.
Many ceiling fan kits will come with a brace that is designed to help hold the fan in place. When purchasing your ceiling fan, make sure that yours does. If it does not, then you will need to pick one up.
These braces are basically flat, telescoping pieces of metal that have been designed to press firmly against the joists and hold the weight of the fan, and can be found at a local home improvement store.
Slip the brace for your ceiling fan into the hole and make sure it is spread until it contacts the joists on either side.
As you are doing this, center the brace in the hole so that you can tighten it a little easier. Use a channel lock or adjustable wrench to ensure the brace is completely tightened.
4. Attach new box.
Thread the new box with the wiring, and then place the box into the hole. Secure the box to the brace with some bolts.
5. Install the mounting plate.
Once you have attached the new box, it is time to install your mounting plate. This mounting plate is what will help secure the fan to the brace.
Thread the wires through the mounting plate and then secure the mounting plate to the box using some nuts and bolts that came with the fan.
Make sure that everything is secured tightly so that it doesn't fall down with the additional weight of the fan.
6. Assemble the canopy and down rod.
Following the directions provided by the manufacturer, begin to assemble the canopy and down rod of the fan.
This will involve running the fan leads through the rim ring, canopy and the down rod.
Once you have threaded the wires, screw the down rod on tightly.
Be careful that you do not damage the wires, and do not attach the fan blades yet.
7. Attach the wiring.
Begin hanging the canopy by using the temporary system that was provided by the manufacturer. If necessary, have a friend hold the fan in place as you begin to attach the wiring.
Most fans only use two wires, a black one and a white one.
Attach the black wire from the fan to the black house wire, and the white one to the white house wire.
If you have more than these two wires, follow the directions from your manufacturer.
Cap each wire with wire nuts to make sure that the wires are not exposed.
8. Attach the canopy.
After you have attached the wiring, go ahead and attach the canopy to the mounting plate.
As you are doing this, remove the temporary system that was provided by the manufacturer, and be careful that you don't over tighten the screws and nuts.
Over tightening can lead to cracking or damaging the ceiling.
9. Attach the fan assembly.
Once you have the canopy attached to the mounting plate, it is time to begin assembling the fan itself.
Do this by attaching the blades, one at a time, to the appropriate brackets.
10. Balance and test the blades.
Finally, after you have assembled the blades and attached them to the fan motor assembly, it is time to balance everything and test your blades.
This means that you turn your fan on to its lowest setting and check to see if it wobbles.
If it wobbles then you need to pull out the balancing kit that came with the fan and follow the directions carefully.
Test your fan again after balancing, and then enjoy!
Here are some helpful videos.
Mr. Fix-It
_____________________________
Security cameras are becoming more valuable and used today more than ever before. Cameras are used both inside and outside of the home.
Inside the home, they can tell you what is happening in your home. If for example, you have an elderly parent and just want to see activity in the home, the interior camera can be the answer.
If you want to verify that a cleaning service is in your home, a camera can do so.
Many cameras can be live (see what is happening as it occurs) and can have a record function to see what has happened in the past.
Many of them have motion sensors, which trigger the record function when the sensor indicates that there is movement.
Some systems will actually send you an alert on your smart phone or computer when the system identifies motion.
Again, we do not recommend any specific product but do share a website to help you to learn about offerings.
One such internal camera is...
http://shop.us.dlink.com/shop.html
This Komfy switch is a light switch that is actually a camera for interior usage.
Exterior cameras can be focused on any entrance to your home or any area behind or on the sides of your home. One of the more popular areas is to view both front and rear doors.
Some systems will allow you to talk thru your mobile device to talk with whom ever rings your doorbell. They can also talk to you thru the system. There may be many brands that have different features that you can evaluate.
Though we do not recommend any specific products, but you many want to examine www.ring.com. Their website explains all the benefits and option of their particular system.
Most of these systems work off the Wi-Fi in your home.
Some are wireless and some require wiring inside your home. We encourage everyone to look at what is available and decide if they may be right for you.
Let us know if you have a system that you are using.
Here are a couple of videos using the Komfy Switch.
__________________________Nothing Like a Ceiling Fan in the Summer

Installing one isn't as tough as you might think.
8. Attach the canopy.
Designer Lighting

When it comes to choosing the lighting for your home, you have a lot of options.
There are countless styles and designs to pick from, and the sky is the limit when it comes to your choices.
Lamps and other sources of light are available to suit your exact decorating needs.
Choosing designer lighting can be a great way to get a distinctive look in your home.
These lights from well-known designers tend to boast quality as well as style, and can make a statement in your home's decorating. Whether your style is modern or classic, you can improve your home's appearance and lighting with designer lights.
The lighting needed in your home can depend on a few factors.
Initially you will want to consider how much natural light the room gets, and then which areas of the room will require lighting.
You will then need to think about what types of lighting to get.
You might want a ceiling fixture for overhead light, a floor lamp, or even just a table lamp to add a bit of extra light.
One of the most exciting parts of choosing designer lighting for your home is to decide on the style you want.
If the room already has a theme, then you will probably want to follow that theme closely as you select the right lighting.
If you are working with an unfurnished space, then you will get to decide what style of decor and lighting you would like.
For a style that is sleek and modern, opt for contemporary designer light fixtures or lamps.


This style can be edgy and bold, and lighting in this style can make a big statement in a room.
For those who prefer a more traditional look, a classic style might best suit a room.

Lamps that have a classic look tend to go with a lot of furniture and other decor, and may be the best choice if you aren't sure about a piece that stands out too much.
Victorian Lighting

Rustic Lighting
Choosing to use designer lighting in your home can add a sophisticated look that can work well with a room's theme and lighting needs.
Many designer companies have stores where you can see the lighting in person, or websites where you can browse options.
Here are a few videos to help you design the perfect lighting for your home.
Good Luck !
Mr. Fix-It
__________________________________

When it comes to choosing the lighting for your home, you have a lot of options.


This style can be edgy and bold, and lighting in this style can make a big statement in a room.

Lamps that have a classic look tend to go with a lot of furniture and other decor, and may be the best choice if you aren't sure about a piece that stands out too much.


Rustic Lighting
Choosing to use designer lighting in your home can add a sophisticated look that can work well with a room's theme and lighting needs.
Need an Electrician ?
How to Find the Right One

There are times when an electrical project may be just a little to large or complex for the aspiring home electrician to try and accomplish themselves.
In situations such as these, it would be by far the wisest course of action to hire a professional electrician.
For many people though, finding a good electrician is a difficult prospect at best.
That does not have to be the case anymore.
Here are some simple guidelines that anyone can use to be able to find a good and reliable electrician.
Preplan
If at all possible, you should write down what work you believe you need done.
Try to be as detailed as possible, include areas of the house, materials, equipment and so on.
This list, or plan, is going to help you have an idea of what to expect when you ask the electricians later on for an estimate.
Reviews
Ask friends, relatives and neighbors if they happen to know any good electricians.
You should also check with your local building inspector, building supply store, and better business bureau for good electricians in your area.
Compile a list of the names that each give you, and compare them.
The names that appear on at least two of the lists are the better ones, since they have a reputation for quality work.
Interview
Narrow the list that you compiled to three.
Call up each and ask them to come over to give take a look at the work that you have planned.
As you are talking to them, hand them the list you made before, and ask them for an estimate in writing of what they believe the work is going to cost.
Compare each one that you get, and go with the one that you believe is going to be best for your needs.
Contract
One you have decided on which electrician's services you are going to utilize, you should draw up a contract.
This contract should have all aspects of the project clearly written out, to include time schedule, materials, cost, etc. and what is going to happen if the cost, or time is overrun. These contracts are designed to help protect both you and the electrician from any misunderstandings.
Here's a helpful video.
Mr. Fix-It
____________________________________
Mr. Fix-It Cautions Homeowners
There are Many Out There whose Advice
is False...Resulting in Scams to Senior Citizens
 Our Mr. Fix-It
Forrest Fetherolf
Our Mr. Fix-It
Forrest Fetherolf
People are being ripped off right and left with HVAC Contractors scaring residents they need unnecessary work on the units.
Now that summer is approaching, contractors are on the prowl looking for victims that will fall for their sales pitch.
Contractors are telling residents their unit(s) are getting old and should be upgraded to a new and more efficient unit to the tune of $13,000 to $20,000.
Keep in mind, a new upgraded 14 seer HVAC unit complete only cost the contractor about $5500.
The remainder is labor for the time to remove old unit and install new.
Most change outs take 2-3 men less than two days to complete.
Then victims will also be convinced to change out all the duct work because it was installed incorrectly.
Not so...just another gimmick for the contractor to make money.
Duct work is sized according to room size when first installed as per building code.
Upgrading the HVAC unit does not require ducts to be replaced, the upgraded units do not blow more air, only are more efficient in their operation saving electricity.
Another scam is duct cleaning, my opinion is that is unnecessary if you install good filters and change regularly depending on usage.
There is no way dirt can get in the duct work system unless filters are not used.
The SCA phase 2 homes have what is called an Air Cycler to automatically turn furnace blower motor on for 10 minutes and off for 20 when the HVAC unit is not operating in the heat or cooling mode.
I have written articles on how to disable the Air Cycler because it is another useless feature to prematurely cause the blower motor to fail and increase you electrical bill.
The Air Cycler system includes a 5" duct located in the return air filter box above the filters.
The 5" duct is covered by a very coarse square green (inadequate) filter to filter the air coming through the duct from a "T" top inlet on the roof.
This should be blocked off because the incoming roof top air is not adequately filtered when the air is directed through you HVAC system throughout the house causing excessive dust to accumulate on furniture and floors.
The York HVAC units are good for 20 years or more. However, parts may fail from time to time and need to be replaced.
Many of the parts cost as little as $20 for electrical components to $200 for a fan motor.
A new circuit board will cost about $200.
These prices do not include labor.
All these components can be changed out in less than two hours.
A failed compressor motor replacement can cost around $2500 parts and labor.
An annual check-up is not necessary...usually this is an opportunity for HVAC Contractors to get their foot in the door to convince owners to do unnecessary repairs or something is about to fail.
One of the common suggestions is to add freon because it is low to the tune of $400 to $500.
The HVAC system freon coolant system is sealed and normally does not need more freon to be added unless it is leaking.
If leaking or low...the unit would not provide sufficient cooling on hot days.
I receive many calls from residents for advice on HVAC systems.
My comment is...."If the HVAC cools you in summer, keeps you warm in winter, and isn't making unusual noise...then leave it alone".
Mr. Fix-It
________________________
Making Your Home Energy Efficient
 If you make your home more energy efficient, not only will you save money on your gas and electric costs, you will also help the environment.
While it may be easier to turn the thermostat up if you feel a draft, it is more cost-advantageous and eco-friendly to find the source of the air leak and repair it.
Here are some great ways for creating a more energy efficient home:
 1. Use a gas oven or stove rather than electric, since gas appliances radiate more heat for less money than do electric appliances.
2. Insulate your water heater to conserve energy, prevent heat loss and lower your energy bill.
3. Replace furnace filters regularly.
4. Clean the lint filter or your clothes dryer every time you dry a load of clothes. Your dryer will work more efficiently, using less energy.
5. Use low-flow showerheads that deliver the same amount of heat using less water and energy.
6. Replace all the light bulbs in your house with lower watt florescent bulb. They not only use less energy, but they last longer than incandescent bulbs.
7. Something as simple as turning off all the lights when you leave a room can help save energy.
8. If you don't already have one, install a programmable thermostat. You can program it to set to an alternate temperature during the day when no one is at home.
9. Update and install energy efficient doors and windows.
10. Use ceiling fans to help circulate hot air trapped at the ceiling down into the room during the winter months. Reverse the fan rotation during summer months to help pull warm air up toward the ceiling.
11. The next time you need to replace an appliance, choose those with a higher energy rating.
12. Since they can provide natural daylight and ventilation, consider installing a skylight.
Use Common Sense When Thinking About Using Energy More Efficiently
1. Use a gas oven or stove rather than electric, since gas appliances radiate more heat for less money than do electric appliances.
2. Insulate your water heater to conserve energy, prevent heat loss and lower your energy bill.
3. Replace furnace filters regularly.
4. Clean the lint filter or your clothes dryer every time you dry a load of clothes. Your dryer will work more efficiently, using less energy.
5. Use low-flow showerheads that deliver the same amount of heat using less water and energy.
6. Replace all the light bulbs in your house with lower watt florescent bulb. They not only use less energy, but they last longer than incandescent bulbs.
7. Something as simple as turning off all the lights when you leave a room can help save energy.
8. If you don't already have one, install a programmable thermostat. You can program it to set to an alternate temperature during the day when no one is at home.
9. Update and install energy efficient doors and windows.
10. Use ceiling fans to help circulate hot air trapped at the ceiling down into the room during the winter months. Reverse the fan rotation during summer months to help pull warm air up toward the ceiling.
11. The next time you need to replace an appliance, choose those with a higher energy rating.
12. Since they can provide natural daylight and ventilation, consider installing a skylight.
Use Common Sense When Thinking About Using Energy More Efficiently

1. Instead of heating up the oven range, use your microwave oven to cook foods.
2. Switch out your old computer for a sleek laptop, which uses less energy.
3. Use outdoor solar lighting instead of electrical lighting.
4. If you see damaged or cracked caulking around windows, replace it so to cut down cold drafts in the winter, and air conditioning loss in summer.
5. Hang drapes at your windows during all seasons to help insulate rooms.
How about a few videos...
____________________________
Have to Install a new Toilet?
No Problem

If you say that it is time to install a toilet, many people are going to start running for the hills. The reason for this is because people believe that this is something so difficult and complicated that no one but an experienced plumber is going to be able to do.
Luckily, such people couldn't be more wrong.
Anyone, and I mean anyone, can accomplish this task, as long as they have confidence in themselves, and proper instructions.
As always, prior to beginning, you need to gather a few items.
You are going to need to gather these items:
-
Bucket
-
A few sponges or towels
-
Screwdriver (either Philips or straight edge—check your toilet first)
-
Toilet flange bolts 5/16" in diameter
-
Wax ring
-
Either an adjustable wrench or a set of wrenches
After you have gathered all of these different items, you are ready to begin the task of installing your new toilet.
As the name implies, we are going to be installing a toilet, so you should have already removed your old toilet.
If you have not already done so, then there is little that you can do to install your new one.
Once you are truly ready meaning you have gathered all your materials and removed the old toilet, you can proceed to the first step.
1. On opposite sides of the flange you should see two holes designed to hold the flange bolts. Place those bolts in the holes so that the bolts are pointing straight up.
You can then place your new wax ring onto the flanges.
2. You are now going to lower the toilet onto the wax ring.
Be sure that you have both bolts coming up through the base of the toilet.
Just push down—straight down—on the toilet.
As you do this, make sure that you put a bit of pressure to create a watertight seal. (That is the purpose of the wax ring—to create a seal between the flange and the bottom of the toilet.)
3. If there is any rocking after you have placed the toilet onto the bolts, use a couple of rubber shims under the base of the toilet, and some nuts and washers on the flanges.
Tighten everything down until snug. Do not tighten too much or you can cause the bowl to crack.
4. Now you are going to attach the tank to the bowl.
This is going to simply require attaching 2 bolts with rubber washers on the inside of the tank.
As you are doing this, make sure that you place a rubber gasket between the bowl and tank so that you can cushion the two parts of the toilet.
5. Reconnect the water supply to the toilet.
Do this by connecting the water supply line to the base of the toilet.
Once you turn on the water, be sure that you check for any leaks.
If there are, then you are going to need to make sure that you have fixed the leaks.
6. In order to complete your task, you now need to replace the decorative caps over the flange bolts.
Chances are you may need to trim them in order to fit over the bolts.
Install the toilet seat and tank cover, and all that you have left to do is clean up any mess.
As usual...we have some videos to help you.
Happy Flushing !
Mr. Fix-It
_____________________________
Need an Electrician ?
How to Find the Right One

There are times when an electrical project may be just a little to large or complex for the aspiring home electrician to try and accomplish themselves.
In situations such as these, it would be by far the wisest course of action to hire a professional electrician.
For many people though, finding a good electrician is a difficult prospect at best.
That does not have to be the case anymore.
Here are some simple guidelines that anyone can use to be able to find a good and reliable electrician.
Preplan
If at all possible, you should write down what work you believe you need done.
Try to be as detailed as possible, include areas of the house, materials, equipment and so on.
This list, or plan, is going to help you have an idea of what to expect when you ask the electricians later on for an estimate.
Reviews
Ask friends, relatives and neighbors if they happen to know any good electricians.
You should also check with your local building inspector, building supply store, and better business bureau for good electricians in your area.
Compile a list of the names that each give you, and compare them.
The names that appear on at least two of the lists are the better ones, since they have a reputation for quality work.
Interview
Narrow the list that you compiled to three.
Call up each and ask them to come over to give take a look at the work that you have planned.
As you are talking to them, hand them the list you made before, and ask them for an estimate in writing of what they believe the work is going to cost.
Compare each one that you get, and go with the one that you believe is going to be best for your needs.
Contract
One you have decided on which electrician's services you are going to utilize, you should draw up a contract.
This contract should have all aspects of the project clearly written out, to include time schedule, materials, cost, etc. and what is going to happen if the cost, or time is overrun. These contracts are designed to help protect both you and the electrician from any misunderstandings.
Here's a helpful video.
Mr. Fix-It
____________________________________
Mr. Fix-It Cautions Homeowners
There are Many Out There whose Advice
is False...Resulting in Scams to Senior Citizens
Our Mr. Fix-It
Forrest Fetherolf
People are being ripped off right and left with HVAC Contractors scaring residents they need unnecessary work on the units.
Now that summer is approaching, contractors are on the prowl looking for victims that will fall for their sales pitch.
Contractors are telling residents their unit(s) are getting old and should be upgraded to a new and more efficient unit to the tune of $13,000 to $20,000.
Keep in mind, a new upgraded 14 seer HVAC unit complete only cost the contractor about $5500.
The remainder is labor for the time to remove old unit and install new.
Most change outs take 2-3 men less than two days to complete.
Then victims will also be convinced to change out all the duct work because it was installed incorrectly.
Not so...just another gimmick for the contractor to make money.
Duct work is sized according to room size when first installed as per building code.
Upgrading the HVAC unit does not require ducts to be replaced, the upgraded units do not blow more air, only are more efficient in their operation saving electricity.
Another scam is duct cleaning, my opinion is that is unnecessary if you install good filters and change regularly depending on usage.
There is no way dirt can get in the duct work system unless filters are not used.
The SCA phase 2 homes have what is called an Air Cycler to automatically turn furnace blower motor on for 10 minutes and off for 20 when the HVAC unit is not operating in the heat or cooling mode.
I have written articles on how to disable the Air Cycler because it is another useless feature to prematurely cause the blower motor to fail and increase you electrical bill.
The Air Cycler system includes a 5" duct located in the return air filter box above the filters.
The 5" duct is covered by a very coarse square green (inadequate) filter to filter the air coming through the duct from a "T" top inlet on the roof. This should be blocked off because the incoming roof top air is not adequately filtered when the air is directed through you HVAC system throughout the house causing excessive dust to accumulate on furniture and floors.
The York HVAC units are good for 20 years or more. However, parts may fail from time to time and need to be replaced.
Many of the parts cost as little as $20 for electrical components to $200 for a fan motor.
A new circuit board will cost about $200.
These prices do not include labor.
All these components can be changed out in less than two hours.
A failed compressor motor replacement can cost around $2500 parts and labor.
An annual check-up is not necessary...usually this is an opportunity for HVAC Contractors to get their foot in the door to convince owners to do unnecessary repairs or something is about to fail.
One of the common suggestions is to add freon because it is low to the tune of $400 to $500.
The HVAC system freon coolant system is sealed and normally does not need more freon to be added unless it is leaking.
If leaking or low...the unit would not provide sufficient cooling on hot days.
I receive many calls from residents for advice on HVAC systems.
My comment is...."If the HVAC cools you in summer, keeps you warm in winter, and isn't making unusual noise...then leave it alone".
Mr. Fix-It
|
Making Your Home Energy Efficient
While it may be easier to turn the thermostat up if you feel a draft, it is more cost-advantageous and eco-friendly to find the source of the air leak and repair it.


1. Instead of heating up the oven range, use your microwave oven to cook foods.
Have to Install a new Toilet?
No Problem

If you say that it is time to install a toilet, many people are going to start running for the hills. The reason for this is because people believe that this is something so difficult and complicated that no one but an experienced plumber is going to be able to do.
Luckily, such people couldn't be more wrong.
Anyone, and I mean anyone, can accomplish this task, as long as they have confidence in themselves, and proper instructions.
As always, prior to beginning, you need to gather a few items.
You are going to need to gather these items:
- Bucket
- A few sponges or towels
- Screwdriver (either Philips or straight edge—check your toilet first)
- Toilet flange bolts 5/16" in diameter
- Wax ring
- Either an adjustable wrench or a set of wrenches
After you have gathered all of these different items, you are ready to begin the task of installing your new toilet.
As the name implies, we are going to be installing a toilet, so you should have already removed your old toilet.
If you have not already done so, then there is little that you can do to install your new one.
Once you are truly ready meaning you have gathered all your materials and removed the old toilet, you can proceed to the first step.
1. On opposite sides of the flange you should see two holes designed to hold the flange bolts. Place those bolts in the holes so that the bolts are pointing straight up.
You can then place your new wax ring onto the flanges.
2. You are now going to lower the toilet onto the wax ring.
Be sure that you have both bolts coming up through the base of the toilet.
Just push down—straight down—on the toilet.
As you do this, make sure that you put a bit of pressure to create a watertight seal. (That is the purpose of the wax ring—to create a seal between the flange and the bottom of the toilet.)
3. If there is any rocking after you have placed the toilet onto the bolts, use a couple of rubber shims under the base of the toilet, and some nuts and washers on the flanges.
Tighten everything down until snug. Do not tighten too much or you can cause the bowl to crack.
4. Now you are going to attach the tank to the bowl.
This is going to simply require attaching 2 bolts with rubber washers on the inside of the tank.
As you are doing this, make sure that you place a rubber gasket between the bowl and tank so that you can cushion the two parts of the toilet.
5. Reconnect the water supply to the toilet.
Do this by connecting the water supply line to the base of the toilet.
Once you turn on the water, be sure that you check for any leaks.
If there are, then you are going to need to make sure that you have fixed the leaks.
6. In order to complete your task, you now need to replace the decorative caps over the flange bolts.
Chances are you may need to trim them in order to fit over the bolts.
Install the toilet seat and tank cover, and all that you have left to do is clean up any mess.
As usual...we have some videos to help you.
Happy Flushing !
Mr. Fix-It
_____________________________Becoming More Energy Self Sufficient

Anyone who is interested in saving as much money as possible in today's economy should look into becoming more energy self sufficient.
One of the fastest rising costs of living today is energy, and as we enter the high usage months this cost only seems to sky rocket.
Here are some simple methods that you can use to help you become a little more energy self sufficient.
What you use
First of all, you need to determine what your energy usage.
NV Energy provides this information to you in each bill they send.....READ IT...it's tailored to YOUR HOME.
Here's a sample.

Another (and most accurate) method for doing this would be to add up your past year's energy bills.
Add up each month, and then divide by twelve to get the average amount of energy you use each month.
If you don't have your bills for the last year, you can use your last months bill as a very rough estimate.
Simply by knowing what you pay, you will be able to come up with other methods to help cut your costs.
Appliances
When purchasing your appliances, make sure that you purchase the appliances that have been awarded the energy star rating.

These appliances have been specifically tested, designed, and proven to use less energy than other similar appliances.
In addition, many times you can get a small rebate, or even a discount from your local electric company by using these appliances.
Lights
While they are expensive, Compact Florescent Light bulbs (CFLs) are a great way to reduce your energy consumption.

These light bulbs have been shown to use roughly 75% less electricity than normal light bulbs and have a longer service life.
However, be careful if you break them since special methods need to be use to clean up the mess.
Here are a couple videos.
Energy Star ratings for appliances...
Compact Florescent Light bulbs...
Mr. Fix-It


_______________________________
Replacing a Light Switch
 Being able to do your own basic home electrical repairs can save you a lot of money, so instead of calling in a professional electrician to replace a damaged light switch, why not do it yourself?
Replacing a light switch is probably one of the easiest electrical jobs that anyone can do, and is a great way to introduce the whole idea of home electrical repair.
To begin, you are going to need to gather together a few basic items, all of which you either already have, or can purchase at any home improvement store.
You are going to need masking tape, Sharpie marking pens, screw drivers and a new set of switches.
Since you may be dealing with more than one type of screw, you are probably going to want to have a complete set of screwdrivers on hand.
Once you have gathered these items together you are ready to begin.
Again, before you begin, be aware that working with electricity is dangerous, and as such should be treated with respect and care.
1. When you begin, you need to turn off the power using the main circuit breaker for the area that you are going to be working on.
This is going to ensure that there is no electrical power running through the area that you are working on, and to keep it as such, make sure that you clearly mark the circuit breaker as being out of order, being worked on or some such so that no one comes along and turns it back on.
2. After you have turned off the power, go to switch and remove the cover plate using the appropriate screwdriver.
These cover plates are typically made of plastic, but some are metal so you should use caution.
3. Once you have removed the cover plate, remove the mounting box.
This mounting box is the small electrical box that the switch is placed in.
Do this by removing the two screws that are holding the box in place.
Now you need to carefully remove the switch from the wall, it should come out enough to expose the wiring.
4. Look in at the wiring, and you should see two screws that are holding the wires to the switch. Clearly tag or mark each wire so that you know which screw they came from.
I would suggest using colored sharpies and masking tape, since the wires are usually color coded so that should help.
Now remove the wires from the screws.
5. Take your replacement switch and hold it right-side up (you are going to know by the way that the word "off" appears when in the off position).
Then begin to reattach everything using the reverse process of how we took it all apart.
6. After you have replaced the switch cover you are ready to test your work.
Turn the power back on, and try turning on your light.
You should know immediately if everything was done properly.
Here are some helpful videos.
Mr. Fix-It
_____________________________

Replacing a light switch is probably one of the easiest electrical jobs that anyone can do, and is a great way to introduce the whole idea of home electrical repair.
To begin, you are going to need to gather together a few basic items, all of which you either already have, or can purchase at any home improvement store.
You are going to need masking tape, Sharpie marking pens, screw drivers and a new set of switches.
Since you may be dealing with more than one type of screw, you are probably going to want to have a complete set of screwdrivers on hand.
Once you have gathered these items together you are ready to begin.
Again, before you begin, be aware that working with electricity is dangerous, and as such should be treated with respect and care.
1. When you begin, you need to turn off the power using the main circuit breaker for the area that you are going to be working on.
This is going to ensure that there is no electrical power running through the area that you are working on, and to keep it as such, make sure that you clearly mark the circuit breaker as being out of order, being worked on or some such so that no one comes along and turns it back on.
2. After you have turned off the power, go to switch and remove the cover plate using the appropriate screwdriver.
These cover plates are typically made of plastic, but some are metal so you should use caution.
3. Once you have removed the cover plate, remove the mounting box.
This mounting box is the small electrical box that the switch is placed in.
Do this by removing the two screws that are holding the box in place.
Now you need to carefully remove the switch from the wall, it should come out enough to expose the wiring.
4. Look in at the wiring, and you should see two screws that are holding the wires to the switch. Clearly tag or mark each wire so that you know which screw they came from.
I would suggest using colored sharpies and masking tape, since the wires are usually color coded so that should help.
Now remove the wires from the screws.
5. Take your replacement switch and hold it right-side up (you are going to know by the way that the word "off" appears when in the off position).
Then begin to reattach everything using the reverse process of how we took it all apart.
Then begin to reattach everything using the reverse process of how we took it all apart.
6. After you have replaced the switch cover you are ready to test your work.
Turn the power back on, and try turning on your light.
You should know immediately if everything was done properly.
Here are some helpful videos.
Mr. Fix-It
_____________________________Room Design

When it comes to decorating and furnishing your home, you might like to keep it simple and just use whatever you happen to have.
But have you noticed the mood that mismatched furniture and randomly-placed decoration can cause?
In this kind of area, you might feel jumbled, unsettled, and disorganized.
Even if you haven't considered it before, the way a room looks can have a large effect on how you feel overall.
Because having an orderly home is important, it can be helpful to consider room design when it comes to placing things in the room.
Each room has potential to become a place where you will like to be, and by situating the right furniture and decorations with the perfect colors, you can design a room that will suit you.
Room design consists of several things, including color, style, function of the area, pieces of furniture, and decorations.
Want some ideas on how to use furniture to create the right "mood" in living room?
What about colors? Here's a tip or two for you.
When all of these aspects work in harmony, the room will be a pleasant place to hang out and may even help your mood to improve.
A well-designed room can make a huge difference in how your home looks.
The first thing to consider when it comes to room design is what the room will be used for.
Will it be for entertaining, sleeping, eating, working, cooking, or something else?
Now, you should think about what you want to get out of the room and design the area in a way that makes it both functional and attractive.
If you have an area where you want to entertain guests, for example, you should consider comfortable but classy seating that makes conversation easy.

Have a small living room? These ideas may help.
Make your dining room a place of beauty !

How about a small dining room?
Can't forget the master bedroom !
In a bedroom, using certain colors to paint and decorate can create a calming effect.

When you have visitors that are staying for a few days...impress them as well with a beautiful and comfy guest room.

Can't forget the bathroom !

You can use art or other decor to give a room a little more personality and add interest.
A great way to start designing a room is to choose a theme.
It could be modern, ocean-inspired, floral, classic, or whatever you like.
Find furniture and decor to fit your theme, and your room will look very put-together and neat.
If you want to make a quick and easy change to the design in an area, replace some furniture pieces, repaint the area, or find some new art to display to add to the look of the room.
Give your room an appealing look by paying special attention to the area's design.
The pieces you use and how you place them can make all the difference.
Mr. Fix-It


__________________________________
Kitchen Cabinet Re-Facing

There comes a time in just about every homeowner's life when they simply get tired of the way that their kitchens look.
While it would be nice to have the money to simply replace the existing cabinets, or completely remodel, the truth is that most of us cannot afford to do something like that.
Rather than take out a huge loan, why not try something that is a little more affordable...
like kitchen cabinet re-facing !
Kitchen cabinet re-facing is a surprisingly affordable option if you are looking to make a change in your home.
In fact, doing the work yourself is a relatively easy, though time consuming, process.
All you really need to do is make sure that you follow the directions listed below.
That, and be sure that you set aside a couple of days in order to get the project completed.
1. Disassemble the cabinets.
Completely remove all the doors, drawers, and hardware on the cabinets.
Set everything aside in order, to help you remember where everything goes when you need to put it back together.
2. Lightly sand everything.
While you could completely sand everything, you really don't need to.
Instead, all you need to do is lightly sand the faces of the enough to rough up the smooth finish.This will allow you provide a rough enough surface for the new veneer to stick to it.
Don't forget to work the insides of the cabinetry as well.
3. Refill all holes.
Take a putty knife, and wood putty, and fill any and all holes that you see in the doors and drawers.
Where possible, make the surface of these now filled holes as smooth as possible, but don't worry about making it too smooth.
4. Apply veneers.
Begin applying your veneers to the cabinetry.
If you are using a nailer to help put everything together, then you want to make sure that you have the depth properly adjusted.
Otherwise, you can easily find yourself punching the nails too deep into the cabinetry to do any real good.
Instead, make sure that you have the nailer set to sink the heads of your brad nails just below the surface of the veneer (you will want to be using 5/8 inch brads for this project).
Apply a thin film of wood glue to the roughened surface of the cabinetry.
Align the veneer to the surface of the cabinetry as carefully as you possibly can, and then press it down.
Carefully begin nailing the surfaces to each other working from the top down towards the bottom of the cabinetry so that you can avoid creating any air bubbles in your work.
Continue to do this until you have applied the veneer to all of the cabinetry that you are re-facing.
Once you have done that, allow the glue sufficient time to dry before you proceed.
There will be small indentations where the brads went into the veneer, use some wood putty to fill these indentations, and then allow that to dry.
Sand the wood putty smooth with a sanding block to ensure that you don't damage the veneers in any way.
5. Stain the interiors.
Set the cabinetry that you have finished already aside, and begin working on the interiors of the cabinets that are attached to the walls.
Use a paintbrush and begin to apply some stain to the interior of your cabinets.
When staining these cabinets begin working from the interior out, since it will allow you to work on the more difficult areas first.
Be sure that as you are applying the stain that you are following any directions that came from the manufacturer.
6. Stain the exteriors.
While the interior of the cabinets dry, go ahead and begin working on the exterior that is if you are going to be staining the exterior of your cabinetry.
Begin at the top of the cabinets and work your way downwards so that you do not have any drips or streaks as you continue working.
7. Repeat.
Repeat steps five and six until you have achieved two things.
The first is that the colors match between all pieces of the cabinetry.
The second is that the color is the shade you want.
Be sure that you allow enough time between coats for the stain to dry completely.
8. Apply a sealant.
Once you have finished staining the cabinetry, it is time to put a sealant on them.
Use three coats of a good quality polyurethane sealant.
This will help protect the cabinets from the day to day hazards of being in a kitchen.
Ideally you should use a water based sealer since they are usually odor free, or at the least, have less of an odor.
9. Reassemble.
After you have finished applying the sealant, and letting everything dry, it is time to begin putting everything back together.
When everything is back together you are basically finished except for the cleanup.
Need some video help?
Here you go !
We have a step-by-step nine video presentation to walk you through the entire process.
1.
2.
3.
4.
5.
6.
7.
8.
9.
Well, there you have it !
Good Luck.
Mr. Fix-It
_____________________
Changing a Furnace Filter


NV Energy wants to make sure you have as many tools as possible to help manage your energy use and monitor your costs.
When was the last time you changed your furnace filter?
What to do:
Changing your furnace filter often is an easy way to keep your furnace happy.
Once a month is recommended.
Shop smart by buying six or eight filters at a time so you always have a new one on hand.
When you're putting in a new filter, write the date on it so you'll know exactly when it was installed.
Another tip is to put reminders on your calendar so you don't forget or let it go too long between changes.
Why it matters:
As air circulates around your home, it picks up debris like dust and pet hair which gets carried down your ducts and deposited squarely on your furnace filter.
The more time your filter stays on duty, the more debris it attracts - and the harder your furnace has to work to pull air through the filter.
Replacing your filter monthly helps your furnace and central air conditioner breathe easier and use less energy to heat or cool your home.
Here are some helpful videos:
BE CAREFUL...DO NOT DO THIS YOURSELF IF YOU ARE CONCERNED ABOUT CLIMBING A LADDER !
Mr. Fix-It
___________________________
There comes a time in just about every homeowner's life when they simply get tired of the way that their kitchens look.
While it would be nice to have the money to simply replace the existing cabinets, or completely remodel, the truth is that most of us cannot afford to do something like that.
Rather than take out a huge loan, why not try something that is a little more affordable...
like kitchen cabinet re-facing !
Kitchen cabinet re-facing is a surprisingly affordable option if you are looking to make a change in your home.
In fact, doing the work yourself is a relatively easy, though time consuming, process.
All you really need to do is make sure that you follow the directions listed below.
That, and be sure that you set aside a couple of days in order to get the project completed.
1. Disassemble the cabinets.
Completely remove all the doors, drawers, and hardware on the cabinets.
Set everything aside in order, to help you remember where everything goes when you need to put it back together.
2. Lightly sand everything.
While you could completely sand everything, you really don't need to.
Instead, all you need to do is lightly sand the faces of the enough to rough up the smooth finish.This will allow you provide a rough enough surface for the new veneer to stick to it.
Don't forget to work the insides of the cabinetry as well.
3. Refill all holes.
Take a putty knife, and wood putty, and fill any and all holes that you see in the doors and drawers.
Where possible, make the surface of these now filled holes as smooth as possible, but don't worry about making it too smooth.
4. Apply veneers.
Begin applying your veneers to the cabinetry.
If you are using a nailer to help put everything together, then you want to make sure that you have the depth properly adjusted.
Otherwise, you can easily find yourself punching the nails too deep into the cabinetry to do any real good.
Instead, make sure that you have the nailer set to sink the heads of your brad nails just below the surface of the veneer (you will want to be using 5/8 inch brads for this project).
Apply a thin film of wood glue to the roughened surface of the cabinetry.
Align the veneer to the surface of the cabinetry as carefully as you possibly can, and then press it down.
Carefully begin nailing the surfaces to each other working from the top down towards the bottom of the cabinetry so that you can avoid creating any air bubbles in your work.
Continue to do this until you have applied the veneer to all of the cabinetry that you are re-facing.
Once you have done that, allow the glue sufficient time to dry before you proceed.
There will be small indentations where the brads went into the veneer, use some wood putty to fill these indentations, and then allow that to dry.
Sand the wood putty smooth with a sanding block to ensure that you don't damage the veneers in any way.
5. Stain the interiors.
Set the cabinetry that you have finished already aside, and begin working on the interiors of the cabinets that are attached to the walls.
Use a paintbrush and begin to apply some stain to the interior of your cabinets.
When staining these cabinets begin working from the interior out, since it will allow you to work on the more difficult areas first.
Be sure that as you are applying the stain that you are following any directions that came from the manufacturer.
6. Stain the exteriors.
While the interior of the cabinets dry, go ahead and begin working on the exterior that is if you are going to be staining the exterior of your cabinetry.
Begin at the top of the cabinets and work your way downwards so that you do not have any drips or streaks as you continue working.
7. Repeat.
Repeat steps five and six until you have achieved two things.
The first is that the colors match between all pieces of the cabinetry.
The second is that the color is the shade you want.
Be sure that you allow enough time between coats for the stain to dry completely.
8. Apply a sealant.
Once you have finished staining the cabinetry, it is time to put a sealant on them.
Use three coats of a good quality polyurethane sealant.
This will help protect the cabinets from the day to day hazards of being in a kitchen.
Ideally you should use a water based sealer since they are usually odor free, or at the least, have less of an odor.
9. Reassemble.
After you have finished applying the sealant, and letting everything dry, it is time to begin putting everything back together.
When everything is back together you are basically finished except for the cleanup.
Need some video help?
Here you go !
We have a step-by-step nine video presentation to walk you through the entire process.
1.
2.
3.
4.
5.
6.
7.
8.
9.
Well, there you have it !
Good Luck.
Mr. Fix-It
Changing a Furnace Filter

___________________________
Floating Hardwood Flooring

It seems that you can't turn around in a home improvement store anymore without hearing about "floating hardwood flooring".
If you turn your TV set on to watch your favorite home improvement channel, chances are you'll hear some mention of this popular style of flooring at least once throughout the evening.
When it comes to changing the flooring in your home or installing some new types of flooring, you might even consider getting some of this; however, before you to out and purchase a bunch of "floating hardwood flooring, perhaps you should learn about it first.
Here are some simple guidelines that can help yo determine whether this is the right option for your personal situation.
What is it?
Simply put, "floating hardwood flooring" is a type of flooring specifically designed to be installed easier than other traditional methods.
It's typically a manufactured material that is engineered to look like wood; however, if you are willing to spend a little more, you can often purchase REAL WOOD for your floating floor.
How is it different?
Floating hardwood flooring is different from traditional methods of flooring in that it is designed TO GO OVER AN EXISTING FLOOR or sub-floor with little or no work !
While it is possible to put floating hardwood floors directly over a preexisting floor, it is usually better to remove everything down to the sub-floor (the floor under the one you walk on) level prior to installation.
Benefits
The primary benefit is that you will get a beautiful looking hardwood floor...without having to pay the exorbitant costs usually associated with them.
The "floating hardwood floor" that you can purchase from most home improvement stores will actually last a lot longer (with proper care) than your typical hardwood floor as well.
Can you install it?
This depends on your skill.
How confident are you in basic carpentry skills?
All you really need to know is how to measure and cut wood and follow printed directions...
...but...if you are unsure in any way, then you can easily hire a professional from your home improvement store to help you out.
At the very least, hiring the pro, and having that individual teach you, will enable you to be sure you get the job done RIGHT...NOW & in the FUTURE.
Here are a few videos to assist you if you choose to tackle this project yourself.
First...what is a floating floor?
Next, how do you go about installing one?
Mr. Fix-It
_____________________________
Greener Approaches with Your Home Decors
Greener Approaches with Your Home Decors

Pollution, improper waste management, and global warming are major issues the world is facing today.
Little by little, the environment is changing.
Nevertheless, we can now act in making our homes a better place to live.
The best way is to start by using green decors at home. Here's how they can help.
Toxic & Chemical Free

Go organic.
People who are into "green" living also use organic produce and materials.
Today, you can find home decors and furniture of naturally made materials like wood.
Compared to those which are synthetic materials, these natural decors are specifically designed to be free of allergens and other harmful components.
That's why they're perfect for the home.
Rest assured that these products will allow you to breathe comfortably and easily.
Provide Natural Lighting

We all know that we need electricity in lighting up the house. If there's nothing you can do about it, you can still go "green" by changing into more cost-effective and environment friendly bulbs such as LED or light-emitting diode bulbs.
They can last for a long time without consuming to much electricity.
On the other hand, you can always have solar lights installed in specific areas of the house which you want to light up during the night just like your driveway, backyard, and garden.
Foster Comfortable Living

During summer you have to spend extra cash for your electrical bill since you'll be using your air conditioning.
The same thing goes for winter when you need to run your furnace to keep it warm.
Why spend so much when you can hit two birds with one stone through "green" decors?
Simply plant trees around the house and you have instant shade to keep you cool without using a fan or air conditioner at various times of the year.
Trees can also prevent strong winds during the cold season to enter your home, keeping you warm.
To top it off, you have abundant supply of oxygen every day.
Having potted plants indoors can also make the whole place very appealing while trees around the house can make your whole property very attractive.
Allows You to Enjoy the Sun

Staying indoors on a glorious sunny day is such a spoiler. Why deprive yourself of the sun's energy and radiance when you can spend a few hours with "green" decors?
You can set up some lounging chairs and a nice table in your back yard where you can have some fun in the sun regularly.
You can have a barbeque party at the same time or enjoy a pitcher of lemonade (beer) and some chips to get you re-energized.
Pay Less for More

It's very common to see plants wither during the summer due to insufficient water. Don't make your garden look like a desert by planting low maintenance plants.
The secret here is xeriscaping...reducing the need for supplemental irrigation...or planting native plants that need little water in order to survive.
Say Goodbye to Disposables

It's very expensive to buy new furniture and decors every now and then once the old and cheaper ones become too damaged to be recycled.
Why not buy a piece of furniture that's built to last for years.
Hard wood like cedar and mahogany can last a lifetime.
They also don't contain chemicals nor are they high maintenance.
You can just polish them now and then to make them look brand new.
East to Mix and Match

One of the secrets of having a beautiful house is the kind of decor one chooses to have.
Remember that people will talk once they see how you poorly coordinated your furniture and decors inside the house.
With "green" living you'll never go wrong since you will be using decors which are easy to mix and match.
Wood dominates the house and all the furniture within including your kitchen counter tops and even your back yard retreats.
Aid in the Country's Development

The economy greatly affects and development of one's country.
One of the reasons why it doesn't seem to progress is because the country depends too much on other countries especially when it comes to petroleum products.
Once you start using "green" decors, you save your homeland from spending too much on imported products.
Heal The World

If you have children or grandchildren it is only normal to be concerned about their future.
"Green" living can provide them with a better world where there is less pollution and fewer chemicals.
The earth can repair itself once people start to live "green" and use natural products.
Indeed you can contribute a great deal by using and patronizing organic products by having "green" home decors.
We have a few videos to give you some ideas as to eco-friendly home decors.
Mr. Fix-It

Pollution, improper waste management, and global warming are major issues the world is facing today.

Go organic.
Provide Natural Lighting
We all know that we need electricity in lighting up the house. If there's nothing you can do about it, you can still go "green" by changing into more cost-effective and environment friendly bulbs such as LED or light-emitting diode bulbs.
Foster Comfortable Living

During summer you have to spend extra cash for your electrical bill since you'll be using your air conditioning.

Pay Less for More

Say Goodbye to Disposables

East to Mix and Match

Remember that people will talk once they see how you poorly coordinated your furniture and decors inside the house.
Aid in the Country's Development

Heal The World

________________________
________________________
Winterizing a Hot Tub

When someone talks of frozen water pipes during winter, the real problem is not the pipes freezing—it's the water left inside of the pipes that does the damage.
When water freezes, it expands.
Since a pipe cannot contract, the expanded hard water (ice) will crack and burst the pipe, causing damage that takes a lot of money to repair.
If you don't plan to use your hot tub during the winter months, then you'll need to drain all of the water from the tub and pipes to ensure that the freezing temperatures won't damage the tub and plumbing.
If you are going to shut down your hot tub for the winter, follow these steps to winterize your hot tub:
1. Unplug the tub and disconnect it from the power source.
Turn the heater switch to the off position, turn off the power button, and then find the circuit breaker for the tub and turn it off.
2. Remove the thermal cover and set it aside, and then drain the tub by removing the drain plug, and then siphon any remaining water with a hose.
3. Turn the circuit breaker back on, turn the power switch on, and then run the blowers for about one minute so that any remaining water spews from the water lines.
4. Turn the power switch off again, as well as the switch for the tub at the circuit breaker.
Take apart all of the valves and drains on the tub's pump and heater, and allow the water to drain out.
Make sure that you remove all of the water, even if you have to use a wet/vac.
5. Store away the pump, heater, and valve and drain parts.
Remove the tub's filter, clean it if it is reusable, and store it away with the other parts.
6. Using old rags or towels, completely dry the inside and outside of the tub.
Place the tub's cover on top and secure it.
7. Cover the entire tub and cover with a tarp, and secure it by tying it down or weighing it down with bricks or concrete blocks.
Check the warranty of your hot tub.
Some manufacturers will guarantee against damage during winter only if you use a professional to winterize your hot tub.
It is advisable to call in a professional if you feel the need to blow out the water lines on your hot tub, since most homeowners do not know the proper pressure to use on pipes, and could cause damage to them.
Here are some helpful videos if you choose to shut down that spa over the winter months.
https://www.youtube.com/watch?v=NaZ6ZhxvQm4
https://www.youtube.com/watch?v=gBXRgpVDyRs
In the spring....if you continue to use the hot tub during the winter months.....clean and change the water.
Maintenance is CRUCIAL to avoiding HUGE REPAIR BILLS.
Here's how !
https://www.youtube.com/watch?v=A9wULw93izo

Then...Enjoy !
____________________________
2 Simple Ideas How to Keep Your Heating Bills Down this Winter

Energy bills tend to rise while the outside temperature drips, and no one wants to spend more money than they really have to !
Here are a couple very simple ways to lower your expenses in the fall and winter months.
Got ceiling fans?
If you don't...you should...because they are big money savers.

In the colder months, you should reverse the direction of the fan to pull cool air toward the ceiling.
Why?
Heat rises, and you don't want it to stay on top of your room....you want it near you...at the bottom.

Simply flip the toggle switch underneath the fan and put it on a low setting.
You should feel the difference in no time.
Another way to save on energy costs is by flushing out your water heater once a year.
But..before you start this simple project, we think you should know something about water heater in general and how they work.
Here's an excellent video that explains it all...in a simple way... that includes how to flush it.

As sediment and debris build up, that causes a drop in efficiency or even leaks over time, which will ultimately cost you.
To flush.....
1.Turn off the water heater and fasten a hose to the faucet at bottom of the tank.
2. Run the other end of the hose outside or to a laundry tub.
3. Open the valve and let the water and residue drain out.
Do this yearly and you'll be good to go!
Just a couple ideas to prove you don't have to take a lot of time or energy to save money.
_________________________
Choosing & Applying Wood Stain Colors

Everyone will readily admit that color means a lot when it comes to decorating. However, an area of color that many people overlook when decorating is that of wood stain colors.
If you are using (or planning to use) wood as part of your overall decorative scheme, then you need to pay some attention to the color of the stain you use.
Choosing the best wood stain colors is a remarkably easy thing to do, as long you follow these simple guidelines:
Type
When choosing a wood stain, regardless of the color, you need to decide on what type of stain you want.
There are basically two different kinds of stain that you can use, both with their plusses and their negatives.
These two types are water-based and oil-based stains.
In perhaps the simplest terms possible, a water-based stain can go just about anywhere, but will require a little more work to maintain.
An oil-based stain will be more durable to the elements, require less maintenance, and can have a more even and full look.
Purpose
To properly decide on wood stain colors, you also need to look at the purpose behind the stain, as well as what is being stained.
Are you going to be leaving the wooden item outside?
Will it be exposed to a harsh environment?
Is the item only going to be used as a decorative item, or will it also be used as a functional piece?
Durability
Are you looking for wood stain colors that are particularly durable?
If so, you typically should go for a darker color.
Since you are the one that will be doing the work, you should choose a stain that will last and require lower maintenance on your part.
Design scheme
Having a particular design scheme in mind will make choosing wood stain colors a whole lot easier.
It is always an easier task of choosing a color to match within an existing scheme, rather than to try and force a hodge-podge collection together.
Take time to actually plan out your scheme before hand, and decide where you will be using that scheme.
Is it going to be a theme for your entire home, or is it only going to be used in a certain part?
Need some help as to staining?
Make sure you use the right type of brush.
Do you have to remove an existing stain?
Need a more "technical" explanation between water based and oil based varnishes?
Mr. Fix-It
_________________________
Energy-Efficient Appliances

The typical household spends nearly $1,500 annually on energy bills, with major appliances accounting for almost thirty percent of that amount.
A quick and easy way to save money on your energy bill is to replace lower efficiency appliances with energy-efficient models.
And while it's true that energy-efficient appliances cost more money up front, they will save you more money over time in lower energy bills.
The easiest way to find energy-efficient appliances is to look for the Energy Star-rated models.
There are two stickers to look for:
A sticker that includes the Energy Star logo, letting you know that a particular model can save you up to thirty percent annually in energy savings.

A bright yellow energy guide sticker that details information about how much energy the appliances uses, approximate annual operating costs, and energy use comparisons with other models.

Most major appliances qualify for Energy Star Ratings, and they include refrigerators, dishwashers, clothes washers, dehumidifiers, and room air conditioners, to name a few.
Two major appliances that most of us use nearly every day are a clothes washer and a refrigerator.
If you had energy-efficient models, here's what you could expect from each:
Clothes washers that are Energy Star-rated use fifty percent less energy than their standard counterparts.

Since they use less water and take more water away during the spin cycle, drying time is reduced, saving wear-and-tear on your clothing.
Not only do you save money operating the machine, you save money on water usage, and in replacing worn out clothing.
Energy Star-rated refrigerators use almost half of the energy of those models made before 1993, so you will see a cost savings in your annual electric bill if you use an energy-efficient refrigerator.

You won't have to give up convenience for efficiency, either.
Most models come with the latest features such as ice makers and through-the-door water and ice dispensers.
Even if you decide that your budget cannot cover the cost of a new energy-efficient appliance....
...remember that there are ways that you can save energy using your current appliances.
 Always run full loads when you use your dishwasher, clothes washer, and clothes dryer.
Allow dishes to air dry instead of using the dry cycle on your dishwasher.
Hang clothes to dry instead of using your clothes dryer.
Set your water heater temperature to a lower setting.
All of these tips will help you save energy and lower your energy bill.
Here's a great video about to save money by washing clothes....the right way !
Can't forget the right way to use your dishwasher !
Which ones should you buy ????
Consumer Reports is always a GREAT GUIDE !

Clothes Washers...
Dishwashers...
Mr. Fix-It
If you are using (or planning to use) wood as part of your overall decorative scheme, then you need to pay some attention to the color of the stain you use.
Choosing the best wood stain colors is a remarkably easy thing to do, as long you follow these simple guidelines:
Type
When choosing a wood stain, regardless of the color, you need to decide on what type of stain you want.
There are basically two different kinds of stain that you can use, both with their plusses and their negatives.
These two types are water-based and oil-based stains.
In perhaps the simplest terms possible, a water-based stain can go just about anywhere, but will require a little more work to maintain.
An oil-based stain will be more durable to the elements, require less maintenance, and can have a more even and full look.
Purpose
To properly decide on wood stain colors, you also need to look at the purpose behind the stain, as well as what is being stained.
Are you going to be leaving the wooden item outside?
Will it be exposed to a harsh environment?
Is the item only going to be used as a decorative item, or will it also be used as a functional piece?
Durability
Are you looking for wood stain colors that are particularly durable?
If so, you typically should go for a darker color.
Since you are the one that will be doing the work, you should choose a stain that will last and require lower maintenance on your part.
Design scheme
Having a particular design scheme in mind will make choosing wood stain colors a whole lot easier.
It is always an easier task of choosing a color to match within an existing scheme, rather than to try and force a hodge-podge collection together.
Take time to actually plan out your scheme before hand, and decide where you will be using that scheme.
Is it going to be a theme for your entire home, or is it only going to be used in a certain part?
Need some help as to staining?
Make sure you use the right type of brush.
Do you have to remove an existing stain?
Need a more "technical" explanation between water based and oil based varnishes?
Mr. Fix-It
_________________________
Energy-Efficient Appliances

The typical household spends nearly $1,500 annually on energy bills, with major appliances accounting for almost thirty percent of that amount.
A quick and easy way to save money on your energy bill is to replace lower efficiency appliances with energy-efficient models.
A quick and easy way to save money on your energy bill is to replace lower efficiency appliances with energy-efficient models.
And while it's true that energy-efficient appliances cost more money up front, they will save you more money over time in lower energy bills.
The easiest way to find energy-efficient appliances is to look for the Energy Star-rated models.
There are two stickers to look for:
A sticker that includes the Energy Star logo, letting you know that a particular model can save you up to thirty percent annually in energy savings.
A bright yellow energy guide sticker that details information about how much energy the appliances uses, approximate annual operating costs, and energy use comparisons with other models.

Most major appliances qualify for Energy Star Ratings, and they include refrigerators, dishwashers, clothes washers, dehumidifiers, and room air conditioners, to name a few.
Two major appliances that most of us use nearly every day are a clothes washer and a refrigerator.
If you had energy-efficient models, here's what you could expect from each:
Clothes washers that are Energy Star-rated use fifty percent less energy than their standard counterparts.

Since they use less water and take more water away during the spin cycle, drying time is reduced, saving wear-and-tear on your clothing.
Not only do you save money operating the machine, you save money on water usage, and in replacing worn out clothing.
Energy Star-rated refrigerators use almost half of the energy of those models made before 1993, so you will see a cost savings in your annual electric bill if you use an energy-efficient refrigerator.

You won't have to give up convenience for efficiency, either.
Most models come with the latest features such as ice makers and through-the-door water and ice dispensers.
Even if you decide that your budget cannot cover the cost of a new energy-efficient appliance....
...remember that there are ways that you can save energy using your current appliances.

Allow dishes to air dry instead of using the dry cycle on your dishwasher.
Hang clothes to dry instead of using your clothes dryer.
Set your water heater temperature to a lower setting.
Set your water heater temperature to a lower setting.
All of these tips will help you save energy and lower your energy bill.
Here's a great video about to save money by washing clothes....the right way !
Can't forget the right way to use your dishwasher !
Which ones should you buy ????
Consumer Reports is always a GREAT GUIDE !

Clothes Washers...
Dishwashers...
Mr. Fix-It
_________________________
Creating a Comfortable Walk-In

There are several ways that you can go about creating a comfortable walk-in.
The first you can hire a contractor to come out and build an addition onto your home, which may cost several thousand dollars.
You could also use an existing closet, and simply expand it a little more. This option, while it may work quite well, can also be quite expensive.
The least expensive, and easiest, solution is to use an existing, small bedroom, and convert it to a walk-in closet.
There are some benefits to using this method, as well as some draw backs.
First of all, you will need to actually have an extra bedroom that you can use.
If you have few guests....or....want to avoid them....this might be the best idea for you to use a room that is rarely used.
Here's what you need to do to convert a small bedroom into a comfortable walk-in.
Draw a Plan
As always when you do a home improvement project, you should begin by drawing up a plan.
This plan should be drawn as much to scale as you possibly can make it.
This way you can play around and decide on the final elements without having to incur the costs of trying different styles.
Arrange the floor plan to your liking, but be sure that you allow enough space for everyone who will be using the closet.
Decide on the Style
Once you have decided on the overall plan, take a little time to decide on the specific style.
What this means is...are you going to have custom made built in cabinets, or will you use some other style?
Decide on your Materials
While it may be nice to have everything in your walk-in closet made from cedar, oak, or some other type of wood, it can actually get pretty expensive.
Take some time to decide and price out the materials needed to make your walk-in closet.
Use your plan that you drew earlier to help you determine the proper amount, and give you a good estimate of the cost for materials.
Decide Who will do the Work
Once you have decided on a plan, style, and the materials, you need to decide who will do the work.
While it is often initially cheaper to do the work yourself, it can be quite cost effective to have a professional do the work for you.
Look at all the pros and cons of having a professional do it, and doing the work for yourself before you make your decision.
Do the Work
Finally, all you need to do now is get the work done.
Once you have finished the work, sit back and enjoy your newly acquired storage pace.
Want some ideas on how to convert that extra bedroom to a walk-in closet ?
Check out these videos for some ideas.
Mr. Fix-It
_______________________
Removing Adhesive from Tile

Trying to remove tile adhesive from tile is easy to do if you're using fresh adhesive.
Simply wipe away with a clean, damp cloth.
But if you're trying to remove tile adhesive from tile that's been in place for a long time, that's an entirely different scenario.
Short of chipping it away, risking damage to existing tile, you can use a solvent to loosen the adhesive.
You can try myriad solvents, such as denatured alcohol and other paint strippers, but a very good solvent rated highly by consumers is named "Citistrip".

You can find it at your local home improvement or hardware store.
If you can't find it in a store, perform an online search for it.
We found it on Amazon.com.
It comes in gel form and is easy to use because it stays wet and active for up to twenty-four hours.
What's better is that it has no fumes, thus making it safe for indoor use.
Once you have it, follow these steps to remove tile adhesive from tile:
-
Use latex or protective gloves, and eye goggles.
-
Shake the product well and pour about two cups into a metal bowl.
-
Using a brand-new paint brush, apply the product generously to the tile adhesive. The layer that you apply should be thick.
-
Since the product will stay wet up to twenty-four hours, you can wait a few hours and allow the product to work. Allow the product to sit for no less than thirty minutes, however, before taking the next step.
-
Test a small area for progress. Use a plastic spatula or plastic paint-stripping tool and scrape a small area. If the adhesive pulls away from the tile, then continue to scrape away the remainder of the product and adhesive. If the adhesive is pliable yet still adheres to the tile, allow the product to sit for a few hours.
Once you've removed all of the product along with the adhesive, make sure that you dispose of the waste by wrapping it first in old newspaper, and then within a thick garbage bag.
Take care not to allow pets or children near the product while it is working, as it is an eye and skin irritant.
As with all household chemicals, keep them out of the reach of children.
Here's a video explaining how to remove adhesive from a tile floor.
You might also want to try Citistrip for other home improvement projects as well.
Here's a demonstration using it to strip a wooden table for refinishing.
Finally, we found another advantage of Citistrip over other stripping products...."You won't stink"!
Mr. Fix-It
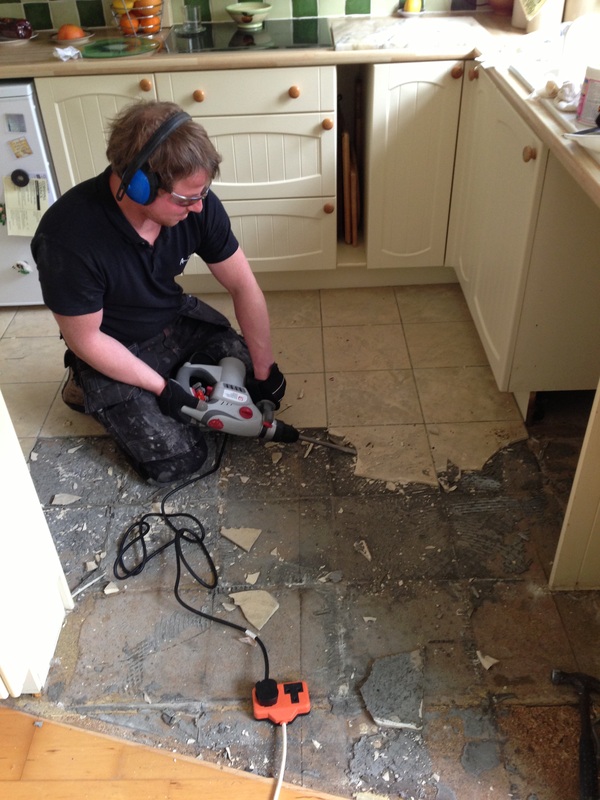

- Use latex or protective gloves, and eye goggles.
- Shake the product well and pour about two cups into a metal bowl.
- Using a brand-new paint brush, apply the product generously to the tile adhesive. The layer that you apply should be thick.
- Since the product will stay wet up to twenty-four hours, you can wait a few hours and allow the product to work. Allow the product to sit for no less than thirty minutes, however, before taking the next step.
- Test a small area for progress. Use a plastic spatula or plastic paint-stripping tool and scrape a small area. If the adhesive pulls away from the tile, then continue to scrape away the remainder of the product and adhesive. If the adhesive is pliable yet still adheres to the tile, allow the product to sit for a few hours.
Here's a demonstration using it to strip a wooden table for refinishing.
-
Good Morning,My water bill has practically doubled, I am wondering if I have a leak in my landscaping. Who would be the person/company you recommend to detect where the leak is and to repair it? Elaine
-
Elaine,
If your water bill has skyrocketed, chances are you have a leak in the underground watering system.
I hate to be the bearer of bad tidings, but if your system is approximately 15 years old...it may be "shot" and needs total replacement. It's a project that is expensive and could cost $1200-$1500.
My landscaper is a company called SOS Lawn Maintenance and can be reached at (702) 372-9479. Ask for "Shane". He is licensed, shows up when he is supposed to do so, and has been doing business in Sun City Anthem for the entire 10 years I have resided here.
Hope this helps.
-
Good Morning,My water bill has practically doubled, I am wondering if I have a leak in my landscaping. Who would be the person/company you recommend to detect where the leak is and to repair it? Elaine
-
Elaine,
If your water bill has skyrocketed, chances are you have a leak in the underground watering system.I hate to be the bearer of bad tidings, but if your system is approximately 15 years old...it may be "shot" and needs total replacement. It's a project that is expensive and could cost $1200-$1500.My landscaper is a company called SOS Lawn Maintenance and can be reached at (702) 372-9479. Ask for "Shane". He is licensed, shows up when he is supposed to do so, and has been doing business in Sun City Anthem for the entire 10 years I have resided here.Hope this helps.

________________________
Finding & Fixing Hidden Leaks

You know you have a leak when your faucet drips, but do you know how to find a hidden leak?
Finding and fixing leaks can save as much as 11,000 gallons of wasted water per year and more than 10 percent on water bills.
If you suspect you have a phantom water waster in your home, follow these tips to find the culprit.
But first, make sure no water is being used inside or outside of your home.
If you are not able to find the leak, you may want to consider contacting a professional plumber to locate and fix the leak.
If you find a simple leak like your toilet flapper or kitchen faucet, you may want to fix the problem yourself.
For more information, call the Conservation Helpline at (702) 258-7283.
If you find a simple leak like your toilet flapper or kitchen faucet, you may want to fix the problem yourself.
_________________________
Solving Dishwasher Problems

How many times have you come home from a long day expecting to be able to have a nice yummy dinner on your freshly cleaned dishes, only to open up the dishwasher to find that they are still dirty after being washed?
Troubleshooting dishwasher problems is something that every person should know at least the basics.
Unfortunately, this is not always the case.
Here are a few simple ways that you can troubleshoot your dishwasher problems.
Scrape the dishes
Did you scrape your dishes off before you put them into the dishwasher?
Surprisingly many dishwashers will not be able to clean off all kinds of food particles.
In order to make it a little easier for your dishwasher to clean, make sure that you at least scrape (not wash) the dishes before you place them into the dishwasher.
This means that you don't leave any spaghetti noodles stuck to the plate, or that large pieces of food have been removed before placing the dish into the dishwasher.
Properly load the dishwasher
Was the dishwasher properly loaded?
If you do not properly load the dishwasher, you will not be able to get all of your dishes clean.
Most often this means that you have large cake pans, baking dishes, pots, or pans on the bottom shelf.
This will prevent the vast majority of the water from getting to the top shelf, and thereby decreasing the amount of cleaning power of your dishwasher.
Check the spin arm
Remove the bottom shelf of the dishwasher and check the spin arms.
These are the arms that spin around and throw water everywhere in the dishwasher.
Over time the little holes that the water comes out of can get clogged.
It doesn't matter if they become clogged from calcium buildup or from food particles that have gotten dried onto the arms.
If the arm holes are not cleaned every so often, then the cleaning power of your dishwasher decreases.
Check the drain screens
Periodically you will need to check the drain screens along the bottom of the dishwasher.
The reason for this is that over time your screens can become clogged with food, and this food will be thrown around the dishwasher, defeating the main purpose of the dishwasher.
Finally, if you have checked all of these issues and you still find yourself with dirty dishes after using the dishwasher, then you have a problem.
Call in a professional service man to take a look at the appliance for you, but be sure that you explain that you have checked these common problems.
Here are some videos to help you solve a dishwasher problem.
Mr. Fix-It
_________________________
Keeping Costs in Line on Home Improvement Projects

One of the biggest problems with doing any kind of home improvement project is the amount of money that it usually takes to do the job right.For some reason, no matter how well someone does their planning, it can easily be expected to have the project go over budget by at least 10 percent, and often more.
Due to this, finding ways of lowering costs on projects is something that should always be looked for whenever possible.
Following the suggestions outlined here should help you be able to keep those costs down as low as possible.
When possible, do your own work
Typically, labor intensive aspects of projects (such as demolition, painting, insulation, or even the general clean up) are the most expensive portions.
One way to dramatically reduce the overall costs of your home improvement project is to handle any and all labor intensive aspect of the project yourself.
However, if you do utilize this, keep in mind that your project will only be able to proceed as quickly as you complete the task.
Be aware that you will also be responsible for the results of the work that you accomplish.
Plan accordingly
Whenever possible, stick with preexisting fixtures and features.
By replacing or remodeling such things as plumbing or gas lines you can significantly increase the cost of your project.
While you don't always have to do this, be aware that most changes you make will entail a corresponding increase (often dramatic) in overall price.
In addition, if you have a contractor doing the work for you, then ask for a similar rate brake that they get.
For example, when a contractor purchases their materials from a home improvement store for a large project, they often get a 10 percent discount. If they are getting a discount for their purchases, it is only fair that you get a similar one.
Stick to your budget
Perhaps the single most difficult aspect of any home improvement project is actually sticking to the budget that you come up with during the initial planning.
This however is the single most important part of lowering costs on your project.
The best way to stick to your budget is to first decide on how much money you will spend, and then keep that as a hard target.
If you increase your expenditures in one area (for example buying custom countertops) reduce the expenditures in another area (resurfacing your cabinets instead of getting new ones).
Buy direct from source
If you are doing your own work, try to purchase your materials directly from the source whenever possible.
Find your own specialists
If you have the patience, you can always try being your own general contractor.
This means that you find, negotiate, and hire your own specialists for each individual job that comes along.
Be careful when doing this though, since you have to be responsible for scheduling, supervising, negotiating fees and terms, and paying the subcontractors, in addition to often being responsible for the requisite permits.
Here are a few videos to help you with that do-it-yourself project.
Mr. Fix-It
Plan accordingly
Stick to your budget
Buy direct from source
Find your own specialists
Here are a few videos to help you with that do-it-yourself project.
______________________
Panel Window Treatments

If you ever had to decorate the interior of a home before, you probably know how important the window treatments are !
These window decorations are more than just part of the decor. They also serve the function of letting light in, keeping light out, and controlling the amount of privacy in a room.
Window treatments included blinds, drapes, and valances in various fabrics or materials.
Choosing the proper winder treatments for a particular room can take some thought. After all, the look of your windows should be in harmony with the room's overall theme.
The colors or patterns you use for your window coverings should work well with the furnishings, paint colors, and carpet in the room.
Use the style of the area to determine which window treatments might work the best.
While deciding on what kind, of window treatments you want, you will come across may types of possible coverings.
One popular and classy way to cover your windows is to choose panel window treatments.
As the name suggests, these windows treatments use vertical panels to cover your windows and allow you to control the lighting, just like horizontal blinds.

These panels can vary in size, and might be made of vinyl, wood, bamboo, fabric, or other materials.
These panel treatments can be found in many patterns and colors to suit your decorating needs.
Because you can find larger panels, this treatment works especially well for large windows or even as sun protection on outdoor decks or in sun rooms.
These panels can move on a track system, and can be used to cover windows as well as for room dividers or as a door.
The tracks for these blinds are rather easy to install, and cleaning the blinds takes minimal effort.
Depending on the material used, you will mostly just need to regularly dust and wipe the blinds off with a damp cloth.
If your blinds are made with a washable fabric, you can even wash them once in a while after dirt and dust build up.
The vertical blinds are less likely to become damaged and are safer too, since panels can be easily removed and replaced as needed and don't easily allow pets to get stuck or tangled in them.
Panel window treatments are a versatile and beautiful way to cover your windows in any area.
Any room will look more "put together" with this simple window setup.
To help installing window treatments, you might want to watch these helpful videos.
Here's a video showing some different ideas for window treatments on sliding glass doors.
Mr. Fix-It
___________________________
Ideas in "Prettying Up" Your Deck
Why have this....
When you could have this....

Despite what many people may think,decorating a deck is just like decorating any other room in your home.
This should remove much of the anxiety that you may be feeling at the prospect of doing any decorating.
In fact, as long as you keep in mind that you are simply decorating another room in your home, then all you need to do is...
... follow these simple guidelines in order to get the perfect look for your deck or patio.
How much space do you have to work with?
Often the biggest difficulty that anyone has with decorating a deck is they don't stop to consider how much room they have to work with. This is actually understandable since there are may or may not be walls to help set up the boundaries.
When looking at your deck, if you don't have walls, try to visualize walls where the railings, or edges of the patio are.
The area that you have left is the "room" that you need to decorate.
Decide on a theme for your deck.
Think of a theme that you would like for your deck, and use that to guide the overall decorating scheme that you will be using.
Some examples that you could use are setting up your deck as an out door bistro, or pub, or even as another rec center that your family can have fun in.
Use your imagination, and keep in mind that this is your home, and as such it should be a reflection of yours and your family's personality.
Get furnishings that go with your theme.
After having decided on a theme, start purchasing furnishings that will go along with that theme.
Keep in mind as you are doing this that you want to have the furnishings compliment the look of your home as well.
There should be a sense of flow and extension from the rest of the home that goes with the deck. The idea is to have the deck feel like another room of your home after all.
Try it out, but trust your instincts.
As you are placing the furniture and arranging the accessories, do not be afraid to try out different arrangements, since that is the only way that you can really find what will work for you.
However, keep in mind that you need to trust your instincts.
If that patio furniture set simply doesn't feel right in the center of the deck, then try placing it somewhere else.
Here are a few ideas that might help you along in your planning.....
...and don't forget adding a few plants and flowers.
 Mr. Fix-It
When you could have this....

Often the biggest difficulty that anyone has with decorating a deck is they don't stop to consider how much room they have to work with. This is actually understandable since there are may or may not be walls to help set up the boundaries.
Think of a theme that you would like for your deck, and use that to guide the overall decorating scheme that you will be using.
After having decided on a theme, start purchasing furnishings that will go along with that theme.
As you are placing the furniture and arranging the accessories, do not be afraid to try out different arrangements, since that is the only way that you can really find what will work for you.
However, keep in mind that you need to trust your instincts.
...and don't forget adding a few plants and flowers.

_________________________
Leather Furniture
Keeping it Clean Means Lasting Forever

Leather couches and other pieces of furniture are comfortable and look beautiful.
It's important; however, to take care of the leather furniture and keep it clean to ensure it will stay looking nice !
It's important; however, to take care of the leather furniture and keep it clean to ensure it will stay looking nice !
Before cleaning
Make sure you know what kind of leather (finished or unfinished, furniture is usually finished) you have.
Check to see if there are any tags from the manufacturer on your furniture. Often, tags will have directions on how to clean the kind of leather that the piece of furniture is made of.
Many times, the retailer that you have purchased your furniture from will have provided you with cleaning directions and supplies. Check to make sure that you did not forget about any that you may have been given.
Also, before you use any type of cleaning product, test it on a small, hidden area of the furniture to make sure that it does not change the color. You do not want to damage your leather furniture in the process of cleaning it!
General cleaning
Keeping your leather clean will help it to look better and last longer.
The best way to do this is, first, to use a vacuum to get rid of any dust or small particles on the furniture.
Next, get a cloth slightly wet (you do not want the cloth to be so wet that it leaves water on the furniture).
Then, put a small amount of a gentle cleaner on it (like liquid soap).
Another option is to mix a solution of water and soap, and then get the cloth wet.
Gently rub the surface of the leather.
Then use a new damp cloth to wipe up the lather left from the soap.
To polish the leather, use a new cloth, but do not get it wet this time.
To polish the leather, use a new cloth, but do not get it wet this time.
When the leather is dry, you can use a leather conditioner to replace some of the moisture.
Do not use water to get rid of grease stains—just wipe the stain with a dry cloth.
Ink stains are best removed by using a cotton swab dipped in rubbing alcohol and then immediately drying the area (a blow dryer on a low setting works well).

For dark stains, mix one part lemon juice with one part cream of tartar, then rub it onto the area.
Let it sit for ten minutes before using a damp rag with soap (like from the general cleaning) to remove the paste.
Try this on the leather seats in your car.

Do not use any abrasive cleaners because they will scratch the leather.
Also, using any kind of oil or furniture polish may leave your furniture sticky.
Another way to keep your leather furniture looking nicer is to keep it out of direct sunlight.

Here are a couple other helpful videos.
Mr. Fix-It
__________________________
Fixing a Doorbell

Have you ever gone over to anyone house, pressed the doorbell and waited? And waited...and waited...and waited?
Eventually you get a little frustrated and end up knocking on the door.

Invariably, you come to find out that the entire mess could have been avoided if only you had known that the doorbell was out of order, or if the doorbell had been replaced.
Replacing a doorbell is a surprisingly easy electrical task that any homeowner can do.
In fact, all you really need to do is purchase a new doorbell unit and follow the directions as printed by the manufacturer.
However, here are some general instructions that you can use to replace most doorbells.
Shut off power
Whenever you work with electricity be sure that you turn the power off, you don't want to accidentally get electrocuted.
Turn the power off at the circuit box to ensure that there is no power running through those wires, and leave a note so that no one accidentally turns it on while you are working.
Remove doorbell cover
Remove the doorbell cover plate by unscrewing the screws.
Remove the unit
Pull out the doorbell unit by using your hand.
Be sure that you don't touch any of the exposed metal parts as you do this, just as a precaution against any sudden shocks.
The unit should only come out part way, and should still be attached to some wiring.
Disconnect the wires
Disconnect the wires by unscrewing the clamp screws which hold them in place.
Replace the unit
If you do not already posses one, take your old unit down to the local home improvement store and get a replacement.
Pull the replacement unit out of the package and ensure that it fits into the existing hole.
Reconnect the wires
Reconnect the wiring by attaching the exposed wires to the clamp screws, and then tightening them.
Do not over tighten, but ensure that the screws are not loose in any way.
Replace the unit and cover
Place the unit cover and tighten the screws holding it in place. Do not over tighten the screws or you could accidentally damage and crack the cover.
Turn power back on and test
Return the power to that part of the house, and test out your new work.
Typically the most common cause of a new doorbell unit not working is that there is a loose connection somewhere.
Here's a video from Home Depot on how to repair that doorbell that doesn't seem to ring !
Got an annoying sound that you want changed? Try this video....

Mr. Fix-It
____________________________
Got a Wall that's Water Damaged?

Have you ever looked at your wall, and found a patch of it to be a different color than the rest?
If that patch grows over time, and particularly if that patch starts to bubble, then you may have a leak in your walls.
Here is a 2 part video on how to find a leak.
While repairing a leak in the wall can be a little frustrating, perhaps the most frustrating part of the whole mess is needing to fix the water damage to your wall.
Repairing water damaged walls isn't something that is particularly hard, just a little time consuming.
Fix the leak
Initially, before you can even really begin repair water damaged walls, you need to fix the leak that caused the water damage.
The best way to get this done properly is to hire a professional plumber to come out and inspect the pipes as quickly as possible.
Of course, you should always turn your water off as soon as you see any water damaged areas so that the damage does not spread.
Cut a hole
After you have repaired the leak, cut out a few holes near the water damaged area of the walls.
This will help to provide ventilation for the area that has the water damage, and help dry it out quicker.
These holes should be about 4 inches square, and should be located near each end of the joist or stud.
If you find any insulation that is wet, then you need to remove that as well.
Allow the wall to dry
Simply allow your walls to dry out.
This can take a day or two, so don't be in to big of a hurry.
Properly allowing your walls to dry will reduce the risk of any mold or mildew growing in the walls, and becoming a health hazard later on.
Fans and dehumidifiers can be used to help ensure that you have a completely dry wall, and actually help speed up the process a little bit.
Patch the hole
Once your wall has dried, it's time to patch it up.
Be sure that you have any insulation that you removed prior to patching the hole.
Prime the wall
After you have patched all of the holes that you put into your wall, you will need to prime the wall. By priming the wall, you will also be preparing it for later painting, and protecting the wall from any stains.
Typically you will want to use an oil-based sealer, since a latex-based sealer may allow water stains to seep through again.
For a more even coloring, you may want to prime the entire wall, rather than just the damaged area.
Repaint the wall
Once you have finished priming the wall, all you really need to do is repaint the area.
Great care should be taken to match the existing paint scheme when you are doing this step though.
For this reason, it is recommend that you repaint the entire wall, simply to make sure that you have the paint matched properly.
Here are a couple helpful videos.
For that small repair....
For that big repair...
Mr. Fix-It
