


If you have ever done any repair work on your roof, talked with a roofer, or simply walked around a home improvement store, then chances are you have heard the term roof flashing.
Let's answer a few common questions.
What is roof flashing?
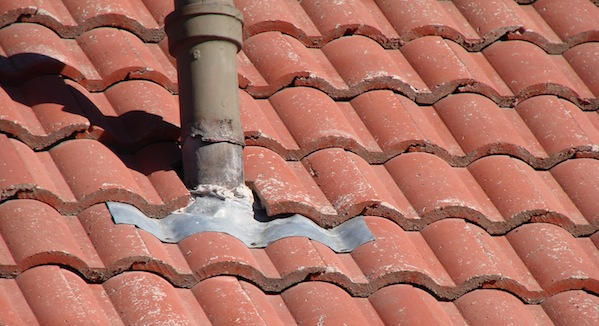
Roof flashing is a material that is commonly used to provide a seal over joints in roof and wall construction to help protect the roof from water.
This type of seal is used wherever you can see two or more areas of the roof coming to join in a point.
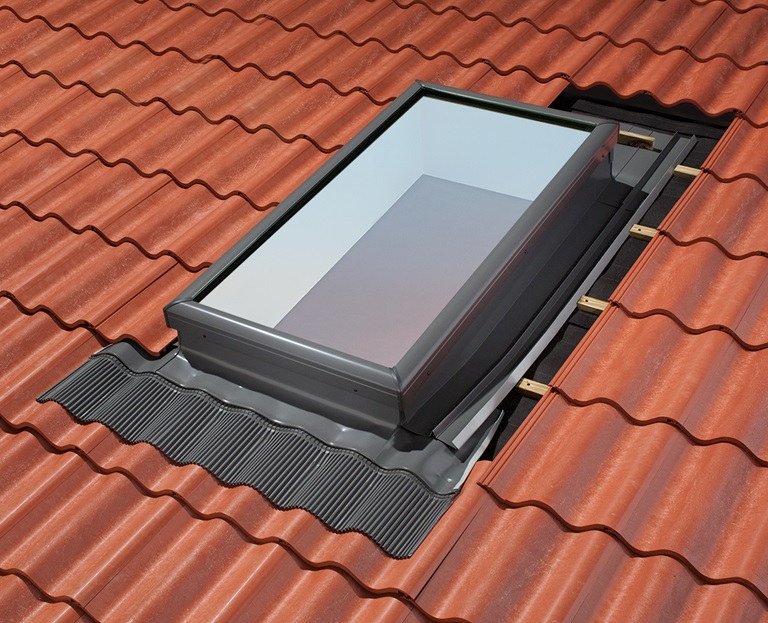
For example, you should find flashing around things like chimneys, in the valleys of the roof, around skylights, windows, and so on.
What is roof flashing made of?
Roof flashing is typically made from aluminum or galvanized steel, though it can really be made from anything that will help create a solid seal against water.
The reason that aluminum and galvanized steel is often used is that they are fairly durable, and light weight materials that you can easily install.
When should you fix roof flashing?
While you can easily go for a little while with shingles that are looking a little worse for the wear, flashing is something that you should fix as soon as you see a problem.
There are several different ways that roof flashing can show that it needs to be replaced, the most common of which is that it is loose, bent, weathered, or even oxidized (rusted).
What can damaged flashing do?
Considering that the whole point of flashing is to help create a water proof seam, it only stands to reason that water damage will result.
In addition to water damage in the roof, you could potentially see water damage in the walls, and insulation.
If the damage is severe enough, or goes untreated long enough, you could even potentially see health problems due to mold growth.
Summary
Now that you know a little bit more about roof flashing, and just what it does, you can easily see how important it is.
Keep this in mind the next time you take a look at your roof and you notice a problem with the metal pieces, or if a roofer says that you need to repair it.
Be willing to spend a few dollars to fix this minor piece of roofing equipment, or be ready to spend thousands of dollars repairing the entire roof.
Mr. Fix-It
___________________________
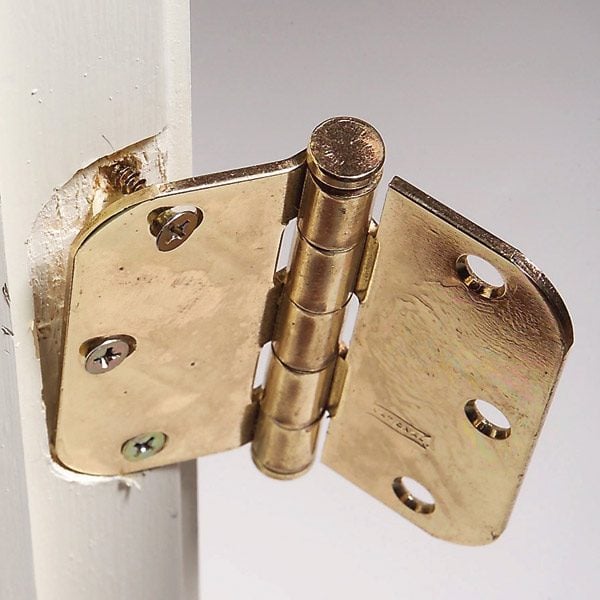
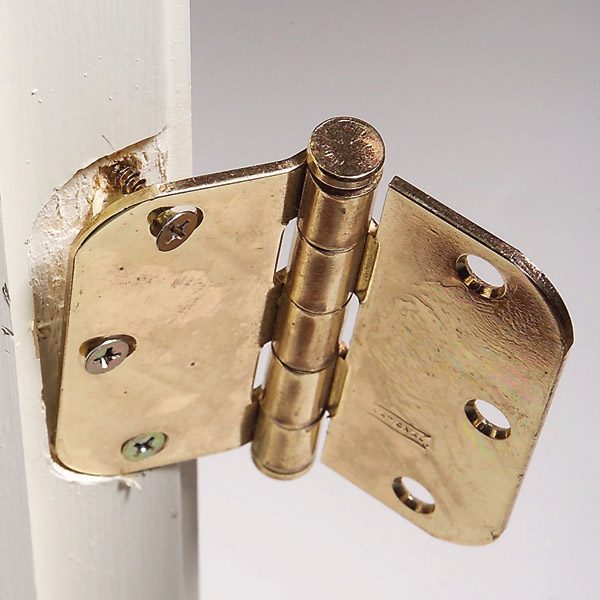
Have you ever noticed how, every once in a while, your door hinges will get a little loose?
Don't worry, this just happens over time, but does need to be addressed when found.
If you don't, you can easily find that your door comes off the wall, and you are faced with an even bigger problem than the one you had before.
Luckily tightening up loose hinges isn't all that difficult of a task to accomplish. In fact, it is so easy that just about anyone can accomplish, no matter what their skill level.
All you really need to do is use one of three four methods, and you should find that you have no problem.
Try Simple Tightening
Often the simplest answers are the best answers.
If you find loose hinge, the very first thing that you should try is tightening the existing screws.
Grab the appropriate screwdriver, and then begin tightening.
Keep turning the screw until it stops turning, or until you notice that it won't tighten any longer.
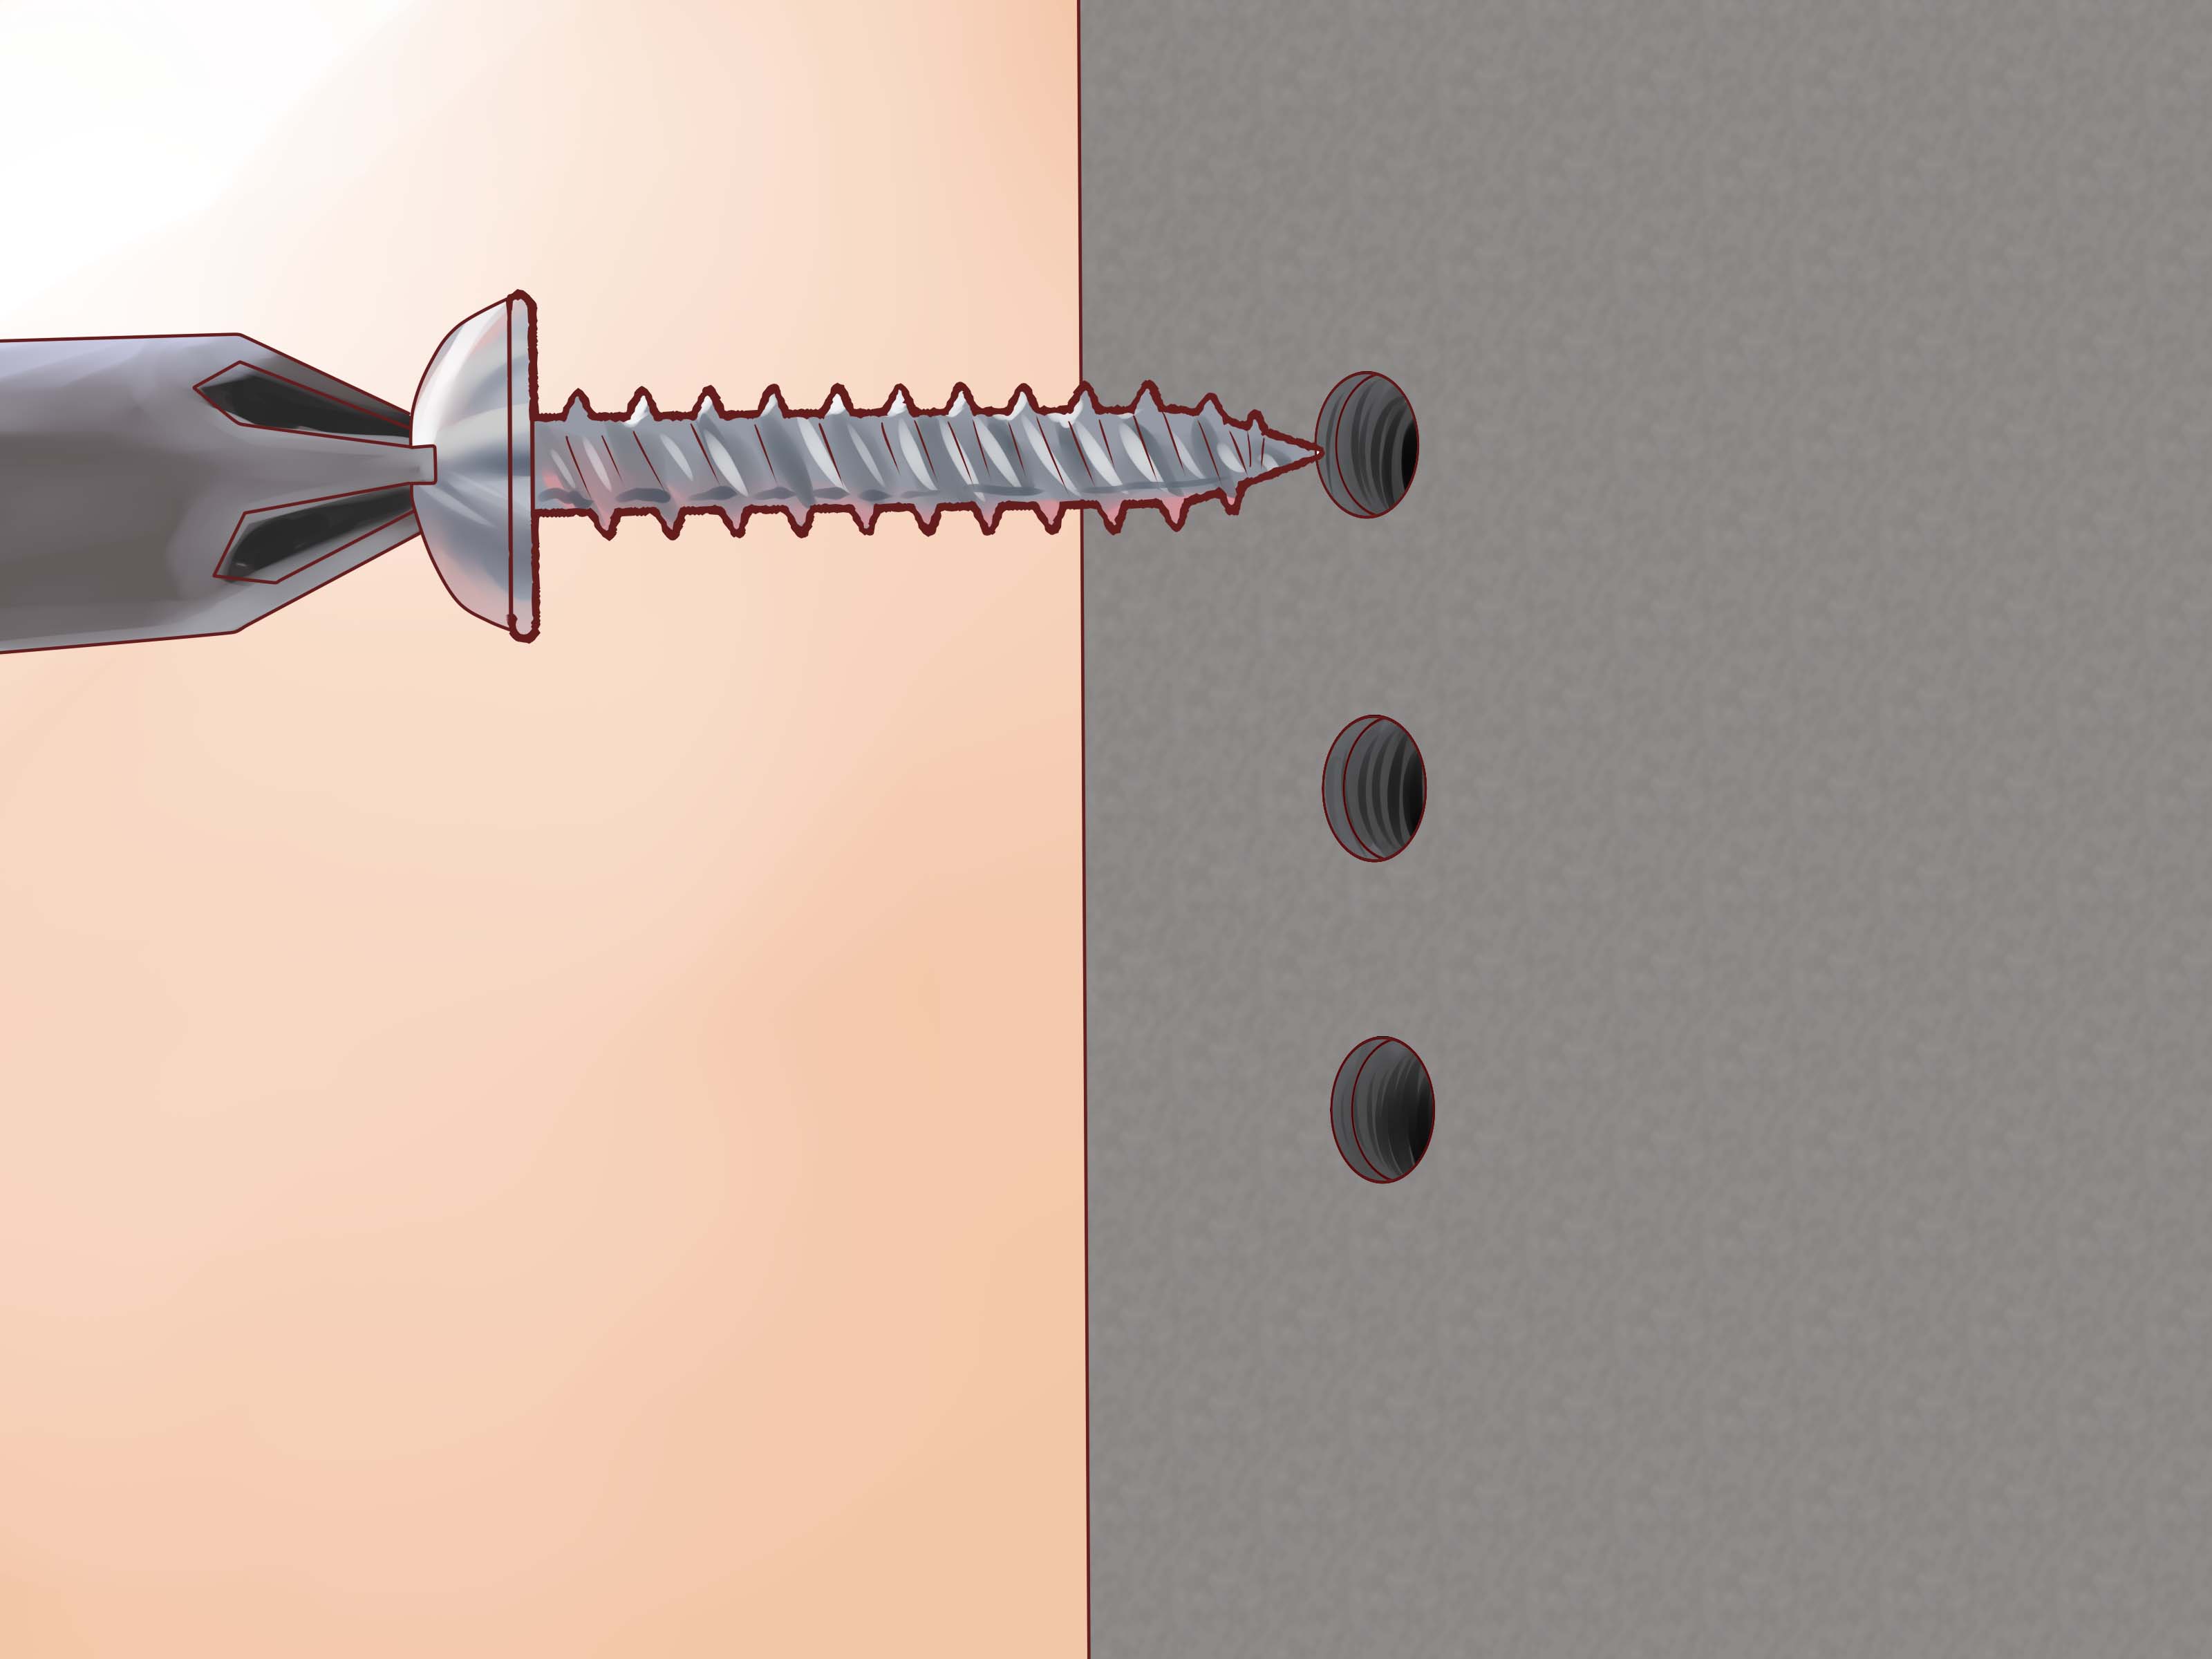
Use a Longer Screw
![]()
Over time screws have a tendency to wear away at the wood that is holding them in place. If this happens with the screws in your hinges, and you find that you simply can't tighten the ones that are currently in place, then you should try using a longer screw.
For example, if you use a screw that is 2-1/2 inches long, you will easily be able to get past the wood that has been worn away and get into some wood that hasn't been used yet.
Refill the Hole
A very effective method for tightening up loose hinges is to actually refill the hole, and then drill it out again.
This will require that you first take off the door, as well as the door hinges.
Once you have done that, identify the troublesome holes, and grab a few golf tees.
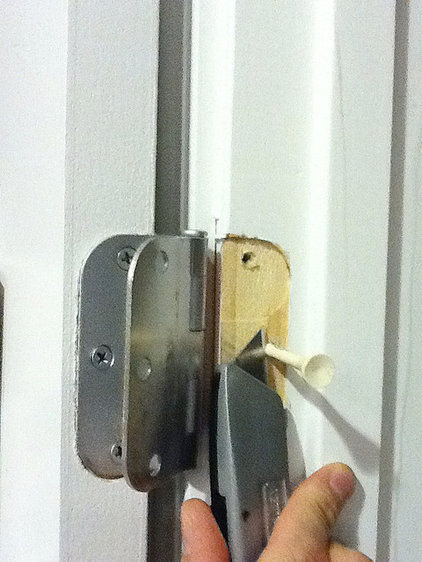
Fill the hole partway up with some wood glue, and then stick the golf tee in as far as it will go.
If you can, lightly tap the tee with a hammer to make it nice and snug.
Allow the tees and glue to dry overnight, and then cut off the exposed parts of the tee so that it is flush with the door frame.
Drill a small pilot hole for your screws, and then reattach the door and hinges using the newly filled and stronger holes to support the weight.
Need some video help?
https://www.youtube.com/watch?v=zPvOd2XctJg
https://www.youtube.com/watch?v=OZKEu9YsED8
https://www.youtube.com/watch?v=xT5bxg9Xp1g
Mr. Fix-It
_____________________________
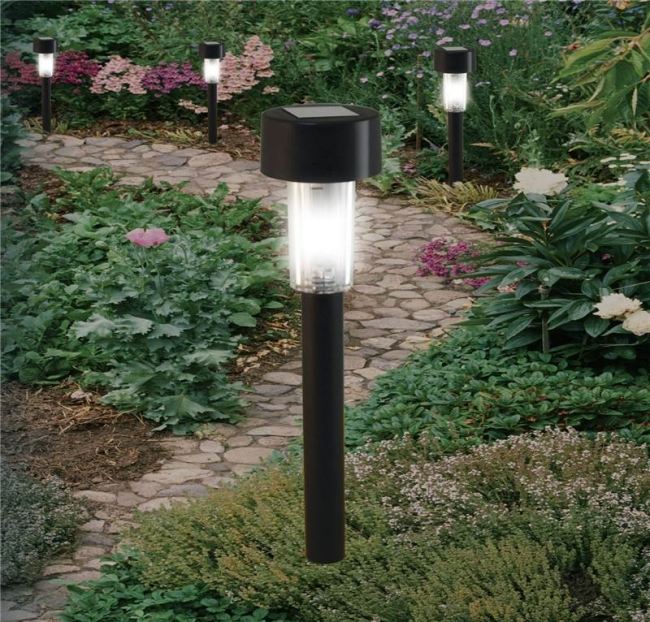
Instead of wondering who (or what) may be waiting for you in the dark, why not "shed some light" on the situation?
That is what outdoor lights are designed to do after all.
If you have inadequate lighting, no lighting, or are simply looking for a change, then you need to follow these guidelines. They are designed to help you not only choose the best possible outdoor lights, but to also ensure that you get them installed properly.
Space
What is the total area that you wish to have lit up? What is the effect that you will be going for? Outdoor lights are supposed to help light up the exterior of our homes, so one of the main things that you need to know is how large of a yard that you have.
Make sure that you have the measurements of your yard, and that you choose those lights that will provide enough light for your space.
Security
Outdoor lights are a great way to increase the security of your home. For the most security minded outdoor lights, choose those that can be turned on through the use of motion sensors.
These kinds of lights will automatically turn on whenever anyone comes around at night, while also helping to lower your electricity bill by only turning on when there is activity in your yard.
Style
As you are looking through the various styles available, it is a good idea to take a picture of your home with you. This way you will be able to better match the lighting style to that of your home.
Be sure that the lights will enhance the look of your home, and not detract from it.
Easy of Use
Remember that you will be using these lights for years. Be sure that you choose lights that will be easy for you to both use and maintain as well.
When looking around the home improvement store, practice putting in light bulbs on a fully assembled unit. This will give you an opportunity to see how easy it will be to replace any burnt out lights in the future.
Install
Considering that you are working with electricity, it is highly recommended to hire a professional electrician to install your lights. Though it is more expensive, you will be able to ensure that the work is done according to code, as well as having a guarantee of having the work done by someone who knows what they are doing.
Need some videos?
https://www.youtube.com/watch?v=zJhrCQ6hOZA
https://www.youtube.com/watch?v=Q2WFyycpBqU
https://www.youtube.com/watch?v=O8K3gL-W9iE
Mr. Fix-It
_____________________________

... you can't always get your screens off your windows.
In those instances, you will need to use a different method.
Here is a great method for cleaning window screens without having to remove them from your windows.
Here are the materials you're going to need before you begin the task:
Spray bottle
Homemade cleaning detergent (75% water, 20% vinegar, 5% detergent)
Newspaper, paper towels, or lint-free cloth
Sturdy step ladder
Standard 110-volt vacuum cleaner
Once you have the above items, now it's time to clean the screens by simply following these steps:
1. Vacuum.
Attach the brush attachment to your vacuum cleaner and begin vacuuming your screens from the inside of your house.
Start at the top and work your way down.
Make sure you vacuum the entire screen, window track, and surrounding areas completely.
Be sure that you use a standard 110-volt vacuum cleaner, since the little 12-volt vacuum cleaners will not have enough power to do the job.
2. Spray.
Using your homemade cleaning detergent and a spray bottle, spray some of the solution onto the screen.
Start at the top and work your way down to the bottom to ensure you get everything.
Don't over spray, which would lead to dripping and pooling at the bottom of the window.
3. Air dry.
Leave the windows open and allow the screens to air dry for a few minutes.
Repeat this process with all the windows in your home.
4. Outside.
Go outside and, starting at the first window, repeat step one.
Make sure that you vacuum every part of the window. You may also need to use a step ladder to be able to reach every part of your window, just make sure that it is a safe and sturdy one.
5. Spray and scrub.
Spray some of your homemade cleaning solution onto the cloth, paper towel, or newspaper that you are using and begin to gently scrub the window screen.
Make sure that you are being gentle; if you press too hard you will tear the screen.
6. Air dry.
Once again, leave your windows open and allow the window screens to dry completely.
7. Go inside.
After the screens are dry, go back inside and repeat step five and six.
This time though, instead of using the cleaner, simply use regular clean water.
Finally, after you have followed these steps, you simply allow your screens to dry.
Your window screens are now clean, and you didn't even need to take them off to do it.
Here's a video for additional helpful tips:
https://www.youtube.com/watch?v=1Vp20_NxLhM
Mr. Fix-It
_________________
Here are a few simple ways that you can troubleshoot your dishwasher problems.
Scrape the dishes
Did you scrape your dishes off before you put them into the dishwasher?
Surprisingly many dishwashers will not be able to clean off all kinds of food particles. In order to make it a little easier for your dishwasher to clean, make sure that you at least scrape (not wash) the dishes before you place them into the dishwasher.
Properly load the dishwasher
Was the dishwasher properly loaded? If you do not properly load the dishwasher, you will not be able to get all of your dishes clean.
Most often this means that you have large cake pans, baking dishes, pots, or pans on the bottom shelf.
This will prevent the vast majority of the water from getting to the top shelf, and thereby decreasing the amount of cleaning power your dishwasher has.
Check the spin arm
Remove the bottom shelf of the dishwasher and check the spin arms.
These are the arms that spin around and throw water everywhere in the dishwasher.
Over time the little holes that the water comes out of can get clogged.
It doesn't matter if they become clogged from calcium buildup or from food particles that have gotten dried onto the arms.
If the arm holes are not cleaned every so often, then the cleaning power of your dishwasher decreases.
Check the drain screens
Periodically you will need to check the drain screens along the bottom of the dishwasher.
The reason for this is that over time your screens can become clogged with food, and this food will be thrown around the dishwasher, defeating the main purpose of the dishwasher.
Need some video help?
https://www.youtube.com/watch?v=CI41NoqAuew
https://www.youtube.com/watch?v=sKD7YFXDTqQ
https://www.youtube.com/watch?v=yban1TEAEwY
Mr. Fix-It
______________________________
Need a New Garbage Disposal?


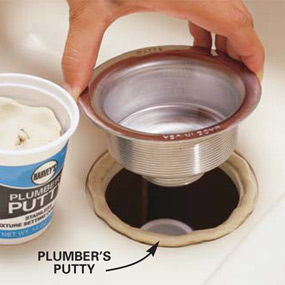
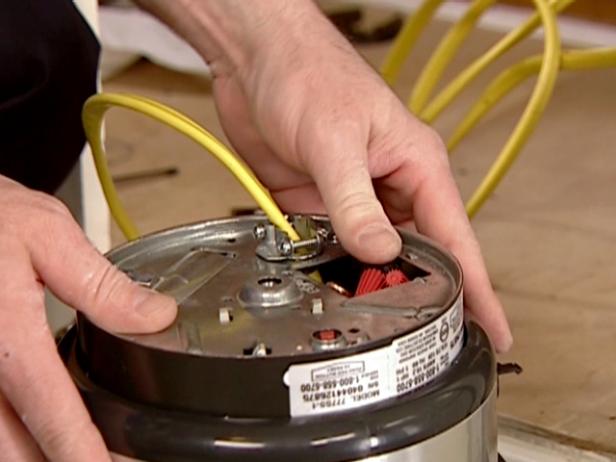
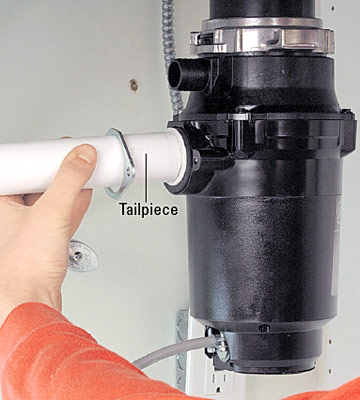
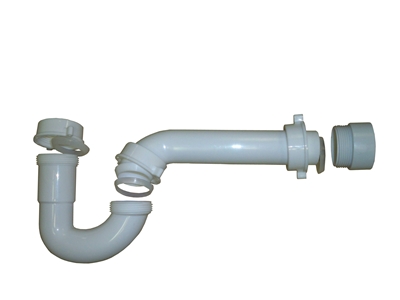
Once you have finished the process of installation, you still need to do a bit of testing.
Testing is rather simple, in that you simply need to run the water and the disposal.
As long as it is running, and there are no leaks, you are pretty much done. All that you have to do after successfully installing and testing the garbage disposal is clean everything up.
We have a few videos:
https://www.youtube.com/watch?v=pYKXGDBxx_k
https://www.youtube.com/watch?v=pPtTUi9cxts
https://www.youtube.com/watch?v=i8_og7cezVc
Mr. Fix-It
_________________________
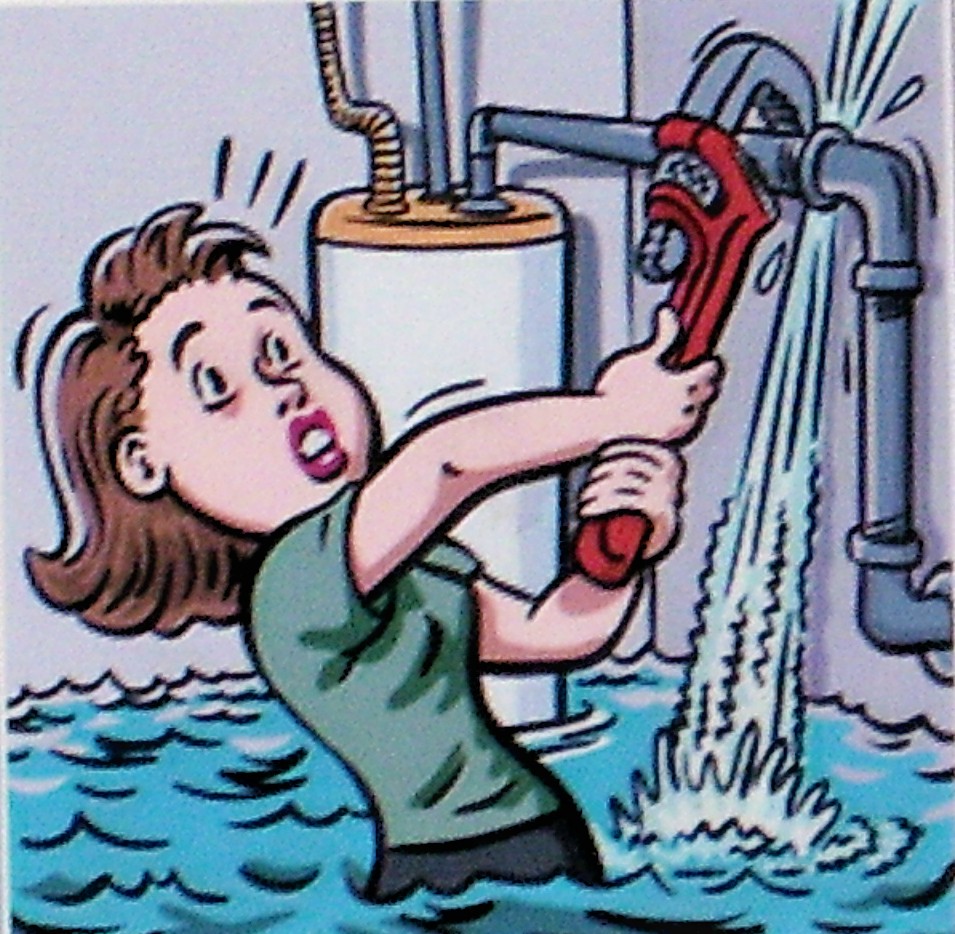
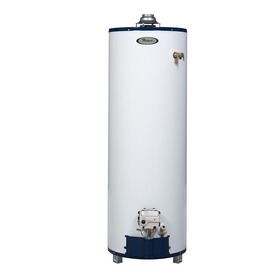
I Need a New Water Heater

In large part this is because these are usually large, complex pieces of equipment that the average home owner doesn't understand.
In addition, there is the fear that by choosing the wrong water heater a home owner can end up paying a huge energy bill that they cannot afford.
The truth is that choosing a water heater is simply a matter of following a few simple guidelines.
With these guidelines in hand, you can be assured that you will be able to choose the best possible water heater unit for you home, and your needs.
Energy is important
When looking through your options in a water heater, you need to make sure that there is a large yellow sticker. This yellow sticker will have the words "Energy Guide" written clearly on it, and will show the annual average usage of electricity or natural gas for that particular unit.
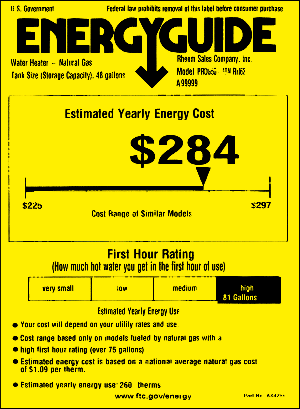
As you look at this sticker, you may notice that there is a little bit of information missing, which is the rate of recovery.
Ask about this information, since it will tell you how quickly the unit will heat up your water.
Size for electrical and gas heaters
Size really does matter when choosing a water heater.
Surprisingly, there is a difference between the size of a gas heater and the size of an electrical heater that you will need.
For example, a family of four that has two bathrooms, a washing machine, and a dishwasher will need to have an electrical unit that is between 50 and 80 gallons; whereas, a gas heater only needs to be between 50 and 75 gallons.
The electrical unit should also have a heating unit that is around 5,500 watts, while the gas unit should have a 40,000 Btu heating element.
The warranty matters
Perhaps one of the most important elements to consider when choosing a water heater is the warranty.
Each warranty will have a different lifespan, most falling between 6 and 12 months.

Be sure that you know the length of time that your warranty will last, as well as what the warranty will cover.
This can help save you an immense amount of money later on if there is a problem.
Always try to get the best possible warranty.
Here's some video help.
https://www.youtube.com/watch?v=hc4rRWTeDrI
https://www.youtube.com/watch?v=0IqfbWQ89IY
https://www.youtube.com/watch?v=Zny_wyRB_8k
Mr. Fix-It
From Marty Winger...to...Anthem Opinions
As a side note to your commentary about water usage, this topic had me contact SNWA in regards to my “Water Heater.” It seems that since I have lived here I have had to replace it about every 4 years.
Of course as it is told to me (many times) by SNWA our water is very hard (duh). It costs nearly a thousand dollars every time we replace it!
As compared to Los Angeles water, a water heater needs replacing about every 25 to 30 years, and that’s without doing anything to it.
The SNWA suggests removing the sediment about once a year, and its not a big deal to do, but I do it about 3 times a year.
It is the main cause of all the problems (sediment) to destroying the water heater, aside of the fact I never drink the stuff, and do have an R.O. and always drink bottled water too.
SNWA said the particulates don’t cause any serious problem, but none the less…”don’t drink the water!”
Bottom line is as was told to me by the SNWA person (who was quite helpful) he’d try to see if there is any programs that help us, the consumer to rebate these issues to get an inline filter to alleviate the problem.
This is of course help us to get some discount pricing on a filter (about $300-400), and plumbing costs.
Another thing he said was, “they do about 300K checks a year,” and I said that is a minimum standard to meet the requirements set by our government.
I know removing the particulates would pretty closely make the cost of delivery of water quite expensive and that’s why I want a consumer program to offset the costs involved for the inline filter for the water heater.
_____________________________
Roof Problems?

Choosing roof contractors can be a stressful process, particularly if you are faced with a roof that needs some serious repair work done.
Instead of wasting your time worrying, and possibly choosing the wrong contractor, use these simple guidelines.
As you are talking to your potential roof contractors, ask these questions and write down the answers. After going through all the answers, choose the one that has the most yeses and you will know that you have chosen the best possible roof contractor.

Are they licensed?
While it may be nice to have a friend do the work for you (after all, he's cheap) he may not be the best possible choice to repair your roof.
While a license may not guarantee that a contractor will be doing good work, it will show that they are more likely to know what they are doing.
Always ask your potential roof contractor whether or not they are licensed.
Do they have insurance?
It is absolutely essential that you roof contractor be insured, and have enough insurance to cover the work you want done.
Keep in mind that they will be working on your roof, the thing that which has the sole purpose of keeping everything inside safe from what is outside.
Ask for a copy of their insurance certificate to verify whether they actually have the insurance necessary for your job.
How long have they been in business?
You should always choose the contractor with the most experience.
How long have they been in business?
Do they have an office, or are they working out of their garage?
Is it possible to visit their business?
You want to make sure that you are not hiring some fly-by-night joker who will take your money and run.
One of the best possible ways to check this is to see how financially vested they are in their business.
Are they willing to provide references?
Every successful contractor should be willing to provide references.
Just as with any potential employee that you may hire (and keep in mind that you will be hiring these people, and paying their salary while they work for you) you have the right to ask for references.
If they do not, ask why.
Have you checked the Better Business Bureau?
It is always a great idea to check with your local Better Business Bureau to see if there were any complaints against the contractor, and how those complaints were handled.
Here's how to contact the Southern Nevada Better Business Bureau:
https://www.bbb.org/bbb-locator/LocationResult/?Address_State=Nevada,NV&strType=branch
Keep in mind that it is impossible to please everybody, so what you are looking for is how the complaints were handled.
Were they handled properly, or were they ignored?
This will provide you with a great example of how they treat their customers.
Another check is the Nevada Contractors Review Board. Here's their link:
http://www.nvcontractorsboard.com/
Need some other video tips to follow?
https://www.youtube.com/watch?v=6SORlCTYlQc
https://www.youtube.com/watch?v=ltit9tImvB4
Mr. Fix-It
_____________________________

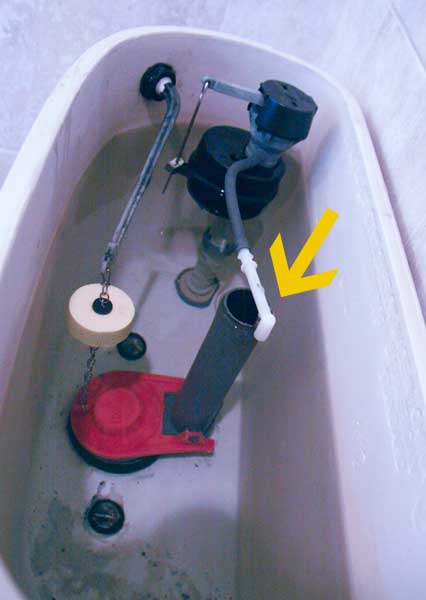
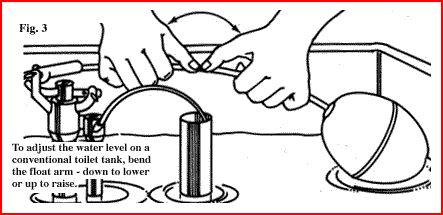
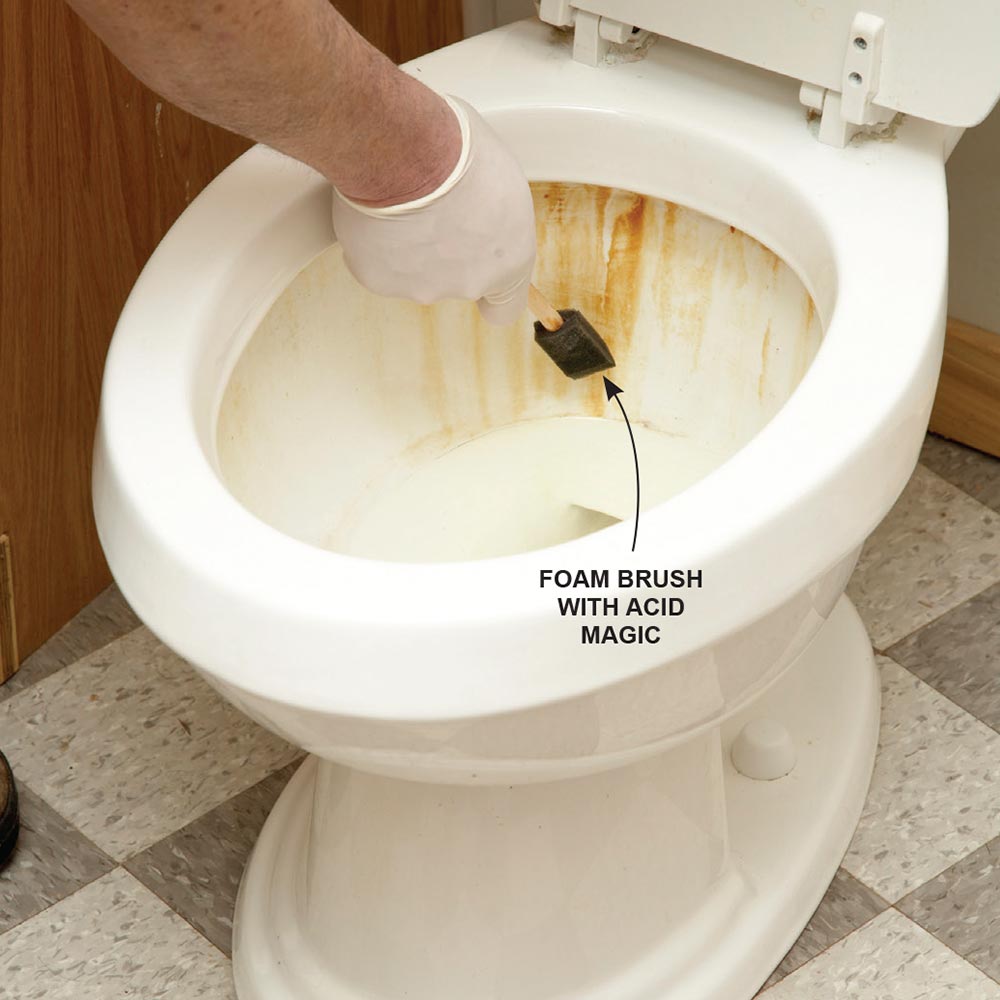
Anyone who has ever had a running toilet knows just how annoying it can be. It is almost as annoying as those high water bills that can result from a running toilet, or from simply having a bunch of kids in your home. Whatever the reason, by simply and correctly adjusting the water level of toilet, you can not only lower your water bill, you can also keep your toilet from running. Here's what you need to do.
Check the current water level.
Remove the top from off of the toilet. This will allow you to access the interior of the toilet, and begin to make your changes. When you first look into the toilet tank, take a moment to check what your current water level is at. The water level should never be above the overflow pipe. If it is, then you are going to run the risk of having a "running" toilet.

Determine your desired level.
Decide where you will want to have your water level at, and place a mark there. This mark can be placed on the outside of the toilet, since it may be a little difficult (and not to mention wet) if you put it on the inside of the toilet. One way that you can make this mark is by using a piece of black electrical tape, or even using a grease pencil.
Bend the ball cock.
After you have made your mark, go ahead and bend the ball cock to about the level of the mark. To do this, you don't actually bend the ball cock (the floating thing) in the tank. Rather, you bend the arm that is attached to it. Be careful as you do this so that you can avoid breaking the arm. Bend the arm until the ball cock is at roughly the same level as the mark that you made.
Test your work.
Once you have bent the arm to the ball cock, it is time to check your adjustment. Simply flush the toilet, and wait for the tank to refill. It should refill only to the level where you have bent the arm too. If the water level is still not to your desired level, repeat the process until you have the desired results.
______________________________
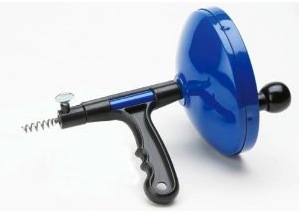
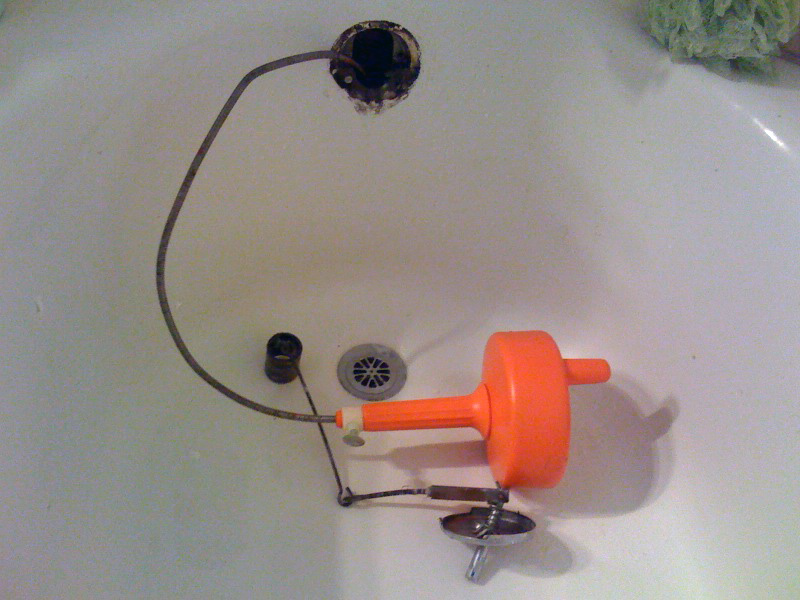
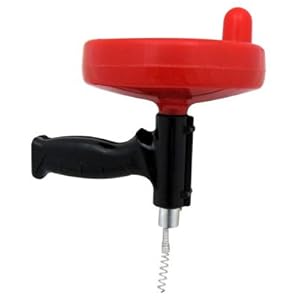
Clogged Drain? Use a Snake

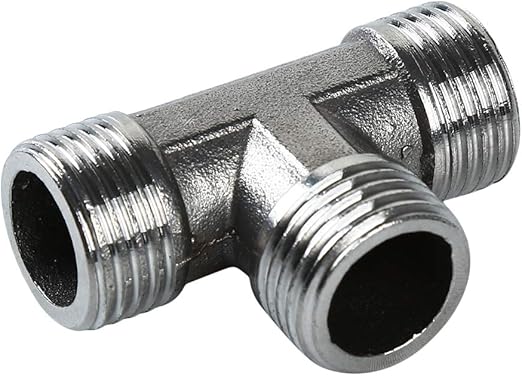
While you can always use a plunger, an alternative tool that you can use is the drain-and-trap auger, commonly referred to as a snake.
However, if you do not know how to use a drain-and-trap auger properly you can create more of a mess than you would believe.
Follow these steps to ensure that you use one properly.
1. Turn off the water.
Before you can begin using a drain-and-trap auger on your clogged pipes, you will need to shut off the water. This will help prevent any accidents, or messes from cropping up while you do your work.
The best way to do this is by shutting the water off to that particular section of pipes.
2. Remove the pipe.
Once you have the water shut off, you can then begin removing the pipe.
The first thing that you need to do is start unscrewing the straight sections of pipe that attaches to the bend (or trap) in the pipes.
When you have the threads nice and loose, but not completely removed, place the bucket under the pipes, and then continue to remove the pipe.
The bucket will catch any remaining water in the drain, and not make a mess.
Set the pipe into the bucket, and then set both aside, out of the way.
3. Begin feeding the snake.
Unloose about three feet of the snake, and put on some work gloves. The gloves will help protect your hands while you are feeding the snake, and keep you from getting too dirty.
Place the end of the drain-and-trap auger into the drain, and slowly work it forward.
4. Slowly work the snake.
Turn the hand crank on the auger, and it will help to turn the auger as you slowly feed it through the pipe. This will allow you to slowly work through any clogs that you find.
Be very careful as you do this that you do not force the snake through any blockage, or you can find yourself potentially breaking the pipes.
Continue the process until you have completely run out the snake.
5. Retract the snake.
Once you have fully extended the snake, retract the auger.
Do this by basically doing everything you did earlier, but in reverse.
If it is possible, as you remove the snake from the wall, use a rag to help clean it off.
6. Replace the pipe.
When you have completely removed the pipe from the wall, replace the pipe you removed earlier.
Tighten the pipes until they are hand tight, and then go ahead and test your work.
7. Test your work.
Turn the water back on, and test the work you have done.
As long as you did the work properly, you should notice that the water drains a lot quicker.\
If you are satisfied with the work, you can then go ahead and clean everything up.
If, after you have replaced the pipe and turned the water on, you still have a problem you have two choices.
The first choice is to get a longer auger, and repeat the work.
The second is to simply hire a professional, and have him do the work for you.
Sometimes a picture is worth a thousand words:
https://www.youtube.com/watch?v=JRjoCAPNNUo
Mr. Fix-It
______________________________

Test your smoke alarms, fire extinguishers, carbon monoxide detectors, and all GFCI outlets.
Replace batteries in alarms and household gadgets.
Inspect and clean out all drains, especially tub and shower drains. If the water drains slowly when you run the water, you likely have a clog and will want to remove it using a plumber’s snake or a commercial clog removal product.
Inspect your washing machine water hoses for cracks and give it a thorough cleaning.
Clean your faucet aerators and showerheads to remove mineral deposits. Soaking in equal parts water and vinegar solution for about 30 minutes should do the trick. Use a commercial mineral removal product for heavy or stubborn deposits.
Vacuum your heat registers and heat vents.
Flush out your hot water heater. This will remove sediment to help it work more efficiently and prolong the life of your water heater.
Inspect and clean out your dryer vent and make sure that your outdoor air vents aren’t blocked.
Check your water softener and top up salt if necessary.
Clean your garbage disposal..
Power wash your windows, siding, patio, and driveway.
Change your air conditional filter.
Fertilize your lawn if you have one.
Clean ceiling fans.
Trim trees and shrubs.
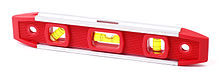
Check caulking and silicone seals in bathrooms, kitchen, and around windows and doors.
Remove winter insulation on outdoor faucets.
Clean blinds, window screens and door screens.
Clean your furnace filter. You want to remove dust build-up to make it easier for the furnace to function properly in regulating your home’s temperature. This will also help keep energy bills down, too.
Lastly, if you have a home warranty it’s important to review it to make sure your particular home systems and appliances are adequately covered, especially your HVAC for heavy summer air conditioning usage.

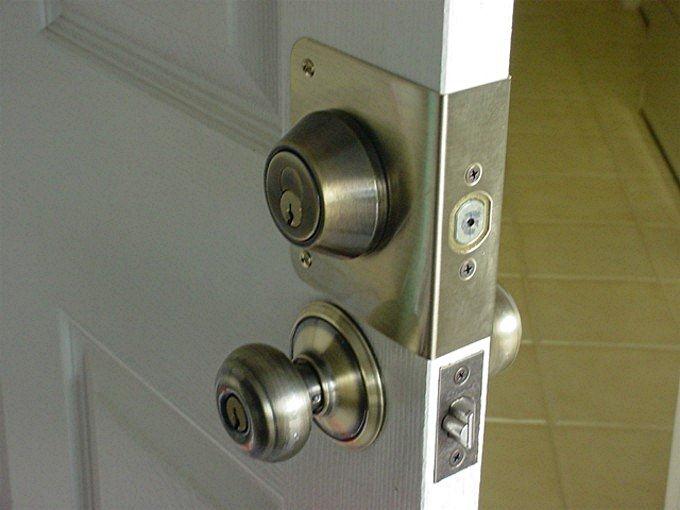
Perhaps the current deadbolt is a double-keyed cylinder, and you would rather have a single-keyed unit.
Whatever your reasons for replacing a deadbolt, replacing one is much easier than installing one on an un-mortised door since the holes have already been drilled.
All you really need to complete the project is a screwdriver.
Make certain that your new deadbolt is the same size as the old one, and follow these guidelines to replace it:
1. Unlock the bolt and open the door.
Find the latch plate and the strike plate. The latch plate is on the door...
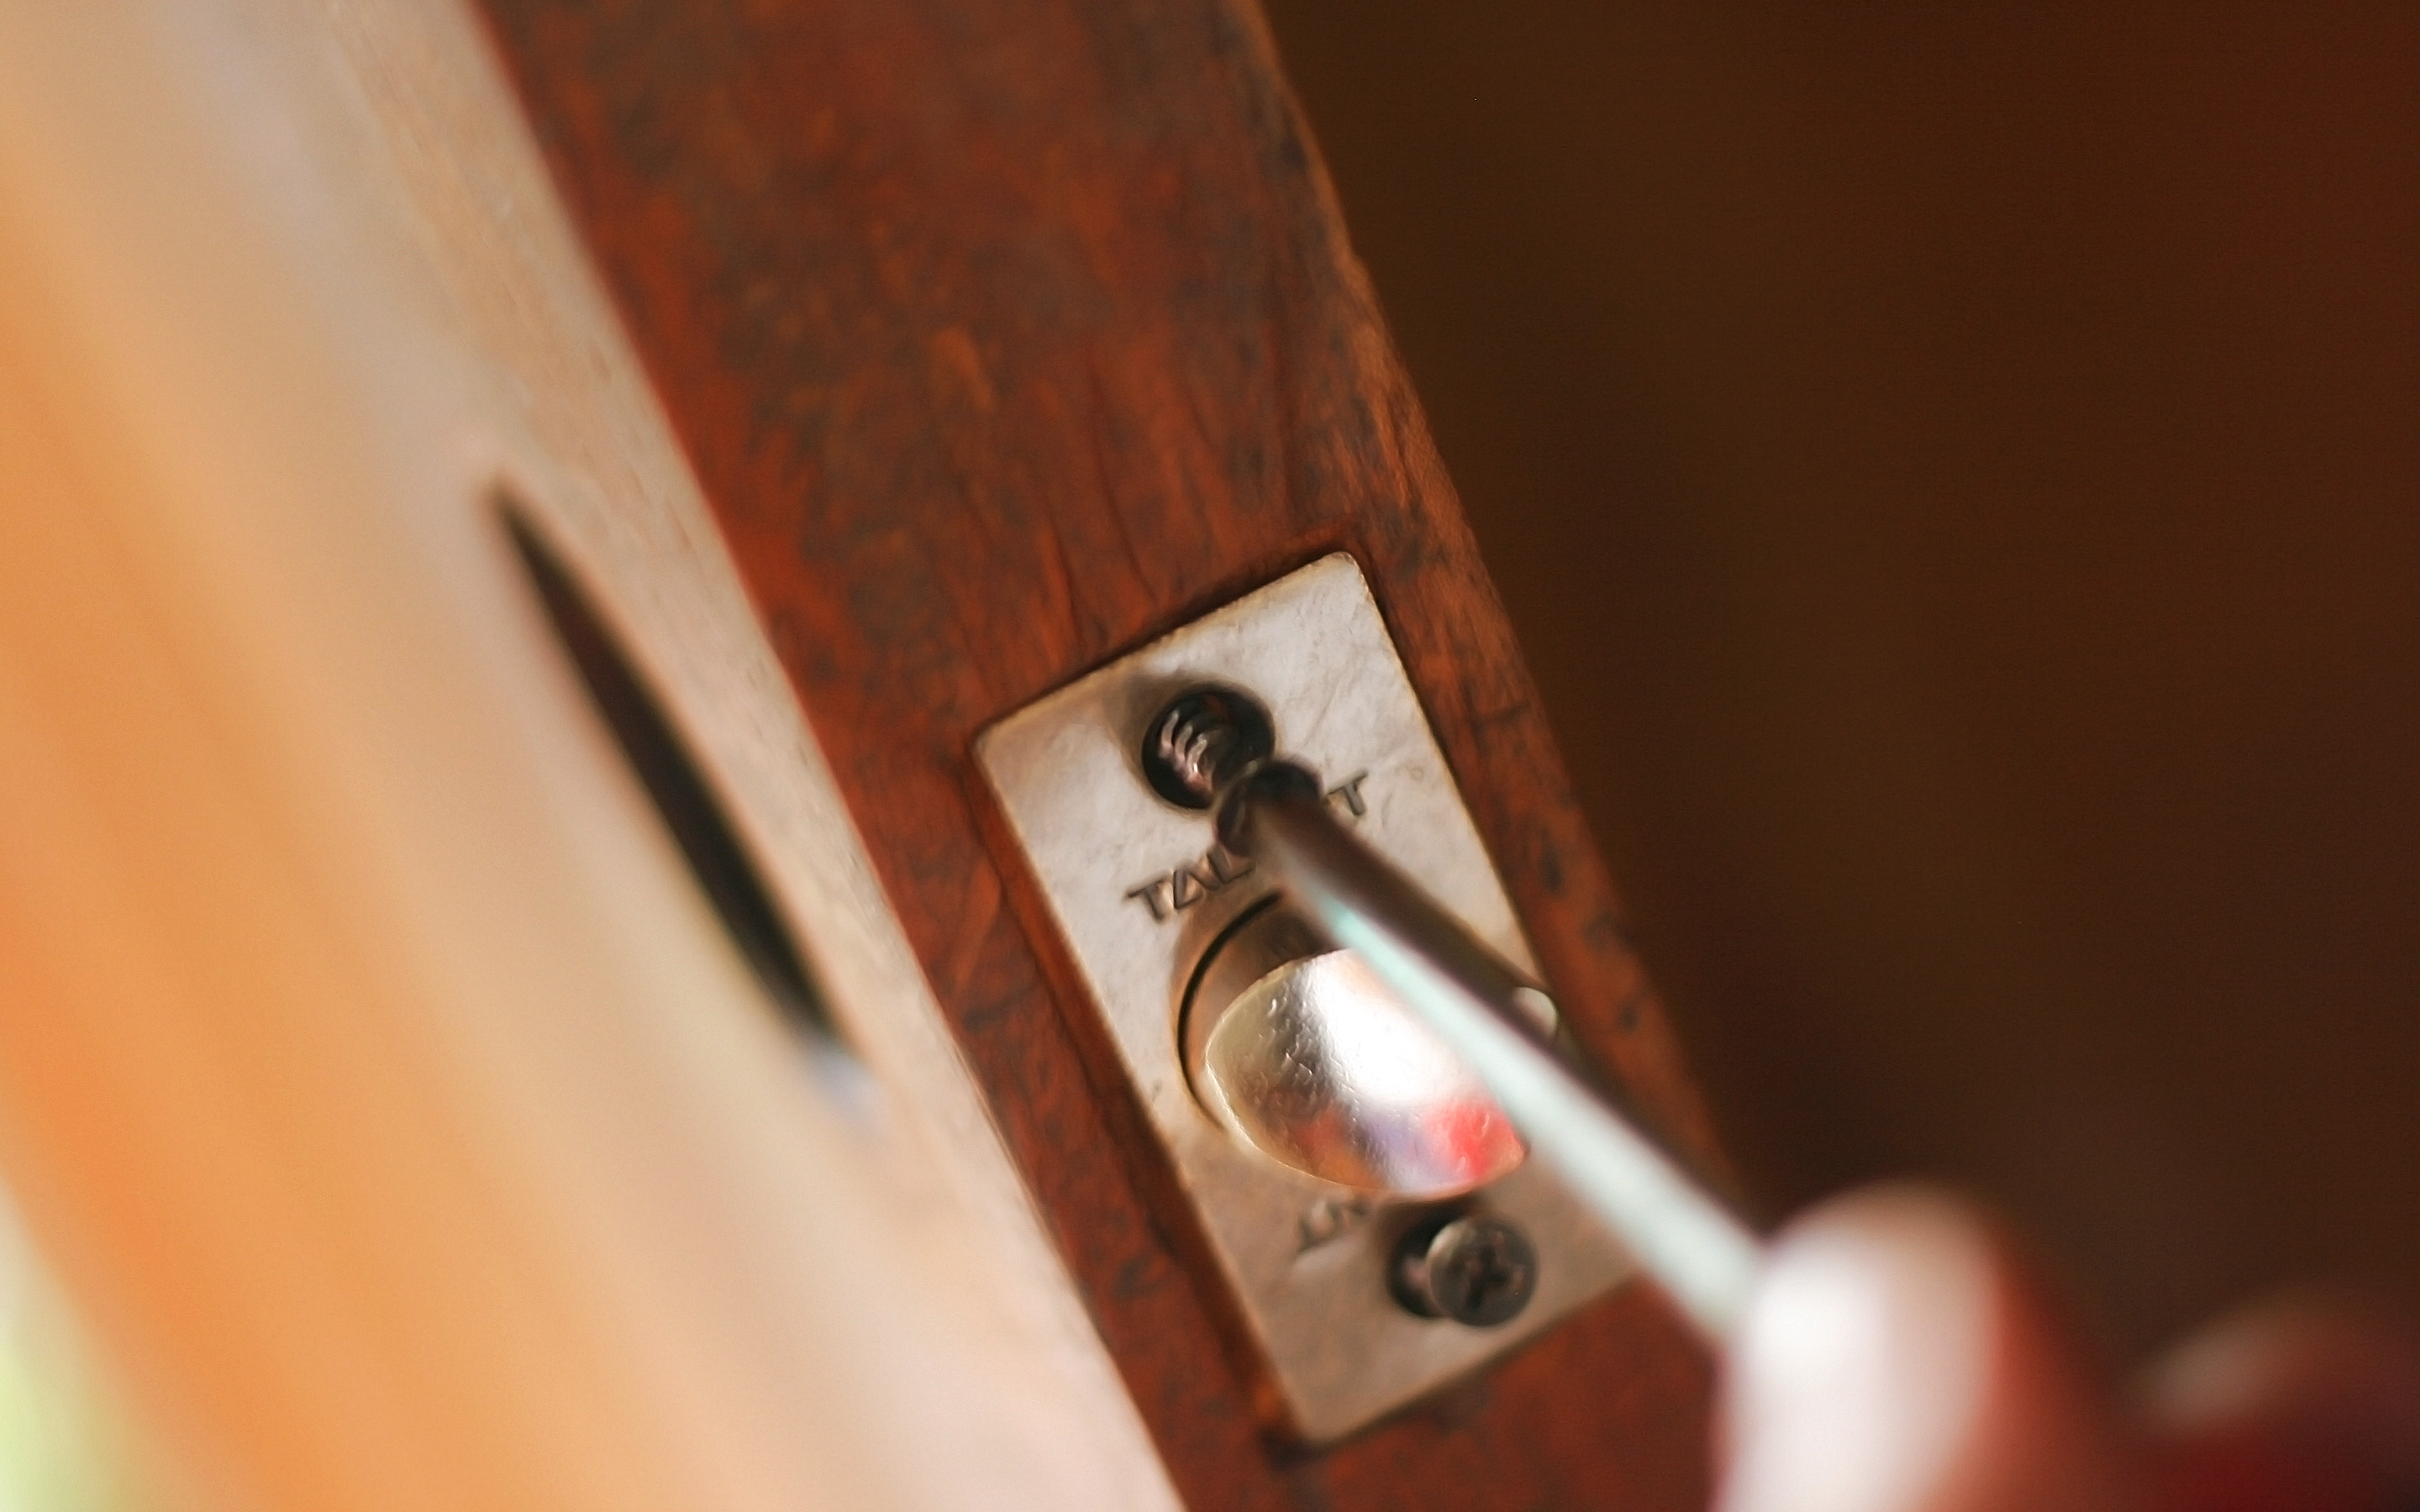
and the strike plate...
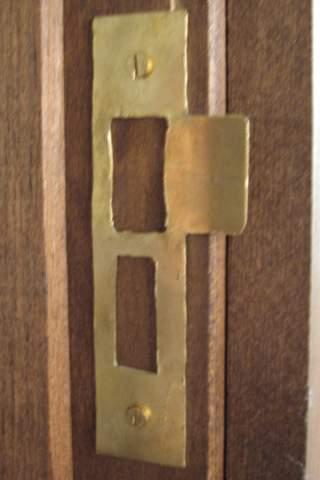
... is opposite the latch plate, on the door frame.
2. Remove the screws that hold the latch plate in place.
If they are tight, use a power drill to remove them.
3. With the edge of the screwdriver, gently pry the latch plate from the door.
4. Dismantle the lock assembly by removing the screws holding it together.
5. Remove the two pieces of the assembly by pulling them apart.
They might be tight, so you may need to jiggle them a bit to loosen them.
6. Remove the strike plate from the facing door frame by removing the screws that hold it in place, and then pry it from the door frame with the edge of the screwdriver.
7. Open your new deadbolt kit and read the directions to familiarize yourself with your project.
8. Insert the new assembly into the hole of the door, and screw into place with the screws included in your kit.
9. Now install the latch plate and secure it by tightening its screws.
10. Before you install and tighten the facing strike plate onto the door frame, align the latch with the strike plate.
An easy way to check alignment is to extend the bolt with the door open, apply lipstick to the end of the bolt, close the bolt, shut the door, and extend the bolt.
Open the door and you will see the lipstick mark on the door frame where you need to place the strike plate.
11. Place the strike plate onto the door frame where you see the lipstick mark, and tighten the screws to secure it.
Test the functionality of your new deadbolt by turning the latch several times, and then going outside and locking and unlocking it with your key.
That's all there's to it.
Need to watch a video to see how it's done?
https://www.youtube.com/watch?v=Jb6qZs9E9UE
https://www.youtube.com/watch?v=eEvL89SD3lw
Don't Currently Have a Deadbolt but want to install one?
https://www.youtube.com/watch?v=xISR-PRcb_s
Troubleshooting a dead bolt lock?
https://www.youtube.com/watch?v=jwQPXjxfBb4
Mr. Fix-It
___________________________
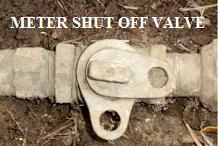
You wake up one morning to the faint sound of running water, but you don't know exactly where it is coming from.
Do you know where the water shutoff valve is?
Locating the water shutoff valve in this situation can be a bit of a nightmare if you don't know exactly where it is.
Luckily, the water shutoff valve is not that difficult to find.
All you need to do is follow these simple directions, and you should have no problem whatsoever finding the shutoff valve.
Just keep in mind that it is better to find that valve prior to an emergency forming.
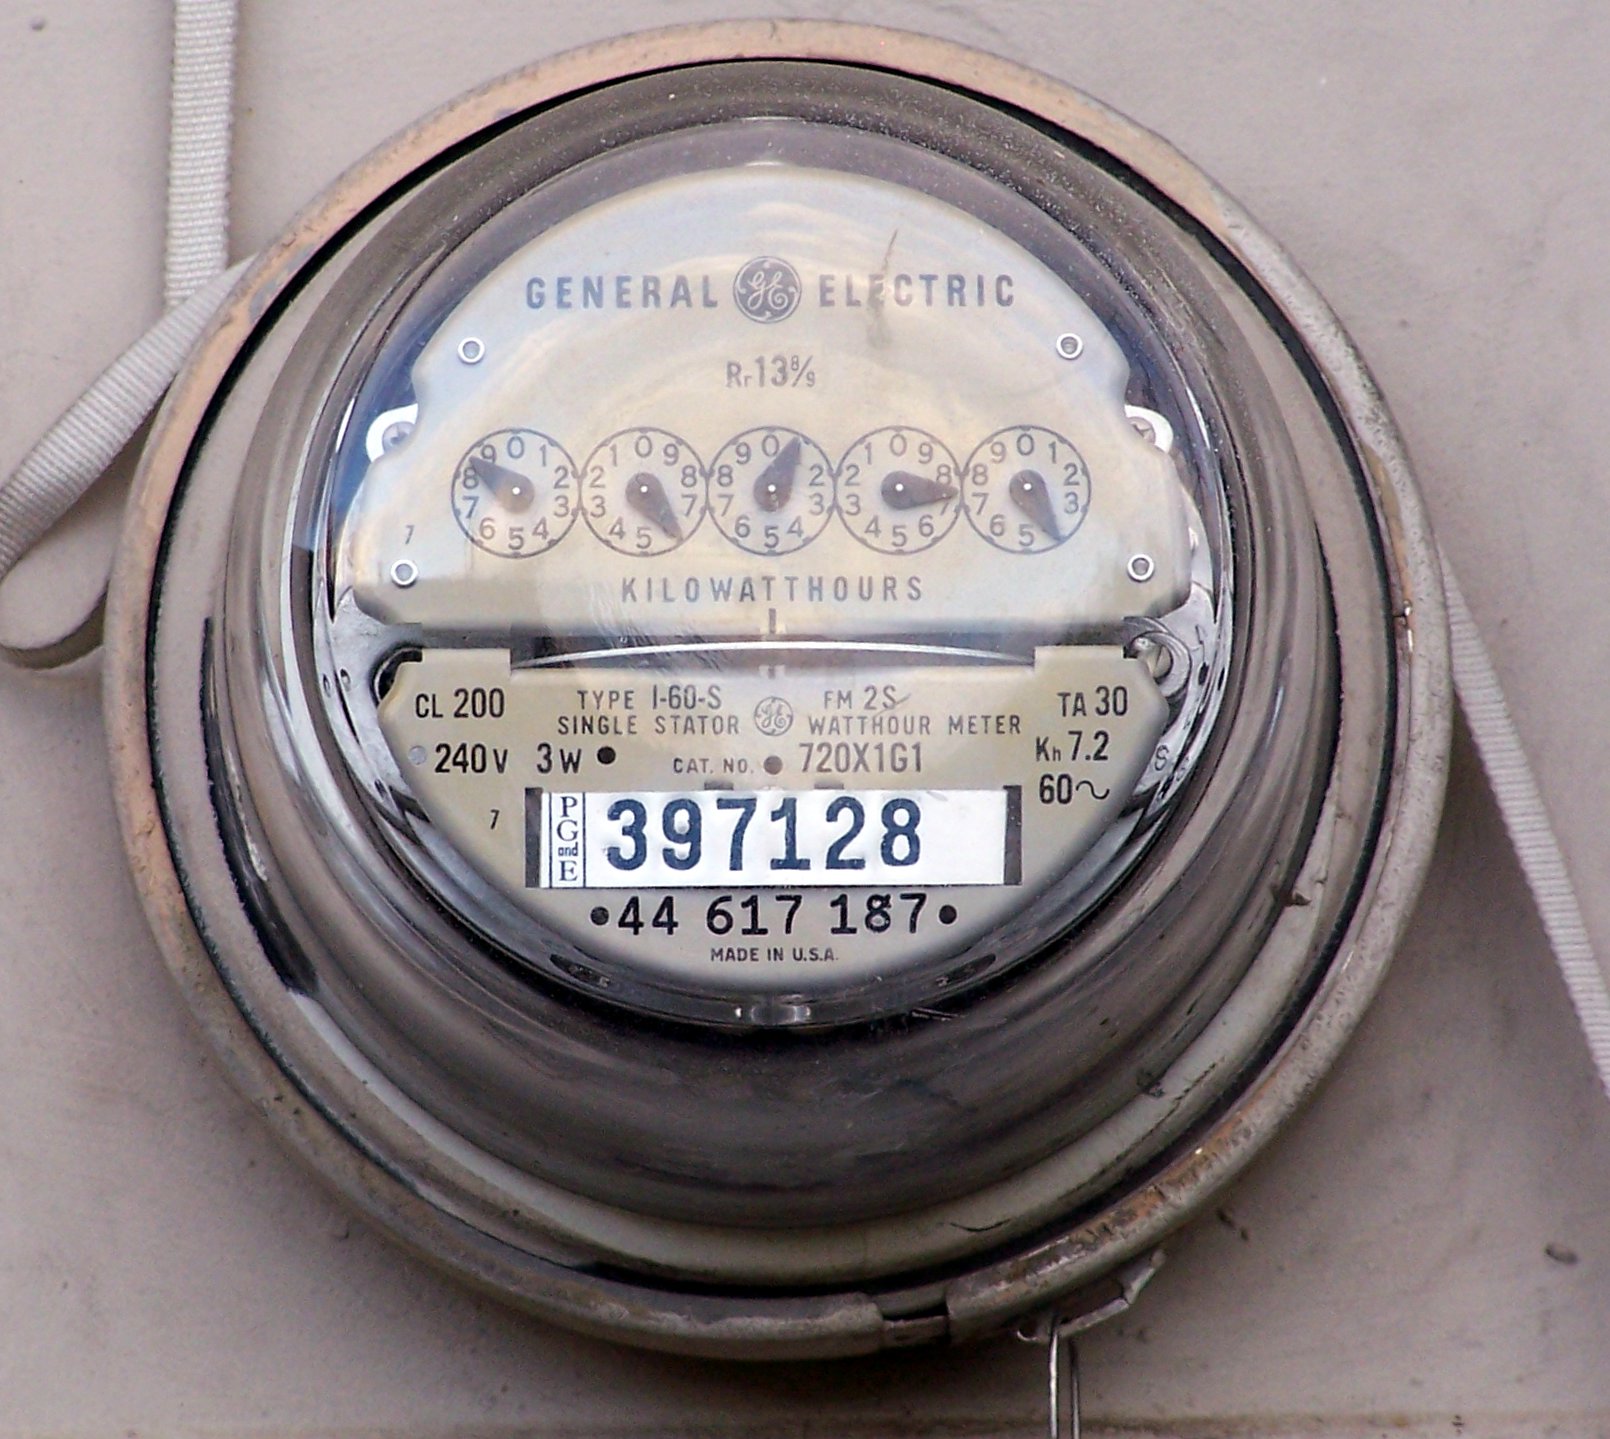
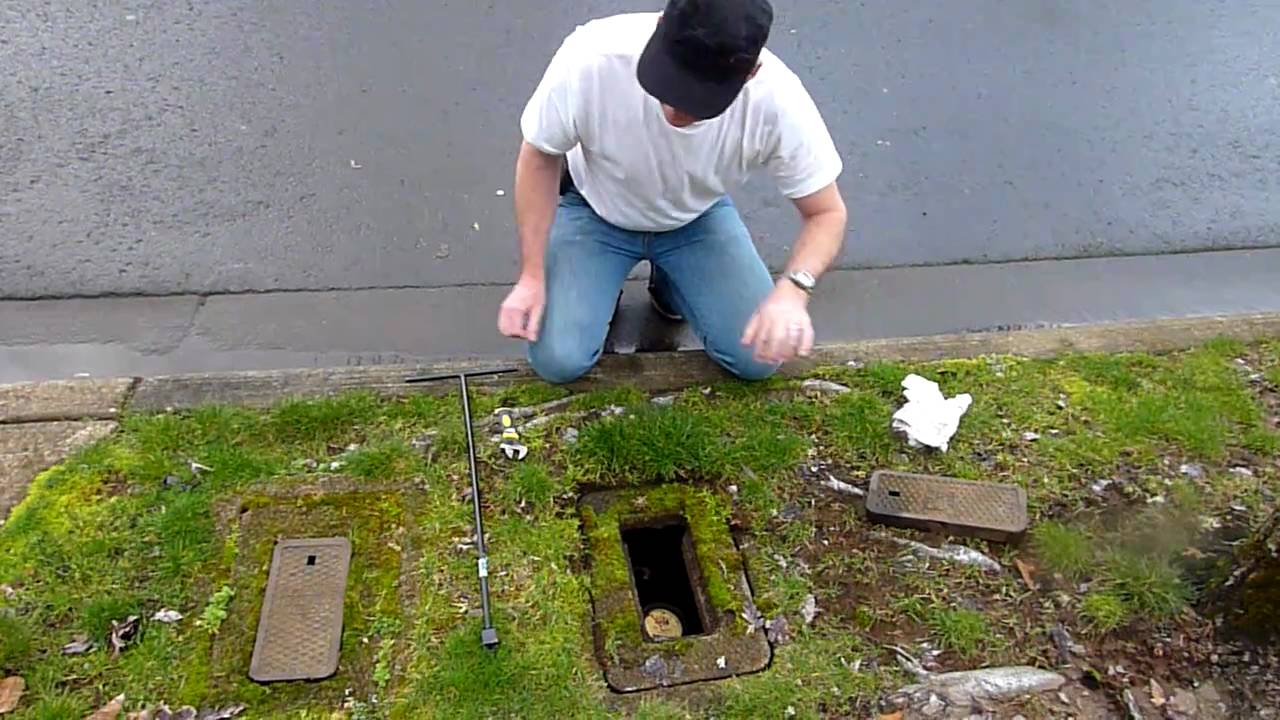
1. Locate the water meter.
The first step in locating the water shutoff valve is to find the water meter.
On most houses this is where the shutoff valve will be located.
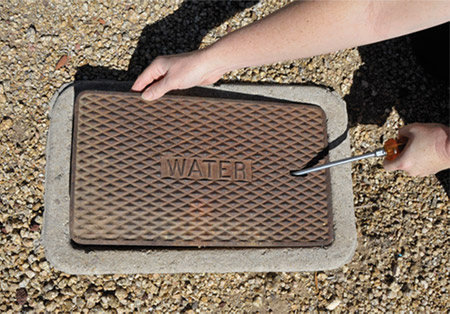
For most people in our association, the water meter will be located outside, usually in a little box that is near the front curb.
2. Identify the knobs.
When you have found the water meter take a look and see if you can find the pipe that leads into it, and the one that leads out of it.
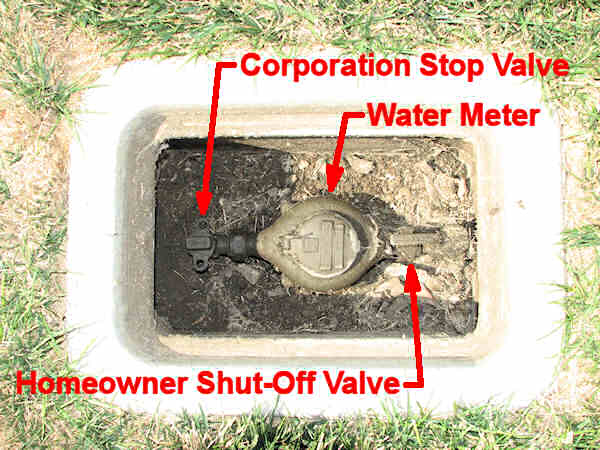
Both of these pipes will have a knob attached to them.
One of the pipes is the water supply that comes into the house from the city, to be read by the meter.
The other pipe is the one that heads towards the house.
3. Turn the correct knob.
Locate the knob that is attached to the pipe that is leading towards the house from the street.
This will be the one that is on the pipe that is between the meter box and the street.
Turn the knob until the water stops flowing.
This will stop the water from flowing towards your house, and stop the bill from getting higher at the same time.
4. Test, and do your work.
Now that you have the water shut off, go ahead and test to make sure that you really do have the water turned off.
You do this simply by going into the home, and turning the water on.
If you did everything right, the water will run for a moment or two, and then stop.
Once the water does stop go ahead and do the work that you needed to have done.
5. Restart the water.
After you have completed the work that was needed, go back out to where the valve was located and turn the water back on.
Make sure that you turn the same knob that you used to turn the water off, otherwise you are simply turning the water off again, and you can easily get confused.
Video help?
https://www.youtube.com/watch?v=gBUGCBLPERc
https://www.youtube.com/watch?v=RvE6n7rTGnM
https://www.youtube.com/watch?v=zInC9ivYt2Q
____________________________

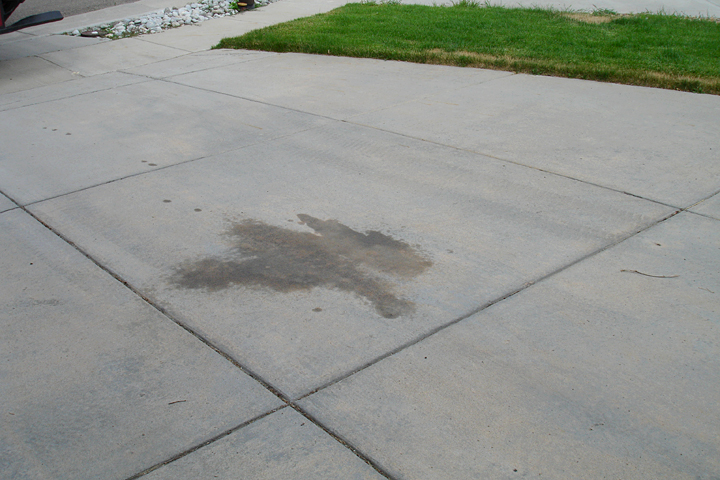
A clean driveway can be a great asset to the curb appeal of any house...
...and rust spots often slip by and deface the entire slab.
These can be caused by some fertilizers or perhaps metal particles from your car. In addition, if you have a concrete driveway, there may be rebar in it which can also create rust spots.
Depending on what your driveway is made of, here are a few suggestions for getting rid of the orange stains.
Concrete slabs or pavers can both be cleaned the same way, and you may want to start with the more gentle methods, and work your way up to the nasty stuff.
1. Lemon juice directly on the stain, with a little scrubbing and some sunshine, can help to lighten the area.
This is a mild solution and will work best on fresh stains in very sunny areas.
Squeeze the juice from a lemon, as much as needed, to cover the spot.
With a stiff wire brush scrub, run in the lemon juice for a few minutes to ensure the juice is penetrating the stain.
Let is sit in the sun for natural bleaching.
Rinse the spot with a hose once the sun is no longer touching the area.
Repeat this as many times as needed to return the stain to the right color.
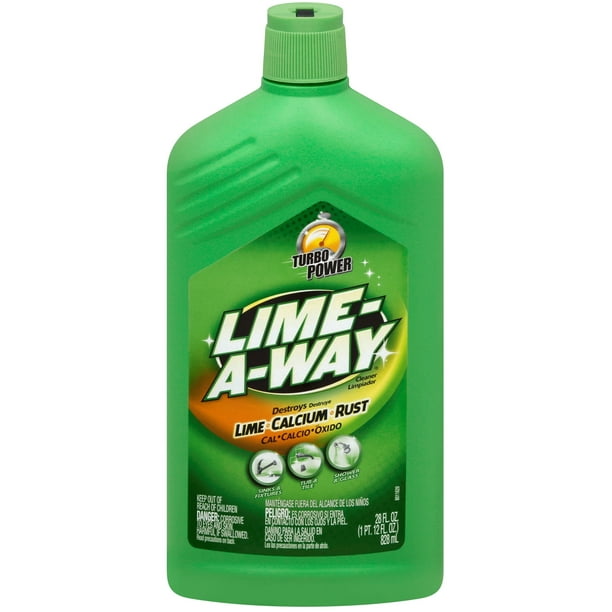
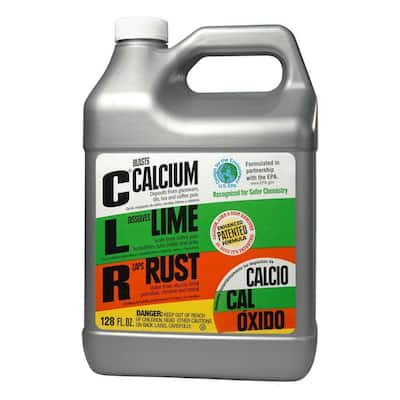
2. Commercial rust removers can be found almost anywhere.
You can try the spray kind, like CLR, applied directly to the stain. Let it sit overnight before rinsing thoroughly.
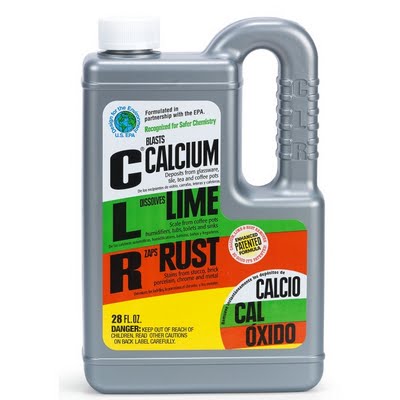
This can work to remove larger or darker stains.
There are also rust removers made for use on concrete, like Concrete Rust Remover.

Read and follow the instructions carefully when using these types of products to get the best result.
3. Muratic acid and other acidic cleaners should be a last result after exhausting your other options.
Because you are handling an acid, you need to make sure you are protecting yourself from any injury.

Gloves, goggles, and at least a mask if not a respirator, should be worn when you apply to and rinse this from your driveway.
Cover the affected area with the muratic acid, being careful not to get any on the unstained surface.
Let the acid sit for a short time, then rinse it off with a hose or a pressure washer.
This will lighten any area that is applied.
If you leave it on too long, you will have a light spot on your driveway in place of the rust stain.
You can use it on your entire driveway to avoid this problem.
Asphalt driveways can get rust stains as well, and will benefit from a few of the same methods as concrete.
1. Rust removers can be used on asphalt as well in the same manner as the concrete, but be prepared to repeat the process a few times to get the stain to lift.
2. Acids will make a mess of asphalt, so you want to stay away from them as a stain lifter.
You can use a little amount of gasoline to soften the stained area and then work it out using a wire brush.
Be careful that you do not over brush and create a divot in your driveway.
The asphalt will harden as it dries so let it sit for a long while without disturbing it.
3. Resealing the area or the entire driveway with an asphalt sealer, which you can pick up at hardware store, will hide any stains and fill in any cracks.
Just roll on the sealer with a roller and let it set as directed by the instructions.
If you want to fill in cracks while you are doing this, refer to the instructions for the product.
Be careful when using any of these methods that you do not harm you plants or lawn by applying the products to them.
Getting rid of stains on your driveway can make a big difference in how the outside of your house looks.
Give these a try and it can give your home a "facelift" to restore the clean look of a new house.
https://www.youtube.com/watch?v=ZNuJbaRRm2s
https://www.youtube.com/watch?v=R7pXfUfr-XI
Mr. Fix-It
___________________________

Fixing a Wobbly Chair
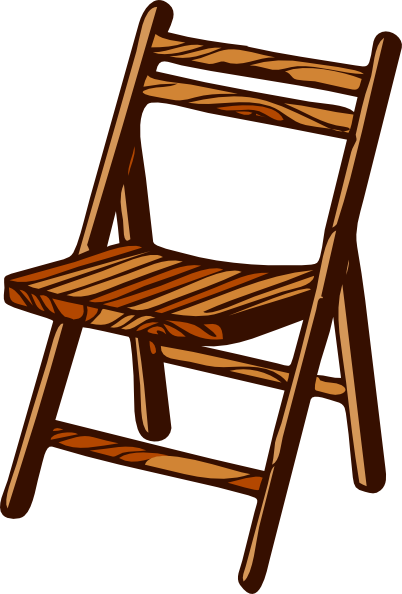
Have you ever noticed just how easy it is for wooden chairs to become loose over time? For some reason these types of chairs will become wobbly, creaky, and generally rickety.
Tightening a loose chair isn't particularly difficult, and is often a task that can be completed with only a few minutes of work. Just use these simple methods, and you will have a perfectly working chair again in almost no time at all.
Joints
Quite often the easiest way to tighten a loose chair joint is to simply use a bit of glue. Simply remove the joint a bit and apply a bit of glue to the joint. When you have done that, put the joint back together, and then use a belt that has been carefully tightened to hold it in place as the glue dries.
Another step that you could do to help with this is to actually use a screw, or angle brace of some sort, that will be placed in an inconspicuous location to help hold the joint together.
When both glue and screw are used, you will have a tight hold on the joints.
Leg...Spindles...Rungs
Another part that often becomes loose on chairs are the decorative spindles, legs, and rungs that you can see on most styles of chairs.
When these types of items are loosened, the easiest method for tightening them is to apply a small screw that can be hidden.
Simply drive the screw from the underside, or other location that is out of sight, through the chair and into the decoration.
Be careful that you use the narrowest possible screw for this job, or you may run the risk of splitting the wood.
In addition, if you run the screw in and then remove it, you can place a drop or two of wood glue, and use that to strengthen the bond between the wood parts.
Structural Parts
Structural parts can often be repaired in much the same manner as described above; however, you will typically need to be driving the screw from outside.
To hid this, you will need to first attach the screw as described above, but with the head recessed into the wood a bit.
Find a wood dowel that will match the color of the wooden chair, or some paint that you can apply.
Cut a little bit of the dowel off so that it will fit cleanly into the hole left behind.
Smear some wood glue over the sides of the dowel plug that will be going into the hole, and then place the plug into the hole.
Wrap the dowel with wax paper (glue won't stick to wax paper), and then wrap the paper tightly with string to hold it in place.
Allow the glue to dry completely before you remove the wax paper.
These methods are designed to work on the most commonly loosened parts of a wooden chair....as long as the break isn't too severe. If that is the case, you may need to take the item to a professional.
We have some videos.
https://www.youtube.com/watch?v=xBkce8meWkU
https://www.youtube.com/watch?v=QGeInlnQ-Rs
https://www.youtube.com/watch?v=D6bcKHtX5-w
Mr. Fix-It
_____________________________
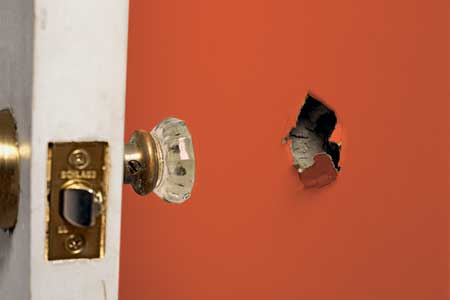
Have you ever been faced with the problem of repairing a hole that was put into your wall?
Many people believe that for the large holes, this is a complicated and difficult task. Luckily, this is not something that is as difficult as many people may think. All that someone needs to do is gather a few items, and have some time that can be devoted to the task.
Items needed:
Sandpaper
Adhesive fiberglass tape
Drywall compound (also known as "mud")
Sheetrock
Hair dryer (optional)
Paint (matched to existing paint)
Paint brush
Sanding block, or sanding tool
Drywall saw or knife
Drywall screws
Screwdriver
After you have completed gathering these items, use the following checklist and you are going to be able to have a wall that is as good as new.
1. Make sure that the hole in the sheetrock is cleaned and prepped for repair.
Use a drywall saw or knife to remove the damaged portion of wall.
(In fact, you could or should probably do this step before beginning anything else, since you could take a small piece of the painted sheetrock with you to find matching paint.)
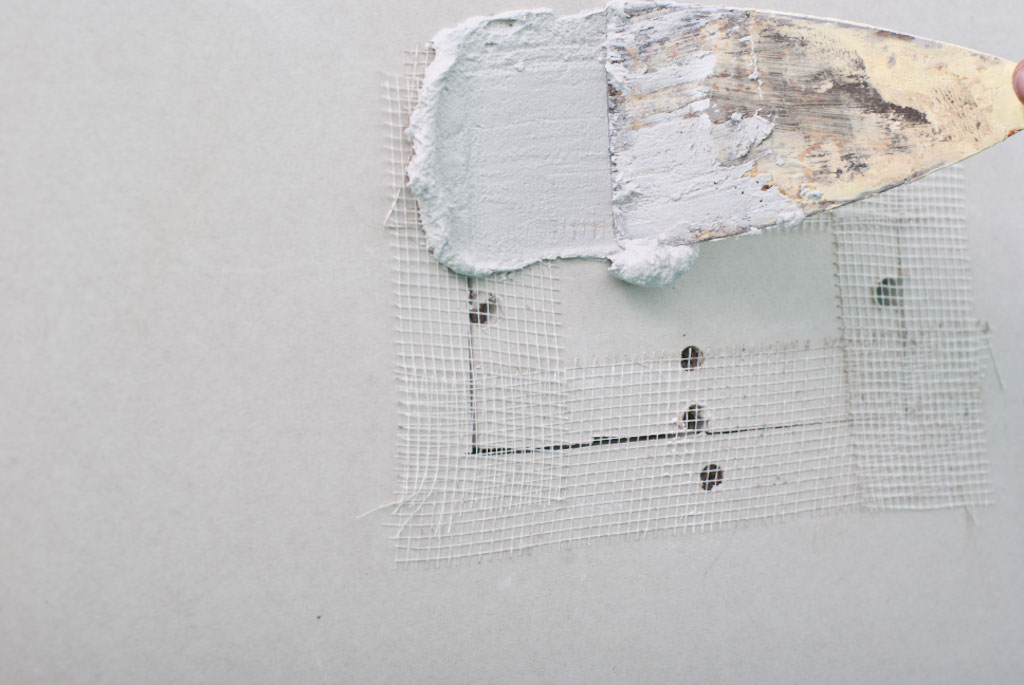
2. Take a piece of the sheetrock and screw the backing board (the scrap board).
The board is going to act as a support structure for the patch.

Apply some of the adhesive to the board to help keep it in place as your patch.
3. After you have the patch in place, take some of your "mud" and apply a coat over the entire patch, and about 5 to 7 inches past the edges to help provide extra support to the patch.
Apply this coat in as even of a manner as possible.
After you have done this, you are going to need to wait for the mud to dry completely, which can take up to twelve hours.
One method that you can use to speed this up, you can use that hair dryer mentioned in the items list.
Considering that this is going to dry the mud much quicker, you can be ready to go to the next step in as little as 30 minutes.
4. Take some of the sandpaper and your sanding tool to smooth out the mud.
You want the area as smooth as possible prior to painting.

If you have found yourself with spots that are thinned out too much, simply repeat step three and four as needed.
5. Paint your wall.
You can now paint your wall, and if you have done all the steps properly, then you are not going to be able to see any of the damaged wall.
All that you have left to do now is to clean up.
Need a video?
https://www.youtube.com/watch?v=lj7YK1lIRUM
https://www.youtube.com/watch?v=zeC59Ck31uc
Mr. Fix-It
_____________________________
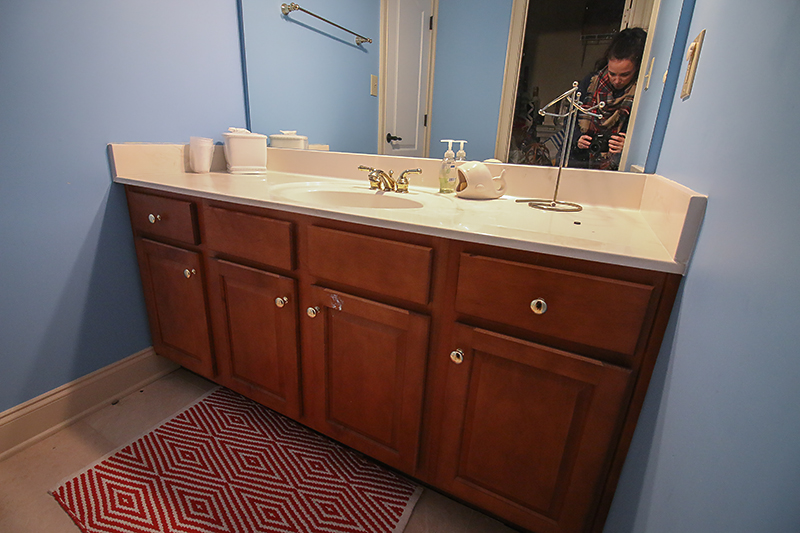

Refinishing bathroom cabinets is probably the greatest money saving alternatives available.
This is a project that anyone interested in doing their own remodeling project can handle.
All that anyone needs to do is have a little patience, be willing to get a little dirty and that you have the proper materials.
Materials needed:
Tarps
Finish
Stain, sealer, varnish or lacquer (your choice)
Paintbrush
Primer ( use a product like Liquid Sand)
Degreaser, cleanser
Sand paper
Soft sponge or rags
New hardware
Steps:
Prepare
Begin your refinishing project by selecting a work area.
You want to use an area that is well ventilated and that can be kept dust free.
One of the best locations to use is your garage. Make sure that you have laid out the tarps so that you don't create any stains.
Identify
Once you have decided on where your work space location, you now need to diagnose what type of finishing agent was used on your cabinets. Chances are some it is going to be something along the lines of a shellac, varnish or lacquer. It's also possible that there was a stain used.
Remove
After you have determined what type of finishing agent was used, you need to remove the cabinetry from the bathroom.
Begin with the doors, and then move onto the main body.
Make sure that you have placed all the pieces in one location so that you don't lose anything to be able to put it all together again.
Considering how difficult it can be to remove the actual body, you might want to just leave the body in place and strip it in place.
Clean
After you have removed all the pieces, you need to go ahead and clean everything thoroughly. Try using such things as degreaser, rags and sponges.
Remove as much of the dirt and grime as you can, and then allow everything to dry thoroughly before proceeding.
Strip
Once you have cleaned and dried the pieces, go ahead and strip the old finish or varnish.
Before proceeding, you want to make sure that you have correctly identified the finish that was used, because not all stripping agents are going to work equally well in this situation.
Refinish
After you have stripped the old finish or varnish, go ahead and use the primer.
Just like when you paint a car, when you paint or refinish wood you want to use a primer. In part this is to help bond the stain, varnish or finish to the wood, but also to help make sure that everything is absorbed at the same speed.
Allow the primer to thoroughly dry before applying the stain.
Once the primer is dried, take some of the sandpaper, and very lightly—using just enough pressure to hold the paper to the surface—smooth out any ridges.
Now, go ahead and paint the stain or finish onto the wood.
Allow a minimum of 15 minutes to pass between coats, to ensure you have not missed any parts, and that you get the color you are looking for.
Clean
Once everything is refinished, go ahead and reassemble your cabinets using the new hardware you picked out.
Clean everything up as you go along.
That's all there's to it. You are now finished.
Need some video help?
Part One
https://www.youtube.com/watch?v=KklkN81WShc
Part Two
https://www.youtube.com/watch?v=WvFdOBSOF5E
Part Three
https://www.youtube.com/watch?v=3DLYs0wwixU
Mr. Fix-It
_____________________________
Does Your Door Trim Need Repair Help ?

Have you ever noticed how it always seems like the doors to a home are among the first things that need repairing? Usually this is due to the sheer volume of wear and tear that we put on these items.
With all the things that go through a door, it only stands to reason that the door trim will end up taking most of the damage.
Luckily, repairing door trim is a fairly easy process.
All you need to do is follow these step by step instructions, and you will soon have your door trim looking brand spanking new again.
Materials
Hammer
Hand saw
Finishing nails (usually #12 or #6)
Small pry bar
Camera
Wood stain, paint, or sealer
Paint brush
Sand paper
Paper
Measuring tape
Ruler
Pencil
Handheld power sander.
Procedure:
1. Measure
The first step in repairing your door trim would be to measure the existing trim. This will allow you to know exactly how much you will to purchase.
Simply use your measuring tape to measure the existing door trim with your measuring tape, and write down the answers.
Measure everything at least two times in order to ensure that you get the correct measurements.
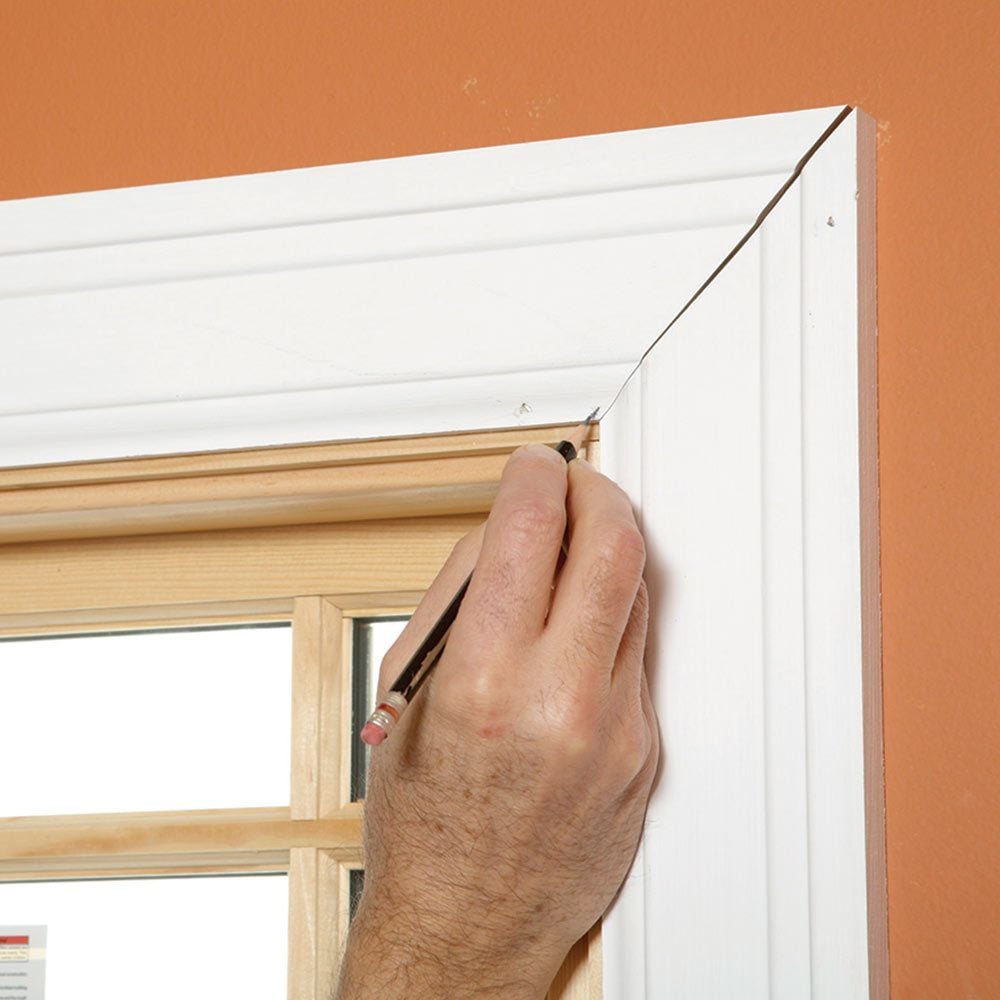
2. Match
If you like your current style of door trim, and would like to match it then take a picture of the trim.
Take this picture along with you to your local home improvement store, and see if they have any trim that will match it.
Have the home improvement store cut the trim to your specification, and if at all possible see if they can create a miter cut where the pieces will meet.
While you are at the home improvement store be sure that you also purchase some paint, stain, or sealer for your wood.
Make sure that you purchase enough so that you can cover the entire pieces.
2. Remove
Once you get home with your new pieces of door trim, it is time to remove the old damaged pieces.
Begin by removing the door from the door frame, and then removing the old door trim.
When removing the door trim, be sure that you do it carefully so that you do not damage the frame itself.
3. Replace
After having removed all the trim, it is time to replace everything.
Carefully line everything up as straight as possible.
If you have one, use a carpenter's level to ensure that everything is nice and straight.
Use a hammer and the finishing nails to attach the trim to the frame.
If necessary take your miter saw or handsaw and ensure that everything is trimmed properly so there are no gaps in the trim.
4. Stain, seal, or paint
Finally, once you have your trim in place it is time to stain, seal, or paint it.
Before you do this though, take some time to sand the wood so everything is nice and smooth, and to remove any existing sealant, paint, or stain that may have been on the undamaged portions of door trim.
Once everything has been sanded so that it is smooth to the touch, go ahead and begin applying your stain, paint or sealer.
Be sure that you follow the direction properly, and allow to dry completely before replacing your door.
Need some video help?
https://www.youtube.com/watch?v=urgXb6mRmmM
https://www.youtube.com/watch?v=h2iFZkjUu7U
Mr. Fix-It
_______________________

An improperly caulked seam is something that leads to many of the leaks a homeowner is faced with.
Re-caulking the seals and joints of your tub annually is something that can, and will greatly reduce the chances of any leaks that may crop up.
Prior to beginning any home repair project, the first step is to gather all of the materials needed. To accomplish this home repair project, you are going to need the following:
Tube of caulking

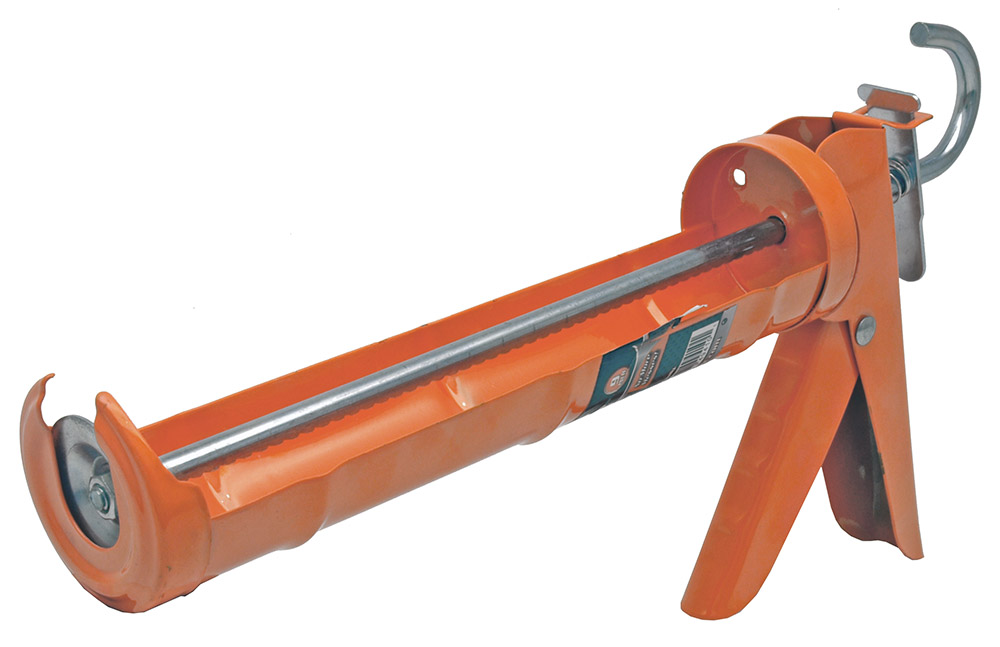
Caulking gun
(if required for the tube of caulking you selected)
Multi-purpose tool or a knife

Damp rags
Caulking can come in several different types of containers.
For small caulking jobs, you may be able to get by with a small tube that you can squeeze without a caulking gun. For larger jobs, you'll want to get larger tubes of caulking, which always require a caulking gun. These aren't expensive, and your local home improvement store can help you get the right one for your caulk tubes.
To begin the project, you'll need to remove all of the old caulking that is associated where the leak is located.
In order to make sure that all of the caulking has been removed, use the knife or multi-tool to remove the caulking from the area.
Be careful, however, that you don't gouge or damage the surface of the tub itself or the wall.
When you have removed as much of caulking as you can with your hands and the tools, then use your damp cloths to wash off as much of the caulking residue as you can. This is going to ensure that you get as much of the caulking as possible, while cleaning the area and preparing it for the re-caulking.
You are now ready to apply the new caulking.
If you are using a caulking gun, insert the tube into the gun.
(The caulking gun provides the proper amount of constant pressure necessary to apply the caulking evenly and smoothly.)
Use your knife to cut the tip of the caulk tube so you have a hole about 1/4-inch in diameter. This is where the caulk "bead" is formed as the caulk leaves the tube.
Place the tip of the caulk tube into the corner formed by the tub and the wall, at one end of where you just removed the old caulking.
Make sure that the tube is at an angle.
Squeeze the tube or pull the trigger on the caulking gun and the caulk should start to come out.
Keep the tip of the tube in contact with the corner and slowly move the tube so that you "lead" the caulk down the seam.
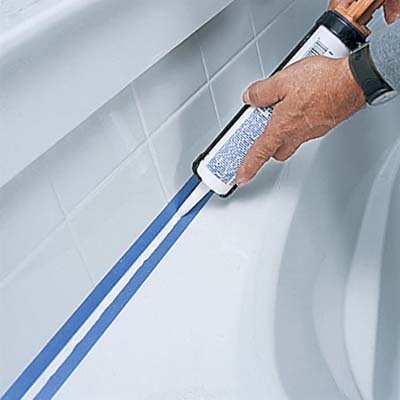
As you apply the caulk, make sure you use a continuous and steady stream of the material.
When the caulk has been completely applied to the seam, use one of the damp cloths to wipe up any excess caulking that may be there.
Be aware that you need to let the caulk completely dry before using the tub again.
The best possible way of doing this is to let the caulk dry overnight at a minimum.
Need a video?
https://www.youtube.com/watch?v=k0j5jYy3qHg
______________
Saving Money by Installing as Efficient Showerhead

Have you ever noticed how the price of water bills tend to always go up, and never really down?
Instead of just going along with this, why not look for ways to lower your water bill?
One very effective method for doing that would be to install a more water efficient showerhead.
For you "engineers" out there...here's how they work !

Good thing that installing a water efficient showerhead is not only an easy task, but one that even the most inexperienced do it yourself enthusiast can accomplish in a single afternoon.
Simply follow these directions to get the job done quickly and efficiently.
Items needed:
Plastic bucket (1 gallon sized)
Stopwatch, or wristwatch with second counter
Water efficient showerhead
Appropriate sized adjustable wrench (typically 12 inches)
Teflon, or silicone, thread sealing tape
Procedure:
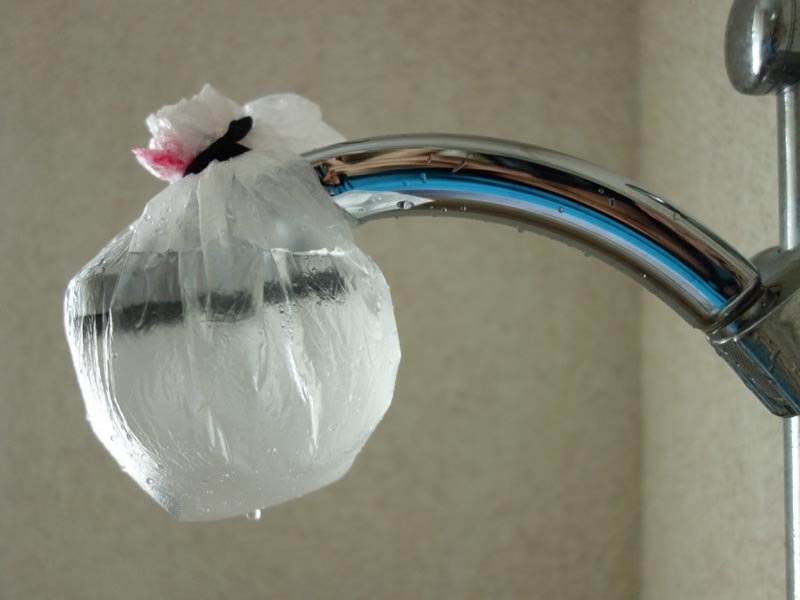
1. Check your water flow.
Before you can install a water efficient showerhead, you should check to see if you actually need one.
Turn the water of your shower on, and then place a 1 gallon bucket under the water flow.
Allow the timer to run until you have filled up the bucket.
Divide the number 60 by the total number of seconds it took to fill up the bucket, and you will have your total water flow, which is measured as gallons per minute (gpm).
2. Get the appropriate shower head.
Now that you know your gpm, output, you can begin thinking about getting the appropriate water efficient showerhead.
Typically you will only need to get a water efficient showerhead that filled your bucket in 20 seconds or less.
When looking at the packaging of the potential showerheads, you need to first look at the gpm rating.
Ideally you want one that is at 2.5 gpm or less.
After you have found the appropriate speed ratings, you can begin looking at other features as adjustable showerheads, pulsating, fine spray, wands, and so forth.
3. Remove the old head.
When you get home, you can begin removing the old showerhead.
All you need to do is grab your adjustable wrench and hold onto the shower pipe (firmly) so that you don't accidentally damage it.
Set the adjustable wrench to the appropriate size, and begin loosening the head carefully. You will want to use the flat sides of the shower head to do this, and continue turning until you have completely removed the head.
4. Remove old sealing tape.
Once you have the showerhead removed, you will need to remove the old sealing tape from the threads of the shower pipe.
If the tape doesn't want to come off easily, you may need to use a scrubbie to help remove it.
You will want all the sealant tape removed before you apply the new tape to the threads.
5. Apply new sealing tape.
After you have removed all of the old tape you can begin applying the new sealing tape.
Start at the open end of the pipe, and work your way backwards to cover all the threads.
When doing this, you will want to wrap the tape clockwise, overlapping the tape half the width so that you get a nice tight seal.
You should only have to apply the tape once until you have covered all the threads.
6. Thread the new shower head.
Remove the new showerhead from the packaging, and begin threading it onto the shower pipe.
Turn the showerhead carefully with one hand, while you hold the shower pipe with your other.
Continue to turn the showerhead by hand until it won't turn any more, making sure that you are turning it clockwise so you don't accidentally cross thread the showerhead.
7. Check your work.
Once you have the showerhead hand tight on the shower water pipe, you will want to check your work and make sure that there are no leaks.
This means that you will want to turn the water on.
You only need to worry about a leak if you see water dripping from the top of the shower head.
If you do see a leak, tighten the showerhead with your adjustable wrench by turning it 1/4 turn, and repeat your test. Continue to tighten and test in this manner until you no longer see any leaks.
Now that you have your new water efficient showerhead installed, you should notice a decrease in your monthly water bill.
Keep your old water bill, and compare it to your current one.
If there still isn't any change you may want to have a look at the rest of your pipes, or even install other water efficient items throughout your home.
Need a video?
https://www.youtube.com/watch?v=-9yq1VuDGHQ
Fix-It
______________

While marble is usually a fairly easy material to keep clean, there are times when there are going to be some fairly stubborn, or difficult stains.
However...there are two ways that you can go about cleaning these kinds of stains from your marble.
Specialized Cleaners
There are some specialized cleaners available that you can use to clean stubborn marble stains.
One example of such a cleaner is a product called Motsenbockers's Lift Off...
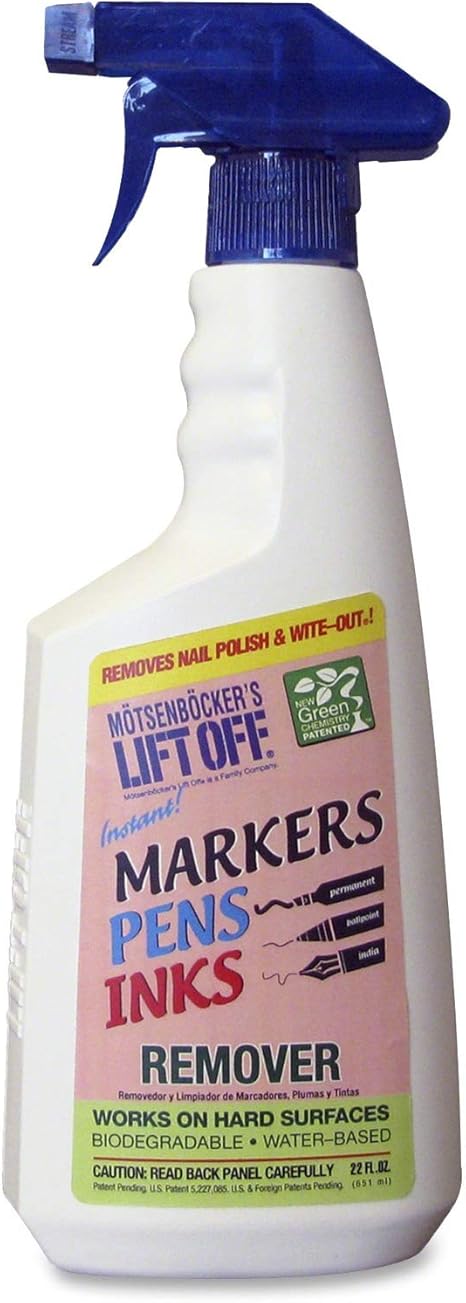
...which has been specially formulated to deal with strong or stubborn stains without many of the problems that other cleaners have.
Other cleaners that you may wish to consider using are ones that have been specifically formulated for cleaning marble. While more expensive than general cleaners, they will most likely get off any stubborn marble stains that you may be faced with.
Simply be sure that you follow the manufacturers directions closely.
General Cleaners
With general cleaners, you will need to use more elbow grease.
In order to get your marble really clean, you will need to grab a timer, and an adjustable nozzle spray bottle filled with some filtered or de-mineralized water.
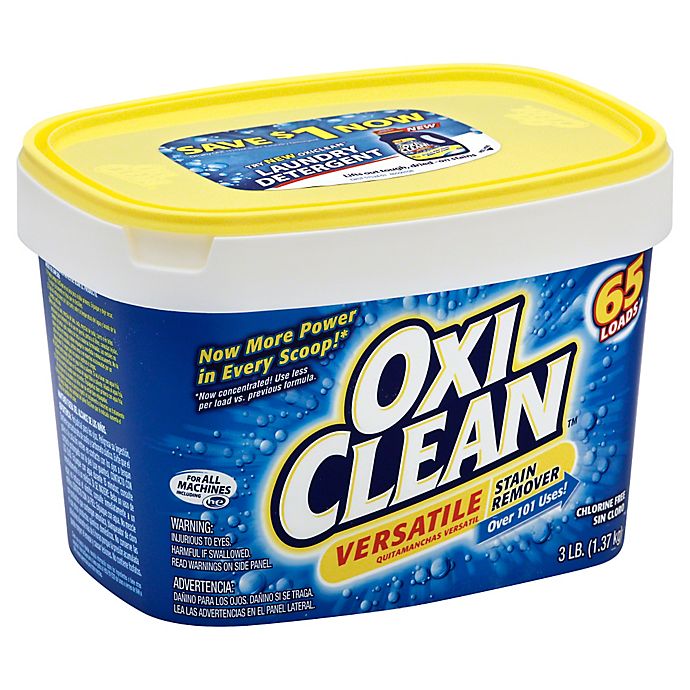
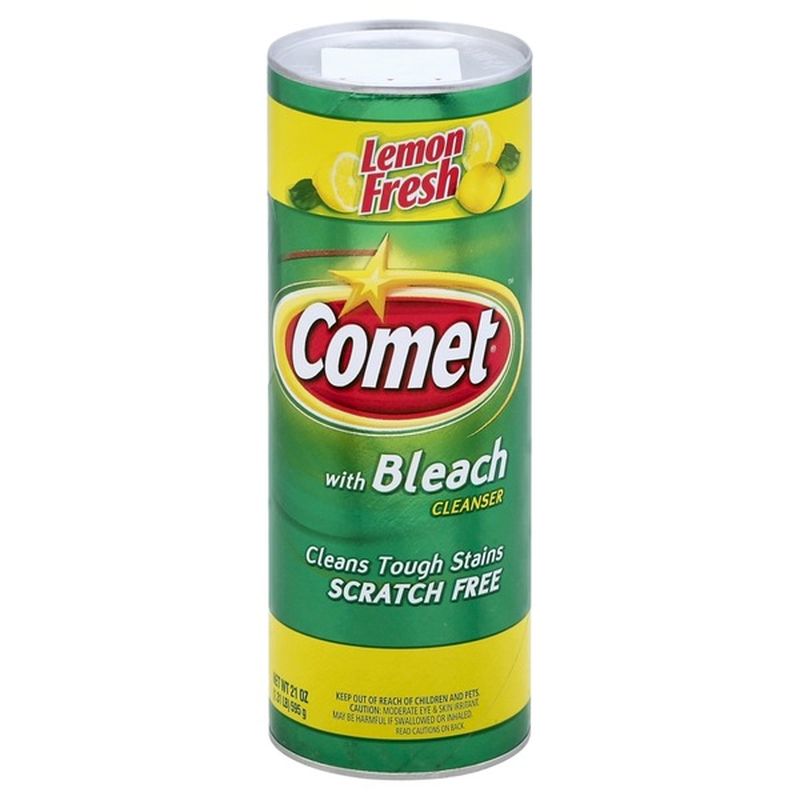
Use powdered cleanser (such as OxyClean or Comet), and bleach to make some slurry.

Mix together the powdered cleanser and bleach, using equal amounts of both materials.
Set your timer to 45 minutes, and then put enough of the slurry onto your stain to cover it to a depth of around 3/8 inch.
Start your timer, and periodically mist the slurry till the timer stops.
The reason for this is that the slurry will not work very well if it is allowed to totally dry, so it will need to remain moist.
Once the 45 minutes has passed, rinse the area thoroughly with water.
If the stain has not been completely removed, you can repeat the process.
Another option is to make the slurry once again, cover the stain with it, and then cover the slurry with plastic, and then a towel and allow everything to sit overnight.
Be aware that you should keep your work area well ventilated since the cleaner will usually begin bubbling as it begins to dissolve the organic components of the stain.
If you happen to be sensitive to chemicals, then you may need to wear a mask to help protect from the scent.
When handling the slurry, make sure that you are also wearing some rubber gloves to help protect your skin from any irritation.
Some other ideas?
https://www.youtube.com/watch?v=hlJ44JdP2vk
https://www.youtube.com/watch?v=UxRlg_OuhHU
https://www.youtube.com/watch?v=eWxumwp1hOk
_____________________________

Furniture that you've had in your home for a while can become boring over time. Sometimes, you just want to decorate with something new and fresh but due to financial or other restraints you can't completely redecorate an area in your home.
You might think that you'll be stuck with the same boring set-up forever, but the truth is that it isn't difficult to make a change to your home's decor.
Although you might think you have to spring for brand new furniture to get a fresh and unique look, all you really need is to know how to change the furniture you already own.
If you have old chairs, tables, dressers, stools, shelves, or other pieces of furniture, you can give them new life with a coat of paint and a little time.
There are many options for potential designs, but odds are you are looking for a fun and unique way to personalize your furniture and add life to your home.
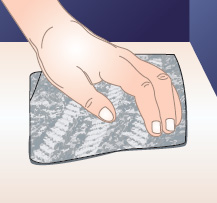
Sponge painting furniture is one option that will allow you to redecorate without over-doing it.
Using a sponge painting technique to decorate your furniture is a great way to help you change things a bit around your house.
Instead of seeing the same old shelves everyday, for instance, you can practically start over with a new-looking piece of furniture.
Another plus of sponge painting your furniture is that you can cover up scratches, marks, or imperfections in an old piece of furniture.
Because sponge painting adds a textured look to surfaces, most flaws will be easily hidden under the paint.
Sponge painting a piece of furniture is a fairly easy process.
First you will need to sand down the old paint on the surface, then clean the area.
Using paint colors of your choice, first apply a base coat that covers the whole piece, then allow to dry.
Next, apply another color (either a little lighter or a little darker than the base) over the base coat using a sea sponge.
The sponge creates an interesting effect that adds a textured look to the furniture and completely changes its appearance.
Once you have finished painting and you are happy with the result, apply a protective coat of sealant and allow to dry.
A new coat of paint applied in a fun way can add life to your furniture and give your home an interesting new look.
Give this method a try on your old furniture and you might be pleasantly surprised.
How about a few video ideas?
https://www.youtube.com/watch?v=d56tl5FFN50
https://www.youtube.com/watch?v=chX3ychlWYk
https://www.youtube.com/watch?v=Tkf0sQ5IzW4
Mr. Fix-It
_____________________________
New Blinds....How to Hang Them

Lumber Sizes


Wood that has been planed and surfaces is referred to as dressed.
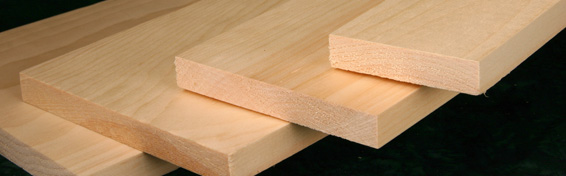
Typically nominal sized wood is slightly larger than the actual, dressed, measurements.

Nominal wood that is more than is two inches by whatever, and four inches by whatever are referred to as dimension lumber.
or
Don't Forget


1. Turn off the power.
3. Inspect the filter.
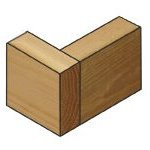
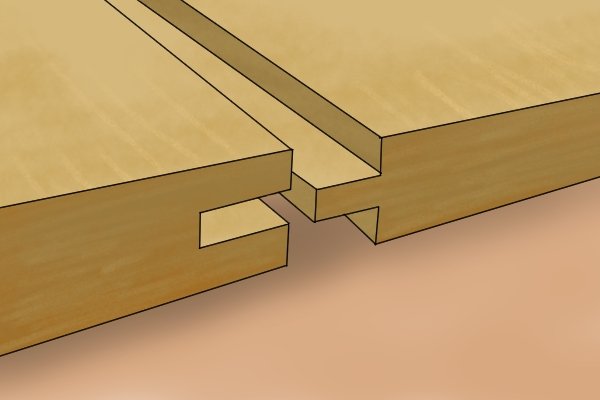
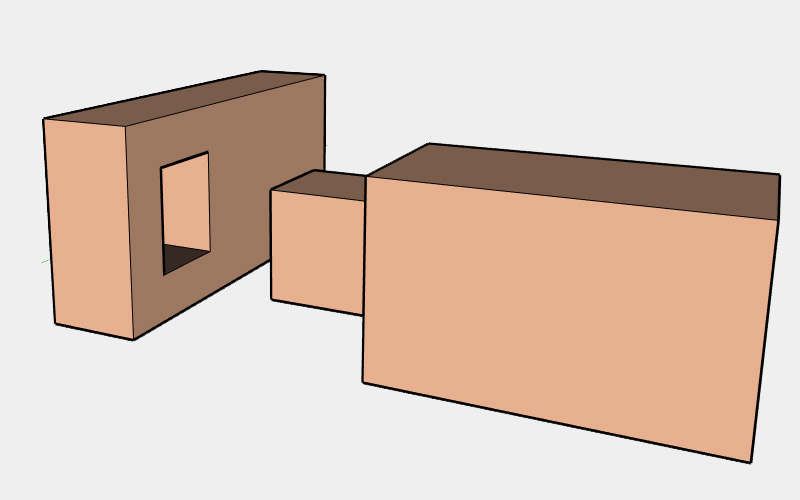
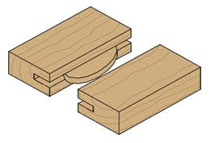
Starting a Woodworking Project ?

Knowing the different types of wood joints can be an exceptionally helpful bit of knowledge to have, particularly as you begin planning out your next woodworking project.


Fiber Material
Cover Texture


Anyone that has ever done a home painting job can tell you that the most expensive part of any painting project is the paint itself. This is particularly true when trying to find a custom paint color.
Mr. Fix-It
Got a fireplace?

A number of homes in our community have a gas fireplace. Though they are a beautiful addition to any home, most people don't realize that they need to be cleaned on a periodic basis for a number of reasons.
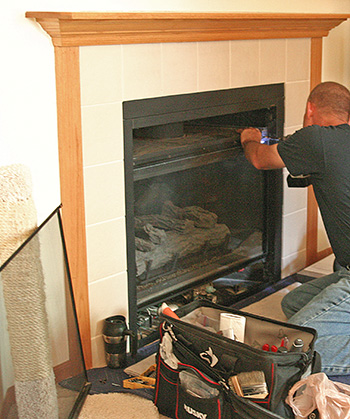

When you hire a professional to inspect, and clean, your gas fireplace be sure that you do a few things first.

While it is more expensive to hire a professional, you can be sure that you are getting quality work done, and that it has been done right.
Latex or Oil Based Paint


Beware of Scams


What is it ?
Where are they located ?


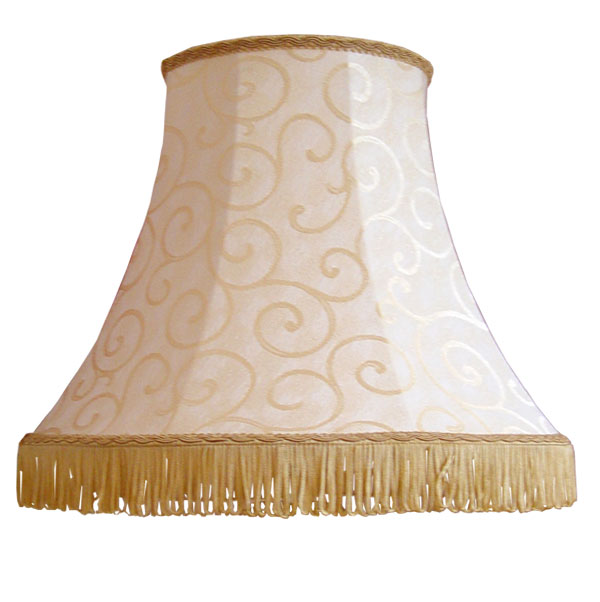
How to Repair a Lamp Shade
Latex & Oil Paint


Take the time available while you are waiting for the plumber to arrive to clean up as much of the mess as possible.
After all, while the plumber may be able to repair the pipes, they won't exactly clean up the mess that the bad pipes left behind.
Need more visual help?


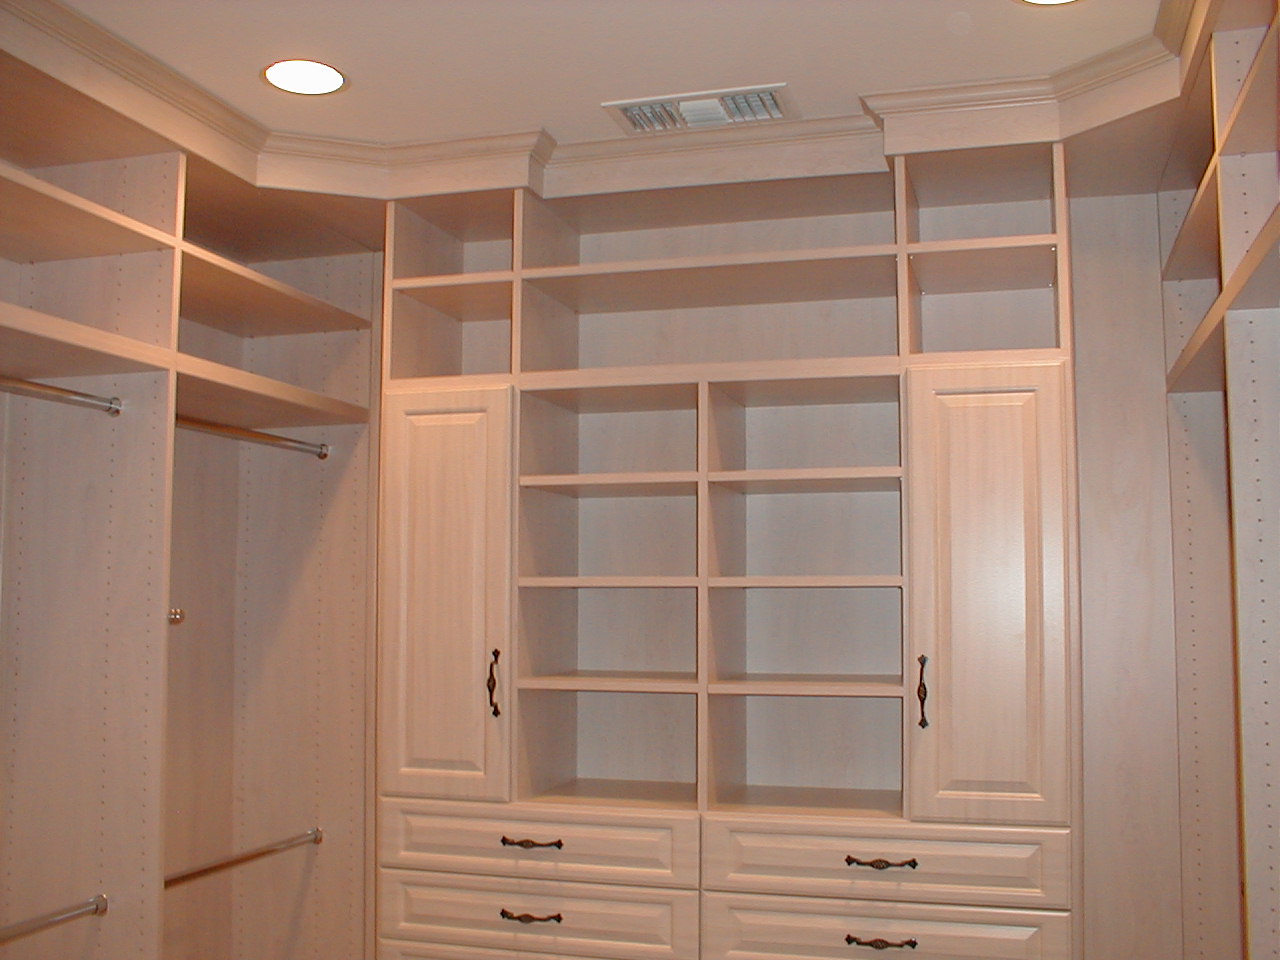
Have you ever had a dream of having your own custom closet?


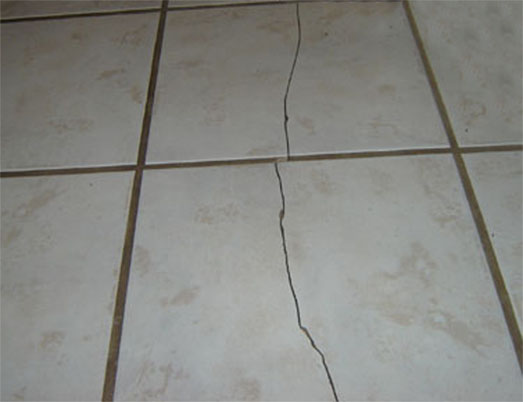
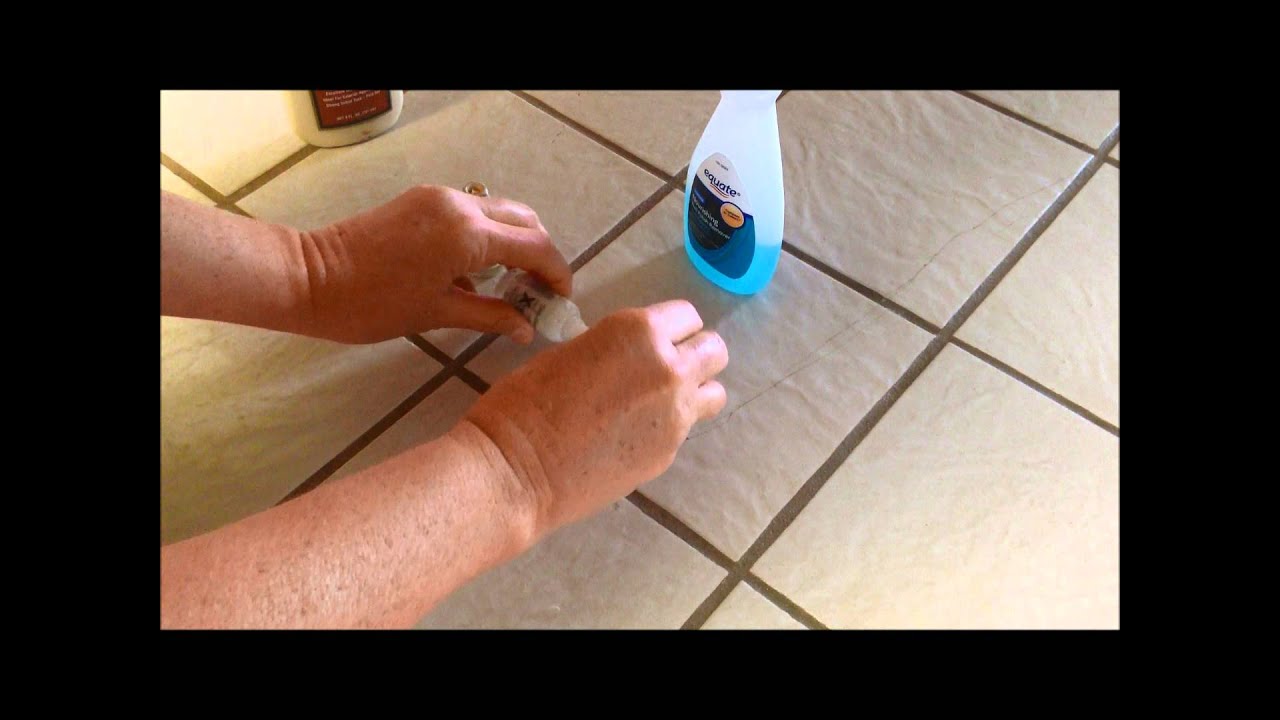
All anyone needs to do to fix a loose tile is a few items, and about an hour of your time.
Finding Your Shut Off Values


:max_bytes(150000):strip_icc()/residential-air-conditioning-units-556557331-580f81385f9b58564cee1e11.jpg)
Many of our 10 to 20 year old HVAC Units are failing because of the capacitor(s). They can die suddenly without warning.


_____________________________

Removing rust stains from concrete may seem a little difficult to do at first glance; however, when the proper steps are taken just about any rust stain can be removed from any concrete surface.
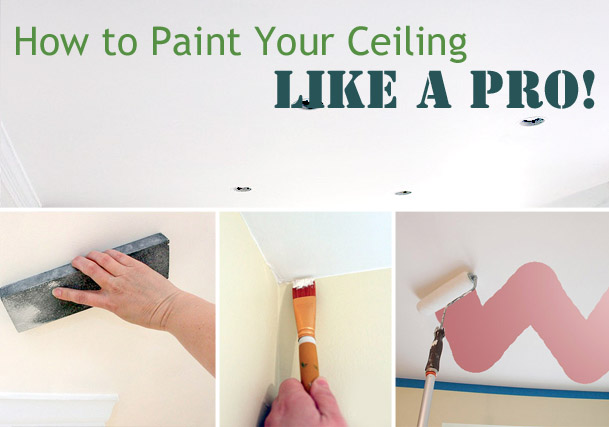
The "Art" of Painting

If you don't take the proper steps when painting near windows, you can easily find yourself with more work than you wanted. For example, if you would like to be able to open your windows again, there are a few precautions you will need to take.

HVAC is the most expensive mechanical item in your home to repair or replace.
Now is the time to start planning what you should do when the HVAC unit fails to keep you warm in winter, cool in summer, or is making strange noises.
Now that our homes in SCA are approaching 15 to 22 years old you can expect the HVAC to start to have failure, if they haven’t already.
The life expectancy of HVAC is 15 or more years for the air conditioner side and up to 30 years for the heating side.
Many times the HVAC with minor issues such as the thermostat, capacitor, fan motor, switch, etc. will cost a few dollars to repair.
I have always recommended replacing the defective part just like you would if the brakes failed in your car.

You don’t replace the car, you replace the brakes.
Many folks have already fallen victim to the HVAC Companies high pressure sales pitch to spend thousands of dollars to replace the entire system and all ducting within the first 15 years.

To me, replacing the ducting is a waste of money.
How much should you pay to replace the HVAC?
The cost can be broken down into size and efficiency.
The minimum requirement to replace you existing HVAC in our Nevada location is a 14 Seer for cooling and 90% efficiency to heating.
The higher the seer rating and efficiency the more to unit will cost.
Any additional cost should only relate to the HVAC equipment efficiency, not the labor to install.
I see no reason to install a more efficient unit than minimum required.
The size unit you need is based on BTU’s or Tonnage which relates to the area of your house to be conditioned.
A good way to estimate the cost to replace a HVAC unit:

One ton HVAC will condition about 500 square feet of your home.
One ton HVAC installed will cost about $1700 per ton.
For a 1800 sq ft home…divide 1800 by 500 multiplied by $1700 = $6120.
The material cost for this unit is about $3000, any amount over that is strictly labor, profit and overhead.
The HVAC system replacement should take less than 20 man hours to install.
If you have questions, email or text to discuss your situation and options…...it’s free!!!
(818) 207-1868 Text


Necessary Garage Upgrades


Getting Your Air Conditioning System


Before beginning any kind of A/C repair or inspection, be sure it’s powered off in order to prevent damages to any of its many parts. It’s also an important step for ensuring your personal safety, as air conditioner repair can sometimes be a tricky task.
Cleaning the Condenser

Professionals

The Foundation Assisting Seniors will install the filters for you at no cost.You purchase the filters and they will install. call them at 725-244-4200
ReplyDelete