Information Pages

Mr. Fix-It's World of Home Improvement


Forrest Fetherolf
Mr. Fix-It

Keeping an Eye on Roof Flashing
Can Save Big Bucks
 
 
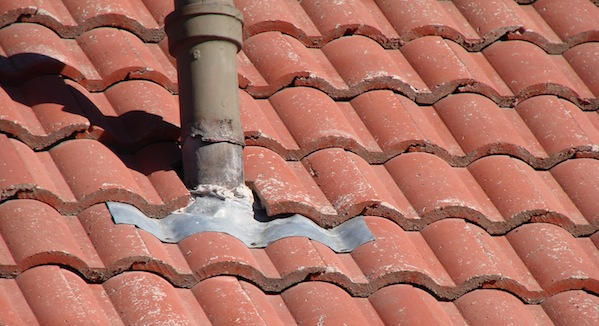
tile-vent-flashing.jpg (599×326)

If you have ever done any repair work on your roof, talked with a roofer, or simply walked around a home improvement store, then chances are you have heard the term roof flashing.

Let's answer a few common questions.

What is roof flashing?

Roof flashing is a material that is commonly used to provide a seal over joints in roof and wall construction to help protect the roof from water.

This type of seal is used wherever you can see two or more areas of the roof coming to join in a point.
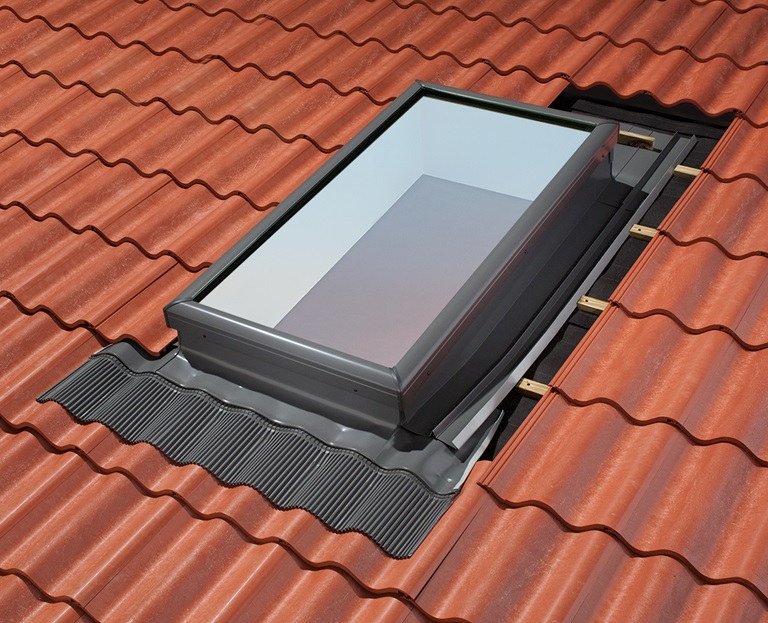
curb-flashing2.jpg (768×623)

For example, you should find flashing around things like chimneys, in the valleys of the roof, around skylights, windows, and so on.

What is roof flashing made of

Roof flashing is typically made from aluminum or galvanized steel, though it can really be made from anything that will help create a solid seal against water.

The reason that aluminum and galvanized steel is often used is that they are fairly durable, and light weight materials that you can easily install.

When should you fix roof flashing

While you can easily go for a little while with shingles that are looking a little worse for the wear, flashing is something that you should fix as soon as you see a problem.

There are several different ways that roof flashing can show that it needs to be replaced, the most common of which is that it is loose, bent, weathered, or even oxidized (rusted).

What can damaged flashing do

Considering that the whole point of flashing is to help create a water proof seam, it only stands to reason that water damage will result.

In addition to water damage in the roof, you could potentially see water damage in the walls, and insulation.

If the damage is severe enough, or goes untreated long enough, you could even potentially see health problems due to mold growth.

Summary

Now that you know a little bit more about roof flashing, and just what it does, you can easily see how important it is.

Keep this in mind the next time you take a look at your roof and you notice a problem with the metal pieces, or if a roofer says that you need to repair it.

Be willing to spend a few dollars to fix this minor piece of roofing equipment, or be ready to spend thousands of dollars repairing the entire roof.

Mr. Fix-It

___________________________

Got a Loose Door Hinge ?
Here's the Simplest Way to Fix it
  
 FH07MAY_STRSCR_02.JPG (600×600)

Have you ever noticed how, every once in a while, your door hinges will get a little loose?

Don't worry, this just happens over time, but does need to be addressed when found.

If you don't, you can easily find that your door comes off the wall, and you are faced with an even bigger problem than the one you had before.

Luckily tightening up loose hinges isn't all that difficult of a task to accomplish. In fact, it is so easy that just about anyone can accomplish, no matter what their skill level.

All you really need to do is use one of three four methods, and you should find that you have no problem.

Try Simple Tightening 

Often the simplest answers are the best answers.

If you find loose hinge, the very first thing that you should try is tightening the existing screws.

Grab the appropriate screwdriver, and then begin tightening.

Keep turning the screw until it stops turning, or until you notice that it won't tighten any longer.

Use a Longer Screw

7029-24.jpg (3200×2400)

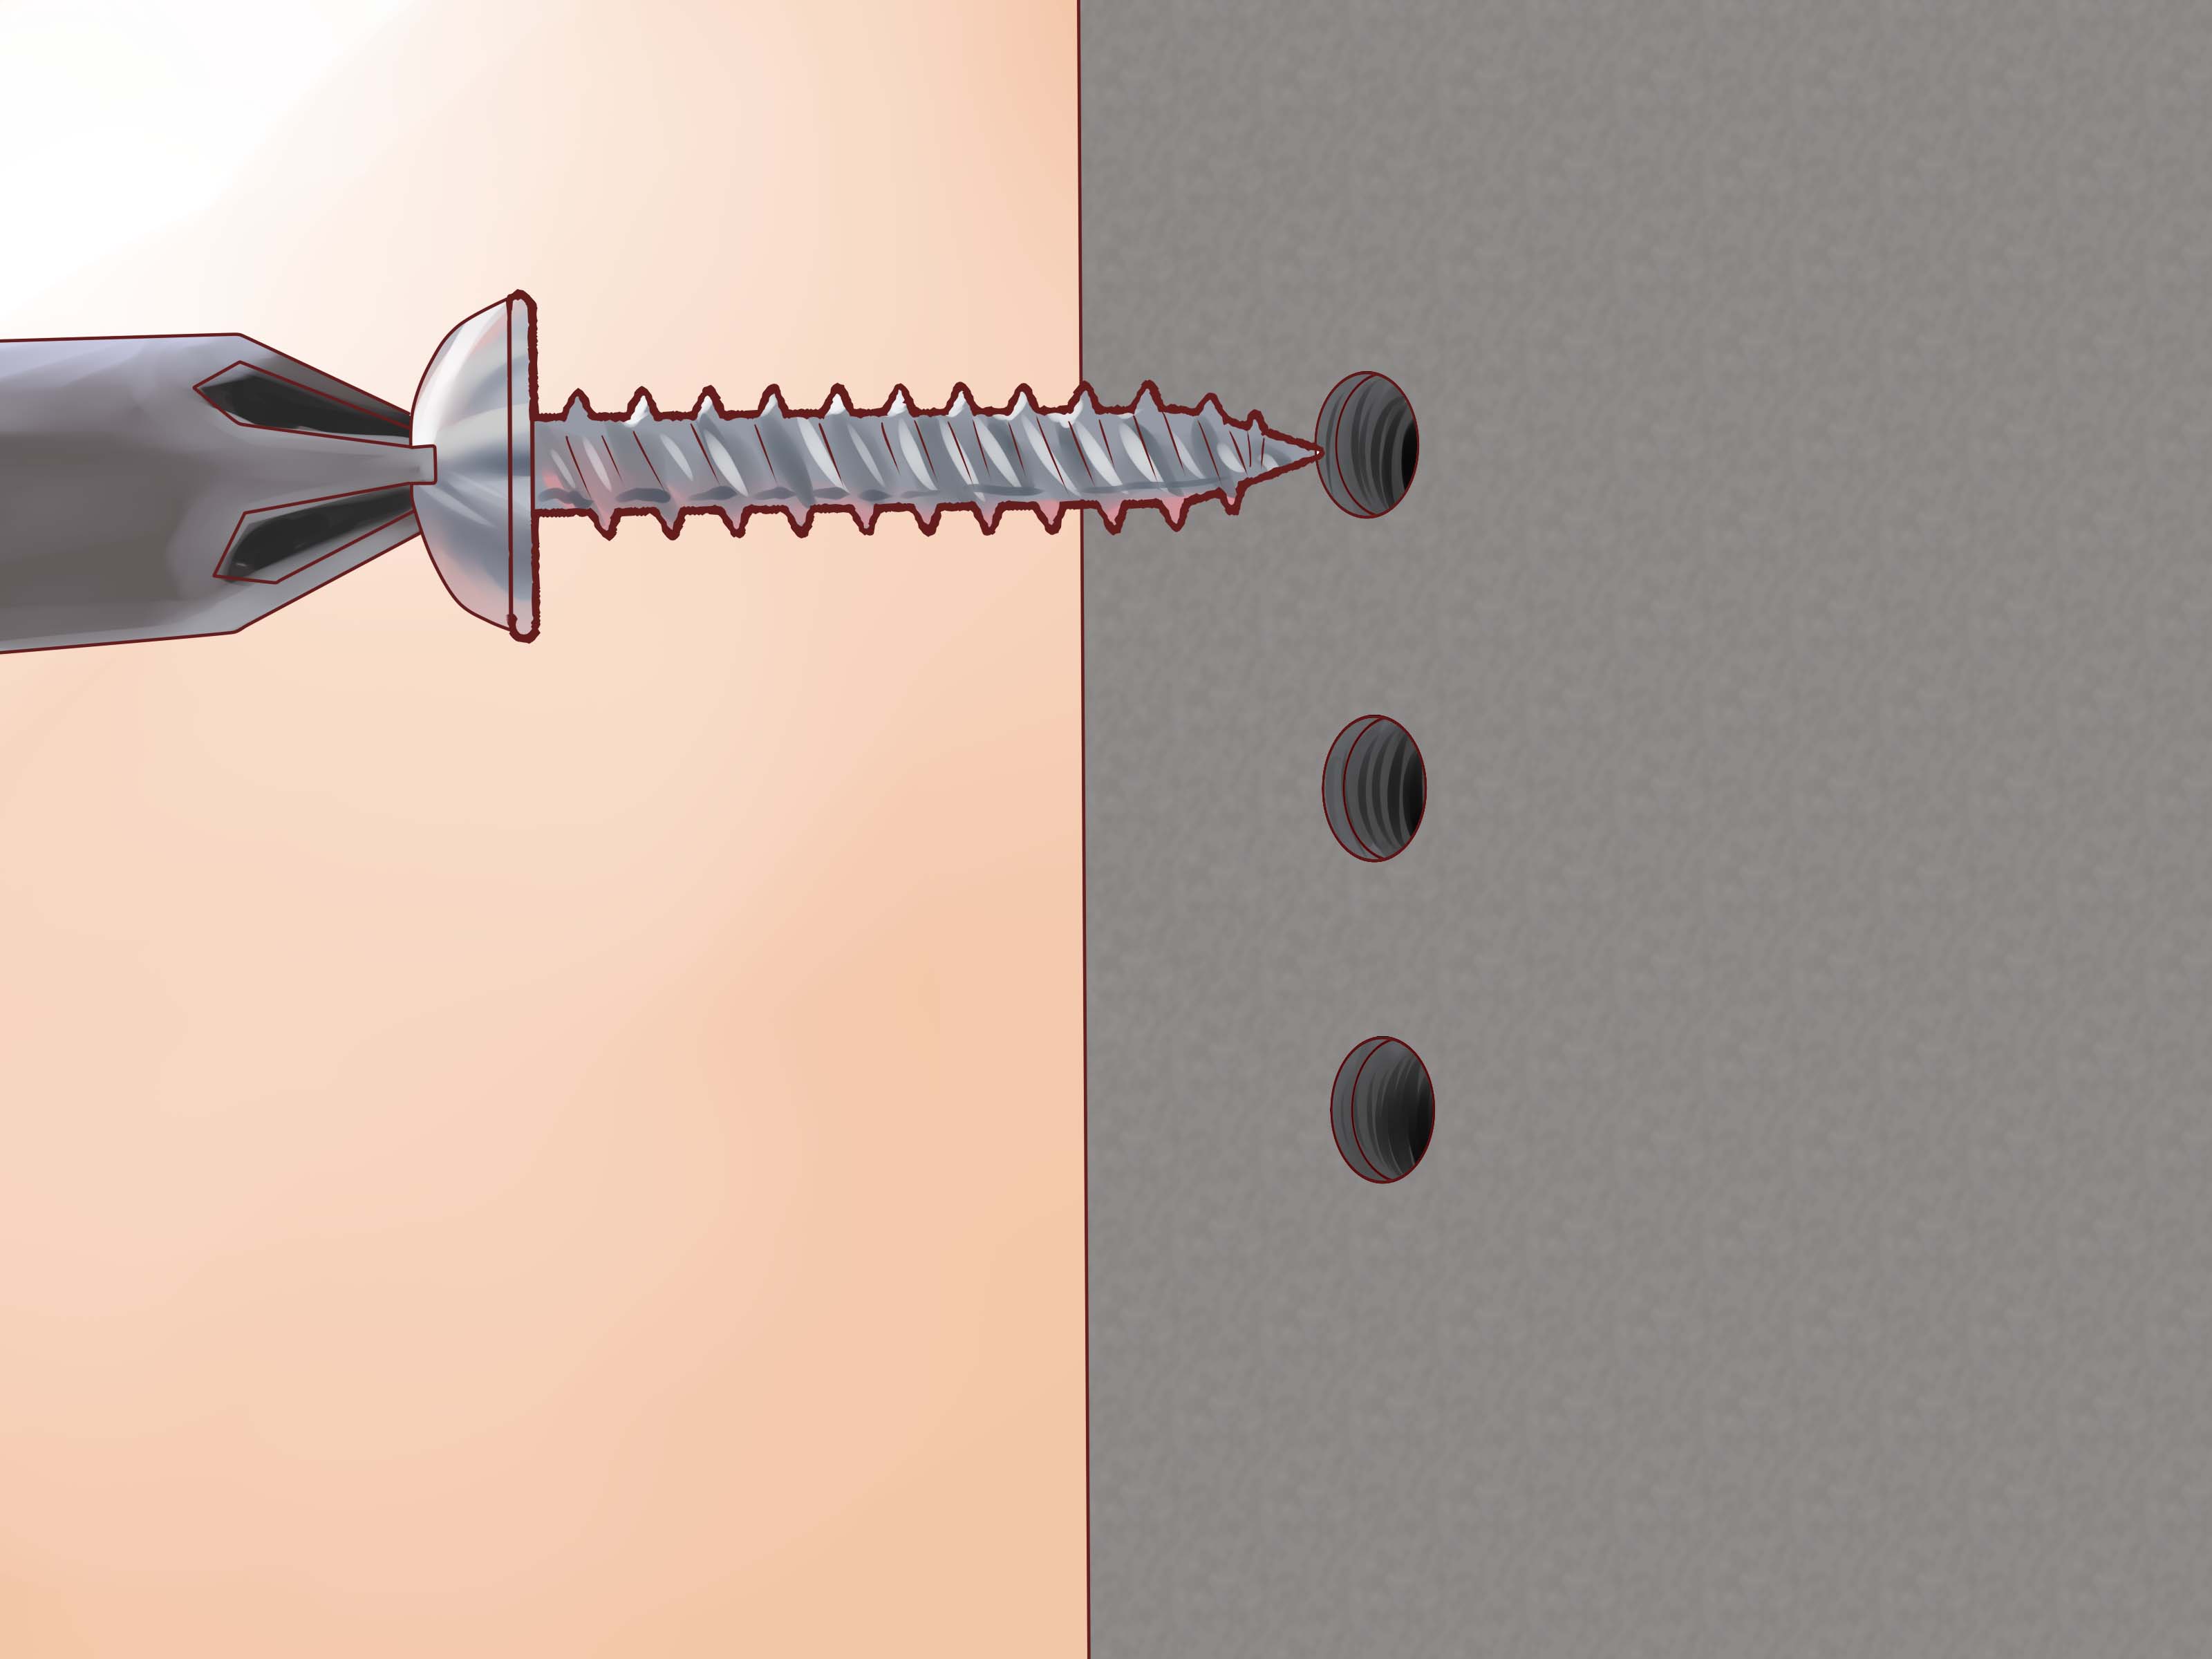
Over time screws have a tendency to wear away at the wood that is holding them in place. If this happens with the screws in your hinges, and you find that you simply can't tighten the ones that are currently in place, then you should try using a longer screw.

For example, if you use a screw that is 2-1/2 inches long, you will easily be able to get past the wood that has been worn away and get into some wood that hasn't been used yet.

Refill the Hole 

A very effective method for tightening up loose hinges is to actually refill the hole, and then drill it out again.

This will require that you first take off the door, as well as the door hinges.

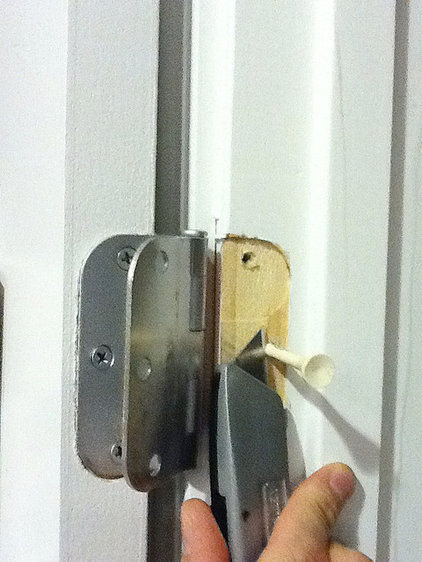
Once you have done that, identify the troublesome holes, and grab a few golf tees.
5d510bbd0e8f6c06_5103-w422-h562-b0-p0---.jpg (422×562)

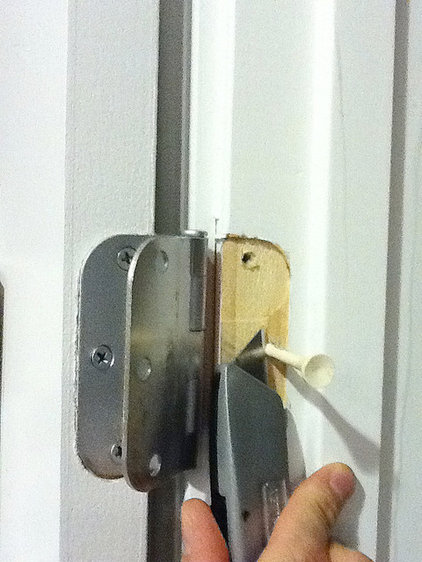
Fill the hole partway up with some wood glue, and then stick the golf tee in as far as it will go.

If you can, lightly tap the tee with a hammer to make it nice and snug. 

Allow the tees and glue to dry overnight, and then cut off the exposed parts of the tee so that it is flush with the door frame.

Drill a small pilot hole for your screws, and then reattach the door and hinges using the newly filled and stronger holes to support the weight.

Need some video help?

https://www.youtube.com/watch?v=zPvOd2XctJg

https://www.youtube.com/watch?v=OZKEu9YsED8

https://www.youtube.com/watch?v=xT5bxg9Xp1g

Mr. Fix-It

_____________________________


Time to Redo Your Outdoor Lighting ?
 
3a8343e8-40ec-449b-aab4-4ff83fbd4bdf.jpg (650×622)
 

Have you ever gone home at night, only to find that you don't have any lights on?

Instead of wondering who (or what) may be waiting for you in the dark, why not "shed some light" on the situation?

That is what outdoor lights are designed to do after all.

If you have inadequate lighting, no lighting, or are simply looking for a change, then you need to follow these guidelines. They are designed to help you not only choose the best possible outdoor lights, but to also ensure that you get them installed properly.

Space

What is the total area that you wish to have lit up? What is the effect that you will be going for? Outdoor lights are supposed to help light up the exterior of our homes, so one of the main things that you need to know is how large of a yard that you have.

Make sure that you have the measurements of your yard, and that you choose those lights that will provide enough light for your space.

Security

Outdoor lights are a great way to increase the security of your home. For the most security minded outdoor lights, choose those that can be turned on through the use of motion sensors.

These kinds of lights will automatically turn on whenever anyone comes around at night, while also helping to lower your electricity bill by only turning on when there is activity in your yard.

Style

As you are looking through the various styles available, it is a good idea to take a picture of your home with you. This way you will be able to better match the lighting style to that of your home.

Be sure that the lights will enhance the look of your home, and not detract from it. 

Easy of Use 

Remember that you will be using these lights for years. Be sure that you choose lights that will be easy for you to both use and maintain as well.

When looking around the home improvement store, practice putting in light bulbs on a fully assembled unit. This will give you an opportunity to see how easy it will be to replace any burnt out lights in the future.

Install

Considering that you are working with electricity, it is highly recommended to hire a professional electrician to install your lights. Though it is more expensive, you will be able to ensure that the work is done according to code, as well as having a guarantee of having the work done by someone who knows what they are doing.

Need some videos?

https://www.youtube.com/watch?v=zJhrCQ6hOZA

https://www.youtube.com/watch?v=Q2WFyycpBqU

https://www.youtube.com/watch?v=O8K3gL-W9iE

Mr. Fix-It

_____________________________
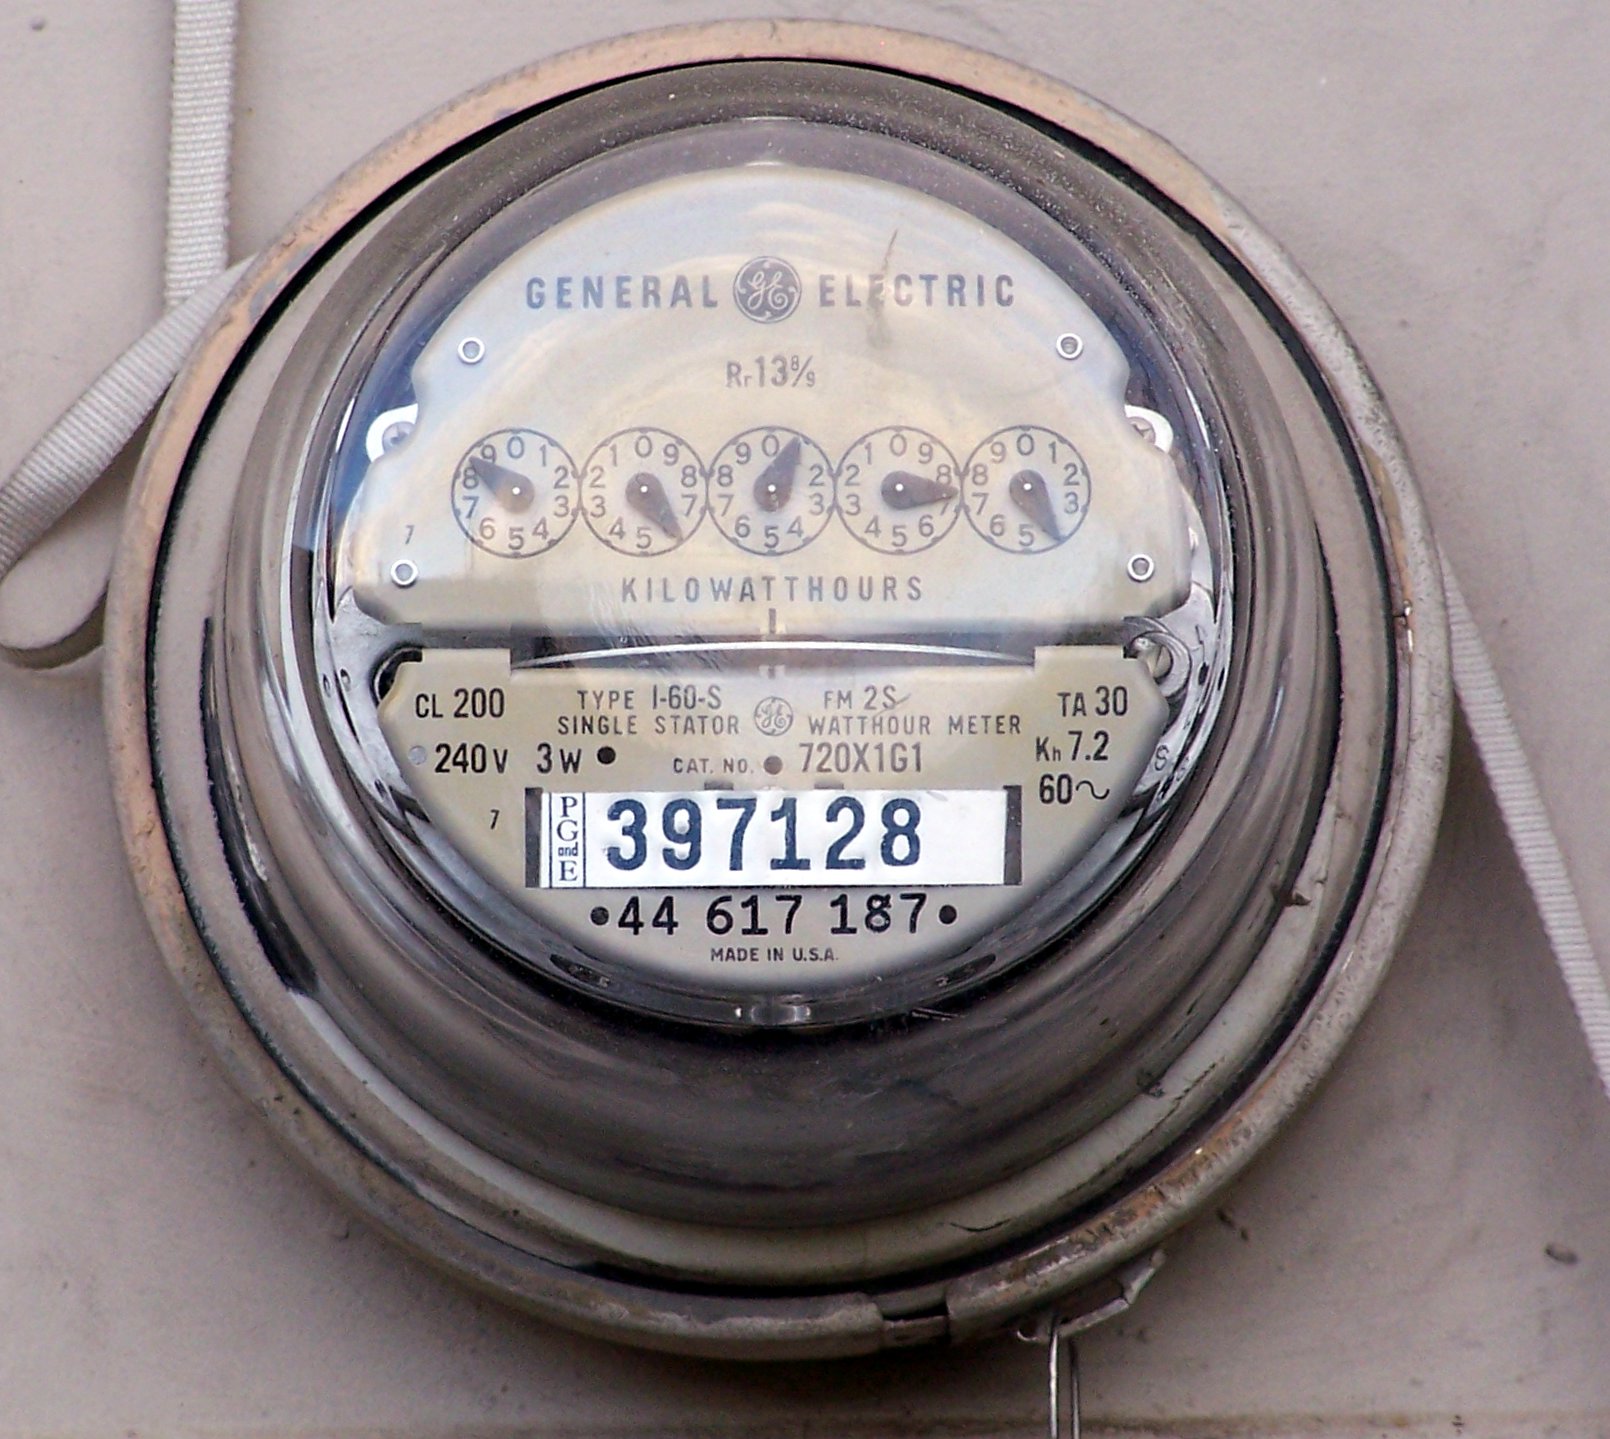


How to Reaan Electric Meter
 
Electrical_meter.jpg (1610×1439)
 

If you are looking to save some money on your energy bills, then one of the very first things that you will need to do is learn how to read your electric meter.
 
After all, if you are looking to save money, you need to know how much you are spending don't you?
 
The same principle works in your utilities as well.
 
Instead of waiting to look at your monthly electric bill, why not look at the readings as you go?
 
It would be much the same as looking at the receipts that you get every time you buy something.
 
All you need to do is follow these simple directions.
 
1Get the tools.
 
As with any project, you really need to have the right tools to get it done properly; however, in this case, the right tools are really only going to be some items that you can use to help keep track of what you find.
 
That means that you will need a pen and some paper.
 
Preferably you will want to use a notebook that you can dedicate to keeping track of your readings. This will allow you the opportunity to track your usage, and make adjustments where necessary.
 
2Locate the meter.
 
For the most part, locating your electric meter isn't all that difficult. Usually you can find it somewhere along the outside of your home, usually in the back some where along the walls.
 
3Read the meter.
 
The first thing that you need to know about your meter is that it will measure the amount of electricity that you use in a kilowatt hour (kwh).
 
One kilowatt hour is the same as using 1,000 watts of energy in an hour.
 
Once you have located the electric meter, you need to know how to read it properly. This can be quite different from reading other kinds of meters, since most electric meters have five dials on them.
 
These are read from right to left, and when you see the pointer of the dial between two separate numbers you will always write down the lower number as long as the dial to the right has not passed zero.
 
If the pointer has passed zero, then go with the number that is closest to the pointer.
 
Write down the number.
 
Write down the numbers that you find, if you want, you can write them all down.
 
When writing them down you should place them in a notebook that you can dedicate solely to the use of this purpose.
 
Close up the cover, and then go about your business as normal.
 
4. Revisit and repeat.
 
After a couple of days, repeat the entire process, and compare the results.
 
If you would like to know how much electricity you have used, simply subtract your first reading from your later one to get the amount of electricity used.
 
Repeat the entire process as often as you want to get an idea of how much electricity you have used between readings.
 
To get an accurate reading for the entire month, simply add together the readings that you took for the entire month, or subtract the first reading of the month to the last reading of the month.
 
It's that easy !
 
Need some video help?


Mr. Fix-It
_____________________________

Washing Your Screens
without
Removing Them
 
box2.png (320×210)


There are several ways to go about cleaning your window screens. First and foremost, you can simply take them off the windows and scrub away; however, that method can take a lot of time, energy, and not to mention...

... you can't always get your screens off your windows.

In those instances, you will need to use a different method.

Here is a great method for cleaning window screens without having to remove them from your windows.

Here are the materials you're going to need before you begin the task:

Spray bottle

Homemade cleaning detergent (75% water, 20% vinegar, 5% detergent)

Newspaper, paper towels, or lint-free cloth

Sturdy step ladder

Standard 110-volt vacuum cleaner

Once you have the above items, now it's time to clean the screens by simply following these steps:

1Vacuum

Attach the brush attachment to your vacuum cleaner and begin vacuuming your screens from the inside of your house.

Start at the top and work your way down.

Make sure you vacuum the entire screen, window track, and surrounding areas completely.

Be sure that you use a standard 110-volt vacuum cleaner, since the little 12-volt vacuum cleaners will not have enough power to do the job.

2Spray

Using your homemade cleaning detergent and a spray bottle, spray some of the solution onto the screen.

Start at the top and work your way down to the bottom to ensure you get everything.

Don't over spray, which would lead to dripping and pooling at the bottom of the window.

3. Air dry.

Leave the windows open and allow the screens to air dry for a few minutes.

Repeat this process with all the windows in your home.

4. Outside

Go outside and, starting at the first window, repeat step one.

Make sure that you vacuum every part of the window.  You may also need to use a step ladder to be able to reach every part of your window, just make sure that it is a safe and sturdy one.

5Spray and scrub

Spray some of your homemade cleaning solution onto the cloth, paper towel, or newspaper that you are using and begin to gently scrub the window screen.

Make sure that you are being gentle; if you press too hard you will tear the screen.

6. Air dry

Once again, leave your windows open and allow the window screens to dry completely.

7Go inside

After the screens are dry, go back inside and repeat step five and six.

This time though, instead of using the cleaner, simply use regular clean water.

Finally, after you have followed these steps, you simply allow your screens to dry.

Your window screens are now clean, and you didn't even need to take them off to do it.

Here's a video for additional helpful tips:

https://www.youtube.com/watch?v=1Vp20_NxLhM

Mr. Fix-It
_________________

 
The Right Way to Paint a Ceiling
 
how_to_paint_ceiling_like_professional.jpg (609×427)
 
We don't really recommend seniors painting ceilings, but if you're one of the "brave" and want to do it yourself, there's a right way to do it.
 
Painting ceilings can provide some rather unique challenges, the most obvious of which is that if you aren't particularly careful, you can end up with paint dripping into your face and eyes.
 
If you follow these simple steps, you will not only learn how to paint the ceiling properly, but also avoid most of the mess that you could expect otherwise.
 
1. Gather your tools
 
In order to paint your ceiling, you will need to gather together all of the tools you are going to use.
 
Typically this will be things like drop clothspaint brushesrollers (particularly thick napped ones for textured ceilings), extension handles for the paint rollersladders, and a painting tray.
 
Furthermore, you will need to have the proper paint to useprimer to help hold the paint, as well as painters tape to help protect objects and areas that you don't want painted.
 
Depending on the size of the ceiling you may also want to try using a paint sprayer to help.
 
2Prepare the work area
 
Before you start slapping paint on the ceiling, you need to prep your work area.
 
This means that you need to remove as much of the furniture in the room as possible.
 
Anything that you can't remove needs to be covered with a drop cloth to protect it from any paint that could potentially spill.
 
Once you have the drop cloths in place, clean the ceiling so that you have a dust and dirt free surface.
 
If necessary, you may want to also wash the ceiling, and allow it to dry before you finish prepping the area. 
 
You will also want to use some painters tape around things like lights, and have it hold up newspaper on any skylights that you may have.
 
3. Prime the ceiling
 
Using the paint sprayer (if you have one) or the paint brushes and rollers, prime your ceiling.
 
Paint this in much the same manner that you would the walls with one minor difference.
 
That difference is that you will want to use as little primer as possible so that it won't drip.
 
Start by cutting in from the outside of the ceiling, and work towards the middle for at least three or four inches. This will give you a bit of breathing room so that you don't accidentally paint the walls.
 
Once you have primed the ceiling, allow it to dry, and then put on another coat, being sure that you allow it to dry completely prior to proceeding to the next step.
 
4. Cut in
 
Since the ceiling is now primed, you can begin the actual painting process. As with the primer, you will want to initially cut in from the outer edges using a paint brush.
 
Make sure that you don't put too much paint on the brush, or it will end up dripping down your arm or even on your face.
 
5Paint it
 
Use paint brushes, rollers, or a paint sprayer to ensure that you put it on smoothly and evenly.
 
As you did when you put the primer on, and when you also cut in, you will want to use the least amount of paint possible so that it doesn't end up dripping down the walls, onto the floors, or on you.
 
6. Dry, and double check
 
Allow the paint to completely dry, and then look over your work.
 
Repeat the painting process described in steps four and five as often as necessary until you have the look and color that you want on your ceiling.
 
Do not rush the project, and be sure that you allow the paint to completely dry between each coat.
 
Once you have finished, and are satisfied with the way that your ceiling looks, you're done.
 
All you really need to do now is clean the area, and put everything away.
 
Pay particular attention to any paint that may have spilled, and clean it up as quickly as you can.
 
In addition you will also want to clean your tools so that you don't damage them, and properly store any excess paint that you may have remaining.
 
Videos?


Mr. Fix-It
______________________________
 

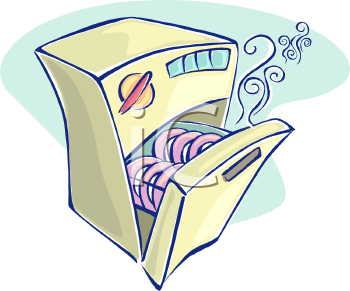
Dishwasher Not Cleaning Properly ?
 
 0511-1009-2817-0333_Cartoonish_Dishwasher_clipart_image.png (350×291)
 
How many times have you opened up the dishwasher to find that that your dishes are still l dirty after being washed?

 Here are a few simple ways that you can troubleshoot your dishwasher problems.

Scrape the dishes

Did you scrape your dishes off before you put them into the dishwasher?

Surprisingly many dishwashers will not be able to clean off all kinds of food particles. In order to make it a little easier for your dishwasher to clean, make sure that you at least scrape (not wash) the dishes before you place them into the dishwasher.

Properly load the dishwasher

Was the dishwasher properly loaded? If you do not properly load the dishwasher, you will not be able to get all of your dishes clean.

Most often this means that you have large cake pans, baking dishes, pots, or pans on the bottom shelf.

This will prevent the vast majority of the water from getting to the top shelf, and thereby decreasing the amount of cleaning power your dishwasher has.

Check the spin arm

Remove the bottom shelf of the dishwasher and check the spin arms.

These are the arms that spin around and throw water everywhere in the dishwasher.

Over time the little holes that the water comes out of can get clogged.

It doesn't matter if they become clogged from calcium buildup or from food particles that have gotten dried onto the arms.

If the arm holes are not cleaned every so often, then the cleaning power of your dishwasher decreases.

Check the drain screens

Periodically you will need to check the drain screens along the bottom of the dishwasher.

The reason for this is that over time your screens can become clogged with food, and this food will be thrown around the dishwasher, defeating the main purpose of the dishwasher.

Need some video help?

https://www.youtube.com/watch?v=CI41NoqAuew

https://www.youtube.com/watch?v=sKD7YFXDTqQ

https://www.youtube.com/watch?v=yban1TEAEwY

Mr. Fix-It

______________________________


 Need a New Garbage Disposal? 

Here's How to Install it
 
 How to Replace a Garbage Disposal - YouTube


 Whether you already have a garbage disposal that needs replacing, or you are looking to install one for the first time, it never hurts to know the proper methods for installing a garbage disposal.
 
Installing a garbage disposal isn't all that difficult of a task, though it can take a bit of time for the "do it yourselfer"  who is just starting out.
 
At most, this project should only take you half of a day if you follow these directions.
 
1. Check for space
 
Before you can actually install a garbage disposal you need to make sure that you actually have the space for it.
 
This means that you will need to look under the sink, take everything out, and then get some measurements.
 
Take those measurements to your local home improvement store, and get a disposal that will fit within those dimensions.
 
2Disconnect power and water
 
After you have the model of disposal that you want, take it home and begin the installation process.
 
To begin with you need to shut of the power to the kitchen by turning off the power at the circuit breaker.
 
Furthermore, you also need to remove the existing drain lines.
 
You will also want to place a rag or something in the main drain to help prevent any leaks.
 
Look at where the drain and the pipes meet, and remove the large nut.
 
Once you have done that you can actually remove the strainer, or drain, body from the bottom of the sink by pushing the strainer body carefully.
 
3Remove the old putty
 
Using a putty knife, or even a screwdriver, remove all of the putty that you find around the opening in the sink.
 
Be prepared to do a bit of scrubbing with a wash rag and a green scrubby to help ensure that you remove all of the putty from the opening.
 
Once you have done that, take a look at the mounting assembly.
 
Grab a screwdriver and loosen all of the screws until you can reach the snap ring.
 
4. Get rid of the snap ring
 
Take a screwdriver and pry the snap ring off of the sink flange.
 
detp104_2fa_lg.jpg (616×462)
 
Once you have done that, the mounting assembly should be able to come apart fairly easily. As you are taking everything apart, be very careful that you do not damage the gasket, and that you don't lose anything.
 
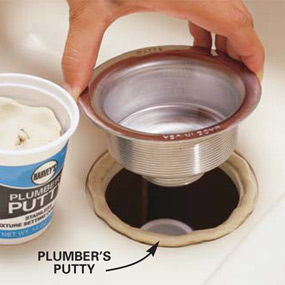
5Apply some new putty
 
Roll a bunch of plumbers putty into a rather long snake, and press it firmly into place around the opening.
 
4tBux.jpg (285×285)
 
Once you have done that begin putting the mounting assembly back together.
 
6Slip your mounting ring over the flange
 
You will need to hold the gasket and backup ring in place while you slip the mounting ring over the sink flange.
 
You can very easily hold all the pieces together using a rubber band (a wide one), just make sure that you place the rubber band above the snap ring groove.
 
7Install a new snap ring
 
Slide the new snap ring by sliding it up the sink flange. Continue to slide it up the flange until it snaps into place in the groove.
 
Once you have done that, you can then remove the rubber band, and wipe up any putty that may have been pushed out of the flange.
 
8Knock and pull the plug
 
Take a look at the disposal unit, and grab a flat headed screwdriver.
 
Identify where the plug is located, and then begin knocking it back into the unit.
 
Turn the unit back upright, and then remove the gasket and ring.
 
Once you have done that all you need to do is turn it upside down again, and then remove the plug.
 
With the plug removed, you can then replace the gasket and ring.
 
Take the time to locate the electrical hole, and when you find it insert a wire clamp if one is not there.
 
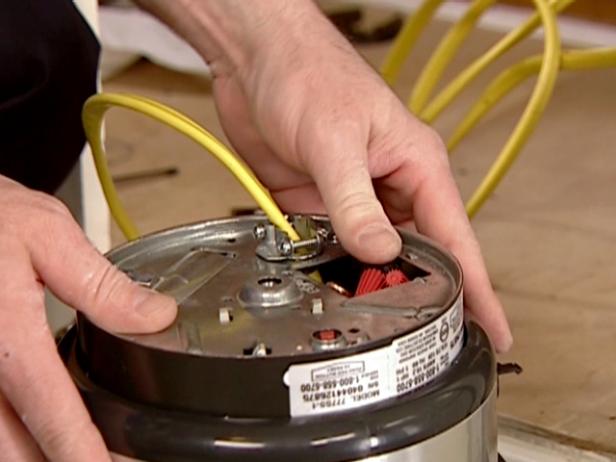
9Remove the access hole cover
 
Look at the bottom of your disposal unit, and see if you can locate the access hole. Most access holes covers are held in place with a single screw, so identify which one it is, and then remove that screw.
 
detp104_3fc.jpg.rend.hgtvcom.616.462.jpeg (616×462)
 
With the cover removed, pull out the ends of the wires so that you can begin connecting them.
 
10Connect and store the wires
 
Use the wire clamp to hold the electrical wire, and begin connecting the wires in the access hole.
 
As you are connecting the wire, make sure that you are matching the colors (i.e., black to black, and white to white), and that you are using a wire nut to connect the wires together.
 
You may also want to wrap the wire nuts (and thus the wires) in some electrical tape to add a bit of extra security.
 
Do not forget to connect the ground wire as well.
 
When you have finished connecting the wires, plush them back into the access hole, and secure the cover of the access hole.
 
Furthermore, you will want to tighten the electrical clamp down as much as you can, but do not damage the wires.
 
11. Mount the system
 
Begin mounting the disposal system to the mounting ring that you assembled earlier. Follow any specific mounting instructions that came with your unit, but typically you only need to insert the top end of the mounting gasket into the mounting assembly.
 
When you have done that, simply turn the mounting ring right until the tabs feel secure.
 
Use adjustable pliers to lock the tabs over the ridges.
 
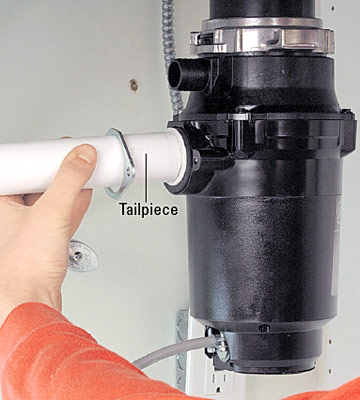
12Install the drain lines
 
Begin installing the drain lines by first attaching the tailpiece...
 
p_SCP_221_07.jpg (360×400)
 
...and trap arm.
7503.jpg (400×300)
Insert the discharge tube into the T-fitting, but do not completely tighten the slip nut.
 
Insert the opposite end of the discharge tube into the disposal system, and then use a screwdriver to secure the metal flange with the bolt that came along with the disposal system.
 
When you have done that, go ahead and tighten all of the slip nuts.
 
13Finish off the installation
 
Finish off the installation of your garbage disposal by slipping the bell over the disposal drain, then clamping it down.
 
PD_0042_175_9209X (400×400)
 
Chances are you will need to use a screw driver to finish clamping everything down so be sure that you have one of both types on hand to ensure that you can get the job done properly.

Once you have finished the process of installation, you still need to do a bit of testing.

Testing is rather simple, in that you simply need to run the water and the disposal.

As long as it is running, and there are no leaks, you are pretty much done. All that you have to do after successfully installing and testing the garbage disposal is clean everything up.

We have a few videos:

https://www.youtube.com/watch?v=pYKXGDBxx_k

https://www.youtube.com/watch?v=pPtTUi9cxts

https://www.youtube.com/watch?v=i8_og7cezVc

Mr. Fix-It

_________________________

 I Need a New Water Heater

Which One Do I Need ?
 
water_heaters.jpg (375×362)
 
It comes as no surprise that water heaters don't seem to last very long here in our part of country. Normally they last 5-6 years before that hot shower suddenly becomes fit for a polar bear.
 
So...if you're "on borrowed time" or in need of one, this article is for you.
 
Choosing a water heater is a process that has long left people confused and frustrated.

In large part this is because these are usually large, complex pieces of equipment that the average home owner doesn't understand.

In addition, there is the fear that by choosing the wrong water heater a home owner can end up paying a huge energy bill that they cannot afford.

The truth is that choosing a water heater is simply a matter of following a few simple guidelines.

With these guidelines in hand, you can be assured that you will be able to choose the best possible water heater unit for you home, and your needs.

Energy is important

When looking through your options in a water heater, you need to make sure that there is a large yellow sticker. This yellow sticker will have the words "Energy Guide" written clearly on it, and will show the annual average usage of electricity or natural gas for that particular unit.

Understanding Energy Efficiency in Water Heaters - Ruud

As you look at this sticker, you may notice that there is a little bit of information missing, which is the rate of recovery.

Ask about this information, since it will tell you how quickly the unit will heat up your water.

Size for electrical and gas heaters 

Size really does matter when choosing a water heater.

Surprisingly, there is a difference between the size of a gas heater and the size of an electrical heater that you will need.

water_heater_sizing_guide.gif (479×408)

For example, a family of four that has two bathrooms, a washing machine, and a dishwasher will need to have an electrical unit that is between 50 and 80 gallons; whereas, a gas heater only needs to be between 50 and 75 gallons.

The electrical unit should also have a heating unit that is around 5,500 watts, while the gas unit should have a 40,000 Btu heating element.

The warranty matters

Perhaps one of the most important elements to consider when choosing a water heater is the warranty.

Each warranty will have a different lifespan, most falling between 6 and 12 months.

Compare-water-heater-warranties-in-Singapore.jpg (1912×952)

Be sure that you know the length of time that your warranty will last, as well as what the warranty will cover.

This can help save you an immense amount of money later on if there is a problem.

Always try to get the best possible warranty.

Here's some video help.

https://www.youtube.com/watch?v=hc4rRWTeDrI

https://www.youtube.com/watch?v=0IqfbWQ89IY

https://www.youtube.com/watch?v=Zny_wyRB_8k

Mr. Fix-It

From Marty Winger...to...Anthem Opinions

As a side note to your commentary about water usage, this topic had me contact SNWA in regards to my “Water Heater.” It seems that since I have lived here I have had to replace it about every 4 years.

Of course as it is told to me (many times) by SNWA our water is very hard (duh). It costs nearly a thousand dollars every time we replace it!

As compared to Los Angeles water, a water heater needs replacing about every 25 to 30 years, and that’s without doing anything to it.

The SNWA suggests removing the sediment about once a year, and its not a big deal to do, but I do it about 3 times a year.

It is the main cause of all the problems (sediment) to destroying the water heater, aside of the fact I never drink the stuff, and do have an R.O. and always drink bottled water too.

SNWA said the particulates don’t cause any serious problem, but none the less…”don’t drink the water!”

Bottom line is as was told to me by the SNWA person (who was quite helpful) he’d try to see if there is any programs that help us, the consumer to rebate these issues to get an inline filter to alleviate the problem.

This is of course help us to get some discount pricing on a filter (about $300-400), and plumbing costs.

Another thing he said was, “they do about 300K checks a year,” and I said that is a minimum standard to meet the requirements set by our government.

I know removing the particulates would pretty closely make the cost of delivery of water quite expensive and that’s why I want a consumer program to offset the costs involved for the inline filter for the water heater.

_____________________________

 Roof Problems?

Get the Right Contractor to Fix It
 
Roof-Factory-dog-mascot-rough-color-01b.jpg (399×500)
One of the most important parts of any building is the roof.
 
When this vital part of the home runs into problems often other, and even more expensive problems, arise.
 
When faced with a problematic roof, one of the quickest and easiest ways to ensure that the problems are repaired is through the use of roof contractors. But how do you know who to choose?

Choosing roof contractors can be a stressful process, particularly if you are faced with a roof that needs some serious repair work done.

Instead of wasting your time worrying, and possibly choosing the wrong contractor, use these simple guidelines.

As you are talking to your potential roof contractors, ask these questions and write down the answers. After going through all the answers, choose the one that has the most yeses and you will know that you have chosen the best possible roof contractor.

CartoonManager.jpg (300×406)

Are they licensed? 

While it may be nice to have a friend do the work for you (after all, he's cheap) he may not be the best possible choice to repair your roof.

While a license may not guarantee that a contractor will be doing good work, it will show that they are more likely to know what they are doing.

Always ask your potential roof contractor whether or not they are licensed.

Do they have insurance? 

It is absolutely essential that you roof contractor be insured, and have enough insurance to cover the work you want done.

Keep in mind that they will be working on your roof, the thing that which has the sole purpose of keeping everything inside safe from what is outside.

Ask for a copy of their insurance certificate to verify whether they actually have the insurance necessary for your job.

How long have they been in business? 

You should always choose the contractor with the most experience.

How long have they been in business?

Do they have an office, or are they working out of their garage?

Is it possible to visit their business?

You want to make sure that you are not hiring some fly-by-night joker who will take your money and run.

One of the best possible ways to check this is to see how financially vested they are in their business.

Are they willing to provide references? 

Every successful contractor should be willing to provide references.

Just as with any potential employee that you may hire (and keep in mind that you will be hiring these people, and paying their salary while they work for you) you have the right to ask for references.

If they do not, ask why.

Have you checked the Better Business Bureau? 

It is always a great idea to check with your local Better Business Bureau to see if there were any complaints against the contractor, and how those complaints were handled.

Here's how to contact the Southern Nevada Better Business Bureau:

https://www.bbb.org/bbb-locator/LocationResult/?Address_State=Nevada,NV&strType=branch

Keep in mind that it is impossible to please everybody, so what you are looking for is how the complaints were handled.

Were they handled properly, or were they ignored?

This will provide you with a great example of how they treat their customers.

Another check is the Nevada Contractors Review Board. Here's their link:

http://www.nvcontractorsboard.com/

Need some other video tips to follow?

https://www.youtube.com/watch?v=6SORlCTYlQc

https://www.youtube.com/watch?v=ltit9tImvB4

Mr. Fix-It

_____________________________


Adjusting a Toilet's Water Level

How to Adjust Water Level in the Toilet Bowl | Toiletseek

Anyone who has ever had a running toilet knows just how annoying it can be. It is almost as annoying as those high water bills that can result from a running toilet, or from simply having a bunch of kids in your home. Whatever the reason, by simply and correctly adjusting the water level of toilet, you can not only lower your water bill, you can also keep your toilet from running. Here's what you need to do.

Check the current water level.

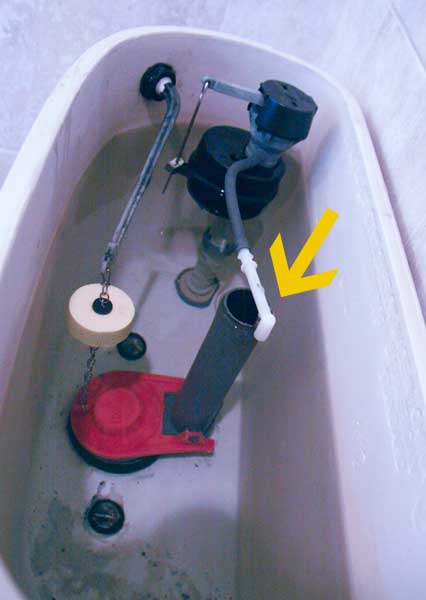
Remove the top from off of the toilet. This will allow you to access the interior of the toilet, and begin to make your changes. When you first look into the toilet tank, take a moment to check what your current water level is at. The water level should never be above the overflow pipe. If it is, then you are going to run the risk of having a "running" toilet.

How to Stop a Running Toilet: A Beginner's Guide - Dengarden

Determine your desired level.

 Decide where you will want to have your water level at, and place a mark there. This mark can be placed on the outside of the toilet, since it may be a little difficult (and not to mention wet) if you put it on the inside of the toilet. One way that you can make this mark is by using a piece of black electrical tape, or even using a grease pencil.

Bend the ball cock.

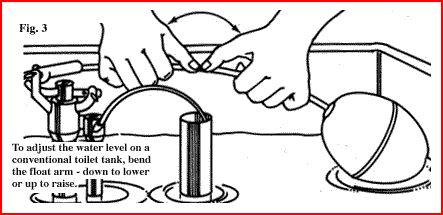
After you have made your mark, go ahead and bend the ball cock to about the level of the mark. To do this, you don't actually bend the ball cock (the floating thing) in the tank. Rather, you bend the arm that is attached to it. Be careful as you do this so that you can avoid breaking the arm. Bend the arm until the ball cock is at roughly the same level as the mark that you made.

Test your work.

 Once you have bent the arm to the ball cock, it is time to check your adjustment. Simply flush the toilet, and wait for the tank to refill. It should refill only to the level where you have bent the arm too. If the water level is still not to your desired level, repeat the process until you have the desired results.


 Mr. Fix-It

______________________________

 Clogged Drain?  Use a Snake

 Drain snake - how to snake a drain

If you have a slow draining sink, toilet, or tub, or even a complete blockage, you can easily find yourself with a potentially messy problem.

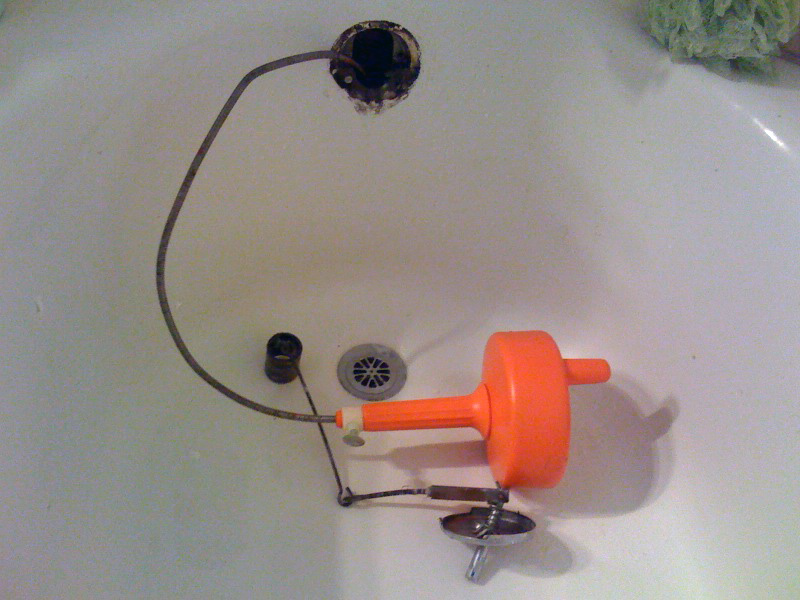
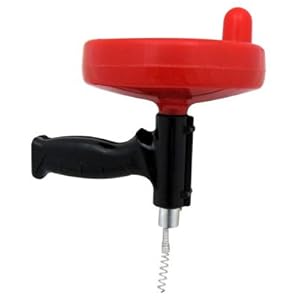
 While you can always use a plunger, an alternative tool that you can use is the drain-and-trap auger, commonly referred to as a snake.

drum-auger.jpg (299×213)

However, if you do not know how to use a drain-and-trap auger properly you can create more of a mess than you would believe.

Follow these steps to ensure that you use one properly.

1Turn off the water

Before you can begin using a drain-and-trap auger on your clogged pipes, you will need to shut off the water. This will help prevent any accidents, or messes from cropping up while you do your work.

The best way to do this is by shutting the water off to that particular section of pipes.

2Remove the pipe

Once you have the water shut off, you can then begin removing the pipe.

The first thing that you need to do is start unscrewing the straight sections of pipe that attaches to the bend (or trap) in the pipes.

When you have the threads nice and loose, but not completely removed, place the bucket under the pipes, and then continue to remove the pipe.

The bucket will catch any remaining water in the drain, and not make a mess.

Set the pipe into the bucket, and then set both aside, out of the way.

3Begin feeding the snake

Unloose about three feet of the snake, and put on some work gloves. The gloves will help protect your hands while you are feeding the snake, and keep you from getting too dirty.

Place the end of the drain-and-trap auger into the drain, and slowly work it forward.

4Slowly work the snake

Turn the hand crank on the auger, and it will help to turn the auger as you slowly feed it through the pipe. This will allow you to slowly work through any clogs that you find.

Be very careful as you do this that you do not force the snake through any blockage, or you can find yourself potentially breaking the pipes.

Continue the process until you have completely run out the snake.

5. Retract the snake

Once you have fully extended the snake, retract the auger.

Do this by basically doing everything you did earlier, but in reverse.

If it is possible, as you remove the snake from the wall, use a rag to help clean it off.

6. Replace the pipe

When you have completely removed the pipe from the wall, replace the pipe you removed earlier.

Tighten the pipes until they are hand tight, and then go ahead and test your work.

7Test your work

Turn the water back on, and test the work you have done.

As long as you did the work properly, you should notice that the water drains a lot quicker.\

If you are satisfied with the work, you can then go ahead and clean everything up.

If, after you have replaced the pipe and turned the water on, you still have a problem you have two choices.

The first choice is to get a longer auger, and repeat the work.

The second is to simply hire a professional, and have him do the work for you.

Sometimes a picture is worth a thousand words:

https://www.youtube.com/watch?v=JRjoCAPNNUo

Mr. Fix-It

______________________________


Getting Your Home Ready for Summer
A Check List
 

Tips to make your house summer-proof - Trisara


  • Test your smoke alarms, fire extinguishers, carbon monoxide detectors, and all GFCI outlets.  

  • Replace batteries in alarms and household gadgets. 

  • Inspect and clean out all drains, especially tub and shower drains. If the water drains slowly when you run the water, you likely have a clog and will want to remove it using a plumber’s snake or a commercial clog removal product. 

  • Inspect your washing machine water hoses for cracks and give it a thorough cleaning.

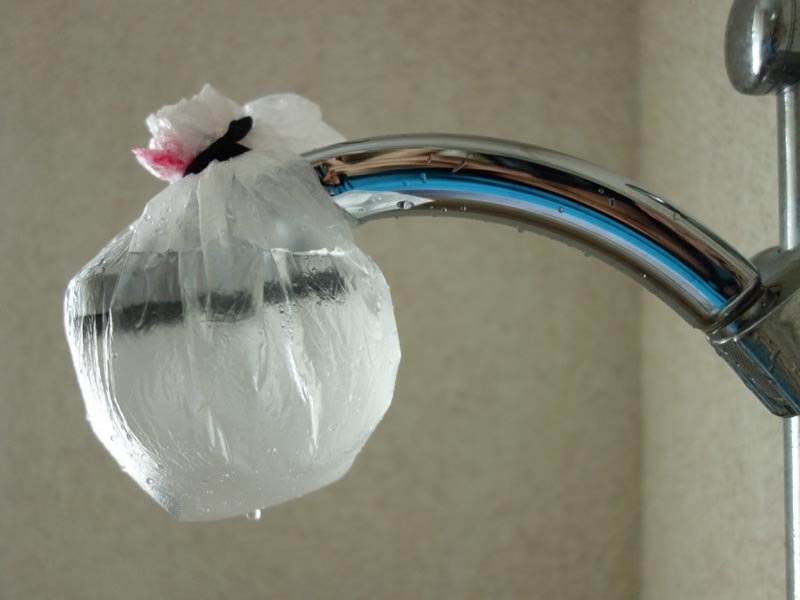
  • Clean your faucet aerators and showerheads to remove mineral deposits. Soaking in equal parts water and vinegar solution for about 30 minutes should do the trick. Use a commercial mineral removal product for heavy or stubborn deposits.

  • Vacuum your heat registers and heat vents.

  • Flush out your hot water heater. This will remove sediment to help it work more efficiently and prolong the life of your water heater.

  • Inspect and clean out your dryer vent and make sure that your outdoor air vents aren’t blocked.

  • Check your water softener and top up salt if necessary.

  • Clean your garbage disposal..

  • Power wash your windows, siding, patio, and driveway.

  • Change your air conditional filter.

  • Fertilize your lawn if you have one.

  • Clean ceiling fans.

  • Trim trees and shrubs.

  • Check caulking and silicone seals in bathrooms, kitchen, and around windows and doors. 

  • Remove winter insulation on outdoor faucets. 

  • Clean blinds, window screens and door screens.

  • Clean your furnace filter. You want to remove dust build-up to make it easier for the furnace to function properly in regulating your home’s temperature. This will also help keep energy bills down, too. 

  • Lastly, if you have a home warranty it’s important to review it to make sure your particular home systems and appliances are adequately covered, especially your HVAC for heavy summer air conditioning usage.

_________

Time to Change Your Deadbolt Locks ?
Falcon D241 Single Cylinder Grade-2 Deadbolt Lock
 
There are times when you need to replace an existing deadbolt.

Perhaps the current deadbolt is a double-keyed cylinder, and you would rather have a single-keyed unit.

Whatever your reasons for replacing a deadbolt, replacing one is much easier than installing one on an un-mortised door since the holes have already been drilled.

All you really need to complete the project is a screwdriver.

Make certain that your new deadbolt is the same size as the old one, and follow these guidelines to replace it:

1Unlock the bolt and open the door.

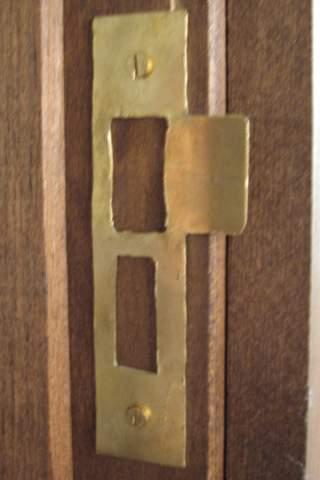
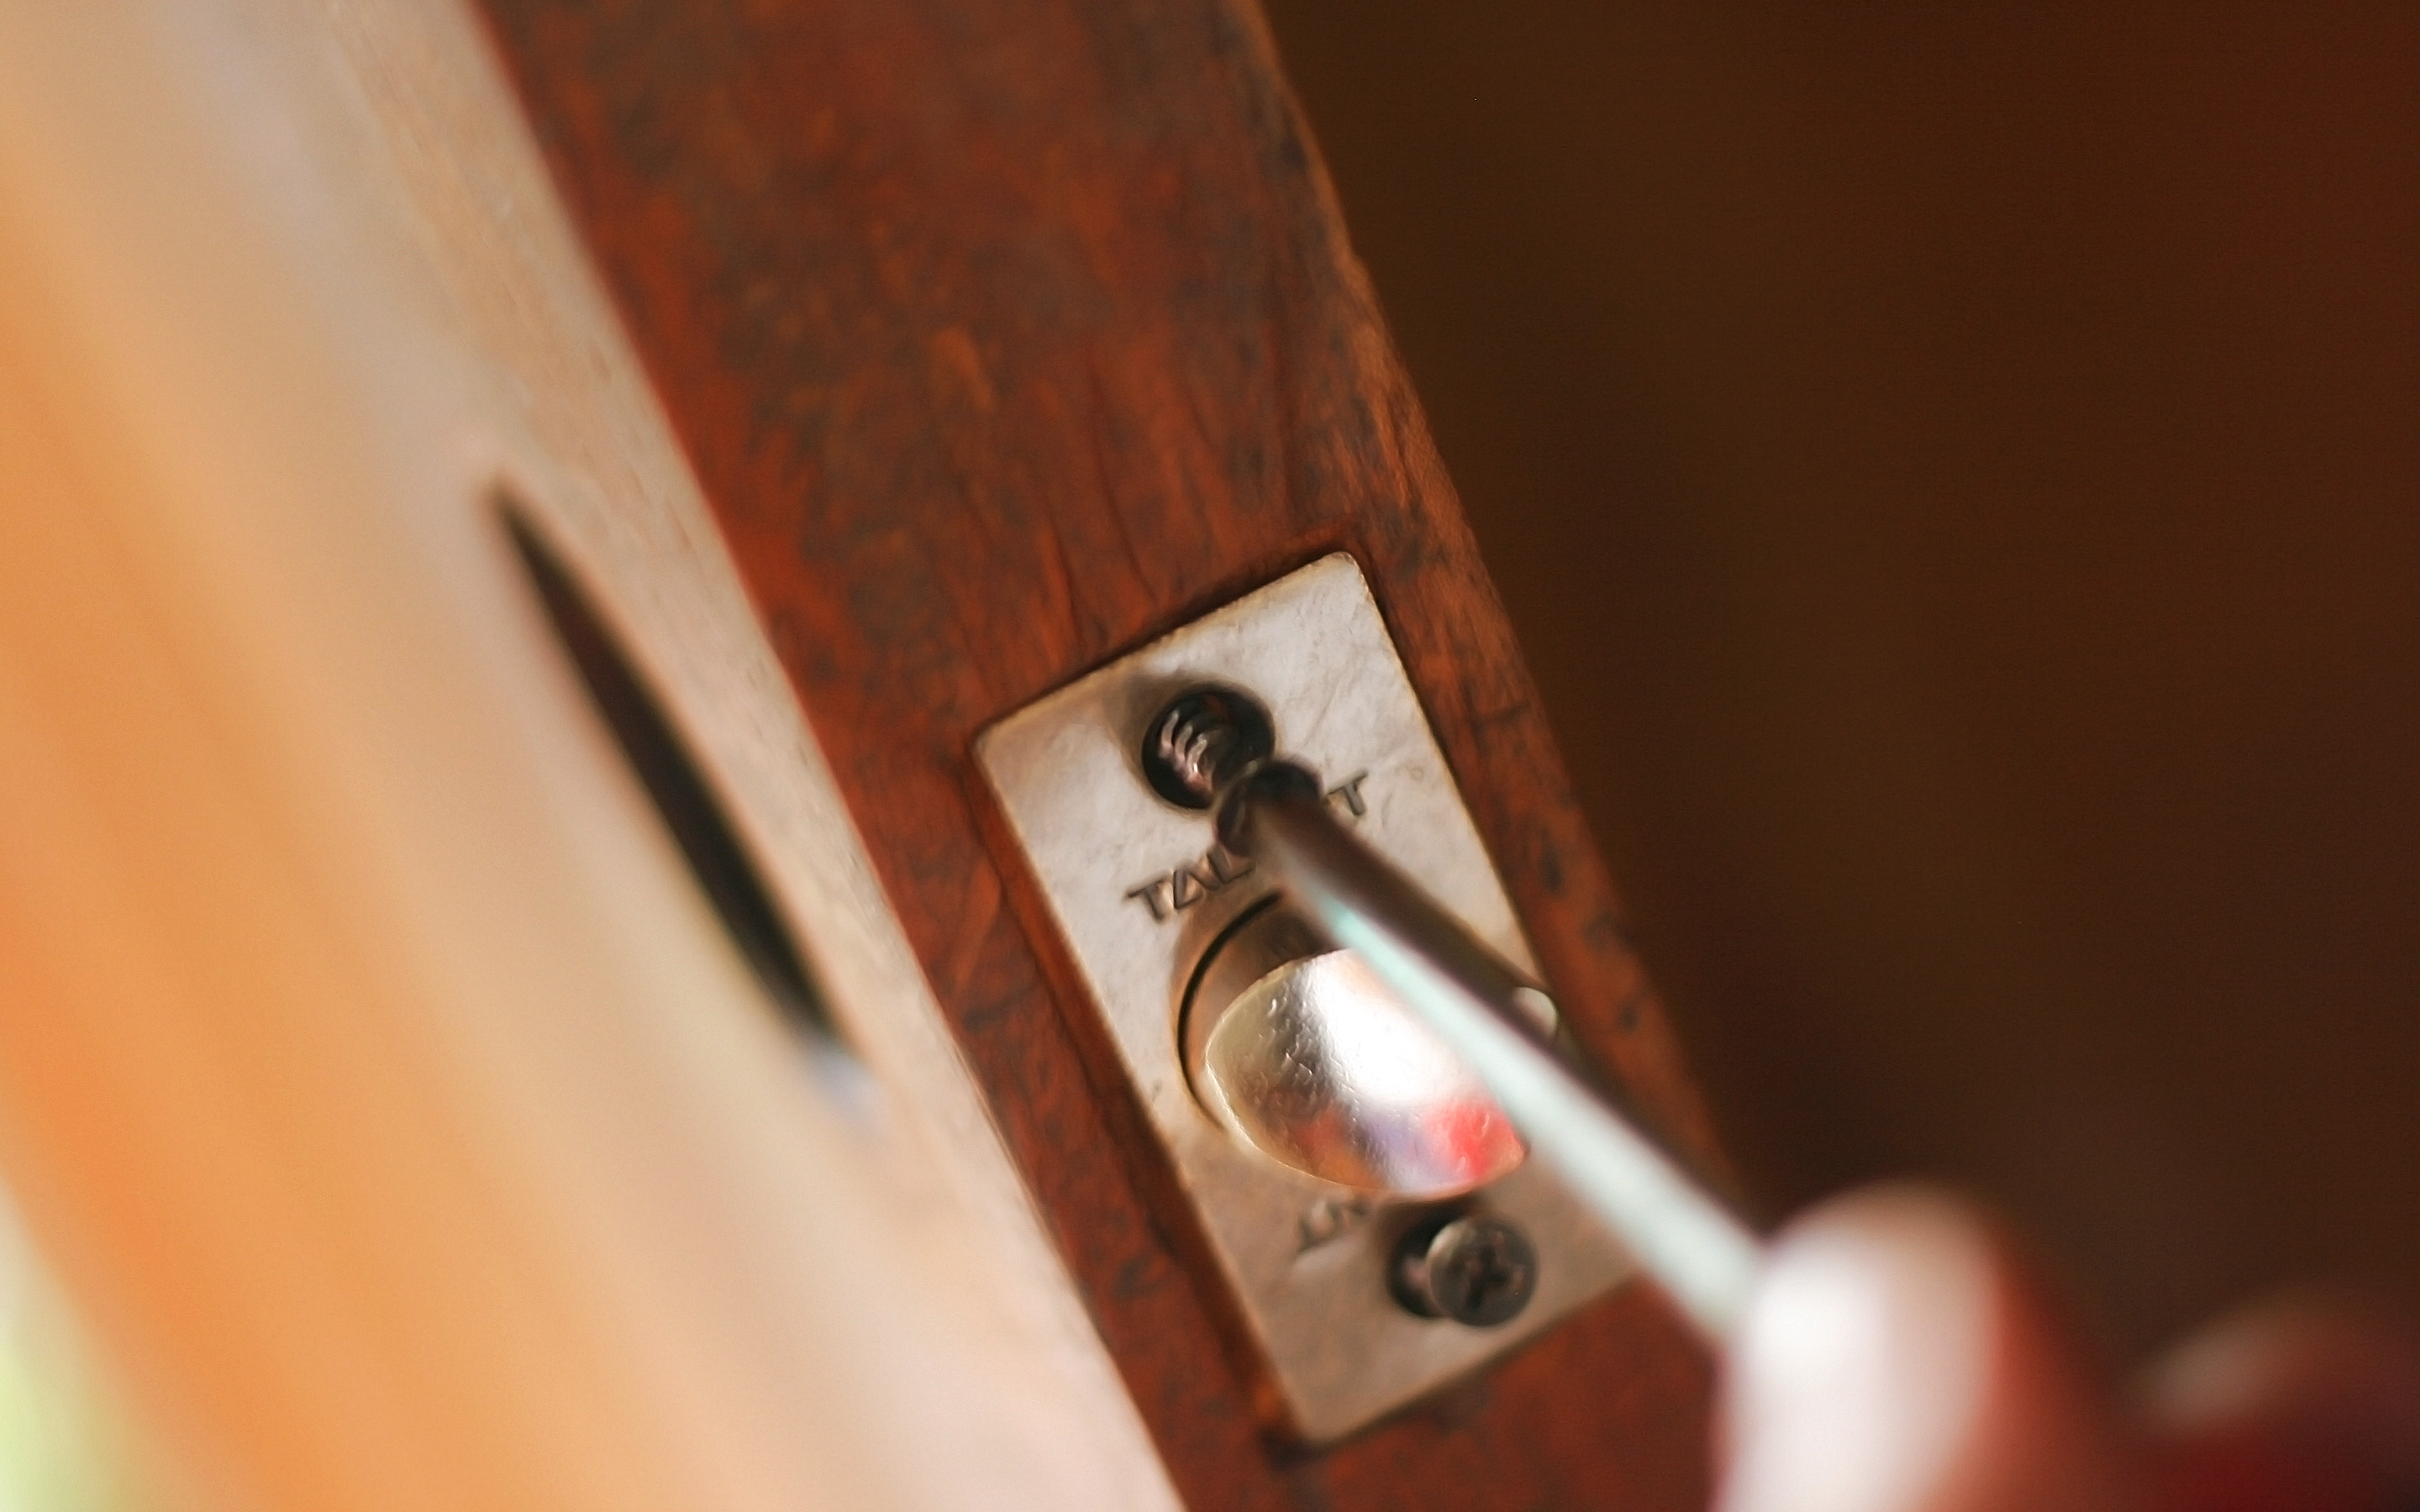
Find the latch plate and the strike plate. The latch plate is on the door...
Install-a-Door-Latch-Attached-Mortise-Plate-Step-6.jpg (2880×1800)

 and the strike plate...

strikeplate-strikeplate.jpg (320×480)

... is opposite the latch plate, on the door frame.

2. Remove the screws that hold the latch plate in place.

If they are tight, use a power drill to remove them.

3With the edge of the screwdriver, gently pry the latch plate from the door.

4Dismantle the lock assembly by removing the screws holding it together.

5Remove the two pieces of the assembly by pulling them apart.

They might be tight, so you may need to jiggle them a bit to loosen them.

6Remove the strike plate from the facing door frame by removing the screws that hold it in place, and then pry it from the door frame with the edge of the screwdriver.

7Open your new deadbolt kit and read the directions to familiarize yourself with your project.

8. Insert the new assembly into the hole of the door, and screw into place with the screws included in your kit.

9Now install the latch plate and secure it by tightening its screws.

10Before you install and tighten the facing strike plate onto the door frame, align the latch with the strike plate.

An easy way to check alignment is to extend the bolt with the door open, apply lipstick to the end of the bolt, close the bolt, shut the door, and extend the bolt.

Open the door and you will see the lipstick mark on the door frame where you need to place the strike plate.

11Place the strike plate onto the door frame where you see the lipstick mark, and tighten the screws to secure it.

Test the functionality of your new deadbolt by turning the latch several times, and then going outside and locking and unlocking it with your key.

That's all there's to it.

Need to watch a video to see how it's done?

https://www.youtube.com/watch?v=Jb6qZs9E9UE

https://www.youtube.com/watch?v=eEvL89SD3lw

Don't Currently Have a Deadbolt but want to install one?

https://www.youtube.com/watch?v=xISR-PRcb_s

Troubleshooting a dead bolt lock?

https://www.youtube.com/watch?v=jwQPXjxfBb4

Mr. Fix-It

___________________________
 

Where's Your Water Shut-Off Valve ?
 
maxresdefault.jpg (1280×720)

 
Just imagine if you will the following scenario.

You wake up one morning to the faint sound of running water, but you don't know exactly where it is coming from.

Do you know where the water shutoff valve is?

Locating the water shutoff valve in this situation can be a bit of a nightmare if you don't know exactly where it is.

Luckily, the water shutoff valve is not that difficult to find.

All you need to do is follow these simple directions, and you should have no problem whatsoever finding the shutoff valve.

Just keep in mind that it is better to find that valve prior to an emergency forming.

1Locate the water meter

The first step in locating the water shutoff valve is to find the water meter.

On most houses this is where the shutoff valve will be located.

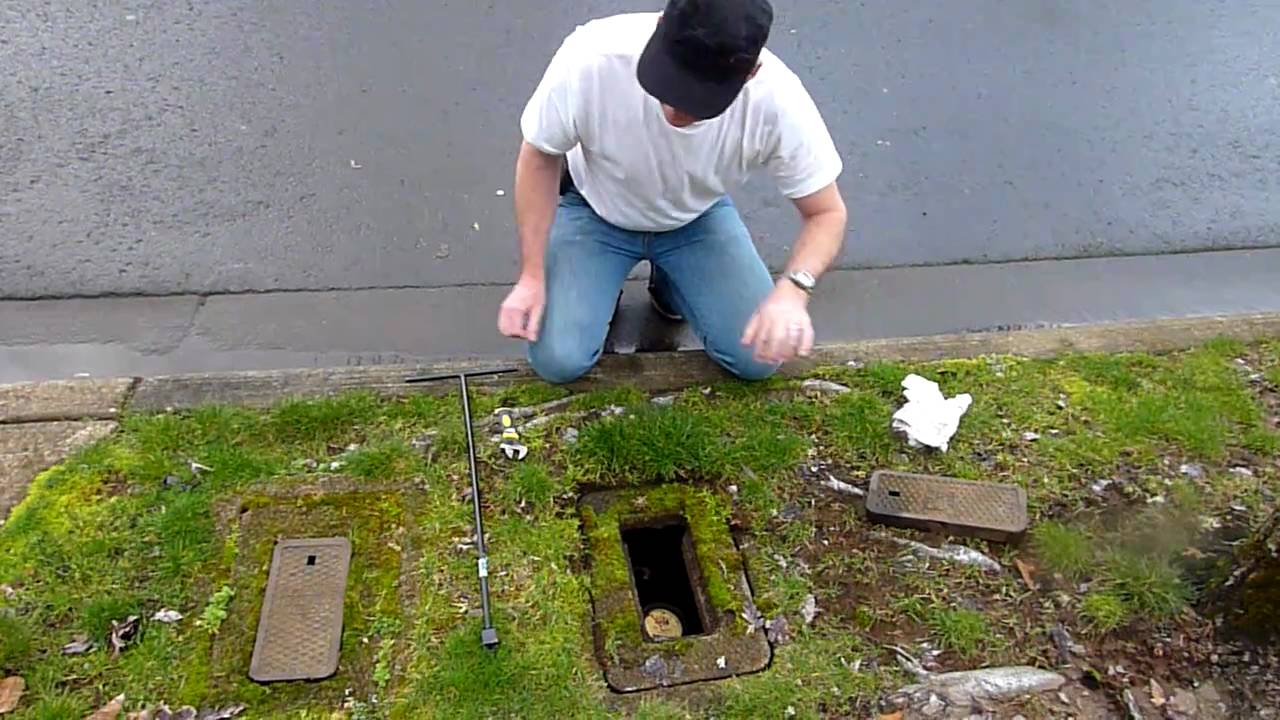
For most people in our association, the water meter will be located outside, usually  in a little box that is near the front curb.
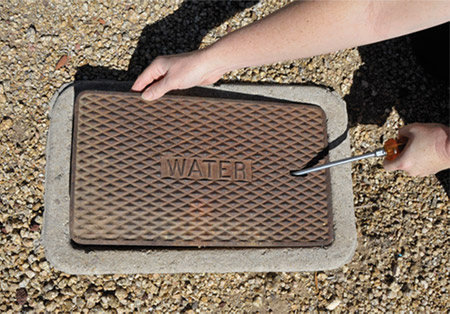
How to Read your Water Meter | Smart Home Water Guide

2. Identify the knobs

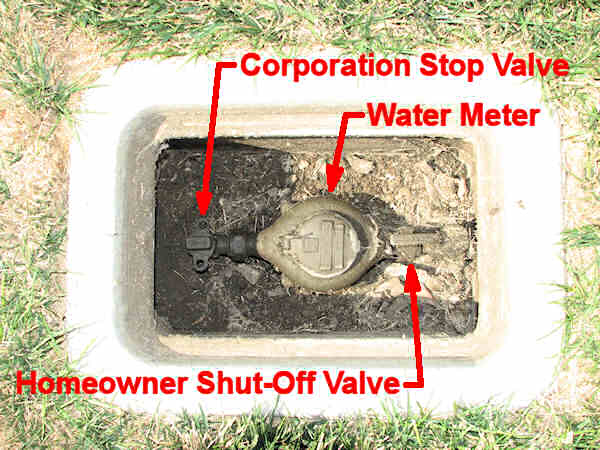
When you have found the water meter take a look and see if you can find the pipe that leads into it, and the one that leads out of it.
new-water-main-01.jpg (600×450)

Both of these pipes will have a knob attached to them.

One of the pipes is the water supply that comes into the house from the city, to be read by the meter.

The other pipe is the one that heads towards the house.

3Turn the correct knob

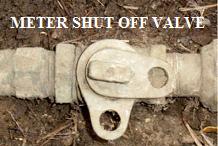
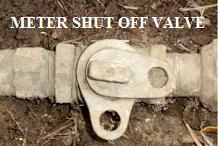
Locate the knob that is attached to the pipe that is leading towards the house from the street.
rwi_523_Manville_Meter_Shut-Off_Valve_1352902479_5775.jpg (218×146)

This will be the one that is on the pipe that is between the meter box and the street.

Turn the knob until the water stops flowing.

This will stop the water from flowing towards your house, and stop the bill from getting higher at the same time.

4Test, and do your work

Now that you have the water shut off, go ahead and test to make sure that you really do have the water turned off.

You do this simply by going into the home, and turning the water on.

If you did everything right, the water will run for a moment or two, and then stop.

Once the water does stop go ahead and do the work that you needed to have done.

5Restart the water

After you have completed the work that was needed, go back out to where the valve was located and turn the water back on.

Make sure that you turn the same knob that you used to turn the water off, otherwise you are simply turning the water off again, and you can easily get confused.

Video help?

https://www.youtube.com/watch?v=gBUGCBLPERc

https://www.youtube.com/watch?v=RvE6n7rTGnM

https://www.youtube.com/watch?v=zInC9ivYt2Q

____________________________


 A Rust Stained Driveway Needs
 a Good Cleaning
 
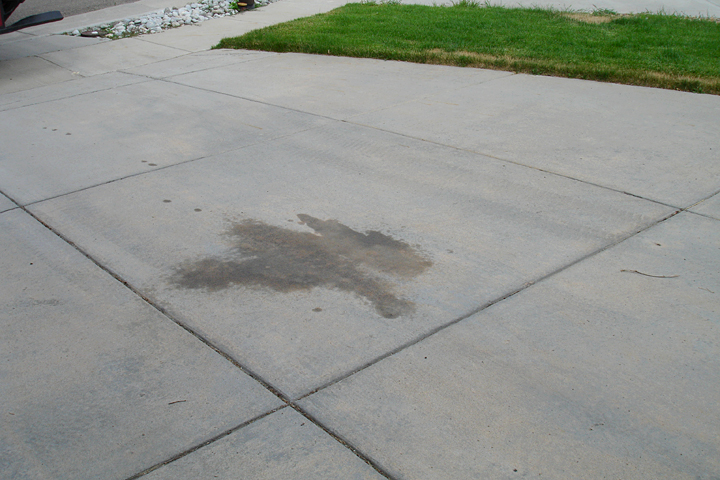
Driveway-oil-stain.jpg (2048×1536)
 

A clean driveway can be a great asset to the curb appeal of any house...

...and rust spots often slip by and deface the entire slab.

These can be caused by some fertilizers or perhaps metal particles from your car.  In addition, if you have a concrete driveway, there may be rebar in it which can also create rust spots.

Depending on what your driveway is made of, here are a few suggestions for getting rid of the orange stains.

Concrete slabs or pavers can both be cleaned the same way,  and you may want to start with the more gentle methods, and work your way up to the nasty stuff.

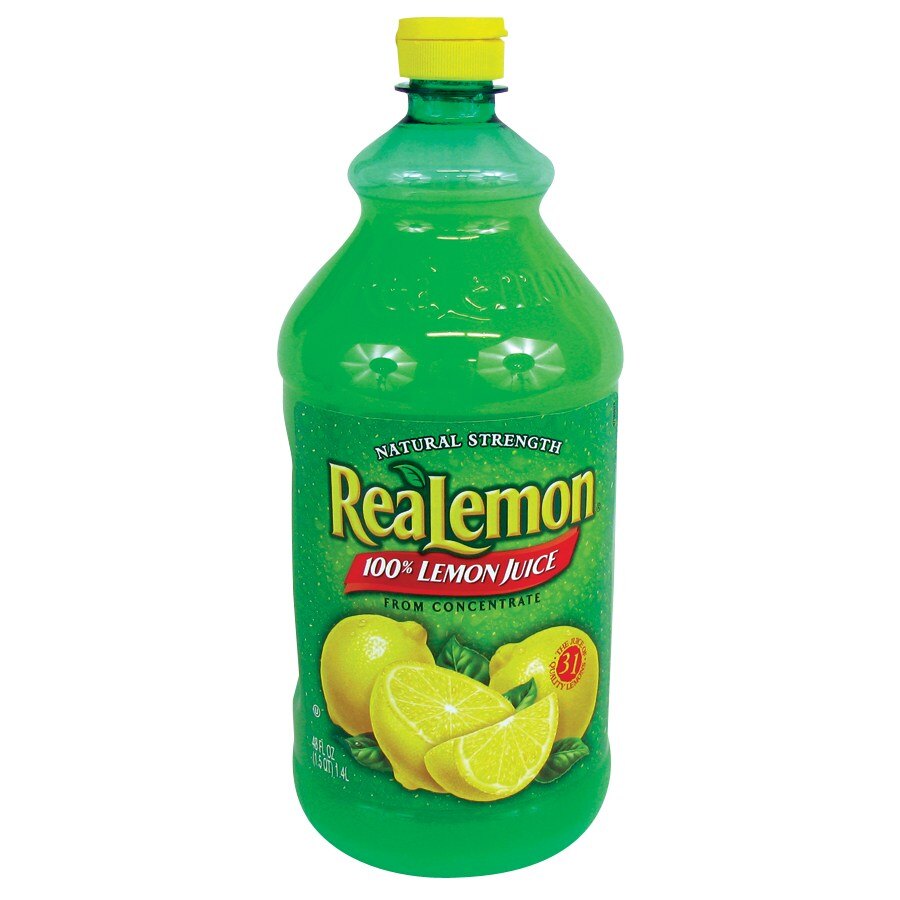
1. Lemon juice directly on the stain, with a little scrubbing and some sunshine, can help to lighten the area.

This is a mild solution and will work best on fresh stains in very sunny areas.
realemon-100-lemon-juice-48-oz-bottle.jpg (900×900)

Squeeze the juice from a lemon, as much as needed, to cover the spot.

With a stiff wire brush scrub, run in the lemon juice for a few minutes to ensure the juice is penetrating the stain.

Let is sit in the sun for natural bleaching.

Rinse the spot with a hose once the sun is no longer touching the area.

 Repeat this as many times as needed to return the stain to the right color.

2Commercial rust removers can be found almost anywhere.

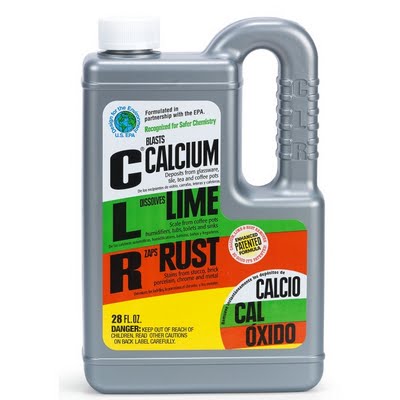
You can try the spray kind, like CLR, applied directly to the stain. Let it sit overnight before rinsing thoroughly.
CLR.jpg (400×400)

This can work to remove larger or darker stains.

There are also rust removers made for use on concrete, like Concrete Rust Remover.

concrete-cleaners-stripping-Rust-Remover.png (514×606)

Read and follow the instructions carefully when using these types of products to get the best result.

3Muratic acid and other acidic cleaners should be a last result after exhausting your other options.

Because you are handling an acid, you need to make sure you are protecting yourself from any injury.

Jasco_Muriatic_Acid_Gal_GJMA220.jpg (900×900)

Gloves, goggles, and at least a mask if not a respirator, should be worn when you apply to and rinse this from your driveway.

Cover the affected area with the muratic acid, being careful not to get any on the unstained surface.

Let the acid sit for a short time, then rinse it off with a hose or a pressure washer.

This will lighten any area that is applied.

If you leave it on too long, you will have a light spot on your driveway in place of the rust stain.

You can use it on your entire driveway to avoid this problem.

Asphalt driveways can get rust stains as well, and will benefit from a few of the same methods as concrete.

1Rust removers can be used on asphalt as well in the same manner as the concrete, but be prepared to repeat the process a few times to get the stain to lift.

2Acids will make a mess of asphalt, so you want to stay away from them as a stain lifter.

You can use a little amount of gasoline to soften the stained area and then work it out using a wire brush.

Be careful that you do not over brush and create a divot in your driveway.

The asphalt will harden as it dries so let it sit for a long while without disturbing it.

3. Resealing the area or the entire driveway with an asphalt sealer, which you can pick up at hardware store, will hide any stains and fill in any cracks.

Just roll on the sealer with a roller and let it set as directed by the instructions.

If you want to fill in cracks while you are doing this, refer to the instructions for the product.

Be careful when using any of these methods that you do not harm you plants or lawn by applying the products to them.

Getting rid of stains on your driveway can make a big difference in how the outside of your house looks.

Give these a try and it can give your home a "facelift" to restore the clean look of a new house.

How about a video?

https://www.youtube.com/watch?v=ZEc_TyM5s5Q

https://www.youtube.com/watch?v=ZNuJbaRRm2s

https://www.youtube.com/watch?v=R7pXfUfr-XI

Mr. Fix-It

___________________________


Starting a Project that Requires a Contractor?
Here's a Helpful Check List
 
house-under-construction-cartoon.gif (364×312)
 
Just about everyone has heard some horror story about people hiring a general contractor to perform a simple home improvement project only to enter a scene from the classic movie, "The Money Pit."
 
Unless you are wanting to experience the wonders of having your wallet fleeced, and your room only half finished, then you need to have a carefully constructed contractor contract. That's where these general contractor contract tips come into play.
 
As you prepare to hire your choice for a general contractor, be sure that you have these tips nearby. As you look through the contract, make sure that each and everyone one of these points is covered.
 
If you find something that isn't covered, be sure to hand it back, and have it added. Once the contract is completed to your satisfaction go ahead and sign it.
 
1Spell out everything
 
No matter how silly it may seem, you want to make sure that you have as many things as possible spelled out. This includes your name, the contractor's name, your address, the contractor's address, the work that is going to be completed and so on.
 
These things need to be included so that everyone knows exactly what work needs to be completed, and that there are no surprises encountered by anyone.
 
Keep in mind that a contractor is totally within their rights to charge you more for work that isn't spelled out, so it is always a good idea to have every step of the process spelled out—that way you can't get charged for something that you thought should have been included, but wasn't.
 
2Itemize everything
 
In your contract, be sure that you have a complete itemized list of all the materials that will be used in your project.
 
Avoid using any words or phrases that imply or say "of equal value."
 
The reason for this is that it leaves a lot of wiggle room for the contractor to pocket the difference between the product you agreed to pay for and something that is of "equal value."
 
However, do not tie the hands of your contractor either.
 
Have clauses in your contract that will allow substitutions to be made, but only with your prior approval.
 
3. Milestones
 
It is completely fair to have an outline of the milestones for your project to be included in the contract. This will allow you to plan, and expect when certain steps or points of the project should be completed.
 
Around each milestone markers you should also include a payment plan. This way you refrain from paying the complete amount up front and running the risk of having the contractor run off.
 
In addition, this will also allow you to better budget your project, so you don't necessarily have to have the entire amount of money at one time.
 
4. Penalties
 
Included in your contract you should also have a section for "penalties".
 
What this means is who will be responsible for fixing problems that crop up if the work isn't up to specifications or code.
 
If at all possible, try to also work in a penalty for any late work (i.e., you don't have to pay as much for work that has not been completed on time).
 
5. Double check the contract
 
Before signing anything, be sure that you double check the contract.
 
If at all possible have your attorney take a look at it to make sure that it is a legally binding contract for your area.
 
You don't want to think you have an iron clad contract, only to find that it isn't valid in your city, county, or state.
 
Here are some helpful videos.


Mr. Fix-It
___________________________

 Fixing a Wobbly Chair

 
119498555124689266sedia_in_legno_architett_01.svg.hi.png (402×594)

Have you ever noticed just how easy it is for wooden chairs to become loose over time? For some reason these types of chairs will become wobbly, creaky, and generally rickety.

 Tightening a loose chair isn't particularly difficult, and is often a task that can be completed with only a few minutes of work. Just use these simple methods, and you will have a perfectly working chair again in almost no time at all. 

Joints

 Quite often the easiest way to tighten a loose chair joint is to simply use a bit of glue. Simply remove the joint a bit and apply a bit of glue to the joint. When you have done that, put the joint back together, and then use a belt that has been carefully tightened to hold it in place as the glue dries.

 Another step that you could do to help with this is to actually use a screw, or angle brace of some sort, that will be placed in an inconspicuous location to help hold the joint together.

 When both glue and screw are used, you will have a tight hold on the joints.

 Leg...Spindles...Rungs

 Another part that often becomes loose on chairs are the decorative spindles, legs, and rungs that you can see on most styles of chairs.

 When these types of items are loosened, the easiest method for tightening them is to apply a small screw that can be hidden.

 Simply drive the screw from the underside, or other location that is out of sight, through the chair and into the decoration.

 Be careful that you use the narrowest possible screw for this job, or you may run the risk of splitting the wood.

 In addition, if you run the screw in and then remove it, you can place a drop or two of wood glue, and use that to strengthen the bond between the wood parts. 

Structural Parts

 Structural parts can often be repaired in much the same manner as described above; however, you will typically need to be driving the screw from outside.

 To hid this, you will need to first attach the screw as described above, but with the head recessed into the wood a bit.

 Find a wood dowel that will match the color of the wooden chair, or some paint that you can apply.

 Cut a little bit of the dowel off so that it will fit cleanly into the hole left behind.

 Smear some wood glue over the sides of the dowel plug that will be going into the hole, and then place the plug into the hole.


Wrap the dowel with wax paper (glue won't stick to wax paper), and then wrap the paper tightly with string to hold it in place.

 Allow the glue to dry completely before you remove the wax paper.

These methods are designed to work on the most commonly loosened parts of a wooden chair....as long as the break isn't too severe. If that is the case,  you may need to take the item to a professional.

We have some videos.

https://www.youtube.com/watch?v=xBkce8meWkU

https://www.youtube.com/watch?v=QGeInlnQ-Rs

https://www.youtube.com/watch?v=D6bcKHtX5-w

Mr. Fix-It

_____________________________
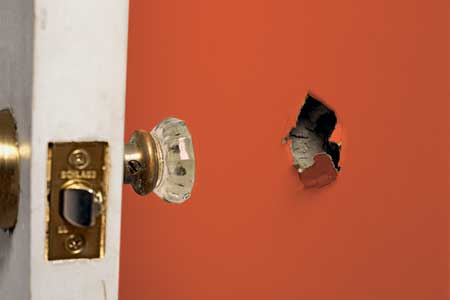


Got a Hole in a Wall that Needing Fixing?

  holes-x.jpg (450×300)

Have you ever been faced with the problem of repairing a hole that was put into your wall?

Many people believe that for the large holes, this is a complicated and difficult task. Luckily, this is not something that is as difficult as many people may think. All that someone needs to do is gather a few items, and have some time that can be devoted to the task.

Items needed:

Sandpaper

Adhesive fiberglass tape

Drywall compound (also known as "mud")

Sheetrock

Hair dryer (optional)

Paint (matched to existing paint)

Paint brush

Sanding block, or sanding tool

Drywall saw or knife

Drywall screws

Screwdriver

After you have completed gathering these items, use the following checklist and you are going to be able to have a wall that is as good as new.

1Make sure that the hole in the sheetrock is cleaned and prepped for repair.

Use a drywall saw or knife to remove the damaged portion of wall.

(In fact, you could or should probably do this step before beginning anything else, since you could take a small piece of the painted sheetrock with you to find matching paint.)

2Take a piece of the sheetrock and screw the backing board (the scrap board).

The board is going to act as a support structure for the patch.

Drywall Repair: How to Repair Drywall | PlanItDIY

Apply some of the adhesive to the board to help keep it in place as your patch.

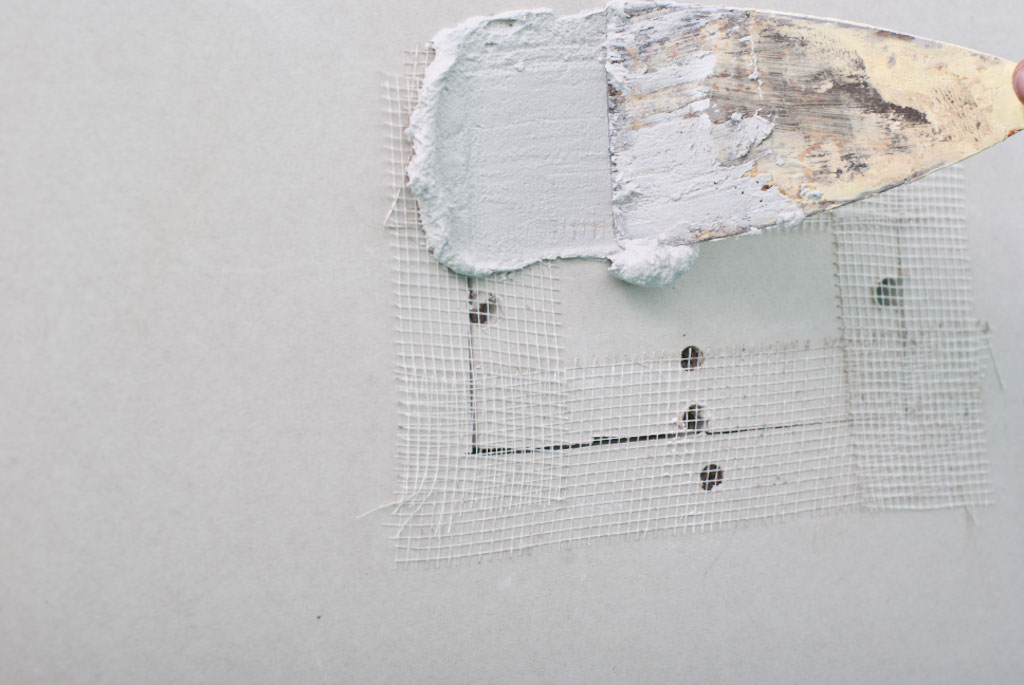
3After you have the patch in place, take some of your "mud" and apply a coat over the entire patch, and about 5 to 7 inches past the edges to help provide extra support to the patch.

Apply this coat in as even of a manner as possible.
spreading-mud-over-the-patch.jpg (1024×685)

After you have done this, you are going to need to wait for the mud to dry completely, which can take up to twelve hours.

One method that you can use to speed this up, you can use that hair dryer mentioned in the items list.

Considering that this is going to dry the mud much quicker, you can be ready to go to the next step in as little as 30 minutes.

4Take some of the sandpaper and your sanding tool to smooth out the mud.

You want the area as smooth as possible prior to painting.

DTTR309_drywall-patch-inserted_s4x3_lg.jpg (614×462)

If you have found yourself with spots that are thinned out too much, simply repeat step three and four as needed.

5Paint your wall.

You can now paint your wall, and if you have done all the steps properly, then you are not going to be able to see any of the damaged wall.

All that you have left to do now is to clean up.

Need a video?

https://www.youtube.com/watch?v=lj7YK1lIRUM

https://www.youtube.com/watch?v=zeC59Ck31uc

Mr. Fix-It

_____________________________
  

Time to Refinish Your Bathroom Cabinets?
  
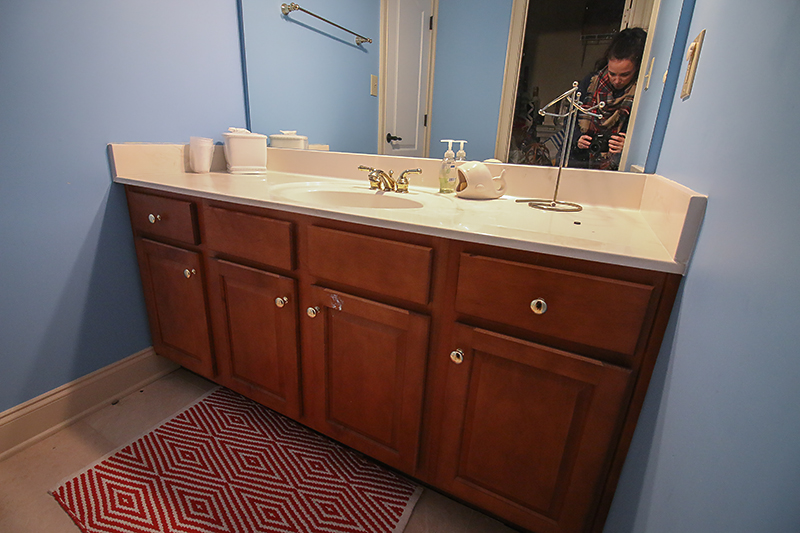
Remember when your bathroom cabinets looked like this?

How to Refinish a Bathroom Vanity - Bower Power
 
Are they looking like this now?
 
 wfrfn019a_furniture_refinish.jpg (280×240)
 
It may be time to refinish the cabinetry.
 
When looking at redecorating your bathroom, one of the best ways to save some money is to not replace the cabinets.

Refinishing bathroom cabinets is probably the greatest money saving alternatives available.

This is a project that anyone interested in doing their own remodeling project can handle.

All that anyone needs to do is have a little patience, be willing to get a little dirty and that you have the proper materials.

Materials needed:

Tarps

Finish

Stain, sealer, varnish or lacquer (your choice)

Paintbrush

Primer ( use a product like Liquid Sand)

Degreaser, cleanser

Sand paper

Soft sponge or rags

New hardware

Steps:

Prepare

Begin your refinishing project by selecting a work area.

You want to use an area that is well ventilated and that can be kept dust free.

One of the best locations to use is your garage. Make sure that you have laid out the tarps so that you don't create any stains.

Identify

Once you have decided on where your work space location, you now need to diagnose what type of finishing agent was used on your cabinets. Chances are some it is going to be something along the lines of a shellac, varnish or lacquer. It's also possible that there was a stain used.

Remove

After you have determined what type of finishing agent was used, you need to remove the cabinetry from the bathroom.

Begin with the doors, and then move onto the main body.

Make sure that you have placed all the pieces in one location so that you don't lose anything to be able to put it all together again.

Considering how difficult it can be to remove the actual body, you might want to just leave the body in place and strip it in place.

Clean

After you have removed all the pieces, you need to go ahead and clean everything thoroughly. Try using such things as degreaser, rags and sponges.

Remove as much of the dirt and grime as you can, and then allow everything to dry thoroughly before proceeding.

Strip

Once you have cleaned and dried the pieces, go ahead and strip the old finish or varnish.

Before proceeding, you want to make sure that you have correctly identified the finish that was used, because not all stripping agents are going to work equally well in this situation.

Refinish

After you have stripped the old finish or varnish, go ahead and use the primer.

Just like when you paint a car, when you paint or refinish wood you want to use a primer. In part this is to help bond the stain, varnish or finish to the wood, but also to help make sure that everything is absorbed at the same speed.

Allow the primer to thoroughly dry before applying the stain.

Once the primer is dried, take some of the sandpaper, and very lightly—using just enough pressure to hold the paper to the surface—smooth out any ridges.

Now, go ahead and paint the stain or finish onto the wood.

Allow a minimum of 15 minutes to pass between coats, to ensure you have not missed any parts, and that you get the color you are looking for.

Clean

Once everything is refinished, go ahead and reassemble your cabinets using the new hardware you picked out.

Clean everything up as you go along.

That's all there's to it.  You are now finished.

Need some video help?

Part One

https://www.youtube.com/watch?v=KklkN81WShc

Part Two

https://www.youtube.com/watch?v=WvFdOBSOF5E

Part Three

https://www.youtube.com/watch?v=3DLYs0wwixU

Mr. Fix-It

_____________________________

 Does Your Door Trim Need Repair Help ?

 
How To Repair Door Trim - YouTube
 

Have you ever noticed how it always seems like the doors to a home are among the first things that need repairing? Usually this is due to the sheer volume of wear and tear that we put on these items.

With all the things that go through a door, it only stands to reason that the door trim will end up taking most of the damage.

Luckily, repairing door trim is a fairly easy process.

All you need to do is follow these step by step instructions, and you will soon have your door trim looking brand spanking new again.

Materials

Hammer

Hand saw

Finishing nails (usually #12 or #6)

Small pry bar

Camera

Wood stain, paint, or sealer

Paint brush

Sand paper

Paper

Measuring tape

Ruler

Pencil

Handheld power sander.

Procedure:

1. Measure

The first step in repairing your door trim would be to measure the existing trim. This will allow you to know exactly how much you will to purchase.

Simply use your measuring tape to measure the existing door trim with your measuring tape, and write down the answers.

Measure everything at least two times in order to ensure that you get the correct measurements.

2Match

 If you like your current style of door trim, and would like to match it then take a picture of the trim.

Take this picture along with you to your local home improvement store, and see if they have any trim that will match it.

Have the home improvement store cut the trim to your specification, and if at all possible see if they can create a miter cut where the pieces will meet.

FH10APR_TIGMIT_04.JPG (1000×1000)

While you are at the home improvement store be sure that you also purchase some paint, stain, or sealer for your wood.

Make sure that you purchase enough so that you can cover the entire pieces.

2. Remove

Once you get home with your new pieces of door trim, it is time to remove the old damaged pieces.

Begin by removing the door from the door frame, and then removing the old door trim.

When removing the door trim, be sure that you do it carefully so that you do not damage the frame itself.

3Replace

After having removed all the trim, it is time to replace everything.

Carefully line everything up as straight as possible.

If you have one, use a carpenter's level to ensure that everything is nice and straight.

220px-Tool-level.jpg (220×78)

Use a hammer and the finishing nails to attach the trim to the frame.

If necessary take your miter saw or handsaw and ensure that everything is trimmed properly so there are no gaps in the trim.

4Stain, seal, or paint

Finally, once you have your trim in place it is time to stain, seal, or paint it.

Before you do this though, take some time to sand the wood so everything is nice and smooth, and to remove any existing sealant, paint, or stain that may have been on the undamaged portions of door trim.

Once everything has been sanded so that it is smooth to the touch, go ahead and begin applying your stain, paint or sealer.

Be sure that you follow the direction properly, and allow to dry completely before replacing your door.

Need some video help?

https://www.youtube.com/watch?v=urgXb6mRmmM

https://www.youtube.com/watch?v=h2iFZkjUu7U

Mr. Fix-It

_______________________


Is it Time You Re-Caulked Your Bathtub ?
 
FTOV49DH5E9PXP4.LARGE.jpg (980×734)
 
One of the more annoying problems that a homeowner faces is that of leaky tubs and sinks. Many people think that they have to have a professional plumber fix any leaks in the home, when in reality they can fix it themselves.

An improperly caulked seam is something that leads to many of the leaks a homeowner is faced with.

Re-caulking the seals and joints of your tub annually is something that can, and will greatly reduce the chances of any leaks that may crop up.

Prior to beginning any home repair project, the first step is to gather all of the materials needed. To accomplish this home repair project, you are going to need the following:

Tube of caulking

caulk02.jpg (450×267)

Caulking gun

(if required for the tube of caulking you selected)

2928.JPG (1000×647)

Multi-purpose tool or a knife

15 Best Caulk Finishing Tool and Caulk Removal Tool: (in 2020)

Damp rags

kitchenandbathroomrenovation91b.jpg (217×203)

Caulking can come in several different types of containers.

For small caulking jobs, you may be able to get by with a small tube that you can squeeze without a caulking gun. For larger jobs, you'll want to get larger tubes of caulking, which always require a caulking gun. These aren't expensive, and your local home improvement store can help you get the right one for your caulk tubes.

To begin the project, you'll need to remove all of the old caulking that is associated where the leak is located.

In order to make sure that all of the caulking has been removed, use the knife or multi-tool to remove the caulking from the area.

Be careful, however, that you don't gouge or damage the surface of the tub itself or the wall.

When you have removed as much of caulking as you can with your hands and the tools, then use your damp cloths to wash off as much of the caulking residue as you can. This is going to ensure that you get as much of the caulking as possible, while cleaning the area and preparing it for the re-caulking.

You are now ready to apply the new caulking.

If you are using a caulking gun, insert the tube into the gun.

(The caulking gun provides the proper amount of constant pressure necessary to apply the caulking evenly and smoothly.)

Use your knife to cut the tip of the caulk tube so you have a hole about 1/4-inch in diameter. This is where the caulk "bead" is formed as the caulk leaves the tube.

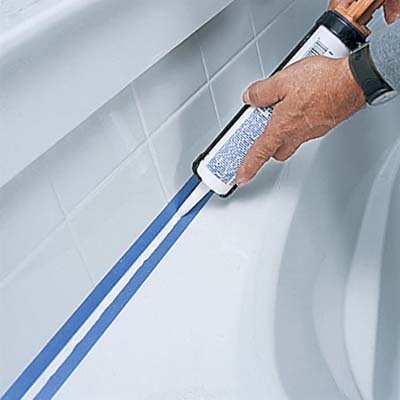
Place the tip of the caulk tube into the corner formed by the tub and the wall, at one end of where you just removed the old caulking.

Make sure that the tube is at an angle.

Squeeze the tube or pull the trigger on the caulking gun and the caulk should start to come out.

Keep the tip of the tube in contact with the corner and slowly move the tube so that you "lead" the caulk down the seam.
09-save-money.jpg (400×400)

As you apply the caulk, make sure you use a continuous and steady stream of the material.

When the caulk has been completely applied to the seam, use one of the damp cloths to wipe up any excess caulking that may be there.

Be aware that you need to let the caulk completely dry before using the tub again.

The best possible way of doing this is to let the caulk dry overnight at a minimum.

Need a video?

https://www.youtube.com/watch?v=k0j5jYy3qHg

______________

Saving Money by Installing as Efficient Showerhead

 
a-higiene-ducha.gif (400×400)
 

Have you ever noticed how the price of water bills tend to always go up, and never really down?

Instead of just going along with this, why not look for ways to lower your water bill?

One very effective method for doing that would be to install a more water efficient showerhead.

For you "engineers" out there...here's how they work !

Oxygenics Water Saving Showerheads - Manhattan Green Solutions

Good thing that installing a water efficient showerhead is not only an easy task, but one that even the most inexperienced do it yourself enthusiast can accomplish in a single afternoon.

Simply follow these directions to get the job done quickly and efficiently.

Items needed:

Plastic bucket (1 gallon sized)

Stopwatch, or wristwatch with second counter

Water efficient showerhead

Appropriate sized adjustable wrench (typically 12 inches)

Teflon, or silicone, thread sealing tape

Procedure:

1. Check your water flow

Before you can install a water efficient showerhead, you should check to see if you actually need one.

Turn the water of your shower on, and then place a 1 gallon bucket under the water flow.

Allow the timer to run until you have filled up the bucket.

Divide the number 60 by the total number of seconds it took to fill up the bucket, and you will have your total water flow, which is measured as gallons per minute (gpm).

2Get the appropriate shower head

Now that you know  your gpm, output, you can begin thinking about getting the appropriate water efficient showerhead.

Typically you will only need to get a water efficient showerhead that filled your bucket in 20 seconds or less.

When looking at the packaging of the potential showerheads, you need to first look at the gpm rating.

Ideally you want one that is at 2.5 gpm or less.

After you have found the appropriate speed ratings, you can begin looking at other features as adjustable showerheads, pulsating, fine spray, wands, and so forth.

3Remove the old head

When you get home, you can begin removing the old showerhead.

All you need to do is grab your adjustable wrench and hold onto the shower pipe (firmly) so that you don't accidentally damage it.

Set the adjustable wrench to the appropriate size, and begin loosening the head carefully. You will want to use the flat sides of the shower head to do this, and continue turning until you have completely removed the head.

4. Remove old sealing tape

Once you have the showerhead removed, you will need to remove the old sealing tape from the threads of the shower pipe.

If the tape doesn't want to come off easily, you may need to use a scrubbie to help remove it.

You will want all the sealant tape removed before you apply the new tape to the threads.

5Apply new sealing tape

After you have removed all of the old tape you can begin applying the new sealing tape.

Start at the open end of the pipe, and work your way backwards to cover all the threads.

When doing this, you will want to wrap the tape clockwise, overlapping the tape half the width so that you get a nice tight seal.

You should only have to apply the tape once until you have covered all the threads.

6Thread the new shower head

Remove the new showerhead from the packaging, and begin threading it onto the shower pipe.

Turn the showerhead carefully with one hand, while you hold the shower pipe with your other.

 Continue to turn the showerhead by hand until it won't turn any more, making sure that you are turning it clockwise so you don't accidentally cross thread the showerhead.

7Check your work

Once you have the showerhead hand tight on the shower water pipe, you will want to check your work and make sure that there are no leaks.

This means that you will want to turn the water on.

You only need to worry about a leak if you see water dripping from the top of the shower head.

If you do see a leak, tighten the showerhead with your adjustable wrench by turning it 1/4 turn, and repeat your test. Continue to tighten and test in this manner until you no longer see any leaks.

Now that you have your new water efficient showerhead installed, you should notice a decrease in your monthly water bill.

Keep your old water bill, and compare it to your current one.

If there still isn't any change you may want to have a look at the rest of your pipes, or even install other water efficient items throughout your home.

Need a video?

https://www.youtube.com/watch?v=-9yq1VuDGHQ

Fix-It

______________


Cleaning Marble Stains

 Before & After: Cleaning and Restoring Marble – Design*Sponge

While marble is usually a fairly easy material to keep clean, there are times when there are going to be some fairly stubborn, or difficult stains.

However...there are two ways that you can go about cleaning these kinds of stains from your marble.

Specialized Cleaners

There are some specialized cleaners available that you can use to clean stubborn marble stains.

One example of such a cleaner is a product called Motsenbockers's Lift Off...


Amazon.com : Motsenbocker's Lift-Off - No. 3 Pen, Ink Graffiti Remover, 22  oz. Trigger Spray : Jan San Supplies : Office Products

...which has been specially formulated to deal with strong or stubborn stains without many of the problems that other cleaners have.

Other cleaners that you may wish to consider using are ones that have been specifically formulated for cleaning marble. While more expensive than general cleaners, they will most likely get off any stubborn marble stains that you may be faced with.

Simply be sure that you follow the manufacturers directions closely.

General Cleaners

With general cleaners, you will need to use more elbow grease.

In order to get your marble really clean, you will need to grab a timer, and an adjustable nozzle spray bottle filled with some filtered or de-mineralized water.

Use powdered cleanser (such as OxyClean or Comet), and bleach to make some slurry.

OxiClean® 48 oz. Versatile Stain Remover Powder | Bed Bath & Beyond

Comet With Bleach Cleanser Lemon Fresh (21 oz) - Instacart


 Amazon.com: 1-Clorox Concentrated Ultra Bleach (3 quart bottle 96 fl oz) :  Health & Personal Care


Mix together the powdered cleanser and bleach, using equal amounts of both materials.

Set your timer to 45 minutes, and then put enough of the slurry onto your stain to cover it to a depth of around 3/8 inch.

Start your timer, and periodically mist the slurry till the timer stops.

The reason for this is that the slurry will not work very well if it is allowed to totally dry, so it will need to remain moist.

Once the 45 minutes has passed, rinse the area thoroughly with water.

If the stain has not been completely removed, you can repeat the process.

Another option is to make the slurry once again, cover the stain with it, and then cover the slurry with plastic, and then a towel and allow everything to sit overnight.

Be aware that you should keep your work area well ventilated since the cleaner will usually begin bubbling as it begins to dissolve the organic components of the stain.

If you happen to be sensitive to chemicals, then you may need to wear a mask to help protect from the scent.

When handling the slurry, make sure that you are also wearing some rubber gloves to help protect your skin from any irritation.

Some other ideas?

https://www.youtube.com/watch?v=hlJ44JdP2vk

https://www.youtube.com/watch?v=UxRlg_OuhHU

https://www.youtube.com/watch?v=eWxumwp1hOk

_____________________________


Sponge Painting Your Furniture
 
MEBEL__49.JPG (498×373)
 

Furniture that you've had in your home for a while can become boring over time. Sometimes, you just want to decorate with something new and fresh but due to financial or other restraints you can't completely redecorate an area in your home.

You might think that you'll be stuck with the same boring set-up forever, but the truth is that it isn't difficult to make a change to your home's decor.

Although you might think you have to spring for brand new furniture to get a fresh and unique look, all you really need is to know how to change the furniture you already own.

If you have old chairs, tables, dressers, stools, shelves, or other pieces of furniture, you can give them new life with a coat of paint and a little time.

There are many options for potential designs, but odds are you are looking for a fun and unique way to personalize your furniture and add life to your home.

Sponge painting furniture is one option that will allow you to redecorate without over-doing it.

Using a sponge painting technique to decorate your furniture is a great way to help you change things a bit around your house.

Instead of seeing the same old shelves everyday, for instance, you can practically start over with a new-looking piece of furniture.

Another plus of sponge painting your furniture is that you can cover up scratches, marks, or imperfections in an old piece of furniture.

Because sponge painting adds a textured look to surfaces, most flaws will be easily hidden under the paint.

Sponge painting a piece of furniture is a fairly easy process.

First you will need to sand down the old paint on the surface, then clean the area.

Using paint colors of your choice, first apply a base coat that covers the whole piece, then allow to dry.

Next, apply another color (either a little lighter or a little darker than the base) over the base coat using a sea sponge.

The sponge creates an interesting effect that adds a textured look to the furniture and completely changes its appearance.

Once you have finished painting and you are happy with the result, apply a protective coat of sealant and allow to dry.

A new coat of paint applied in a fun way can add life to your furniture and give your home an interesting new look.

Give this method a try on your old furniture and you might be pleasantly surprised.

How about a few video ideas?

https://www.youtube.com/watch?v=d56tl5FFN50

https://www.youtube.com/watch?v=chX3ychlWYk

https://www.youtube.com/watch?v=Tkf0sQ5IzW4

Mr. Fix-It

_____________________________

New Blinds....How to Hang Them


window_treatment_image.jpg (650×295)

Have you ever noticed how hanging blinds often seems to be more difficult that it needs to be?

Whether it is due to having a hard time getting everything nice and level or it's due to the blinds falling down and causing a little damage to your walls, this task can be a major "pain" if you don't know what to do.
There is some good news about hanging blinds:
It doesn't need to be as difficult as people usually make it out to be !
Here are a few methods you can use to help make your blinds look as nice as possible when you hang them.
1. Use existing hardware
Perhaps the single easiest method for hanging blinds is to use existing hardware.
What this entails is simply removing any old, existing blinds and then replace them with your new blinds.
This is the easiest and least expensive method since you are utilizing work that has already been done.
2Tension rods
Another inexpensive alternative to hanging blinds would be to use tension rods.
While this method will not work for all blinds, it will work with many cloth blind variants.
The tension rod is a spring-loaded device that uses the tension generated by the springs to hold its place, even with the added weight of blinds.
21CdCxyTU8L._QL70_.jpg (165×194)
Simply push in the ends of the rod and put it into place where you want the blinds to hang.
3Do your own work
Doing your own installation is certainly an alternative method you can use to hang blinds.
When doing your own work, though, you will need to first measure the space that you will be working with and be sure that you write down the measurements. This allows you to choose the proper-sized blinds for your window.
Purchase the blinds that you wish to use and carefully read the installation instructions that come with the blinds. These will differ according to manufacturer and should be read several times to ensure that you understand what needs to be done.
Take your time and be careful when you are installing your blinds so that you only have to do the work one time.
If you plan to make any new holes in your wall, keep in mind that you may want to put in a drywall sink.
This will help keep your screws in place in the drywall used in many homes and make a more secure anchor for your blinds.
4Hire a professional
One way to be certain that you get guaranteed results is to hire a professional.
Though this is the most expensive method, usually you can get a guarantee on any work that they do.
Video help?


What about Vertical Blinds?


Mr. Fix-It
 _________________________

Lumber Sizes
Beaver Clipart photos, royalty-free images, graphics, vectors ...
Understanding lumber sizes is a good way to really break into the do it yourself scene. After all, learning the different sizes of lumber will let you know what you are dealing with as you wander through the lumber yards and home improvement stores purchasing your materials.

All you need to do is keep in mind this information as you are doing your shopping. 
Nominal vs. Dressed

There are typically two terms commonly used when talking about lumber sizes. Those terms are nominal and dressed.

 Nominal refers to wood that has been rough cut, and hasn't been planed or surfaced.

1.jpg (220×160)

Wood that has been planed and surfaces is referred to as dressed.

7610189_orig.jpg (566×176)

Typically nominal sized wood is slightly larger than the actual, dressed, measurements.

Board vs. Dimension

Another couple of terms that are commonly used in lumber sizes are "board" and "dimension". These terms are usually in reference to how thick the lumber is. For example, a nominal piece of wood that has a thickness of one inch or less will usually be listed as board lumber.

5.jpg (220×160)

Nominal wood that is more than is two inches by whatever, and four inches by whatever are referred to as dimension lumber.

p_1000100168.jpg (1000×1000)
Measurements

When you look at lumber when in the store, you will usually see the size listed in one of two ways.

The first way is something along the lines of 1x6, 2x2, or even 4x4.

These measurements refer to the thickness of the wood by the width of the wood.

The second method of listing lumber sizes is usually only referred to when you are talking about wood that has been cut to a specific length.

For example the dimensions of 1x6x8 refers to a piece of wood that is one inch thick, by six inches wide, and eight inches long.

The same type of measurements also apply to dressed wood as well.
Now that you know the basics of what makes up the lumber sizes, you can begin understanding what is offered at the various stores.
Keep in mind that the information listed here is for the most commonly used measurements and sizes at lumber yards and home improvement stores.
If you still have any questions you can easily ask the clerks on staff at the stores for a bit more information and they will be more than happy to help you out.
Some tips on purchasing lumber?

Check out Home Depot

or
Lowe's

Mr. Fix-It
___________________________

A New Ceramic Floor
or
 Replacing a Cracked Tile

cracked-tile.jpg (523×402)


Laying ceramic tile in your home is a great method for increasing the value of your home, as well as,  sprucing the place up; however, if you have never done this before it can be a little intimidating and even a little difficult.

However, just because it is difficult doesn't mean that the project is impossible.

Begin laying ceramic tile in your kitchen or bathroom by simply following these instructions and you will be amazed with your results, and the way that your new floor looks.

1Get your materials

Before you can begin laying ceramic tile you need to actually get the materials that you will be using.

In this case you will need to get the following items:

carpenter's square

chalk line

ceramic tile (in whatever color or pattern you wish)

plastic spacers

tape measure
ceramic tile backboards
grout (choose a color that compliments the tile)
a putty knife
a utility knife or ceramic tile saw.
Make sure that you get enough tile and grout for your project.
If you don't know exactly how much you need, talk to one of the clerks at your local home improvement store to get the amount that you need.
2Prepare the workspace
Once you have your materials you can begin preparing the workspace.
In effect this means that you will have to carefully remove any and all tile or flooring that is already installed in that particular room.
Be careful as you do this so that you don't end up damaging the sub-flooring.
If you do damage the sub-floor, you will need to replace it before you can proceed.
When you have the sub-flooring clear of any remaining dirt, dust, and debris, you can begin laying down the ceramic tile backboards.
This will provide you a more secure foundation for your tile.
Make sure that you secure the backboard to the sub-flooring according to the manufacturer's instructions
3. Lay out your pattern
An integral part of laying ceramic tile is figuring out the pattern that you want to use.
There are two ways that you can determine this patter.
The first is to lay the tile out in a different room as close to the way it will be in the bathroom or kitchen.
The second is that you draw the pattern out on a piece of notebook paper or graph paper.
Both ways work, and both will allow you to see what the final result of your work will look like. Best of all, this will also allow you to make any changes to your design without undoing a lot of hard work.
3Put down a chalk line
Using you chalk line, go ahead and lay a line that is perpendicular to the entry way you are starting from.
This will allow you to center the pattern off of what people will first see as they enter the room; however, if your entry way is of center, you may want to choose a different part of the room to center your chalk line off of.
4. Start laying the tile
Once you have your chalk line laid down, you can begin laying the tile itself down.
Place the tile adhesive on the back of the tiles, and then lay them down carefully.
As you are doing this make sure that you don't put too much adhesive on the tiles, and that you are carefully lining the tiles up off of the center chalk line you laid.
As you put each tile down, put some spacers along the tile to help provide the proper amount space for later grouting.
Press down firmly (but gently) on each tile, and then move on.
5Offset each row
As you finish laying down the first line of tiles you can begin laying down the second line as well.
Simply offset the next row so that the seams of the tiles are offset.
This will provide a stronger and more stable design for your tiles which will allow the grout to hold the tiles in place a lot more effectively.
6Repeat
Repeat  steps four and five necessary until you are finished with the project. Do not be afraid to put down another chalk line if your initial chalk line has faded too much to be easily seen. Just make sure that you have your new line properly aligned with the original line.
7. Apply grout
Allow the tile adhesive to dry completely before you begin applying the grout.
Typically this will take no more than four to eight hours.
While the adhesive is drying, take the time to read the instructions that came with the grout material. These instructions will tell you not only how to make the grout properly, but also how to apply it.
Prepare the grout according to the instructions that are on the package, and then begin applying it at the back of the room, working your way out of the room.
As you are applying the grout be sure to remove the spacers.
Put enough grout into the seams between the tiles to help hold them together.
Don't worry if you get any grout on the tiles themselves, as it can be cleaned off rather easily. Just wipe off the excess and move on.
8. Dry
After you have finished applying the grout allow plenty of time for the grout to dry.
To be on the safe side, make sure that no one walks on the tile for a minimum of 24 hours.
This will allow enough time for the adhesive and grout to completely cure and adhere to the tiles

9Clean up
While you are waiting for the tile to finish curing, go ahead and begin cleaning up the mess you made from laying the tile.

Save any extra tile and grout compound that you may have in case you need to make any repairs in the future.

When the tiles have finished curing, grab a cloth and a small bucket of warm soapy water to clean off the tile floor.

This will help remove any remaining dust and dirt, as well as any excess grouting that may have gotten on the tiles.

Keep in mind that you will need to take your time while you are laying ceramic tile. By hurrying while laying your ceramic tile you can end up with overly large seams, misaligned, or simply shoddy. Take your time, and you will have an end result that you can be truly proud of.

Need some video help?  Of course.


How to Install Ceramic Tile
Follow These Steps

1.


2.


3.


Fixing a Crack without Replacing the Ceramic Tile

maxresdefault.jpg (1440×1080)
Replacing the Cracked Ceramic Tile

Good Luck !

Mr. Fix-It

_____________________________

Don't Forget
The Range Hood Filter
Needs Cleaning Too !

Clean Greasy Range Hood Filters! How to Clean Your Stove Hood ...


If you are looking to increase the air quality of your home, and most particularly your kitchen, one of the easiest ways is to maintain the range hood air filter.

By periodically cleaning the range hood air filter, you will help ensure that the air in your kitchen is free of the grease, dirt, and other particulates that can often help make the kitchen air seem to stagnate so quickly.

Just follow these instructions to ensure your filter is working at its best.


How To Clean a Greasy Range Hood Filter | Cleaning hacks, Cleaning ...

1Turn off the power

Before you do anything with the filter or range hood, you should turn off the power to the kitchen. This will help prevent any possible electrical accidents from happening when you remove the filter.

Turn the power off at the circuit breaker, then test the hood to ensure that the power has been successfully cut off.

2Remove the filter

The next step in cleaning a range hood air filter is to remove the filter from the hood.

This can easily be done with the help of a screwdriver to loosen the mounting clips or screws.

Before you begin removing the filter, though, make sure that you take a good look at the owner's manual for your particular model. It will tell you the proper procedure for safely removing the filter cover.


3. Inspect the filter

Once you have the filter out of the range hood, you need to take a good look at it.

There are usually two types of filters that are used in range hoods, and you need to know which kind you have.

The first type is a charcoal filter, and the second is a wire mesh filter.

If your filter is a charcoal filter, you simply need to replace it with a new one.

However, if you have the second type, a wire mesh filter, you will need to wash it before you replace it.


See these additional steps for a wire mesh filter.

aWash the filter

If you have a wire mesh filter, you can begin washing it.

One of the best ways to do this is to use two separate buckets.

In the first bucket you will want to put a bit of baking soda, some of your favorite degreasing dish detergent, and some warm (almost hot) water.

Fill the bucket with water until the suds are at the top.

Fill the second bucket with clean, hot water.

Dip a rag or "scrubbie" in the cleaning solution and use it to scrub the filter.

Periodically dip it into the hot water to rinse it out, then dip it back into the cleaning solution, and start scrubbing again.

Continue to clean the filter until you believe it is clean, and then rinse the entire filter off.

Don't forget to clean both sides of the filter.

If you don't want to scrub the filter by hand, then simply stick the filter (by itself) into your dishwasher for a complete cycle.

Make sure that it is the only thing in there, though.

b. Dry the filter

Set the filter in the drying rack to dry, or remove it from your dishwasher.
Do not proceed until the filter is completely dry.

cInspect and repeat

Once the filter is dry, you need to inspect it. Make sure that the filter is not only clean, but also free of any signs of rust or other kinds of damage.

If you find any dirt or grease still on the filter, repeat the cleaning process.
If you find any rust, repeat the cleaning process using a scouring pad and light pressure to help remove it.

dReplace and test

When you are happy with the way the filter looks and after it is completely dry, you can put it back into the range hood. Make sure that you put it back the same way that you took it out.

If you have any questions about which way it should go in, please refer to your owner's manual.

With the filter back in place, you can go ahead and turn the power back on to the kitchen, and then test your work.

Once you have your air filter cleaned properly and put back in place, you are done.

Now that you know how to do it, you should get in the habit of keeping the filter clean. This means that, on average, you should go through the cleaning process for the range hood air filter at least once a month, or as often as you feel as necessary to get the job done.

Need a video or two?


Mr. Fix-It
___________________________

And The Last Time You Cleaned
Your Showerhead
Was ????

9c4oELeni.gif (490×364)
Over time, the small holes in a showerhead will become clogged. The rate at which this happens depends on factors in water such as the amount of minerals.

The easiest way to tell if you have a clogged showerhead is if your shower has become erratic, spitting water in peculiar patterns.

You will probably be able to see the deposits in the holes of your showerhead, but they may be so deep, you may not be able to see them.

To clean out the mineral deposits, soak the parts in vinegar overnight by placing a plastic bag over the showerhead.

Soak-your-shower-head-in-vinegar.jpg (800×600)

The next morning, scrub off any encrusted minerals with steel wool or a wire brush.

This should not be too difficult after soaking the head thoroughly.

If necessary, poke open the small holes in the faceplate with a pin or a tack.

If soaking the showerhead in vinegar is not enough, you can also soak the showerhead in hot vinegar.

Heat the vinegar, not quite to boiling, and pour it into a container.
Place the showerhead in the hot vinegar.

Just like with the regular vinegar, let it soak overnight, or about ten to twelve hours.

Once it has been thoroughly soaked, rinse the head vigorously in hot water.

As an extra measure, take a very thin wire and poke each hole before rinsing. A small, unfolded paperclip will probably do the job. Once again, you can also use a pin or a tack.

If you prefer a commercial solution, you can use Lime-A-Way or CLR.


Lime-A-Way Lime, Calcium & Rust Cleaner, 28oz Bottle - Walmart.com ...

f958fa0d-a348-4ddf-ad4d-bfdfb8374f48_400.jpg (400×400)
Fill a bowl with the cleaner and soak the showerhead parts in it overnight.
Thoroughly rinse them off.

Make sure to read the warning label on the container before use.
Reassemble your showerhead carefully.

When done, you should get like-new performance from the showerhead without replacing it.

Here's some helpful videos:

Mr. Fix-It
____________________________

Starting a Woodworking Project ?
 Wood Joints Are Vital

 Types of wood joints and joinery. Industrial vector illustration ...

Knowing the different types of wood joints can be an exceptionally helpful bit of knowledge to have, particularly as you begin planning out your next woodworking project.
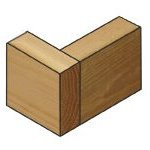
It can be a little difficult to keep all the different names straight, particularly for beginning woodworkers or do it yourselfers, so take advantage of this helpful little list.

Below you will find most of the common types of wood joints, as well as a brief description of what each one is.

Basic Butt
butt.jpg (150×150)

Perhaps the single most basic, and easiest of all the joints, is the basic butt joint.

This type of joint is what you get when you have one piece of wood "butt" up against another, usually at a square angle.

One of the most common places that you can see this type of joint is in the framing of walls.

Mitered Butt 

Mitered Butt Joint in Saravanampatti , Coimbatore , Sree Sastha ...


This type of joint is extremely similar to the basic butt, except with a small twist.

Instead of having the two boards meet at a square angle, the end of each board is cut at reciprocating angles to create a 90 degree angle.

For example, the most common type of mitered butt joint cut is where each board end is cut at a 45 degree angle, and then joined together.

Half-Lap

half-lap-joint | Town & Country Gardening

In the half-lap joint, you will be removing part of both boards where they will be joined together.

Typically, you will be removing a small notch on each board that goes no more than halfway through it.

When the pieces of wood are joined, you will have an exceptionally strong joint, but some wood that is now a bit more delicate.

Tongue and Groove

RB-27B-1.jpg (600×400)

The tongue and groove joint is typically used when you are looking to join to square boards along a single long edge.

What you do with this type of joint is create a small lip or tongue along the edge of one of the boards, and a correspondingly deep groove along the middle of the other board.

Mortise and Tenon

How To Make Mortise And Tenon Joints With Power Tools

 A mortise and tennon style of joint is one that is commonly seen when making furniture.

One way that you could use to describe this type of joint is the peg and hole method.

Basically you are creating a peg out of one piece of wood, and a corresponding hole in the other piece of wood.

The peg is called the tenon, and the hole is called the mortise.

Biscuit

biscuit-joint.jpg (209×143)


One joining method that is similar to the tongue and groove method is called biscuit joints.

What you do is cut slots in both pieces of wood that you want to join, and then use a wafer of a different type of wood (often beechwood) called a biscuit to join them together.

This type of joint is commonly used when making table and desk tops.
Now that you know what some of the different types of wood joints, you can begin experimenting.

After all, experimenting and trying out new things can be one of the most enjoyable parts of working with wood.

While some types of joints won't work as well for some projects, you may be surprised at the results when you try a few things out.

Some video help?


Have fun !

Mr. Fix-It
_____________________________

Gonna Paint?
Use the Right Roller
d-person-painting-roller-brush-illustration-man-red-rendering-human-people-character-30613439.jpg (213×160)

One of the best tools that you can get for doing any painting is a paint roller. They are great because they can apply so much paint in such a short period of time.

Another benefit of paint rollers is that the paint goes on with little or no streaking, less mess, and in more interesting styles or textures.
Unfortunately though, anyone that has ever strolled through a home improvement store can tell you about the large selection of painting tools out there.

Using some simple guidelines, you can choose the correct roller for your next home decorating project.

Surface Texture

The texture of the surface that you are going to paint plays a huge roll in what type of roller you need to select.

If the surface is smooth, then you need to select a paint cover that has a short nap (length of fibers—the "plushy" surface that holds the paint) of between 1/8 and 1/4 inch.

The reason for this is that a longer nap leaves a textured look that you may not want.

For surfaces that are slightly rough, use a nap of medium length, 3/8 to 1/2 inch.

These longer fibers are going to be able to apply the paint into the valleys of the rough surface.

For the really rough surfaces, such as block, stucco and brick, you are going to want to use a long nap of 3/4 to 1-1/4 inch long.

Fiber Material

Paint type interacts with fiber materials differently.

If you are going to use an oil-based paint, then you need to use a natural fibered cover.

Water based (or latex) paints should use a synthetic fiber cover.
Basically, just remember that synthetic should go with natural, in other words opposites attract.

Roll Cages

The roll cage is what holds the cover sleeve onto the roller. Since the cover sleeve is what holds the paint onto the roller, then you want something that is going to be strong enough to hold a sodden sponge in place.

If the cover sleeve slips, it is going to lead to streaking, which defeats one of the purposes of getting a roller to begin with.

Cover Texture

Depending what you are wanting in the "look" for your decorating style, choose different styles of cover pads.

There are different styles and textures available.

Since most places where you purchase such pads should have examples of what the final result is going to look like, take a look at the final result and decide if it is what you want. This way you are not going to be upset by not getting the results that you want.

How about a video or two ?

Mr. Fix-It
_________________________


Toilet Won't Stop Running?
It's an Easy Fix
Charleston Water on Twitter: "A running toilet can waste up to 200 ...
Anyone who has ever had a running toilet knows just how annoying it can be. It is almost as annoying as those high water bills that can result from a running toilet.
By simply and correctly adjusting the water level of toilet, you can not only lower your water bill, you can also keep your toilet from running.
Here's what you need to do.

Check the current water level

Remove the top from off of the toilet. This will allow you to access the interior of the toilet, and begin to make your changes.
When you first look into the toilet tank, take a moment to check what your current water level is located.
The water level should never be above the overflow pipe.

40956d1344178265-toilet-overflow-tube-runs-continuously-toilet.jpg (426×600)

If it is, then you are going to run the risk of having a "running" toilet.

Determine your desired level

Decide where you will want to have your water level at, and place a mark there.
This mark can be placed on the outside of the toilet, since it may be a little difficult (and not to mention wet) if you put it on the inside of the toilet.
One way that you can make this mark is by using a piece of black electrical tape, or even using a grease pencil.

Bend the ball cock

After you have made your mark, go ahead and bend the ball cock to about the level of the mark. To do this, you don't actually bend the ball cock (the floating thing) in the tank. Rather, you bend the arm that is attached to it.
40252d1338640007-toilet-tank-fills-up-too-much-water-adjusting-tank-level.jpg (443×215)
Be careful as you do this so that you can avoid breaking the arm.
Bend the arm until the ball cock is at roughly the same level as the mark that you made.
Test your work

Once you have bent the arm to the ball cock, it is time to check your adjustment. Simply flush the toilet, and wait for the tank to refill.

Flushing.jpg (180×179)
It should refill only to the level where you have bent the arm too.
If the water level is still not to your desired level, repeat the process until you have the desired results.
Here are a few videos for some other helpful hints:
This video covers different types of toilets.
Need a new flapper?
Doe you have a water tank leak?

Toilets !  We have to have them...so you should know how to fix the most common problems.
Mr. Fix-It
_________________________

   Got a Painting Project that Requires Mixing Paint?
Do it Yourself...and Save Money !

Mixing-Paints-Guide-Sheet1.png (600×762)

Anyone that has ever done a home painting job can tell you that the most expensive part of any painting project is the paint itself. This is particularly true when trying to find a custom paint color.

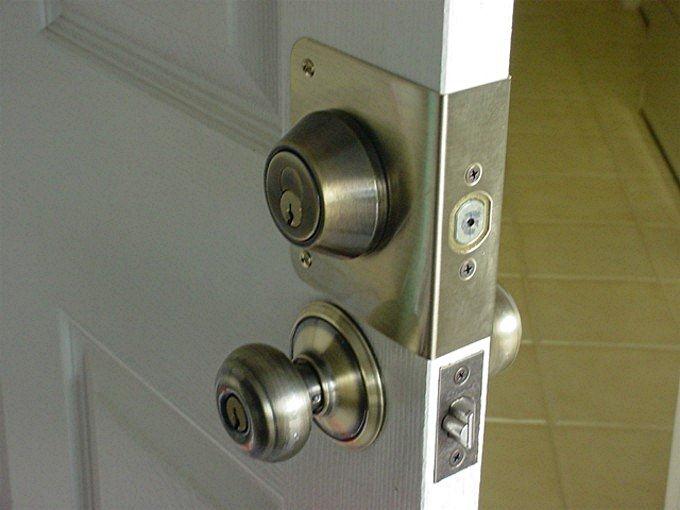
While there are several different methods that you can use to try and lower this price, the most effective method is by mixing paint yourself.

In order to begin mixing paint properly, you need to understand a few basic guidelines. With these guidelines in hand, you will be able to branch out, experiment, and achieve the colors that you really want, or only a fraction of the original price.

Decide on a Color

Before you can begin mixing your paint, you need to know what color you will be using. This means that you need to actually decide on the color that you want. You can get this color from anything, or even anyone.

Wherever you get it, make sure that it will work with the overall design scheme of your home.

Take a Look at the Color Wheel

Now that you know what color you want, you need to figure out how to make it.

To do this you need to pull out your color wheel, and take a look at it. This will tell you what colors you will need to mix in order to get your desired results.

Know your Paints

Decide on what type of paint you want to use. The brand doesn't really matter in this particular case, since brands can be mixed with no problem.
Rather, what you need to look at is if you will be using oil or water based paints.

These two types of paints cannot be mixed.

Start Collecting

Talk to your friends, family, and neighbors to see if they have any left over paint that they don't need. If not, talk to your local paint store to see if they have any that they don't need anymore, or buy the smallest amounts possible to get the results that you want.

One color that you should always have on hand is white, since that will be the one that you start with as your base.

Start Small and Mix Thoroughly

Begin mixing your paints together, but do it in small increments.

For example, start off with a small amount of white paint in a rolling tray or old clean bucket. To this add a small amount of your next color (such as red to achieve a pink color), and if you are adding more than one, alternate between each application of color.

Between each application be sure that you mix the paint completely and thoroughly.

While you can always use a paint stirring stick to mix everything together, a faster way would be to use an old mixing set from your kitchen.

Test your Work

Once you believe that you have achieved the color that you want, test out your work.

Simply dab a small amount of paint onto a piece of paper or wood, and then allow it to dry.

You will want to see the color dried out so that you can get a realistic idea of what you will have after you have painted your room.

While you are waiting for it to dry, cover the paint that you have mixed so that it doesn't dry out.

Some videos?


Mr. Fix-It
________________________

Loose Doorknob Driving You Crazy ?

306d8c0c34eac437b8f4fe209f474327.jpg (736×414)
If you have a loose doorknob, there is no need to call in the professionals.
With the right tools you can easily fix a squeaky, loose doorknob.
The first thing you need to do is get your hands on an Allen wrench or a regular screwdriver.
Before you can begin tightening the doorknob you must determine what type of lock your door has.
Looking at the side of the door, with the doorknob perpendicular to the door, look at the shape surrounding the lock to determine what route you will take in tightening the doorknob.
Most homes are equipped with cylindrical locks or tubular locks (characterized by the lock being encircled by an oval or circle)...
457527772_764.JPG (800×490)
... but doors found in warehouses often have a lockset.
Locksets are rectangular in shape.
Deadbolt Knob on thin door.jpg (680×510)
 If you have cylindrical locks or tubular locks all you need to do is secure the lock properly, and in turn the doorknob will tighten.
If you do own a lockset then a few more steps are necessary.
1. Remove the lock panel with the screwdriver in order to expose the inner workings of the lock.
2. Unscrew one of the doorknobs to expose the end of the other and to view how it interacts with the lockset.
3. Tighten the connection between the exposed knob spindle and the lockset.
4. Hold the doorknob that is still attached closely against the paneling of the door as you screw the other doorknob back into the spindle and lock set.
5. Screw in the doorknob until it is tight against the paneling of the door.
If you have correctly tightened the doorknob, it will move freely but it will not jiggle in the frame of the door.
If you wish to alter the placement of the doorknob, you should follow this same process and then alter the placement by shifting placement during the tightening of the knob against the paneling of the door.
Need some video help?


Mr. Fix-It
_____________________________

Got a fireplace?
When Was the Last Time it was Cleaned?

The Do's & Don'ts of Cleaning the Fireplace - The Maids Blog

A number of homes in our community have a gas fireplace. Though they are a beautiful addition to any home, most people don't realize that they need to be cleaned on a periodic basis for a number of reasons.
On the average, cleaning a gas fireplace is going to be a whole lot easier than cleaning a regular fireplace.

Gas burns cleaner, and with a whole lot less mess, than a regular fireplace.

Most gas fireplaces are designed to have the "log" remain in place, and should not be removed.

If you find yourself needing to clean the log, simply get a washcloth or a sponge, and scrub the log clean with warm soapy water.

For any particularly nasty buildup though, you can always use a strong cleaner, such as vinegar, to get the crud off.

Keep an eye out for one thing; any dirt getting into the gas line.

You can often tell that your gas line is getting clogged with dirt and grime, if the pilot light goes out (even after repeated cleaning), or that the fire goes out once you have it lit.

If you find that dirt is getting into your gas line, then you have a problem that you need to have fixed immediately.

Unless you are a professional HVAC repairman though, you should hire a professional to do the work for you instead of doing it yourself.

IMG_7064.jpg (350×419)

The reason for this is that gas is an extremely dangerous substance to work with, and should best be left to a professional.

Hire a professional to come over to inspect your fireplace.

Often when people try to clean out their own gas fireplaces, they accidentally damage the orifices.
Products | brass | Grow Masters
This allows dirt to get into the lines and clog them.

Aside from leaking natural gas, and a possible uncontrolled fire or risk of explosion, there is also the danger of "incomplete combustion."

This means that abnormal amounts of carbon dioxide (CO2) could be produced.
22e3a29e-d6ae-42e7-912d-d0d7b7f4425b-large16x9_gasleak.png (986×555)

When you hire a professional to inspect, and clean, your gas fireplace be sure that you do a few things first.

1Be sure that you call around to several places, ask questions, get an estimate, and compare prices.

You may be able to get some recommendations from friends and family, but be sure that you still go with one that has several years' worth of experience.

2. Make sure that the professional at the very least looks at the thermocouple, as well as, taking a look at the log itself to see if it needs to be replaced.

Fireplace 27.5inch Thermocouple Flame Failure Safety Device ...

While it is more expensive to hire a professional, you can be sure that you are getting quality work done, and that it has been done right.

Here's a set of five videos to guide you step by step.

Step 1.

Step 2.
Step 3.
Step 4.
Step 5.

Good luck.
Mr. Fix-It
________________________________

Latex or Oil Based Paint
Which One Should be Used ?

oil-vs-latex.jpg (728×333)
Have you ever noticed how there are really only two choices in paint when it comes to painting your home?

Those two choices are latex and oil-based paints.

Deciding between latex and oil-based paints does not need  to be particularly difficult or time consuming. All you really have to do is know your project, and what each type of paint is best used for it.

To that end, here is a bit more information that you can use to make that decision as easy as possible.

Latex Paint
Building Cartoon 530*530 transprent Png Free Download - Hardware ...
Application 

In most, if not all, cases latex paint is extremely easy to work with.
The reason for this is that it can be applied smoothly and evenly, usually with little clumping or thin spots.

One of the biggest drawbacks to using this type of paint is that you will need multiple coats to not only cover any darker undercoats, but to just get the shade of color that you want.

On the plus side, if you use latex paint you will only have to wait one to six hours before the paint is completely dried.

Durability

Latex paint is extremely resistant to fading, and can be used on most surfaces. The reason for this versatility in surfaces is that it can adhere to most surfaces without problems, and has a higher elasticity than oil based paints.
Odor

While latex paint has a bit of an odor it is typically fairly little when compared to other kinds of paints.

This is not to say that you will not want to ensure that your work area is well ventilated, but you will typically not require any special breathing apparatuses when using it.

Cleanup

For the most part, latex paint is extremely easy to clean up, particularly when the paint is still wet.

To clean up latex paint all you will usually need is water, maybe a little bit of soap, and a washcloth.

Oil-Based Paint

oil_based_can-150x194.jpg (150×194)

Application

Generally speaking oil-based paint is a heavier and thicker paint than latex.
This makes it more difficult to apply in comparison to latex.

This means that things like brush strokes and roller marks can often show up a little easier than other paints; however, since it is a heavier and thicker paint oftentimes a single coat is all that is needed to get the job done.

Durability

Oil based paint does have a tendency to fade over time, and can be used on practically all surfaces.

Unlike with latex paints, oil-based paints can be used on surfaces that have a powdery residue on it, such as masonry, concrete, or even stucco.

Additionally oil-based paint can also be used on surfaces that have already been painted without the need to remove that paint.

It also takes a minimum of eight hours for oil based paint to dry completely, though it can also take up to 24 hours as well.

Odor

Unfortunately oil-based paint has an extremely strong odor when compared to other kinds of paint.
In addition to only painting in a well-ventilated area it may be a good idea to get a ventilator to help reduce the amount of fumes that you are breathing.
Further, you will want to make sure that you do not have any open flames near the paint or in the area to help prevent any accidental fires.

Cleanup

If at all possible, do not make any mistakes when you are painting something with oil-based paints.

The reason for this is that it will require a paint stripping agent, such as paint thinner or turpentine, in order to remove the paint.

Summary

As you can see, both types of paint have their benefits and drawbacks. In addition to all of this information, there is one additional thing to consider before you make your final choice.

Typically latex based paint is used indoors along walls and doors, while oil-based paint is used for exterior projects.

That being said both types of paints can be used either interior or exterior—it just depends on the look you are going for !

Need a video for some help ?


Mr. Fix-It


Two years ago I painted my exterior fence (with the approved color, of course) and used Sherwin-Williams exterior Latex - I was hesitant to use Latex because I was worried about fading, durability, etc. Surprisingly, after over two years the paint job looks like new.....of course I sanded/primed any rust spots first and thoroughly washed down the fence before the paint was applied......it has withstood the test of time equal to (or better than) the paint SCA contractors used on their portion.
_______________________________

Heating Ventilation & Air Conditioning Units
(HVAC)
Beware of Scams
Contractors Vent about HVAC Scams | 2015-04-06 | ACHRNEWS
Our homes in Sun City Anthem are at the age requiring more and more maintenance. 

The HVAC units (Heating, Ventilation, and Air Conditioning units) installed by Pulte are at least 14 years old. 

When many of the York HVAC units were installed, there was s shortage of HVAC evaporator coils. 

Sierra Air, the installer, decided to install Aspen evaporator coils

A HUGE MISTAKE !!! 

The evaporator coils were used mainly between 2004 to 2006.

The main issue was in design and material used. 

Rather than using a plastic condensate pan that would not rust out, an uncoated steel pan was used with aluminum evaporator coils coming in contact with the steel pan

As the steel pan rusted, the condensation drain lines would collect rust, plug up the drain lines, or rust would build up between evaporator and steel pan not allowing condensation to reach the drain line port.

When the condensation (water) could not drain properly, the pan would overflow, drip on the ceiling, damaging the drywall and paint.

For those taking advantage of the Aspen Class Action Lawsuit, many property owners recently received $2200 per HVAC for damages to our homes.

The sad result was that local HVAC companies used the rust issue to sell you a new complete HVAC system for as much as $18,000 per unit. 

That is a major rip-off and many unsuspecting residents took the "bait".

HVAC Scams and Bait & Switch Tactics | HVAC Murfreesboro TN

Replacing the entire system is unnecessary

The evaporator coil can be replaced out for about $1400 including 6 man hours labor to install.

I have changed 2 of my 10 SCA properties.

This photo is the condensation drain located outside of your home. 


The brown rust is an indication the pan has rusted and just a matter of time will fail plugging the drainline and leaking on the ceiling.

This photo is the HVAC Tech preparing to remove and replace the evaporator coil in the attic.


This photo depicts the rust build up inside of the failed the evaporator coil.


If you have any questions or need a referral for repairs, feel free to contact me.

Mr. Fix-It
Forrest Fetherolf
Cell:  (818) 207-1868
________________________

What's a Pipe Diverter

Amazon.com: lehao397 3 Way Diverter Water Pipe Tee T Shape Adapter ...


Have you ever heard of a pipe diverter before? Chances are fairly good that if you are relatively new to the whole home plumbing scene, you  don't know what this piece of equipment is, what it is used for, and other pertinent information.

Keep reading to find out not only what is a pipe diverter, but some other rather useful information about this piece of equipment as well.

What is it ?


 In the simplest possible terms, a pipe diverter is exactly what it sounds like...a piece of plumbing equipment that is utilized to divert the flow of water from one particular pipe to another.

Diverters are also used to help join two pipes into one, where you want the water to come out of a single faucet.

Where are they located ?

Many times you will see find diverters in bathrooms and kitchens where you will find sinks, tubs, and showers.

All of these items will have two separate pipes of water (one hot, one could) which lead to the faucet.

The diverter will be used to join the two items into the single opening offered by the faucet.
When is to time to replace them ?


As with most things in this world, pipe diverters will eventually fail and need to be replaced. The trick is to learn the symptoms that symbolize when a diverter pipe is about to fail.

Perhaps the single best indicator of having a problematic pipe diverter is low water pressure.

This lowered water pressure will be focused near the problem area (i.e., the kitchen or bathroom specifically).

Now that you know a little more about pipe diverters, you can begin using them a little more effectively.

Keep in mind that if you find yourself needing to make any repairs or replacements to problematic or damaged diverter pipes, you may need to do some serious repair work.

While you can easily make the repairs yourself, depending on where the problem is, you may also need to do a bit of demolition work on the walls to make the repairs to the pipes.

Mr. Fix-It
_____________________

Let's Clean that Stained Driveway

driveway-before.jpg (720×480)

Driveways are one of the first things that guest to your home are going to see, and as such they can make a huge impression on how your home is viewed.


We have all heard the old refrain about first impressions, and what people think.


So, if first impressions are so important when it comes to personal appearances, then won't it play just as large of a role with a home?


One of the easiest ways to improve the appearance of a home is to clean that old greasy driveway.


While this is a relatively easy task to complete, the key word is relatively, so there are a few things that you are going to need to gather in order to complete this job.


Those items are an old deck broom that you don't mind ruininga dust pansome kitty litter, elbow grease, and time.


When you have gathered all of your materials, you are ready to begin your task.


First, you are going to want to do this chore on a day when it is sunny outside, so that you are able to see the grease spots as clearly as possible.

On the day that you have chosen for your driveway's facelift, choose the largest of the oil spots to remove first.


After choosing which oil spot to remove, you are going to simply pour some of the kitty litter onto the oil spot.


How Kitty Litter went from happy accident to $2 billion industry ...


The kitty litter is used to absorb the oil or petroleum product.


After laying down a nice, fairly thin layer of the kitty litter onto the oil spot, let it sit for a few moments, allowing a little time for the product to be absorbed.


If the stain is older, then you do not need to wait, you can proceed to the next step right away, which is to work the kitty litter into the stain.


You accomplish this by either using your foot or the broom.


Feel free to use both, since you are going to get tired.


Be advised, you are going to ruin your broom, so only use one that you do not mind either dedicating solely to this purpose, or that you have no problem throwing away.


When you have worked the kitty litter into the stain properly, all that is going to remain is a fine powder.


Simply sweep up the powder and dispose of the mess properly.


Today's society typically requires special disposal of oil and petroleum products, so be sure that you know what the current laws and procedures are prior to disposal.


You do not want to get into any trouble simply for cleaning your driveway.


Need a video?


Mr. Fix-It

____________________________

Got a Loose Door Hinge ?
Here's the Simplest Way to Fix it

  FH07MAY_STRSCR_02.JPG (600×600)

Have you ever noticed how, every once in a while, your door hinges will get a little loose?

Don't worry, this just happens over time, but does need to be addressed when found.

If you don't, you can easily find that your door comes off the wall, and you are faced with an even bigger problem than the one you had before.
Luckily tightening up loose hinges isn't all that difficult of a task to accomplish. In fact, it is so easy that just about anyone can accomplish, no matter what their skill level.

All you really need to do is use one of three four methods, and you should find that you have no problem.

Try Simple Tightening

Image result for tightening a loose hinge with a screw driver

Often the simplest answers are the best answers.

If you find loose hinge, the very first thing that you should try is tightening the existing screws.

Grab the appropriate screwdriver, and then begin tightening.

Keep turning the screw until it stops turning, or until you notice that it won't tighten any longer.

Use a Longer Screw

7029-24.jpg (3200×2400)

Over time screws have a tendency to wear away at the wood that is holding them in place. If this happens with the screws in your hinges, and you find that you simply can't tighten the ones that are currently in place, then you should try using a longer screw.

For example, if you use a screw that is 2-1/2 inches long, you will easily be able to get past the wood that has been worn away and get into some wood that hasn't been used yet.

Refill the Hole 

A very effective method for tightening up loose hinges is to actually refill the hole, and then drill it out again.

This will require that you first take off the door, as well as the door hinges.
Once you have done that, identify the troublesome holes, and grab a few golf tees.

5d510bbd0e8f6c06_5103-w422-h562-b0-p0---.jpg (422×562)

Fill the hole partway up with some wood glue, and then stick the golf tee in as far as it will go.

If you can, lightly tap the tee with a hammer to make it nice and snug.

Allow the tees and glue to dry overnight, and then cut off the exposed parts of the tee so that it is flush with the door frame.

Drill a small pilot hole for your screws, and then reattach the door and hinges using the newly filled and stronger holes to support the weight.

Need some video help?


Mr. Fix-It
_________________________

How to Repair a Lamp Shade
bowed-empire1.jpg (600×602)
The quality of your light can be easily diminished by a damaged or broken lamp shade. Lamp shades are often unique and irreplaceable, so the option of going out and purchasing a new one for your beloved lamp may not be an option.

Here are some basic suggestions and guidelines for repairing your lamp
shade.

Before you can begin your project, you will need to properly assess the damage.

The two most common "ailments" lampshades experience are discoloration and the ring coming apart from the fabric portion of the shade.

With a quick trip to the craft store and a few craft items laying around the house you can make this an easy fix.

If your lamp shade has been discolored you will need a bleach solutionspray bottlewindow and a sponge.

Use a low strength bleach solution (usually about a gallon of warm water with a standard "lid" filled with Clorox bleach).

Using your spray bottle, spray the fabric on the lampshade (be sure do to this away from other fabrics).

You do not want your shade soaking but you want to ensure that every area has been exposed to the bleach solution.

You can use a sponge to apply the solution if you feel more comfortable with that.

After you have finished bleaching the shade you can place it in the sun to dry.

If the lampshade fabric has become detached from the ring that gives form to the shade, you will need a hot glue gun,some glue sticksscissors, and double fold bias tape.

Your first step is to remove the ring entirely from the shade and set it aside.
Next you will cut a piece of bias tape that is approximately the same size of the ring.

Working from underneath the shade you will put a little bit of glue on the upper portion of the ring and underneath the radius of the fabric.

Before the glue dries you will hold the metal ring against the edges of the fabric and gently press the bias tape into place, encircling the metal and fabric portions. You may want to secure your work with clothes pins until it has dried properly.

Note:

If you do not feel comfortable fixing your lamp shade, especially if it is a family heirloom, call a pro !

Videos?


_________________________

Latex & Oil Paint
Be Careful with Repainting One on the Other
oil-vs-latex.jpg (728×333)
Everyone knows just how important it is to remove any remnants of old paint that may be stuck on a surface before you begin repainting; however, there are going to be some instances where you cannot do thatparticularly when you are dealing with oil paint.

It's a good thing that repainting latex on oil paint isn't impossible.

All you need to do is follow these instructions.

1Prep the area

Before you can begin repainting latex on oil paint you need to prepare your work area. This means that you need to remove as many items from the room as possible so that you don't accidentally get any paint on anything that you don't want.

In addition to this you will want to put down some drop cloths to help protect your floor as well as any furniture that you couldn't remove earlier.

2Rough it up

A good thing, and bad thing, about oil paint is that it tends to leave the surfaces it is applied to very slick an smooth.

While this may look good, it does make things really difficult when you are trying to paint the wall.

To counteract this tendency of the oil paint grab some 100-grit sand paper and lightly run it over the walls. Periodically run your hand over the wall, and ensure that you have created a rough surface that the latex paint can latch onto.
3Wash the wall

Once you have "roughed" up the walls, wash them down with a damp cloth or sponge.

This will remove the dirt, grime, and dust that can make it difficult for paint to adhere to a wall.

Only use a damp cloth when you do this since you do not want to waterlog the walls.
4Apply oil based primer

After you have finished washing the walls or surface, take the opportunity to finish preparing the area.

This means that you want to apply some painters tape around the hardware, window frames, door frames, and other areas that you don't want to paint with your new paint.

When everything is ready to go, you can begin applying your primer.
Before you apply the primer you want to make sure that you choose a primer that is oil based, and then begin painting it onto your walls.

5Paint

Allow the primer to completely dry before you begin applying the latex paint. This will allow for a better overall look, as well as ensuring that the paint adheres as best as possible.

Start applying the paint in one corner of the room near the ceiling, and work your way across and down around the entire room.

As always, when you are doing any painting project you will need to allow some time to pass between each coat you apply. This will allow the paint to dry, and give you the time necessary to determine whether you have missed anything, while also deciding whether you liked the current coloring or not.
If you do like the color as it is, go ahead and begin cleaning up.

If you do not, then go ahead and apply another coat.

Repeat the wait, dry, and inspect procedure between each coat that you would like to apply to your wall.
 ___________________

Using a Drain Snake

tub.jpg (800×600)


Before starting any type of home plumbing task, you need to make sure that you have the tools necessary to accomplish the job.

There are only four things that you will need in order to properly accomplish this job, and those four things are a:

bucket
pair of adjustable pliers
drain auger (or snake)
towel
If you do not already have a snake, you can purchase one at any department or hardware store.

31ZyJ0H5uNL._SY300_.jpg (300×300)

The price is going to range between $6.00 and $39.00 depending on brand, type, and which store you purchase it at.

Once you have these four items, you are ready to begin the job.

1When considering whether you want to snake your drain, you need to make sure that you know what kind of pipes your plumbing is made from. 

Are the pipes metallic or from PVC?

This is an important thing to know, since if the pipes are made from PVC you could potentially break them if you are not careful when removing the blockage.

2Look under the sink to see if you can find the water shutoff valve.

It is going to look similar to what you use to turn on or off your sprinklers.

You want to make sure that you have turned off the water since if you haven't you are going to have a really big mess on your hands.

3After you shut off the water, set your bucket under the bend in the sink's pipe.

This bend in the pipe is what is commonly known as the trap. This is the area where the blockage typically forms, since it is designed to keep things from coming back up the drain.

4Use the adjustable pliers to loosen the nuts that are holding the pipe bend in place at both ends.

As you are loosening the pipe, water and gunk is going to be coming out from the loosened pipe. Don't worry; this is why you have the bucket under the pipe. 

Simply let everything fall into the bucket, including the pipe bend.

5Take your drain auger and stick it into the end of the drainpipe that goes into the wall.

6. Place the corkscrew end in and turn the handle clockwise as you go.

You are going to keep feeding the snake into the wall until you have reached the blockage.

7. Gently but firmly push the snake through the blockage.

Once you have pushed through the blockage, reverse the snake and it should pull some of the blockage back out of the pipe.

8. Let the clog drop into your bucket.

This is going be messy, so this is why you have that towel. Be ready to clean up the mess by using the towel to wipe off the snake as you bring it back out of the drainpipe.

9If there was no blockage in the wall, check the pipe bend that you previously removed.

You can clear this out by simply pushing the end of the snake through the trap or by using at table knife to dislodge any blockage.

10Replace the trap and tighten the nuts that hold the trap in place.

Do not over-tighten them, but make sure they are snug enough that there will be no leakage around the connection.

11Turn your water back on and run some water through the drain.

If you successfully removed the clog in the drain, the water should empty normally.

If you successfully tightened the nuts around the trap, you should not have any leakage around the trap.

Videos?


Mr. Fix-It
_____________________

Removing Rust Stains

Image result for removing rust stains

 Rust stains from iron left on your driveway, or rust stains on your bathroom fixtures, can be removed with a variety of products.

Smaller rust stains on clothes or fixtures can be removed with household remedies, while more severe stains may need chemical remedies.

For a small rust mark on clothingif the clothing is machine washable or hand washable and can be washed in hot water, boil the clothing in a large pot of water with about a quarter cup of cream of tartar.

DSC04200.JPG (1600×1200)


This should break the rust stain down and wash it away.
Rinse the garment well.

If the garment cannot be washed in hot water, or the cream of tartar doesn't work completely, apply a paste of lemon juice and salt to the stain.

Press the paste into the stain, and rinse thoroughly.

Reapply the paste before the garment has dried, then wash the garment normally in the washing machine.

For carpet stainstry a stain remover that contains oxalic acid.

103ef8ca98aeef2b962e1be1e78744eb.jpg (600×315)


Follow these steps:

1. Spray the stain with water, then dab at the stain with a clean cloth or cotton ball that has some stain remover on it.

2. Press the stain with a dry cloth, and then sponge a small amount of water onto the stain.

3. Dab the stain again with the stain remover.

4. Once you've lifted the stain, rinse the stained area with water.

5. Sponge water onto the stain with a fresh sponge or cloth, and use dry towels to soak up the water.

6. Press the wet area with a towel or paper towel to dry the stain as much as possible.

Be careful not to let the carpet backing get wet.

Sprinkle a layer of baking soda onto the carpet and let it sit for a few hours before vacuuming it up.

For fixturesif the stain is small, you can try scrubbing at the stain with a paste of lemon juice and salt.

remove-tough-toilet-rust-stains.jpg (1000×1000)

Use a strong scrub brush, but a wire-based brush may scratch the finish of the fixture, so you may wish to avoid wire or steel wool.

You may use a stain remover that contains oxalic acid to remove rust stains from fixtures as well.

Follow these steps:

1. Sprinkle or spray the stain remover onto the fixture and let it sit.

2. Avoid scrubbing your fixtures with abrasive cleaners—you may, however, need to scrub a little bit with a rag or the rough side of a sponge.

3. Wear rubber gloves while using oxalic acid products.

If you have a rust stain on concretetry a solution of trisodium phosphate (TSP) and water.
scrubbing.jpg (300×225)


Follow these steps:

1. Mix about a spoonful of TSP into a bucketful of water.

2. Pour the mixture onto the rust stain.

3. Scrub it with a scrub brush.

There are also many products you can buy to remove iron from your furniture, clothes, and sidewalk.

You may wish to look at installing an iron filter on your water supply if the iron on your fixtures is coming from your water.

Need a video for help?


______________________

Removing a Screw Can be a Problem at Times
Unless
You Know How to Do It
screw_1631495.jpg (375×500)
 While screws are perhaps one of the most easy to remove fasteners around, even they can become difficult and problematic over time.
Removing stubborn screws can be so difficult that it is entirely common to hear screams of frustration when a person is faced with this situation.

That being said, removing stubborn screws doesn't need to be as difficult as some people make it out to be.

Just follow these instructions, and you will have that screw removed in almost no time at all.
Get the Right Tools

As with any type of job, removing stubborn screws will require that you use the proper tools. In this particular case this means that you will need to get either a vise gripped wrench or a t-handle, a power drill with the bits, hammer, and screw extractor.

All of these tools can be purchased at your local home improvement center if you don't already have them.

Drill a Guide Hole

Compare the various drill bits that you have to the screw (not the head, but the screw) and choose one that is a little smaller than the screw, and that it matches the size of the screw extractor.

Insert the bit into the drill, and begin drilling a guide hole for the screw extractor. Be careful that you don't go too far, on the average only 1/4 inch deep is the deepest that you need to go.

Insert the Extractor

Place the screw extractor into the hole, and check to make sure that it fits snugly. If it doesn't, you will need to either select a different extractor, or create a slightly larger hole.

Get a Grip 

When you have matched up the drill hole with the proper screw extractor, you will need to get a grip on the situation.

The best way to do this is by using either a T-handle or a vice grip wrench.
These tools will allow you to get a good solid hold on the extractor, and allow you to turn it like it needs to be.

Start Twisting

With the handle now ready for you to turn, begin twisting and turning the screw extractor counter-clockwise.

As you are doing this you need to also push down as much as you can to apply pressure to the screw to help loosen it up as you are turning.

Don't worry if you still weren't able to initially remove the screw.

All you need to do is repeat steps two through five that are listed above.

This time you will want to create a slightly larger guide hole, and use the next largest size of screw extractors.

Remember that even though this is a relatively quick process, you really don't want to rush it. If you do you can end up causing more damage than you would have otherwise.

We have a few videos to help you.


Mr. Fix-It
________________________

Temporarily
Repairing the Dreaded
Leaky Pipe

cartoon_flood_woman.jpg (955×934)

Emergency pipe repair work is something that every homeowner should understand and learn. This way they can help prevent additional costs associated with a bad pipe, or plumbing work.

By following these simple directions, you can easily repair many kinds of leaks that you can find in your home.

1. Identify the leak

Before you can do any type of repair work, you need to identify where the problem lies.

This should be rather simple since it will be the area that has the water gushing out of it.

If the leak is behind walls, look for an area of your wall that is showing water damage.

2. Shut off the water

Once you have identified where the leak is, turn the water off.
Ideally, you should only have to go to the water main in your home, and turn it off.

However, if you can't find it, you can also turn the water off from the main at the street.

At this time, if you need to and you haven't already, remove any drywall between you and where the leak is located.

3. Place a patch

Take a good look at the pipe, and see how much of a crack is, and then locate an old garden hose.

Cut a piece of hose that is at least as long as the crack in the pipe, and at least 1/4 inch longer on each side of the crack.

Cut a straight line lengthwise down the short piece of rubber hose, and then place this patch over the crack in the pipe.

4Use some clamps

Get some hose clamps, at least three or four, and space them out evenly along the patch.

Tighten these clamps until the patch is nice and snug.

You can easily tell when this happens by seeing the rubber of the hose dimple in slightly.

5Test your work

After you have placed the patch on the crack, and tightened the clamps, turn the water back on.

You may want to have a friend standing near the damaged pipe to tell you if there is any noticeable water.

If you did the work right, you should not see any drips or leaks. That being said, you will still want to limit your water use as much as possible until the plumber can come and fix the problem.

In the event that there is a slight leak, tighten the hose clamps some more until the leak stops.

6Call the plumber

With the repair work finished, you should call your plumber.

 If you don't already have one on speed dial, take the extra time you now have and call around for one.

Once you have finished testing your work, and have called the plumber, you really only have one thing left to do—clean up.

Take the time available while you are waiting for the plumber to arrive to clean up as much of the mess as possible.

After all, while the plumber may be able to repair the pipes, they won't exactly clean up the mess that the bad pipes left behind.

Need more visual help?

Mr. Fix-It
___________________________

Owning a Drain & Trap Auger
A Household Must

230362.jpg (640×480)
Have you ever wondered what a drain-and-trap auger is?

Chances are you have heard the term at least once either by reading about it, or by talking to a plumber, or perhaps the clerk at the local home improvement store.

It is a rather technical term, or name, for an item that is exceedingly common.

Here is a little bit more information about these common, and wonderfully helpful tools.

What is it?

The term drain-and-trap auger is the correct and proper name for what most people call "the snake."

Next to a plunger, this tool is perhaps the single most common tool available for removing clogs from rains. In fact, it is such a common tool that you can easily find it in the tool box of any professional plumber.
It is also a tool that every homeowner should have as well.

What are they used for?

These tools are used to remove blockages found in a drain.

While they can be used for most drains and pipes, this particular type of tool is most commonly designed for dealing with the drains and pipes associated with toilets, sinks, and tubs.

How do they work? 

Drain-and-trap augers work by slowly turning as they extend.

As they do this, they can often work their way through a blockage, and eventually push through. When they do push through, and they are then eventually retracted, this will leave an opening which will allow water and other fluids to pass through without much problem.

Keep in mind that most models that you can get for home use only extend out about 25 feet. 

If there is a blockage further than that you will need to either contact a professional plumber, or rent a longer snake.

Simple maintenance 

As with most types of tools, and particularly plumbing tools, if you don't take proper care of the drain-and-trap auger, you can expect to see it deteriorate rather quickly.

The simplest form of maintenance that you can perform on a snake is to thoroughly clean it when you are done.

This can easily be done by taking the fully retracted snake outside, and then fully extending it. With the snake fully extended you can then rinse the snake off. 

Retract the snake, and then extend it out again to rinse off one more time. Repeat the process until the snake is completely clean.

Keep in mind that you should only need to use one that is no more than 25 feet long.

Here's a couple of helpful videos:


Mr. Fix-It
______________________

 Adjusting
 Your
Gas Water Heater
035505146397lg.jpg (276×276)
Gas water heaters have one thermostat and one heat source.

The thermostat is found near the bottom of the tank, usually having a dial control setting. Simply rotate the dial to the number you want.

Some gas water heaters have thermostats housed underneath a metal plate. Simply swing the plate aside to expose the dial and rotate it to the number you want.

Always raise the thermostat of your hot water heater incrementally and allow at least four hours for the desired temperature to be reached.

When a water heater leaves the factory, it is set between 140 and 150 degrees. It takes two seconds to receive a third-degree burn from water heated to 150 degrees.

Dishwasher water needs to reach at least 180 degrees in order to kill bacteria, but your home hot water heater cannot reach that temperature without ruining the relief valve. Therefore, home dishwasher manufacturers equip their products with booster heaters to heat the water inside of the dishwasher to reach 180 degrees.

Need a couple of videos?


Mr. Fix-It
_____________________________

Weather Stripping
Summer or Winter...It's an Energy Saver

Image result for weather stripping"
If you struggle to maintain a desired temperature in your home you may have damaged weather stripping on your doors or windows.

The inability to maintain a desired temperature in your home can result in astronomical utility bills and be incredibly frustrating.

Next time it is windy or rainy trace your hands along the outline of your door or window to determine if the weather stripping is really damaged or if it another problem.

If you are positive that weather stripping is damaged you can begin the process of replacing the weather stripping.

Preparaton

You should start your project with a quick trip to your local hardware store where you should pick up nails, a nail set, and weather stripping materials.

Remove your old weather stripping and do a thorough job of washing down the area. Use liquid detergent and hot soapy water and wash away dirt and dust.

Measure your new weather stripping against the sides of the door or window. Add an additional two inches to each edge so they can fold around corners and protect you if you happen to measure incorrectly.
It is now time to replace the weather stripping.

Replacing the Weather Stripping

Place your weather stripping into place and nail it down securely so that when you open and close your window or door it stays properly secure.

Don't use the hammer to completely pound in the nails; this can damage the weather stripping. You'll instead want to use the nail set to finish placing the nails and avoid damaging the weather stripping.

Words of Advice

Checking your weather stripping regularly can help you to avoid having to do a complete redo job.

When you annually check your weather stripping you should check for frayed edges, loose nails and decay.

If you notice frayed edges you can trim the edges and use a nail polish to seal the edges so that it does not continue fraying.

Using hot soapy water can help you wash away materials that encourage decay.

Loose nails can lead to damage, so replacing those nails or reinstalling them will help you avoid the costly replacement effort.

Summarizing It All

By learning how to simply replace your weather stripping you can ease any financial burden associated with hiring a professional.

Remember to check your weather stripping annually and you will save even more on the materials you may need to replace your own weather stripping. 

Some videos?  Of course !


Mr. Fix-It
__________________________

Want a Closet That's Just for You?
Design It Yourself

after-closet-design.jpg (1280×960)

Have you ever had a dream of having your own custom closet?

Instead of watching those home improvement television shows where they are always unveiling new and interesting custom closets, why not design your own?

Believe it or not, you may already know the basics of designing custom closets by having watched those shows.

Here are a few simple guidelines that you can use when designing custom closets for your home.

It's quick, simple, and easy enough that anyone can do it.
Here's how it's done.

Design

There are all kinds of possible designs available for a custom closet system. When you are looking at making your own custom closet system, you need to ask your self basically what you want?

Do you want something that you can walk into?

Or something that makes a smaller closet more organized?

Either way, you should sit down and actually sketch out a rough floor plan for your new closet system. It doesn't necessarily need to be exactly to scale. You should make notations as to how big each item will be so you can later on know what you need to purchase.

Storage

While drawing your plan, keep in mind that the primary purpose of a closet is storage.

In your design you need to keep in mind that there are a few necessary basics that should be included.

You will need an area for shoes and boots, perhaps a space for large hanging items such as dresses and coats, and another area for smaller hanging items such as shirts and pants.

How much space will you dedicate to each?

Finally, keep in mind that you may want to dedicate a part of your closet for general storage space as well.

Materials

What materials do you envision your closet being made from?

What many people may not realize is that often the final cost of your closet will rise in direct proportion to the materials you use.

 For example a wood laminate closet may easily cost you a few thousand dollars and wood will cost you dramatically more.

Who to do it 

When designing your custom closet keep in mind who is going to actually be building it.

While it may be nice to think that you can do your own carpentry, often this kind of work is harder than you might think. It is usually best to hire someone to do the work for you.

However, if you will be doing your own construction try to keep the design rather simple so that it is easier to install.

Cost

As you are designing your custom closet, keep a running tally of what the final cost is going to be. It is easiest to do this by having a copy of the measurements that you made, and finding the cost of the different materials at your local home improvement store.

Remember that it is entirely possible to add BIG BUCKS to your final cost if you have hired someone else to do the work for you.

Here's a helpful video:


Mr. Fix-It
____________________________

It's Important to Clean
Compact Fluorescent Lighting

 Image result for Compact Fluorescent Lighting

Did you know that compact fluorescent light bulbs use at least two-thirds less energy than standard incandescent bulbs, to provide the same amount of light, and last up to ten times longer than standard bulbs?

If you replace one regular light bulb with a compact fluorescent light bulb, you will save at least thirty dollars in energy costs over the life of the bulb.

But....

Did you also know that fluorescent light illuminates brighter than incandescent light?

With that said, a fluorescent bulb will only be as good as it is cleanMeaning, if the light is dirty, it won't illuminate as well.

Follow these simple cleaning tips when cleaning your fluorescent lights to make sure that they are lighting your way the best they can.

Since lighting attracts bugs, dirt, and dust, they need to be cleaned often. 

Most people never think to clean their light bulbs when they clean house, but it is a good idea to schedule regular light bulb cleaning into your housecleaning schedule.

Here are some tips:

1Always disconnect the light from the electrical source before you clean.

2If the light bulb has been on, allow it to cool before you clean it.

3For wall fixtures and outside lighting, remove the bowl or cover by loosening the screws that hold the cover in place.

4Dispose of dead bugs and large debris from the bowl or cover.

5Wash the cover or bowl in warm water and detergent, and allow it to air dry while you clean the rest of the light fixture.

6Use a vacuum cleaner attachment to vacuum dust and debris from the light fixture.

7Apply Windex with a soft cloth to clean the metal parts of the light fixture.

Make absolutely certain that the lamp is completely removed from the electric source before you complete this step.

8. If your light fixture contains chrome, clean it with chrome cleaner or polish.

9Clean the fluorescent light bulb.

Never immerse the light bulb into water.

If you have a tube light, simply use a dry cloth to clean the length of it.
If you have spiral fluorescent light bulbs, use a feather duster to clean the winding tube.

Replace the bulbs and then replace the bowls or light covers.

If the covers have water spots after you wash them, wipe them to crystal clarity with Windex and a soft cloth.
Make sure you tighten the holding screws sufficiently, but do not over tighten since doing so may crack the glass covers.

Have a "brighter" day!

Mr. Fix-It
 _________________________

Got a Loose Tile?
Here's How to Fix It

Related image

All anyone needs to do to fix a loose tile is a few items, and about an hour of your time.

The items that you need to gather together are a drill and complete set of drill bitsa construction syringesome two part epoxy (or glue)grout that matches the existing style and some golf tees.

If you don't have these items around the home, then you can purchase them all at your local department store, home supply depot, or the local sporting goods store.

Once you have all of these items you are free to start your project.

The first step is to select a drill bit that is slightly smaller than the grout joints in width.

Fit this drill bit into your drill and proceed to drill one small hole into the grout on each side of the tile. Be careful when you do this that you do not crack the tile itself, or you may end up having to replace the tile.

In the event that this happens, you may wish to take the broken tile to your local home supply store and see if you can find a matching one, so that you can replace just that tile instead of having to replace the entire floor.  

Many of our homes have existing tiles buried somewhere in the garage !

Once you have drilled the holes, you need to mix the glue (or epoxy) properly.

Just follow the manufacturers' directions as listed on the package, after which you are just about ready to glue that annoying tile down.

Before doing that though, you want to stick a golf tee all but one of the holes you drilled.

These tees are going to help ensure that all the empty spaces under the tile are filled with the epoxy you are about to inject.

Use your construction syringe, with as small of an applicator nozzle as you can find, to inject the epoxy into the floor.

You want to ensure that you have a tight fit, as close to airtight as you can get so that the glue does not seep out around the nozzle while you are injecting it into the holes.

Keep injecting the stuff under the tile until it starts to ooze out around the golf tees.

 When this happens, simply remove the tees, and remove the excess epoxy.

Allow the epoxy to dry out (or cure as it says on the directions), and while it is doing so mix the grout.

Once the epoxy is dried, apply the grout to the holes you created, and you are finished.

We have a few videos:


Mr. Fix-It
 ________________________

Finding Your Shut Off Values

shut-off.bmp (300×404)

Can you, right now, locate and turn off the various utilities in your home?
If not, you really need to take the time to learn how.

Luckily, locating the utility shutoff valve or valves for your home is an extremely important skill to have.

This is particularly true if you live in an area that has a lot of earthquakes, or you have a history of plumbing issues.

Here is how you can locate, and shut off, the two major utility shutoff valves in your home.
Gas

gasserviceshutoff.jpg (159×160)

1Find the gas meter

In most cases the gas shutoff valve can usually be found near the gas meter of your home.

This is often located outside the home, and is usually has the appearance of a pipe that comes out of the ground, which then goes into the gas meter.

To turn off the gas, simply turn the handle on the pipe counterclockwise.

2Keep the area clear

When you find the gas meter, take a quick look around.

Is the area around the meter free from any obstructions?

You don't want to have any bushes, plants, or even covers in the way.

These types of items can often delay you in an emergency situation when you aren't thinking very clearly.

3. Place the right tools

Many times these shutoff valves are not firmly attached to the pipes so that they do not accidentally get messed with !

Instead, these types of shutoff valves are attached by a cord or chain to the pipes themselves.

Identify these tools, and then paint them in a bright eye catching color.

Some examples of the colors you may want to choose are bright red or 
yellow.

4Turn off the pilot lights

Whenever you do shut off your gas lines you will also want to make sure that you turn off all the pilot lights in your home.

This will help ensure that no gas leaks into your home when you do turn the gas back on.

5. Practice

Just knowing where your shutoff valve is located isn't enough. To be truly effective in an emergency situation you should also practice several times to become familiar with the process.

It would also be a good idea to teach all the adults, as well as older responsible children, the process so that they too can shut off the gas when the need arises.

6. Look into automatic options

A great alternative method that you could use are called automatic gas shutoff valves.

These valves are designed to shut off the flow of gas to the home in the event of an emergency, such as an earthquake.

In fact, in some cities and states these are even required for your home to be considered up to code.
Water

Related image

1Locate the main

In order to ensure that the water to your home is truly shut off, you need to actually find the water meter box to your home.

This box is typically in the front of your home near the driveway or sidewalk.

Related image

In the event that you cannot find the box call your local water company to have someone come out and show you where it is.

Open the box and look inside you will find a valve that is similar to those found on the gas meters.

To turn off the water, simply turn the handle counterclockwise until it won't turn any more.

2Keep it clear

One of the drawbacks to water meter boxes is that they are "natural" homes for spiders, snakes, mice, bugs, and other critters.

Periodically you will want to remove the cover to the meter box and check to ensure that it is free from any critter.

Further, you will also want to ensure that the shutoff valve has plenty of room to move the handle.

3Prepare the area

It can often be difficult to see the handle of the shutoff valve in an emergency, one way to help make this an easier task is to paint the handle an eye catching color.

While red is a good color for a handle that is in the open, for a box environment you will want to use a brighter color such as yellow.

4Practice, practice, practice

As with most things, shutting off the water to your house is something that you should practice. This way you can make sure you are able to do it in a high stressed situation, such as an emergency.

Furthermore, it would also be a good idea to teach all the adults, as well as older responsible children, the process so that they too can shut off the water when the need arises.

Electricity
Image result for electric main switch box
While it doesn't use a valve, it is a good idea to also learn how you are supposed to shut off your electricity.

This is a particularly good idea if you have any gas lines in your home.

Usually the best place to shut off electricity in your home is at the electrical panels.

Simply throw the circuit breakers into the off position and you will have the electricity shut off throughout the house.

Keep in mind that some houses have several electrical panels, so you will need to make sure you know where all of these panels are so that you can shut the electricity off when and if you need to.

Videos?
Gas

Water

Electricity

Mr. Fix-It
_______________________

Make a Wall Look Special...
Glaze it !

Image result for glazed bedroom wall

Are you thinking of redoing your walls, but want something a little different than wall paper or the traditional paint job, you may want to consider glazing.


Related image
While the traditional paint jobs on walls can look nice, or even potentially fantastic, glazing is something truly amazing. When it is done right, glazing a wall can make the room you are working on truly remarkable.

To get that remarkable look, all you need to do is follow these simple steps.

Get the Tools

Since glazing is a type of painting job, you will need to get all of the traditional painting tools that you see in other types of paint jobs.

The only real difference is that you will also want to get a squeegee, a ruler, and some neutral glazing medium.

Be sure that you get enough of the glazing medium to complete your work.
Also, when you get your paint you will want to make sure you get semi-gloss paint only.
Prepare Your Room

As you always do with a paint job, make sure that you prepare the room properly. This means that you need to place painters tape along the trim, light switches, and even along windows to help protect them from accidental painting.

If possible, remove anything that can potentially lead to you having an accident when you are painting.

Don't forget to lay down drop cloths over large furniture and on the flooring.

Make Adjustments to Your Tools

Before you can really begin glazing walls, you need to make a slight adjustment to one of your tools.

That tool is the squeegee, and that adjustment is cut a few notches in the rubber of the squeegee at regularly spaced distances using a ruler to get the distances right.
Paint the Room

Paint the room as you normally would, with the lightest colored paint to work as a base coat.

The easiest way to do this is by using a paint roller, though you will want to "cut-in" near the trim and other difficult areas with a hand brush.

Allow the walls to completely dry prior to proceeding to the next step.

In fact, it would even be a good idea to allow the paint to dry over night before going on, you really want the walls to be bone dry.

Make the Glaze

To make your glaze you will need to mix together four parts of your glazing medium to one part of the darker colored paint.

Pour the mixed glaze into a painting tray and begin painting the walls using a foam based paint roller.

As always, use a hand brush to cut into the difficult areas.

Begin Combing

When you have finished painting the glaze onto the wall, you will want to use the squeegee to "comb" the walls.

This is when you run the squeegee along the walls in curved strokes.

Since you really want to do this work while the paint is wet, you may want to have at least one other friend and an additional squeegee to help you do the work.
Allow the Paint to Dry

Once you have finished working the squeegees over the walls, you can allow the paint to dry before you can begin removing the painter's tape.

On the average this will take about four hours to do, though you can easily let the paint dry overnight to really get it completely dry.

Inspect the Work

After the paint has finished drying, and before you begin cleaning up, you really need to inspect the work.

Inspect the work, and make sure that it is completed the way that you want, and that you haven't accidentally gotten any of the paint somewhere you don't want it to be.

In the event that you do find some paint on the trim, you will need to cover the accident with some paint that matches the rest of the trim work.

Just be very careful when you do this, since if you get any paint meant for the trim on the wall, you will need to repaint the entire wall to repair the problem.

Videos to help you ?


Mr. Fix
________________

Guidelines for the Perfect Bathroom
Lighting Fixtures

Related image
Choosing great bathroom light fixtures can be confusing for anyone who is not a professional interior decorator. Luckily, it doesn't have to be that way anymore.

If you ever wanted some ideas on bathroom light fixtures, but don't know where find them, we have some ideas that can get you started in making sure you have the right ones for you.

Here are a few guidelines you should consider.

 Light Level

When looking at the light fixtures that you may want, you need to consider the light level you want for your bathroom.

Do you like your room to be bright or one that is a little darker?

Without even putting in a dimmer switch, the type of light fixture that you choose will greatly affect the amount of light you have in a particular room. 

Compare the styles and choose several styles that you may like.

Location 

Where in your bathroom will you be having the light fixtures?

Typically, light fixtures should be placed so that you can illuminate the room, while also being able to illuminate your face so that you can better see what you are doing when you are shaving or putting on makeup.

Either way, where you plan on putting your light fixtures will also have an impact on what kind of light fixtures you can even have.

Style 

When choosing your light fixtures, try to focus on how they will interact with the style of your bathroom.

You want something that will be an extension of the room's style, rather than something that will conflict with it.

The goal is to have your light fixtures be so inconspicuous, and blend with the room so naturally, that you don't even notice them unless you are looking right at them.

Can you install it? 

Are you planning on having a professional come and install your new light fixtures? If not, then you need to make sure that ones that you like are all models that you will be able to install yourself.

For the most part, light fixtures are fairly easy to install, as long as you are careful; however, it is highly recommended that you leave more extensive electrical work (beyond simple fixture installation) to the professionals.

Can you maintain it? 

Just like anything else that you purchase, you will need to maintain your new possession.

Is the new light fixture something that you will be able to take care of through casual everyday maintenance?

Does the new light fixture require major work on your part to even change a light bulb?

Keep in mind that even if something looks nice and pretty you are the one that is going to need to change the light bulb eventually.

More ideas?  Watch them !


Mr. Fix-It
__________________________


Changing the Capacitor on your Air Conditioning
Unit(s) is Inexpensive Maintenance
the Can Keep You Cool this Summer

Image result for air conditioning unit

 Many of our 10 to 20 year old HVAC Units are failing because of the capacitor(s).  They can die suddenly without warning.

hvac_capacitor.jpg (362×242)
The Capacitor is necessary to start and run the air conditioner compressor motor and cooling fan located outside your home in an HVAC unit.

When the capacitor fails, the compressor and/or cooling fan will attempt to start without success, or will not respond at all.

The change out is rather straight forward and simple; and with a bit of mechanical skill and following the instructions, can take less than 20 minutes.

HVAC companies can charge several hundred dollars to replace a capacitor only costs about $10.00.

Think about some preventive maintenance and change the capacitor now.
It can keep you cool and your wallet full !

We have a few videos to help.

Mr. Fix-It
__________________________
  
The Right Way to Paint in Tight Corners

Related image

If your walls are all the same color, then painting into tight corners does not present much of a problem.

But if your walls are different colors...

 painting a tight corner can be challenging ! 

Follow these steps to achieve clean corners when painting:

1. Paint both walls and stop just short of the corner.

2. Choose the lightest colored wall and paint it completely into the corner, and do not worry about getting paint onto the other wall.

3. Using painter's tape, tape the corner of the wall that you've completely painted (the lightest colored wall), ensuring that the tape is as close to the corner as possible. Use hard pressure when taping to ensure against bleeding.

4. Now paint the corner again with the lightest color, allowing it to bleed.
Since it will bleed onto its own color, it doesn't matter that it's bleeding.

Allow that paint coat to dry at least three hours, leaving the tape in place.
5. Now that the bleeding process has cured, you can paint the opposite corner with the darker colored paint.

Use an angled brush to paint the darker color into the corner, taking care not to paint beyond the painter's tape.

6. Allow the paint to dry overnight, and then carefully remove the tape.
Another method for painting into tight corners is to use an artist's brush in the corner, before painting the rest of the wall.
art-paint-brushes.jpg (345×348)

Use a quality artist's brush with angled bristles and paint a strip about one-inch wide from the ceiling to the floor. Take short strokes, using plenty of paint per swipe.

Since smaller brushes use less paint, you will need at least two coats of paint per wall.

Once you've finished the corner strips, paint the rest of the wall.

One more method of painting into tight corners is the paint-and-wipe method.

Quickly paint as much paint as you can straight into the corner, without worrying about getting it onto the other wall, and then just as quickly use a very damp rag to wipe the paint away from the facing wall.

If you are using any color but dark red, this is a great method for painting tight corners.

I've also found sponge brushes are great for getting paint into places that a regular paintbrush can't reach, like the small bit of wall between two door jambs.


foambrush.jpg (200×196)

Sponge brushes are actually bits of sponge, glued to a wooden handle.
Manufactured to be used and then thrown away, sponge brushes are inexpensive and easy to use. Just make sure that you have enough paint in the sponge, since they are highly absorbent.

Videos?


Mr. Fix-It

_____________________________

Getting Rid of Rust on Concrete

Driveway-oil-stain.jpg (2048×1536)

Removing rust stains from concrete may seem a little difficult to do at first glance; however, when the proper steps are taken just about any rust stain can be removed from any concrete surface.

Keep in mind that if you are not particularly careful, you can actually cause some serious damage to your concrete, which will lead to a need for earlier replacement.

Here are a couple of methods that you can use to ensure that your concrete is free from rust.

1. Use a power washer

You can use a power, or pressure washer in conjunction with either laundry detergent or concrete cleaner to remove rust from concrete.

Make sure that you completely clean the entire concrete surface by sweeping, and then wetting the surface down.

Then apply the cleaner and scrub using a stiff bristled brush.

After scrubbing, simply power wash the area and you should be finished. However, you may need to repeat the process a few times before you get the stain completely removed.

2Commercial cleaners

Most hardware stores carry commercially made and mixed concrete cleaning detergent. Usually these cleaners will come in either powdered or pre-mixed liquid forms.

When using them, make sure that you follow the directions as listed on the cleaner (also, the use of a good, stiff bristled brush wouldn't hurt).

3Muriatic acid

By applying a little bit of muriatic acid to the rust stained concrete, you are certain to remove the stain.

Only one little problem with this method though, it is an acid.

This means that if you are not particularly careful you cannot only remove the stain, but more of the sidewalk than you plan, as well as some of your own skin.

When using this method, be sure that you carefully read and follow the directions on the back of the package as posted by the manufacturer.

In addition, make sure that you are wearing proper safety equipment such as gloves and goggles before handling this material.

Finally, after you have finished removing the rust from your concrete, you will need to reseal it.

This will help protect you concrete surface from getting stained again, as well as protecting it from the elements.

In addition, by resealing the concrete you should also have an easier time cleaning it in the future.

Videos?

Pressure Washing

Commercial cleaning

Muriatic Acid (3 part videos


Mr. Fix-It
_____________________________

The "Art" of Painting
Near a Window

maxresdefault.jpg (1920×1080)

If you don't take the proper steps when painting near windows, you can easily find yourself with more work than you wanted. For example, if you would like to be able to open your windows again, there are a few precautions you will need to take.

Same goes if you'd like to actually look through your windows without any paint in the way !

To be able to avoid some of the more common issues, simply make sure that you follow these simple guidelines.

Materials needed

Metal roller tray
Angled, natural bristle paintbrush (for best results)
Three inch trim roller
Stir stick
Utility knife
Paint can opener (or flat tipped screwdriver)
Drop cloth (canvas or plastic is best)
Paint
Lots of newspaper
Painter's tape

Procedure

1Prep and tape the area.

Before you can begin painting near windows, you need to properly prepare the area for your work. 

This means that you need to remove any and all hangings, drapes, or other items that you may have near the windows.

Next lay out your drop cloth on the ground in front of the window, and begin taping off the window. The ideal way to do this is by running painters tape along the outer edge of the windows to protect it from getting any paint.
You may need to apply couple of rows. 

Repeat the process on the inside of the windows, but this time adding some newspaper to the mix.

Basically you want to tape the newspaper to the windows so that you can keep as much of the paint off of the windows as much as possible.

If you have any interior trim, apply the newspaper and painters tape around it, leaving the trim exposed.

2Get the paint ready.


Open your paint can, and stir it all together. This will help prepare the paint for the work you will begin shortly.

Pour a little bit of the paint into the roller tray and then slowly roll the roller into the paint.

3Start at the top.

Begin painting your window at the top. This will help you prevent any drips or running paint from ruining any work.  You will be able to help hide any drips or runs when you do it this way.

Slowly work the roller over as much of the wood as you can, though you will not be able to get everything.

You will need to use the paint brush to cut in and get into the tight corners that the roller can't reach.

4Work the edges.

Repeat the process for the sides of the windows, being sure that you don't miss anything. You may need to use the paintbrush so that you can get everything.

5. Interior trim.

When working the interior trim you shouldn't have all that much difficulty since you can simply paint over the trim and not worry about getting the newspaper dirty.

You may miss a couple of places if you don't use the paint brush to help out.

6. Finish at the bottom.

Repeat the painting process at the bottom of the window. Use the roller as much as possible, and then finish up with the paint brush.

Make sure that you don't paint over the edge of the window and inadvertently seal the window shut. If you do, you may want to run a utility knife along the edge to help break the seal.

7Repeat as necessary.

Repeat steps three through six as often as necessary for multiple coats of paint.
Allow enough time to pass between the coats so that the preceding coat is completely dry prior to you starting the next one.

Here are some helpful videos:

Mr. Fix-It
_______________________

Does Your Wood Floor Squeak ?
Let's Fix it !

handyman-20281070.jpg (293×160)


A squeaky floor can be a truly annoying thing for most people.

Fixing squeaky flooring isn't all that difficult of a task, and one that just about anyone can do. Just make sure that you follow these simple directions.

Keep in mind, that most of these directions will require that you also work from underneath the floor, so you may have to do some additional work to access that point.

1Fix the joist directly

Often times squeaky flooring is caused by the sub-flooring becoming separated from the floor joists, which causes the nails to squeak as they go in an out of the holes in the joists.

If the gap between the flooring and the joist is large enough, you can simply fasten an appropriately sized piece of scrap flooring to the joist.

Make sure that the flat edge of the scrap wood is flush against the flooring, and then attach it to the joist.

You may want to use screws instead of nails as they are less likely to work themselves loose over time.

2. Use a shim

If the gap between the joist and the flooring is small enough, you can simply slide in a shim to help make things nice and tight.

Apply a bit of wood glue or construction adhesive to the shim, and then slide it into the gap. Be careful that you don't force the shim too much or you can end up making the gap wider.

Ideally, you will want to use a shim that is difficult to push in, but one that you don't have to force into the space.

3Reattach the floor and sub-floor

Sometimes the flooring and the sub-flooring can become separated, and this can cause the squeaking.

The easiest way to fix this problem is to use a screw that won't go all the way through both the flooring and the sub-flooring, but is long enough to attach the two.

Simply locate the place that they are separated, and then insert the screw into that location.

If the separation is large enough, you may need to use more than one screw.

Do not place these screws closer than six inches to each other.

Videos?


Mr. Fix-It
_____________________

Heating & Air Conditioning Concerns
(HVAC)

Related image

HVAC is the most expensive mechanical item in your home to repair or replace.

Now is the time to start planning what you should do when the HVAC unit fails to keep you warm in winter, cool in summer, or is making strange noises.


Now that our homes in SCA are approaching 15 to 22 years old you can expect the HVAC to start to have failure, if they haven’t already. 

The life expectancy of HVAC is 15 or more years for the air conditioner side and up to 30 years for the heating side.

Many times the HVAC with minor issues such as the thermostat, capacitor, fan motor, switch, etc. will cost a few dollars to repair. 

I have always recommended replacing the defective part just like you would if the brakes failed in your car. 


Image result for cartoon tired air conditioner

You don’t replace the caryou replace the brakes.

Many folks have already fallen victim to the HVAC Companies high pressure sales pitch to spend thousands of dollars to replace the entire system and all ducting within the first 15 years. 

Image result for rip off


The existing ducting is adequate to handle the new unit without any modifications unless damaged in some way. 

To me, replacing the ducting is a waste of money.

How much should you pay to replace the HVAC?

The cost can be broken down into size and efficiency. 


The minimum requirement to replace you existing HVAC in our Nevada location is a 14 Seer for cooling and 90% efficiency to heating

The higher the seer rating and efficiency the more to unit will cost. 

Any additional cost should only relate to the HVAC equipment efficiency, not the labor to install.

 I see no reason to install a more efficient unit than minimum required.

The size unit you need is based on BTU’s or Tonnage which relates to the area of your house to be conditioned.

A good way to estimate the cost to replace a HVAC unit:


Image result for piggy bank cartoon saving moving

One ton HVAC will condition about 500 square feet of your home.


One ton HVAC installed will cost about $1700 per ton.


For a 1800 sq ft home…divide 1800 by 500 multiplied by $1700 = $6120.


The material cost for this unit is about $3000, any amount over that is strictly labor, profit and overhead.

The HVAC system replacement should take less than 20 man hours to install.


If you have questions, email or text to discuss your situation and options…...it’s free!!!
Image result for cartoon tired air conditioner

Mr. Fix-It
Forrest Fetherolf
forrestf@cox.net
(818) 207-1868 Text
__________________________

Which High Efficiency Light Bulbs Are Best

41HmeSE0ksL._SX342_QL70_.jpg (342×342)
There are all kinds of reasons that can influence you to be as energy efficient as possible.

Some of the more common reasons include wanting to save money on your monthly utility bills, wanting to save money on shopping, and even wanting to reduce the amount of energy that you use in general.

Whether you are looking to make a green impact on the planet, or saving a little green in your wallet, you need to know the right methods for choosing energy efficient light bulbs.

 In reality, all you really need to do is keep in mind these guidelines, and you should have no problem getting the right light bulbs for your home.

1Check the package

The first thing that you need to understand about choosing energy efficient light bulbs is that they should be clearly marked. This means that you need to look carefully at the packaging.

Good quality energy efficient light bulbs will be clearly marked with Energy Star somewhere on the packaging.

Image result for energy star

If the packaging isn't clearly marked, it may not be as energy efficient as the packaging may lead you to believe.

2Types 

There are several different types of light bulbs that are designed to be energy efficient. Perhaps the single most popular type are fluorescent bulbs (both regular and compact) which also provide the most "natural" light of all the energy efficient light bulbs.

In fact, these are so popular that some cities are making it illegal to sell the old incandescent light bulb anymore in favor of these.

Another of the more popular choice are the light emitting diodes (LEDs) or even halogens which tend to provide the brightest lights.

3Benefits 

If there is one benefit that all energy efficient light bulbs will share is that it will save you money.

Energy efficient light bulbs are also engineered to have a minimum of ten times the service life of regular light bulbs.

In addition, these lights will usually give of the same amount of light using a whole lot less energy than traditional light bulbs.

For example, an LED bulb that only uses about three watts of energy can put out as much light as a 45 watt incandescent bulb.

4. Potential drawbacks

 CFLs (compact fluorescent light bulbs) have a couple of large drawbacks.
The first is that as they are now, you cannot really use them effectively with a dimmer switch.

Another potential drawback is that CFLs are extremely hazardous if they get broken.

 In fact, they are so dangerous that the EPA considers them hazardous materials.

Here are some helpful videos:


Mr. Fix-It
____________________________

Hardwood Flooring Can Often Be Restored
Instead of Replaced 

 Image result for restoring hardwood floors

There are times when you instead of replacing your entire hardwood floors, all you need to do is some minor touch ups. This kind of simple hardwood floor restoration isn't all that hard, though you do need to make sure that you have the right tools, and a fairly steady hand.

Simply follow these instructions and you should have no problem with getting your flooring looking its best again.

How bad is it? 

Look at the damage on the floor, and see how bad it is.

Most minor scratches, which are scratches that are less than six inches in length, and no more than 1/8 inch in depth, are easily fixed.

Anything larger than that, you may want to look into replacing that section of flooring, or taking more in depth restoration measures.

Light scratches need steel wool. 

Light scratches can be described as a scratch or divot that appears to be surface damage only. For example, can you look at the scratch, and it simply looks like some of the surface wood or sealant came off?

If so, you have a light scratch.

Grab some fine steel wool, and rub it lightly over the scratch in the same direction as the grain.

If you rub against the grain, you can easily find yourself needing to make more repairs. Continue to rub the area until it is smooth to the touch.

Deep scratches need sandpaper. 

For deeper scratches (which are up to 1/8 inch deep) you will need to use some lightweight sandpaper. 

Once again, lightly rub the sand paper in the direction of the grain or you will end up with a larger project.

Keep sanding the area until it has become completely smooth and even to the touch. You are simply smoothing out the rough edges of the scratch, so don't get too carried away.

Apply some mineral spirits. 

Begin preparations for filling and sealing by making sure that you pick up all the loose fine dust that is left over from the sanding.

The easiest way to accomplish this is with the help of some mineral spirits and a soft clean rag.

Apply the spirits to the rag, and then rub it over the sanded area.

Fill the scratch. 

Allow the mineral spirits to dry, and then it is time to fill the scratch. This should only take about five minutes worth of work.

Get some premixed wood filler that matches the color of your hardwood floor.

Once you have that, put some onto a plastic putty knife and then fill the scratch.

Be sure that you are holding the plastic putty knife at an angle to get as much filler into the scratch as possible.

Do not use a metal putty knife, or you can easily create new scratches that will need to be repaired.

Sand the scratch. 

Once the filler has dried to the touch (should be no more than an hour) it is time to sand the area smooth.

Use some lightweight (about 180 grit should do the job) and sand away the excess filler.

 Do not press to hard, or sand too much or you can find yourself with a bigger mess to repair.

Seal it.

Seal the now restored area of your floor to help protect it against the elements and daily use.

Use either a varnish, polyurethane sealant, or some other product that will do the job, and match the rest of your floor.

Put everything away, and you are now finished.

Videos?

Here's a 4 part.. step by step "how to do it" procedure that should be helpful.


Mr. Fix-It
____________________________

Knowing How Deep
to
Drill a Hole

Related image

Next time you are asked to drill a hole or need to for a personal project, you may wonder how to drill the hole to a desired depth.

Before beginning your project there are a variety of tools you may need.

Necessary tools for drilling include: drilling bits, a measuring tape or rulera pencil or marking toola center puncha rubber bandgoggles, and a clamp.

All these items can be found at your local hardware store and grocery store.

Before beginning your big project, make sure that you are drilling in the proper place.

Be confident about the placement of frames and the like prior to beginning your project.

If you are hanging an item, check to make sure that you are not near electrical wiring or a cement wall.

Knock on the wall you wish to drill into and listen for a slightly hollow sound.

If you are concerned about hitting electrical wires you may speak to a contractor or a home improvement guru.

Drilling a hole to a desired depth is dependent on the length of your drill bit.
When selecting the drill bit you intend to use for your particular project, keep in mind its length.

The length of your drill bit will be the size, or depth, of your drilled hole.

With a wax writing utensil or a pencil, mark the spot you intend to drill your hole.

Using a center punch or nail, lightly tap an indent in the middle of your mark with a hammer.

Having an indent will help you to secure the drill bit in the right place when you begin drilling.

When drilling a hole into small items use a clamp to properly secure or fasten the item you are drilling or hanging in front of your marked area.

By using a clamp, you reduce your risk of injury.

If you do not use a clamp, you run the risk of the item falling during installation.

You may now begin drilling.

If you are drilling for the first time, or feel nervous about your project, you may want to use a smaller drill bit to make an initial hole.

Small drilling bits are easier to use and handle and can help you drill to the right depth.  If you start with a large drill bit you may be frustrated when you find that you do not want your hole that deep.

If you wish to continue drilling the hole deeper, select the next size drill bit until you reach your desired depth.

By applying a light pressure, you reduce your risk of losing control of the drill and drilling too deeply.

Another great method for drilling a hole to the desired depth is to use a rubber band.

Place a rubber band on the drill bit to mark the depth of the hole you wish to make.

Advance the bit slowly as you drill, and stop drilling when the rubber band has reached the surface.

Be sure that you use both hands, one to steady the drill and regulate the speed of advancement, and the other to keep the drill working.

When you are done, admire your final project!

Here's a couple of greats video to help out !


Mr. Fix-It
________________________

House Too Noisy?

Related image

Part of reducing interior noise levels lies in understanding where these noise levels come from.

While it may be easy to say that they come from the television or  radio, this isn't entirely correct. 

In large part, the design of the home plays a huge role in how noisy it is.

The shapes, sizes, ceiling heights, and arrangement of the room and their contents can all greatly affect the way that noise acts in a home.

Typically, there is little that can be done in this particular area to help in reducing interior noise other than rebuilding or substantially modifying the house.

It's not just the way that the house is designed though that can be blamed for interior noise levels, the other reason is actually sound.

Simply put, sound can either be absorbed or reflected.

In the cases of a home that is an echo chamber, there is little absorption, which in turn reduces interior noise levels.

With homes that have large amounts of hard floors, or are designed in certain ways, there is generally a lot of reflection.

This means that the sound persists and is echoed and transmitted throughout the home, room to room. Hence, a noise that is generated in one room, can easily be heard in all of the others.

If you have the money, a good engineer or contract or even an interior designer can take a look at such situations, appraise it, and deliver some recommendations. 

These recommendations can help to mitigate the problem, or even eliminate it; however, this option is generally very expensive, and one that should only be relied upon as a last resort.

For those that are faced with a home that has a lot of hard surfaces, and not a whole lot of money, there are a few options that you can use.

The first thing to do is remember that angles and hard surfaces can often act like the cushions on a billiard table, which tends to "reflect" a billiard ball that hits them.

The simplest solution is to therefore break up these hard, reflective surfaces by adding soft, cushiony surfaces that will help absorb the sound and kill the echoes and transmission of the sound

Just by doing this you will be able to greatly reduce the interior noise level of your home.

Carpets, rugs, cushions, velvety cloth wallpapers, corkboard, acoustic ceiling tiles, heavy folded cloth drapes and curtains, and insulated walls can all help an awful lot in reducing interior noise.

Typically small rooms reflect noise less, while the opposite is true for larger rooms.

This means that larger rooms may need to be"broken up."

This can be done in a variety of ways, for instance you could use cloth screens to help create more "rooms" out of the single larger room.

Using tapestries hung on the back of bookcases can also do the same thing. In the end, simply rearranging the furniture and appliances can have a huge impact.

Try rearranging a few of the items in your home and see if that works in reducing interior noise levels.

Here are some helpful videos.


Mr. Fix-It
______________________

Necessary Garage Upgrades

Image result for cartoon  open garage

For some reason, the garage is one of the most often remodeled rooms in the home.

Perhaps this is because due to the fact that when people remodel their garage, they forget a few things and then have to do it over again. 

If you are planning to remodel your garage, keep in mind these necessary garage upgrades. That way you only have to do the job once !

Space 

It almost seems like you can never have too much space in your garage.
When planning your garage upgrades though, keep in mind that while it may be nice to have unlimited space in your garage, it isn't really practical to have a garage that is as big as your house.

Keep your desires and your needs balanced and realistic. To do this though, you need to have a purpose for your garage in mind.

Will it be storing your cars?

Will it be used as a storage room?

Have a single purpose in mind and work around that.

Storage 

Regardless of what the primary purpose for your garage is going to be, you need to make sure that you have plenty of storage room.

At the very least, you need to ensure that you are able to properly store the items that you keep in your garage.

For example, if you use your garage as a game room, then you may want to think about creating some storage for the games.

Insulation

When you upgrade or remodel your garage, make sure that it is properly insulated.

This includes the garage door.

An improperly insulated garage can become horrendously cold during the winter and exceptionally hot during the summer.

Either of these can lead to higher energy bills and an uncomfortable situation for you when you use the garage.

Soundproofing

 Some may say that soundproofing your garage may not be necessary, strictly speaking.

However, if you are in the rest of the house do you really want to hear the noise coming from the garage?

Those cars getting fixed, the music or even the games being played can all get pretty loud.

At the very least, soundproofing your garage will provide peace and quiet for the rest of the home.


Image result for what goes on in the garage stays in the garage sign

Here's a few ideas on how to make your garage more useful...and maximize the space.


As you can see, there's more to a garage than a car...and...golf cart !


Mr. Fix-It
___________________________

Switching to LED Lights 
9008644-led-technologie-zeichen.jpg (1200×900)

If you're like most baby boomers or from earlier generations, when you think of office or overhead lighting, you envision fluorescent bulbs; and when you think of home lighting, you think of the familiar incandescent light bulbs.

But... the next time you purchase light bulbs for your lamps, take a look at the LED lights that are offered for home use.


The main difference between incandescent and LED lamps is the filament versus the electronic chip used to generate the beam of light.


That is, the incandescent bulb uses a filament, and LED lights use a light-emitting diode (thus, the initials L.E.D.).


LED lighting is part of a type of lighting referred to as solid-state lighting (SSL), which incorporates the use of solid-state electro-luminescence, rather than thermal radiation to emit light.


Because it doesn't use thermal radiation to emit light, SSL generates light while creating very little heat.


Here are some points to consider if you're contemplating using LED lighting in and around your home:


1Hot, but not


Unlike incandescent bulbs, LED bulbs produce very little heat.


If you've ever changed a hot incandescent bulb, then you know how the bulb can burn your fingers.


If you touch an LED bulb, it will not burn at all since they produce 95% less heat than incandescent bulbs.


2Long lasting


LED lights can last up to one hundred times longer than incandescent bulbs and up to ten times longer than fluorescent bulbs.


Since you'll need to change bulbs less frequently, you'll save money in the long run by purchasing LED lighting.


3Versatile


You can use LED lights in and around your home and rest easy in the knowledge that it is safe to use around children and pets.


 If they touch the lighting, they won't be burntThe lights will not shatter, either.


With traditional lighting, you run the risk of shattering a bulb if you drop it or run into it.


With LEDs, the casings are high density plastic, and will not easily shatter upon impact.


Use LEDs if you're concerned about helping the environment, because they are extremely eco-friendly.


LEDs use a fraction of the energy of traditional lighting, and lend themselves well to a variety of uses, including solar lighting and other renewable energy sources.


LEDs use lower wattage than incandescent bulbs, translating into energy and money savings for the consumer.


Some videos? 


Mr. Fix-It

_________________________

Getting Your Air Conditioning System
Ready for Summer


l1129807535.jpg (350×262)
Summer is almost upon us, and that means it’s time to check your A/C system.

It’s important to regularly check the system in order to prevent any breakdowns once things start to heat up.

Below are a few helpful steps for checking your A/C system.


Image result for air conditioning outdoor unit

Power Down

Before beginning any kind of A/C repair or inspection, be sure it’s powered off in order to prevent damages to any of its many parts. It’s also an important step for ensuring your personal safety, as 
air conditioner repair can sometimes be a tricky task. 

Cleaning the Condenser

Inspect the area around the condenser for any debris that could potentially prevent air from flowing into the system.


To help the condenser breathe, make sure there are at least a couple of feet between the condenser and any shrubbery, fencing, or tree branches that are in the area.

Use a regular garden hose to then wash both the inside and outside of the unit. 


If you suspect small leaks in your A/C system, you can usually fix them from the condenser’s end by using a refrigerant leak repair kit.


Related image

It simply clips to the condenser’s suction line and sends sealant throughout the system, sealing any small leaks along the way.


Be sure to also check the fan belt,  which connects the motor and the blower, can weaken or wear down over time and require readjustment, more lubrication of the bearings, or even a total replacement.

Different A/C systems require different fan belts, so make sure you find one that’s specific to your system before purchasing.

After you repair or replace your fan belt, make sure there is at least half to three quarters of an inch of slack in the line.

Fan belts that are too loose or too tight are more likely to break. 


Duct work & Filters

Now it’s time to start following the A/C system indoors.


First, you’ll want to search your house for all registers (vents) and make sure that any rugs, carpeting, or furniture does not block them.

If you have floor registers, make sure to look inside for any foreign objects; it’s not uncommon for small household objects to fall through the vents.

Next you’ll want to inspect the duct work running through your attic or basement. Make sure that they are properly insulated and that there are no gaps in the seams.

Improper insulation can cause irregular condensation on the cold metal coils and lead to leaks that can seep through your ceiling. 


After the duct work has been properly inspected, go ahead and check your filters for any clogs.


It’s recommended that you change filters at least once a month to keep your system running smoothly.

Filters that protect against common allergens will tend to clog quicker, so they require more frequent attention. 

Professionals


Consider hiring an air conditioning repair professional to regularly check your A/C system. There are many parts that can go unnoticed by the untrained eye, and a professional can help prevent future problems by providing proper, detailed maintenance.

Video?

____________________________


Home Air Filters?

changing-air-conditioner-air-filter.jpg (526×451)

Have you noticed a sudden upsurge of sneezing, coughing, or other allergy attack symptoms within your home?

If so then you probably need to change the air filter on your HVAC system.

Keep in mind that choosing efficient air filters, which is what you want to do in this situation, requires a bit more effort than simply going to your local home improvement store.

Here are a few things that you should keep in mind.

Know the Size

An important part of choosing efficient air filters is to make sure that you choose one that will work for your particular unit. This means that you need to know the size of air filter you can use for your particular HVAC unit.

Usually all you need to do to find this information is look at the existing air filter and see what size it is.

If the existing air filter does not have a readily seen size, then take a look on the door to the air filter compartment.

On this panel you can usually find some rather important information that will include the filter size for your particular HVAC unit.

Look for Energy Efficiency

Take the size information that you now have, and go to your local home improvement store. There you will find a variety of different air filters, and while many will work, most will not work for what you want.

Take a look at the energy efficient models that are on sale.

These are the ones that you will want to continue looking at since they are designed to be the most energy efficient in how they capture the particulates that are within the air, and purifies it.

Find the ones that have the highest energy ratings before you continue making your choice.

Check the Ratings

Take a look at the filtration ratings that typically come with these types of units.

Make sure that you know what the usable ratings for your particular HVAC model are, and if you don't know, look up the model on line to ensure that you find the correct rating range.

If you are looking for the best filters you will want one that meets the HEPA requirements.

One Time vs. Reusable

You can often find one time usable units,  or ones that are reusable. Either one will work just as well, the question is a matter of cost efficiency.

The single use models are typically lower costing initially, though the cost of purchasing a new one every six months can quickly add up.

The reusable ones are initially more expensive, but over the long run are more cost efficient if you clean them regularly.

The choice of which one to use is up to you.

Change It Regularly

Once you have finished choosing efficient air filters that you can use in your home, you need to then change it out regularly.

This is a rather simple operation in most cases, and is something that most homeowners can accomplish.

Usually all you really need to do is remove the old one, and then place the new one in properly.

Most, if not all, HVAC units have instructions on the door to where the filter is located. If not, then take a look at the packaging for the filter to find the instructions. Simply follow those instructions and you will be able to change the filter without too much (if any) problems.

Need a video?


Mr. Fix-It
 ________________________________


1 comment:

  1. The Foundation Assisting Seniors will install the filters for you at no cost.You purchase the filters and they will install. call them at 725-244-4200

    ReplyDelete