
PRUNING ROSES
PRUNING ROSES
How to Do It...and...When

1. Prune roses to remove dead and diseased wood as well as weak or twiggy growth and crisscrossing canes throughout the bush. Pruning also rejuvenates and shapes the bush.
Prune in late January or early February before the plants begin active growth.
2. When cutting back canes, make a diagonal cut one quarter inch above a healthy outside bud.
This will encourage the plant to spread out, to allow light and air to penetrate and rejuvenate the plant. The free flow of air through the plant results in better control of powdery mildew.
3. To remove an entire cane, make the cut flush at the crown.
Treat exposed cut surfaces with a pruning seal to prevent insects and diseases from entering.
4. After pruning, apply a dormant spray found at all nursery outlets according to package directions containing lime sulfur to help reduce insect infestation the coming year.
Hybrid Tea & Grandiflora

Each hybrid tea cane at the tip will produce one large dominant bloom with smaller secondary blooms underneath.
For a larger bloom, remove the secondary buds.
The granadilla which is a cross between a hybrid tea and floribunda, combines bloom quality of the hybrid tea with bloom abundance of the floribunda.
Prune climbing hybrid teas and ever blooming large-flowered climbers in early spring while they are dormant.
Do not take as much wood from the ever bloomers as from the climbing hybrid teas.
Depending on the roses vigor, expect larger but fewer blooms if you prune moderately.
Conversely, light pruning will give more but smaller blooms.
Once you complete pruning, all remaining canes should be equal distance from each other, radiating from the center of the plant.
Floribunda

Produces more blooms than grandifloras but they are smaller.
They require less pruning than hybrid teas or grandifloras.
In this case, reduce the top portion of the plant by one-third.
Also remove all weak canes developing from the base leaving only the most vigorous ones.
Miniature rose

They are usually under 1’ in height and the flowers are generally less than 1.5 inches in diameter.
They need little pruning.
Just shape and prune back by one-half any strong canes coming from the base of the plant.
During the growing season remove faded flowers back to a strong lateral bud.
Tree Rose

This requires severe pruning to keep the top small and to reduce damage during windstorms.
Remove all undesirable wood as suggested for the bush roses and then remove all the remaining canes back to three to four buds.
Make these cuts just above an outside bud.
Climbing and rambling rose

These requires only mild pruning.
Don’t prune any climbers, except to cut out deadwood, for the first two or three years. This will allow them to establish mature canes.
Do it right after their spring bloom. This enables the bush to send up new canes which produce flowers next year.
Prune out long, unwieldy, unproductive canes back to the crown.
Prune back secondary canes which branch along the
cane of the previous year to one or two buds.
Pluck the faded blossoms off ever blooming climbers, but be careful not to take any foliage; the repeat blooms grow from the leaves immediately under the old flower cluster.
When removing blooms from climbing hybrid teas, leave two sets of leaves on each flowering shoot.
_____________________________
Ignoring First Freeze Warning
Can Be Damaging & Costly
to
Plants

How to Do It...and...When
Prune in late January or early February before the plants begin active growth.
2. When cutting back canes, make a diagonal cut one quarter inch above a healthy outside bud.
This will encourage the plant to spread out, to allow light and air to penetrate and rejuvenate the plant. The free flow of air through the plant results in better control of powdery mildew.
3. To remove an entire cane, make the cut flush at the crown.
Treat exposed cut surfaces with a pruning seal to prevent insects and diseases from entering.
4. After pruning, apply a dormant spray found at all nursery outlets according to package directions containing lime sulfur to help reduce insect infestation the coming year.
Hybrid Tea & Grandiflora
Each hybrid tea cane at the tip will produce one large dominant bloom with smaller secondary blooms underneath.
For a larger bloom, remove the secondary buds.
The granadilla which is a cross between a hybrid tea and floribunda, combines bloom quality of the hybrid tea with bloom abundance of the floribunda.
Prune climbing hybrid teas and ever blooming large-flowered climbers in early spring while they are dormant.
Do not take as much wood from the ever bloomers as from the climbing hybrid teas.
Depending on the roses vigor, expect larger but fewer blooms if you prune moderately.
Conversely, light pruning will give more but smaller blooms.
Once you complete pruning, all remaining canes should be equal distance from each other, radiating from the center of the plant.
Floribunda
Produces more blooms than grandifloras but they are smaller.
They require less pruning than hybrid teas or grandifloras.
In this case, reduce the top portion of the plant by one-third.
Also remove all weak canes developing from the base leaving only the most vigorous ones.
Miniature rose
They are usually under 1’ in height and the flowers are generally less than 1.5 inches in diameter.
They need little pruning.
Just shape and prune back by one-half any strong canes coming from the base of the plant.
During the growing season remove faded flowers back to a strong lateral bud.
This requires severe pruning to keep the top small and to reduce damage during windstorms.
Remove all undesirable wood as suggested for the bush roses and then remove all the remaining canes back to three to four buds.
Make these cuts just above an outside bud.
Climbing and rambling rose
Don’t prune any climbers, except to cut out deadwood, for the first two or three years. This will allow them to establish mature canes.
Do it right after their spring bloom. This enables the bush to send up new canes which produce flowers next year.
Prune out long, unwieldy, unproductive canes back to the crown.
Prune back secondary canes which branch along the
cane of the previous year to one or two buds.
Pluck the faded blossoms off ever blooming climbers, but be careful not to take any foliage; the repeat blooms grow from the leaves immediately under the old flower cluster.
When removing blooms from climbing hybrid teas, leave two sets of leaves on each flowering shoot.
_____________________________
Ignoring First Freeze Warning
There's nothing sadder than waking up in the morning, getting ready to take a morning stroll...
...and...
...see those beautiful plants you've loved and cared for year in and year old....
...look like this !
 And...they did, because you didn't love them enough to take a few steps to care for them.
Seriously, ff you haven’t already taken steps to protect your plants for the winter months, here a few ways to care for them:
AND DOING IT NOW BEFORE THE FIRST FREEZE SHOULD ALL THEM TO SURVIVE
Bring your smaller container plants, especially succulents, indoors.
Mulch or cover outdoor plants with straw, blankets or cardboard.

To prevent heat loss from sides of containers, push together large outdoor pots and wrap the bases with plastic, burlap or a blanket.

Rosemary topiaries or potted citrus plants or roses should be moved close to the wall of your house for warmth.
Cover plants such as camellias with an old sheet or, for plants taller than 3 feet, black plastic.
Be sure to turn off automatic sprinklers, detach hoses from faucets and wrap the faucets to protect outdoor pipes.
Don’t worry if plant leaves wilt; they protect themselves against cold by dehydrating themselves. Given time, most will perk back up.
If you see damage from frost (black or purple flaccid leaves or stems), particularly on woody perennials...

... wait until the spring to prune so as to not shear off healthy tissue.
Some video help?
The Garden Wizard
___________________________
Rocks...Make for Beautiful Landscaping

OK, we live in a desert, but that doesn't mean you can't have a garden...made of stone !
Stone creates a strong impact of focal point while character plants create visual interest on both sides of the paths.
Garden landscaping with stone is just another superb addition to your garden.
Whenever you are planning to beautify your home entrance or garden, organic and natural materials should fall on the top of your priority list.
A rock garden or landscaping with stone is just another example of fine garden art ideas. All you have to do is just to use rocks or stones to transform your dull plain and boring entrance or backyard into a beautiful and mesmerizing oasis.
Utilize the sculptural beauty of stones and use them in eye catching path ways and stylish designs. Try to make them look as natural as possible.

There are different varieties of rocks or stones that could be used differently in your garden landscaping ideas.
Large slabs of stones make a perfect outdoor staircase for backyards.
You could also mix and match different sizes and colors of stones on the same pathway to create visual interest and landscaping depth.

Use the curvy arrangements of identical stones, or use them in multi colored arrangement, also use them in different sized slabs to make a wilder pathway.


 Whatever your preferences, don't forget stones in your planning.
Best part ?
Whatever your preferences, don't forget stones in your planning.
Best part ?
You don't have to water them !
The Garden Wizard
____________________________
Rocks...Make for Beautiful Landscaping
OK, we live in a desert, but that doesn't mean you can't have a garden...made of stone !
Stone creates a strong impact of focal point while character plants create visual interest on both sides of the paths.
Garden landscaping with stone is just another superb addition to your garden.
Whenever you are planning to beautify your home entrance or garden, organic and natural materials should fall on the top of your priority list.
A rock garden or landscaping with stone is just another example of fine garden art ideas. All you have to do is just to use rocks or stones to transform your dull plain and boring entrance or backyard into a beautiful and mesmerizing oasis.
Utilize the sculptural beauty of stones and use them in eye catching path ways and stylish designs. Try to make them look as natural as possible.
There are different varieties of rocks or stones that could be used differently in your garden landscaping ideas.
Large slabs of stones make a perfect outdoor staircase for backyards.
You could also mix and match different sizes and colors of stones on the same pathway to create visual interest and landscaping depth.
Use the curvy arrangements of identical stones, or use them in multi colored arrangement, also use them in different sized slabs to make a wilder pathway.
Whatever your preferences, don't forget stones in your planning.
Best part ?
You don't have to water them !
The Garden Wizard
____________________________
Getting Acquainted with your
Drip Irrigation System

Drip System Components
A drip irrigation system consists of several components.
Getting to know each of these parts will help you in designing the right system for your needs.
For best results the components should be made by the same manufacturer- the fitting should have the same manufacturer as the poly pipe, the hole punch should be made by the same manufacturer as the emitter.
This will ensure a more precise fit between all of the individual pieces.
Emitters
Emitters are the most important part of a drip irrigation system. They deliver water to the plants at a slow, consistent rate.
They can operate at various pressures ranging from 10-50 pounds per square inch (PSI) and can deliver between ½ gallon to 24 gallons of water per hour (GPH).
For your landscape, look for emitters with PSI between 20-40 and a delivery rate of 1-2 GPH.
Because water pressure frequently varies, emitters should be pressure compensating so that water will be delivered at the same rate.
Some emitters will have built in check valves to avoid dirt and debris from being pulled back into the tubing or pipe when the system shuts down.
Emitters with built in check valves are a real advantage when the outlet of the emitter is buried under ground.
Inline Drip Tubing
Inline drip tubing is poly pipe with emitters installed directly in the pipe at uniformly spaced intervals between the emitters.
Inline drip tubing can range from ¼” in size to ½” in size.
Emitter spacing in ¼” inline tubing is usually six (6) to 12 inches apart.
In ½” inline tubing the emitter spacing is usually 12 inches, 18 inches, or 24 inches apart.
The output of the emitters for inline tubing can range from 0.25 GPH to 1.00 GPH.
The emitters can be pressure compensating or non-pressure compensating.
If the inline tubing is going to be installed for less than 50 feet, non-pressure compensating emitters are adequate.
For inline tubing that will be installed longer than 50 feet, pressure compensating emitters are recommended.
Be careful if using any tubing that has laser holes or porous pipe as they tend to clog easy and will not have an even distribution of water from the beginning of the pipe to the end.
Drip Tubing
Drip tubing delivers water to the laterals. Two sizes are typically used, ½ inch and ¼ inch.
When purchasing tubing, use the same manufacturer’s pipes and fittings because size may vary from one manufacturer to another.
Drip Laterals
Drip laterals consist of either polyethylene drip tubing, flexible PVC tubing or PVC pipe.
They supply water to the drip emitters.
120 gallons per hour divided by 60 minutes = 2 gallons per minute.
How do you know how much water your drip irrigation system may be delivering? It depends on the type of emitters installed.
For example, let’s say you have 120 one-gallon-per-hour emitters. This would equal an irrigation rate of two gallons per minute.
Control Valves
Valves control the flow of water to the irrigation lines.
Electric or manually operated valves open and close to allow water to flow to separate irrigation zones within your landscape.
Electric control valves are operated by an irrigation controller (clock) that can be programmed with specific times and cycle durations.
When using an electric clock, check the manufacturer’s specifications to ensure the valve will operate at the flow conditions for that station.
If flow conditions are below the manufacturer’s recommendations, the valve may work at first but can fail prematurely (2 to 5 years) instead of lasting 10 or more years.
Filters
The filter usually consists of a fine mesh screen that protects emitters from becoming clogged with dirt and debris.
For most drip irrigation systems, a filter with a 150 mesh screen will be suitable.
Drip systems using ½ GPH emitters perform better if a 200 mesh screen is used.
It is recommended that filters are installed after the control valves and before the pressure regulators.
Some filters may not hold up under the constant water pressure experienced before the control valve, but it is still the best place for them to protect the pressure regulator from potential dirt or debris clogs.
Water sources that contain sand may require a different type of filtration. Check with your local drip irrigation supplier or the product manufacturer for products that will work best for your system.
Pressure Regulator
Most drip systems operate at a low pressure, usually between 20 and 40 PSI.
The pressure regulator will maintain a constant pressure to the drip emitters.
Your home’s water source may vary in pressure and if the pressure is too high, your drip irrigation system can be damaged.
The pressure regulator is recommended to be installed after the control valves and filters, and before the drip emitters.
There can be multiple pressure regulators installed in a zone, especially on slopes or large zones to maintain a more constant pressure throughout.
Like some electric control valves, pressure regulators may have specific flow rates.
On slopes, the pressure regulator should be installed in the middle of the top third of the area being covered by the regulator.
Flush Valve
Flush Valves are installed at the ends of every lateral or drip tubing for routine flushing and cleaning of dirt and debris from the system.
Flush valves can be manual or automatic.
Emitters with built-in check valves should always have a manual flush valve at the end of every lateral.
Controller/Clock
Irrigation controllers are electronic clocks that turn the irrigation system on and off at scheduled times. The clocks are programmed with run times for each station to ensure that the plants receive sufficient water.
Select a controller that has the ability to run multiple programs.
This allows you to meet the individual needs of your landscape’s zones.
For example, trees, shrubs, grass and garden areas should all be on separate stations because each requires different lengths of watering times and a variable number of days between waterings.
Be sure to install a controller that has a sufficient number of stations to allow for your current needs and the addition of valves in the future.
For help with setting the schedule on your irrigation clock, check with your local nursery, irrigation supplier or water supplier.
Free irrigation clock demonstrations are offered at the Acacia Demonstration Gardens in the City of Henderson and at the Gardens at the Las Vegas Springs Preserves.
Smart controllers are irrigation clocks that automatically adjust irrigation run times in response to environmental changes like wind and rain.
Air Vents
Air vents protect the irrigation system from air buildup.
They also prevent dirt from being drawn into the piping through an emitter when the system shuts off.
Air vents should always be installed at the highest point(s) in a zone when emitter outlets are buried.
When emitters with built in check valves are used, installing an air vent is not recommended.
Backflow Preventers
A backflow prevention device keeps irrigation water from flowing back into and contaminating your drinking water supply.
The most commonly used backflow preventers for irrigation are the pressure vacuum breaker and the reduced pressure principle assembly.
The reduced pressure principle assembly is recommended for use when fertilizer is incorporated into the system.
For proper installation, check local plumbing codes and install to the manufacturer’s specifications.
The Garden Wizard
_______________________________
Spring Flowers Bring Beauty to Any Home
Penstemon Flowers

If for no other reason, perhaps the best reason to plant "penstemon flowers" is that they attract one of God's special creatures..
 Hummingbirds
Penstemon is a highly attractive and popular flowering plant.
Trumpet shaped blooms, on this perennial plant, come in white, red, pink, purple, and lavender. When in bloom, they will attract these dainty birds to your yard and flower beds.


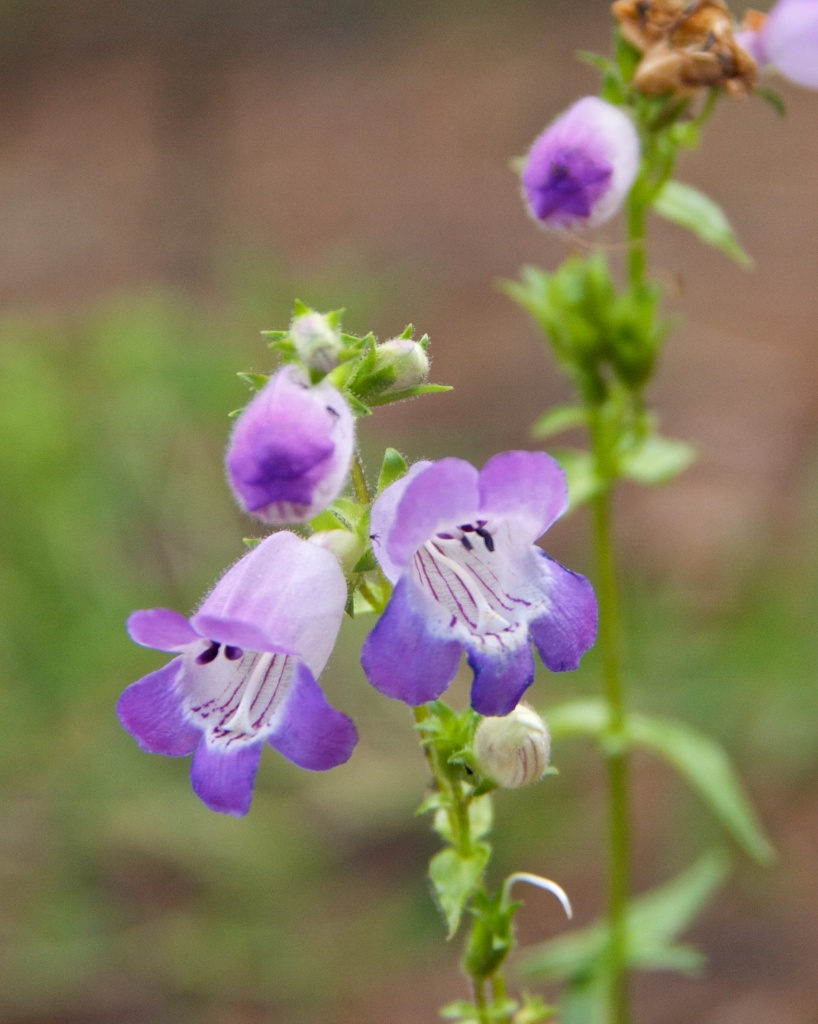
The most popular variety of Penstemon grow two to three feet tall.
They look good in beds and borders.
Make sure to grow them within site from your window or deck, where you can watch the hummingbirds, as they visit the flowering blooms.
Penstemon are grown from seeds.
Sow Penstemon seeds directly into your flower garden after all danger of frost has past and the soil has warmed.
Or, start them indoors.
Place these small seeds at the top of the loose soil, and water lightly into the soil.
They will germinate within 7-14 days.
How to Grow Penstemon Flowers
Penstemon plants are easy to grow.
They prefer full sun, but will tolerate partial shade.
Penstemon plants need a well drained soil.
They thrive in loose, gravelly soil, and will do best in raised beds, or on hillsides and slopes.
Too much fertilizing these plants will only result in more foliage, not blossoms.
Just follow these steps and as the summer sun shines, you'll not only enjoy their beauty, but the elegance of their tiny fluttering friends as well.
1. Space or thin plants to about 18" apart.
2. Water plants during dry periods.
3. Water to a depth of three to four inches. Roots do not go deeply.
4. Allow the soil to dry between watering.
5. Add general purpose fertilizer when planting, and every four to six weeks during the season. (too much fertilizer will result in more foliage, not blossoms.)
6. Switch to a high phosphorous formula just before the blooming period.
7. Keep the areas weeded when plants are young.
8. Cut spikes when in full bloom, and place in your favorite vase. Or, leave them in the flowerbed to attract hummingbirds. After blooming, cut back spent flower spikes. This will promote re-blooming.
9. When the season is over, cut the plants back.
10. Add a layer of mulch in colder weather to protect the rhizomes (the horizontal stems of the plant) over the winter.
Flowers Bloom: Summer through Fall
The Garden Wizard
____________________________
Getting Acquainted with your
Drip Irrigation System

Drip System Components
A drip irrigation system consists of several components.
Getting to know each of these parts will help you in designing the right system for your needs.
For best results the components should be made by the same manufacturer- the fitting should have the same manufacturer as the poly pipe, the hole punch should be made by the same manufacturer as the emitter.
This will ensure a more precise fit between all of the individual pieces.
Emitters
Emitters are the most important part of a drip irrigation system. They deliver water to the plants at a slow, consistent rate.
They can operate at various pressures ranging from 10-50 pounds per square inch (PSI) and can deliver between ½ gallon to 24 gallons of water per hour (GPH).
For your landscape, look for emitters with PSI between 20-40 and a delivery rate of 1-2 GPH.
Because water pressure frequently varies, emitters should be pressure compensating so that water will be delivered at the same rate.
Some emitters will have built in check valves to avoid dirt and debris from being pulled back into the tubing or pipe when the system shuts down.
Emitters with built in check valves are a real advantage when the outlet of the emitter is buried under ground.
Inline drip tubing is poly pipe with emitters installed directly in the pipe at uniformly spaced intervals between the emitters.
Inline drip tubing can range from ¼” in size to ½” in size.
Emitter spacing in ¼” inline tubing is usually six (6) to 12 inches apart.
In ½” inline tubing the emitter spacing is usually 12 inches, 18 inches, or 24 inches apart.
The output of the emitters for inline tubing can range from 0.25 GPH to 1.00 GPH.
The emitters can be pressure compensating or non-pressure compensating.
If the inline tubing is going to be installed for less than 50 feet, non-pressure compensating emitters are adequate.
For inline tubing that will be installed longer than 50 feet, pressure compensating emitters are recommended.
Be careful if using any tubing that has laser holes or porous pipe as they tend to clog easy and will not have an even distribution of water from the beginning of the pipe to the end.
Drip Tubing
Drip tubing delivers water to the laterals. Two sizes are typically used, ½ inch and ¼ inch.
When purchasing tubing, use the same manufacturer’s pipes and fittings because size may vary from one manufacturer to another.
Drip Laterals
Drip laterals consist of either polyethylene drip tubing, flexible PVC tubing or PVC pipe.
They supply water to the drip emitters.
120 gallons per hour divided by 60 minutes = 2 gallons per minute.
How do you know how much water your drip irrigation system may be delivering? It depends on the type of emitters installed.
For example, let’s say you have 120 one-gallon-per-hour emitters. This would equal an irrigation rate of two gallons per minute.
Valves control the flow of water to the irrigation lines.
Electric or manually operated valves open and close to allow water to flow to separate irrigation zones within your landscape.
Electric control valves are operated by an irrigation controller (clock) that can be programmed with specific times and cycle durations.
When using an electric clock, check the manufacturer’s specifications to ensure the valve will operate at the flow conditions for that station.
If flow conditions are below the manufacturer’s recommendations, the valve may work at first but can fail prematurely (2 to 5 years) instead of lasting 10 or more years.
The filter usually consists of a fine mesh screen that protects emitters from becoming clogged with dirt and debris.
For most drip irrigation systems, a filter with a 150 mesh screen will be suitable.
Drip systems using ½ GPH emitters perform better if a 200 mesh screen is used.
It is recommended that filters are installed after the control valves and before the pressure regulators.
Some filters may not hold up under the constant water pressure experienced before the control valve, but it is still the best place for them to protect the pressure regulator from potential dirt or debris clogs.
Water sources that contain sand may require a different type of filtration. Check with your local drip irrigation supplier or the product manufacturer for products that will work best for your system.
Pressure Regulator
Most drip systems operate at a low pressure, usually between 20 and 40 PSI.
The pressure regulator will maintain a constant pressure to the drip emitters.
Your home’s water source may vary in pressure and if the pressure is too high, your drip irrigation system can be damaged.
The pressure regulator is recommended to be installed after the control valves and filters, and before the drip emitters.
There can be multiple pressure regulators installed in a zone, especially on slopes or large zones to maintain a more constant pressure throughout.
Like some electric control valves, pressure regulators may have specific flow rates.
On slopes, the pressure regulator should be installed in the middle of the top third of the area being covered by the regulator.
Flush Valves are installed at the ends of every lateral or drip tubing for routine flushing and cleaning of dirt and debris from the system.
Flush valves can be manual or automatic.
Emitters with built-in check valves should always have a manual flush valve at the end of every lateral.
Irrigation controllers are electronic clocks that turn the irrigation system on and off at scheduled times. The clocks are programmed with run times for each station to ensure that the plants receive sufficient water.
Select a controller that has the ability to run multiple programs.
This allows you to meet the individual needs of your landscape’s zones.
For example, trees, shrubs, grass and garden areas should all be on separate stations because each requires different lengths of watering times and a variable number of days between waterings.
Be sure to install a controller that has a sufficient number of stations to allow for your current needs and the addition of valves in the future.
For help with setting the schedule on your irrigation clock, check with your local nursery, irrigation supplier or water supplier.
Free irrigation clock demonstrations are offered at the Acacia Demonstration Gardens in the City of Henderson and at the Gardens at the Las Vegas Springs Preserves.
Smart controllers are irrigation clocks that automatically adjust irrigation run times in response to environmental changes like wind and rain.
Air Vents
Air vents protect the irrigation system from air buildup.
They also prevent dirt from being drawn into the piping through an emitter when the system shuts off.
They also prevent dirt from being drawn into the piping through an emitter when the system shuts off.
Air vents should always be installed at the highest point(s) in a zone when emitter outlets are buried.
When emitters with built in check valves are used, installing an air vent is not recommended.
Backflow Preventers
A backflow prevention device keeps irrigation water from flowing back into and contaminating your drinking water supply.
The most commonly used backflow preventers for irrigation are the pressure vacuum breaker and the reduced pressure principle assembly.
The reduced pressure principle assembly is recommended for use when fertilizer is incorporated into the system.
For proper installation, check local plumbing codes and install to the manufacturer’s specifications.
The Garden Wizard
_______________________________
Spring Flowers Bring Beauty to Any Home
Penstemon Flowers
If for no other reason, perhaps the best reason to plant "penstemon flowers" is that they attract one of God's special creatures..
Hummingbirds
Penstemon is a highly attractive and popular flowering plant.
Trumpet shaped blooms, on this perennial plant, come in white, red, pink, purple, and lavender. When in bloom, they will attract these dainty birds to your yard and flower beds.
The most popular variety of Penstemon grow two to three feet tall.
They look good in beds and borders.
Make sure to grow them within site from your window or deck, where you can watch the hummingbirds, as they visit the flowering blooms.
Penstemon are grown from seeds.
Sow Penstemon seeds directly into your flower garden after all danger of frost has past and the soil has warmed.
Or, start them indoors.
Place these small seeds at the top of the loose soil, and water lightly into the soil.
They will germinate within 7-14 days.
How to Grow Penstemon Flowers
Penstemon plants are easy to grow.
They prefer full sun, but will tolerate partial shade.
Penstemon plants need a well drained soil.
They thrive in loose, gravelly soil, and will do best in raised beds, or on hillsides and slopes.
Too much fertilizing these plants will only result in more foliage, not blossoms.
Just follow these steps and as the summer sun shines, you'll not only enjoy their beauty, but the elegance of their tiny fluttering friends as well.
1. Space or thin plants to about 18" apart.
2. Water plants during dry periods.
3. Water to a depth of three to four inches. Roots do not go deeply.
4. Allow the soil to dry between watering.
5. Add general purpose fertilizer when planting, and every four to six weeks during the season. (too much fertilizer will result in more foliage, not blossoms.)
6. Switch to a high phosphorous formula just before the blooming period.
7. Keep the areas weeded when plants are young.
8. Cut spikes when in full bloom, and place in your favorite vase. Or, leave them in the flowerbed to attract hummingbirds. After blooming, cut back spent flower spikes. This will promote re-blooming.
9. When the season is over, cut the plants back.
10. Add a layer of mulch in colder weather to protect the rhizomes (the horizontal stems of the plant) over the winter.
Flowers Bloom: Summer through Fall
The Garden Wizard
____________________________
Learn from Experts at the Springs Preserve

Take Informative landscaping classes at the Spring Preserve.

333 S. Valley View Blvd. (at US 95)
Las Vegas NV
Open Daily: 10:00am to 4:00pm
Are you looking to convert your water-thirsty grass to a more efficient form of landscaping?
Are you more of the do-it-yourself type?
Then come down to the Springs Preserve for one of several free landscaping classes taught by expert staff from the Southern Nevada Water Authority.
Classes are held year round and range from an overview of the Water Smart Landscapes Rebate Program.
For more information or to make reservations, call (702) 862-3760.
__________________________
Roses...Care for Them
Roses...Care for Them
and
They'll be Back Each Year

MONTHLY CARE OF ROSES
JANUARY
Plant bare root roses this month, but no later than mid February.
Plant container roses anytime except during the heat of summer.
Strip off old leaves from canes prior to pruning to force the bush into dormancy.
Prune roses before they leaf out.
Remove debris from the area and spray with a
dormant oil mixed with a pesticide to control
over wintering pests on bushes and soil.
FEBRUARY
In mid-February, fertilize roses with a balanced fertilizer.
Add a cup of sulfur, 1/4 cup of magnesium sulfate (Epson salts) and one-half cup of super phosphate to each established rose to stimulate new cane growth and improve bloom quality.
Always water bushes thoroughly before and after fertilizing.
Apply a 3-inch layer of mulch to the rose bed after applying the fertilizer.
MARCH, APRIL, & MAY
Continue to fertilize roses monthly with a balanced rose fertilizer.
Apply iron chelates as needed to correct iron deficiency.
For higher quality blooms, foliar feed with a soluble
fertilizer in early April.
For larger blooms, remove secondary buds below the lead bud on hybrid teas.
For a more uniform bouquet of flowers, on florabunda remove the large center blooms.
Water early in the morning to minimize mildew. If possible, avoid wetting the foliage - use drip or soaker irrigation.
Use a recommended fungicide if the mildew becomes a problem.
Control aphids and thrips with a recommended insecticide.
The big rose display occurs from mid-April through May.
For fresh roses, cut back to where a cane is strong
enough (thickness of a pencil) to support a new
bloom.
Cut just above an outside leaf (five leaflets.)
JUNE, JULY, & AUGUST
Fertilize roses at one half the normal rate.
Yellow leaves indicate iron deficiency - treat with iron chelates.
In June, apply one fourth cup of magnesium sulfate (Epsom salt.)
Apply one cup again at the end of August.
Water deeply once a week or more often if necessary.
Remove faded roses after bloom.
Apply three to four inches of mulch to the rose beds and sprinkle a light application of nitrogen over the covering to hasten decomposition.
Roses produced during the summer are usually half the size of spring and fall roses.
Treat powdery mildew and insect-infested roses with the proper sprays.
Beginning in late August, remove all weak and undesirable canes to the crown or base of the rose.
Reduce the bush’s top growth by one third to stimulate the fall flush of growth.
SEPTEMBER
Return to normal amounts of fertilizer.
Also include one cup soil sulfur and one-half cup
superphosphate per plant.
For higher quality blooms, apply a soluble fertilizer to the foliage every two weeks until buds show color.
Spray to control any insects and diseases.
OCTOBER
With cooler weather and shorter days, lengthen the intervals between irrigations, but do not let the root zone dry out.
Fertilize with a balanced rose fertilizer and one cup of sulfur to spur on blooms before Columbus Day.
The fall bloom cycle begins at the end of the month and continues into December.
Foliar fertilize until buds show color.
Disbud hybrid teas leaving the terminal buds for higher quality blooms.
Remove suckers that rise below the bud union or graft near the soil line.
Cut off spent blooms to stimulate flowering.
NOVEMBER & DECEMBER
Irrigate every two weeks if needed.
This is an excellent time to prepare new rose beds.
Evaluate the roses and discard those that did not perform well to make room for newer varieties.
Have the soil tested if there is a suspected problem or roses have performed poorly.
DO NOT FERTILIZE ROSES IN NOVEMBER, DECEMBER, AND JANUARY.
MONTHLY CARE OF ROSES
JANUARY
Plant bare root roses this month, but no later than mid February.
Plant container roses anytime except during the heat of summer.
Strip off old leaves from canes prior to pruning to force the bush into dormancy.
Prune roses before they leaf out.
Remove debris from the area and spray with a
dormant oil mixed with a pesticide to control
over wintering pests on bushes and soil.
FEBRUARY
In mid-February, fertilize roses with a balanced fertilizer.
Add a cup of sulfur, 1/4 cup of magnesium sulfate (Epson salts) and one-half cup of super phosphate to each established rose to stimulate new cane growth and improve bloom quality.
Always water bushes thoroughly before and after fertilizing.
Apply a 3-inch layer of mulch to the rose bed after applying the fertilizer.
Continue to fertilize roses monthly with a balanced rose fertilizer.
Apply iron chelates as needed to correct iron deficiency.
For higher quality blooms, foliar feed with a soluble
fertilizer in early April.
For larger blooms, remove secondary buds below the lead bud on hybrid teas.
For a more uniform bouquet of flowers, on florabunda remove the large center blooms.
Water early in the morning to minimize mildew. If possible, avoid wetting the foliage - use drip or soaker irrigation.
Use a recommended fungicide if the mildew becomes a problem.
Control aphids and thrips with a recommended insecticide.
The big rose display occurs from mid-April through May.
For fresh roses, cut back to where a cane is strong
enough (thickness of a pencil) to support a new
bloom.
Cut just above an outside leaf (five leaflets.)
Fertilize roses at one half the normal rate.
Yellow leaves indicate iron deficiency - treat with iron chelates.
In June, apply one fourth cup of magnesium sulfate (Epsom salt.)
Apply one cup again at the end of August.
Water deeply once a week or more often if necessary.
Remove faded roses after bloom.
Apply three to four inches of mulch to the rose beds and sprinkle a light application of nitrogen over the covering to hasten decomposition.
Roses produced during the summer are usually half the size of spring and fall roses.
Treat powdery mildew and insect-infested roses with the proper sprays.
Beginning in late August, remove all weak and undesirable canes to the crown or base of the rose.
Reduce the bush’s top growth by one third to stimulate the fall flush of growth.
SEPTEMBER
Return to normal amounts of fertilizer.
Also include one cup soil sulfur and one-half cup
superphosphate per plant.
For higher quality blooms, apply a soluble fertilizer to the foliage every two weeks until buds show color.
Spray to control any insects and diseases.
With cooler weather and shorter days, lengthen the intervals between irrigations, but do not let the root zone dry out.
Fertilize with a balanced rose fertilizer and one cup of sulfur to spur on blooms before Columbus Day.
The fall bloom cycle begins at the end of the month and continues into December.
Foliar fertilize until buds show color.
Disbud hybrid teas leaving the terminal buds for higher quality blooms.
Remove suckers that rise below the bud union or graft near the soil line.
Cut off spent blooms to stimulate flowering.
NOVEMBER & DECEMBER
Irrigate every two weeks if needed.
This is an excellent time to prepare new rose beds.
Evaluate the roses and discard those that did not perform well to make room for newer varieties.
Have the soil tested if there is a suspected problem or roses have performed poorly.
DO NOT FERTILIZE ROSES IN NOVEMBER, DECEMBER, AND JANUARY.
_________________________
Drip Watering Tips
During winter, Southern Nevada Water Authority recommends running your drip irrigation system in a single cycle of 30 to 90 minutes, one day a week.
The length of watering should be determined by the emitter flow rate, soil type and weather conditions.
____________________________
The Do's & Don'ts of Fall Rose Care
 1. Don't cut your roses back in autumn.
If you prune now, you'll suffer "dieback" and will have to cut back more severely in the spring. Wait until they bloom before breaking out the pruning shears.
2. Don't trim off rose hips, the colorful fruits that form in the late summer and early fall.
They often turn beautiful shades of orange-red, and are a signal to the bush that it's time to get ready for a long winter nap.
3. Do tear off and destroy any leaves that display signs of disease or insect infestation.
Also, dig up and discard any bushes that have died. Never put diseased leaves or dead roses in a compost pile.
4. Do identify any bushes that might need some extra winter protection.
Most of the newer scrubs and miniatures don't need special care. If you aren't sure whether a variety is tender or not, play it safe and add an 8 inch mound of soil, compost, leaf mold, or other organic material around the base of the bush.
The Garden Wizard
___________________________
1. Don't cut your roses back in autumn.
If you prune now, you'll suffer "dieback" and will have to cut back more severely in the spring. Wait until they bloom before breaking out the pruning shears.
2. Don't trim off rose hips, the colorful fruits that form in the late summer and early fall.
They often turn beautiful shades of orange-red, and are a signal to the bush that it's time to get ready for a long winter nap.
3. Do tear off and destroy any leaves that display signs of disease or insect infestation.
Also, dig up and discard any bushes that have died. Never put diseased leaves or dead roses in a compost pile.
4. Do identify any bushes that might need some extra winter protection.
Most of the newer scrubs and miniatures don't need special care. If you aren't sure whether a variety is tender or not, play it safe and add an 8 inch mound of soil, compost, leaf mold, or other organic material around the base of the bush.
The Garden Wizard
___________________________
During winter, Southern Nevada Water Authority recommends running your drip irrigation system in a single cycle of 30 to 90 minutes, one day a week.
The length of watering should be determined by the emitter flow rate, soil type and weather conditions.
The Do's & Don'ts of Fall Rose Care
1. Don't cut your roses back in autumn.
If you prune now, you'll suffer "dieback" and will have to cut back more severely in the spring. Wait until they bloom before breaking out the pruning shears.
2. Don't trim off rose hips, the colorful fruits that form in the late summer and early fall.
They often turn beautiful shades of orange-red, and are a signal to the bush that it's time to get ready for a long winter nap.
3. Do tear off and destroy any leaves that display signs of disease or insect infestation.
Also, dig up and discard any bushes that have died. Never put diseased leaves or dead roses in a compost pile.
4. Do identify any bushes that might need some extra winter protection.
Most of the newer scrubs and miniatures don't need special care. If you aren't sure whether a variety is tender or not, play it safe and add an 8 inch mound of soil, compost, leaf mold, or other organic material around the base of the bush.
The Garden Wizard
___________________________
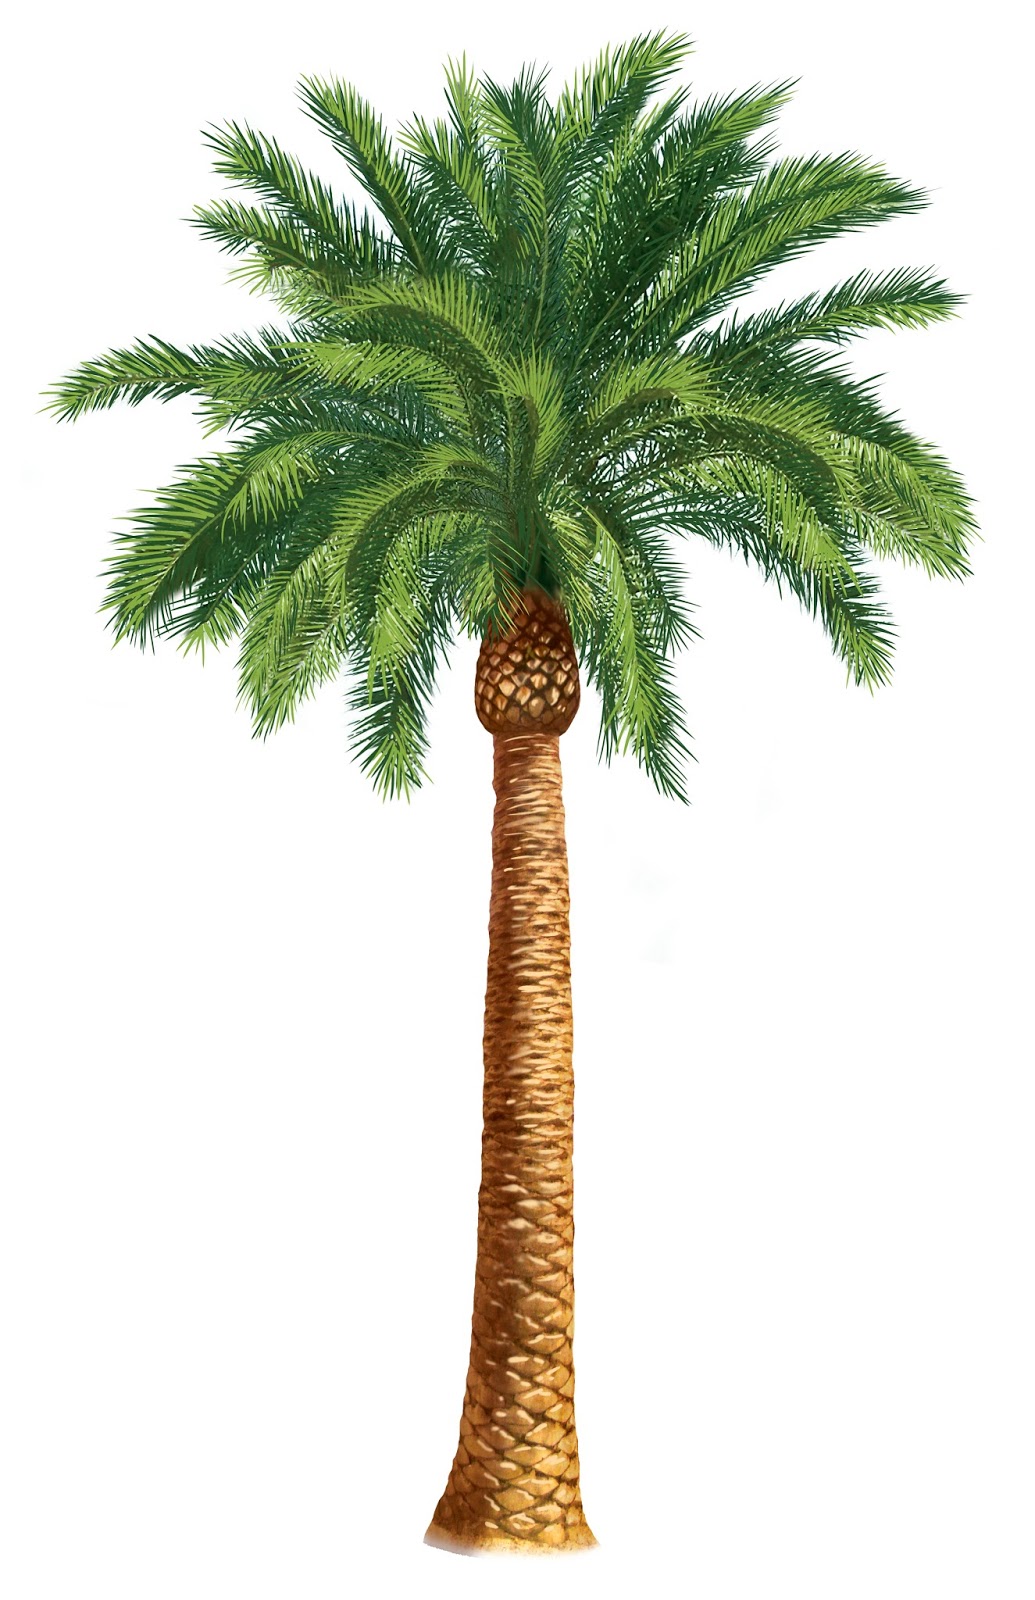
Only a Pro Should Trim a Palm Tree

They're beautiful....and...they grow...like weeds !
...and trimming the branches (fronds) is a task that requires skill....professional skill.
This might come as a great surprise to many of you, but 68 people across the United States DIED in 2013 as a result of trimming palm trees...the greatest majority, from SUFFOCATION !
Suffocation ?
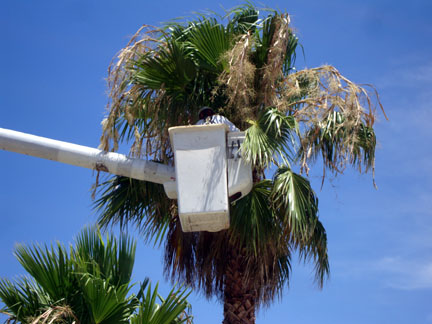
When workers cut palm tree fronds from BELOW rather than from ABOVE, loose fronds can pile up inside the tree instead of falling to the ground.
That can create an avalanche affect that causes the fronds to collapse on the trimmer....trapping and potentially suffocating the individual.
Fronds can weigh hundreds of pounds when they collapse. Their combined weight can immobilize a climber and force his body against the palm trunk with hundreds of pounds of pressure.
Much of the force lands on the climber's head, forcing the chin into the chest, and limiting the ability of breathe !
Here's what happened in California...and could easily happen here.
...and in Arizona.
Why do accidents like this take place ?
...because many homeowners either try to do this themselves, or hire unlicensed tree trimmers.
For those of you out there that have there luscious trees, how many times have you received a knock on your door asking if you would like to have your palm(s) trimmed?
Think twice....
If an unlicensed worker should incur an injury...other than the guilt you would undoubtedly feel....there is also the matter of LIABILITY.
If a worker is UNINSURED and gets injured, the homeowner can be LIABLE.
Here's the RIGHT WAY !
First, tree trimmers should be trained and certified by a recognized organization, such at the International Society of Arborculture or Treecare Industry Association.

Workers who aren't licensed should be supervised by one who is licensed.
Ideally, a trimmer should use a bucket truck or other aerial device with fall protection equipment to allow them to trim while stay out of the way of fallen fronds.

If a bucket truck isn't an option, workers should follow industry climbing practices, which call for trimmer to remain ABOVE, rather than BELOW, palm fronds.
A few other tips....
1. Palm trees should be trimmed once or twice a year.
2. Hire LICENSED tree care companies. Nevada doe NOT OFFER a state certified arborist license, but it does issue landscape licenses.
3. Ask to see BOTH the company LICENSE, and PROOF OF LIABILITY INSURANCE....prior to contracting with ANY landscaper.
The Garden Wizard
________________________
They're beautiful....and...they grow...like weeds !
When workers cut palm tree fronds from BELOW rather than from ABOVE, loose fronds can pile up inside the tree instead of falling to the ground.
That can create an avalanche affect that causes the fronds to collapse on the trimmer....trapping and potentially suffocating the individual.

Workers who aren't licensed should be supervised by one who is licensed.
If a bucket truck isn't an option, workers should follow industry climbing practices, which call for trimmer to remain ABOVE, rather than BELOW, palm fronds.
From the Southern Nevada Water Authority...
Drought Worsens

Lake Mead's water level, which serves as a reservoir system, has dropped more than 130 feet since January 2000.
Southern Nevada relies on the Colorado River for 90% of its water supply.
Challenges created by declining lake levels include:
1. Possible reduction in available Colorado River water available if conditions warrant a shortage declaration.
2. Facility operational challenges if lake levels fall below water intakes.
3. Water quality issues as the warmer surface water draws closer to the intake openings.
Drought Worsens
Lake Mead's water level, which serves as a reservoir system, has dropped more than 130 feet since January 2000.
Southern Nevada relies on the Colorado River for 90% of its water supply.
Challenges created by declining lake levels include:
1. Possible reduction in available Colorado River water available if conditions warrant a shortage declaration.
2. Facility operational challenges if lake levels fall below water intakes.
3. Water quality issues as the warmer surface water draws closer to the intake openings.
Prepared for Impacts
The Southern Nevada Water Authority has been monitoring and responding to the drought for more than a decade.
The Water Resource Plan includes detailed plans for securing short and long term water resources.
In addition, SNWA implemented one of the most progressive and comprehensive conservation programs in the nation.
Community participation in these programs and adherence to conservation measures such as landscape restrictions and mandatory watering restrictions have garnered significant results.
Between 2002 and 2014, Southern Nevada’s consumption of Colorado River water decreased by 32 billion gallons — a 30% reduction — despite the addition of 520,000 residents during that time.
Impact of Shortage Declaration
If Lake Mead dips below 1,075 feet, the Secretary of the Interior could declare a shortage.
According to the 2007 Interim Surplus Guidelines, Nevada would be required to reduce its Colorado River allocation from 300,000 acre feet per year to 287,000 acre feet.
Even if the secretary declared a shortage, Southern Nevada would not experience any immediate impacts due to the success of the community’s conservation efforts.
Per capita water use has declined significantly and Southern Nevada is not currently using its full Colorado River allocation.
Facility and Water Quality Impacts
Should the drought continue and Lake Mead water levels fall to 1,050 feet or lower, SNWA’s drinking water Intake No. 1 would not be able to draw water from the lake.
The SNWA Board of Directors approved construction of a third intake in 2005.
Intake No. 3 will allow SNWA to draw water from the lake should levels drop below 1,000 feet.
In December 2014, the SNWA Board approved the development of a low lake level pumping station at Lake Mead.
When finished in 2020, the new pumping station will be capable of pumping water from the lake to an elevation as low as 875 feet (above sea level), and it will work in concert with the community’s current intake system.
__________________________
Summer Landscape Tips

Watering is allowed daily from May 1 through Aug. 31, but that doesn't mean you need to drown your yard—or even water every day—when temperatures climb.
Here are tips to manage your water bill and keep your yard healthy while still complying with watering restrictions.
Take a Day Off
Watering is allowed daily from May 1 through Aug. 31, but that doesn't mean you need to drown your yard—or even water every day—when temperatures climb.
Here are tips to manage your water bill and keep your yard healthy while still complying with watering restrictions.
Take a Day Off
One way to keep your water bill down during peak temperatures is to cut one watering day per week out of your daily sprinkler schedule.
Taking just one day off can reduce your water use by as much as 10 to 15 percent.
Time of Day
One way to keep your water bill down during peak temperatures is to cut one watering day per week out of your daily sprinkler schedule.
Taking just one day off can reduce your water use by as much as 10 to 15 percent.
Time of Day
Water in early-morning hours before sunrise to lessen water lost to evaporation and daytime winds.
Mid-day watering is prohibited from 11 a.m. to 7 p.m. from May 1st until Oct. 1st.
Plant Selection
Water in early-morning hours before sunrise to lessen water lost to evaporation and daytime winds.
Mid-day watering is prohibited from 11 a.m. to 7 p.m. from May 1st until Oct. 1st.
Plant Selection
Use the Nevada Southern Water Authority Plant Search to choose plants that are native to the arid climate of Southern Nevada and require less water and time.
There are a variety of low maintenance plants which will add both color and vibrancy to your landscape.
Bermuda and other warm-season grasses require about one-third less water than Tall Fescue grass.
Monitor Your Landscape
Make adjustments to watering times as needed.
Shaded or protected areas may need less water than other zones.
You may even be able to water less frequently than seven days a week.
Cycle and Soak Watering
Make adjustments to watering times as needed.
Shaded or protected areas may need less water than other zones.
You may even be able to water less frequently than seven days a week.
Cycle and Soak Watering
Schedule sprinklers to water in three short cycles, each about one hour apart.
The Southern Nevada Water Authority recommends watering lawns 3 times a day for 4 minutes each watering.
Drip Irrigation
Schedule sprinklers to water in three short cycles, each about one hour apart.
The Southern Nevada Water Authority recommends watering lawns 3 times a day for 4 minutes each watering.
Drip Irrigation
While drip irrigation is permitted any day of the week during summer, experts agree that running it a maximum of three days a week during warmer months is much better for plants than daily watering.
The length of watering time for plants on drip systems varies depending on the type of emitter, plant types and soil conditions.
Check Your Irrigation System
Check your irrigation system weekly for broken or misaligned sprinkler heads and drip emitters, which can be prime water-waste culprits.
Upgrade Your Irrigation Clock
Check your irrigation system weekly for broken or misaligned sprinkler heads and drip emitters, which can be prime water-waste culprits.
Upgrade Your Irrigation Clock
Replace your irrigation system with a "smart clock" and save water and money.
Brown Spots on the Lawn
(if you have a Lawn)
Hand water brown spots and check your irrigation system.
Lawns usually develop brown spots because of faults in the sprinkler system, such as mixed types of sprinkler heads, blocked spray patterns, and improper spacing between sprinklers.
Check that your sprinkler heads are level to grade, perpendicular to the slope of the lawn and not watering sidewalks, walls or patios.If grass blocks the spray, trim around the sprinkler head or install a taller 3- or 4-inch pop-up.
Lawn sprinkler heads should provide "head-to-head" coverage.That means the spray of one sprinkler should reach the head of the adjacent sprinkler.
If your lawn looks great except for stressed areas in front of the sprinkler heads, the heads are too far apart.
A device called an undercut nozzle can help. Talk to an irrigation specialist if you decide to change out the nozzle.Watering system pressure also can cause brown spots.
Misting and excessive drift are signs of high pressure.Low pressure displays itself with weak, short spray patterns and reduced coverage.
Replace your irrigation system with a "smart clock" and save water and money.
Brown Spots on the Lawn
Brown Spots on the Lawn
(if you have a Lawn)
Hand water brown spots and check your irrigation system.
Lawns usually develop brown spots because of faults in the sprinkler system, such as mixed types of sprinkler heads, blocked spray patterns, and improper spacing between sprinklers.
Check that your sprinkler heads are level to grade, perpendicular to the slope of the lawn and not watering sidewalks, walls or patios.If grass blocks the spray, trim around the sprinkler head or install a taller 3- or 4-inch pop-up.
Lawn sprinkler heads should provide "head-to-head" coverage.That means the spray of one sprinkler should reach the head of the adjacent sprinkler.
If your lawn looks great except for stressed areas in front of the sprinkler heads, the heads are too far apart.
A device called an undercut nozzle can help. Talk to an irrigation specialist if you decide to change out the nozzle.Watering system pressure also can cause brown spots.
Misting and excessive drift are signs of high pressure.Low pressure displays itself with weak, short spray patterns and reduced coverage.
Combat Compacted Soils
Combat Compacted Soils
Compacted soils also can stress your lawn. Sometimes simply aerating a stressed area and giving it a good soaking solves the problem.
Purchase a hand-operated coring aerator at a nursery, or hire a professional to do the job.
Aeration should be done at least twice a year.
An extremely dry lawn becomes hydrophobic, or water-repelling.
Add a tablespoon of liquid soap to a gallon of water and drench the dried area. This breaks down the surface tension of the grass, making it hydrophilic, or water-loving. Then give it a good soaking.
Water between 2 and 5 a.m. through September. This is the coolest time of the day or night, and your lawn will more effectively soak in the water you give it.
Leaf Scorching and Burning
Leaves usually are stressed for one of two reasons: improper watering or improper fertilization.
Since both over watering and under watering can damage plant leaves, the best solution is to water deeply and infrequently. This allows oxygen in the soil, washes salts away and encourages deep rooting.
For most trees and shrubs older than three years, water deeply once every seven to 10 days (run your drip system one to three hours to soak the root zone).
Newer plants may need water twice as often until established.
Add a layer of surface mulch 2- to 4-inches thick to conserve water between waterings and cool and enrich the soil.
Make sure you have the right fertilizer both for your specific plants and for the time of year.
Some fertilizers release much faster in hot weather, increasing the potential for damage. Follow package directions exactly and err on the conservative side. Then, irrigate well to move nutrients to the soil.
Bug Damage
For a non-pesticide alternative to getting rid of aphids and other pests , spray plants with a strong blast of water from your hose.
Bug Damage
For a non-pesticide alternative to getting rid of aphids and other pests , spray plants with a strong blast of water from your hose.
You'll knock bugs off and damage or drown many of them.
Or, buy beneficial "predator" bugs like ladybugs at nurseries and set them loose to attack aphids and let nature run its course.
______________________________
Sprinkle, Plant & Kill
You'll knock bugs off and damage or drown many of them.
Or, buy beneficial "predator" bugs like ladybugs at nurseries and set them loose to attack aphids and let nature run its course.
______________________________Sprinkle, Plant & Kill
(This Weekend's Garden Project)
 The warm weather snuck up on me this year. The 80 degree days seem to be here a bit early. I dread a long, hot summer could be just around the corner.
My Midwest relatives are living through that Flip Flops and Earmuffs weather phase. This is the time of year when school children simply "lose" their coats. It’s 40 degrees when they head off to school and 70 degrees when they get home.
Coats languish on hooks in lockers and classrooms; forgotten until needed the next morning. Ah. Memories.
There is a certain satisfying symmetry, however, knowing the grandkids are exacting their revenge on their own parents...while you're playing golf !
Here in Henderson we are experiencing steadily warming temperatures. No chance of a late frost.
Spring is decidedly here.
There are three landscaping activities to do this weekend.
These projects sound like the title to a Quentin Tarantino movie:
Sprinkle, Plant and Kill.
Sprinkle

Sprinkle chelated iron onto the soil around the base of all your plants.
Not on the plant. Sprinkle the ground below.
Chelated iron is an orange-colored dust in a convenient shaker can.

The iron is slow release. You won’t see an immediate “TAH DAH!!” response from your shrubs. The iron is formulated to release slowly .
The purpose of adding iron is to help support your landscape all through the spring and summer months ahead.
This is your spring dusting.
Another dose should be applied in autumn.
Plant

Plant your tomatoes.
Look for a variety that will produce in 90 days or less.
If your tomato plants go in this weekend, you should be able to harvest in June.
Expect only one harvest.
The weather gets too hot for a tomato plant to flourish further into the summer.
I consistently have folks who correct me and vouch that they have home-grown ‘maters in August.
Hooray for them !
Don’t count on it, though.
Successfully planting tomato plants in the desert requires some special handling.
Select "leggy" plants.
If the plant is 8 inches tall, it is perfect.
Strip all the leaves from the stem except two or three leaves at the very tip top of the plant.
Dig a deep hole and plant the roots with that long stem attached all the way down into the soil.
Just those tippy-top leaves should be exposed.
Everywhere a leaf was removed, the plant will send out a root.
That extra root system creates an awesome water and nutrient delivery system for your tomatoes.
Water your crop diligently in order to enjoy sweet, tender fruit.
Kill

Kill destructive insects
If the bugs are already active, shoot them with an insecticide.
Douse the leaves, the stems, and the soil.
I use Sevin as a pre-emergence measure.

I had Black Widows spinning their webs in the courtyard a couple years ago. That was disconcerting. Creepy, too !
A dose of Sevin the next spring encouraged the "ladies" to relocate.
If you are wary of strong chemicals, then try this recipe for an eco-friendly pesticide.
In a spray bottle, mix together:
2 tbsp dish detergent
2 tbsp rubbing alcohol
water
Liberally spray the plants...both sides of the leaves…with the spray.
You can leave it on or wash it away with a good spray from the hose. Your choice. Reapply until the pest activity ceases.
DO NOT KILL BEES....they don't like to die...besides they help your garden !
Bees pollinate. They make those tomato plants you took care in planting, bear tomatoes.
If you locate a hive in your yard, call a bee removal company.
These companies are listed in the yellow pages between Bedspreads and Beer Dispensing.
There is a joke in there somewhere, but I cannot access it right now.
Enjoy this glorious time of year.
Check out those sunsets.
Look up...and...Smile.
Carol Van Camp
The Garden Wizard
__________________________
(This Weekend's Garden Project)
The warm weather snuck up on me this year. The 80 degree days seem to be here a bit early. I dread a long, hot summer could be just around the corner.
My Midwest relatives are living through that Flip Flops and Earmuffs weather phase. This is the time of year when school children simply "lose" their coats. It’s 40 degrees when they head off to school and 70 degrees when they get home.
Coats languish on hooks in lockers and classrooms; forgotten until needed the next morning. Ah. Memories.
There is a certain satisfying symmetry, however, knowing the grandkids are exacting their revenge on their own parents...while you're playing golf !
Coats languish on hooks in lockers and classrooms; forgotten until needed the next morning. Ah. Memories.
There is a certain satisfying symmetry, however, knowing the grandkids are exacting their revenge on their own parents...while you're playing golf !
Here in Henderson we are experiencing steadily warming temperatures. No chance of a late frost.
Spring is decidedly here.
There are three landscaping activities to do this weekend.
These projects sound like the title to a Quentin Tarantino movie:
Sprinkle, Plant and Kill.
Sprinkle
Sprinkle chelated iron onto the soil around the base of all your plants.
Not on the plant. Sprinkle the ground below.
Chelated iron is an orange-colored dust in a convenient shaker can.
Chelated iron is an orange-colored dust in a convenient shaker can.
The iron is slow release. You won’t see an immediate “TAH DAH!!” response from your shrubs. The iron is formulated to release slowly .
The purpose of adding iron is to help support your landscape all through the spring and summer months ahead.
This is your spring dusting.
Another dose should be applied in autumn.
Another dose should be applied in autumn.
Plant
Plant your tomatoes.
Look for a variety that will produce in 90 days or less.
If your tomato plants go in this weekend, you should be able to harvest in June.
Expect only one harvest.
The weather gets too hot for a tomato plant to flourish further into the summer.
I consistently have folks who correct me and vouch that they have home-grown ‘maters in August.
Hooray for them !
Don’t count on it, though.
Successfully planting tomato plants in the desert requires some special handling.
Select "leggy" plants.
If the plant is 8 inches tall, it is perfect.
Strip all the leaves from the stem except two or three leaves at the very tip top of the plant.
Dig a deep hole and plant the roots with that long stem attached all the way down into the soil.
Just those tippy-top leaves should be exposed.
Everywhere a leaf was removed, the plant will send out a root.
That extra root system creates an awesome water and nutrient delivery system for your tomatoes.
Water your crop diligently in order to enjoy sweet, tender fruit.
Kill
Kill destructive insects
If the bugs are already active, shoot them with an insecticide.
Douse the leaves, the stems, and the soil.
I use Sevin as a pre-emergence measure.
I use Sevin as a pre-emergence measure.
I had Black Widows spinning their webs in the courtyard a couple years ago. That was disconcerting. Creepy, too !
A dose of Sevin the next spring encouraged the "ladies" to relocate.
If you are wary of strong chemicals, then try this recipe for an eco-friendly pesticide.
In a spray bottle, mix together:
2 tbsp dish detergent
2 tbsp rubbing alcohol
water
water
Liberally spray the plants...both sides of the leaves…with the spray.
You can leave it on or wash it away with a good spray from the hose. Your choice. Reapply until the pest activity ceases.
DO NOT KILL BEES....they don't like to die...besides they help your garden !
Bees pollinate. They make those tomato plants you took care in planting, bear tomatoes.
If you locate a hive in your yard, call a bee removal company.
These companies are listed in the yellow pages between Bedspreads and Beer Dispensing.
There is a joke in there somewhere, but I cannot access it right now.
Enjoy this glorious time of year.
Check out those sunsets.
Look up...and...Smile.
Carol Van Camp
The Garden Wizard
The Garden Wizard
__________________________
Drip Watering Tips

Drip systems should run longer than
sprinkler systems because they deliver
water more slowly.
Drip systems should run longer than
sprinkler systems because they deliver
water more slowly.
sprinkler systems because they deliver
water more slowly.
Because plants have different watering needs than grass, your irrigation clock should allow different settings for drip and sprinkler stations.
Drip irrigation is truly beneficial to plants in desert environments. Drip systems should run longer than sprinkler systems because they deliver water more slowly.
Determine the amount of time to water based on the rate of flow of your drip emitters, the types of plants you are watering and the condition of the soil.
Rate of Flow
To find out how fast your drip emitter produces water, measure how many seconds it takes to fill a tablespoon:
14 seconds equals 1 gallon per hour
7 seconds equals 2 gallons per hour
4 seconds equals 4 gallons per hour
How Much to Water
Drip irrigation is usually needed less frequently than sprinkler irrigation.
The following frequency is recommended by Southern Nevada Water Authority and should provide most plants with sufficient water:
1 day per week or less during the winter
2 days per week during spring and fall
3 days per week during the summer
In general, the higher the gallon per hour flow of your emitter, the shorter your drip system run time.
Common Drip Emitters
(gph: gallons per hour)
Emitter Type
|
Length of Watering
|
|---|---|
High-Flow Emitter
(Up to 20 gph) |
12 Minutes Each Watering
|
Low-Flow Emitter
(Up to 4 gph) |
30 Minutes Each Watering
|
Low-Flow Emitter
(Up to 2 gph) |
60 Minutes Each Watering
|
Low-Flow Emitter
(Up to 1 gph) |
90 Minutes Each Watering
|
If your plants appear stressed, check the soil moisture.
If the soil is wet, your plants may be over watered.
Water less often or for less time.
If the soil is dry, check that all emitters are working.
If they are, increase the watering time or add emitters only near the stressed plants.
Deep Watering
Water plants by applying water slowly and deeply over a long period of time.
Deep watering allows roots to become more firmly established which means healthier plants.
It also means less run-off as water is applied slow enough that the soil is able to absorb it. Because deep watering is more important than frequency, be sure to check the soil for moisture and proper drainage.
Designing and Planning Your Drip System
A new plant may require only one emitter initially.
As the plant grows, so does the demand for water.
When a drip system is installed, it should be designed so it has the flexibility to change the amount of emitters and the location of the emitters in the landscape.
Each emitter should give you at least a 30-minute run time without runoff.
Trees may also need more drip irrigation adjustments as they mature.
See below for general drip emitter quantities.
Plant Type
|
Canopy Diameter
|
Minimum # of Emitters
|
|---|---|---|
Small Shrubs/Groundcovers
|
1-3 Feet
|
2
|
Large Shrubs
|
4-6 Feet
|
2-3
|
Small Trees
|
7-10 Feet
|
3-5
|
Medium Trees
|
11-14 Feet
|
4-6
|
Large Trees
|
15-20 Feet
|
6-12
|
Extra Large Trees
|
21+ Feet
|
12+
|
Maintenance
Check your drip line periodically for breaks and check emitters for clogs or heads that have broken off. Ensure that each emitter is releasing the proper amount of water.
Flush the drip irrigation lines and filters every time you change your irrigation schedule or at least twice a year.
Find the "end cap" on your drip line.
This should be at the furthest point from your valve box.
Open the cap and briefly run the system to flush out any debris that could be clogging your line.
Turn off the water before trying to recap your line
._______________________________
Water Smart Landscapes Rebate

The Water Smart Landscapes Rebate helps property owners convert water-thirsty grass to desert landscaping, a lush yet water-efficient landscape.
Southern Nevada Water Authority will rebate customers $1.50 per square foot of grass removed and replaced with desert landscaping up to the first 5,000 square feet converted per property, per year.
Beyond the first 5,000 feet, SNWA will provide a rebate of $1 per square foot.
The maximum award for any property in a fiscal year is $300,000.
Certain restrictions apply to well owners.
For more information, including terms and requirements, view the program conditions.
http://www.snwa.com/rebates/wsl_conditions.html
Check In
Apply online or call (702) 258-7283 for a printed application.
You also can request an information packet on the program.
Before you get started, Southern Nevada Water Authority will answer your questions and review the lawn areas you're converting.
You must participate in a pre-conversion site visit before removing your lawn.
Starting without Southern Nevada Water Authority approval will make your conversion ineligible.
Dig In
Upgrade some or all of your lawn to a Water Smart Landscape.Use the Southern Nevada Water Authority free landscape sample designs.
If you choose to work with a professional, consider the Southern Nevada Water Authority list of Water Smart Contractors.
You also may find the Souther Nevada Water Authority Plant Search tool of use in selecting plants and creating a shopping list.
Cash In
After you complete your upgrade, you'll get a cash rebate for every square foot of lawn converted to water-smart landscaping.
Every square foot of grass replaced with water-smart trees, shrubs and flowers saves an average of 55 gallons of water per year, so you'll also save money on your monthly water bill.
Get the Facts
Not sure if the rebate covers artificial turf?
Check the Frequent Questions page to find out more about these and other rebate issues.
Get Useful Tips and Resources
Upon enrollment, you will receive the "Simply Beautiful" packet, a step-by-step guide to landscape planning, installation and maintenance.
Southern Nevada Water Authority also offers a variety of online tools and resources to help you plan and install your landscape and to maintain your new landscape.
Program Saves Billions of Gallons
The Water Smart Landscape rebate program has helped the community upgrade more than 168 million square feet of lawn to water-efficient landscaping, saving the community billions of gallons of water.
____________________________
Use Precautions when Temperatures Drop

The Southern Nevada Water Authority has some great tips when it comes to the upcoming winter months.
Falling temperatures can create loss and havoc....unless you take just a few simple precautions.
1. Avoid watering during early morning hours. when water can freeze on sidewalks and streets.
2. Adjust your sprinkler heads so water does NOT reach the pavement.
3. Turn off your landscape irrigation when temperatures drop to freezing....you'll avoid COSTLY DAMAGE. Look for broken or misaligned heads, leaks, and broken pipes BEFORE restarting your system.
4. Disconnect and drain garden hoses, and WRAP EXPOSED PIPES or VALVES to insulate them from the cold.

5. Loosely drape an old towel over an exposed irrigation backflow device and cover with a tall bucket that touches the ground. You can also purchase an inexpensive backflow device cover, available at most nurseries and home improvement stores. NEVER obstruct or seal the ports.

6. Locate your water shut-off valve and learn how to turn off wter at its source so you can avoid damage from leaks or burst lines.
7. Cover your sensitive plants with a sheet , burlap, or other NON-PLASTIC material if frost is predicted. Remove covers after the sun is up and temperatures rise.
8. Relocate container plants. Bring them inside or store them in your garage. Expose them gradually to the sun when the spring arrives.
Here's a terrific video to protect yourself from winter damage ! A few minutes of prevention can prevent hours of expensive repair.
Carol VanCamp
The Garden Wizard
NOTE...See our Last Minute Post entitled
The Southern Nevada Water Authority has some great tips when it comes to the upcoming winter months.
6. Locate your water shut-off valve and learn how to turn off wter at its source so you can avoid damage from leaks or burst lines.
The Garden Wizard
NOTE...See our Last Minute Post entitled
Protection Tips for Heating, Plumbing Ahead of the Hard Freeze
...under our Information Page
" Henderson...Las Vegas...Nevada... News Happenings"
for Channel 8 News Weather Advisory
____________________________
for Channel 8 News Weather Advisory
Winter Landscape Tips

During the winter, sprinkler irrigation is limited to one assigned day per week.
Make sure you water on your assigned watering day.
Watering restrictions also apply to drip irrigation.
Sunday is not an optional watering day.
Water in the mid-morning to avoid the afternoon winds that keep your sprinklers from hitting their grass target.
You also will reduce the risk of icing that can occur if you water during early morning or evening.
Check Your Sprinklers
During the winter, sprinkler irrigation is limited to one assigned day per week.
Make sure you water on your assigned watering day.
Make sure you water on your assigned watering day.
Watering restrictions also apply to drip irrigation.
Sunday is not an optional watering day.
Sunday is not an optional watering day.
You also will reduce the risk of icing that can occur if you water during early morning or evening.
Check Your Sprinklers
 Turn on your sprinklers and scan for broken or misaligned heads, as well as broken pipes.
A twisted head could water your sidewalk instead of your grass.
Protect Pipes and Hoses
Turn on your sprinklers and scan for broken or misaligned heads, as well as broken pipes.
A twisted head could water your sidewalk instead of your grass.
A twisted head could water your sidewalk instead of your grass.
Protect Pipes and Hoses

There are several steps you can take to protect the pipes and hoses in your home and landscape from cold weather:
Disconnect and drain garden hoses when they are not being used.
Insulate your irrigation backflow device by draping a towel over it and cover with a bucket or other protective cover that touches the ground. Never obstruct or seal the ports of a backflow protection device.
Wrap exposed irrigation pipes with pipe insulation, insulated "faucet socks," an old towel or duct tape.
Set heat to 55 degrees when you're away to protect pipes and houseplants.
Turn off the water valves to your washing machine to avoid flooding from burst hoses.
Don't leave interior or exterior pipes dripping. Valley temperatures generally don't drop low enough for a long enough period of time to warrant it.
Locate your water shut-off valve and learn how to turn off water at its source, so you can ward off damage from leaks or burst lines. Know how to turn off your irrigation backflow device as well.
Daylight Saving Time Ended on November 1st
There are several steps you can take to protect the pipes and hoses in your home and landscape from cold weather:
Disconnect and drain garden hoses when they are not being used.
Insulate your irrigation backflow device by draping a towel over it and cover with a bucket or other protective cover that touches the ground. Never obstruct or seal the ports of a backflow protection device.
Wrap exposed irrigation pipes with pipe insulation, insulated "faucet socks," an old towel or duct tape.
Set heat to 55 degrees when you're away to protect pipes and houseplants.
Turn off the water valves to your washing machine to avoid flooding from burst hoses.
Don't leave interior or exterior pipes dripping. Valley temperatures generally don't drop low enough for a long enough period of time to warrant it.
Locate your water shut-off valve and learn how to turn off water at its source, so you can ward off damage from leaks or burst lines. Know how to turn off your irrigation backflow device as well.
Daylight Saving Time Ended on November 1st

Don't forget to reset your irrigation clock when daylight saving time ends on the first Sunday in November.
When you're changing your indoor clocks, make sure you also change the time on your irrigation clock.
This also is a great time to check your clock's batteries.
Don't forget to reset your irrigation clock when daylight saving time ends on the first Sunday in November.
When you're changing your indoor clocks, make sure you also change the time on your irrigation clock.
This also is a great time to check your clock's batteries.
Protect New Plants

February is usually mild enough to allow you to plant petunias pansies, snapdragons and other cool-season annuals in a well-drained, highly enriched soil.
Adding protective mulch on the soil around your plants will conserve water so you don't have to water as often.
Remember to stake new plants and water them deeply to prevent damage from winds.
Remember to stake new plants and water them deeply to prevent damage from winds.
Revive Roses
.jpeg)
Fertilize established rose bushes now to encourage spring blooms and put down a 3-inch layer of mulch around each plant.
Always water before and after applying fertilizer.
Fertilize Fruit Plants
Fertilize established rose bushes now to encourage spring blooms and put down a 3-inch layer of mulch around each plant.
Always water before and after applying fertilizer.
Fertilize Fruit Plants
 Peak blooming season is in the spring, and the best time to fertilize fruit trees and grapes is the six weeks before and after they bloom.
Fertilize in late winter for the finest fruit.
Peak blooming season is in the spring, and the best time to fertilize fruit trees and grapes is the six weeks before and after they bloom.
Fertilize in late winter for the finest fruit.
Leave Damaged Plants Alone
Peak blooming season is in the spring, and the best time to fertilize fruit trees and grapes is the six weeks before and after they bloom.
Fertilize in late winter for the finest fruit.
Leave Damaged Plants Alone
Leave Damaged Plants Alone
 If you notice frost or a freeze has damaged a plant, leave it alone until warmer weather arrives and new growth appears.
Pruning or transplanting a damaged plant during winter months can hurt or even kill it.
Pruning
If you notice frost or a freeze has damaged a plant, leave it alone until warmer weather arrives and new growth appears.
Pruning or transplanting a damaged plant during winter months can hurt or even kill it.
Pruning
 The ideal time to prune trees and shrubs is in late winter, when plants are
mostly dormant.
Finish heavy pruning by mid-February, before buds show evidence of swelling.
Don't prune more than one-quarter of the living tissue during the year.
The ideal time to prune trees and shrubs is in late winter, when plants are
mostly dormant.
Finish heavy pruning by mid-February, before buds show evidence of swelling.
Don't prune more than one-quarter of the living tissue during the year.
mostly dormant.
Finish heavy pruning by mid-February, before buds show evidence of swelling.
Don't prune more than one-quarter of the living tissue during the year.
Protect Your Pets

You can keep your pets safe during cold weather by using the following tips:
Make sure your pets are indoors, if possible, during cold weather.
If your pets are outside, make sure they have access to draft- free shelters, elevated off the ground, to keep themselves warm.
Make sure your pets get plenty of water.
Keep paws away from salts, if you use salt to mitigate snow/ice.
Make sure, if you're using anti-freeze or any other chemicals, that you keep them away from your pets.
Protect Your Pool

You can help reduce risks to your pool and/or spa from freezing conditions by following some of these tips:
During freezing temperatures run the filtration pump and jet pumps continuously.
Adjust pool and spa jets upwards to reduce surface freezing.
Maintain proper pool water level at all times.
Have all air and water leaks repaired.
Remove and store all pool accessories in a clean, dry area.
You should also consult with your pool maintenance company to see about winterizing your pool.
____________________________________
Waste Not...Want Not !
 Benjamin Franklin allegedly coined that phrase. My parents echoed it to me as your parents may also have admonished you.
My life-style is vastly different than that of my folks, however.
I currently have more pairs of shoes in my closet than my mother probably owned in her entire life.
Yet... a conservation sensibility is built into my psyche.
I use the recycling bin at home and anywhere I see one.
I don’t let water run down the drain as I brush my teeth.
I capture rainwater to use on my plants.
I launder full loads of clothing and then air-dry as many as possible.
If I were Queen of Nevada, I would encourage the use of clotheslines.
But…I digress.
That self-indulgent rant was spurred by a YouTube video about using coffee grounds as fertilizer.
Simply, I agree.
I consistently add coffee grounds to pots of plants.
.jpeg)
I dilute the left-over coffee in the pot and use it to water my houseplants as well as those in the courtyard.
 Coffee is acidic. Our soil is alkaline.
Can’t hurt !
I further researched the topic. Several videos suggest that coffee grounds work well as a pest control agent for ants.
Got ants? Why not try coffee grounds?
Coffee is acidic. Our soil is alkaline.
Can’t hurt !
I further researched the topic. Several videos suggest that coffee grounds work well as a pest control agent for ants.
Got ants? Why not try coffee grounds?

What do you have to lose?
Waste not. Want not.
Many articles and videos popped up in my research.
Harvesting coffee grounds from a local coffee shop is encouraged.
That’s very ambitious.
Adding pulverized egg shells is also advised. In short, coffee grounds and egg shells generate organic fertilizer.
 We’re talking about making compost.
Remember that from the 70’s?
Waste not. Want not.
Now...I can’t see myself fencing off a spot in the yard... Layering organic matter...Grabbing a pitchfork...Combining and churning up the contents of left-over meals (minus the meat and the Styrofoam container from the restaurant).
Pretty confident there is a CC&R controlling this.
But, my research did yield small, manageable, tumbling composting bins.
We’re talking about making compost.
Remember that from the 70’s?
Waste not. Want not.
Now...I can’t see myself fencing off a spot in the yard... Layering organic matter...Grabbing a pitchfork...Combining and churning up the contents of left-over meals (minus the meat and the Styrofoam container from the restaurant).
Pretty confident there is a CC&R controlling this.
But, my research did yield small, manageable, tumbling composting bins.

The bins are a cylinder with a screw-on lid. Store it in an obscure corner of the patio.
Voila! No stink. No pitchfork.
Start now.
Add coffee grounds, egg shells, rejected fruit, veggies and wet shredded newspaper through the cold months.
You will have rich compost to add to your plants in the spring.
Tomatoes and herbs will love it.
 Bonus. Creating something from nothing is empowering. It will feed your soul as well as your garden.
Waste not. Want not.
Here is a link to Woodland Direct. It sells the mentioned tumbling composters. Inventory also includes patio heaters, fire pits, rain barrels and pizza ovens too. Pizza! Yum.
http://www.woodlanddirect.com/
Bonus. Creating something from nothing is empowering. It will feed your soul as well as your garden.
Waste not. Want not.
Here is a link to Woodland Direct. It sells the mentioned tumbling composters. Inventory also includes patio heaters, fire pits, rain barrels and pizza ovens too. Pizza! Yum.
http://www.woodlanddirect.com/
Outdoor/Composting
If you are an avid Do-It-Yourself person, here are the instructions to create a compost bin out of a 10 gallon plastic bucket.
Churning the contents is a matter of kick-rolling the compost bin around the yard. Organic stress-relief! Two benefits in one.
In both cases, be a good neighbor and please position your composting bin in a spot where fellow residents don’t have to look at it.
Waste not. Want not.
Stay tuned for my next article, "Don't Toss Those Coffee Grounds".
There are SO MANY THINGS they can be used for in and around the house !
Mom would be so proud !
 Carol Van Camp
The Garden Wizard
Carol Van Camp
The Garden Wizard
You can help reduce risks to your pool and/or spa from freezing conditions by following some of these tips:
During freezing temperatures run the filtration pump and jet pumps continuously.
Adjust pool and spa jets upwards to reduce surface freezing.
Maintain proper pool water level at all times.
Have all air and water leaks repaired.
Remove and store all pool accessories in a clean, dry area.
You should also consult with your pool maintenance company to see about winterizing your pool.
____________________________________
Waste Not...Want Not !
My life-style is vastly different than that of my folks, however.
I dilute the left-over coffee in the pot and use it to water my houseplants as well as those in the courtyard.
I further researched the topic. Several videos suggest that coffee grounds work well as a pest control agent for ants.
What do you have to lose?
Pretty confident there is a CC&R controlling this.
But, my research did yield small, manageable, tumbling composting bins.
The bins are a cylinder with a screw-on lid. Store it in an obscure corner of the patio.
Add coffee grounds, egg shells, rejected fruit, veggies and wet shredded newspaper through the cold months.
You will have rich compost to add to your plants in the spring.
Outdoor/Composting
If you are an avid Do-It-Yourself person, here are the instructions to create a compost bin out of a 10 gallon plastic bucket.
Waste not. Want not.
Stay tuned for my next article, "Don't Toss Those Coffee Grounds".
There are SO MANY THINGS they can be used for in and around the house !
____________________________________
Springs Preserve Events
Throughout the year, the Springs Preserve offers a wide variety of events and activities for kids and adults.
Ever been there? There's lots to do...if you go !
...just another reason to "get out of your house" and enjoy some of the wonderful entertainment venues available to you....and....your guests...here in town.
About the Springs Preserve

Here's their website and some of the pending activities they have planned....
You can also call (702) 822-7700 for any of the events listed below:
Visit the Springs Preserve
333 S. Valley View Blvd. at US 95
Open Daily From 10 a.m. to 6 p.m.
Learn from our experts at the Springs Preserve
Take informative landscaping classes at
the Springs Preserve.
the Springs Preserve.
Are you looking to convert your water-thirsty grass to a more efficient form of landscaping?
Are you more of the do-it-yourself type?
Then come down to the Springs Preserve for one of several free landscaping classes taught by expert staff from the Southern Nevada Water Authority.
Classes are held year round and range from topics like drip irrigation to an overview of the Water Smart Landscapes Rebate Program.
For more information or to make reservations, call
(702) 862-3760.
Botanical Gardens Programming

The Botanical Gardens at the Springs Preserve provides a creative, innovative learning environment for visitors to explore native and non-native desert-adapted plant life through interpretive stations, hands-on workshops, guided tours, and more.
To see the Botanical Garden's programming schedule:
_____________________________

A few days ago I received a water bill....and....proceeded to call 911 when I saw the amount on the statement !
After looking at the amount, I checked my July, 2013 bill and realized that I had consumed in excess of 24,000 ADDITIONAL GALLONS of water in July, 2014 over the previous year.
Sound familiar?
Turns out the culprit was the underwater sprinkler system.
It was leaking as quickly as my wallet does when I go to a casino !
It was leaking as quickly as my wallet does when I go to a casino !
There's more to know about the signs of a leaky system other than the water bill.....
When you find reduced water pressure in one or more of your lawn sprinkler system heads, or when you find soggy areas of your lawn that don't seem to dry out, these can be signs of a leak in your sprinkler system.
You will need to locate the pipe or sprinkler head that is leaking, and repair it.
To repair such a leak in your sprinkler system, follow the 4 steps below.
Things You'll Need:
Things You'll Need:
- Replacement pipe and fittings
- Shovel
- Stainless hose clamp
- Gripping pliers
- Hacksaw or plastic pipe cutter
- PVC primer and cement
- Screwdriver
Step 1 - Determining if a Leak Exists
Chances are good that if you have a small leak, the only way you'll know it exists is when you find a reduction in pressure at sprinkler system heads when the system is turned on. Or, you'll find excess water somewhere in your system. If, for example, your system pipes are running close to the foundation of your home, and if you were to see underground water leaking through your home's foundation, this could be evidence that a sprinkler system pipe is broken. You may also see evidence of leaks in pooled water or soggy patches of lawn in places where such water should not exist.
Step 2 - Finding the Leak
Once you've determined there is a leak in your sprinkler system, the next step is to locate the leak. If it is below ground, locating it will typically be a challenge, because you're not likely to see the actual leak. With your sprinkler system turned on, begin at your first sprinkler head and follow the heads through which water is flowing at its usual rate. When you reach the first sprinkler head with reduced pressure, this will tell you the leak is between this head and the previous one. Look for an area between these two sprinkler heads where water is bubbling up through the lawn, where the lawn is soggy, or where water is pooled.
Step 3 – Capping Sprinkler Heads
If you find equal water pressure at all system heads, chances are good that the leak in your system is too small to create reduced pressure in any of the heads. At this point, you'll need to increase the water pressure. To do that, turn your sprinklers off, replace all sprinkler heads using heads with caps screwed onto sprinkler risers. Turn your water on, and check to determine if there is reduced water pressure at any of the sprinkler heads.
Step 4 - Repairing The Leak
Having identified where your leak is located, dig carefully until you've uncovered the sprinkler pipe or fitting from where the water is leaking. If the leak is coming from a bad pipe joint seal, tighten the seal clamps or replace the seal. If it is coming from a broken pipe or riser, replace the pipe where the break is located. When finished, turn on the sprinkler system, and check to be sure your repair has fixed the leak. Then, replace the soil and lawn.
Not qualified (or scared) to do it yourself?
Don't be ashamed....that number would probably approach 99.99% of most people.
So...call a pro !
I called my landscaper and learned a few things about sprinkler systems....notably, they don't last much longer than 10 years !
My home is 15 years old, so I guess my luck stretched 5 years past what "the book" said it would....but that also means....one has a choice:
a. try and find the leak and fix it
or
b. replace the entire sprinkler system.
I went the later route when my landscaper, told me I am the 10th home in Sun City Anthem that he's replaced the entire system in 2014.
Expensive?
Yes, but will quick patch jobs add up and inevitably, result in having to eventually replace the entire system ?
That...is for you to decide.
At any rate, do yourself a favor and check around the house to see if you have any trouble spots.
Would I do this myself ?
I don't think so !
(OK...most of you who know me are aware of my "nimble" fixing ability)
Need a referral to a person who is LICENSED, INSURED, has done landscaping in Sun City Anthem for 10 years and has 35 years of experience ?
Here's my guy...NO PAID COMMERCIAL...just a Referral....
...to a person I've done business with for the entire 9 years I've been a Sun City Anthem Resident .
Shane Siebert
Owner
S.O.S. Lawn Service
(702) 372-9479
Dick Arendt
______________________________
From Southern Nevada Water Authority
Summer Landscape Tips
Watering is allowed daily through Aug. 31, but that doesn't mean you need to drown your yard—or even water every day—when temperatures climb.
Here are tips to manage your water bill and keep your yard healthy while still complying with watering restrictions:
Take a Day Off
One way to keep your water bill down during peak temperatures is to cut one watering day per week out of your daily sprinkler schedule. Taking just one day off can reduce your water use by as much as 10 to 15 percent.
Time of Day
Water in early-morning hours before sunrise to lessen water lost to evaporation and daytime winds. Mid-day watering is prohibited from 11 a.m. to 7 p.m. from May 1 until Oct. 1.
Plant Selection
Use our Plant Search to choose plants that are native to the arid climate of Southern Nevada and require less water and time.
There are a variety of low maintenance plants which will add both color and vibrancy to your landscape.
Bermuda and other warm-season grasses require about one-third less water than Tall Fescue grass.
Monitor Your Landscape
Make adjustments to watering times as needed.
Shaded or protected areas may need less water than other zones. You may even be able to water less frequently than seven days a week.
Cycle and Soak Watering
The Southern Nevada Water Authority recommends watering lawns 3 times a day for 4 minutes each watering.
Drip Irrigation
While drip irrigation is permitted any day of the week during summer, experts agree that running it a maximum of three days a week during warmer months is much better for plants than daily watering. The length of watering time for plants on drip systems varies depending on the type of emitter, plant types and soil conditions. See our drip watering tips for details.
Check Your Irrigation System
Check your irrigation system weekly for broken or misaligned sprinkler heads and drip emitters, which can be prime water-waste culprits.
Upgrade Your Irrigation Clock
Replace your irrigation system with a "smart clock" and save water and money.
Southern Nevada Water Authority offers an instant rebate coupon for smart irrigation controllers and rain sensors that automatically shut off your irrigation when it rains.
Mow for Best Results
Each time you mow the lawn, change directions. Set your mower to the proper height to promote a healthy lawn and to reduce water use. Recommended mowing heights are 2 1/2" to 3" for Tall Fescue and 3/4" to 1 1/2" for Bermuda.
Brown Spots on the Lawn
Lawns usually develop brown spots because of faults in the sprinkler system, such as mixed types of sprinkler heads, blocked spray patterns and improper spacing between sprinklers.
Check that your sprinkler heads are level to grade, perpendicular to the slope of the lawn and not watering sidewalks, walls or patios.
If grass blocks the spray, trim around the sprinkler head or install a taller 3- or 4-inch pop-up.
Lawn sprinkler heads should provide "head-to-head" coverage. That means the spray of one sprinkler should reach the head of the adjacent sprinkler.
If your lawn looks great except for stressed areas in front of the sprinkler heads, the heads are too far apart.
A device called an undercut nozzle can help. Talk to an irrigation specialist if you decide to change out the nozzle.
Watering system pressure also can cause brown spots.
Misting and excessive drift are signs of high pressure. Low pressure displays itself with weak, short spray patterns and reduced coverage.
Combat Compacted Soils
Compacted soils also can stress your lawn.
Purchase a hand-operated coring aerator at a nursery, or hire a professional to do the job.
Aeration should be done at least twice a year.
An extremely dry lawn becomes hydrophobic, or water-repelling.
Add a tablespoon of liquid soap to a gallon of water and drench the dried area. This breaks down the surface tension of the grass, making it hydrophilic, or water-loving.
Then give it a good soaking.
Water between 2 and 5 a.m. through September.
This is the coolest time of the day or night, and your lawn will more effectively soak in the water you give it.
Leaf Scorching and Burning
improper watering or improper fertilization.
Since both over watering and under watering can damage plant leaves, the best solution is to water deeply and infrequently.
This allows oxygen in the soil, washes salts away and encourages deep rooting.
For most trees and shrubs older than three years, water deeply once every seven to 10 days (Run your drip system one to three hours to soak the root zone).
Newer plants may need water twice as often until established. Add a layer of surface mulch 2- to 4-inches thick to conserve water between waterings and cool and enrich the soil.
Make sure you have the right fertilizer both for your specific plants and for the time of year.
Some fertilizers release much faster in hot weather, increasing the potential for damage. Follow package directions exactly and err on the conservative side.
Then, irrigate well to move nutrients to the soil.
Bug Damage
For a non-pesticide alternative to getting rid of aphids and other pests, spray plants with a strong blast of water from your hose.
You'll knock bugs off and damage or drown many of them. Or, buy beneficial "predator" bugs like ladybugs at nurseries and set them loose to attack aphids and let nature run its course.
________________________________
Deep Watering

It is "officially" too hot out there.
Temperatures are regularly in the 90’s and inching into the 100’s.
Your pansies are kaput.

Your roses are hunkered down and putting out fewer blossoms.

Your non-desert plants are going into a period of dormancy.

The plants are conserving.
Give them water
but
don’t fertilize
Fertilization encourages growth. The old “beating a dead horse” analogy is appropriate here. Help them hang on for the next 90 days or so.
Generally speaking:
Water.
No food.
No food.
The yucca, lantana and sage are right at home in the heat. They are fine.
Driving around the neighborhood, I see some very dry trees. This is a hard time for trees.

Realize this: if a leaf has already changed from green to a shade of brown, it is dead. No amount of water in the world is going to resurrect it.
It might not immediately drop from the tree, but it is dead just the same. It’s a matter of time.
So…if an entire tree is turning from green to brown…it is extremely stressed.
It costs a "few" bucks to remove a dead tree.
Give it a chance. As long as branches don’t easily snap when bent, there is still a chance to pull it through.
Stand back and look at the tree from a distance.
Is it green and perky and swaying with the breeze? Your tree is fine.
If it looks droopy or brittle however, you have a problem.
Tree roots are deeper than the roots of shrubs.

Water needs to get all the way down to all the roots. Time for some...
Deep Watering
On the next watering day...

... put the hose about 2 feet away from the trunk. Turn it on to just a tiny trickle.
...Leave it there for 15 minutes.
...Reposition the hose and let it trickle for another 15 minutes.
...Hit all four points of the compass. The watering should take an hour.
...Keep a watchful eye so that the water isn’t running off. Wasted water helps no one.
That’s it!
Check it from a distance again in a couple days. You should notice that the tree is more supple. If not, do another deep water.
After two spaced deep waterings, there should be a difference. If not, it might be too late.
If your tree doesn’t respond to the water, then remove it quickly.
Boring insects seek weak trees. You will then be hit with a double whammy: killer insects in a dead tree. Who could ask for more?
Your eyes are your best tool.

Look at the trees in your landscape...today !
Carol VanCamp
The Garden Wizard
________________________________
Cactus Need Tender Lovin' Care

What do pitchforks, an electric carving knife, tongs, thick rubber gloves and possibly a length of garden hose have in common?
An episode of Criminal Minds?
Maybe…but in this case, I’m referring to cactus.
Cactus can be described (generally) as Opuntia:
Prickly Pear varieties

and
Cholla varieties.

Columnar (such as Saguaro)
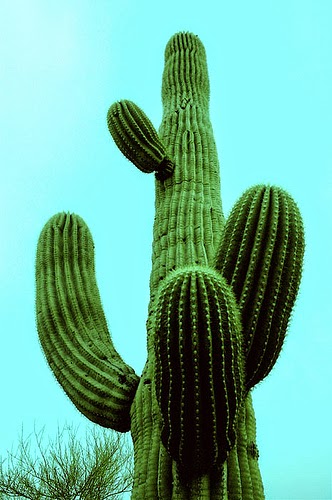
and
Mexican Pipe Organ

Globular (such as Barrel Cactus)
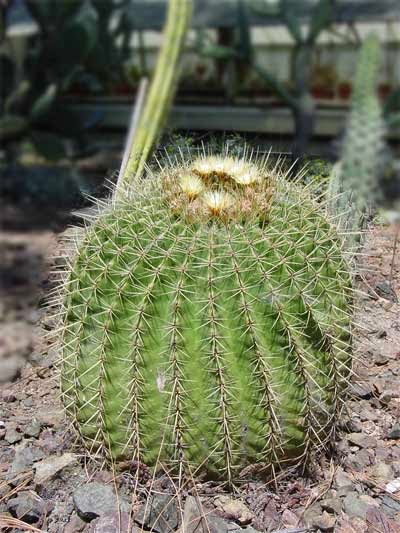
I remind you, these are Very General Descriptions for the Somewhat-Interested-But-Not-Really Homeowner.
The Mojave Desert (where Anthem is located) is the most receptive to Opuntias and Globulars.
The Sonoran Desert (Phoenix) is also receptive to Columnar cactus.
Saguaros grow beautifully in the Sonoran. Saguaros struggle in the Mojave.
The reason: greater seasonal temperature shifts.

The Mojave gets colder longer in the winter. Summer in the Mojave is hotter longer. You might not notice the difference, but a Mexican Pipe Organ Cactus probably will.
Here is a helpful link:
This fellow gives advise on proper watering, winterizing, insect control and propagation. It is a commercial site in Arizona but the advise is universal.
How does one prune a cactus?
Use thick rubber gloves, tongs and an electric carving knife.
Grab the pad with the tongs. Use the electric knife to cut it away from the main trunk.
So how does one move a cactus?
Use thick rubber gloves, pitchforks or a length of garden hose.
Overnight temperatures should be consistently in the 80’s to transplant cactus.
The one constant is thick rubber gloves. The local nurseries sell actual Cactus Gloves. They are well worth the investment.
One does not look free-wheeling and fashionable when dealing with cactus.
Wear long sleeves, heavy long pants which cover the tops of leather boots. Athletic shoes are no match for a cactus spine.
Flip flops and sandals are a Big No No.
And if…just if…you nudge a rattlesnake or a scorpion….leather boots, my friend. Boots will save you.
When moving cactus from one spot to another, it is best to re-orient the cactus so that is faces in the same direction as it did in its former spot.
The cactus responds better and has less chance of sun burning. So, before it is moved, note which direction is North on the plant. A tiny dollop of paint will do the trick. Obviously, plant so that the North spot is again facing North.
Don’t rush into transplanting. Let the revealed roots harden overnight.
Have the new spot ready. For heavens sake, don’t park it next to a sidewalk.
The following methods were developed by local Master Gardeners several years ago.
Moving a small erect specimen is an exercise in coordination.
The root system is shallow and spreading.
Two pitchforks and two people working on opposite sides, can loosen the ground around the plant and lift it out of its spot.
Stepping in unison, (so you think you can dance?) maneuver the cactus to a wheelbarrow. Hint: no one should be walking backward.
The hole in the new location should be shallow and wide.
Using the same formula, two people and two pitchforks, re-orient the cactus. Spread the roots and cover them thoroughly.
Do not pile up soil and deeply bury the bottom of the cactus, however. Just make sure it is anchored.
Water slowly and deeply. Let the soil dry out. Repeat deep watering. Let it dry. Once a month might be adequate in your location.
Move a barrel cactus with a length of hose.
Loosen the soil with the pitchforks, lift from the spot and then lasso the cactus with the garden hose.
Place the barrel cactus carefully in the wheelbarrow.
Move to the new spot. Again, re-orient the plant.
Cover the roots. Make sure the plant is anchored.
Water.
Dry out.
Repeat.
Re-orientation is especially important for Barrel Cactus.
Shriveled pads can be trimmed from a Prickly Pear.
Barrel Cactus weaken and die.
If a prickly pear or cholla cactus become speckled with white patches, it might be Cochineal Scale. Mealybugs have made a home in the plant.

You can rid the plant of the bugs pretty easily.
If the problem is minimal, using a Q-tip, dab the spots with hydrogen peroxide.
More than a few? Gently scrub them off with a toothbrush and dish washing soap.
Always hit the spots with a spray from the hose after you’ve intervened.
You will probably notice purple residue where the spots have been removed.
Here’s a piece of trivia: Native Americans harvested the cochineal scale to create a purplish red dye. Mealy bugs make purple dye. If you see Carmine or Cochineal Extract listed as an ingredient in a cosmetic; it’s smooshed mealy bugs. Makes that new lipstick a bit less appealing, doesn’t it?
Need to remove a cactus spine because you failed to use proper caution?
Try Elmers Glue.
Spread a thick layer over the affected spot. Let it dry completely. Pull the dried layer of glue off in the same direction the spine is inserted. Works on rose thorns also.
Cactus in the wild are protected. Sounds goofy but there is a very valid reason. Cactus only grow when there is rain. Ten years of drought = minimal or zero growth for ten years.
A cactus in open desert may very well be 100+ years old. One must respect that. If you want to move a cactus from public land to your yard, you better talk to the Bureau of Land Management first. Permission is required. Period.
Enjoy your summer..
...and those gorgeous cactus flowers!


Carol Van Camp
The Garden Wizard
_________________________
IPM: Integrated Pest Management
Thrips, Aphids, Borers and Spittlebugs. Sounds like a name for a law group.
These particular pests, however, won’t be on television promising you fast money. They’re after your landscaping.
Equally as obnoxious as the TV lawyers, at least you can control thrips, aphids, and spittlebugs with somewhat ease.
Borers are tenacious and much nastier.
THRIPS

Thrips are tiny insects with thin, feathery wings. They can be clear or brown or white or whatever, so good luck identifying them by their color.
They feed on leaves causing very distinctive silvery patches on the injured leaf. That’s diagnostic.
Thrips will also climb down into the very center of rose buds. When the rose blooms, the blossom is deformed.
If your lovely rose has a couple misshapen petals, you now know who to blame.
Thrips are prolific little insects. A thrip can go from egg to adult in as little as 2 weeks.
Their life pattern goes from eggs on the leaves to full-grown bugs living in the soil at the base of the plant.
I’ve read that thrips hitch a ride on plants in the greenhouses where the plants are propagated.
It seems that they will also bite humans if left to their own devises. Evil little insects.
APHIDS

Aphids are small, greenish-grayish, soft-bodied insects. No wings.
Aphids occur mainly in colonies.
Sometimes called “plant lice”, aphids can be found on any part of the plant.
They aren’t picky.
An aphid colony generally starts when a lone female finds a host plant. She produces offspring that in turn also produce offspring.
Colonies can grow quickly and produce significant plant damage.
If you don’t see a cluster of aphids on the plant, then look for “honeydew”. It is easy to detect on leaves because the leaves look “shiny“ in sunlight.

Aphids are glutinous. When they consume more than they need to live, they excrete excess water and sugar. Hence, honeydew.
Ants and other insects find honeydew to be really yummy and may “tend” aphids to acquire it.
The main predators of aphids are ladybugs.

Cute little ladybugs gleefully devour aphids.
BORERS

Borers are tree killers.
The borer tunnels into the tree from any spot it finds advantageous. The borer then lays it’s eggs inside the trunk of the tree.
The eggs hatch and the larvae also starts to tunnel through the trunk of the tree.
The borer emerges through a hole that has been, yep, you guessed it, bored into the tree from the inside out.
Once those holes appear, chop down the tree. Get rid of it completely.
Treat the ground upon which it stood.
Disinfect the tools used to fell the tree.
These are bad, bad bugs. This is about the only time I would ever suggest a strong chemical intervention.
Boring insects usually only attack weakened trees.
So to prevent borers, keep your trees healthy with water, pruning and proper feeding.
SPITTLEBUGS

Finally, the relatively benign Spittlebug.
Unfortunately, but aptly named, these critters leave a white, cottony, drippy-looking layer on rosemary and lavender plants.

The cottony stuff is the Spittlebug Cloaking Device.
Although not a subtle way to hide, the bugs produce the cottony layer in order to stay cool and hidden. The layer easily succumbs to a good hard spray of water.
Although the bugs are feeding on the sap of the rosemary, the insects themselves are more a nuisance than harmful.
The eggs “winter” in the rosemary and make themselves evident in spring.
The moral of the story is to get ‘em while they’re young.
As new growth emerges on your established landscape, wash it down.
A good strong spray of water from a garden hose will discourage pests. It will, in fact, wash them away.
Combine a little dish detergent and rubbing alcohol into a spray bottle with water.
Liberally spray your plants with the concoction.
Wash it away after an hour.
Park your newly acquired plants on the driveway and give them a good cleansing also. Let them sit on the cement for a little while before you position them among your other ornamentals.
A little prevention will keep the pests away.
And...
TiVo...

... will take care of the lawsuit ads !!!
This is your Garden Wizard...buzzing into spring !
Carol Van Camp
____________________________
Growing Tomatoes in a Hot Dry Climate
Remember those Topsy Turvy Tomato Bag Planter thing-a-ma-jigs from a couple summers ago?

The casinos gave them away and they were a hot item at Bed Bath and Beyond.
I do not know one person who had any luck with the tomato bags. As it turns out, they actually could have worked if only we had been given a few important tips.
In fact, “bag gardening” is producing results in hot, dry Texas.
I will address that later in this article.
Three things to consider when trying to grow tomatoes in the desert:
soil depth
planting practices
the variety of tomato
The time to plant is now.
Big surprise! It is spring, after all.
Importantly, all possibility of frost (don’t snicker) is essentially eliminated on March 19 this year.
Tomatoes are either determinate or indeterminate.
Determinate varieties are bush-like and One and Done. One crop and that’s it. Since a realistic growing season for us is 60 to 70 days, that might be just about right for you.
Indeterminate are tomatoes on the vine. The growing season is potentially longer, but I wouldn’t bet on many viable tomatoes after mid June. Just too darn hot.
So, when considering tomato plant choices for Anthem, look for tomatoes labeled for 60- to 70-day maturity.
Suggested varieties include:

Yellow Pear

Cherry

Sweet 100

EarlyPak

Earlygirl

Small Fry

Patio

Champion

Earliana

Sunripe
I haven't checked the local nurseries to see what varieties are being offered.
Remember, growing “big ole maters” shouldn’t be the goal.
Taste and texture are more important so smaller fruit is desirable.
Shorter ripening time = smaller tomatoes.
Soil depth is important because growing tomatoes in the desert is different than areas with milder climates and more rain.
Most of us (I assume) look for nice, stout, hardy plants.
In the case of tomato plants in a hot dry climate; tall and leggy are okay. The reason: the plants need to be planted deeply.
Select a deep planter and fill it will rich potting soil.
The planting process is to strip all the bottom leaves off the plant. Revealing 6 inches or more of stem is perfectly acceptable. Leave just a couple leaves at the top.
Poke a hole in the potting soil.
The handle of a wooden spoon is one choice. Poke and wiggle, wiggle, wiggle until the hole is the size of the root ball.
Fill the cavity with water, and bury that tomato plant almost up to the remaining leaves. Every spot a leaf was removed along the stem with send out a root.
You have just created a water and nutrient delivery system that will greatly benefit the plant.
Supplement the soil with some peat moss.
Use a slow release liquid vegetable fertilizer and keep your eye on the water. Keep them moist but don’t drown them.
Back to the idea of “bag gardening”.
I received a Face Book post (Face Book is the only way we know what our families are doing) attributed to the West Texas Vegetable Growers. West Texas is hot and dry.
This article outlined an ingenious way to grow leaf lettuce, spinach and radishes. The author buys bags of potting soil, pokes holes on one side for drainage and cuts out a “window” on the other side of the bag.
The soil is raked and loosened with a small hand rake.
The bags are set upon a grate suspended between saw horses.
Using a shaker with large holes, the writer mixes the vegetable seeds, in this case leaf lettuce, in with corn meal and shakes them onto the bed of soil in the bag.
The cornmeal shows where the seeds have been sown.
The seeds are covered with a light layer of soil and misted regularly until established.
The watering can be more vigorous after the plants are producing.
The suspended bags keep the plants off the hot cement and makes them easy to harvest because they are at waist height. Use scissors to harvest leaving the original plant in place. Allegedly, the plants continue to produce.
Just like the Las Vegas Valley however, the growing season is about 60 days.
Brilliant…but ugly!
We have CC&Rs here so I suggest trying this on a smaller scale and keeping your “garden” out of your neighbor’s line of sight.
If you seriously want to grow your own healthy and organic food, a raised bed is a great solution. I am including a link to an article from Sunset Magazine on building a raised bed.
The Topsy Turvy Tomato planter wasn’t a bad idea. Just poor instructions for those of us here in the Mojave.
And when you've harvested your crop....
Send some to Anthem Opinions !
Carol Van Camp
The Garden Wizard__________________________________
Wildflowers of the Mojave

The majority of my family resides in the mid-west. They have been clobbered this year. Piles of snow. Biting cold. Layers of ice. My niece posted on her Face Book page, “I feel like I’ll never see the crocus and tulips this year.”
Crocus.... tulips….

I love the spring flowers in the Midwest.
I am especially fond of bearded iris.

Alas, these flowers aren‘t easy to grow here in the desert. I understand that a few determined people can coax the tubers to blossom.
Propagation (the production of more plants by seeds, cuttings, grafting or other methods) requires an extended exercise in digging and sheltering and hovering. Not my cup of tea.
I want a plant that voluntarily presents itself once it is established: Goes “TAH DAH!!” at the proper time.
Fortunately for us, the early spring wildflowers in our valley do exactly that.
Two such charmers are penstemons and mallows.
Penstemons
.jpeg)

The penstemons are set to bloom within days.
The cluster I have in my yard are pushing buds up into the sunlight. A relative of the snapdragon, penstemons produce erect spires of tubular flowers. The flowers bloom in a rainbow of color: red, pink, yellow, orange, purple. Hummingbirds find penstemon blossoms irresistible. Penstemon are perennial and will faithfully bloom every year. As with many spring flowers, the blooms won’t last for long.
Why not propagate the penstemon for next year’s spring beauty?
Propagation is relatively easy, too. Don’t dead-head or cut down the spears. Allow the spears to dry out. Crush one of the dried flower pods in your fingers. The ripe seeds are itsy-bitsy and black. Once you find those tiny black seeds, keep crushing and sprinkling among the rocks in a sunny and dry spot in your landscaping. The seeds will remain dormant until next winter when they will germinate.
Next spring: “TAH DAH!“
The remaining foliage will stay green throughout the year. The leaves form a rosette close to the ground. Cut the stalks down to within 6 inches of the rosette.
Mallows
Mallows are also ready to bloom.
Mallows are small shrubs.
The Desert Globe Mallow...

... is common along the roadsides and rocky out-crops in our area. Desert Globe Mallow has silvery-green foliage and beautiful coral-colored blossoms. The flowers are little cups about 1 ½ inches across.
I spotted them along Via Inspirada last spring.
If you are inclined to hike a bit, the Railroad Tunnels hike in Boulder City is resplendent with these beauties. I discovered them on a hike in early March.
So inspired, I planted a Desert Globe Mallow in our courtyard. I was disappointed that it dried out too soon and took on the look of a wayward tumbleweed in the landscaping.
I have, however, had wonderful luck with a...
Cape Mallow

A Cape Mallow is compact. The leaves and blossoms are demure. They look like miniature hollyhocks. I chose pink.
It was planted in a generously-sized pot. It did “poop out” after about 5 years, but I was able to find another one at the local nursery. It also lasted about 5 years so I am in search of a replacement. I suspect it became pot bound.
It is an effortless plant that blooms continually throughout spring, summer and into fall. The Cape Mallow is native of South Africa.
I have included links to two desert nurseries:
High Country Gardens
...is in Santa Fe, New Mexico. It is a retail nursery so consumers can order plants off the website. HCG carries a variety of penstemons and some mallows good for Zone 9.
Mountain States Nursery
...is in Glendale, Arizona Mountain States Nursery s a wholesale nursery so a consumer cannot directly order plants from it.
I’m giving you this link because the Mountain States website has downloadable plant information sheets. The website is wonderfully comprehensive.
So, TAH DAH!
Get on out there and look for the natural beauty of our surrounding desert.
Spring has sprung....
Carol VanCamp
The Garden Wizard
____________________________
Spring is Just Around the Corner...Get Ready !
Got roses?

Trim them.
Feed them.
Want to transplant something?
Do it now.
Plant some pansies and osteospermum (look like daisies) for early spring color.
Pansies

Osteoperum

Throw your coffee grounds into the pot for a little extra juice for the plants.
Water them with your left-over coffee.
Don’t want the rest of that beer?
Onto the plant it goes. Waste not, want not.
Honestly…this is the time for all that.
Once temperatures crest 70-ish daily, new growth will start appearing.
Too late. You’ll be in a holding pattern until October.
Please. I’m begging you.
Turn your over-clipped-and-mostly-dead-square-or-spherically-shaped Texas Ranger sage brush into a real, naturally shaped shrub.

Texas Ranger after trimming
It will look ugly only for a short period of time.
It will, in fact, look dead. It is not.
It is like Lazarus and will rise again.
Only this time it will be lush and full and growing in a lovely naturally-shaped rounded form. There will be long spears of leaves and purple flowers reaching upward. The whole plant will be alive, not just the outermost 3 inches of it. The shrub will easily be 3 to 5 feet tall by the end of summer.
You don’t have a thing to lose by trying.
In fact, you will gain a new plant without a stop at the nursery.
Once you “open” it up to the sun and wind and rain, it will reward you.
You can almost hear it sigh “Ah-h-h-h. That feels good.”
Bonus
You won’t need to pay someone to keep it “in check”.
My Master Gardener friend, Debra, is in charge of the common grounds for her small neighborhood HOA. She had more than twenty square Texas Ranger sages chopped right down to the ground.
She reports that with every shrub, the landscapers said, “This one too?!” Poor guys were horror-stricken.
The plants came back. Beautifully back.
Her landscapers are now Believers.
I actually challenge you to kill a Texas Ranger sage by chopping it down even with the ground. I’ve tried.
My husband, transplanted one from another spot in the yard. He moved the bush under a tree and too close to a fence.
I’ve referred to this as Andy Landscaping. That is a subject for another day.
Here is a photo of my "doomed" shrub.
Pretty darn healthy for a goner, wouldn’t you say?

Texas Ranger in full bloom
Looks like a new 5 gallon offering from the nursery.
Here is also a photo of a recently pruned Texas Ranger in my own yard. I will get in there and remove most of those inch wide branches. Smaller branches are going also. It will be gorgeous in about 12 weeks.

Pruned Texas Ranger
Happy Spring!
Carol VanCamp
The Garden Wizard
_______________________
What To Do with Poinsettias after the Holidays

I usually have 3 things left after the holidays: candy canes, a large green, pine-scented candle and a poinsettia.
They were oh-so-festive a few weeks ago.
In mid-January, they are a nuisance.
Since I was raised to “Use it up. Wear it out.”, I can’t just heave these items into the trash can.
The candy canes will go into my mother’s cookie jar along with candy canes from the last 5 years.
I’ll diligently burn the candle until the wick surrenders and falls over into the molten wax.
The poinsettia is troublesome, however. I mean...it’s alive.
One can’t just snuff something alive because it’s not fashionable this week.
Here’s my dilemma. My in-laws retired to Sun and Fun, Too! (actual return address) in Weslaco, Texas. It was a hot, barren, desert mobile home park in the Rio Grande valley. My mother-in-law would plant a poinsettia out beside the carport every year. The dang things would flourish! Burning sun and lousy soil…sound familiar? If a poinsettia can survive that then I have to at least try to bring this poinsettia into the new year here. Again.
Poinsettias are native of Mexico.
Success should be better here than good old Michigan. Right?
I’ve read numerous articles from various bona fide sources. Here is the basic information I’ve sorted and filtered.
Put the poinsettia in a better pot.
I’ve left it in the plastic grocery-store pot in the past and the poor poinsettia became a leggy, pale version of its once glorious self.
Keep it in a sunny spot.
Cut all growth down to about 6 inches with a minimum of 3 leaves per stem.
Water the plant when the soil surface becomes dry to the touch. Don’t let the poinsettia wilt.
Fertilize monthly with a good houseplant fertilizer.
Pinch back new growth in the summer for a more robust plant in the winter. Easy stuff.
Now the tricky part.
In order to produce blooms, a poinsettia must have 12 hours of complete darkness for 8 weeks.
Suggestions are to put the plant in a closet from 5 pm until 8 am daily through October and November into December. Another suggestion is to put a box over the plant for the required times. Either way, one must remember to sequester and then liberate the poinsettia every day for 2 months.
Hm-m-m….
I know my mother-in-law didn’t baby-sit a plant for 60 days. So, I have adopted a new attitude about saving my poinsettia.
Let nature take it’s course.
Makes me wonder, though, how one can purchase those picture-perfect plants so inexpensively.
_________________________
Christmas lights are good for your landscaping
Cold weather is ahead. Blustery and windy and chilly: we've had and will have freeze warnings for the next few months.
It is a chore to put up strings of Christmas lights when it’s cold and the wind is blowing. Makes you want to just lay them across the shrubs and call it a day !
As luck would have it, that’s a great solution for keeping the frost away from your delicate plants.
Christmas lights, the older the better, emit just enough heat to keep Old Man Winter from nipping your trees and shrubs.
You can add an additional layer of protection by also covering your brightly decorated plant with light fabric. Cheesecloth (like everyone has cheesecloth just sitting around the house), burlap and landscaping cloth work well.

An old sheet will do the trick also. As far as the old sheet goes, I guess you need to decide the value of sheltering your plant versus nasty glances from the neighbors.
I see some folks have wrapped their cactus in burlap. Opposing points of view, all from experts, exist over the value of swathing your Saguaros in cloth.

I think it’s fine. Burlap breathes.
The point is to keep the frost from sitting on the plant. It’s the sun burning the frost off that damages the plant as much as the frost itself.
Newspaper will work in a pinch. Just remove it in the morning before it blows into the neighbor’s property.
If you have a decorative palm, such as a Sego, nestle those lights right down close to the heart of the palm.Covering isn’t necessary.
Never use plastic.
Plastic keeps warmth in. Plants are not warm-blooded. Therefore, plastic is worthless at preserving your landscaping.
Unhook your hoses and winterize your irrigation system.
Make sure your back-flow protection device is wrapped and insulated to keep it from cracking. Place a clay pot upside down over it like a terra cotta shell.
I’ll bet that you will get your plants protected from the cold on exactly the same day you see someone in shorts and flip-flops at the market. Vegas, Baby!
Wishing peaceful, safe Holidays and a very Merry Christmas to everyone.
___________________________
Holidays are the Time to Think About Pine Trees

I promised Dick that I would write an article on cactus. Too late.
Cactus should be left alone until the evenings consistently warm up to 60 degrees again. That certainly isn’t right now. Our evenings are dropping into the 40’s and any pruning or transplanting now would doom your cactus.
So, what can I write about?
The holidays are here. Thanksgiving and Hanukkah actually merge this year.
Not a lot of us are concerned about the landscaping right now. It’s all food and gifts and family and friends and decorating for the festivities.
Time to put up the Christmas tree.
Hey! Christmas tree!!
Pines!
I’ve found my topic.
Here in the Las Vegas valley, two pines seem to do the best: Mondell and Aleppo.
Both trees are drought-tolerant and tolerate our rocky alkaline soil.
The Mondell has a classic pointed growing pattern.
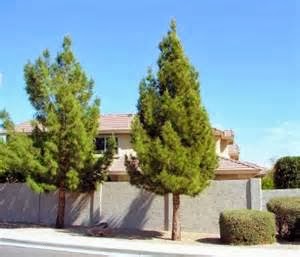
The Aleppo is more free-form. Think Bonsai. The Aleppo can bend and turn and gnarl and send out tufts of needles and, in my opinion, is more interesting in the landscape than the Mondell. Unfortunately, the Aleppo is prone to disease. Planting an Aleppo pine requires good stewardship to keep it healthy.

Only prune pine trees in the spring.
As with any tree, do not cut off the top. Remember, trees grow from the top.
Bottom branches can be systematically eliminated in order to keep the tree nicely formed. Take the whole branch all the way to the trunk.
It is also a good idea to prune away little sucker branches that sprout and then immediately die along the trunk. These tiny sprouts pop out between the large, sturdy branches. Removing these little branches keeps the tree looking open and neat. Taking a leaf blower to the tree removes dry needles. A healthy pine will naturally drop needles in the spring.
You can control the size of the pine by removing some of the new growth.
This again should only be done in the spring.
The new growth on the tips of the branches are called candles. The candles are tight bunches of very soft, pliant needles. You can remove half of them without damaging the tree. No special tools. Just pinch off some of the soft new growth. Once the candles spread apart and harden, it is too late.
Mature pine trees do not need fertilization. They are just fine, thank you.
The Mondell is sometimes called a Mondale or Afghan pine. Evidently they grow prolifically in Afghanistan and Pakistan. Aleppo pines are Middle Eastern in origin.
Some of the oldest organisms on the planet are pines trees.
A Bristlecone pine can be thousands of years old. The pine reaches 30 to 40 feet in height but continues to increase in trunk size. The trunks are massive. Bristlecone pines grow right here in Nevada. Great Basin National Park is home to a grove of ancient Bristlecones.

A researcher was given permission to study the Bristlecone pine back in 1964. In the name of researching climate change, for heaven’s sake, Prometheus was a Bristlecone pine cut down while still living. It’s trunk had 4900 rings: a ring for each year of its existence. It was the oldest known tree on earth. Bet Santa left that guy a lump of coal that year.
My best wishes for a joyous holiday season. Peace.
Have a question or have something in the garden you'd like me to discuss?
Drop me at note at anthemopinions@gmail.com.
Carol Van Camp
The Garden Wizard
_________________________________
A Rose by Any Other Name Would be...Dr. Huey?

I am opening this article on rose care with three very helpful links.
One is for the American Rose Society:
The second is for feeding roses ala the American Rose Society:
The third is for pruning roses per the American Rose Society:
Pruning is specific to whether the rose is a tea, a climber, a tree, a bush, a miniature, or an Old Rose.
Using sharp saws and loppers to make a 45 degree cut is the best. A little dab of Elmer’s glue protects the cuts.
The most important tool is a pair of gloves to keep the thorns from ruining your day.

Feeding depends upon your choices. Do you want to go organic or purchase a balanced fertilizer from the nursery?
Either way, in the Las Vegas valley, the addition of ½ cup of both soil sulfur and super phosphate are recommended for September.

Regular feeding promotes blooming, so fertilize every time the current crop of buds first begin to show color. Slow down the watering in October but don’t let anything dry out.

On this side of the country, my "rosarian" friends prefer Weeks brand bare root roses. http://weeksroses.com/ Weeks Roses are grown in California.
Whatever brand you prefer, the canes should be unwaxed. Waxed canes “cook” in our desert heat.
I love roses….in someone else’s yard.
As my previous articles indicate, I’m an advocate of stress-free landscape maintenance.
Roses are a bit too persnickety for me. However, my husband planted a rose in the corner of our courtyard a couple years ago.
The good news is that it continues to produce roses every spring and fall. The blooms are fragrant although not perfectly formed. The plant itself is hardy even though my rose-pruning practices lack any particular skill. I give it rose food in the spring and fall and dust it for bugs.
Mysteriously, a climbing rose planted 11 years ago and presumed dead, has arisen.
So, I qualify my statement. Perfect roses are too persnickety for me.
Wild roses are right up my alley.
That wild climber in my courtyard has a good chance of being a Dr. Huey rose.
The Dr. Huey Rose was introduced in the early 1900’s and became popular because it climbed and produced big red blooms. The rose had its problems and became less and less popular except for one thing: it is the root stock for many of the hybrid roses produced today.
_____________________________
Round Two

My husband and I hired a talented landscaper when we built here. Our property was beautiful.
Thirteen years later, we need to revive the joint.
Rabbits ate the euonymous...
The fountain grass got out of hand and met its demise...
The crepe myrtle never flourished...
and...
the princess palm croaked after a couple weeks of freezing weather.
Of the ornamentals.. only the rosemary, sage and fan palms have prevailed.
If you find you are in the same predicament, here is information to help you with your re-landscaping.
Regarding shrubs. Resist the urge to buy anything in a container over 5 gallons. Plants in two gallon containers will grow just as well at half the cost.
At the nursery, grasp the plant close to the soil line and see if it wiggles.
Don’t buy a wiggly plant. Don’t buy a plant with ultra dry soil. Don’t buy a plant with soggy soil. Like Baby Bear, you want it “just right”.
Regarding trees. Don’t buy a wiggly tree either. Nor super dry. Nor soggy. Whatever tree you select, see that the top hasn’t been radically chopped off.
Trees grow from the top.
Some people believe that the bottom branch of a tree moves up the tree as it grows. Nope. The bottom branch of the sapling you purchase will be the bottom branch of the mature tree. If it isn’t pruned off, that is.
Trees work on hydraulics. Roots take in water and send it up the trunk to the leaves. For that reason, it helps the tree to leave those little “suckers” along the trunk until the tree gets established. They’re like rest stops on the way to the ultimate destination. When purchasing a tree, check to make sure the bark isn’t split anywhere on the trunk. Split bark means bad hydraulics.
Should you stake a tree? Yes. But only for a while. The tree actually needs to whip around in the wind. It strengthens the trunk. Remove the stakes after one growing season.
Dig the hole (with the aid of a pick axe and dynamite) the same depth as the container but at least 3 times bigger around. Yet another reason to buy a 2 gallon plant. Fill the hole with water and see if it drains. If the water is still there after 24 hours, select another spot. Your landscaper will roll his eyes at this. Too bad. Do it anyway. It’s your money.
If the hole drains, mix native soil, sans rocks, with richer soil to fill in around the root ball. Expect more eye-rolling.
Remove the root ball from the container. Place the root ball in the center of the big hole. Take a pruning saw or sharp knife and cut through the edge of the root ball from top to bottom. Make 4 cuts: north, south, east and west. If the roots have started to become pot-bound, they will swirl. Swirling roots will stunt and ultimately kill the plant. Cutting through the roots can ensure against swirling. Fill in with the amended soil. Pack it in firmly. Don’t stomp it down so hard that it compacts, though. Water deeply.
I have recommended that plants be grouped. Grouping looks better and also makes irrigation easier. If you use some of the desert adapted plants I’ve been nagging you about, you will be able to keep them under control with thoughtful annual pruning in the fall each year.
That’s it. If they get too big and woody, whack them down to 12 inches and let them start over.
Yucca’s are even more maintenance free. Grouping 3 or 5 red yucca in a ho hum corner of the lot will fill in nicely and require minimal upkeep. The goal is sustainability.
Mysteriously, there are spots on everyone’s property that resist fruitful growth. If you must have some color in that spot, try grouping an uneven number of various sized pots planted with cactii. It’s visually interesting and doesn’t require any digging. It’s a contemporary spin on the old wagon wheel and steer skull solution.
A little homework and correct horticultural practices will re-create a beautiful environment around your home again.
So who’s the talented now?
Keeping you GREEN.
Until next time...
Carol Van Camp
The Garden Wizard
Trick or Treat!…um…what?

Pull into a parking place. Crack the windows and put the sun shade in the windshield. Walk briskly over the baking asphalt into the store. What do you see?
Autumn. Pumpkins and Halloween decorations nestled up next to the Back to School stuff.
Surprise! Seems surreal. We all lament that time shoots right by. It isn’t going to slow down.
In seven short weeks it will be October.
If you are thinking that you might want to change the landscaping at your home, this would be a good time to do some research and planning for October execution.
October is a great time to plant. Not too hot. Not too cold. The plants have time to get established in their new home.
Make a statement with your landscaping.
Group plants together. Allow ample open space around the groupings. The open space is like an arrow pointing to the pretty stuff. Group your plants in uneven numbers. Even numbers of plants are visually stagnant. An uneven number of plants is visually dynamic.
For variety, choose plants that will grow at different heights. Taller at the back. Shortest at the front. Mix textures. An example: Mexican Bird of Paradise at the back (lacey), Red Yucca in the middle (erect), and Trailing Purple Lantana in front (solid and carpet-like).
Depending on the room you have, a mass planting can be stunning. Again, use uneven numbers of the sameheight under 3 feet. You should be able to easily see over the top of the grouping.
Resist Andy landscaping.
You’ve seen it: “He put a shrub here. And he added another one there. And he added one there. And he added that one too.” Andy. Get it? Looks random. Is random.
In Henderson, we have approximately 265 growing days a year. Our annual precipitation is about 4 inches. The USDA says we are in hardiness Zone 9. Zone 9 means that our temperatures can bottom out around 20 to 25 degrees F. Our soil is poor containing very miniscule amounts of natural nutrients. Our water is alkaline. Gardener’s Paradise, right?
Depends on what you plant. In my never-ending crusade to make Anthem a community of the desert instead of a community in the desert., try desert adapted vegetation.
You will reduce your water bill. Desert plants aren’t prissy. You can cut most desert plants right down to the ground and they will almost always come back nicely.
Rabbits shun them. And…this is key…
...they will actually flourish here. One caveat. Watch for thorns. Some desert adapted plants arm themselves. Pyracantha comes to mind.
I recommend acquiring a book written by Linn Mills called Nevada Gardener’s Guide. Linn was the County Extension Agent to Clark County back when Wayne Newton’s house was “out in the sticks”. There are great plant recommendations in there. Bear in mind, however, that Nevada is a really big state and the climate is vastly different from top to bottom.
Remember, Anthem is in Zone 9. Very important. Zone 9.
So when the frost is on the pumpkin (up North) and you’ve switched from white flip flops to black flip flops because it is after Labor Day, you’ll be ready to spruce up your property.
The Garden Wizard
_________________________
The Buzz About Bees
My neighbor discovered that the "trumpet vine" in her entryway had been invaded. Precise little half-moons had been incised from the edges of the leaves.

The gentleman at Star Nursery told her that the damage was caused by bees.
He is correct.
Leafcutter Bees to be exact.

In fact, my neighbor watched as an industrious little bee landed, cut and flew away with a piece of the trumpet vine under it’s wing.
I am not an entomologist. My insect knowledge extends to:
“Yep. Something’s eating that plant.”
So, the good folks at Star are probably a better source for insect damage than I. They have literally, “seen it all”.
One thing I do well, though, is research.
I was asked to write this article. Hence, I did my research and can share this information with you about Leafcutter Bees.
The bees do not consume the leaf fragments. The female uses them to make cocoons for her eggs.
They are mild little bees.
Rather shy, they are not prone to stinging unless directly assaulted. The sting is mild. The damage to the leaves is not particularly harmful.
The leaves look funky but won't die from the cuts. The bee builds its colony in the woody part of older plants. These bees are particularly fond of rose bushes. So, inspect your rose bushes for those little half-moon cuts on the leaves.
Generally, the Leafcutter Bee is a fairly benign neighbor. The pros suggest mechanically stopping the bees. In other words, put netting over the affected plant. I guess you need to decide what looks worse: netting or cut leaves.
However....
A great number of honey bees in Las Vegas are Africanized.
Africanized is the technical term for the dreaded moniker: Killer Bee.
Africanized bee colonies are guarded by sentry bees. Get too close and the sentry will dive-bomb you. Honest. BOOM! Flies right into your chest and buzzes away. Be watchful. If you notice a couple bees buzzing about, and the population of buzzers increases as you approach, you’re getting close to their home. Just back off.
The Africanized Killer Bees aren’t very picky about where they build their hives. The colonies for these bees may well be in the ground. They like one particular spot under the mounds of rosemary in my yard. If you are concerned about a hive, a pest control company specializing in bee removal can help you.
Don’t kill them. Please.
Bees are pollinators. Bees are essential to the eco-system of our world. No bees; no fruit. I understand that my neighbor was sold some type of garlic spray to discourage the bees from making lace out her trumpet vine. Fine. Shoo them away. Leave them alone. Have them removed. Just don’t laden them with Raid.
And that’s the buzz....about bees !
Having a problem that you'd like me to research? Just send us an email at
I'll do my best to get you the answers you need.
Until next time...this is your Garden Wizard...this time "buzzing along" !
Carol Van Camp
The Garden Wizard
________________________________
To Feed....or...Not to Feed
It’s 100 Degrees Outside !

Do You Know What Your Plants are Doing?
You’ve seen him. The shirtless guy running down the street in scorching heat. He looks miserable... red-faced and ready to drop. Maybe he knows something I don’t. Getting ready for the Zombie Apocalypse? Olympic fame? Rational reasons to trot along under the blazing sun elude me.

So what does a bare-chested masochist have to do with plants?
The runner is forcing his body to defy its natural rhythm. Plants also have a natural rhythm. Plants conserve energy when the heat rises.
The plants in your landscaping are now in survival mode. That happened when temperatures crested 90 degrees.
Look at rose bushes. They aren’t blooming anymore. They have entered a state of dormancy. Still alive but not producing. They need water. They do not need forced growth.
What would force a plant to grow?
The wrong fertilizer would do that. I’m assuming most residents have a fertilizer delivery system in their irrigation system.
In the heat of summer, use a hot weather fertilizer with your irrigation system. Fertilizers have three numbers listed on the package. They represent, in order, the nutrients nitrogen, phosphorus and potassium.
Nitrogen produces lush, green foliage.
Phosphorous is needed for strong root development.
Potassium creates strong plant structure.
The designation for these nutrients on the fertilizer bag will be represented by three numbers separated by hyphens (eg.16-4-8). The higher the number, the greater that nutrient has been formulated into that particular package of fertilizer. A hot weather fertilizer will have equal amounts of all three nutrients. Think 7-7-7 or 9-9-9. When it is sizzling outside, check that the nitrogen content is low.
Nitrogen encourages new growth. Remember our over-exerted runner? High nitrogen content during hot, hot weather forces the plant to over-exert itself. Expect that perky new growth to burn. It’s not suppose to be there. Dismal results and the plant is not stronger for it either. Remember that old commercial, “You can’t fool Mother Nature!”? Bingo !
Some desert plants such as Texas Ranger Sage and Desert Willow will bloom in spite of the heat.

Texas Ranger Sage
The Texas Ranger is actually reacting to humidity. Some folks call it the Barometer Plant. It is truly a mystery that this particular sage will bloom 10 days after rainfall but doesn’t react to irrigation in the same way. I can’t find any botanical explanations for the Desert Willow’s tenacity. Mother Nature again, I guess.
If you have a pot of annuals stationed by the front door, manual watering, a dash of plant food and shade should keep them healthy and possibly blooming. No guarantees.
As for the rest of your plantings, nurture them for autumn vitality. Appropriate feeding will keep them healthier…for the long run.
So...let's keep all that "expensive" foliage as healthy and green as possible.
It's keeping them "green" or draining the "green" from your pocketbook !
Until the next time, this is your Garden Wizard wishing you and your plants a healthy life !
Carol VanCamp
The Garden Wizard
____________________________________
Gardening Cures from Your Kitchen
Okay! Okay! OKAY!!
Here is the recipe for the Rabbit Repellent I mentioned in my last article.
.jpg)
I also have included a rose spray and pesticide. The common ingredient in all these concoctions is liquid dish detergent. The dish detergent is the medium that makes the other ingredients stick to the plant.
Ultra Stinky Rabbit Repellent Spray
(not the official name but one whiff of this stuff and you’ll understand)
1 quart water
2 tbsp hot pepper sauce (Tabasco)**
1 tbsp garlic powder
2 tbsp liquid dish detergent
1 tbsp rubbing alcohol
1 raw egg
Mix all ingredients together and immediately transfer into a spray bottle.
The raw egg will rot and cause the mixture to smell like, what else?, a rotten egg.
Shake vigorously before each use. Use rubber gloves. Diligently try not to spray yourself anywhere. Shoes included. The odor will seep in and hang around for way too long. Sure-fire method to clear surrounding tables at the buffet.
** alternate ingredient: 2 tbsp hot chili sauce
Here is a good organic spray to take care of Powdery Mildew on roses.
Baking Soda Spray
! tbsp vegetable oil
1 quart distilled water
1 tbsp apple cider vinegar
1 tsp Listerine (yes, the mouthwash)
1 tbsp liquid dish detergent
1 ½ tbsp baking soda
Mix and transfer into a spray bottle.
Shake vigorously before each use.
Here is an organic pesticide:
Bug Off Spray
1 quart water
2 tbsp liquid dish detergent***
2 tbsp rubbing alcohol
Mix and transfer into a spray bottle.
Shake vigorously before each use.
Spray both sides of the leaves. The trick with this spray is to use it in the early morning and spray it off with a good strong stream of water an hour later. The goal is to stun ‘em and flush ‘em.
*** alternate ingredient: 2 tbsp peppermint soap (nope, don’t know where to get it)
These mix up in a wink. Right at the sink. (Quick! Name that song.) You aren’t Madame Rue, though.
These potions are not magic...or...toxic. If your pooch or your grand-child should drink any of these mixtures, it won’t “stay down” for long. Messy aftermath, but no trips to the emergency room either.
So..here's to sending those bunnies to Hare Heaven...
Carol Van Camp
The Garden Wizard
___________________________________
Those Wascally Wabbits
Elmer
Fudd must have lived in Sun City Anthem. Just like Elmer, who in our community
hasn’t wanted to blast the little cotton-tailed boogers into
oblivion?

I
have gathered together a list of eco-friendly rabbit repellents over the years.
Here are a few that have worked well for the
"pros".
1. Hot pepper flakes liberally sprinkled among
the posies is one
suggestion.
2. A spray-able potion of hot chili
sauce, water and raw egg is another. It really stinks and must be re-applied
almost daily.
3. I think coyote urine is the most
mysterious. Exactly how does one harvest coyote urine and redistribute it over
the landscape? Wouldn’t it be easier to just put the whole coyote in the
yard? Repellent and disposal in one sleek
package.
Our
local rabbits are ravenous critters so there are absolutely no 100% fool-proof
solutions.
The
easiest way, however, to keep the rabbits from compulsively chowing down on your
landscape is to plant the stuff they don’t like to eat. Again, no
guarantees.
If you have turf, resign
yourself to maintaining a giant salad bowl for the
bunnies.
Fescue
lawns are like candy to rabbits. Those sweet, tender, individual blades of grass
are irresistible.

Consider golf course
wisdom. Plant hybrid Bermuda grass. The rabbits will still feast on your
lawn but maybe not as
enthusiastically.

Santa
Ana and Tifgreen are favorite varieties. The lawn will brown in the winter and
green-up again in the spring. A hybrid Bermuda lawn will also be a bit more
water-efficient since it is a carpet-like grass. Bermuda grass doesn’t feel as
luxurious under bare feet.
Since
I have seen exactly zero residents picnicking and/or frolicking through their
front yards around here, the bare foot test simply doesn‘t apply. If you must
have green grass through all the seasons, try artificial turf. The rabbits
really, really won’t eat
that.
Want
a spot of color that probably won’t be nibbled to the ground in 24
hours?
Sage: Texas
Ranger (purple) and Autumn
(red)

Lantana:
Purple, Golden Shower, Irene. Irene blooms have golden centers ringed with hot
pink.

Germander:
blue-violet

Gazania:
multi-colored. Dense and carpet-like, gazania will cover a forsaken barren spot
easily.

Rosemary:
blue-violet

Vitex: aka
Chaste Tree: Purple

Vinca: pinks
and purples

Feathery
Cassia: bright yellow spring blossoms. Delicate, fern-like foliage year
round.

All have
interesting foliage and abundant seasonal blossoms. The afore mentioned plants
actually like the desert and its pitiful soil and minimal
water.
If
you wish to keep the plants ornamental, plant them in a
pot.
Here’s
the plus; a rabbit will usually bypass these plants in search of something a bit
more succulent. Even better, hummingbirds are attracted to them
also.
Bunnies
will bug you less (Get it?? Bugs Bunny??) if
they shun your plantings for tastier offerings “over
there”.
You
can always try pepper flakes as a repellant but I think you’ll be more satisfied
using them to garnish your next
pizza.
Got
a question or a concern ? Send us an email. We'll do our best to help you the
best we can.
Until
next time...Stay Green.
Carol
VanCamp
The
Garden Wizard
___________________________

Soon,
the Water District will start enumerating the days you may water your
residential landscaping. The primary, number one question that comes into the
Master Gardeners Help Line (702-257-5555) this time of year is about
watering.
How much? How often? How do I know?
Here is the answer:
it isn’t how often you water that counts. It is how deeply you water. How do you
know the depth the water is reaching? Buy a water gauge. Every nursery has
them.
In a perfect world, the guys who set up the stations of your
irrigation system would have set one station for trees; another station for
bushes; and a third station for small plants and flowers.
Your grass
would be a separate station. If you actually have that system, congratulations!
You are the exception.
For those of us who weren’t that fortunate,
supplementing the water on specific plants can keep them healthy.
There
are no hard and fast rules. Everyone has a micro-climate in their own yard.
Using the water gauge, you can discover what it is in your yard.
The rule
of thumb for trees is to water down 18 to 24 inches. Bushes need 12 inches of
deep water. Annuals, potted plants and turf, 4 or 5 inches.
Set the timer on your irrigation
system to start at 6 am with another dose at 7 am and yet another dose at 8 am.
Water 3 times over 3 hours in the morning before the heat sets in. Spacing the
watering allows “layers” of water to seep down into the root system. Close down
the emitters on small plants. Open them up fully for trees. Don’t allow run-off.
Again, use your water gauge.
Resist watering turf at night. That practice
encourages the growth of mold…and those nasty, nasty “water bugs”.
Yuck!
Trees suffer the most in our climate. Trees and their extensive
root systems need more deep water than a petunia plant. Take a water depth
measurement on your trees. Turn your hose on enough for a steady drip, drip,
drip and let each tree have about an hour of very slow watering. If the water
runs off, the drip is too powerful. Ease it back. Move the watering spot around
the perimeter of the tree every 15 minutes. Use that handy, dandy gauge you
bought to see how deeply that additional water has gone. Adjust accordingly. It
is very likely that you will only have to complete this exercise every couple of
months. Watch the tree. Look for changes. Your eyes are your best source of
information.
And now a little sermon about water conservation
!
Wars have been waged over this precious stuff. Lives have been lost
protecting and procuring it. Is it gold? Maybe oil? Nope. It’s water. There is
no life of any definition without water. Without water, The Big Blue Planet is
The Big Dead Planet.
It’s in our own best interest to use our water here
in the valley judiciously.
We in SCA have been blessed to be able to
purchase lovely homes in a prestigious community. However, if we (all citizens
of southern Nevada) squander water, we are in danger of severe rationing. Our
lovely homes won’t be worth the dynamite to blow them up without clean,
available water.
Many of us
moved here from soggy locations. What did we know about planting for only 4
inches of annual rainfall? We relied on landscapers to guide us in landscaping
our new homes. Many of them didn’t do us any favors. But now we are
wiser.

So, please, check the emitters on your
property for “gushers“. Replace rabbit-ravished vegetation with desert
vegetation (they won‘t eat it). Let’s become a community of the desert instead
of a community in the desert.
Carol Van Camp
The Garden Wizard
The Garden Wizard

Las Vegas Springs Preserve
The Las Vegas Springs Preserve is having its Spring Plant Sale on Saturday April 6, 8 am to 2 pm. Here is a link to its site:
The
promo speaks of drought-tolerant and desert
plants.
What is the difference?
A drought-tolerant plant is a plant which can survive in higher
temperatures and with less water. As with most plants, it will go dormant once
temperatures pass 90-ish. It will eventually croak without
enough water,
however.
A desert plant is naturally adapted to living in harsh
desert conditions. It is the survivor that evolved from its ancient
predecessors. The leaves are smaller. It doesn't respire as much (release water
and oxygen through its
leaves).
A
desert plant will go dormant and survive many, many weeks without any water at
all. Some creosote bushes are estimated to be thousands of years old. The plant
generally grows in a spreading formation so that it shades its own root system.
The root system is shallow in order to take advantage of any rainfall no matter
how little.
Most
importantly, a desert plant will use every single drop of water it
receives.
The
only difference between a Mesquite Tree and a Mesquite Bush is an abundance of
water.
For
a desert
plant....
Water = Grow, Grow,
Grow.
No water = hunker
down.
Why
use desert
plants?
Because
Sun City Anthem is in the desert. Sun City Anthem is in the Mojave Desert, as a
matter of fact, and the Mojave is a hum-dinger as far as deserts
go.
This
desert is harsh.
...Higher
high temperatures in the
summer.
... Lower
low temperatures in the
winter.
... Four
inches of annual rainfall. Four. That’s
it.
...The
soil is highly
alkaline.
And
then there is the caliche. Need I say
more?
I
understand that desert plants aren't very pretty. May I suggest putting the
pretty stuff up by the house in pots? Glorify your courtyard. Let the No Man’s
Land on the other side of the garage...go
native.
Plants indigenous to the
Mojave are Brittle Bush, Creosote and the Joshua Tree. In fact, Joshua
Trees are found nowhere else on earth. Brittle Bush and Creosote are all over
the Revere golf
courses.
And
did you know the pervasive fragrance smelled during one of our rainstorms
is creosote?
So,
if you are replacing vegetation, please consider using desert plants. The
Springs Preserve will have plenty from which to
choose.
Links
for more information on desert
plants:
Until
the next time.
Carol
Van Camp
The
Garden Wizard
____________________
Pruning

Pruning
is the systematic and selective (very important word) removal of dead or
overgrown branches. Correct pruning improves the health of your plants and the
presentation of your
property.
There
are some basics.
1.
Keep your shears and saws sharp.
2.
Step back and survey your work as you
go.
3.
Remember, plants put out new growth at the spot where they are
pruned.
Palms are an
exception and I’ll address that
too.
There
are 3 popular pruning travesties favored in Sun City
Anthem:
The Screaming
Tree, Pencil Pointed Palms, and Texas Ranger
Topiary.
Inexplicably,
there are trees in this community rendered into two blank branches reaching to
the sky in supplication.
“What
did I ever do to these guys?!?!” they seem to visually scream; hence the Screaming
Tree.
Unless
you are creating a landmark for a treasure map, don’t do
that.
A
good arborist (certified tree person) will never take more than one third of the
existing growth of a tree.
To
prune a tree, cut the offending branch from the tree at the spot from which it
grew out of the original branch. The cut should conform with the remaining
branch.
Then
dab on some Elmer’s Glue to seal the cut. If the tree has gotten out of hand,
take a couple seasons to coax it back into a pleasant, natural
shape.
The natural, healthy form
of Mexican Palm foliage is round. It’s a big old ball at the
end of a uniformly sized trunk. It is not a few fronds sprouting out of an
ever-diminishing trunk.
Arborists call this practice Pencil Pointing.
The process slowly but surely kills a perfectly good palm tree. The heart of the palm is the point from which it grows. The heart is top-center of the trunk. Too few fronds means no protection from heat, cold or critters for the heart. Damage the heart and you have a $200 removal expense. Trim fronds after they have died. They serve a vital purpose up until that point.

Finally, Texas Ranger
Topiary.
This is the practice of forming a sage brush into a sphere or cube. Peek inside one of these fanciful shapes and you will find an essentially dead plant. Trimming off only the ends causes excessive branching. The bush puts out literally thousands of tiny branches but there is still only one root system to deliver water and nutrition. The entire bush needs access to air, sunlight and water.
This is the practice of forming a sage brush into a sphere or cube. Peek inside one of these fanciful shapes and you will find an essentially dead plant. Trimming off only the ends causes excessive branching. The bush puts out literally thousands of tiny branches but there is still only one root system to deliver water and nutrition. The entire bush needs access to air, sunlight and water.

The
good news is that Texas Ranger Sage is a desert plant. That makes it a survivor.
In autumn, you can cut your Texas Ranger down to 12
inches.
Really
!
Using
the same pruning method as with a tree, reduce the number of main branches
coming out of the ground to 3 or 4.
It
will look forlorn over the winter but will reward you with a beautiful new
healthy and naturally shaped bush in the
spring.
The
Master Gardeners of Southern Nevada have a Help line: (702)
257-5555.
It's
operational from 8:00 am to 5:00 pm weekdays. A certified Master Gardener will
answer.
Got
a question ? Have something you'd like to discuss ?
Send
it to AnthemOpinions@gmail.com and we'll get to it as quickly as we
can.
Until
next time.
Carol
VanCamp
The
Garden Wizard
No comments:
Post a Comment