
Air Conditioners
They Require Cleaning Maintenance

During the hot months, your air conditioner works hard so you and your family can stay cool.
Unfortunately, the favor is not always returned.
Many air conditioning units are not properly maintained, which can lead to other problems later on.
It is always a good idea to clean your air conditioner regularly.
While one cleaning a year should be sufficient, if the unit is used heavily then it might need more attention.
Filters may need changing more often during the hot months since you will be using the unit more often.
There are two basic types of air conditioners: window units and central air conditioners.
A window air conditioner is generally used to cool a single room or area, while the central air conditioner works to chill the entire home.
In this article we'll only cover central air because rarely do we see any window units in our community.
Both kinds of air conditioners need to be properly cared for.
A clean air conditioner is not only more efficient, it is also safer to operate. To ensure that your air conditioning unit is clean and ready to use, there are a few instructions you'll need to follow.
To clean a central air conditioner:
1. Turn the power off on the air conditioning unit.
Start by cleaning the outdoor part of the air conditioner. The fan will need to be cleaned of any debris that may be sticking to it.
Wipe off the coils and the interior of the air conditioner.
2. Look inside the air conditioner.
Check for any potential problems like leaks.
Make sure that if anything seems wrong, you contact a professional to have it fixed.
3. If any parts of the motor need lubricating, use a few drops of oil to do the job.
4. Clean or replace filters that are dirty.
4. Clean or replace filters that are dirty.
This may need to be done often during times of heavy use.
Check out these additional videos.
Mr. Fix-It
_____________________
Swamp Cooler: Not Tough to Install

Swamp Coolers vs. Air Conditioners
Swamp Coolers vs. Air Conditioners
So it's an air conditioner, right?
Technically, yes -- it conditions the air by cooling it, but it works much differently than what we commonly think of as an air conditioner.
Standard AC units work by passing air over a set of coils filled with a refrigerant like Freon (a trade name for a variety of chemical blends), which heats and cools as it's compressed and expands.
The air is cooled by the coils, sent into your house, and then re-circulated over and over through the machine, venting hot air generated in the process to the outside.
It's a closed process -- leaving a window or door open allows the cool air to escape and makes the air conditioner work harder to supply cold air.
Swamp coolers are an open system.
They rely on the flow of air through the building to direct the cool air, and since they always need hot, dry air to evaporate the water, it needs to displace the air already in the house.
Both systems can use either a large central unit or small window units, but air from the swamp cooler needs a way out.
Opening and closing windows and doors controls the air flow from the swamp cooler to different parts of the house, while central air conditioners use ducts to direct the flow.
Swamp coolers can also use ducts in some cases, but they need to be larger than traditional air conditioner ducts to account for a greater flow of air from the swamp cooler.
Standard air conditioners also dry the air, condensing water vapor from the cooled room as it passes over the cold coils.
The water drains outside -- that's the distinctive drip you'll feel if you stand under a window air conditioning unit long enough.
The result is a dryer room, and in humid climates, that can be a good thing. Too much humidity can prevent perspiration, which is how we cool ourselves naturally.
Since swamp coolers work by putting water into the dry air, they act as humidifiers.
This is great in dryer climates, because humidity can also be too low for comfort.
Under the right conditions the water-laden breeze also can have a secondary effect of helping the skin's perspiration, resulting in an even cooler feel than the swamp cooler would give on its own.
Because of the different ways they work, you can't run a swamp cooler and a standard air conditioner in the same house.
They would cancel each other out, just like running a dehumidifier and a humidifier in the same room.
Now that you know the difference....how do you go about installing a swamp cooler?
Installing a swamp cooler (sometimes known as an evaporative cooler) is a fairly heavy duty task.
Not because it is terribly complex, but rather because it is actually a heavy job.
Those coolers aren't exactly light !
Just because it is a heavy task, doesn't mean that you can't do the job.
All you need to do is follow these instructions, and make sure that you have a friend to help you out.
Install support assembly.
Most swamp coolers will come with a support assembly that you can use. However, if yours did not then you can go to your local home improvement store and purchase one.
Make sure that it will fit your particular swamp cooler though, and be sure that you follow the directions from the manufacturer when installing the support assembly.
Build up the outside window sill, if necessary, as directed by the manufacturer.
Place cooler on assembly.
With the help of a friend, place the swamp cooler onto the support assembly.
While one of you is supporting the unit as much as possible on the assembly, attach the brackets and the wall hangers to the actual unit itself.
As you do this, make sure that you are following the manufacturer's directions properly.
Run the water line.
From the outside water source, connect the water line to the cooler.
However, make sure that there is a cutoff valve installed between the water source and the cooler.
This cutoff valve will be invaluable come winter time so that you can drain the system, and not have anything damaged due to the cold weather.
Install air vent.
In the kit for the swamp cooler, there should be an air vent cover that still needs to be attached. Attach that cover now.
This cool-air vent is what will be directing the cool air into your home.
You can plug in the cooler to any power outlet in your home, simply make sure that it is a grounded 120-volt circuit before you do though.
Congratulations, you have now finished installing your new swamp air cooler.
There is only one thing left for you to do, and that is to ensure that there are no leaks around the cooler and the window.
Basically you need to fill in any void space around the cooler.
While it is a good idea to leave a window open to help deal with excessive humidity from a swamp cooler, you still want to have a tight seal with the window that the cooler is in.
This will help prevent any water from rain coming in, as well as preventing any creepy crawlies from getting in.
Want to see just how its done?
Here are a few videos to help you along !
How to install it...
How to maintain it...
Good luck !
Mr. Fix-It
So it's an air conditioner, right?
Technically, yes -- it conditions the air by cooling it, but it works much differently than what we commonly think of as an air conditioner.
Standard AC units work by passing air over a set of coils filled with a refrigerant like Freon (a trade name for a variety of chemical blends), which heats and cools as it's compressed and expands.
The air is cooled by the coils, sent into your house, and then re-circulated over and over through the machine, venting hot air generated in the process to the outside.
It's a closed process -- leaving a window or door open allows the cool air to escape and makes the air conditioner work harder to supply cold air.
Swamp coolers are an open system.
They rely on the flow of air through the building to direct the cool air, and since they always need hot, dry air to evaporate the water, it needs to displace the air already in the house.
Both systems can use either a large central unit or small window units, but air from the swamp cooler needs a way out.
Opening and closing windows and doors controls the air flow from the swamp cooler to different parts of the house, while central air conditioners use ducts to direct the flow.
Swamp coolers can also use ducts in some cases, but they need to be larger than traditional air conditioner ducts to account for a greater flow of air from the swamp cooler.
Standard air conditioners also dry the air, condensing water vapor from the cooled room as it passes over the cold coils.
The water drains outside -- that's the distinctive drip you'll feel if you stand under a window air conditioning unit long enough.
The result is a dryer room, and in humid climates, that can be a good thing. Too much humidity can prevent perspiration, which is how we cool ourselves naturally.
Since swamp coolers work by putting water into the dry air, they act as humidifiers.
This is great in dryer climates, because humidity can also be too low for comfort.
Under the right conditions the water-laden breeze also can have a secondary effect of helping the skin's perspiration, resulting in an even cooler feel than the swamp cooler would give on its own.
Because of the different ways they work, you can't run a swamp cooler and a standard air conditioner in the same house.
They would cancel each other out, just like running a dehumidifier and a humidifier in the same room.
Now that you know the difference....how do you go about installing a swamp cooler?
Installing a swamp cooler (sometimes known as an evaporative cooler) is a fairly heavy duty task.
__________________________
Safe Electrical Strategies

In the world of home improvement, perhaps the single most stressful and dangerous item to work with is electricity.
That being said, there are some electrical safety strategies that you can use to make the whole experience as safe as possible. What may surprise many people is that these strategies and ideas are largely common sense.
But, as the old saying goes:
"Common sense isn't common"
Have a guidebook
Whether you are doing a project that you have done a thousand times before, or you are trying something new, make sure that you have a guidebook with you.
These books, or checklists, can be utilized to ensure that you are doing the project correctly, and help you make sure that you do not miss any steps.
Always have one of these on hand from the very beginning of your project.
Verify everything
Never assume that the wires are hooked up correctly. This means that you should always test to make sure which wires are hot, and which ones are grounded.
You can use a simple voltmeter to do this usually, but this should be done before you actually begin doing the work.
Check your circuit breaker
Before you begin doing any work, make sure that your circuit breaker can actually handle the capacity of the new project.
Perhaps the simplest way to do this is to find on each device that you will be attaching to the circuit breaker what the watts and amps used are, add them all together, and then make sure that you stay under what the max amount is.
Always shut off power
One of the best ways to that you can assure that you do not get hurt while working with electricity, is to shut off all the power to the area that you are working on.
The best way tot do this is to cut off the power at the circuit breaker itself.
If there is no power going to that specific area that you are working on, then you can't really get electrocuted, can you?
Leave signs
When you cut off the power at the circuit breaker, make sure that you leave a note for other people to see.
A simple note is all that you need, something that says "Working on wires, Don't Touch!" will suffice.
This way people will not inadvertently turn the power back on and you get hurt.
Use protective gear
Always wear protective gear when working with electricity.
Some examples of this are to wear rubberized gloves and rubber soled shoes.
In addition, always use tools that have a rubberized handle. The rubber will act as an insulator, and help protect you from any shocks.
Always ask questions
If, as you are working on a project, you find that you have a question then you need to stop.
Do not continue working on a project you don't know how to complete.
Find someone and ask a question, or refer back to your guidebook.
Here are a few videos that give you a few tips on how to handle electricity...using common sense...so you can avoid this !

Mr. Fix-It
______________________________
Making a Room Look Larger with Windows

If you're looking for inexpensive ways to make small rooms appear larger, you can always use the trick that realtors use when they stage rooms for an open house; they use mirrors to make rooms and spaces appear larger than they actually are.
For instance, if a room doesn't have much to offer in square footage, you can strategically place mirrors—or mirrored panels or tiles—on a wall, or even as a framed group placed at the base of a wall.

The mirrors will allow the room to look brighter and larger by reflecting natural light during the day.
If the room is very small, place one side table on an angle, with a simple chair next to it at the same angle, with a floor lamp behind, but slightly to the side of, the chair.
Insert a 100-watt bulb in the lamp and make sure that the shade is appropriate for the lamp, and allows light to penetrate the shade.
Now, place a large mirror on the wall behind the lamp and allow the mirror to reflect the bright light, illuminating the room.
Place another mirror on the opposite wall, allowing the mirrors to reflect each other, and making the room appear brighter and larger.
Then, place mirrors around the room in various positions, reflecting natural light and lamplight, and then take another photograph.
Don't move furniture, curtains, wall hangings, or what-nots.
Just take two sets of photographs of the room; one with mirrors, and one without. Then, compare and contrast the two scenes in the photographs and you will see quite a difference in how the room appears larger with the mirrors, as opposed to how the room looks so much smaller without them.

If a room has little to offer by way of decor, you can place mirrors next to a lamp, plant, or wall hanging to replicate the effect of having more accessories.
More importantly, you can make a small space appear larger if you use mirrors to reflect windows.
If you have a small room with one window, place a large mirror on the opposite wall to reflect the mirror, and make it appear that there are two windows in the room, and not just one.

Adding the appearance of more windows to a room tricks the visitor into thinking that the room is actually larger than it is.
Looking for a few ideas about how to make a room look bigger...with a mirror ?
Here are a few ideas on how to make that bedroom look bigger...with mirrors !
Here's a few other ideas on how to make a room look bigger...using a few other tricks..with a mirror !
Mr. Fix-It
_____________________________
Electric Water Heater Replacement

If you find that your hot water isn't lasting as long as it should, your water heater might have a problem.
Because most water heaters are simple devices, troubleshooting the problem isn't difficult.
Perhaps the heating element is broken, or maybe the high temperature cutoff switch has tripped.
Sometimes sediment may settle within the tank, causing the heating element to fail.
The pressure relief valve might have malfunctioned, causing water not to heat properly.
Or the problem may be as simple as having to adjust your water heater thermostat to a higher level !
If you've ruled out all of those variables, or if your water heater is cracked and leaks water, then it is time to replace the unit.
Make sure that you have help moving the old and new water heaters, andthen...
... follow these steps for replacing an electric water heater.
1. Turn off the electric supply to the water heater at the main electric panel, turn off the water supply at the main shut off valve, and covering the floor with a large tarp.
2. Turn on all of the hot water house taps to drain the hot water from the water heater, and then attach a garden hose to the heater's drain cock.
 Drain the water from the heater into the floor drain or into a bucket.
3. Using a pipe wrench, remove the water lines from the heater and then remove the old heater to a section of the tarp.
4. Have your helper grasp one side of the heater, while you grasp the other, and place the new heater into position.
5. Always follow the installation directions that accompany a new water heater.
You will need to connect the water lines to the heater and then you might need to install temperature and pressure relief valves.
Following the instructions, make the connections from the wires under the electrical plate to the wires from the main panel.
Once you've connected the new heater, turn the hot water taps off in the house, turn the water back on at the main valve, and then fill the water heater completely.
Drain the water from the heater into the floor drain or into a bucket.
3. Using a pipe wrench, remove the water lines from the heater and then remove the old heater to a section of the tarp.
4. Have your helper grasp one side of the heater, while you grasp the other, and place the new heater into position.
5. Always follow the installation directions that accompany a new water heater.
You will need to connect the water lines to the heater and then you might need to install temperature and pressure relief valves.
Following the instructions, make the connections from the wires under the electrical plate to the wires from the main panel.
Once you've connected the new heater, turn the hot water taps off in the house, turn the water back on at the main valve, and then fill the water heater completely.
To remove sediment from the tank, drain about a gallon of water from the drain cock.
Turn on the electrical power to the heater and then set the thermostat.
Here is a three part video explanation of how to replace the unit...
1. Removing the old water heater
2. Placing and plumbing the new water heater
3. Filling the new water heater and placing it in service.
Finally, we have some other helpful hints for you if you decide to tackle this task yourself !
Mr. Fix-It
_____________________________

If you're looking for inexpensive ways to make small rooms appear larger, you can always use the trick that realtors use when they stage rooms for an open house; they use mirrors to make rooms and spaces appear larger than they actually are.
For instance, if a room doesn't have much to offer in square footage, you can strategically place mirrors—or mirrored panels or tiles—on a wall, or even as a framed group placed at the base of a wall.

The mirrors will allow the room to look brighter and larger by reflecting natural light during the day.
If the room is very small, place one side table on an angle, with a simple chair next to it at the same angle, with a floor lamp behind, but slightly to the side of, the chair.
Insert a 100-watt bulb in the lamp and make sure that the shade is appropriate for the lamp, and allows light to penetrate the shade.
Now, place a large mirror on the wall behind the lamp and allow the mirror to reflect the bright light, illuminating the room.
Place another mirror on the opposite wall, allowing the mirrors to reflect each other, and making the room appear brighter and larger.
Then, place mirrors around the room in various positions, reflecting natural light and lamplight, and then take another photograph.
Don't move furniture, curtains, wall hangings, or what-nots.
Just take two sets of photographs of the room; one with mirrors, and one without. Then, compare and contrast the two scenes in the photographs and you will see quite a difference in how the room appears larger with the mirrors, as opposed to how the room looks so much smaller without them.

If a room has little to offer by way of decor, you can place mirrors next to a lamp, plant, or wall hanging to replicate the effect of having more accessories.
More importantly, you can make a small space appear larger if you use mirrors to reflect windows.
If you have a small room with one window, place a large mirror on the opposite wall to reflect the mirror, and make it appear that there are two windows in the room, and not just one.

Adding the appearance of more windows to a room tricks the visitor into thinking that the room is actually larger than it is.
Looking for a few ideas about how to make a room look bigger...with a mirror ?
Here are a few ideas on how to make that bedroom look bigger...with mirrors !
Here's a few other ideas on how to make a room look bigger...using a few other tricks..with a mirror !
Mr. Fix-It
_____________________________
If you find that your hot water isn't lasting as long as it should, your water heater might have a problem.

2. Placing and plumbing the new water heater
3. Filling the new water heater and placing it in service.
Decorating Inside Your Home

Perhaps you're a new homeowner and want to decorate each room in your house.
Or maybe you simply want to update a look that you've had for a few years, giving it a fresh look.
Whatever your reasons for wanting to decorate and design a room, remember to always reflect your personal charisma and flair.
For instance, while the aesthetic lines of traditional furnishings make a home comfortable, you may want to include splashes of color in each room to offset the muted earth tones.
Interior decorating designs can be either contemporary or unusual, and can fall anywhere in between.
How you decorate a room depends entirely on your own taste.
Here are a few interior decorating ideas for updating a room or changing the look entirely:
1.
Paint the ceiling and walls two different colors, or paint opposing walls different colors.

Playing with paint can add a dramatic flair.
And...there are computer programs to help you before you even pick up a brush !
2.
If you have a very large room, arrange furniture to make it appear that there are two distinct rooms within one.
Use a couch or a line of small bookcases to separate the spaces.

3.
Add mirrors to small rooms to make them appear larger, and remove knick-knacks from tables and bookcase tops.

Small rooms can become overwhelmed and appear cluttered if you load them with too many whatnots.
In a small space, place a lovely clock on the wall above a bookcase instead of lining the top of it with candles and plants.Here are some additional tips on how to make a small room look bigger.
In a small space, place a lovely clock on the wall above a bookcase instead of lining the top of it with candles and plants.Here are some additional tips on how to make a small room look bigger.
In a living room, consider using hanging lamps instead of end tables with a lamp on each.
5.
A great substitute for an expensive headboard is a beautiful set of drapes and a curtain rod.
A great substitute for an expensive headboard is a beautiful set of drapes and a curtain rod.
6.
Simply hang the decorative rod and drapes where the headboard would be, and you've created a designer look seen often in catalogues and magazines.
Simply hang the decorative rod and drapes where the headboard would be, and you've created a designer look seen often in catalogues and magazines.
7.
To update a bathroom design, simply change the shower curtain and then add matching bath towels and washcloths.
To update a bathroom design, simply change the shower curtain and then add matching bath towels and washcloths.

You can also place a dish of contrasting colored soaps or bath beads into a lovely glass dish, and place them on the vanity.
Visit your local discount store and purchase inexpensive yard ornaments and then place them all over your home in inconspicuous places.
A large ceramic or clay rabbit placed on the floor next to your fireplace and in between a bookcase will add whimsy to your room decor.
The next time you visit a bookstore, check the books and magazines available for home deco, and get some ideas from looking at the pictures.
You may even seek out an interior designer and ask for advice, but be prepared to pay a hefty price for that advice.
Mr. Fix-It
_______________________________
A New Kitchen Island ?

If you are looking for a simple, though effective, method for giving your kitchen a new look....if you don't already have one...or...if you're looking to change the one you already have....
...then you may want to consider installing a new kitchen island.
Kitchen islands are wonderful items in that they are multifunctional.
Not only do they provide counter space that offers a larger area to work and prepare your meals, they can also provide some extra and often much needed storage space.
Installing a kitchen island is actually a fairly easy and simple building project that most people can accomplish in a few hours. All you really need to do is follow these simple steps, and you will quickly find that you have a new kitchen island to play around with.
Mark your spot
Have a friend help you place the island exactly where you would like it to go in your kitchen.
The reason that you have a friend help you is simple, these things are heavy.
Once you have your island in place, trace the base of the island with a pencil.
This outline will let you know where you should, and should not, place your cleats.
Create some cleats
Pickup and move the island out of the way of the work area.
Using the outline on the floor as a guide cut some short 2 inch x 4 inch pieces of wood so that they will fit along the interior edges of the outline.
You should only need three or four of these cleats.
Screw them into place on the floor.
Set the island in position
Replace the island, making sure that the cleats are flush against the cabinet edges of the island.
Once the island is in place begin checking to ensure that everything is nice and level.
If necessary shim the island to make it as level as possible.
Once the island is level, go around the base and begin drilling some guide holes for the nails or screws that will attach the island to the cleats.
Attach the island to the cleats
Following the guide holes that you have, begin attaching the island to the cleats.
This will help ensure that the island is firm and steady, and will not wobble around while you do your work.
These are basically to clean up from your work, and to prepare the island for use.
Stain or paint the island to match the decor of the rest of your kitchen, and set the countertop onto the island.
Here are a few design and installation videos to help you along in this
.jpeg)
.jpeg)
Once everything is in place, stained, and cleaned...
Have fun!
Mr. Fix-It
_________________________________
New Blinds Aren't Difficult to Hang

Whether you recently moved into a new home, or you have lived in your current residence for an extended period of time, you may feel the urge to switch up your home decor.
One excellent way to change your home decor is to alter the color texture or design of your blinds.
Hanging new blinds is often more difficult than making the initial decision to change them.
Follow a few simple steps with a few simple tools and you will be on your way to beautiful, new blinds in no time.
There are four options available to you and your budget for hanging new blinds:
1. Glue a wooden block to the wall to hang the curtains or the blinds.
Take a quick trip to your local hardware store and purchase wooden blocks (pine, cherry, olive) that fit the style of your curtains.
You may wish to take proper measurements prior to purchasing your wooden blocks so that the blocks are not obvious.
You will also want to purchase construction adhesive for wood.
Purchase decorative hooks to drill into the wooden blocks so that you can properly hang, or mount, your curtain rod or blind pole.
2. Your second option is to purchase a more decorative block (could be gold plated, painted or even made out of quality plastic).
This decorative block is meant to enhance the quality and style of your blinds or curtains. Bring along a sample photo of your blinds or a sample of the fabric of your curtains to properly match with a decorative block choice.
To secure a variety of options, be sure to check online or check antique stores in your town.
Mount the rod or pole just like with the wooden block.
3. If you are in a hurry or are not picky about the appearance of your hanging mechanism, use plain plastic or metal hooks to mount your pole or rod. Using a drill bit, install the hooks appropriately.
If your curtains or blinds have a decorative flare to them, they may have an additional piece that covers where they are mounted, thus making this option cost effective.
4. Your last option for hanging new blinds is to install a wall fastener.
If your walls are built with drywall, this option may be the best for you.
Drywall often leaves empty spaces immediately behind the wall, thus making it extremely effective to use raptor anchors to properly secure your hook.
A raptor anchor is a relatively inexpensive hook that wraps around the back of the wall to secure the item you are drilling into the wall.
New beautiful blinds can take a plain room and make it a stunning one....and practical as well.
Getting the right ones can reduce or eliminate glare that can also allow you to enjoy a TV show if your home gets the morning sun.
Here are a few helpful videos that can help you get the job done.
Want a few ideas on how to reduce glare?
How about motorized blinds...to reduce glare?
 Mr. Fix-It
Whether you recently moved into a new home, or you have lived in your current residence for an extended period of time, you may feel the urge to switch up your home decor.
To secure a variety of options, be sure to check online or check antique stores in your town.
___________________________
Garage Remodeling

For some reason, the garage is one of the most often remodeled rooms in the home.Perhaps this is because due to the fact that when people remodel their garage, they forget a few things and then have to do it over again.
If you are planning to remodel your garage, keep in mind these necessary garage upgrades. That way you only have to do the job once !

Space
It almost seems like you can never have too much space in your garage.
When planning your garage upgrades though, keep in mind that while it may be nice to have unlimited space in your garage, it isn't really practical to have a garage that is as big as your house.
Keep your desires and your needs balanced and realistic.
To do this though, you need to have a purpose for your garage in mind.
Will it be storing your cars?
Will it be used as a storage room?
Have a single purpose in mind and work around that.
Storage
Regardless of what the primary purpose for your garage is going to be, you need to make sure that you have plenty of storage room.
At the very least, you need to ensure that you are able to properly store the items that you keep in your garage.
For example, if you use your garage as a game room, then you may want to think about creating some storage for the games.
Insulation
When you upgrade or remodel your garage, make sure that it is properly insulated.
This includes the garage door.
An improperly insulated garage can become horrendously cold during the winter and exceptionally hot during the summer.
Either of these can lead to higher energy bills and an uncomfortable situation for you when you use the garage.
Soundproofing
Some may say that soundproofing your garage may not be necessary, strictly speaking.
However, if you are in the rest of the house do you really want to hear the noise coming from the garage?
Those cars getting fixed, the music being practiced, or even the games being played can all get pretty loud.
At the very least, soundproofing your garage will provide peace and quiet for the rest of the home.

Here's a few ideas on how to make your garage more useful...and maximize the space.
As you can see, there's more to a garage than a car...and...golf cart !
Mr. Fix-It
If you are planning to remodel your garage, keep in mind these necessary garage upgrades. That way you only have to do the job once !
Space
It almost seems like you can never have too much space in your garage.
When planning your garage upgrades though, keep in mind that while it may be nice to have unlimited space in your garage, it isn't really practical to have a garage that is as big as your house.
Keep your desires and your needs balanced and realistic.
To do this though, you need to have a purpose for your garage in mind.
To do this though, you need to have a purpose for your garage in mind.
Will it be storing your cars?
Will it be used as a storage room?
Have a single purpose in mind and work around that.
Storage
Here's a few ideas on how to make your garage more useful...and maximize the space.
As you can see, there's more to a garage than a car...and...golf cart !
Mr. Fix-It
____________________
Fixing Cabinet Hardware

One of the easiest ways to give your old cabinetry a new look is by simply replacing existing hardware.
Surprisingly though, replacing cabinet hardware can be a little trickier than you may think at first glance. The reason for this is that the vast majority of the impression we get from our cabinets is the hardware that is used.
The right accent piece can help perfect the look you want, while the wrong piece can make even the most beautiful cabinets look horrible.
The actual process of replacing cabinet hardware is actually pretty easy though.
All you need to do is follow these easy simple steps, and you will have your cabinet hardware replaced in almost no time at all.
Remove old hardware
Take off the old pieces of hardware by removing the screw that hold it them in place. Usually you can remove the old hardware by opening the cabinet door, and looking on the back side for the screws.
Place all old screws in a bowl for safe keeping. Be sure that you also remove any plates (also called escutcheons) as well.
Use old hardware as a template
If you don't already have replacement hardware, take one of the old sets with you to your local home improvement store to use as a template.
This is better than simply taking a few measurements, since you know that a similar sized unit will fit the existing holes.
Purchase a sample
Before you purchase enough hardware to replace every thing, purchase a sample. This sample will allow you to test out the final look, without making the often expensive commitment that such purchases can entail.
Make new holes as necessary
Unless you have purchased a new set of hardware that has the exact same measurements as the old units, you will need to make some new holes.
Carefully take some measurements of the new hardware, and mark the corresponding locations on the inside of the cabinets.
Make the new holes relative to the old ones, so that you already have them centered as much as possible.
Fill the old holes with wood putty to help maintain an even strength and appearance.
Reinstall the hardware
Install your new hardware in the new or existing holes, and take a look.
If the results are what you like, then go out and purchase enough new hardware to replace the old.
At this time, be sure that you also purchase enough wood putty if you need it.
Check out these helpful videos to guide you through the process.
https://www.youtube.com/watch?v=fpIvfb_XBtU
Mr. Fix-It
___________________

.jpeg) It's time I spoke out....about my dear husband....the one who has Anthem Opinions co-owner, Allen Weintraub, write these "Mr. Fix-It" articles.
I want to say....thank you, Allen...
It's time I spoke out....about my dear husband....the one who has Anthem Opinions co-owner, Allen Weintraub, write these "Mr. Fix-It" articles.
I want to say....thank you, Allen...
...because this is how my dear husband, Dick, would fix things around our home.
The moral of the story...in our household...

My Husband's Ability to Fix Things

Don't have a spoon?
No Problem...
 Husband: "I can fix that!"
Seat belt broken?
No Problem...
 Husband: "I can fix that!"
New TV too big for the old cabinet?
No Problem...
 Husband: "I can fix that!"
No bottle opener?
No Problem...
 Husband: "I can fix that!"
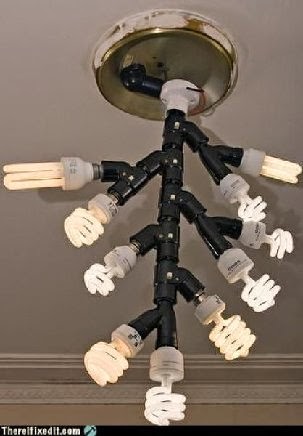
Room too dark using compact fluorescent lighting?
No Problem...
Husband: "I can fix that!"
Room too dark using compact fluorescent lighting?
No Problem...
 Husband: "I can fix that!"
Car stereo stolen?
No Problem...
 Husband: "I can fix that!"
Bookshelf cracking under the weight?
No Problem...
Husband: "I can fix that!"
Bookshelf cracking under the weight?
No Problem...
 Husband: "I can fix that!"
Ice chest not big enough for the party?
No Problem....
 Husband: "I can fix that!"
Can't read the ATM screen?
No Problem...
 Husband: "I can fix that!"
Car imported from the wrong country?
No Problem...
 Husband: "I can fix that!"
Satellite signal goes out when it rains?
No Problem...
 Husband: "I can fix that!"
Electric stove broken & can't heat coffee?
No Problem...
 Husband: "I fixed that!"
Windshield Wiper motor burned out?
No Problem...
 Husband: "I can fix that!"
Display rack at the grocery store falling over?
No Problem...
 Husband: "I can fix that!"
Car can't be ordered with the 'Wood Trim' option?
No Problem...
 Husband: "I can fix that!"
Car exhaust pipe dragging?
No Problem...
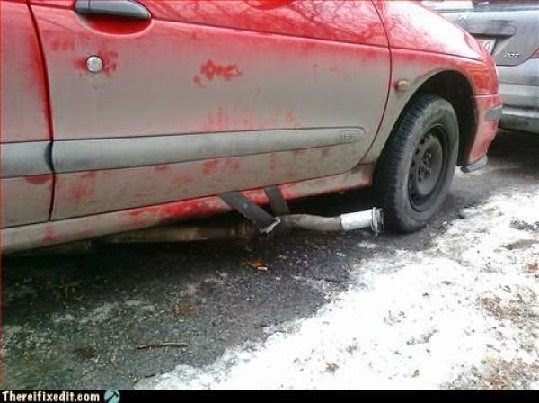 Husband: "I can fix that!"
And - last but not least...
Kids Run out of diapers for the grandchildren?
A Problem...but...not to worry...
 Husband: "I can fix that!"


Miss Fix-It
__________________________
Storm Door Installations
.jpeg)
Have you ever noticed how nice it is to sometimes simply open your door and let the fresh air in?
Unless you have a storm door, this can present some problems.
These problems can range from letting in all kinds of creepy crawlies, to letting your dog or cat out.
If you don't already have a storm door, don't worry, all you need to do is install one.
Installing a storm door is surprisingly easy.
In fact, it is so easy that, as long as you follow these steps and have the proper tools and materials, you can have a new storm door in place in less than an hour.
Here's what you'll need....
Materials
Storm door
Wood spacer strips
Casing nails
Hacksaw
Hammer
Level
Tape measure
Masking tape
Marker
Drill
Drill bits
Screwdrivers (Philips and straight)
Process
 Familiarize yourself with the instructions.
Before beginning any storm door installation, make sure that you familiarize yourself with the manufacturer's instructions.
These instructions will give you more detailed information about the proper installation of that particular model.
If there are any conflicts between the manufacturers directions and these instructions, the manufacturers directions take precedence.
Determine what side your channel will be on.
Each storm door will have a piece called a "Z-channel". It get's it's name because it looks something like a Z , and it is usually premarked for the hinges.
Place the channel on against your door opening, and mark the top with a piece of tape.
Cut the channel strips to size.
Remove 1/8 inch from the top of the Z channel strip from where the top of the channel will meat the top of the opening.
This will allow enough space for the drip cap to be installed later on, if you haven't already done so according to the manufacturers directions.
Position the channel properly.
Place the Z-channel against the hinge side of your door, and begin to attach the channel.
This channel should be placed about 1/8 inch above the top of the door (to provide space for the door to close with the drip cap in place).
Set the doorway.
Set the storm door into your doorway, and ensure everything is plumb with the help of a level.
Have a friend help you to ensure that everything is level by driving a couple of screws to hold the door in place.
Make any adjustments as necessary before installing the remaining screws.
Install your drip cap and channel.
If you have not already done so, you should now install your drip cap onto the door.
This will help prevent any water from "dripping" down into the doorway when it is installed.
Finish attaching any remaining screws to hold the Z-channel in place.
Attach the door sweep.
Once you have the door hung, be sure that you attach the door sweep to the bottom of the door.
This will help ensure that no creepy crawlies can get past your door, as well as help provide a little more insulation for the home when both doors are closed.
Mount your handles.
All you have to do how is install the door handles, and you are finished.
As you do this, make sure that you are following the manufacturers directions closely.

Here's a preliminary video that will give you an idea of the process.
Here's a more detailed 2 part video on the installation.
Finally, if you already have a storm door and it needs to be replaced, you might want to check out this video.
Mr. Fix-It
______________________________
Wainscote Additions
.jpeg)
Adding wainscoting to any room has become much easier in recent years. This is in large part due to the pre-made paneling that you can purchase at many, if not all, local home improvement stores.
By following these simple guidelines, you will be able to add some beautiful
wainscoting to just about any room in a single weekend. You will be amazed at how easy it is to do this kind of work yourself.
Measure
Begin adding wainscoting to your home by taking some measurements.
Measure form the floor to where you want the top of your paneling to go. Typically this is going to be about four feet from the floor.
After you decide how far up you will be going, it is time to measure the length that you will need. To do this, simply measure the length of the walls onto which you are placing the wainscoting. Be sure to write this all down.
Get materials
Take the measurements to your local home improvement store and get the paneling that you will need. Take your pick from the different styles available, though you should try to go with something that evokes the feeling of traditional wainscoting (i.e. vertical lines).
Be sure that you get your paneling unfinished, so that you can paint over it when you are finally finished with your project.
In addition to the paneling, you should also pick up some construction adhesive to glue the paneling to the walls, some 10d, 6d, and 2d finish nails, wood glue, and cove molding.
Mark the walls
It is time to take the materials home and begin laying everything out.
It is always a good idea to lay out the materials that you will be using, so that you can find what you need as you need it.
Once you have your materials laid out, it is time to begin marking the walls for your installation. This will help you ensure that you are installing everything properly.
Use a chalk line to mark the walls where you want the top of the paneling to be. Above this line be sure that you mark the studs, so that you can nail the paneling to the walls as well.
Install the wainscoting
Begin installing the wainscoting by first lying the initial paneling against the wall and ensuring it is level with the line you had made.
If it is not, trim the paneling enough to ensure it is plumb with that line.
Remove the paneling from the wall and apply the construction adhesive.
Replace the paneling onto the wall and press it firmly against the wall.
In the locations that you have placed the marks for the studs, attach the paneling to the wall using the 6d finishing nails.
Space the nails out by about 16 inches along the studs, and only use enough nails as you need to hold the paneling in place. Repeat this process around the entire room.
Cap and finish
Using cove molding, cap the tops and install a baseboard along the bottom of the molding.
Attach these using 2d finishing nails.
Once you have installed these items, apply some primer and paint or finish according to your decorating tastes.
Clean up any mess, and you are finished with adding wainscoting to your room.
Here are a few videos that might help you out on the job !
.jpeg) Mr. Fix-It
Mr. Fix-It
___________________
Don't have a spoon?
No Problem...
No Problem...
Husband: "I can fix that!"
No Problem...
Bookshelf cracking under the weight?
No Problem...
Husband: "I can fix that!"
Ice chest not big enough for the party?
No Problem....
No Problem....
Husband: "I can fix that!"
Can't read the ATM screen?
No Problem...
Husband: "I can fix that!"
Car imported from the wrong country?
No Problem...
Husband: "I can fix that!"
Husband: "I fixed that!"
Windshield Wiper motor burned out?
No Problem...
Windshield Wiper motor burned out?
No Problem...
Display rack at the grocery store falling over?
No Problem...
Husband: "I can fix that!"
Car can't be ordered with the 'Wood Trim' option?
No Problem...
No Problem...
Husband: "I can fix that!"
Car exhaust pipe dragging?
Husband: "I can fix that!"
And - last but not least...

Miss Fix-It
Storm Door Installations
Have you ever noticed how nice it is to sometimes simply open your door and let the fresh air in?
Unless you have a storm door, this can present some problems.
These problems can range from letting in all kinds of creepy crawlies, to letting your dog or cat out.
If you don't already have a storm door, don't worry, all you need to do is install one.
Installing a storm door is surprisingly easy.
In fact, it is so easy that, as long as you follow these steps and have the proper tools and materials, you can have a new storm door in place in less than an hour.
Here's what you'll need....
Materials
Storm door
Wood spacer strips
Casing nails
Hacksaw
Hammer
Level
Tape measure
Masking tape
Marker
Drill
Drill bits
Screwdrivers (Philips and straight)
Process
Familiarize yourself with the instructions.
Before beginning any storm door installation, make sure that you familiarize yourself with the manufacturer's instructions.
These instructions will give you more detailed information about the proper installation of that particular model.
If there are any conflicts between the manufacturers directions and these instructions, the manufacturers directions take precedence.
Determine what side your channel will be on.
Each storm door will have a piece called a "Z-channel". It get's it's name because it looks something like a Z , and it is usually premarked for the hinges.
Place the channel on against your door opening, and mark the top with a piece of tape.
Cut the channel strips to size.
Remove 1/8 inch from the top of the Z channel strip from where the top of the channel will meat the top of the opening.
This will allow enough space for the drip cap to be installed later on, if you haven't already done so according to the manufacturers directions.
Position the channel properly.
Place the Z-channel against the hinge side of your door, and begin to attach the channel.
This channel should be placed about 1/8 inch above the top of the door (to provide space for the door to close with the drip cap in place).
Set the doorway.
Set the storm door into your doorway, and ensure everything is plumb with the help of a level.
Have a friend help you to ensure that everything is level by driving a couple of screws to hold the door in place.
Make any adjustments as necessary before installing the remaining screws.
Install your drip cap and channel.
If you have not already done so, you should now install your drip cap onto the door.
This will help prevent any water from "dripping" down into the doorway when it is installed.
Finish attaching any remaining screws to hold the Z-channel in place.
Attach the door sweep.
Once you have the door hung, be sure that you attach the door sweep to the bottom of the door.
This will help ensure that no creepy crawlies can get past your door, as well as help provide a little more insulation for the home when both doors are closed.
Mount your handles.
All you have to do how is install the door handles, and you are finished.
As you do this, make sure that you are following the manufacturers directions closely.
Here's a preliminary video that will give you an idea of the process.
Here's a more detailed 2 part video on the installation.
Finally, if you already have a storm door and it needs to be replaced, you might want to check out this video.
Mr. Fix-It
By following these simple guidelines, you will be able to add some beautiful
wainscoting to just about any room in a single weekend. You will be amazed at how easy it is to do this kind of work yourself.
If it is not, trim the paneling enough to ensure it is plumb with that line.
________________________________
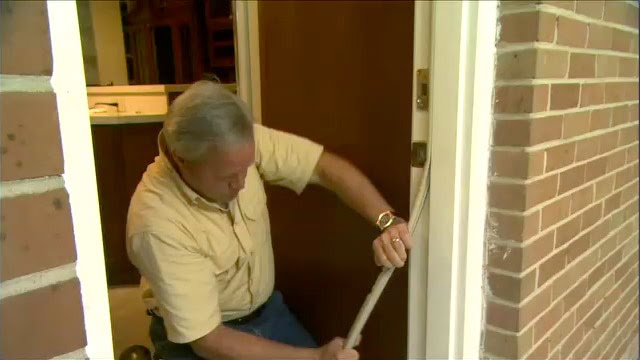
Door Trim Need Replacing ?

Have you ever noticed how it always seems like the doors to a home are among the first things that need repairing?
Usually this is due to the sheer volume of wear and tear that we put on these items.
With all the things that go through a door, it only stands to reason that the door trim will end taking most of the damage.
Luckily, repairing door trim is a fairly easy process. All you need to do is follow these step by step instructions, and you will soon have your door trim looking brand spanking new again.
Materials Needed
Hand Saw
Hammer
Finishing nails (usually #12 or #6)
Small pry bar
Camera
Wood stain, paint, or sealer.
Paint brush
Sand paper
Paper
Measuring tape
Ruler
Pencil
Handheld power sander
Procedure:
Measure
The first step in repairing your door trim would be to measure the existing trim.
This will allow you to know exactly how much you will need to purchase.
The first step in repairing your door trim would be to measure the existing trim.
This will allow you to know exactly how much you will to purchase.
Simply use your measuring tape to measure the existing door trim with your measuring tape, and write down the answers.
Measure everything at least two times in order to ensure that you get the correct measurements.
Match
If you like your current style of door trim, and would like to match it then take a picture of the trim.
Take this picture along with you to your local home improvement store, and see if they have any trim that will match it.
Have the home improvement store cut the trim to your specification, and if at all possible see if they can create a miter cut where the pieces will meet.
While you are at the home improvement store be sure that you also purchase some paint, stain, or sealer for your wood.
Make sure that you purchase enough so that you can cover the entire pieces.
Remove
Once you get home with your new pieces of door trim, it is time to remove the old damaged pieces. Begin by removing the door from the door frame, and then removing the old door trim.
When removing the door trim, be sure thatyou do it carefully so that you do not damage the frame itself.
After removing the trim, be sure to properly dispose of it.
Have you ever noticed how it always seems like the doors to a home are among the first things that need repairing?
Usually this is due to the sheer volume of wear and tear that we put on these items.
With all the things that go through a door, it only stands to reason that the door trim will end taking most of the damage.
Luckily, repairing door trim is a fairly easy process. All you need to do is follow these step by step instructions, and you will soon have your door trim looking brand spanking new again.
Materials Needed
Hand Saw
Hammer
Finishing nails (usually #12 or #6)
Small pry bar
Camera
Wood stain, paint, or sealer.
Paint brush
Sand paper
Paper
Measuring tape
Ruler
Pencil
Handheld power sander
Procedure:
Measure
The first step in repairing your door trim would be to measure the existing trim.
This will allow you to know exactly how much you will need to purchase.
The first step in repairing your door trim would be to measure the existing trim.
This will allow you to know exactly how much you will to purchase.
Simply use your measuring tape to measure the existing door trim with your measuring tape, and write down the answers.
Measure everything at least two times in order to ensure that you get the correct measurements.
Match
Match
If you like your current style of door trim, and would like to match it then take a picture of the trim.
Take this picture along with you to your local home improvement store, and see if they have any trim that will match it.
Have the home improvement store cut the trim to your specification, and if at all possible see if they can create a miter cut where the pieces will meet.
While you are at the home improvement store be sure that you also purchase some paint, stain, or sealer for your wood.
Make sure that you purchase enough so that you can cover the entire pieces.
Remove
Once you get home with your new pieces of door trim, it is time to remove the old damaged pieces. Begin by removing the door from the door frame, and then removing the old door trim.
When removing the door trim, be sure thatyou do it carefully so that you do not damage the frame itself.
After removing the trim, be sure to properly dispose of it.
https://www.youtube.com/watch?v=0Ie7dnbOcXM
(cut & paste)
Replace
After having removed all the trim, it is time to replace everything.
Carefully line everything up as straight as possible.
If you have one, use a carpenter's level to ensure that everything is nice and straight.
Use a hammer and the finishing nails to attach the trim to the frame.
If necessary take your miter saw or handsaw and ensure that everything is trimmed properly so there are no gaps in the trim.
Stain, seal, or paint.
Finally, once you have your trim in place it is time to stain, seal, or paint it.
Before you do this though, take some time to sand the wood so everything is nice and smooth, and to remove any existing sealant, paint, or stain that may have been on the undamaged portions of door trim.
Once everything has been sanded so that it is smooth to the touch, go ahead and begin applying your stain, paint or sealer.
Be sure that you follow the direction properly, and allow to dry completely before replacing your door.
Here's a video to help you out !
https://www.youtube.com/watch?v=0Ie7dnbOcXM
(cut & paste)
(cut & paste)
Replace
After having removed all the trim, it is time to replace everything.
Carefully line everything up as straight as possible.
If you have one, use a carpenter's level to ensure that everything is nice and straight.
Use a hammer and the finishing nails to attach the trim to the frame.
If necessary take your miter saw or handsaw and ensure that everything is trimmed properly so there are no gaps in the trim.
Stain, seal, or paint.
Stain, seal, or paint.
Finally, once you have your trim in place it is time to stain, seal, or paint it.
Before you do this though, take some time to sand the wood so everything is nice and smooth, and to remove any existing sealant, paint, or stain that may have been on the undamaged portions of door trim.
Once everything has been sanded so that it is smooth to the touch, go ahead and begin applying your stain, paint or sealer.
Be sure that you follow the direction properly, and allow to dry completely before replacing your door.
Here's a video to help you out !
___________________________
___________________________
Plexiglas Repairs

Have you ever noticed how you can find Plexiglas (or plexiglass as it is commonly misspelled) can be found just about everywhere?
In homes around the world, Plexiglas can be used for quite a few things—windows in greenhouses, light coverings, windshields on our cars, and so much more.
In fact, there often doesn't seem to be anything that you can't do with Plexiglas.
This leads to the question of how to repair Plexiglas when it becomes damaged, dirty, cracked, or becomes otherwise unusable. Repairing Plexiglas is actually pretty easy to do.
Here's how.
Scratches
To repair scratches in Plexiglas you can do one of two things.
The first is to purchase a kit specifically designed to repair Plexiglas. These kits, while easy to use, can often cost more money than you are willing to spend.
If you plan on using one of these kits, you can often purchase them at your local home improvement store and simply follow the instructions on the back of the package.
The other way you can repair the scratches is to use some regular school glue, some cotton swabs, and a lint free rag.
Apply some glue to the scratches with a cotton swab and allow it to dry for roughly 30 minutes.
Then use a damp lint free rag to wipe off any excess glue from the scratches.
After allowing the Plexiglas to dry overnight, clean as normal with a regular non-abrasive cleaner.
Cracks and Holes
The simplest way to repair cracks and holes in Plexiglas is to simply take the damaged item into a professional and have them either repair it or replace it.
There are also kits that you can purchase which will allow you to repair these types of damage.
Simply follow the directions that come with the packaging, and you will quickly have a crack- and hole-free piece of Plexiglas.
Here are a couple of videos on repairing and polishing plexiglas.
General Wear and Tear
For general wear and tear on a piece of Plexiglas, all you really need to do is polish and clean it.
Most types of Plexiglas can be cleaned and restored.
Here's another video on how to clean plexiglas.
Mr. Fix-It
__________________________
Have you ever noticed how you can find Plexiglas (or plexiglass as it is commonly misspelled) can be found just about everywhere?
In homes around the world, Plexiglas can be used for quite a few things—windows in greenhouses, light coverings, windshields on our cars, and so much more.
In fact, there often doesn't seem to be anything that you can't do with Plexiglas.
This leads to the question of how to repair Plexiglas when it becomes damaged, dirty, cracked, or becomes otherwise unusable. Repairing Plexiglas is actually pretty easy to do.
Here's how.
Scratches
To repair scratches in Plexiglas you can do one of two things.
The first is to purchase a kit specifically designed to repair Plexiglas. These kits, while easy to use, can often cost more money than you are willing to spend.
If you plan on using one of these kits, you can often purchase them at your local home improvement store and simply follow the instructions on the back of the package.
The other way you can repair the scratches is to use some regular school glue, some cotton swabs, and a lint free rag.
Apply some glue to the scratches with a cotton swab and allow it to dry for roughly 30 minutes.
Then use a damp lint free rag to wipe off any excess glue from the scratches.
After allowing the Plexiglas to dry overnight, clean as normal with a regular non-abrasive cleaner.
Cracks and Holes
The simplest way to repair cracks and holes in Plexiglas is to simply take the damaged item into a professional and have them either repair it or replace it.
There are also kits that you can purchase which will allow you to repair these types of damage.
Simply follow the directions that come with the packaging, and you will quickly have a crack- and hole-free piece of Plexiglas.
Here are a couple of videos on repairing and polishing plexiglas.
General Wear and Tear
For general wear and tear on a piece of Plexiglas, all you really need to do is polish and clean it.
Most types of Plexiglas can be cleaned and restored.
Here's another video on how to clean plexiglas.
Here's another video on how to clean plexiglas.
Mr. Fix-It
Motion-Sensor
Lights Installation
Motion-Sensor
Lights Installation
|

There are many different methods that you can use to increase the security around your home. That being said, perhaps one of the simplest and least expensive methods is by simply installing a few motion-sensor lights around your home.
While you can always hire a professional electrician to do the work for you, there is no need.
This is a project that even a novice can accomplish with about two hours worth of work.
All you need to do is follow these simple instructions.
A brief word before proceeding.
The instructions listed here are based off a simple assumption.
That assumption is that you will be installing these motion-sensor lights in the same location as any existing lights that you may already have.
If you are not, then there are several steps you will need to take prior to beginning this project.
Items needed:
-
Motion-sensor light
-
Wire nuts
-
Swivel strap (optional)
-
Screwdriver
-
Combination tool
Procedure:
Shut off power
Whenever you work on an electrical project, remember that safety comes first.
This means that you need to actually shut off the power to the area that you will be working on to ensure that there are no accidents.
The best way that you do this is by shutting off the power at the service panel, and leaving a note to ensure that no one comes along and accidentally turns it on.
Remove old light
After you have shut off the power to the area that you are going to be working, remove the old light.
This means that you will actually remove the complete fixture, not just the light bulb.
Loosen the screws that hold the fixture in place.
Disconnect and inspect the wiring, making note of any wiring that looks corroded.
If you find some, either replace the wiring yourself, or stop the project and call a professional.
Connect the new light
When you have completely disconnected the old light, begin reconnecting the new light.
Run the wires through the rubber gaskets that are on the new light, and then begin splicing the appropriate wires together using the wire nuts to hold everything in place.
Turn the power back on and test your work.
Take time to position
With the power on, position the lights so that they are pointed in the directions that you want.
You may need to loosen a few lock nuts, or bolts to ensure that you are able to do this.
When you have the lights in the directions that you wish, tight everything up and proceed to making any adjustments.
Adjust as necessary
Now comes the fun part, making adjustments to the lights and to the sensitivity of the motion sensor.
Follow the directions from the manufacturer to ensure that you make these adjustments properly.
Set the sensitivity low enough that it won't come on when your neighbor comes out of their door or drives into their driveway, but have it set high enough that anyone who comes into your yard will turn it on.
We have some videos to help you out !
Good Luck !
Mr. Fix-It

____________________________________
Keep the Holiday Lights Safe

Holiday lights are going up across the valley, so firefighters want to make sure residents stay safe and protect themselves from a fire that could spark with holiday lights.
"Electrical fires are the second leading cause of fires in Las Vegas," said Tim Szymanski, Las Vegas Fire & Rescue.
He said the risks for those electrical fires go up even more during the holidays.
Although they cost a little more, first responders said LED lights are the best way to go.
They're safer than older incandescent lights.
 LED Lights
"If you have lights and they're the old fashioned kind -- incandescent....
...GET RID OF THEM...
..but...if you still insist on using them....
 Incandescent Lights
...you will need to examine the wiring, especially if they're old. Every time you bend that wiring, it breaks the insulation on it,” Szymanski said.
Better yet....if you want to really play it safe....don't put the lights up yourself....
USE A PRO !
There are a number of Las Vegas firms that do this for a living.
Here's a list along with reviews as to the quality of their workmanship from "Home Advisor".
But for those of you who still want to put up those old lights have been in your garage for the past 50 years, here are a few tips that you should watch for !
If the lights go out after you plug them in, take heed because firefighters said you could be at risk for a fire.
If your circuit breaker keeps shutting off and you're tried to reset it....even if it shuts off one time, that's an indicator that a fire could potentially start and you need to change something,” Szymanski said.
And don't forget....if you have a real Christmas tree in your home....

WATER IT REGULARLY !
Want to see how fast one will burn?
Here are some helpful safety videos if you decide to do your holiday outdoor decorating this year.
_________________________
There are many different methods that you can use to increase the security around your home. That being said, perhaps one of the simplest and least expensive methods is by simply installing a few motion-sensor lights around your home.
While you can always hire a professional electrician to do the work for you, there is no need.
This is a project that even a novice can accomplish with about two hours worth of work.
All you need to do is follow these simple instructions.
A brief word before proceeding.
The instructions listed here are based off a simple assumption.
That assumption is that you will be installing these motion-sensor lights in the same location as any existing lights that you may already have.
That assumption is that you will be installing these motion-sensor lights in the same location as any existing lights that you may already have.
If you are not, then there are several steps you will need to take prior to beginning this project.
Items needed:
- Motion-sensor light
- Wire nuts
- Swivel strap (optional)
- Screwdriver
- Combination tool
Procedure:
Shut off power
Whenever you work on an electrical project, remember that safety comes first.
This means that you need to actually shut off the power to the area that you will be working on to ensure that there are no accidents.
The best way that you do this is by shutting off the power at the service panel, and leaving a note to ensure that no one comes along and accidentally turns it on.
Remove old light
After you have shut off the power to the area that you are going to be working, remove the old light.
This means that you will actually remove the complete fixture, not just the light bulb.
Loosen the screws that hold the fixture in place.
Disconnect and inspect the wiring, making note of any wiring that looks corroded.
If you find some, either replace the wiring yourself, or stop the project and call a professional.
Connect the new light
When you have completely disconnected the old light, begin reconnecting the new light.
Run the wires through the rubber gaskets that are on the new light, and then begin splicing the appropriate wires together using the wire nuts to hold everything in place.
Turn the power back on and test your work.
Take time to position
With the power on, position the lights so that they are pointed in the directions that you want.
You may need to loosen a few lock nuts, or bolts to ensure that you are able to do this.
When you have the lights in the directions that you wish, tight everything up and proceed to making any adjustments.
Adjust as necessary
Now comes the fun part, making adjustments to the lights and to the sensitivity of the motion sensor.
Follow the directions from the manufacturer to ensure that you make these adjustments properly.
Set the sensitivity low enough that it won't come on when your neighbor comes out of their door or drives into their driveway, but have it set high enough that anyone who comes into your yard will turn it on.
We have some videos to help you out !
Good Luck !
Mr. Fix-It
____________________________________
Keep the Holiday Lights Safe
Holiday lights are going up across the valley, so firefighters want to make sure residents stay safe and protect themselves from a fire that could spark with holiday lights.
"Electrical fires are the second leading cause of fires in Las Vegas," said Tim Szymanski, Las Vegas Fire & Rescue.
He said the risks for those electrical fires go up even more during the holidays.
Although they cost a little more, first responders said LED lights are the best way to go.
They're safer than older incandescent lights.
They're safer than older incandescent lights.
LED Lights
"If you have lights and they're the old fashioned kind -- incandescent....
...GET RID OF THEM...
..but...if you still insist on using them....
Incandescent Lights
...you will need to examine the wiring, especially if they're old. Every time you bend that wiring, it breaks the insulation on it,” Szymanski said.
Better yet....if you want to really play it safe....don't put the lights up yourself....
USE A PRO !
There are a number of Las Vegas firms that do this for a living.
Here's a list along with reviews as to the quality of their workmanship from "Home Advisor".
But for those of you who still want to put up those old lights have been in your garage for the past 50 years, here are a few tips that you should watch for !
If the lights go out after you plug them in, take heed because firefighters said you could be at risk for a fire.
If your circuit breaker keeps shutting off and you're tried to reset it....even if it shuts off one time, that's an indicator that a fire could potentially start and you need to change something,” Szymanski said.
And don't forget....if you have a real Christmas tree in your home....
WATER IT REGULARLY !
Want to see how fast one will burn?
Here are some helpful safety videos if you decide to do your holiday outdoor decorating this year.
_________________________
Chainsaws for the Do-It-Yourselfer

It seems that when you are working in a yard, there is always a need to cut some branches or some wood.
In these instances there really is no substitute for a chainsaw.
Having one available makes short work of those chores.
When it comes time to get a chainsaw, you have two options:
gas-powered saw
or
electric powered saw
I recently had the opportunity to work with a Poulan Pro 400E electric chainsaw.
This model was surprisingly easy to work with and trouble-free.

To test the saw, a pile of three-inch branches in my backyard were tested.
These are my impressions as I started to work with this handy chainsaw.
Ease of Use
The saw came out of the box ready to use.
The only thing I needed to add was the oil for the chain. Any good bar oil will do, and if you can't find one you could use a good 30-weight motor oil as a substitute.
The chainsaw was light and easy to handle and had the power to easily cut through the three-inch limbs I attacked.
Maintenance
Since the saw is electric, the only real maintenance is to add the oil for the chain itself.
There is no gas to mix or motor to maintain; just pull the trigger and you are removing the unwanted limbs and trees from your yard.
Pros
This saw is lightweight and easy to handle with enough power to do the jobs you would find around your home. It has an eighteen-inch blade, which allows you to attack just about anything you want to in your yard.
Cons
The only drawback this saw has is that it is tethered to a cord.
This will limit its use by requiring it to having access to power outlets (110 volts) and a long extension cord.
Overall Experience
This chainsaw was great.
The instructions were easy enough to understand and it has some great safety features with a chain brake and double switches.
It has power to spare and everything I cut felt like the saw was a hot knife going through butter.
Hope this idea has been helpful.
Mr. Fix-It
______________________________
Who hasn't noticed that gas and oil prices seem to be rising and dropping on a daily basis? They might be dropping temporarily, but before long, I'm sure they'll be up again.
And when they rise....they affect just about every aspect of our lives?
One way that we can ensure to save a little more money during the cold of the winter months, and the dramatic heat of the summer months, is to periodically check the weather stripping on our exterior doors.
Properly weatherproofing our doors can dramatically increase savings on our heating and cooling bills.
Simply put, when you see that your weather stripping appears to be worn, frayed, or even old, then it is time to replace them.
Replacing the weather stripping is relatively easy.
The instructions for how to do so can be found on just about every package of weather stripping that is currently sold.
The real trick lies in choosing the best kind of weather stripping for your needs.
There are three basic kinds of weather stripping for your doors.
The first is called wrapped foam, and is without a doubt the easiest kind of weather stripping to install.

Wrapped foam weather stripping is basically something that is made with a small core of either foam or sponge, which is wrapped up in neoprene or rubber.
This type of weather stripping is great since it can usually take a beating, last a relatively long time, is easy to install and adjust to your needs with the use of either a pair of scissors or even a utility knife.
However, since it is so easy to cut, even after you install it, it can be damaged over time, and is often susceptible to dry rot.
The second kind of weather stripping is called metal flange weather stripping.

Usually, this kind of weather stripping is only used on metal exterior doors.
Metal flange weather stripping is usually held in place with screws, and a thin layer of waterproof material between the door and the stripping itself.
Metal flange weather stripping is one that is fairly easy to install, but care needs to be taken.
When adjusting the stripping to it's proper size, it's really easy to get hurt since you will be cutting the metal with tin snips, and the tin is usually fairly sharp.
Finally, the last kind of weather stripping is called vinyl or silicone bulb.

This is one of the more traditional types of weather stripping available, and is also a fairly easy one to install.
In essence, what the silicone or vinyl bulb weather stripping does is create a little bubble, or "bulb," that covers and seals the gap between the door and the threshold.
Typically this kind of weather stripping is attached to the door itself, with the bulb facing towards the ground and often lightly drags across the ground.
Mr. Fix-It
_____________________________
It seems that when you are working in a yard, there is always a need to cut some branches or some wood.
In these instances there really is no substitute for a chainsaw.
Having one available makes short work of those chores.
When it comes time to get a chainsaw, you have two options:
gas-powered saw
or
electric powered saw
I recently had the opportunity to work with a Poulan Pro 400E electric chainsaw.
This model was surprisingly easy to work with and trouble-free.
To test the saw, a pile of three-inch branches in my backyard were tested.
These are my impressions as I started to work with this handy chainsaw.
Ease of Use
The saw came out of the box ready to use.
The only thing I needed to add was the oil for the chain. Any good bar oil will do, and if you can't find one you could use a good 30-weight motor oil as a substitute.
The chainsaw was light and easy to handle and had the power to easily cut through the three-inch limbs I attacked.
Maintenance
Since the saw is electric, the only real maintenance is to add the oil for the chain itself.
There is no gas to mix or motor to maintain; just pull the trigger and you are removing the unwanted limbs and trees from your yard.
Pros
This saw is lightweight and easy to handle with enough power to do the jobs you would find around your home. It has an eighteen-inch blade, which allows you to attack just about anything you want to in your yard.
Cons
The only drawback this saw has is that it is tethered to a cord.
This will limit its use by requiring it to having access to power outlets (110 volts) and a long extension cord.
Overall Experience
This chainsaw was great.
The instructions were easy enough to understand and it has some great safety features with a chain brake and double switches.
It has power to spare and everything I cut felt like the saw was a hot knife going through butter.
Hope this idea has been helpful.
Mr. Fix-It
______________________________
Bathtub Caulking
 Prior to beginning any home repair project, the first step is to gather all of the materials needed. To accomplish this home repair project, you are going to need the following:
- Tube of caulking
- Caulking Gun (if required for the tube of caulking you selected)
- Multi-purpose tool or a knife
- Damp rags
- Caulking can come in several different types of containers.
For small caulking jobs, you may be able to get by with a small tube that you can squeeze without a caulking gun.
For larger jobs, you'll want to get larger tubes of caulking, which always require a caulking gun.
 These aren't expensive, and your local home improvement store help you get the right one for your caulk tubes.
To begin the project, you'll need to remove all of the old caulking that is associated where the leak is.
These aren't expensive, and your local home improvement store help you get the right one for your caulk tubes.
To begin the project, you'll need to remove all of the old caulking that is associated where the leak is.
 In order to make sure that all of the caulking has been removed, use the knife or multi-tool to remove the caulking from the area. Be careful, however, that you don't gouge or damage the surface of the tub itself or the wall.
 When you have removed as much of caulking as you can with your hands and the tools, then use your damp cloths to wash off as much of the caulking residue as you can. This is going to ensure that you get as much of the caulking as possible, while cleaning the area and preparing it for the re-caulking.
You are now ready to apply the new caulking.
If you are using a caulking gun, insert the tube into the gun. (The caulking gun provides the proper amount of constant pressure necessary to apply the caulking evenly and smoothly.) Use your knife to cut the tip of the caulk tube so you have a hole about 1/4-inch in diameter. This is where the caulk "bead" is formed as the caulk leaves the tube.
Or....watch this video for an even easier way to cut off the tip of the caulk tube.
Place the tip of the caulk tube into the corner formed by the tub and the wall, at one end of where you just removed the old caulking.
Make sure that the tube is at an angle.
Squeeze the tube or pull the trigger on the caulking gun and the caulk should start to come out.
Keep the tip of the tube in contact with the corner and slowly move the tube so that you "lead" the caulk down the seam.
As you apply the caulk, make sure you use a continuous and steady stream of the material.
Here's another video about how to use a caulking gun properly:
When the caulk has been completely applied to the seam, use one of the damp cloths to wipe up any excess caulking that may be there.
Here's a great video using a product called LaPage Ultra Seal Kitchen and Bath Silicone sealant.
Be aware that you need to let the caulk completely dry before using the tub again.
Though this product supposedly allows water contact within two hours, the best possible way of doing this is to let the caulk dry overnight at a minimum.
Here's the Before...
When you have removed as much of caulking as you can with your hands and the tools, then use your damp cloths to wash off as much of the caulking residue as you can. This is going to ensure that you get as much of the caulking as possible, while cleaning the area and preparing it for the re-caulking.
You are now ready to apply the new caulking.
If you are using a caulking gun, insert the tube into the gun. (The caulking gun provides the proper amount of constant pressure necessary to apply the caulking evenly and smoothly.) Use your knife to cut the tip of the caulk tube so you have a hole about 1/4-inch in diameter. This is where the caulk "bead" is formed as the caulk leaves the tube.
Or....watch this video for an even easier way to cut off the tip of the caulk tube.
Place the tip of the caulk tube into the corner formed by the tub and the wall, at one end of where you just removed the old caulking.
Make sure that the tube is at an angle.
Squeeze the tube or pull the trigger on the caulking gun and the caulk should start to come out.
Keep the tip of the tube in contact with the corner and slowly move the tube so that you "lead" the caulk down the seam.
As you apply the caulk, make sure you use a continuous and steady stream of the material.
Here's another video about how to use a caulking gun properly:
When the caulk has been completely applied to the seam, use one of the damp cloths to wipe up any excess caulking that may be there.
Here's a great video using a product called LaPage Ultra Seal Kitchen and Bath Silicone sealant.
Be aware that you need to let the caulk completely dry before using the tub again.
Though this product supposedly allows water contact within two hours, the best possible way of doing this is to let the caulk dry overnight at a minimum.
Here's the Before...
 Here's the After...

Mr. Fix-It
_______________________________
- Tube of caulking
- Caulking Gun (if required for the tube of caulking you selected)
- Multi-purpose tool or a knife
- Damp rags
- Caulking can come in several different types of containers.
Mr. Fix-It
Dimmer Switch Problems ?

Whether you are preparing for a romantic dinner for two or working on an important deadline in the middle of the night, you will find that a working dimmer switch is crucial in properly controlling the lighting in your home.
A dimmer switch can be attached to almost any internal lighting in your home in order to vary the brightness or dimness of lighting.
A dimmer switch works by increasing or decreasing the amount of power being supplied to the light in order to brighten or dim it.
Some dimmer switches are knobs and others have sliding mechanisms.

 Dimmer switches are most often used with incandescent lighting fixtures, not with fluorescent fixtures or many of the newer CFL or LED lights.
It is possible that some non-incandescent fixtures will allow you to use them with a dimmer, but you'll want to check with the manufacturer to see if this is the case.
If you use a dimmer with a fixture that doesn't support the variable power supplied by a dimmer, then you run the risk of malfunction, which isn't good with electrical devices—it could even cause a fire!
Of course, if you already have a dimmer in place and all you need to do is replace it, you are probably safe...
...you only need to be concerned with the fixture if you are installing a dimmer switch for the first time or if you are replacing the fixture itself.
In order to replace or install your dimmer switch you will need a few items.
Search your home, local hardware store, or ask your friendly neighbor for a circuit tester, wire nuts, and a set of flathead screwdrivers.
Using the circuit breaker or fuse box...
...generally located in the garage, basement, or laundry room...
...turn off the power to the fixtures that are controlled by the switch.
(Test the lights in the room by flipping various switches in order to ensure that the power is off. When you work with electricity, it is important to take a variety of safety precautions like this one.)
Locate the switch that needs to be fixed or replaced and remove the cover.
(The cover is a piece of plastic or metal that attaches to the wall to protect the light switch and provide an aesthetically pleasing facade.)
The cover is typically held in place by one or two small screws visible from the front of the cover plate.
Remove them, and you should be able to pull the cover right off.
If the dimmer switch uses a knob, it is possible that the knob will block the removal of the cover plate.
In this case, a firm pull on the knob—straight out, away from the wall—should remove the knob and allow you to easily remove the cover plate.
If the room was painted by someone who didn't remove the cover plate before painting, it is possible that the dried paint will keep the cover plate "attached" to the wall.
If this is the case, carefully use a sharp knife to score the paint at the edges of the cover plate. This should allow you to remove the cover plate without damaging the wall.
With the cover plate removed, you should be able to see the screws that actually hold the switch in the electrical box. In almost all instances there are two of these screws—one near the top of the switch and one near the bottom.
Unscrew both of these completely and gently pull the switch assembly out of the electrical box itself.
Suspend the switch a few inches away from the wall so that the wires are exposed.
Take a moment to examine the switch so that you are familiar with how the wires are connected.
In most modern installations, a single-pole switch will have only three wires that connect to the switch—one white, one black, and one green.
The green is the ground wire; it is the white and black wires that actually carry power.
Take note of which wires are connected to which screws and then remove the wires from the old switch.
Important:
If the switch you are replacing has more than three wires to it, it is probably a three-way or four-way switch.
These types of switches have more complex wiring, as they work in conjunction with other switches to control the lights.
For instance, you may have a room where there are two doors and a switch for the lights by each of the doors.
If you are replacing this type of switch, you need to make sure your new switch matches the characteristics of the old one.
Mark which wires were connected to which screws on the switch, remove it from the wires, and take it to the hardware store to get a matching replacement switch.
With your notes about which wires were attached to which screws on the old switch, connect the wires to the same screws on the new switch.
It is possible that the dimmer switch will not have screws, but will instead have wires already attached to the switch. If this is the case, connect the wires for your home to the appropriate wires on the switch using wire nuts and electrical tape.
With the wires securely fastened to the switch, gently push the switch back into the electrical box.
You want to make sure that you align the two switch screws with the proper screw holes in the electrical box.
Tighten the screws to make sure the switch is securely attached, and then replace the cover plate.
Finally, if the dimmer switch uses a knob, press the knob firmly on the switch.
It is now time for the moment of truth:
Return to the fuse box and flip on the breaker for the light circuit.
You can then return to the room and test your dimmer to make sure everything is working correctly.
If you suspect a problem with your installation or you run into a problem, turn off the power at the circuit breaker and immediately get help from a professional electrician.
Dimmer switches are most often used with incandescent lighting fixtures, not with fluorescent fixtures or many of the newer CFL or LED lights.
It is possible that some non-incandescent fixtures will allow you to use them with a dimmer, but you'll want to check with the manufacturer to see if this is the case.
If you use a dimmer with a fixture that doesn't support the variable power supplied by a dimmer, then you run the risk of malfunction, which isn't good with electrical devices—it could even cause a fire!
Of course, if you already have a dimmer in place and all you need to do is replace it, you are probably safe...
...you only need to be concerned with the fixture if you are installing a dimmer switch for the first time or if you are replacing the fixture itself.
In order to replace or install your dimmer switch you will need a few items.
Search your home, local hardware store, or ask your friendly neighbor for a circuit tester, wire nuts, and a set of flathead screwdrivers.
Using the circuit breaker or fuse box...
...generally located in the garage, basement, or laundry room...
...turn off the power to the fixtures that are controlled by the switch.
(Test the lights in the room by flipping various switches in order to ensure that the power is off. When you work with electricity, it is important to take a variety of safety precautions like this one.)
Locate the switch that needs to be fixed or replaced and remove the cover.
(The cover is a piece of plastic or metal that attaches to the wall to protect the light switch and provide an aesthetically pleasing facade.)
The cover is typically held in place by one or two small screws visible from the front of the cover plate.
Remove them, and you should be able to pull the cover right off.
If the dimmer switch uses a knob, it is possible that the knob will block the removal of the cover plate.
In this case, a firm pull on the knob—straight out, away from the wall—should remove the knob and allow you to easily remove the cover plate.
If the room was painted by someone who didn't remove the cover plate before painting, it is possible that the dried paint will keep the cover plate "attached" to the wall.
If this is the case, carefully use a sharp knife to score the paint at the edges of the cover plate. This should allow you to remove the cover plate without damaging the wall.
With the cover plate removed, you should be able to see the screws that actually hold the switch in the electrical box. In almost all instances there are two of these screws—one near the top of the switch and one near the bottom.
Unscrew both of these completely and gently pull the switch assembly out of the electrical box itself.
Suspend the switch a few inches away from the wall so that the wires are exposed.
Take a moment to examine the switch so that you are familiar with how the wires are connected.
In most modern installations, a single-pole switch will have only three wires that connect to the switch—one white, one black, and one green.
The green is the ground wire; it is the white and black wires that actually carry power.
Take note of which wires are connected to which screws and then remove the wires from the old switch.
Important:
If the switch you are replacing has more than three wires to it, it is probably a three-way or four-way switch.
These types of switches have more complex wiring, as they work in conjunction with other switches to control the lights.
For instance, you may have a room where there are two doors and a switch for the lights by each of the doors.
If you are replacing this type of switch, you need to make sure your new switch matches the characteristics of the old one.
Mark which wires were connected to which screws on the switch, remove it from the wires, and take it to the hardware store to get a matching replacement switch.
With your notes about which wires were attached to which screws on the old switch, connect the wires to the same screws on the new switch.
It is possible that the dimmer switch will not have screws, but will instead have wires already attached to the switch. If this is the case, connect the wires for your home to the appropriate wires on the switch using wire nuts and electrical tape.
With the wires securely fastened to the switch, gently push the switch back into the electrical box.
You want to make sure that you align the two switch screws with the proper screw holes in the electrical box.
Tighten the screws to make sure the switch is securely attached, and then replace the cover plate.
Finally, if the dimmer switch uses a knob, press the knob firmly on the switch.
It is now time for the moment of truth:
Return to the fuse box and flip on the breaker for the light circuit.
You can then return to the room and test your dimmer to make sure everything is working correctly.
If you suspect a problem with your installation or you run into a problem, turn off the power at the circuit breaker and immediately get help from a professional electrician.
 For instance, if the breaker won't stay in the on position, you smell smoke, the cover plate for the switch is hot, or the lights won't work as you expect—all these are signs that you may need some help.
 Always remember that safety comes first!
Once your dimmer switch is replaced, it should work correctly and reliably for years to come.
Always remember that safety comes first!
Once your dimmer switch is replaced, it should work correctly and reliably for years to come.
___________________________________
In order to replace or install your dimmer switch you will need a few items.
Inspecting Your Home for Electrical Safety
 It is always a good idea to periodically inspect your home to make sure that it is safe.
This includes checking to make sure that the electrical system in your home is OK as well.
While you may not be able to do a complete electrical system check, you can do a home electric safety inspection that will allow you to know if a professional should take a closer look.
While only a professional can really say whether the electrical system in your home is safe or not, there are a few things that you can do to see whether you need a professional to come in and do a full blown inspection.
A home electrical safety can be done in a relatively short period of time, and give you a good idea of what other steps should be taken.
Here are a few things that you should keep an eye out for when you begin your inspection.
Check the cover plates.

Go through your home and take a look at all the electrical outlets.
Each should have a cover plate, and should not be cracked.
In fact, take a close look at the receptacles themselves to ensure that they are not cracked either.
If you find any that are, replace them as soon as possible.
Check your grounding.
When looking at the receptacles take a look to see if they are grounded.
As a general rule, plugs that have only two prong slots are not grounded and should be upgraded as soon as possible.
 To check for proper polarization and grounding of three prong plugs, use a receptacle analyzer.
 Test your switches.
Flip the switches a few times, and check to see how much play there is.
If it seems like there is too much, or if the switch wiggles when you move it back and forth, then you should have it replaced.
Another good indicator that you need to replace a switch is if you happen to hear a "pop" when you turn it on or off.
Test any GFCIs that you may have.
Just because you have a ground fault circuit interrupter (GFCI) doesn't mean that you don't need to check them.

Check them for proper grounding and polarization as you would with any other three prong plug, as well as by pushing the red test button.
When you push the red button, the black reset button should pop out.
If it doesn't, you need to replace it.
Double check receptacles near water.
It is pretty much common sense that a wet receptacle is a dangerous one.
Despite this, many times those receptacles that are within arms reach of a water source are often overlooked.
Check to make sure that you have a GFCI installed at any receptacle that is near a water source.
Be aware that the codes of some states differ, and you should check with a professional before making any serious changes to your home electrical system.
If you have any doubts at all, then call in a professional to do the work for you.
Mr. Fix-it
_______________________________
A Possible Fire Hazard
Clothes Dryer Vent Blockage

Is your clothes dryer not drying clothes as it should?
Does your laundry room smell of burnt natural gas or differently when the clothes dryer is in operation?
If your clothes dryer is vented into an interior wall in the laundry room, the problem may be found in the "T" top roof jack.
Pulte wasn't thinking very smart by installing the roof jack with fine mesh wire covering the opening to keep bugs and birds out. They didn't consider the mesh keeping the lint from exiting the roof jack, building up on the underneath side and blocking air flow.
The fix is to climb on the roof to remove the wire mesh that is most likely blocked by lint.
To do so, you can reach inside the vent's "T" dome and physically remove the fine wire mesh inside the roof jack.
 OR...
OR...
If your dryer is vented into an exterior wall and exits directly outside through the stucco wall, the problem will be in the 4" flex duct between the dryer and wall.

In either case, the 4” flex duct should be checked first for lint blockage or kinks.
Restricted clothes dryer air flow will cause the dryer thermocouple to activate shutting off the burner prematurely because of excessive heat build up in the dryer before the clothes are dry.
Without vented heated air flow circulating through the dryer, clothes will take hours to dry, not dry at all. or the dryer will become extremely hot, but the clothes will remain damp.
Here are a few local duct cleaning companies around town.
Las Vegas Lint Clogged...
rlyeh.com
(702) 735-0565 - Las Vegas, NV
A Dryer Vent Cleaning Company -
(702) 735-0565 - 6591 Foxwood Ln, Las Vegas, NV.
ABC Carpet Cleaning
abccarpetcleaning.com
(877) 379-6885 - Las Vegas, NV
________________________________
It is always a good idea to periodically inspect your home to make sure that it is safe.
This includes checking to make sure that the electrical system in your home is OK as well.
While you may not be able to do a complete electrical system check, you can do a home electric safety inspection that will allow you to know if a professional should take a closer look.
While only a professional can really say whether the electrical system in your home is safe or not, there are a few things that you can do to see whether you need a professional to come in and do a full blown inspection.
A home electrical safety can be done in a relatively short period of time, and give you a good idea of what other steps should be taken.
Here are a few things that you should keep an eye out for when you begin your inspection.
Check the cover plates.
Go through your home and take a look at all the electrical outlets.
Each should have a cover plate, and should not be cracked.
In fact, take a close look at the receptacles themselves to ensure that they are not cracked either.
If you find any that are, replace them as soon as possible.
Check your grounding.
When looking at the receptacles take a look to see if they are grounded.
As a general rule, plugs that have only two prong slots are not grounded and should be upgraded as soon as possible.
To check for proper polarization and grounding of three prong plugs, use a receptacle analyzer.
Test your switches.
Flip the switches a few times, and check to see how much play there is.
If it seems like there is too much, or if the switch wiggles when you move it back and forth, then you should have it replaced.
Another good indicator that you need to replace a switch is if you happen to hear a "pop" when you turn it on or off.
Another good indicator that you need to replace a switch is if you happen to hear a "pop" when you turn it on or off.
Test any GFCIs that you may have.
Just because you have a ground fault circuit interrupter (GFCI) doesn't mean that you don't need to check them.
Check them for proper grounding and polarization as you would with any other three prong plug, as well as by pushing the red test button.
When you push the red button, the black reset button should pop out.
If it doesn't, you need to replace it.
Double check receptacles near water.
It is pretty much common sense that a wet receptacle is a dangerous one.
Despite this, many times those receptacles that are within arms reach of a water source are often overlooked.
Despite this, many times those receptacles that are within arms reach of a water source are often overlooked.
Check to make sure that you have a GFCI installed at any receptacle that is near a water source.
Be aware that the codes of some states differ, and you should check with a professional before making any serious changes to your home electrical system.
If you have any doubts at all, then call in a professional to do the work for you.
Mr. Fix-it
_______________________________
A Possible Fire Hazard
Clothes Dryer Vent Blockage
Is your clothes dryer not drying clothes as it should?
Does your laundry room smell of burnt natural gas or differently when the clothes dryer is in operation?
If your clothes dryer is vented into an interior wall in the laundry room, the problem may be found in the "T" top roof jack.
Pulte wasn't thinking very smart by installing the roof jack with fine mesh wire covering the opening to keep bugs and birds out. They didn't consider the mesh keeping the lint from exiting the roof jack, building up on the underneath side and blocking air flow.
The fix is to climb on the roof to remove the wire mesh that is most likely blocked by lint.
To do so, you can reach inside the vent's "T" dome and physically remove the fine wire mesh inside the roof jack.
OR...
If your dryer is vented into an exterior wall and exits directly outside through the stucco wall, the problem will be in the 4" flex duct between the dryer and wall.
In either case, the 4” flex duct should be checked first for lint blockage or kinks.
Restricted clothes dryer air flow will cause the dryer thermocouple to activate shutting off the burner prematurely because of excessive heat build up in the dryer before the clothes are dry.
Without vented heated air flow circulating through the dryer, clothes will take hours to dry, not dry at all. or the dryer will become extremely hot, but the clothes will remain damp.
Here are a few local duct cleaning companies around town.
Las Vegas Lint Clogged...
Las Vegas Lint Clogged...
rlyeh.com
(702) 735-0565 - Las Vegas, NV
A Dryer Vent Cleaning Company -
(702) 735-0565 - 6591 Foxwood Ln, Las Vegas, NV.
A Dryer Vent Cleaning Company -
(702) 735-0565 - 6591 Foxwood Ln, Las Vegas, NV.
ABC Carpet Cleaning
abccarpetcleaning.com
(877) 379-6885 - Las Vegas, NV
(877) 379-6885 - Las Vegas, NV
________________________________
Ever Consider Italian Lighting ?

The way you furnish a room has a huge impact on the mood and feel of the area.
Each room should be decorated and furnished according to how the room is meant to be used.
You can do different things to create a peaceful and tranquil area or a fun and exciting space. It all depends on colors, theme, and other decor that you choose for a room.
Like other aspects of setting up a room, the lighting is an important consideration.
Of course, the lighting in a room can help you to control the amount of light, but more than that it can help you achieve the look you are going for in a room.
Lighting is more than just a light bulb—some light fixtures are quite stylish and intricate, and could even be interpreted as a kind of art.
With this in mind, you should be careful of the lighting you choose for an area.
Before deciding, consider if the fixture will be in harmony with the room's overall theme, and if it will provide the kind of light the area needs.
Will you need a small lamp or a larger hanging fixture?
This won't be a simple decision.
There are many styles of lighting out there, and you will have to decide which is the right one for your situation.
The various lamp styles will either blend with your room's furnishings or distract from them, so pay attention to whether or not the lights you are considering will work.
Of the many lamp styles out there, Italian lighting is one of the most elegant yet simple kinds.
These lights offer a beautiful addition to your room, and are likely to go with just about any theme or setup:
Pendant lights are a popular kind of Italian lighting.

These fixtures hang from the ceiling on a long chain, usually with a single lamp at the end. Lamps can range from a simple look to a more intricate design, and they work very well in kitchens. They can be made of glass, bronze, iron, or other materials.
Italian lighting is also offered in the form of wall lamps and often provides local lighting for a smaller area.

These are attached to the wall of a room and might have one lamp or consist of several that extend out from the surface.
Floor and table lamps can also be found in this Italian style.

These often have a sleek fabric shade or a more elegant glass shade, but they are also available in other materials. This is a great way to get Italian lighting in your home without needing to install anything on your walls or ceiling.
Italian lighting offers many options from classic to modern, and you are likely to find just the right lamp for any area of your house.
Here are a few additional ideas !
Mr. Fix-It
_______________________________
Door Not Closing the Way it Should ?
One of the more common items to find on someone's "honey do" list is needing to repair some doors around the home.
After all, it's actually pretty common to find your doors just a little off kilter, or not sitting just right.
Usually this is do to the door hinge being just a tad loose.
Tightening a door hinge is something that anyone can do, and is something that everyone should do to avoid more costly and time consuming repairs later on.
Here are a few simple ways that you can go about tightening the door hinges in your home.
Tighten existing screws

If your door hinges look to be a little loose in the frame, the simplest solution is to tighten the screws in their existing holes.
Usually this is all that will be needed to ensure that your door hinges are tightened properly.
All you need to do is open your door, and use a screw driver to tighten the screws. If this does not work then you will need to try other methods.
Stripped holes
When you try tightening your screws, and you find that the screw is simply turning around and around, without getting any tighter, you have a slight problem.
What this problem is, is the holes have become stripped and the screws will no longer work.
One of the ways that you can fix this problem is to remove your door hinges from the wall, and in the holes that have been stripped is place some wood glue, and stick a golf tee into that hole.
Cut the tee off so that it is flush against the wall, and then have your door hung back up by the remaining holes.
Allow the glue to dry completely overnight, and then remove the door again.
Using a drill and a small wood bit, drill a pilot hole and then reattach the door. Use a drill to help you insert the new screw into the pilot hole and you have now fixed the problem.
Longer screws

An easier way to get around the problem of stripped holes, is to use a longer screw.
You will want to use a screw that is at least an inch longer than your current one, and simply tighten the screws until the door hangs firm.
Make sure that the screw is at least the same size (thickness) or larger than the original.
Also be careful to use a flathead screw only.
Change opening

One of the more time consuming methods for fixing a stripped hole is to change the opening.
What this means is to change the side of the door that the hinges are on.
This will entail a little cutting of the frame (to allow the hinges freedom of movement), a little wood glue and
paint (to fill the old holes and blank patch of the hinges) and some sweat work.
If this sounds too confusing, try this......
Remove the original screw and make the hole SMALLER by inserting a wooden tooth pick in the hole.
Sometimes it will take more than one tooth pick. Then insert the original screw back in.
Since the toothpick takes up space in the hole, the screw should be a tighter fit and not just continue turning.
Try it.....it works and can save you the cost of a handyman.
_______________________________
Drowning a Smartphone...
is
Not Necessarily Fatal !

You have this wonderful thing called a smartphone.
You store your pictures, phone numbers, texts and just loads of information on this little mini-computer device.
You rely on this little devil to help you keep up to date with just about everything.....
....emails, offers of products and even copies of contracts and your calendar.
....and then it happens!

Your smartphone gets submerged in water !!!!
...and that water can come from....
a swimming pool
a shower or bath
a sink
If that happens....do you know what's next?
.....the commode!

WHEN THIS happens… stop agonizing over how you could have stopped it.
In two-weeks this can make for fun story you can tell people at parties.
A few quick safety tips:
As your iPhone is dripping wet… don’t try to use it to call anyone for help.
This is not a good time to attempt a backup.
It doesn’t matter if the phone has only a few minutes of talk time left. Stay away from electrical outlets.
So… what can you do?
1. Power the iPhone or smartphone off. Hold down the power button until you see the red slide to power off slider.
2. If the phone is in a case… take it out. If it has a dust shield that’s easy to remove, take that off too.
3. Standing over the bath, shake as much water from the phone as you can.
4. Many experts say at this point, rinse with distilled water to get the harsh Nevada minerals out of the phone before it dries.
5. Dry off your phone with a towel. Lint free if possible.
6. If you have a cotton bud, do your best to mop any water from the headphone and charging port.
7. Fill a sealable plastic bag or Tupperware container with plain, uncooked rice. Avoid enriched rice as it leaves a residue.
8. Add the Phone. Completely cover it with rice.
9. Seal the bag or container.
It’s okay to put the bowl in a room that’s warm, but do not put it in the oven, use a hair-dryer, or apply an acetylene torch.
To much heat will ruin your phone.
It will take 24 to 48 hours or more for the rice to draw out all the moisture.
When the time is up, try to power your phone back on.
Just hold down the power button until it hopefully starts.
If all goes well, your phone will work.
If your phone won’t power up, you’ll need to get it repaired, but take some solace in the fact that you’ve done all the right things to minimize water damage.
Oh… and don’t forget to throw out the rice.
____________________________
Leaving a Remote Garage Door Opener In Vehicles...Making it Easy for any thief to Enter Your Home
Most new vehicles have built-in remote garage door openers mounted in the overhead console that allow you to open and close your garage door only when the vehicle ignition is in the “On” position.
This prevents others from opening an unlocked car door or breaking a car window to open your garage door or stealing your hand held remote control for later use to enter your home.
Many vehicles without this built-in feature require you to have a remote garage door opener hanging from the sun visor, in the center console or glove compartment.

Thieves know this and within seconds can have access to your garage.
To solve this problem...
Don't leave the remote garage door opener visible or where the thieves know where to look.
An alternative I use requires a few skills with a soldering iron and a drill.
Remove the cover of the remote garage door opener...
... locate the two terminals under the button programmed to open and close the garage door...
... solder two 6” 20 gauge wires to the terminals and to a momentary miniature push button switch...
...drill a 3/8” hole in the lower dash near the steering wheel within easy reach...
...attach the remote behind the dash with double sided tape, install the switch in the dash...
...and now you have added an additional security measure to prevent home invasion.
Another crime stopper...
Remove all unnecessary documents from your vehicle displaying you name and address (repair bill, business cards, etc).
Documents such as registration and certificate of insurance that must be carried in vehicle, take a black felt pen and black out a portion of your name and the street address.
The Police will understand your intent and not make a fuss. The missing information can be confirmed on your driver license.
True story...
A Las Vegas resident parked their van at Lake Mead to spend the weekend on their boat. Upon returning to the van, they noticed a broken window and the garage remote control was missing.
At home they discovered the garage had been broken into with no signs of forced entry and several thousands of dollars in tools and miscellaneous items missing.
Their 16 year old son was home alone and asleep during the burglary.
How did this happen?
...the thief knew the boaters were probably spending the weekend at the lake...
...the van had a remote garage door opener in plain sight...
...and the vehicle registration was in the glove compartment with the owners name and address.
Can you think of an easier way to invite unwanted guests into your home to rip you off
???
___________________________________
Common Sense Can Not Only Save Your Property...but Your Life !
Pretend for a moment you're a thief....
You're cruising a neighborhood and you see this sign.
 Then you come across a home with this sign in front of it.

Think this isn't the case?
Then think again.
Unless you use common sense...
That's exactly the case with many people in our community !
I have always been a proponent for disclosure of what is happening around us with enough details to keep our friends and neighbors informed and safe.
Unfortunately, our leadership has other ideas...
"do not disclose because it will scare our residents and lower our property values."
All police agencies agree that crime awareness leads to crime prevention, and crime prevention leads to peace of mind and safety.
Our community is very safe considering the surrounding areas in Las Vegas ...that should be transmitted to our residents with reminders how to keep SCA safe and crime free.
I received the following email from a resident in Sun City Anthem.
The victim of this burglary made several mistakes allowing a burglar to enter his house while the family was asleep, remove various items, and leave undetected.
This incident could have ended in a tragic situation if the burglar was confronted or entered the home with alternative motives other than petty theft.
The victim was aware of what should have been done to prevent this incident, but "woke up" to reality after they became a victim of a preventable crime.
"I am willing to share our experience if it might help anyone else to avoid the same."
"Our daughter is visiting and staying in our Casita which is in the front of the house. On Monday night, May 12, the three of us watched a movie on television and retired to bed around midnight. We locked our front and back doors, but did not lock the door from the garage to the kitchen. I awoke at 6 A.M. and came to the kitchen to find the door to the garage propped open and the garage door open. We have a side door to the garage which was closed and locked. The front door of the house was also standing wide open."
"Our daughter, who is a light sleeper, did not hear anything. The Casita was locked and nothing missing. In the house a number of drawers in the kitchen, great room and den were open but undisturbed. A few things had been moved around. Missing was my wife's purse, my wallet (which was in one of the drawers) and both of our cell phones. Also missing was a 19 inch television from the den. A pair of earphones was also taken. All three cars had been opened (the keys were hanging on a rack just inside the house from the garage), but nothing taken and the keys were in place. Our daughter is a traveling nurse and had a number of personal possessions in the garage including a very expensive bicycle. None of these items were touched."
"There was no sign of forced entry, and our home was generally undisturbed. Our bedrooms did not appear to have been entered. We called the police; an officer came, and we filed a report."
"I think one of two things happened. Either the thief may have driven through the neighborhood with some type of universal remote which worked on our garage; or a more likely scenario, while my daughter's car was parked in the garage, my truck was parked in the driveway unlocked."
"I drove the truck early that morning but didn't move it after I parked it in the driveway. I cannot remember whether or not I locked the vehicle."
"When she is not here, I park in the garage and do not habitually lock the truck at night."
" I leave my garage door opener on the driver's visor."
"I think the thief may have been just checking cars and found mine to have the opener and opened the garage door. It is on the other side of the house from our bedroom so we wouldn't be awaken by the sound."
" He couldn't have been in the house very long. I had an I-pad and a Kindle next to my cell phone, but he (they?) only took the phone."
Lessons learned:
1. Lock the car/truck doors at night, especially if parked outside.
2. Lock the door from the garage to the house.
3. Turn on the garage door lock mechanism at night.
4. The value of our stolen items was just about equal to the amount of the deductible on our insurance. We were also advised that if we made a claim our rates at next anniversary would probable go up. Value of insurance?
5. Consider a security system. I haven't decided yet if it would make a difference.
"We are happy that we didn't encounter this thief and the things stolen were easily replaced. It took two days to deal with credit cards, driver's licenses, etc. We have had no activity on any cards, but closed the accounts as a safety precaution. I am still concerned about identity theft, no sign of that yet."
The Moral of This Story....
IF YOU MUST PARK A VEHICLE IN THE DRIVEWAY...
LOCK IT
and
REMOVE THE GARAGE REMOTE CONTROL UNIT.
and
LOCK THE DOOR FROM THE GARAGE TO YOUR HOME.
Use common sense, and don't make it easy for a thief to take your belongings...or worse, possibly harm you or a loved one !
________________________________________
Problems with Moen Kitchen Faucets ?
The way you furnish a room has a huge impact on the mood and feel of the area.
Each room should be decorated and furnished according to how the room is meant to be used.
You can do different things to create a peaceful and tranquil area or a fun and exciting space. It all depends on colors, theme, and other decor that you choose for a room.
Like other aspects of setting up a room, the lighting is an important consideration.
Of course, the lighting in a room can help you to control the amount of light, but more than that it can help you achieve the look you are going for in a room.
Lighting is more than just a light bulb—some light fixtures are quite stylish and intricate, and could even be interpreted as a kind of art.
With this in mind, you should be careful of the lighting you choose for an area.
Before deciding, consider if the fixture will be in harmony with the room's overall theme, and if it will provide the kind of light the area needs.
Will you need a small lamp or a larger hanging fixture?
This won't be a simple decision.
There are many styles of lighting out there, and you will have to decide which is the right one for your situation.
The various lamp styles will either blend with your room's furnishings or distract from them, so pay attention to whether or not the lights you are considering will work.
Of the many lamp styles out there, Italian lighting is one of the most elegant yet simple kinds.
These lights offer a beautiful addition to your room, and are likely to go with just about any theme or setup:
Pendant lights are a popular kind of Italian lighting.
These fixtures hang from the ceiling on a long chain, usually with a single lamp at the end. Lamps can range from a simple look to a more intricate design, and they work very well in kitchens. They can be made of glass, bronze, iron, or other materials.
Italian lighting is also offered in the form of wall lamps and often provides local lighting for a smaller area.
These are attached to the wall of a room and might have one lamp or consist of several that extend out from the surface.
Floor and table lamps can also be found in this Italian style.
These often have a sleek fabric shade or a more elegant glass shade, but they are also available in other materials. This is a great way to get Italian lighting in your home without needing to install anything on your walls or ceiling.
Italian lighting offers many options from classic to modern, and you are likely to find just the right lamp for any area of your house.
Here are a few additional ideas !
Mr. Fix-It
_______________________________
Door Not Closing the Way it Should ?
One of the more common items to find on someone's "honey do" list is needing to repair some doors around the home.
After all, it's actually pretty common to find your doors just a little off kilter, or not sitting just right.
Usually this is do to the door hinge being just a tad loose.
Tightening a door hinge is something that anyone can do, and is something that everyone should do to avoid more costly and time consuming repairs later on.
Here are a few simple ways that you can go about tightening the door hinges in your home.
Tighten existing screws
If your door hinges look to be a little loose in the frame, the simplest solution is to tighten the screws in their existing holes.
Usually this is all that will be needed to ensure that your door hinges are tightened properly.
All you need to do is open your door, and use a screw driver to tighten the screws. If this does not work then you will need to try other methods.
Stripped holes
When you try tightening your screws, and you find that the screw is simply turning around and around, without getting any tighter, you have a slight problem.
What this problem is, is the holes have become stripped and the screws will no longer work.
One of the ways that you can fix this problem is to remove your door hinges from the wall, and in the holes that have been stripped is place some wood glue, and stick a golf tee into that hole.
Cut the tee off so that it is flush against the wall, and then have your door hung back up by the remaining holes.
Allow the glue to dry completely overnight, and then remove the door again.
Using a drill and a small wood bit, drill a pilot hole and then reattach the door. Use a drill to help you insert the new screw into the pilot hole and you have now fixed the problem.
Longer screws
An easier way to get around the problem of stripped holes, is to use a longer screw.
You will want to use a screw that is at least an inch longer than your current one, and simply tighten the screws until the door hangs firm.
Make sure that the screw is at least the same size (thickness) or larger than the original.
Also be careful to use a flathead screw only.
Change opening
One of the more time consuming methods for fixing a stripped hole is to change the opening.
What this means is to change the side of the door that the hinges are on.
This will entail a little cutting of the frame (to allow the hinges freedom of movement), a little wood glue and
This will entail a little cutting of the frame (to allow the hinges freedom of movement), a little wood glue and
paint (to fill the old holes and blank patch of the hinges) and some sweat work.
If this sounds too confusing, try this......
Remove the original screw and make the hole SMALLER by inserting a wooden tooth pick in the hole.
Sometimes it will take more than one tooth pick. Then insert the original screw back in.
Since the toothpick takes up space in the hole, the screw should be a tighter fit and not just continue turning.
Try it.....it works and can save you the cost of a handyman.
_______________________________
Drowning a Smartphone...
is
Not Necessarily Fatal !
You have this wonderful thing called a smartphone.
You store your pictures, phone numbers, texts and just loads of information on this little mini-computer device.
You rely on this little devil to help you keep up to date with just about everything.....
....emails, offers of products and even copies of contracts and your calendar.
....and then it happens!
Your smartphone gets submerged in water !!!!
...and that water can come from....
a swimming pool
a shower or bath
a sink
If that happens....do you know what's next?
.....the commode!
WHEN THIS happens… stop agonizing over how you could have stopped it.
In two-weeks this can make for fun story you can tell people at parties.
A few quick safety tips:
As your iPhone is dripping wet… don’t try to use it to call anyone for help.
This is not a good time to attempt a backup.
It doesn’t matter if the phone has only a few minutes of talk time left. Stay away from electrical outlets.
So… what can you do?
1. Power the iPhone or smartphone off. Hold down the power button until you see the red slide to power off slider.
2. If the phone is in a case… take it out. If it has a dust shield that’s easy to remove, take that off too.
3. Standing over the bath, shake as much water from the phone as you can.
4. Many experts say at this point, rinse with distilled water to get the harsh Nevada minerals out of the phone before it dries.
5. Dry off your phone with a towel. Lint free if possible.
6. If you have a cotton bud, do your best to mop any water from the headphone and charging port.
7. Fill a sealable plastic bag or Tupperware container with plain, uncooked rice. Avoid enriched rice as it leaves a residue.
8. Add the Phone. Completely cover it with rice.
9. Seal the bag or container.
It’s okay to put the bowl in a room that’s warm, but do not put it in the oven, use a hair-dryer, or apply an acetylene torch.
To much heat will ruin your phone.
It will take 24 to 48 hours or more for the rice to draw out all the moisture.
When the time is up, try to power your phone back on.
Just hold down the power button until it hopefully starts.
If all goes well, your phone will work.
If your phone won’t power up, you’ll need to get it repaired, but take some solace in the fact that you’ve done all the right things to minimize water damage.
Oh… and don’t forget to throw out the rice.
____________________________
Leaving a Remote Garage Door Opener In Vehicles...Making it Easy for any thief to Enter Your Home
Most new vehicles have built-in remote garage door openers mounted in the overhead console that allow you to open and close your garage door only when the vehicle ignition is in the “On” position.
This prevents others from opening an unlocked car door or breaking a car window to open your garage door or stealing your hand held remote control for later use to enter your home.
Many vehicles without this built-in feature require you to have a remote garage door opener hanging from the sun visor, in the center console or glove compartment.
Thieves know this and within seconds can have access to your garage.
To solve this problem...
Don't leave the remote garage door opener visible or where the thieves know where to look.
An alternative I use requires a few skills with a soldering iron and a drill.
Remove the cover of the remote garage door opener...
... locate the two terminals under the button programmed to open and close the garage door...
... solder two 6” 20 gauge wires to the terminals and to a momentary miniature push button switch...
...drill a 3/8” hole in the lower dash near the steering wheel within easy reach...
...attach the remote behind the dash with double sided tape, install the switch in the dash...
...and now you have added an additional security measure to prevent home invasion.
Another crime stopper...
Remove all unnecessary documents from your vehicle displaying you name and address (repair bill, business cards, etc).
Documents such as registration and certificate of insurance that must be carried in vehicle, take a black felt pen and black out a portion of your name and the street address.
The Police will understand your intent and not make a fuss. The missing information can be confirmed on your driver license.
True story...
A Las Vegas resident parked their van at Lake Mead to spend the weekend on their boat. Upon returning to the van, they noticed a broken window and the garage remote control was missing.
At home they discovered the garage had been broken into with no signs of forced entry and several thousands of dollars in tools and miscellaneous items missing.
Their 16 year old son was home alone and asleep during the burglary.
How did this happen?
...the thief knew the boaters were probably spending the weekend at the lake...
...the van had a remote garage door opener in plain sight...
...and the vehicle registration was in the glove compartment with the owners name and address.
Can you think of an easier way to invite unwanted guests into your home to rip you off
???
___________________________________
Common Sense Can Not Only Save Your Property...but Your Life !
Pretend for a moment you're a thief....
You're cruising a neighborhood and you see this sign.
Then you come across a home with this sign in front of it.
Think this isn't the case?
Then think again.
Unless you use common sense...
That's exactly the case with many people in our community !
I have always been a proponent for disclosure of what is happening around us with enough details to keep our friends and neighbors informed and safe.
Unfortunately, our leadership has other ideas...
"do not disclose because it will scare our residents and lower our property values."
All police agencies agree that crime awareness leads to crime prevention, and crime prevention leads to peace of mind and safety.
Our community is very safe considering the surrounding areas in Las Vegas ...that should be transmitted to our residents with reminders how to keep SCA safe and crime free.
I received the following email from a resident in Sun City Anthem.
The victim of this burglary made several mistakes allowing a burglar to enter his house while the family was asleep, remove various items, and leave undetected.
This incident could have ended in a tragic situation if the burglar was confronted or entered the home with alternative motives other than petty theft.
The victim was aware of what should have been done to prevent this incident, but "woke up" to reality after they became a victim of a preventable crime.
"I am willing to share our experience if it might help anyone else to avoid the same."
"Our daughter is visiting and staying in our Casita which is in the front of the house. On Monday night, May 12, the three of us watched a movie on television and retired to bed around midnight. We locked our front and back doors, but did not lock the door from the garage to the kitchen. I awoke at 6 A.M. and came to the kitchen to find the door to the garage propped open and the garage door open. We have a side door to the garage which was closed and locked. The front door of the house was also standing wide open."
"Our daughter, who is a light sleeper, did not hear anything. The Casita was locked and nothing missing. In the house a number of drawers in the kitchen, great room and den were open but undisturbed. A few things had been moved around. Missing was my wife's purse, my wallet (which was in one of the drawers) and both of our cell phones. Also missing was a 19 inch television from the den. A pair of earphones was also taken. All three cars had been opened (the keys were hanging on a rack just inside the house from the garage), but nothing taken and the keys were in place. Our daughter is a traveling nurse and had a number of personal possessions in the garage including a very expensive bicycle. None of these items were touched."
"There was no sign of forced entry, and our home was generally undisturbed. Our bedrooms did not appear to have been entered. We called the police; an officer came, and we filed a report."
"I think one of two things happened. Either the thief may have driven through the neighborhood with some type of universal remote which worked on our garage; or a more likely scenario, while my daughter's car was parked in the garage, my truck was parked in the driveway unlocked."
"I drove the truck early that morning but didn't move it after I parked it in the driveway. I cannot remember whether or not I locked the vehicle."
"When she is not here, I park in the garage and do not habitually lock the truck at night."
" I leave my garage door opener on the driver's visor."
"I think the thief may have been just checking cars and found mine to have the opener and opened the garage door. It is on the other side of the house from our bedroom so we wouldn't be awaken by the sound."
" He couldn't have been in the house very long. I had an I-pad and a Kindle next to my cell phone, but he (they?) only took the phone."
Lessons learned:
1. Lock the car/truck doors at night, especially if parked outside.
2. Lock the door from the garage to the house.
3. Turn on the garage door lock mechanism at night.
4. The value of our stolen items was just about equal to the amount of the deductible on our insurance. We were also advised that if we made a claim our rates at next anniversary would probable go up. Value of insurance?
5. Consider a security system. I haven't decided yet if it would make a difference.
"We are happy that we didn't encounter this thief and the things stolen were easily replaced. It took two days to deal with credit cards, driver's licenses, etc. We have had no activity on any cards, but closed the accounts as a safety precaution. I am still concerned about identity theft, no sign of that yet."
The Moral of This Story....
IF YOU MUST PARK A VEHICLE IN THE DRIVEWAY...
LOCK IT
and
REMOVE THE GARAGE REMOTE CONTROL UNIT.
and
LOCK THE DOOR FROM THE GARAGE TO YOUR HOME.
Use common sense, and don't make it easy for a thief to take your belongings...or worse, possibly harm you or a loved one !
Problems with Moen Kitchen Faucets ?
Did you know they cost $456.00 ???
Bet you never knew that you could get them replaced FREE of CHARGE, did you?
Does your kitchen faucet look any of these three models? All are model numbers 7560.
.jpeg)
.jpeg)
.jpeg)
Are you the original owner of your home?
Did you know they cost $456.00 ???
Bet you never knew that you could get them replaced FREE of CHARGE, did you?
Does your kitchen faucet look any of these three models? All are model numbers 7560.


Are you the original owner of your home?
Did you originally install it?
If it's leaking, rusting, corroding, hard to swivel the spout, your difficult to turn it on or off...
You want it replaced with a NEW ONE.
Simply...
Did you originally install it?
If it's leaking, rusting, corroding, hard to swivel the spout, your difficult to turn it on or off...
You want it replaced with a NEW ONE.
Simply...
Call Moen U.S. 1-800-Buy-Moen (1-800-289-6636)
5:00 am to 4:00 PM PDT Monday thru Friday
6:00 am to 12:00 PM PDT Saturday
When calling the above number...
Ask for "warranty service".
_________________________
Replacing a Faucet
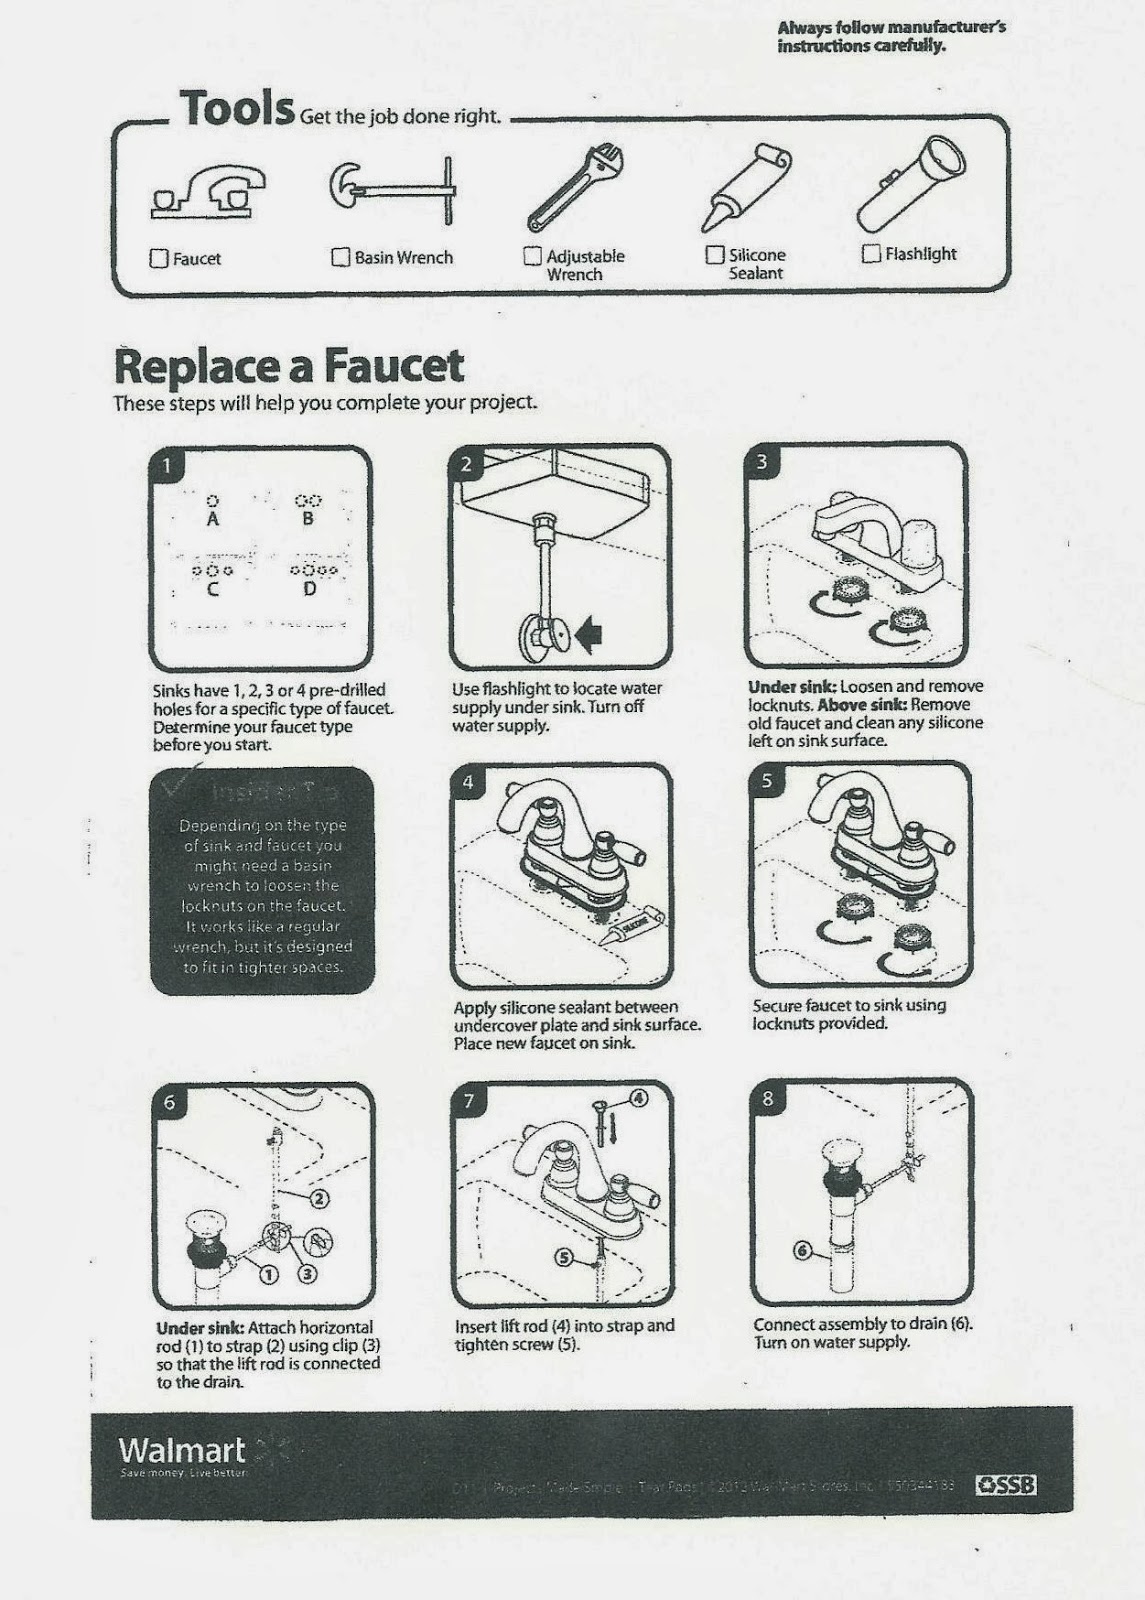
_________________
Minor Garage Door Trim Repair
An Anthem Opinions reader sent us a photo of her garage door with the weatherstrip trim pulling away from the jamb.

When this occurs, usually the cause is swelling of the trim board forcing it to bow and pull away from the door jamb.
Two options to fix the issue...
Replace the entire weatherstrip trim around the door and paint...
Or...
re-adjust the bowed trim.
To re-adjust the trim:
Use a flat pry bar or large flat blade screwdriver to (gently-gently-gently) pry the trim board away from the jamb below the bow toward the ground.
Use wire cutters to cut off any nails protruding through the back side of the trim board or sticking out of the jamb.
Push to trim board back in place allowing the trim board to lay flat against the jamb and re-nail about every 12” down on each side using #6 or #8 x 2” finish nails.
Counter sink the nail heads, add a little spackle or putty to cover the nails.
Dab on the same color paint with a Q-Tip over the nails or repaint the entire trim piece.
Repair cost for the “do-it-yourself”
Less than $20.00.
____________________
5:00 am to 4:00 PM PDT Monday thru Friday
6:00 am to 12:00 PM PDT Saturday
When calling the above number...
Ask for "warranty service".
_________________________
Replacing a Faucet
_________________
Minor Garage Door Trim Repair
An Anthem Opinions reader sent us a photo of her garage door with the weatherstrip trim pulling away from the jamb.
Replacing Ground Fault Circuit Interrupters
Let's talk about GFCI or GFI (Ground Fault Circuit interrupters) receptacles throughout your home.
These little devices are required to be installed in certain areas of your home to protect you against unexpected electrical shock.
Kitchens, laundry rooms, bathrooms, garages, and exterior electrical outlets are required to be protected with a GFCI or GFI.
http://www.cpsc.gov/PageFiles/118853/099.pdf
Like everything in our home these devices begin to fail after a few years of usage. When they do begin to fail, they will trip (turn-off) with no apparent reason or totally fail to reset after they trip.
Replacement is relatively simple if you follow the proper procedure
.http://www.youtube.com/watch?v=OD-XIETgabE
An inexpensive circuit tester is a must for home owners to have available when power is lost to lighting or elect electrical wall outlet.

Using the tester allows you to trouble shoot electrical problems before calling a electrician.


http://www.youtube.com/watch?v=Vkd43t2y2to
Ground Fault Circuit Interrupters ($11 to $15) and the tester ($8) can be purchased at Lowes, Home Depot or online.
_____________________
Saving Energy Costs

Energy bills tend to rise while the outside temperature drops, and no one wants to spend more money than they have to. Check out a few simple ways to lower your expenses in the fall and winter months.
One easy way to warm up a room is to reverse your ceiling fans. In the summer you want your fan to run counterclockwise so it blows down. However, in the colder months, you should reverse the direction of the fan to pull cool air toward the ceiling. Simply flip the toggle switch underneath the fan and put it on a low setting. You should feel the difference in no time.Another way to save on energy costs is by flushing out your water heater twice a year. As sediment and debris build up, they can cause a drop in efficiency or even leaks over time, which will ultimately cost you.
To flush, fasten a hose to the faucet at the bottom of the tank. Run the other end of the hose outside or to a laundry tub. Open the valve and let the water and residue drain out. Do this often and you'll be good to go.
Or...do as I do...keep a short hose attached the water heater drain value, each time you mop the floor. Fill the mop bucket with hot water from the water heater. That saves time trying to fill the mop bucket via the kitchen sink "low flow" faucet.
.jpeg)
Lowering your monthly bills doesn't have to take too much time and energy. Using these simple tips, you can beat the cold without beating up your budget.
____________________________________________________________________________
SEWER / TOILET BLOCKAGE ???
WHAT CAN YOU DO??
House drains/sewer problems can be an embarrassing, smelly, and messy issue if your toilet(s) back up and overflow when have a bunch of friends, neighbors, and relatives in for the holidays.
Usually the house drains/sewer lines are more apt to plug up during these times because of the high demand using the bathrooms.
When one toilet plugs up...normally the blockage is in the toilet and can be “plunged” with a plunger to clear the drain line.
Usually the house drains/sewer lines are more apt to plug up during these times because of the high demand using the bathrooms.
When one toilet plugs up...normally the blockage is in the toilet and can be “plunged” with a plunger to clear the drain line.

When more than one toilet backs up at the same time and/or you notice debris in the shower pan/tub drain(s) backing up...
You have a mainline sewer blockage.
Don't panic and do not call Roto-Rooter just yet.
In the front yard within 2 feet of the house, you should see three black rubber caps in a straight line slightly above ground level...

The pipe closest to the house is a cleanout.
The middle pipe contains an “anti-back flow preventer.”
The pipe furthest from the house is another cleanout.
Caution...Do-Not remove the cleanout cap nearest the house, if you do and the sewer line is completely full, removing the cap can give you a smelly shower as the pressure inside the pipe is forced upward in your face.
First...remove the pipe cap furthest from the house...if no water bubbles out, the blockage is in the middle pipe containing the “anti back-flow preventer” or further up stream toward your house.
Next...remove the middle cap slowly...a few inches down inside the pipe you will find a white 3/4” PVC pipe. Pull the PVC pipe up and out of the pipe and check the flapper valve on the bottom for debris. The flapper may be clogged with paper or other items folks put down the toilet.

Normally, if the flapper is causing the blockage, by pulling it up you may hear water rushing through the sewer pipe...if so...then mission accomplished.
Sometimes, the plugged sewer line will be between the cleanout pipe nearest the house and the pipe containing the flapper valve...
Carefully remove the cleanout cap nearest the house (to avoid a shower), run your garden hose down the pipe full blast, jab the garden house into the pipe as far as you can and let the water run a few minutes to clear all the debris.
If water flows freely, your problem is solved...put everything back in its place (make sure the flapper valve is reinstalled so it will open as water flows from the house to the street)...
Flush all toilets, run water in tubs, showers and sinks to ensure all blockages are gone.
And you have saved yourself about $150 service call.
IF YOU WANT TO SEE THE MOST DECORATIVE PLUNGERS....
=======================================================================
Organizing that Garage Can Be Easier Than You Think....if you Think About it !
Does your garage look like this ?

Here is a low cost simple way to organize your garage...
Keep as much as possible on wheels for ease of moving around, locating things, and cleaning out your garage floor.
This method will also reduce unwanted critters such as bugs, spiders, rats, mice and on occasion a snake or two.
Now you can hose out your garage, or if you have a water leak there is no fear of damaging your valuables that you've forgotten you have been storing for years....
... things you will never use again or saving things for your kids or grand kids that they really don't want.
Using a 4 wheel dolly and see-through stackable storage containers allows you to see what is in the containers as well the ability to reorganize your garage with ease.

Containers can be purchased a Home Depot or Lowes for about $6...

http://www.homedepot.com/p/HDX-12-gal-Flip-Top-Tote-Colors-Vary-by-Store-211512/202520515#.UoziyyTTm_4
The dollies are available on sale now at Harbor Freight for only $7.89

_____________________________________________
WANT TO TAKE ADVANTAGE OF HOME IMPROVEMENT DISCOUNTS?

Many retail store are anxious for your business. These stores will not only price match lower prices for items from competitors, but they will offer an additional discount to make you happy.Price matching with additional discount is not always advertised. "If you don't ask...they won't tell."
A garbage disposal died in one of my rentals. During my online search for a Badger 1 disposal, I discovered Home Depot advertised at $74.96 and Lowes at $84.96.
Sneaky me...I decided to put it to the test.
I printed out Home Depot $74.96 ad and drove to Lowes (which was closer to home). When I showed the clerk the Home Depot ad for $10 less, she said they would price match.
I said...“and...she said... “plus additional 10% discount.”
So, I purchase the Badger 1 for a total of $72.92.
After all, this is a form of Senior entertainment to occupy some of our spare time.
It is easy to go out and spend money, but challenging to price shop
...and it's "invigorating."________________________________________________
That Garage Getting Too Small for Your Eyes ?

Here is a simple but effective way to park you car without crashing into walls or items stored in your garage.

I have used this device for years in my cramped garage to ensure my vehicles are parked...
...in far enough to close the garage safely.
...not to far to allow access in front the vehicles or hit objects in front of the vehicle.
...aligns vehicles in garage to allow you to enter and exit your vehicle without collateral damage.
The installation is simple with two faced sticky tape or screws, comes with a power supple to eliminate changing batteries.
If you can climb a 6' ladder...that is all you need for installation.
This device could save you $$$ in door ding repairs or damage to vehicles, garage doors, and items stored in the garage.
 |
______________________________________________________________________________________
Problems with Cabinet Doors ?
DO YOU HAVE CABINET DOORS NOT CLOSING PROPERLY?
Cabinets installed in our homes have EURO type hidden hinges to open and close the cabinet doors.

Years of use opening and closing the doors causes the internal spring mechanism to become weak or broken not allowing the door to close properly.


A simple fix...
Exchange one or more hinge(s) on the frequently used door with another door used infrequently such as the cabinets above the microwave or refrigerator.

Many times just exchanging one tired hinge with one seldom used will solve the problem for a few more years.
On large doors with 3 hinges you might exchange one or two or three hinges with several smaller doors to solve the problem.
As a last resort...
Replacement Euro hinges can be purchased online, Home Depot, Lowes, or other hardware stores.
It is important to match the hinges exactly because hinges may look similar, but have different design characteristics making them incompatible with existing hinges when used on a single door.
If you buy a different brand/type hinge, it would be wise to replace all hinges on the door at the same time.
Save the good hinges to replace weak or broken hinges on other doors.
A Phillips screwdriver is the only tool you need to complete the job.

Expect to pay less than $3.00 per hinge.
___________________________
That Heating & Air Conditioning Unit...is Getting Old

LETS TALK ABOUT AN EXPENSIVE PROPOSITION IF YOUR HEATING AND AIR CONDITIONING UNIT HAS ISSUES.
Our homes in Sun City Anthem are aging, as we are, and periodically, problems occur requiring repair.
Usually the problems happen when you need heating or air conditioning the most, and "panic mode" sets in as to what to do...and who to call.
I have found many heating and air conditioning companies are reliable and reasonably priced, but like other trades....some companies are out to "rip you off" when the opportunity arises.
Don't be fooled.
Heating and air conditioning units are made up of many components, and if one part fails, it DOESN'T MEAN that you should spend thousands of $$$ to replace the entire unit.
Component failures can be caused by a simple fuse (costing about $2.00), batteries in the thermostat (about $4.00), circuit board (about $200.00), or possibly a fan motor (about $250.00).
These are approximate costs for parts, and any additional expense is a labor charge the company would charge you.
As an example, the heating components can last for up to 20 years in some cases.
Air conditioning can last past 10 years due to he high usage in our hot climate.
But...I have heard horror stories.
One was an 80 year old lady who was charged $18,000.00 to replace the complete heating and air conditioning unit (HVAC), when the cost should have been less the $2,000 p/ton (a 4 ton HVAC for an 1800 square foot home) should have cost only ($2,000 x 4), or about $8,000.00.
But...as I said earlier, all parts do not fail at the same time.
Recently a Sun City Anthem resident called me and asked me what to do when his air conditioning stopped working. I volunteered to "trouble shoot" the cause, and in less than 20 minutes, I found ALL COMPONENTS were functioning properly....except the circuit board, which had failed.
I called MY AIR CONDITIONING SPECIALIST, to report what I had discovered, and he was actually able to salvage the existing circuit board that had failed by installing a remote fan relay, rather selling the resident a completely new circuit board.
Needless to say, the homeowner was very appreciative when he was able to pay $90.00 instead of over $400.00 to $500.00 to replace the entire circuit board....and even happier that he was able to avoid replacing the ENTIRE HEATING & AIR CONDITIONING UNIT at thousands of dollars to replace a unit that was only SEVEN YEARS old.
_____________________________________________
OVERHEAD GARAGE DOOR SECURITY
Most SCA Residents are not aware of the potential overhead garage door security hazard.
.jpg) The newer garage door openers provide a “rolling code” to provide additional security against the bad guys gaining entry into your home through your garage door using a remote control not programmed to the garage door opener.
The newer garage door openers provide a “rolling code” to provide additional security against the bad guys gaining entry into your home through your garage door using a remote control not programmed to the garage door opener.
The professional bad guys have sophisticated electronic equipment capable of transmitting hundreds of random codes in seconds as they drive down your street in hopes to find a match that will open your garage door.
This activity is difficult to defend against...
...unless…you block remote control access by pressing the button the wall unit next to the entry door to your home.
.jpg)
Blocking remote control access can be real a nuisances if you forget to reactivate the remote control access…no one can open the garage door with any remote.
Another issue to remember in securing you garage from illegal remote control access is to frequently remove all stored remote control numbers in the garage door opener and reactivating only the remotes you currently use.
This can be done by following the garage door manual instructions.
http://www.chamberlain.com/NR/rdonlyres/953DinstructionManua21vqvfcxsdskwiztfjybskepvcmtcrtdbg.pdf


(cut & paste...cannot be opened by merely clicking on the link)
Homeowners should be aware of workers (handyman, water softener, landscapers, etc.) you give access to your garage with out watching their activities.
In SCA, I have found there are two types of remote garage door openers capable of opening almost every garage door once programmed.
All the bad guys have to do is walk into your garage with remote(s) in hand, remove the light cover on the rear of garage door opener, press the learn button, press the buttons on the remote(s) until the garage door light flashes (this only takes less than 15 seconds) to program …………and now the bad guys have access to you garage any time they desire with or without you permission.
Many folks buying new or resale homes usually have the door locks re-keyed, but fail to reset the garage door opener.
Handicapped Grab Bars for Your Home
Many of our homes in SCA are equipped with handicapped grab bars in bathroom to assist our aging community.

ADA Compliant (600 lb rated)
Non-ADA Compliant (300 lb rated)
Handicapped grab bars can be purchased in many different styles and lengths online, Home Depot, or Lowes.
The grab bars are either ADA certified or Non-ADA certified. The main difference is the certification and usually the weight rating.
Proper installation is very important regardless of certified or non-certified.
Grab bar kits provide installation instructions mounting hardware for proper mounting to ensure against failure.
Mounting grab bars can either be horizontal, vertical, or diagonally, attached to a wall stud or with various types of fasteners depending on wall conditions such as tile, drywall, synthetic material, fiberglass, etc.
Mounting grab bars to studs, ceramic tile, and synthetic material provides the strongest attachment.
Fiberglass enclosure with drywall backing is by far the weakest.
Special mounting hardware should be used and may not be included with normal packaged mounting hardware. The local hardware store can advise and provide various mounting hardware for fiberglass.
Click here for additional information and videos.
Is a Battery Good...or Bad ?
Recently I received emails from two of our readers (and I might add two of my most favorite people in Sun City Anthem), Dorothy Yu and Shep Rose, regarding a video about how to test whether a battery is functioning or should be replaced.
This may be circulating around our community, but if you haven't seen it, my only comment is...
...Good job, Dorothy and Shep!
...this little 85 pounds of dynamite and retired judge combination is a force to be reckoned with !
What a great piece of information to be aware of as a tip to all homeowners.
How many of you out there have had to replace a battery only to find out the new one...was as bad as the old one?
Well...Thanks to Dorothy Yu and Shep Rose, those days might have come to an end...if you watch the video !
Dick Arendt
________________________________________________
IS YOUR CITY OF HENDERSON
I have received several calls asking for advice regarding high monthly water bills. In two cases their bill was in the high $100 range during the last few summer months.
After asking other residents about their monthly bill, I have discovered that most residents (without a pool or pond) will use about 9,000 to 16,000 gallons of water monthly for household use and landscape during this time of year as compared to the wintertime, when normal usage is 5,000 to 9,000 gallons.
The base cost for water is only $1.46 per 1,000 gallons, but when you add in surcharges, taxes, and sewer fees, the total monthly cost for 6,000 gallons is about $50.
There are a few simple steps a homeowner can take to isolate a problem.
1) Remove the water meter cover in the sidewalk; open the black meter cover to see if the small triangle dial is spinning. If the dial is spinning ever so slightly, and no water is being used in the house and the sprinklers are turned off…YOU HAVE A LEAK!

Water Meter on Sidewalk

Water Meter Dial
2) Next, turn off the house supply valve in the garage located just inside the overhead garage door.

Water Value and Regulator House Supply
Turn off the gate valve on the lawn sprinkler supply before the anti-siphon valve located on the outside of the garage.

Landscape Sprinkler Anti-Siphon Valve
3) Now check to see if the water meter triangle dial is spinning.
If not, that indicates the underground water main supply line between the meter and two valves previously turned off is…LEAK FREE!
4) Next, open the valve in the garage and if the dial is not spinning…YOUR INSIDE HOUSE PLUMBING IS LEAK FREE!
5) Next open the sprinkler valve and turn off the valve in the garage. If water meter triangle dial is NOT spinning…LAWN SPRINKLER SUPPLY IS FREE OF LEAKS.
6) If all the above tests provide no indication of leaks…and the bill is still high...YOU PROBABLY HAVE A PROBLEM WITH THE SPRINKLER SYSTEM.
7) The sprinkler control valves located in the underground box next to the anti-siphon valve could be leaking and not shutting off the water when the sprinklers are not in use, or the sprinkler controller is not properly set to the correct duration to water, number of water times per day or week, or you have a broken or crack buried line somewhere in the yard.
The toilet is the most common cause for unwanted leaking inside the house. I have written an article previously on trouble shooting a leaking toilet.
Broken or cracked buried yard sprinkler water lines can usually be spotted by extreme wet spot area either near a plant or mid-span between plants.
Sometimes a sprinkler dripper head will blow off and you will see a stream of water shooting into the air when in use.
...and here's other helpful advice....
The City of Henderson offers a ONE-TIME leak adjustment in the case of some significant leaks. Adjustments consist of a discounted rate for water consumed in excess of normal daily consumption during a major leak.
Leak Adjustment Program Qualifications: • Have not received a prior leak adjustment at this service address; AND • Resident of the property for a minimum of 13 months prior to the leak; AND • Water consumption increase/high bill occurred less than twelve months ago; AND • The leak which caused the high consumption has been repaired; AND • Average daily water consumption during leak was more than double that of the same period of the previous year; AND • Average daily water consumption has returned to normal for at least one subsequent billing cycle; AND • Have proof of repairs, I.e. Receipts for labor, parts, or equipment; photos; etc.; AND • City of Henderson Utility Services account paid in full/current If you meet ALL of the qualifications above, you may submit an application for a one-time leak adjustment. Once all required information has been received and verified an adjustment will be applied to your account and appear on a subsequent bill.
Adjustments will be granted for one period of no more than 90 days.
Please note this is a one-time only courtesy adjustment; subsequent leaks will not qualify for the program. If you think you qualify for this program, please submit a Request for Leak Adjustment by selecting Utility Services/Water & Sewer/Leak Adjustment Program on the City of Henderson website, or call them at (702) 267-2323 or visit their website at: |
Leaky Toilet ?
Having any problems with the "throne" lately?

Toilets fail to do their job just like every item in your home.
And if toilet is leaking, here are a few tips you should be aware of on how to handle the job.
.jpg)
Flush valves and flapper valves are very easy to remove and replace using only one pair of slip joint pliers.
The cost is less than $20 dollars to replace both with a Flushmaster 400 kit (flush valve and flapper valve) purchased online or from Lowes or Home Depot.

When the flush valve or flapper valve fails, you will have water running into the toilet tank between normal flushes, and see water trickling into the toiled bowl.
Under these circumstances, the flush valve is not shutting off the water supply into the tank, or the flush valve flapper is not sealing the drain between the tank and toilet bowl.
To determine what has failed, remove the tank top and see if the water level is overflowing in the vertical tube in the center of the toilet tank.
If that is the case, either the flush valve is defective or the float level set is to high.
The float can be lowered to shut off the flush valve sooner preventing water from overflow in the vertical tub.
After a moment or two, if the water level, following a normal flush, is below the top of the vertical tube.... but continues to rise and overflows into the vertical tube....
... then the flush valve is defective and must be replaced.
The flapper valve has failed when you observe water continually dripping into the toilet bowl between flushes and you have ruled out a defective flush valve or float adjustment.
The two links below will show you how to remove and replace the defective parts.
I recommend changing both the flush valve and flapper valve if either has failed. The additional expense is minimal, and will save another repair job replacing the other part in the near future.
_________________________________________________
Security Cameras...Are They Necessary ?
Over the past few weeks, I've received a few calls from concerned residents over personal safety issues, and was asked about my feelings regarding home security cameras, and because safety is always a concern, I thought I would share my feelings about them.
Do you need security cameras to protect your property?
.jpg)
(Security Camera....hidden....left of window)
It appears the crime is on the rise in Sun City Anthem and more and more residents are considering installing security cameras.
Sun City Anthem, in reality, has a low crime rate compared to other parts of the Las Vegas valley area.
Before you spend several thousand dollars on a complete security camera system, you should consider alternatives costing much less and will give the same results.
I've used both complete security camera systems with recorder and monitors, and I have also installed dummy cameras on construction sites and homes I occupied.
Both systems worked for me and I am happy to say…no crime has ever occurred.
I recommend installing dummy cameras and warning signs to deter would-be criminals willingness to choose you as a victim.
Bad guys have no way to tell whether the cameras are real or not, and in most cases, will not attempt to commit a crime knowing the cameras might be watching their every move. Normally, the bad guys will simply move on down the street where they feel safe from being identified.
Dummy cameras look real and have a flashing light to attract attention to the cameras.

(Dummy Security Camera)
The only maintenance required once installed, is replacing the LED batteries after months and months of usage.
Dummy cameras and warning signs can be purchased for less than $100 dollars and installed within a couple of hours.
I have included links to purchase dummy cameras and warning signs.
_______________________________________________________________________________
Beware of a "free" Garage Door Check-up
Lately, a company named Anytime Garage Door Company has been in our neighborhood offering a free garage door checkup and lube.
That sounds very nice of them to help our seniors…but be aware of their real motive.
My neighbor had Anytime Garage Door inspect and lube their garage door.
Being rather inquisitive, I asked my neighbor if he was having garage door issues. He said no just having a free service call.
In the meantime, the worker stated the garage door was too heavy for the garage door opener, the springs were weak, and should be replaced, or the garage door opener would burn out in a very short period of time. He did not recommend adjusting the spring torque because that could cause the springs to break…
Baloney !!!!
Springs are designed to torque…that is how they work to open your garage door and some springs will last 10,000 to 30,000 open and closing without failure.

Garage Door Torsion Spring

Garage Door Broken Torsion Spring
His cost to replace both springs would be $170 labor plus the cost of 2 springs (about $100).
When I advised my neighbor his springs need nothing more than an adjustment taking less the 15 minutes, the Anytime Garage Door worker rather quickly excused himself and drove off.
After his departure, I checked the door balance; the door springs were very slightly under on torque specs, but not enough to damage the garage door opener or require adjustment.
Note: Garage door springs are either working or broken or need a minor adjustment. You will know when broken if the opener will not open the door without human assistance.
Just be aware that nothing is free in the long run and many of the service companies will attempt to sell you on unnecessary repairs at inflated values.
Saving Electricity Using Your Home's Hot Water Pump
Becoming familiar with this gadget can save you a bundle over time.

Many of our homes are equipped with a re-circulating hot water pump attached to the water heater located in the garage.
The pump is equipped with a 24 hour timer that can be set to turn on and off at 15 minute intervals.
To save electrical power, preserve the life of the pump, reduce natural gas consumption, and excessive wear and tear on the plumbing, I recommend the following:
1. Set the timer to turn on the pump when you awake.
2. Set the timer to run the pump for 15 minutes (minimum time available).
3. Set the timer to turn off the pump for 30 minutes after each 15 minutes of operation.
4. Set the timer to turn off the pump while you are asleep or not occupying the home.
5. Manually turn off the pump when on vacation and set the water heater control to “vacation.”
This method will greatly reduce to pump operation time and still maintain enough hot water circulation to keep the plumbing supply lines to each fixture hot enough to receive hot water within 10 seconds.
Otherwise without running the pump, you may have to wait more than a minute to receive hot water to the fixture.
Receiving hot water immediately is extremely important for dishwasher and clothes washer operation.
The dishwasher is not capable of heating cold water to clean the dishes; and as a result, many people tend to believe that the dishwasher is failing.... when in reality.... it is lacking hot water supply.
The same conditions apply for the clothes washer.
Repairing the pump is rather simple for the handy person with basic tools.
The cartridge (pictured above with the pump) can be purchased online for about $85.00 and installed by removing 4 screws on the rear of the pump housing.
Now for the bad news…
Pulte plumbed many of our homes with a shut-off valve only on one side of the pump.
This requires the water heater to be drained completely during pump repair or you will have 50 gallons of water spewing in your garage.
Don’t forget to turn off the cold water supply on top of the water heater, if you have to drain the water heater for pump repair.
The cost to buy the entire pump assembly is about $300; requires soldering copper piping to remove and reinstall the pump assemble. A licensed Plumber will charge $150 or more to do the work for you.
Where's the Best Place to Buy Gas ???
With the price of gasoline fluctuating over the past few months, how many of you drive around looking for the lowest price for a gallon of gas?
The social security checks don't get bigger, and the interest on savings accounts certainly isn't worth mentioning, so a little savings here and there certainly doesn't hurt the budget.

So here are a few tips for you when it's time for your next fill-up !
The best time of the day to fill up your gas tank is BEFORE dawn or LATE at NIGHT; the sun and traffic volume are both down. Gas stations usually raise prices during the day, especially during rush hour.

Here's another secret. Between 8:00am and 10:00am, gas station managers and owners usually get in their own cars and check out what their competition is charging. Is there a "best day" to buy gas?
Wednesday
The closer you get to the weekend, and especially at holidays, the prices rise. Usually on Thursdays, when long weekend trips start, the prices start to climb.
But I've saved the best for last.

Just where should you buy it ?
Check out these two sites on the day your search begins. Prices include the best deals for regular unleaded, medium grade, premium, and diesel fuels.

For local prices:
For prices in the Las Vegas valley:
One catch....Neither of these sites indicate if the prices are CASH ONLY or charge a higher price for CREDIT CARDS.
So there you have it...saving money...so you have more for slot machines !
____________________________________
GARAGE DOOR TORSION SPRINGS REPLACEMENT
Like everything else in our aging SCA homes, soon you may experience at the most unfortunate time; the garage door won’t open because of a broken torsion spring.
The torsion springs assist the electric garage door opener to raise and lower the garage door. When a spring breaks, the garage door opener will not have the power to lift the door alone.

I have found a website that has video instructions to replace a double door springs and a single door spring. The website also gives you instruction how to identify and measure existing springs.
I recommend two people to tackle the job mainly because an extra set of hands is helpful and at our age sometimes we need all the help we can get.
The tools are basic tools found in most garage toolboxes and you will need a 6’ stepladder. I made two torsion bar tools to tighten the springs tension from ½ inch diameter x 18” long steel rebar or they can be purchased from the garage door spring supplier. Any ½” steel rod or bolt will work, but it must be a least 18” long to allow enough leverage to tighten the spring tension.

I have found the best price to buy replacement torsion springs...
The total cost including shipping will be about $65.
In examining every double garage door I have encountered in SCA, one spring is approximately 18” long and the other is approximately 22” long.
I buy two 21” springs to replace both the 18” and 22” existing springs. I see no reason having the spring’s different lengths.
The replacement springs are:
RW .207 wire size, 2” diameter, 21” long with cone.
LW .207 wire size, 2” diameter, 21” long with cone.
When ordering a pair of springs, one must be right hand wound (RW) and one left hand wound (LW).
A single garage door requires only one spring usually (LW) depending on which side of center the spring is located on the shaft.
I keep a spare pair of springs on hand in case of emergency for my rentals, friends, and neighbors.
___________________________________________________________________
Home Tips When Traveling
When leaving your home for extended time such as vacation or extended time away, there are both financial saving as well as safety tips that you can try.
• Turn down your water heater to low or some heaters say vacation mode if it is a short time away or turn the heater, the gas valve, and the recirculating pump to the off position if you will be away for an extended period of time. Why pay to continue to heat your water if you are not using it. When you return, it does not take very long to heat up the tank.
 |
| Example of temperature setting |
• If you have a water softener, you can easily disengage the program so you system does not continue to run when you are gone. Many systems just shut the water off to the system to disengage it. In this example, the blue dial is a shutoff

• Turn your heat down by 10 degrees or so. In winter we only are concerned with freezing and in summer we want to control the cool. Adjust your thermostat and remove from program mode to a hold temperature mode.
• Consider turning your house water supply line to the off position. (Usually located in the garage) Most sprinklers systems bypass the water off position and will continue to water shrubs and plants. The risk of water pressure is that a hose inside your home can burst and with no one home, damage and flooding can occur. Dishwashers and your clothes washer have pressure in the hoses even when the appliance is in the off position. (Some folks like stainless steel reinforced hoses rather than the standard rubber hoses). If you are gone for extended times and have someone flushing toilets, running water in the sinks, showers, and tub drains to eliminate sewer smell, this will not work if the water is off.
 |
| Shutoff in a SCA Home |
Use a timer for some light in the house. Random on/off timers or multiple on/off are available.
• If you have landscape lighting, make sure your system is on when you are not there with the start portion programmed to begin when it gets dark. Many systems use a photoelectric cell for turn on time. The off switch can be programmed either to stay on for a designated time or a designated number of hours. (If your system is older and does not have these type options, you can have them replaced at minimal cost)
• Needless to say, lock all doors and windows. For your sliding doors, it is prudent to use a lock bar or piece of wood to secure the sliders. A one-inch dowel rod can easily be cut to fit the door and just lays in the track. Doors cannot be forced open with the lock bar or dowel rod blocking the track. Most forcible entries are thru the sliding doors in a home.
• Place a hold on your mail and newspapers and do not have packages delivered to your home when you are not there. Sounds basic but it is important.
• Ask a friend or neighbor to check your house and driveway for any papers or advertisements that are randomly thrown on your driveway. They need to be removed.
• Contact SCA Community Patrol to provide random house checks while you are away.
• Common sense should dictate what you do. If you are not comfortable or do not understand the above suggestions, you should contact a professional to get another opinion. As you can imagine, the above are suggestions and not guarantees of results. Create a checklist that works for your particular situation.
__________________________________________
Now that the GE microwaves installed in our SCA homes are six years old or more, they are starting to fail from use.

The magnetron (large item) and the high voltage diode (small item) are usually the cause the microwave will not heat the food when the microwave appears to be working.
Often, when the failure to heat the food occurs, a humming noise or other sounds not experienced under normal operation will be heard. That is an indication the magnetron and/or high voltage diode are bad.

If you are up to the challenge, there are many Youtube.com
video instructions “How to replace the GE magnetron and diode.”
The replacement process requires the removal of about 20 screws, some sheet metal parts, the magnetron and diode. Expect to spend about one hour removing and replacing the parts. There are different type screws…it is a good idea to remember the location when they are removed or time will be wasted guessing.
The magnetron and diode parts cost about $100 for Appliance Parts Center of Las Vegas, http://www.appliancepartscenter.us/
Expect to pay about $65 to $85 for a replacement magnetron and $13 to $20 for the high voltage diode either online or from Appliance Parts Center.
The replacement magnetron part number is model specific (10QB90230 or similar product number) to you microwave. The replacement diode part number 11QBP0236 is the same for all microwaves. If you decide to use the GE diode part number listed on your wiring diagram instead of the generic part number, expect to pay about $34 to $55. Don’t waste your money on the GE diode…they are all the same.
______________________________
Home Defects Identified In Sun City Anthem
Do you have cracks at your roof line?
After reading an article in Anthem Today titled “ Possible Defects on the Outside of Your Home”(Refer to “Just In” Nov. 14th (www.Anthemtoday.com), we were notified of possible defects in workmanship as cracks may be occurring on the outside of our homes close to the roof line. The article gave us all the contact information and how to proceed if we saw the cracks.
I looked outside at my home and saw a few minor cracks and at first thought they were so small that they we just from settling. I decided to call the customer service number identified in the Anthem Today article. I called and set up an appointment and met with the customer service inspector who said I had many cracks that would only get worse and they need to be repaired. Pulte Customer service will schedule the repair, tighten the area that has moved, put on more stucco, and repaint so that we will not even know that it was fixed. The representative said to me that it will be covered by their insurance and they will take care of everything. Thank you, Anthem Today, for helping me to identify a problem and directing me as to how to get it fixed.
___________________
Water Heater Maintenance or How to Extend the Life of a Water Heater
Much to my surprise, I learned that water heaters do not last long in Henderson. As a result of the water quality and the widely used water softeners, the life of a water heater is relatively short. Given that they are expensive, we should do everything we can to extend the life of these expensive necessities. As luck would have it, I encountered a neighbor who was having his water heater serviced. I imposed on the repairman and asked if he was checking the anode rod. He said that he was not checking it because the water heater would have to be replaced soon. I was stunned. My novice knowledge helped me to understand the sacrificial anode rod in water heaters. The non expert explanation is that the water has something in it that attacks and distroys steel. The anode rod attracts the bad stuff so the lining of the heater can stay healthier (last longer). A very simple conclusion is that the anode rod must be in place and active to help our heaters last longer. The anode rod gets eaten away with time. If it is not replaced when it is old and smaller, the lining of the heater is next to be attacked. Conclusion, check and replace, if necessary, the anode rod to extend the life of a water heater. Most often, this checking and replacing should be done by a qualified professional.
Another good practice is to drain a few gallons out or the heater once or twice a year to help remove the sediment that accumulates at the bottom of the heater. This can easily be done by the homeowner with a garden hose.
It is far less expensive to change an anode rod than a water heater.
Click on the attached to see a video that further explains how the water heater and anode rod works.
Mr. Fix-It
DO YOU WANT TO CHANGE YOUR ANODE ROD AND SAVE ABOUT $150.00?
ReplyDeleteFor those brave folks with the capability and/or desire to replace their own water heater anode rod, I have a socket wrench designed specifically to remove and replace the anode rod…it is available for use by SCA Residents.
If you have a salt water softener, anode rods can fail within two years. Anode rods can last more than six years without a salt water softener. The secret is to check yours every two years and replace the anode rod when necessary to prolong the life of the water heater.
Local plumbers are charging $800 -$1,000 to replace water heaters. 40 gallon-water heaters cost less than $400; 50 gallon cost less than $500.
Normally homes with only 2 bathrooms and less than 4 occupants need only a 40-gallon water heater, more bathrooms and occupants should have a 50-gallon.
Anode rod replacement is relatively simple, you will need the socket wrench, a 4 or 6-foot stepladder, replacement anode for your type water heater, and plumbers Teflon tape (which I have, also).
Here is one of many links for instructions…
http://www.hot-water-heaters-reviews.com/anode-rod.html#How_does_the_water_heater_anode_rod
If you have questions, feel free to send me an email to forrestf@cox.net
As a licensed general contractor for 30 years, I am not soliciting work, I am soliciting those that need advice to get value for their $$$, avoid scams, and over-charges.
If a contractor is going to be supervising certain structural work, https://www.rebelmouse.com/topratedhumidifiers/
ReplyDeleteEveryone wants to have a energy-efficient and cost-effective system at his place.Air conditioning products of good brands have more benefits. They are energy efficient units with benefits of mobility, easy installation, cost and convenience. Moreover they are ideal for small homes.If you are thinking of purchasing a new air conditioner try to go for energy star products because they have high energy performance.
ReplyDeletehttp://www.airmart.com.au/products/residential-solutions/central-ducted-refrigerative/
Hardwood flooring is a very common material used generally in most residential or commercial establishments today. It's among the simplest kinds of flooring to install. Because of this, several hardwood floor contractors Hardwood Flooring Instalation now offering installation services all over the world.
ReplyDeleteThat article almost covers all of the possible factors of HVAC unit fail. Thanks for giving such useful ideas. Heating and Cooling Woodbridge
ReplyDelete