


Forrest Fetherolf
Getting a Stuck Window Open

The first step in being able to open any stuck window is to determine what is causing it to be stuck.
Take a look at the window frame. Is there any space between the window sill and the window?
If there is not then chances are the window has been painted shut.
To open this all that you need to do is get a utility/carpet knife, painters' spatula or even a sturdy razor blade.
Be careful not to damage the window frame or the window, but force the knife in between and break the seal that has been formed.

After you have removed all of the paint between the window and the sill, then you should try to move the window up and down.
It may take a little work but it should be able to freely move now.
In some cases though, this still won't open the window—simply saying that it may have been stuck for so long that it needs a little more "help" in getting it to move.
If that is the case, then try placing a small block of wood against the window, and gently but firmly tapping it with a hammer to loosen it up a bit more.

Be careful when doing this though that you do not actually break the glass, as you are then going to be faced with the task of replacing an entire window, and not only loosening it up.
If, when you were looking at the frame, you did not see paint, then the window simply could be stuck due to the wood of either the frame or the window being warped.
Such situations are typically caused due to a recent increase of moisture from rain or snow storms.
After about two or three days, it should return to normal, if not though, you should look at replacing the window entirely.
When replacing the window, or after the window has dried out, you might want to consider installing storm windows as opposed to the traditional wood framed windows.
Finally, there is the most obvious of reasons why the window does not move.
That reason is that sometime in the past someone nailed or screwed the window shut.
This is probably the easiest fix of them all.
All that you need to do is remove the nails or screws and you should be able to freely move the window.
If not, then try the block of wood method to see if that helps once you have removed the nails.
Need a video?
Mr. Fix-It
_____________________________
Knowing How to Read a
Water Meter
If you are looking to save some money on your water bills, then one of the very first things that you will need to do is learn how to read your water meter.
After all, if you are looking to save money, you need to know how much you are spending don't you?
The same principle works in your utilities as well.
Instead of waiting to look at your monthly water bill, why not look at the readings as you go?
It would be much the same as looking at the receipts that you get every time you buy something.
All you need to do is follow these simple directions.
1. Gather your tools.
Before you can read your water meter, you should gather together a few tools. These tools aren't to put anything together, but rather to allow you access to the meter, and properly utilize the information that you find there.
These tools are a screwdriver or stick, and a pen and paper.
2. Locate the meter.
The next thing that you will need to do is actually locate the meter. You can do this by either looking around your home, calling the utilities company, or by following the meter reader when they come around.
Typically the water meter is located near the curb of your home, and will have a cover (usually metal or plastic) on it.
3. Open the cover.
Place your screwdriver or strong stick into the slot you find in the meter cover. Usually this slot will be located near the edge of the cover to allow you the chance to apply a little leverage so you have an easier time of lifting up the lid.

Once you do open the lid, be careful when you look inside. Often insects, snakes, or other critters will make a home out of the box, and it could be dangerous to stick your head or hand in there.
If you find anything, then you will need to deal with it.
In addition, if you find any standing water you will want to bail it out, and check for a leak.
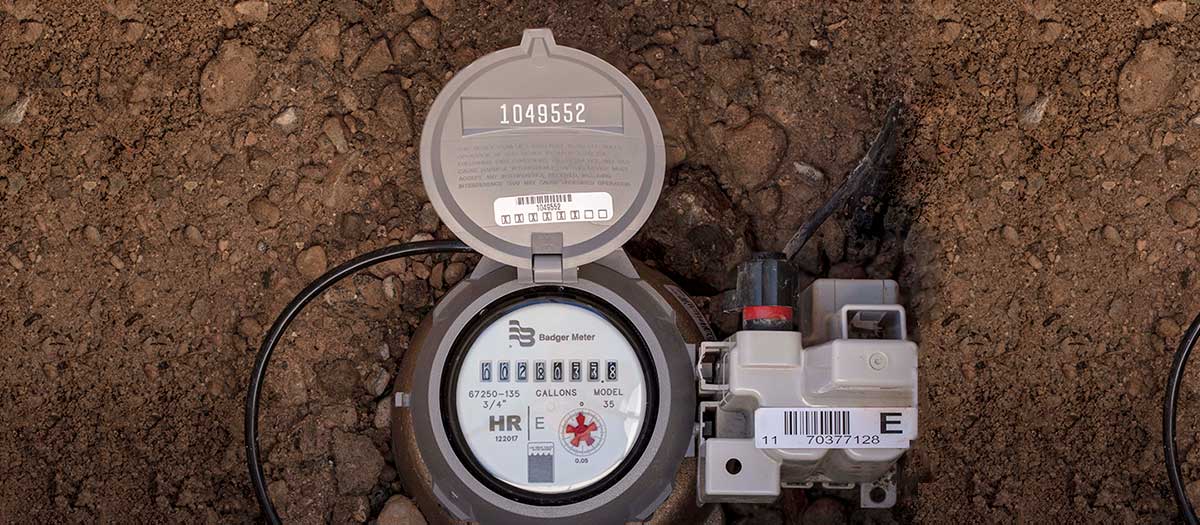
4. Read it.
The first thing that you need to know when actually reading your water meter is that most, if not all, water meters measure water in cubic feet (which is roughly one cubic foot being equal to 7-1/2 gallons).
When you look at the meter, you will see several numbers on the dial, kind of like the miles on a speedometer.
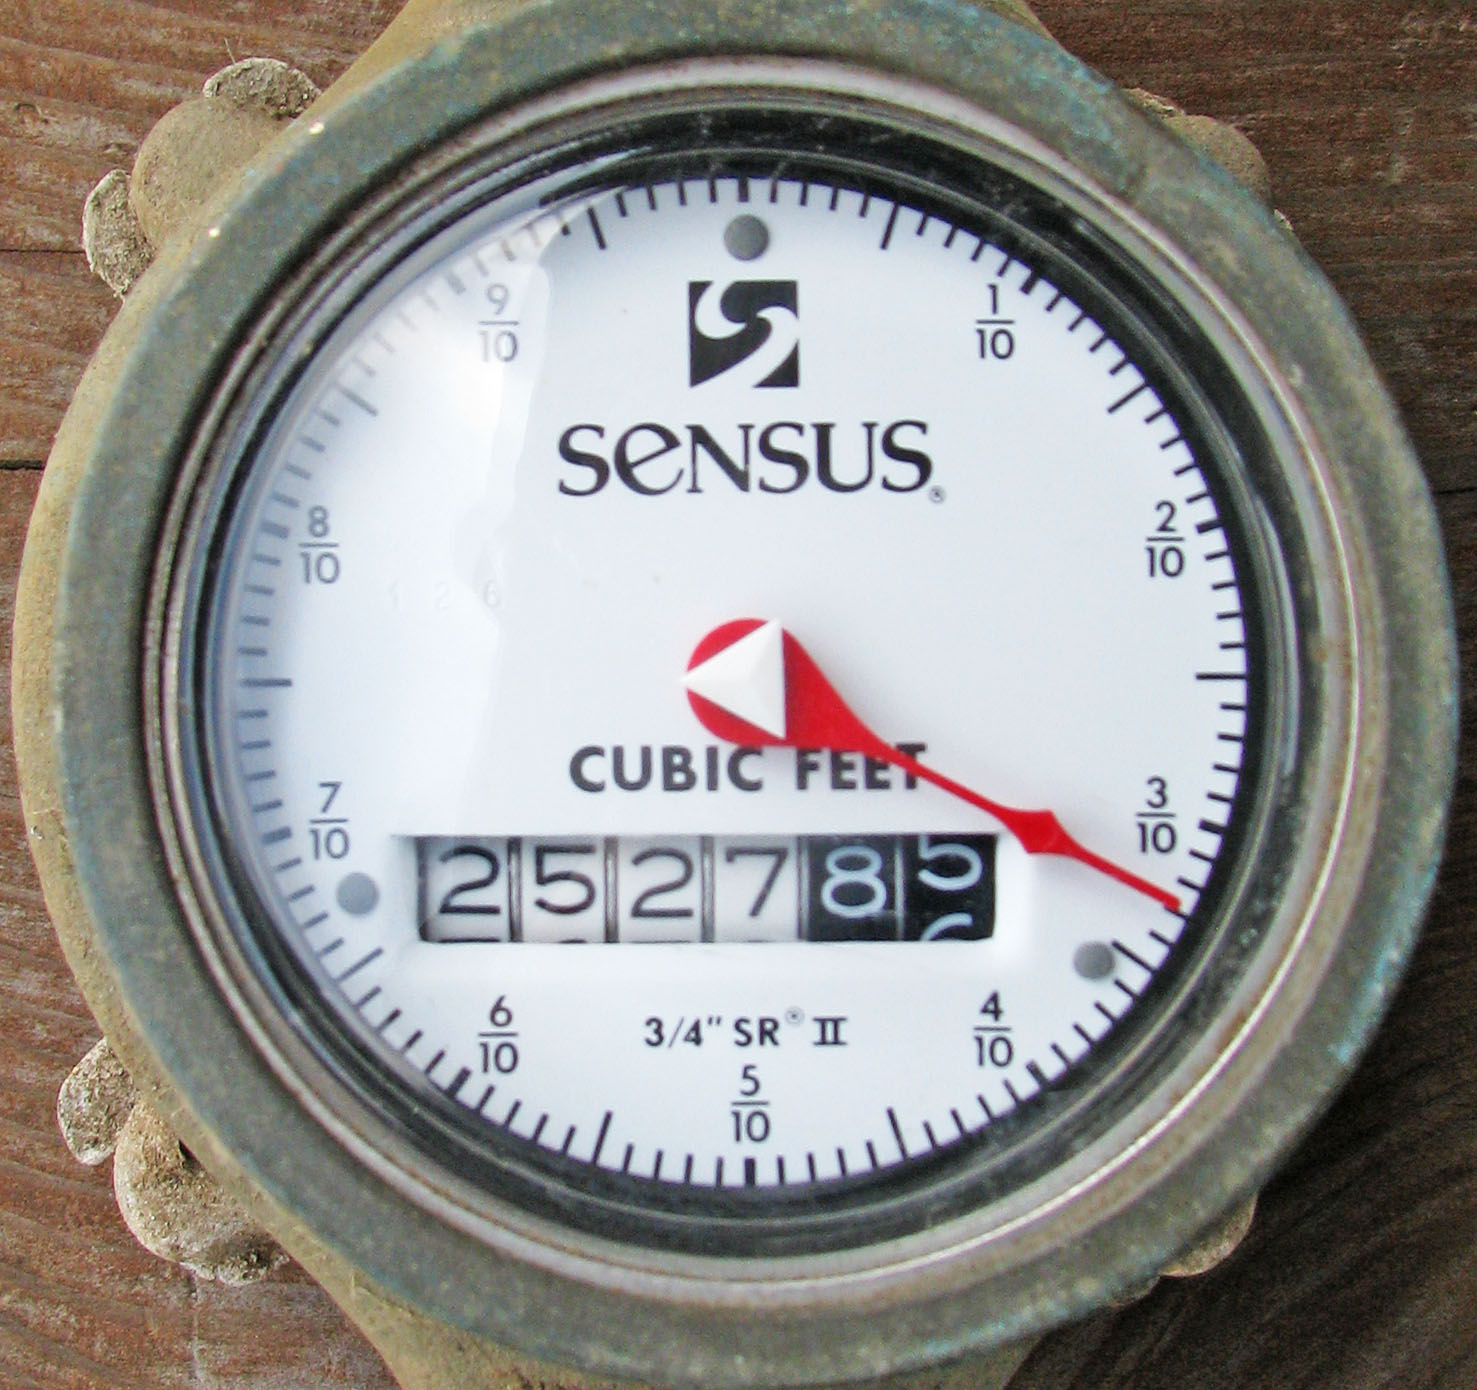
Just as with a speedometer, you can ignore the first two (usually in a darker color), and focus on the remaining numbers.
5. Write down what you see.
Write down the numbers that you find. If you want you can write them all down.
When writing them down you should place them in a notebook that you can dedicate solely to the use of this.
Close up the cover, and then go about your business as normal.
6. Repeat the process as necessary.
After a couple of days, repeat the entire process, and compare the results.
If you would like to know how much water you have used, simply subtract your first reading from your later one to get the amount of water used.
Repeat the entire process as often as you want to get an idea of how much water you have used between readings.
To get an accurate reading for the entire month, simply add together the readings that you took for the entire month, or subtract the first reading of the month to the last reading of the month.
Here are some helpful videos.
Mr. Fix-It
__________________________
I Want to Paint...It's Going to Cost Money

It can be extremely easy to either over estimate, or underestimate how much money it will cost to purchase paint for a renovation project. How to estimate painting costs is more than simply saying that you will spend "X" amount of money on paint and supplies.
How to estimate painting costs is actually a rather simple process. All you really need to do is remember a few simple math tricks, and you will very easily be able to figure out how much paint you will need to purchase.
Once you know how much paint you need to purchase, it is really easy to figure out the amount of money that you should set aside for your painting project.
Here are some ideas for you when it comes to estimating your costs.
Ceiling
It is always a good idea to start with the largest area first, and when painting a room this will usually be the ceiling.
Another trick to remember when figuring out how much paint to buy is to round all your figures up to the largest whole number.
Measure the length of the room, and then the width.
Multiply these two numbers together so that you will get the entire area you need to cover.
Multiply these two numbers together so that you will get the entire area you need to cover.
For example, you have an 11-foot wide room by 14 foot long.
Multiply these two figures together, and you will get a total of 154 square feet.
Multiply these two figures together, and you will get a total of 154 square feet.
Divide this number by 350 (which is the estimated number of feet that a single gallon of paint can cover) to figure out how many gallons you need to purchase for this part of the job.
This would be 154 divided by 350, which gives you a total of 0.44.
For the ceiling of this room, you only need to get one gallon of paint, which given its size, should allow you to do two coats out of the same can.
Walls
Figuring out the walls is much the same as figuring out the ceiling.
Measure the height and length of the largest and smallest walls, and then double the results.
For example, your room is going to have two walls that are 11 feet long by 8 feet tall, while you have another two walls that will be 14 feet long by 8 feet tall.
The math would look something like this: 11 x 8 = 88, 14 x 8 = 112, 112 + 88 = 200, 200 x 2 = 400.
This means that you will need to get enough paint to cover 400 square feet.
Divide this total by 350, and you get 1.14, which means that you should get about 1-1/4 gallons to provide a single coat to each wall.
You will have a bit of paint left over from not painting things like windows, doors, and trim.
Trim
If you have any molding in the room, you will want to paint that as well, though it will usually be a different color.
Determine the length of all the molding, and then add it together.
For example, In the room that we have been working with, you could have a simple chair rail around the room that will give you dimensions like this 11 + 14 + 11 + 14 = 50 feet.
Multiply this amount by .5 so that you can get an estimated width of the molding, which will look like this: 50 x 0.5 = 25 square feet that you will need to paint.
Once again, divide this amount by 350 to get the amount of paint you will need for the trim.
In this case that will be .07, so you should only need one quart to paint all the trim in this particular room.
Doors and Windows
To figure out the amount of paint needed to paint your doors, multiply the number of doors by 20.
In the room we have been working with you have one door to get in, one door to the bathroom, and one door to the closet.
The math would look like this: 3 x 20 = 60 square feet. Now, multiply the number of windows by 7.5, and in this room you have four windows, so the math will look like 4 x 7.5 = 18 square feet.
Add these two totals together (18 + 60 = 78 square feet) and then divide by 350 (78 divided by 350 equals .22).
In this instance you will need to get 1/2 quart to paint the doors and window trim with only one coat.
Add everything together
Once you have figured out the separate amounts for each part of the room, it is time to add everything together.
For the this particular room, you will need to get a minimum of 2.75 gallons, or if you simply round up the total, three gallons to paint your room.
This should give you enough paint to provide two coats for everything, with just a little bit left over.
Take this figure and multiply it by however much the paint you are looking at purchasing is to figure out how much money you should set aside for purchasing the paint.
Videos? Of course !
Mr. Fix-It
_________________________
So You Want to be Your Own Plumber?
You'll Need the Right Tools

As with any type of job, plumbing requires that you have the proper tools to get the job done.
In order to get those essential tools for the home plumber, you need to know what they are.
Here is a list of those tools, as well as a brief explanation of why you will need them.
Considering that some of these tools can be a tad expensive initially, you may want to slowly build your collection up over time.
Plunger
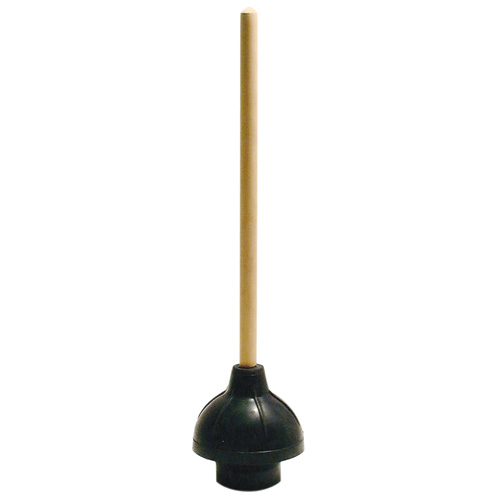
The plunger is probably the most indispensable tool that a plumber can have. It will help with toilets, sinks, tubs, showers, and floor drains.
Basically this is the first tool that someone will grab in any plumbing emergency, and the most commonly used.
Adjustable Wrenches
Adjustable wrenches are another tool that the home plumber must have on hand if they are planning on doing any type of repair work.
The reason for this is that an adjustable wrench can help work on things like compression fittings, supply lines, and so forth.
Basically all it needs is a hex shaped nut and you are good to go.
Ideally you should have two different sizes, one six inches, and the other ten inches.
Snake
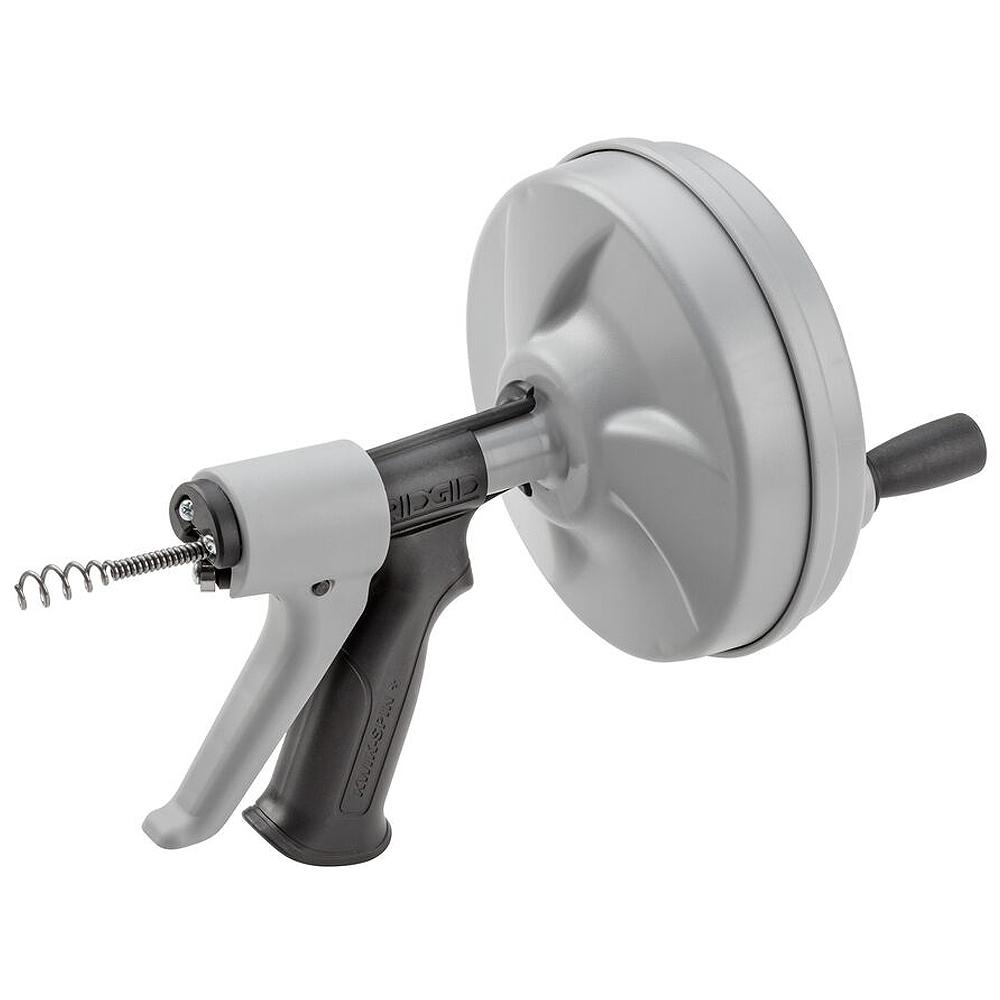
The snake(also known as a hand auger) is a hand cranked tool that is used to clear drains of difficult clogs.
Typically all you will need is one that is about 25 feet long, and you can work on most clogs in the home.
It may be beneficial to also purchase another type of auger, called a closet auger, which is designed to work specifically with toilets; it never hurts to have specialized tools after all.
Teflon Tape
If you are thinking of removing any faucets, shower heads, or even piping, you should have some Teflon tape on hand.
This tape is extremely easy to apply, and will help create a water and air tight seal to keep any water in. In addition, you can often simply apply a bit of this material to a leaky area to fix most leaks.
Channel Lock Pliers
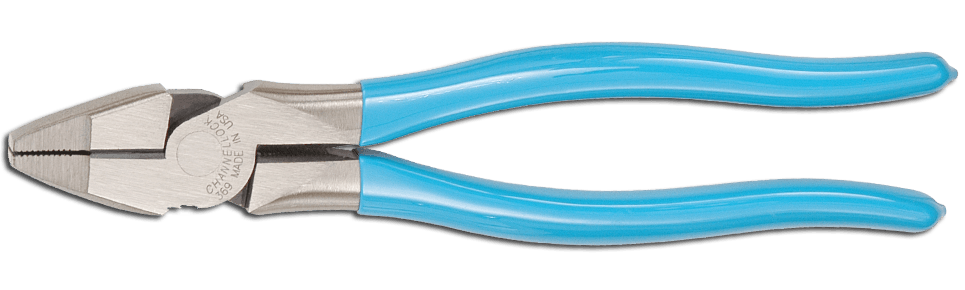
Channel lock pliers, also known as tongue and groove pliers, can be used on just about any kind of plumbing fixture.
This alone makes them an extremely effective and sought after tool. Furthermore, it is often a good idea to get more than one, since they work best in pairs.
Tubing Cutter

Copper pipe is a fairly common plumbing material, and if you find yourself needing to do any cutting then you will want to have the right tool on hand.
A tubing cutter clamps onto the pipe (where you want it), and allows you to spin around and create a flat cut. Definitely a huge help when you want to have a quickly cut, well fitted joint.
Propane Torch
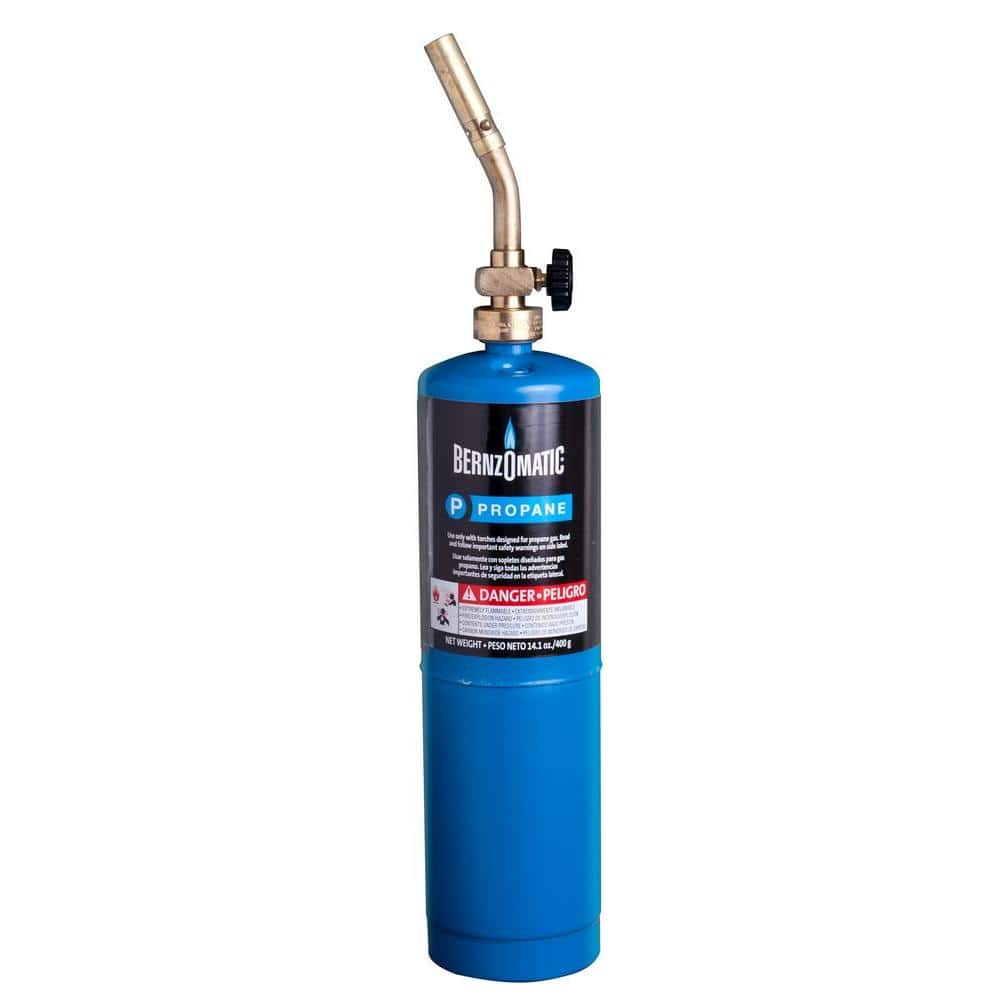
This tool is an absolute must have if you have any copper pipes or fittings in your home. The reason for that is this tool will allow you to easily sweat the pipes and fittings.
You may want to have a self igniting torch, instead of needing to have a striker or matches in your tool box as well.
Hacksaw
A hacksaw can be extremely helpful when you find it time to cut through piping (metal or PVC), screws, nuts, hardware, bolts, and so on.
Just make sure that you have the blade nice and tight in the frame, and that you have at least two or three extra blades on hand.
Metal File

If you end up having to cut some piping, then you should have a file to smooth out the rough edges.
A metal file will (though two is often better) will allow you to remove the burs and gnarls that crop up when cutting, and create difficulties when trying to reseal pipes later on.
And last but not least....
A Good Plumber's Telephone Number

In the event that you can't solve the problem (whatever it is) yourself, you will need to call a plumber.
It is a good idea to have that number ahead of time rather than waiting for an emergency to crop up.
Keep in mind that these are only the most essential of all plumbing tools that you must have in your plumbing tool box.
There are of course dozens, if not hundreds, of tools that you could purchase, but you really don't need to.
These few items are what you absolutely need to have before you can begin tackling your home plumbing needs.
A video?
Mr. Fix-It
____________________________
Everyone has come across a stain or burn in their carpet, some time or another.
Considering the price of carpet today, is it really any surprise that when we come across these damages that we tend to panic?
People typically think that they only have two possible fixes to this problem.
The first would be to replace the entire carpet, which is expensive and time consuming.
The second possibility would be to just let the problem area sit there, and be an eyesore.
To the surprise of many, there is actually another possibility for damaged carpet that many people may not have thought about before, and that would be to fix it yourself.
Just use one some of these simple ideas, and you are going to have some perfect carpet once again.
Incidental Damage
If the damage appears to be of an incidental or minor nature, then fixing repairing the damaged portion could be as simple as giving your carpet a "haircut."
Using some sharp manicuring scissors, or even some fingernail clippers trim off the stained or burned ends of the carpet fibers, and thereby removing the damage.
You are going to need to be careful while doing this, since you could end up making the carpet appear to be uneven, and like a bad haircut, this could lead to more problems.
Moderate Damage
You are going to need to "borrow" a few strands, or a small part of the carpet, from another area of the room.
Be sure to gather these strands, or patch, from an out of the way, meaning out of sight, location like from the back of the closet or something.
Use a razor, or sharp utility knife, and cut out the damaged section.
All that you need to do is cut the fibers, or strands, that are actually damaged in someway, and from the out of the way area, cut a few strands to fit the area of what you just removed.
Then using some type of a waterproof adhesive (like super glue) and a toothpick, glue the "patch" into place.
Major Damage
For this, you are going to need a larger patch.
What you should do for this is cut out the area of the carpet that has been damaged and set it aside.
Either from the back of the closet, from some left over carpet that you have lying around, or from the store, you are going to make a patch that is going to match in size what you have just cut out.
You can use the damaged section as a template in order to get the correct size, and shape of what you are going to need.
Try to have all your cut pieces of carpet be either a triangle or circle in shape, as it is less noticeable to the eye when you do this.
As you are laying down this replacement piece you need to make sure that the "grain" of the carpet matches.
This is the way that the carpet fibers lay, and you want the patch to have as "natural" of a feel as possible.
After you have matched the grain of the carpet, you can either use a waterproof glue or silicone caulk, to glue the patch into place, and hold it down with some type of heavy weight.
Now let it sit for at least twenty-four hours, and you are going to be all finished.
Here are a few videos to help you get the job done...
...and...saving a lot of money as well.
Mr. Fix-It
___________________________
Water Pressure Not What It Should Be?

Have you ever stepped into the shower, looking forward a nice relaxing hot "cleansing", turned the water , and only find a trickle of what you should have?
Everyone experiences plumbing pressure problems every so often. Instead of sitting there and dealing with the lack of proper water pressure, take some time to diagnose the problem. Diagnosing plumbing pressure problems is remarkably easy.
If you are looking to diagnose plumbing pressure problems simply follow these guidelines, and you will be able to figure out what the main problem is pretty quickly. Best of all, you may even be able to prevent major costly repairs if you do it right away.
1. Talk to your neighbors.
If you are experiencing a sudden drop in water pressure, be sure that you talk to your neighbors.
The reason that you ask your neighbors is that you will want to find out if your home is the only one experiencing the problem.
If your home is not the only one that is experiencing the problem, then contact your local utility company—there may be a problem with the water main that they need to fix.
2. Check all the faucets.
Go through your home and check the water pressure from all of your faucets.
If you find that you are only experiencing the loss of water pressure from one of the faucets you will need to check for any obstructions in that faucet.
Remove the aerator of the faucet, and turn the water on again to see if there is any difference in water pressure.
Take the time to clean the aerator and replace it.
3. Clogs or constrictions.
Often the cause for loss in water pressure lies in clogged or constricted pipes.
If you find that your water pressure doesn't change after you have cleaned the aerator, then you may have a clogged or constricted pipe.
The best way to find out for sure is to hire a professional to come over and inspect your pipes.
3. Pooling water.
Pooling water is often an indicator of a loose or unsealed pipe.
Try to trace back any signs of pooling to the pipe that they come from. Once you have traced it back to the proper pipe, check to make sure that it has been sealed properly, and that the pipe is not loose.
If you still cannot find any cause or the pooling water, then you may have a leak that is coming in from further underground.
As usual, we have some videos to help you out !
Mr. Fix-It
___________________________

Have you ever had a problem with your toilet, called a plumber, only to find out that the problem really wasn't really as bad as you thought it was?
Finding this out you usually will cost you $100 or more for a plumber.
Diagnosing toilet problems yourself can not only save you some money that you can use in a variety of other ways, by either telling the plumber what the problem is or by being able to fix the problem yourself.
Here are a few "check points" you can diagnose yourself before you make the plumbing call:
Inspect the base.
Often times one of the first indications of a problem with the toilet is that you will find some water around the base. This means that the first place that you should check is around the base of the toilet itself.
Completely dry the area around the toilet base, and then lay down a towel of some kind (such as a paper towel) and let it sit for a couple of hours.
Check the towel, and if you find that is wet you probably have a problem with the seal that is under the base.
Inspect the tank and feeder lines.
Another one of the more common places that you can find a problem is where the feeder lines and the tank meet.
If you find any condensation there (which is fairly common) simply dry it as much as possible.
After drying it, flush the toilet several times and keep an eye out for any leaks.
Depending on where the leak shows up (if it does) will indicate what the problem is.
For example, if it is near the tank itself then there may be a problem with the flush valve, and if it is near the wall then there is probably a problem with the water supply hose itself.
Examine the tank.
There are a lot of problems that can be found inside the actual tank itself.
This means that you will need to take off the tank, and then flush it.
Time how long it takes to refill the tank, if it is excessively long (usually when it "won't stop running") there is a problem with the flapper or flush valve.
If the flapper is unable to make a good seal then you will probably want to replace it.
If the flush valve (or the float on it) doesn't go down all the way, then you will need to replace that.
Now that you have a rough idea of where the problem lies, you can begin to either work on the problem or let the plumber know what's going on.
With the problem diagnosed, you can easily figure out what you need to do to fix it.
Luckily, most of the problems you will be able to fix yourself, or at least you can if you have the right instructions and a bit of self confidence.
Need some visual help?
Mr. Fix-It
_____________________
Chemical Cleaners
on
Utility Sinks
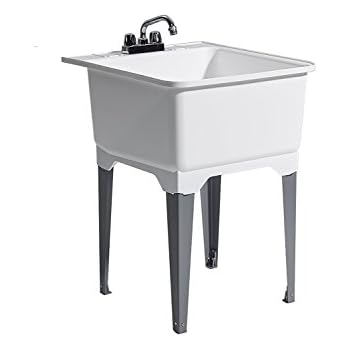
Utility sinks can present their own unique problems considering the range of uses that we put them through.
Due to these varied uses, using a chemical cleaner can present problems.
If you are going to use a chemical cleaner then be sure that you fully read the instructions and only use the cleaner as instructed.
Chemical cleansers are a highly caustic material that can easily cause chemical burns and other forms of damage to your body. They can also cause damage to your pipes, so you'll want to be sure that you use something that is designed to work with your specific type of pipe.
You also shouldn't use a plunger on the sink after pouring in the cleaner, as this could lead to potential harm.
When choosing the type of cleaner that you are going to use, keep in mind the different types of clogs that you might be faced with.
1. If you are faced with a clog that is made of primarily biological materials then use a cleaner that is more of an acidic material.
2. If the clog is something that is made up of grease, then use an alkaline cleanser.
(You never want to mix the types of cleaners, as it can cause an adverse chemical reaction that can be harmful to people.)
Instead of using a commercial cleaner you may want to use a home-made solution.
Simply mix 1/3 cup baking soda with 1/3 cup of vinegar into a pitcher.
After mixing the ingredients, follow these simple steps just as if you were using a commercial chemical cleaner.
1. Determine if the clog is a total blockage or, just a slow drain.
If the drain is totally blocked, and there is absolutely no draining at all, then do not use any type of liquid drain cleaner. This is because the cleaner will not remove the blockage and you are going to be faced with a bigger problem of how to remove the now stagnant caustic water from the sink.
2. After pouring the cleanser into the drain wait for a minimum of five minutes before flushing some regular water down the drain.
The blockage should now be cleared up, and if the drain is not working properly still, you may have to take more drastic measures to remove the blockage.
How about some helpful videos?
Mr. Fix-It
_________________________
Mold Prevention

We have all heard the horror stories about the side effects of rampant mold growth. Who wants to face those problems?
Who would really want to possibly lose their home, and possibly their health, by not taking some simple steps to prevent this from happening?
Luckily, preventing mold growth is actually a really easy matter.
All you need to do is use these simple guidelines, and you will be well on your way to preventing mold growth in your home.
1. Limit carpet use.
One of the biggest causes for mold growth in the home is due to the unrestricted use of carpeting in the home.
While it may be nice to hop out of the shower and step onto a nice soft carpet, but that carpet does get wet. When carpeting gets wet, it can end up having difficulty drying, which can lead to mold growth.
The easiest way to prevent mold growth because of this is by limiting where you use carpeting in your home.
Do not use any carpeting in your bathroom or kitchen.
2. Check for leaks.
Periodically check your home for any leaks. Check everywhere that you can think of for any leaking water, and if you find any clean it up right away. In addition to cleaning it up, be sure that you repair the leak as quickly as possible so that you don't have the problem any more.
3. Periodic cleaning.
Periodically, and regularly clean your air ducts.
Air ducts are a prime location for mold to grow in your home, and unless you regularly clean the ducts, you are running the risk of allowing the uncontrolled growth and spread of mold throughout your home.
At least once a year consider having a professional clean your air ducts, and at least another three times a year clean your ducts yourself.
4. Check fittings and seals.
Wherever you have water pipes, you will want to ensure that they are tightly fitted, and sealed properly.
Don't stop at checking for leaks only, but also make sure that the current seals are in good working order. If they are not, then replace the seals.
If the pipes are not fitted properly, tighten them and then reseal the pipes.
5. Check condensation.
Look throughout your home and keep an eye out for condensation.
If you see condensation, then you will need to wipe it up right away.
In those areas that have a condensation build up ensure that there is proper insulation and ventilation so that there is no future buildup.
6. Ensure ventilation.
Proper ventilation will help reduce the growth of any mold in your home. Simply ensure that your bathroom, kitchen, and basement have proper ventilation to reduce any condensation buildup.
Moisture is one of the key elements to mold growth, and by ventilating a room you will be able to keep the moisture levels of rooms down to a minimum.
Here are a few helpful video tips to keep in mind.
Mr. Fix-It
____________________________
Got a Squeaky Door?
Here's How to Fix It
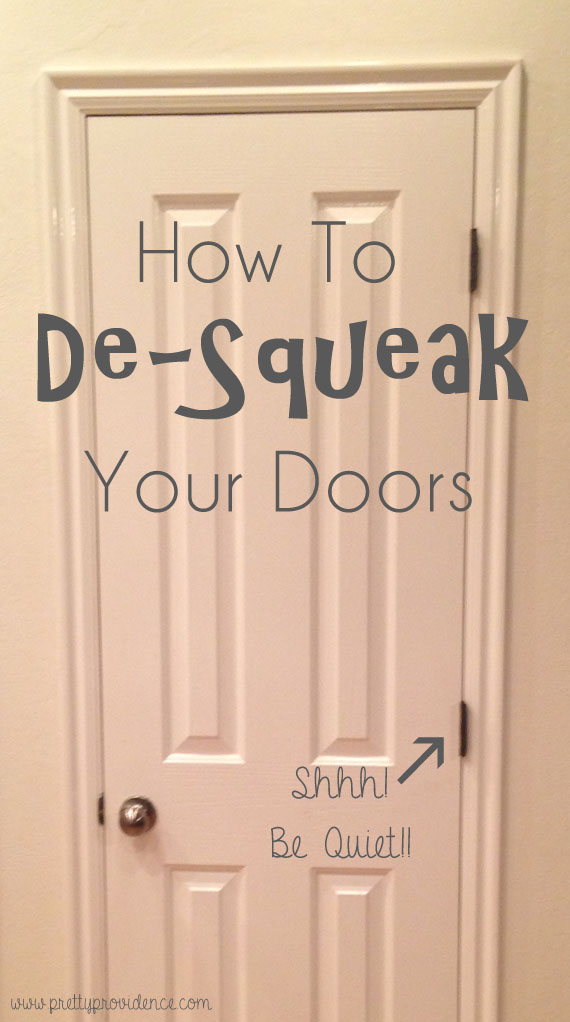
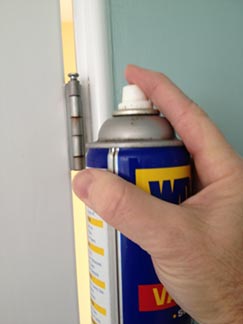
If you have a cabinet door or room door that squeaks each time its opened, chances are the hinges are the culprits of the squeak.
Friction causes hinges to squeak when they are out of alignment, or the hinge pin rubs.
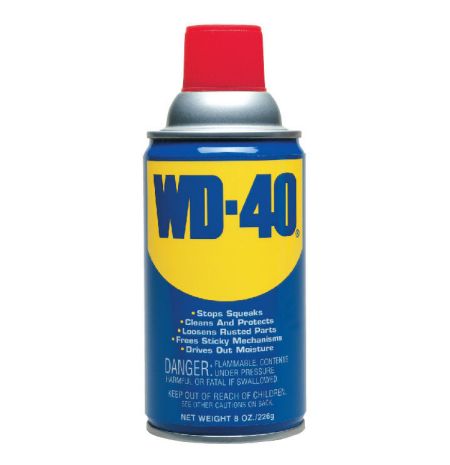
While your first instinct may be to run to the hardware store to find replacement hinges, there is an easier solution that will allow you to keep your original hinges.
Spray the hinges with a lubricant, such as WD-40, and then move the door back and forth several times to allow the lubricant to penetrate the entire hinge pin area.
If lubricating the hinges with the door in place doesn't stop the squeak, follow these steps to remove the door form the hinges and stop the squeak:
1. Remove the hinge pins and then remove the door.
If you have trouble removing the hinge pins, use a large nail and hammer to remove them.
Place the nail on the bottom of the hinge pin, and then hit it with the hammer to partially move the hinge pin up.
Then, take a pair of pliers and pull the hinge pin out the rest of the way.
Set the door aside.
2. Remove the hinges from the door facing and then use steel wool to clean both the hinges and the hinge pins.
Remove all debris by scouring the metal pieces.
3. Use your lubricant (such as WD-40) to lubricate all of the metal parts.
You can also use petroleum jelly to lubricate the parts, but make sure to wipe away the excess.
4. Reinstall the hinges into their original holes and then replace the door and hinge pins.
Chances are you will have fixed the squeaky door by lubricating the hinges and hinge pins.
If you still hear squeaks, then the problem lies in a misalignment.
If you find that you need to realign your door to get rid of the squeak, start by removing the door form the hinges, and then tap the hinge leaf up or down.

Re-hang the door and keep adjusting the door hinge leaf until it stops squeaking when the door is in place.
If the squeak persists even after you've tapped the hinge to realign, then you may need to drill new holes for the hinge.
Doing so involves using wood filler to patch the existing hinge holes.
If you have the time and energy, you can perform the job yourself by researching how to use wood filler.

Or, you can hire a carpenter to perform the job professionally.
It may cost you more money in the long run to hire a carpenter, but he can guarantee that you will be rid of the squeaky door after the job is complete.
Videos help, don't they ?
Mr. Fix-It
____________________________
Looking for a Contractor?
Here's a "Must"Check List
Here's a "Must"Check List

The general purpose of hiring a contractor is to make your project go as smoothly and easily as possible; however, if you don't know what to look for when hiring a contractor you can easily end up in the middle of a financial nightmare.
Here are a few guidelines that you can use to ensure you are able to hire someone that knows what they are doing.
Are they licensed?
It may be tempting to ask your best friend's cousin to do the work for you, but if they aren't licensed you need to go with someone else.
Being licensed also means that the contractor is used to working with the government and ensuring that the work they are doing is actually legal and according to code.
So...ask to see their license, and check to make sure that it is still valid.
At this time, you should make sure that the contractor has some kind of insurance to cover accidents.
References
All good contractors will have a list of past clients (not friends and family) that can attest to their skills on the job.
This list should have no fewer than ten names on it, all with current contact information.
Furthermore, this reference list should have a brief description of the work that they did, and how long it took.
Check them out.
Besides checking into the reference list, you should also look to see what their reputation is with the world at large.
One way that you can do this is to check with the local branch of the Better Business Bureau, as well as the city inspectors to see what they have to say.
A good contractor may have some complaints against them, but they would have been addressed quickly and without too much contention.
Get it in writing.
All reputable contractors should be willing, and even eager to have a contract that details the work that is being done.
It is the responsibility of the contractor to provide that contract, and it should (in detail) the work that is being agreed to, who will be doing it, what types of supplies will be used, any sub-contractors that will be used, and the names of all employees who will be on your property.
Furthermore, the contract should also have a list of what the payment schedule should look like, as well a stipulation that says you will not pay for any additional costs beyond what you were quoted unless you have agreed to it in writing.
Set a few terms.
Prior to signing your contract, you should take the time to think out a few terms and conditions that you want included.
For example, do you want them to show up before 6:00 am, or should they wait till after you have left for work?
What happens if they show up late for work that day, and don't let you know?
Do you want to say that one of the homeowners need to be on hand for any work to be done on the home?
When you find a contractor that is willing to meet with, and abide with, these guidelines you know that you have found a decent contractor.
Summary
Each of these guidelines is a method that you can use to ensure that you are holding the contractor responsible for what is happening on the job site.
Furthermore, if they are willing to agree to these conditions you know that they are willing to stand by their work.
Videos?
Mr. Fix-It
_____________________________What to Do if Your Pipes Freeze

1. Shut off the water immediately.
Don't attempt to thaw frozen pipes unless the water is shut off. Freezing can often cause unseen cracks in pipes or joints.
2. Apply heat to the frozen pipe by warming the air around it, or by applying heat directly to a pipe.
You can use a hair dryer, space heater, or hot water.

Be sure not to leave space heaters unattended, and avoid the use of kerosene heaters or open flames.
3. Once the pipes have thawed, turn the water back on slowly and check for cracks and leaks.

On vacation during the winter months?
1. Have a friend, relative or neighbor regularly check your property to insure the heat is working and the pipes have not frozen.
2. A freeze alarm can be purchased for less than $100 and will call a user-selected phone number if the inside temperature drops below 45 degrees.
Some videos !
Mr. Fix-It
______________________
What's the Toilet Doing Wrong ?

If there is one area of the bathroom, and perhaps the entire home, that sees the most attention of the plumber it has got to the toilet.
When troubleshooting a problematic toilet, all you really need to do is keep in mind these guidelines.
1. Check the water lines.
One of the first places that you should look at when troubleshooting a problematic toilet is the water lines.
Quite often the supply line will deteriorate over time, and as a result will end up creating a leak.
When you do this, it also means that you should look at where the line meets the tank and the wall. Those are the areas that typically see the most damage.
2. Look at the tank.
As long as the supply line is working you will need to look at the tank itself. Look carefully to ensure that there are no cracks, chips, or dings in the tank that could allow some water to leak out.
An easy way to tell if there is a leak or not is to run your hand over the tank and feel for any water.
3. Don't forget the bottom.
When you are looking at the tank, you really need to remember to look at the bottom of the tank as well. For some reason, this particular part of the tank is often overlooked.
Just as when you look at the rest of the tank, you should simply run your hand over it.
If you notice any rough spots, or wet spots, take a closer look.
4. Look at the base of the toilet.
One area that you really need to look at and inspect closely is the base of the toilet.
If the seal is in any way damaged you can easily find yourself with a leak, or other potential problems.
5. Watch the water flush.
Look at the water when it is flushed to see how it runs.
If it is running slowly, then chances are very good that you have a clog or some other obstruction in the pipes that needs attention immediately.
6. Check the ball float.
Another common reason for toilet problems is that the ball float is not working correctly.
Check to make sure that the lever is oiled and working properly.
In addition, lift up the leaver (and the ball float) and watch to see what happens when the plug is opened up. If everything is working properly then the tank should refill without any problem.
When you are able to identify where the problem is located, you will then know what to fix !
Mr. Fix-It
_______________________
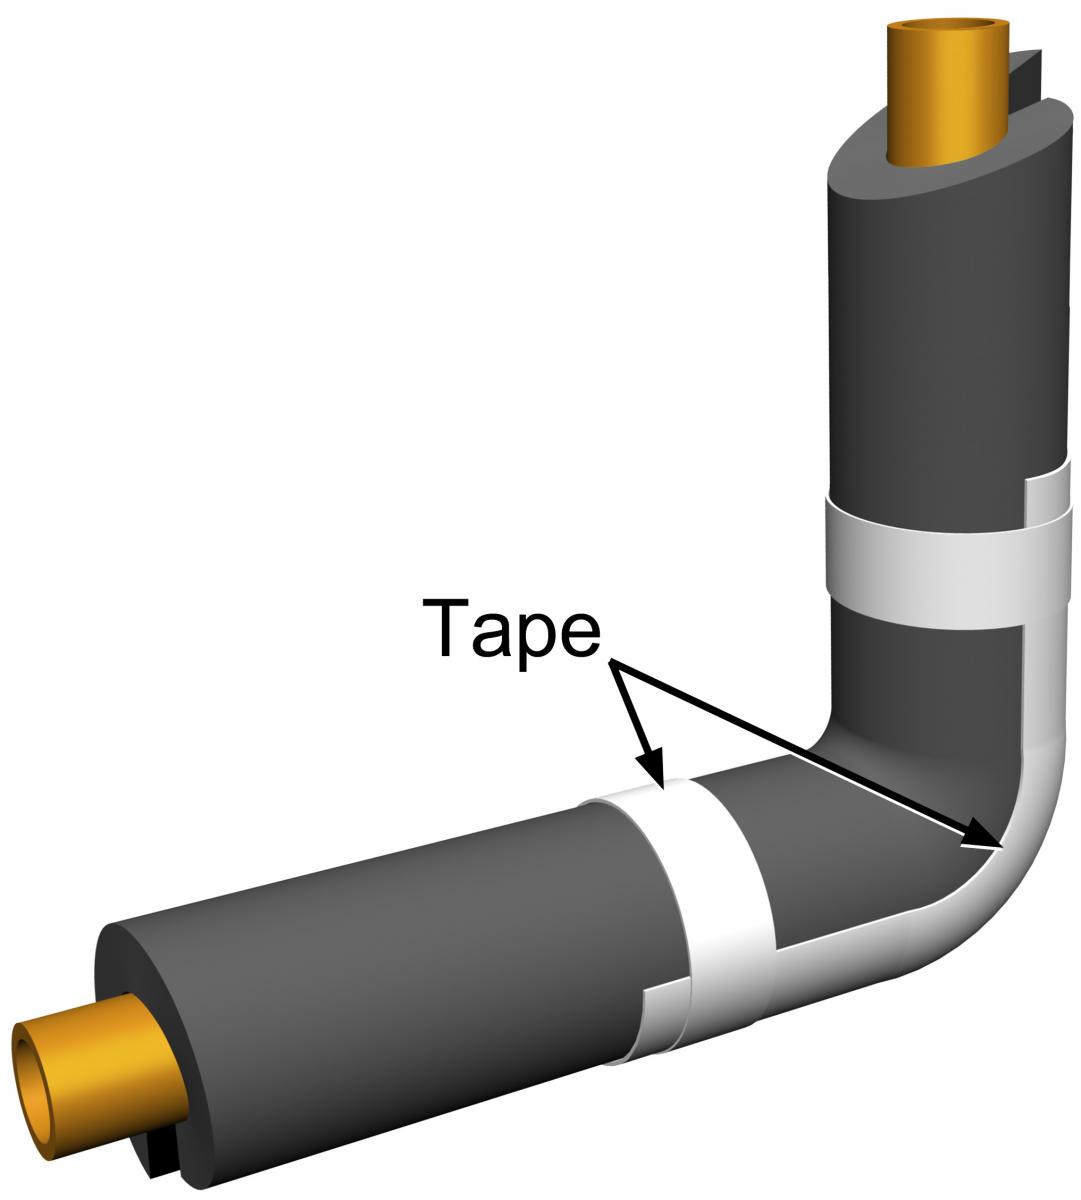
Protecting Pipes and Hoses During Winter Months

There are several steps you can take to protect the pipes and hoses in your home and landscape from cold weather:
1. Disconnect and drain garden hoses when they are not being used.

2. Insulate your irrigation backflow device by draping a towel over it and cover with a bucket or other protective cover that touches the ground.


Never obstruct or seal the ports of a backflow protection device.
3. Wrap exposed irrigation pipes with pipe insulation, insulated "faucet socks," an old towel or duct tape.


4. Set heat to 55 degrees when you're away to protect pipes and houseplants.
5. Turn off the water valves to your washing machine to avoid flooding from burst hoses.
6. Don't leave interior or exterior pipes dripping.
Valley temperatures generally don't drop low enough for a long enough period of time to warrant it.
7. Locate your water shut-off valve and learn how to turn off water at its source, so you can ward off damage from leaks or burst lines.
Know how to turn off your irrigation backflow device as well.
We have some videos.
Mr. Fix-It
_________________________
Repairing Water Damaged Walls
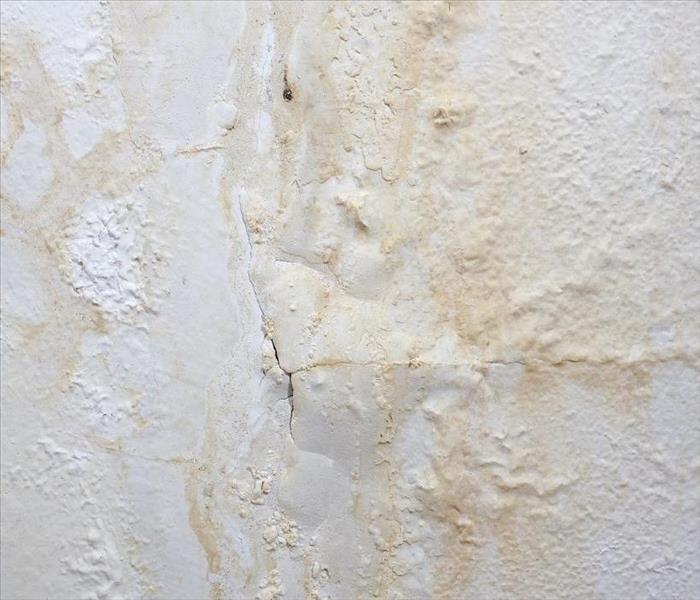
Have you ever looked at your wall, and found a patch of it to be a different color than the rest?
If that patch grows over time, and particularly if that patch starts to bubble, then you may have a leak in your walls.
Here is a 2 part video on how to find a leak.
While repairing a leak in the wall can be a little frustrating, perhaps the most frustrating part of the whole mess is needing to fix the water damage to your wall.
Repairing water damaged walls isn't something that is particularly hard, just a little time consuming.
Fix the leak
Initially, before you can even really begin repair water damaged walls, you need to fix the leak that caused the water damage.
The best way to get this done properly is to hire a professional plumber to come out and inspect the pipes as quickly as possible.
Of course, you should always turn your water off as soon as you see any water damaged areas so that the damage does not spread.
Cut a hole
After you have repaired the leak, cut out a few holes near the water damaged area of the walls.
This will help to provide ventilation for the area that has the water damage, and help dry it out quicker.
These holes should be about 4 inches square, and should be located near each end of the joist or stud.
If you find any insulation that is wet, then you need to remove that as well.
Allow the wall to dry
Simply allow your walls to dry out.
This can take a day or two, so don't be in to big of a hurry.
Properly allowing your walls to dry will reduce the risk of any mold or mildew growing in the walls, and becoming a health hazard later on.
Fans and dehumidifiers can be used to help ensure that you have a completely dry wall, and actually help speed up the process a little bit.
Patch the hole
Once your wall has dried, it's time to patch it up.
Be sure that you have any insulation that you removed prior to patching the hole.
Prime the wall
After you have patched all of the holes that you put into your wall, you will need to prime the wall. By priming the wall, you will also be preparing it for later painting, and protecting the wall from any stains.
Typically you will want to use an oil-based sealer, since a latex-based sealer may allow water stains to seep through again.
For a more even coloring, you may want to prime the entire wall, rather than just the damaged area.
Repaint the wall
Once you have finished priming the wall, all you really need to do is repaint the area.
Great care should be taken to match the existing paint scheme when you are doing this step though.
For this reason, it is recommend that you repaint the entire wall, simply to make sure that you have the paint matched properly.
Here are a couple helpful videos.
For that small repair....
For that big repair...
Mr. Fix-It
___________________________
Hardwood Flooring Can Often Be Restored
Instead of Replaced
There are times when you instead of replacing your entire hardwood floors, all you need to do is some minor touch ups.
This kind of simple hardwood floor restoration isn't all that hard, though you do need to make sure that you have the right tools, and a fairly steady hand.
Simply follow these instructions and you should have no problem with getting your flooring looking its best again.
How bad is it?
Look at the damage on the floor, and see how bad it is.
Most minor scratches, which are scratches that are less than six inches in length, and no more than 1/8 inch in depth, are easily fixed.
Anything larger than that, you may want to look into replacing that section of flooring, or taking more in depth restoration measures.
Light scratches need steel wool.
Light scratches can be described as a scratch or divot that appears to be surface damage only.
For example, can you look at the scratch, and it simply looks like some of the surface wood or sealant came off?
If so you have a light scratch.
Grab some fine steel wool, and rub it lightly over the scratch in the same direction as the grain.
If you rub against the grain, you can easily find yourself needing to make more repairs. Continue to rub the area until it is smooth to the touch.
Deep scratches need sandpaper.
For deeper scratches (which are up to 1/8 inch deep) you will need to use some lightweight sandpaper.
Once again, lightly rub the sand paper in the direction of the grain or you will end up with a larger project.
Keep sanding the area until it has become completely smooth and even to the touch. You are simply smoothing out the rough edges of the scratch, so don't get too carried away.
Apply some mineral spirits.
Begin preparations for filling and sealing by making sure that you pick up all the loose fine dust that is left over from the sanding.
The easiest way to accomplish this is with the help of some mineral spirits and a soft clean rag.
Apply the spirits to the rag, and then rub it over the sanded area.
Fill the scratch.
Allow the mineral spirits to dry, and then it is time to fill the scratch. This should only take about five minutes worth of work.
Get some premixed wood filler that matches the color of your hardwood floor.
Once you have that, put some onto a plastic putty knife and then fill the scratch.
Be sure that you are holding the plastic putty knife at an angle to get as much filler into the scratch as possible.
Do not use a metal putty knife, or you can easily create new scratches that will need to be repaired.
Sand the scratch.
Once the filler has dried to the touch (should be no more than an hour) it is time to sand the area smooth.
Use some lightweight (about 180 grit should do the job) and sand away the excess filler.
Do not press to hard, or sand too much or you can find yourself with a bigger mess to repair.
Seal it.
Seal the now restored area of your floor to help protect it against the elements and daily use.
Use either a varnish, polyurethane sealant, or some other product that will do the job, and match the rest of your floor.
Put everything away, and you are now finished.
Videos?
Here's a 4 part.. step by step "how to do it" procedure that should be helpful.
Mr. Fix-It
- __________________________
Painting Starts with Making Sure You
Have the Right Equipment to Complete the Job

Despite what many people may like to think, choosing your painting equipment, while easy, is not as simple as grabbing a few brushes and a pan.
Having the right type of equipment for the given job can make all the difference in having your painting project looking like a professional did it or having it look like something you did on a free weekend.
Choosing your painting equipment is pretty easy, as long as you keep in mind the basics.
1. Brushes
Perhaps the single most recognizable items of all painting equipment is the paint brush.
It can honestly be said that there is a brush for every kind of job, the trick is to learn what kind of brush you want.
A good quality brush is almost always going to have a shaped hardwood handle, to which the bristles will be attached with a non-corrosive metal ferrule.
The bristles should have multiple spacer plugs, and the end of the bristles should look almost like a chisel at the end.
Brushes should usually be chosen when working with delicate or detail-oriented work such as "cutting in" (which means painting that last little bit of wall that is near doors, ceilings, and windows) or working in corners.
2. Rollers
Rollers and roller covers are perfect for painting large areas. For example, if you needed to paint a large wall, you will want to use a roller and roller pad (or cover) to help get the job done.
A good quality roller should have a sturdy construction and the cage should roll easily when you spin it around.
You don't want it to stick or hesitate as you are painting.
The cover you choose depends on the effect that you want, but there are some generalities that you can keep in mind.
For example, if you are going to be painting an extremely flat surface, then you should only need to use a 1/4 inch nap, whereas if you have a wall that will have some small flaws use a cover that has a 3/8 inch nap.
The roller cover should be made of a material that will absorb the paint nicely, but still be able to part with it easily, and which won't dry out too quickly.
3. Pads
Pads and specialty rollers should only be used when you have a need for them.
Typically, you can follow the same general rules in picking a pad that you do with rollers. Keep in mind that these types of equipment will generally come with instruction on how to use them properly.
4. Mechanical methods
Lately there are all kinds of mechanical methods that you can use to paint.
For example, you can use a paint sprayer to help paint your home, furniture, and hobbies.
Another item that you can often use is called a power painter, which is a "pressurized" paint roller. When using a power painter, be sure that you follow the same general rules as you do with a non-pressurized roller.
For the paint sprayer, choose the one that will fit your needs the best.
Just as with a paint brush, a paint sprayer is usually made to fit a specific job.
Now let's get started with some videos !
Mr. Fix-It
_______________________
Which High Efficiency Light Bulbs Are Best

There are all kinds of reasons that can influence you to be as energy efficient as possible.
Some of the more common reasons include wanting to save money on your monthly utility bills, wanting to save money on shopping, and even wanting to reduce the amount of energy that you use in general.
Whether you are looking to make a green impact on the planet, or saving a little green in your wallet, you need to know the right methods for choosing energy efficient light bulbs.
In reality, all you really need to do is keep in mind these guidelines, and you should have no problem getting the right light bulbs for your home.
1. Check the package
The first thing that you need to understand about choosing energy efficient light bulbs is that they should be clearly marked. This means that you need to look carefully at the packaging.
Good quality energy efficient light bulbs will be clearly marked with Energy Star somewhere on the packaging.

If the packaging isn't clearly marked, it may not be as energy efficient as the packaging may lead you to believe.
2. Types
There are several different types of light bulbs that are designed to be energy efficient. Perhaps the single most popular type are fluorescent bulbs (both regular and compact) which also provide the most "natural" light of all the energy efficient light bulbs.
In fact, these are so popular that some cities are making it illegal to sell the old incandescent light bulb anymore in favor of these.
Another of the more popular choice are the light emitting diodes (LEDs) or even halogens which tend to provide the brightest lights.
3. Benefits
If there is one benefit that all energy efficient light bulbs will share is that it will save you money.
Energy efficient light bulbs are also engineered to have a minimum of ten times the service life of regular light bulbs.
In addition, these lights will usually give of the same amount of light using a whole lot less energy than traditional light bulbs.
For example, an LED bulb that only uses about three watts of energy can put out as much light as a 45 watt incandescent bulb.
4. Potential drawbacks
CFLs (compact fluorescent light bulbs) have a couple of large drawbacks.
The first is that as they are now, you cannot really use them effectively with a dimmer switch.
Another potential drawback is that CFLs are extremely hazardous if they get broken.
In fact, they are so dangerous that the EPA considers them hazardous materials.
Here are some helpful videos:
Mr. Fix-It
__________________________
Wood Flooring Installation Made Easy

When it comes time to install the flooring of your home, you really only have two choices.
The first choice is to hire someone else to do the work for you.
While this may be the most traditional method, and one that can almost certainly guarantee your satisfaction, it is also one of the more expensive options.
The second, and most cost effective, method is to do your own work.
Here's what you have to do, step by step.
1. Preparation
One of the most important steps in installing wood flooring is the preparation that you put into the project before you actually do any installation.
Hardwood flooring needs to be installed on a sub-flooring or flooring base that is dry, clean, smooth, level, and structurally sound.
While you are ensuring that your flooring base or sub floor will fit these parameters, bring in the wood for your flooring into a different room of your home. This will allow the flooring to adjust to the humidity levels prior to installation, and allow you to work with the wood without fear of later warping.
2. Layout
Find out which direction the floor joists are traveling in, and get ready to install the wood flooring so that it will be perpendicular to these joists.
Make marks along the walls where the joists are located with a pencil so that you can easily erase the mark later on.
Lay down a layer of 15 pound asphalt laminated kraft paper for a vapor barrier, as well as reducing the amount of noise that the flooring will make when you walk on it.
3. Start the first few rows
When installing wood flooring it is always a good idea to first layout the first three rows in a sort of dry run.
Before you lay down these rows, use a measuring tape to determine where the middle of the room is on the wall that you will be starting.
Repeat the process on the opposite wall.
Connect these two marks with a chalk line, and double check to ensure that the measurements are the same.
Use this guideline to ensure that you are moving in a straight line as you lay down the flooring.
Turn the first row of flooring so that the groove is towards the middle of the room. You will want to cut off the tongue using a table saw so that you have a flat straight edge to work with.
Between this first row and the wall, place a 1/2 spacer to create an expansion gap (which will be covered by the base molding when you are finished).
Nail the flooring into place with 1-1/2 inch finishing nails that are three inches from the ends of the plank, and about 1/2 inch away from the groove, spaced six inches apart from each other.
Make sure that the nail heads are just below the surface of the wood with the help of a nail set.
Repeat the process for the remaining first row, and then offset the second row so that the seams do not line up (they should be staggered by about six inches for maximum effect).
Make sure to fit the tongue of the second row into the grooves of the first, and then nail about three to four inches from the end, and every eight inches along the length.
Your best bet would be to nail into the floor joists themselves for maximum strength.
Repeat this process with the third row.
4. Repeat until your last row
Dry fit (meaning you don't nail down like you did the first three rows) the next five rows of flooring. Instead, use a pneumatic nailer to blind nail the floor boards into place.
You should be about half way across the floor at this point, so repeat the same process that you did with the original two rows once again, and then repeat the dry fitting technique for another five rows.
You should now be about two rows away from the opposite wall that you started on.
5. Final row installation
For the installation of the final couple of rows, you will want to repeat the same process as with the first couple of rows, but in reverse.
This means that with the row that will be closest to the wall you will want to cut off the groove, or more if the measurements require it) so that you have a flat surface.
Once again, make sure that you are using a 1/2 spacer between the flooring to a expansion gap.
You have now finished installing wood flooring, and all that you have left is some cleanup and a little finishing work.
May it's a bit easier by watching how it's done.
Mr. Fix-It
____________________________
Taking Care of Your Ceramic Tile

While ceramic tiles look beautiful and shiny when brand-new, over time they can become stained, chipped, cracked, loose, and the grout in between can become discolored.
Once any of those things happen to ceramic tiling, the overall look of the tile is dingy.
In certain situations, however, you can restore the tiles to their new luster, instead of going to the expense and labor of replacing them.
If you're a homeowner who doesn't mind a challenge, here are some tips you can use for restoring your ceramic tiles:
Stained tile
For simple stains, such as soap scum, use a soft scouring pad and scouring product designed specifically to clean, but not to scratch, the tile surface.
For embedded stains, such as rust, hard water stains, and lime deposits, use a product specifically made for ceramic tile and follow the directions precisely.
Most of those types of cleaning agents contain acid and, if you don't follow the directions, your risk etching the surface of the tile.
Chipped tile
If the tile is actually chipped, and not cracked, then you might first try to repair the chip by painting it. Visit a flooring store that carries ceramic tile and speak with a qualified salesman to learn about paint that you can purchase for your tile.
Most ceramic tile paints are comprised of both oil paint and epoxy.
If you have a very deep chip or the entire corner of the tile is missing, you can fill it with epoxy putty, sand it, and then paint it to match the surrounding tile.
Cracked tile
Hairline cracks are easy to repair since you only need to touch them up with ceramic tile paint or epoxy, sand away extraneous material once it hardens, and then paint to match.
If the crack is deep and continues into the surrounding grout, remove the grout and replace it.
Glue residue on tile
It is a little difficult to remove glue or adhesives from tile, but not impossible.
The best methods are to use dry ice or a heat gun, using a plastic putty knife to scrape away the glue.
Wear gloves when using the dry ice, as it will burn your skin if you touch it with bare fingers.
Place the dry ice onto the glue for a few minutes, and then chip the glue away from the tile with the plastic putty knife.
If you don't want to use dry ice, use a heat gun to make the glue pliable, and then scrape it away with the putty knife.
Try the methods outlined above to restore your ceramic tile.
Sometimes the process can be laborious, but you will save quite a bit of money if any of the methods work since the only other alterative is to replace the tile completely.
Videos? Sure !
Mr. Fix-It
_____________________________
Utility Sink Clogged?
Using a "Snake"

Just as when you use a snake to unclog kitchen or bathroom sinks, you are going to be utilizing the same methods and tools to snake out a utility sink.
You will want to make sure that before you start any type of home plumbing task that you have the tools necessary to accomplish the job.
There are going to be four things that you'll need:
a bucket
a pair of pliers that are adjustable
a snake (or drain auger)
an old towel
When considering whether you want to snake your drain you need to make sure that you know what kind of pipes your plumbing is made from.
Are the pipes metallic or from PVC?
This is an important thing to know, since if the pipes are made from PVC you could potentially break them if you are not careful when removing the blockage.
If you do not already have a snake, you can purchase one at any department or hardware store.
The price is going to range between $4.50 and $32.50 depending on brand, type, and which store you purchase it at.
Now you are ready to tackle that clogged drain:
1. Turn off the water to the sink.
The shut-off valve should be under the sink; it looks similar to what you use to turn off the water to a toilet or for your sprinklers.
You want to make sure that you have turned off the water since so you avoid any potential "too much water" problems.
2. Set your bucket under the bend in the sink's pipe.
This bend in the pipe is what is commonly known as the trap.
This is the area where the blockage typically forms, since it is designed to keep things from coming back up the pipe.
3. Use your adjustable pliers to loosen the nuts holding the trap in place.
Loosen the nuts at both ends of the trap. As you do so, water and gunk are going to be coming out.
Don't worry; this is why you have the bucket under the pipe.
Simply let everything fall into the bucket, including the trap.
4. Stick the end of the drain auger into the pipe that goes into the wall.
As you are placing the corkscrew end in, turn the handle clockwise.
You are going to keep feeding the snake into the wall until you reach the blockage.
Gently but firmly push the snake through the blockage.
5. Once you have pushed through the blockage, reverse the snake and start removing it from the pipe.
The end of the snake should pull the clog back out and you can let it drop into your bucket.
This is going be messy, so this is why you have that towel. Be ready to clean up the mess by using the towel to wipe off the snake as you bring it back out of the wall.
If there was no blockage in the wall, check the trap that you previously removed.
You can clear this out by simply running the snake through this portion of the pipe, as done with the wall.
After this has been done, replace the trap, tighten the nuts, and turn the water back on.
You're done!
Need some videos?
Mr. Fix-It
__________________________
Remodeling?
Don't Forget "Vapor Barriers"

One of the more confusing, and fairly important, aspects of home construction, and thus remodeling, is the matter of vapor barriers.
A vast majority of homeowners don't know what these are, and it is also a sad fact that many in the construction field don't either.
However, by simply forgetting to install some of these when you are doing a major remodel, you are creating an environment that could lead to some potentially dangerous situations later on in life, like mold or structural damage.
What are vapor barriers?
Vapor barriers exist for one reason and one reason only, which is to help retard, resist, or even prevent the spread of moisture through the different enclosures of your home.
By having these barriers installed properly, you help prevent moisture from getting into the dark spaces of your home, which can go a very, very long way to preventing mold from getting a foothold in your home and thus becoming a health hazard.
These have become so important that the United States government has mandated that they be included in the building codes of most municipalities within its borders.
When they are installed properly, vapor barriers can (and should) be found between the walls, ceilings, and floors of your home...
...simply put, anywhere that there could be a risk of exposure of moisture to the inside of your walls, ceilings, and floors, these are supposed to be.
Strictly speaking, vapor barriers are actually more of a vapor retarder than an actual barrier.
The reason for this is that the ones that are typically used within the building are supposed to be somewhat permeable so that once water vapor has gotten in, it can get back out and allow the area to dry.
Here are the technical classifications of the various vapor barriers, and some of the materials used for that type, according to the United States building codes.
Permeable vapor barriers
These are anything that has a rating of more than 10 US perm, and can include things like unprotected fiberglass insulation, cellulose insulation, unpainted stucco, and so on.
Semi-permeable vapor barriers
These have a rating of between 1 and 10 US perms, and are usually such materials as some latex based paints, heavy asphalt-impregnated building papers, and unfaced expanded polystyrene.
Impermeable vapor barriers
For a vapor barrier to be considered impermeable it needs to have a rating of less than 1 US perm, and can be things like vinyl wall coverings, OSB, vapor retarding paint, and extruded polystyrene.
Keep this in mind when you do your next remodel !
We have some videos.
Mr. Fix-It
___________________________
Want to Replace a Regular Light Switch with a Dimmer ?

One of the best ways to help set a relaxing atmosphere in any room is to dim the lights by using softer lighting.
Unfortunately, while many homes may have a dimmer switch or knob for the lighting in one room, they are not usually found in all of the rooms, or it may not be in the room that you want it to be in.
So how does the home electrician go about replacing a light switch with a dimmer?
Luckily, this is a fairly easy electrical job, and one that you can do yourself without having to resort to calling in a professional electrician to accomplish.
Begin by gathering together all of the equipment and materials that you are going to need.
For this job you need to get a set of screwdrivers, masking tape, pliers, colored markers, three wire nuts and a dimmer switch.
You can purchase them at any local home improvement store.
Once you have all the items together, you are ready to begin replacing that old light switch with your new dimmer by following these 5 easy steps:
1. Begin by turning off the power to the affected room using the circuit breaker.
This ensures that no current is going to be going through the lines you are working on.
After you have shut off the power, make sure that you clearly mark the circuit with some type of sign that says something along the lines of "man at work" since you do not want someone to come along and turn it back on while you are working.
2. After power has been shut off, you need to remove the faceplate from the light switch.
You do this by removing the screws that are holding the plate in place with a screwdriver.
Some plates have more than two screws, so just be sure that you have removed them all.
Set aside the plate and screws.
Now, remove the screws that are holding the switch in place within the mounting box, and set those aside as well.
3. Once the mounting screws have been removed, simply pull the light switch out of the mounting box.
The switch should come out only far enough to expose the wiring.
You are going to want to disconnect the wiring, but before you do, please note the color-coding and where everything was attached.
Use colored markers and masking tape to help with this.
Note that there should be three wires total, one red, one black and either a bare copper or green wire.
That green or copper wire should be disconnected last since it is the grounding wire, and you really don't want to get shocked.
4. Once you have disconnected all the wires you can set aside your old light switch and replace it with the dimmer switch.
Reconnect the wires in the opposite order that you disconnected them.
Be sure to reconnect the wires with their corresponding places on the dimmer switch, using a pair of pliers to help gently tighten the wires together and secure them with a wire nut.
5. Put the wires back into the electrical mounting box, and screw your new dimmer switch into place.
Cover and secure the switch with the face plate, making sure that you have completely tightened the screws into place.
Turn the power back on, and test your work.
You should be able to tell quite easily if everything was done properly.
Here are a few videos to help you out.
Got a dimmer that no longer works? Watch this !
Mr. Fix-It
____________________________
Reverse Osmosis System Leaking ?

If you have a reverse osmosis system installed and is leaking water from the base of faucet (photo 1)...

...the drain line (photo 2) is plugged with debris not allowing water to drain from the Reverse Osmosis system during regeneration cycle.

The fix is simple...
Remove the plastic drain line from plastic elbow connected to drain adapter and clean out debris.
Teflon plumbers tape should be applied to threaded elbow to prevent leaks.

Mr. Fix-It
______________________________
Lowering Costs on Home Improvement Projects

One of the biggest problems with doing any kind of home improvement project is the amount of money that it usually takes to do the job right.
For some reason, no matter how well someone does their planning, it can easily be expected to have the project go over budget by at least 10 percent, and often more.
Due to this, finding ways of lowering costs on projects is something that should always be looked for whenever possible.
Following the suggestions outlined here should help you be able to keep those costs down as low as possible.
When possible, do your own work
Typically, labor intensive aspects of projects (such as demolition, painting, insulation, or even the general clean up) are the most expensive portions.
One way to dramatically reduce the overall costs of your home improvement project is to handle any and all labor intensive aspect of the project yourself.
However, if you do utilize this, keep in mind that your project will only be able to proceed as quickly as you complete the task.
Be aware that you will also be responsible for the results of the work that you accomplish.
Plan accordingly
Whenever possible, stick with preexisting fixtures and features.
By replacing or remodeling such things as plumbing or gas lines you can significantly increase the cost of your project.
While you don't always have to do this, be aware that most changes you make will entail a corresponding increase (often dramatic) in overall price.
In addition, if you have a contractor doing the work for you, then ask for a similar rate brake that they get.
For example, when a contractor purchases their materials from a home improvement store for a large project, they often get a 10 percent discount. If they are getting a discount for their purchases, it is only fair that you get a similar one.
Stick to your budget
Perhaps the single most difficult aspect of any home improvement project is actually sticking to the budget that you come up with during the initial planning.
This however is the single most important part of lowering costs on your project.
The best way to stick to your budget is to first decide on how much money you will spend, and then keep that as a hard target.
If you increase your expenditures in one area (for example buying custom countertops) reduce the expenditures in another area (resurfacing your cabinets instead of getting new ones).
Buy direct from source
If you are doing your own work, try to purchase your materials directly from the source whenever possible.
Find your own specialists
If you have the patience, you can always try being your own general contractor.
This means that you find, negotiate, and hire your own specialists for each individual job that comes along. Be careful when doing this though, since you have to be responsible for scheduling, supervising, negotiating fees and terms, and paying the subcontractors, in addition to often being responsible for the requisite permits.
Here are a few videos to help you with that do-it-yourself project.
Mr. Fix-It
_________________________
Water Conservation...Money Saving Ideas

With the way utility bills keep rising, if you don't take a few simple steps, you can easily find yourself with a huge bill.
One of the simplest ways that you can lower your utility bills in general, and your water bill in particular, is to begin conserving water.
Conserving water in the home isn't that hard. All you need to do is use a few of these suggestions, a little dedication, and you will begin to see results.
Keep in mind though that the best way you can go about conserving water in the home is to follow all of these suggestions, and to do use a little creativity of your own.
Use aerators

Believe it or not, using faucet aerators can help you conserve a huge amount of water in the home. On the average an aerator will allow you to reduce the amount of water that flows through the faucet by about half, with little or no effect on the water pressure.
Over the course of a year this can save you roughly 100 gallons a year per faucet aerator.
Best thing of all is that you can find aerators for your shower and bathtub as well as for your sinks.
Dishwashers help conserve water

Despite what many people may think, washing dishes by hand does not actually help to conserve water.
You will use up to 16 gallons of water to wash your dishes by hand, while a regular dishwasher will only use between 7 and 10 gallons of water.
Some EnergyStar dishwashers can use even less water than that.
Turn the water off

A common mistake at the sink can add up to huge amounts of water wasted and that common mistake is leaving your water running while you do personal grooming such as brushing teeth, shaving, or washing your hands and face.
If you turn the water off when you don't need it, then over the course of a year you can save up to 2,000 gallons of water.
Low flow tech

Low flow technology has come a long way since it was first introduced. In fact you can find low flow water faucets, shower heads, dishwashers, clothes washers, and much more.
Invest in some low flow options around the house, and sit back and watch the savings roll in.
Check for leaks often
Another common cause for wasted water is leaks.
By conducting regular checks of your home for leaks, you can potentially save a huge amount of water. A simple way to check to see if there are any leaks in your water system is to write down the numbers on your water meter when you go out. Check the numbers again when you get home; if they are different (and no one has been home while you were out) then you have a leak. Fix any leaks as soon as you can find them.
Here are a couple video ideas.
____________________________
Broken Window?
If it's not a Picture Window...You Can Fix It Yourself

Fixing the glass in a broken window can be an unnecessarily expensive project for any homeowner. Considering what contractors charge, you may want to seriously consider doing your own glass repair.
Contrary to what many people think, this is something that anyone can do, all that is needed is a few simple tools, new window glass, and some time.
When you go to purchase your new glass, you need to make sure that you have measured all of the openings where the glass is going to be going.
Take your measurements to the clerk at the glass store, and have them cut that new pane 1/8" smaller than the dimensions you took.
Doing this ensures that there is a proper fit and reduces the likelihood that you will need to use a glasscutter later on.
These are the materials you need to do the job:
New glass
Glazing points
Glazing compound
Stiff putty knife
Towel
Single-edged razor
Glass cutter
Needle-nose pliers
Silicone caulk
Straightedge or ruler
Masking tape
Paint primer
Paint to match exterior trim
Small paint brush
After you have collected all of your materials (most are available at any hardware store) you are finally ready to begin the physical process of replacing your window.
To begin, you are going to need to remove what is left of the broken glass.
This can be done by placing your towel over the glass and then breaking the glass. (The towel stops the glass fragments from going everywhere.)
Once you have broken the glass, remove the glass by using careful wiggling motions.
Be careful; you don't want to cut yourself on any sharp edges.
Take your stiff putty knife and remove the old glazing compound from around the edges of the window frame.
It may be difficult to do, since it could be extremely hardened and stuck on, so have some patience as you do this. Keep an eye out for any glazing points that may be stuck in the wooden frame, and use your needle nose pliers to remove them from the wood.
These points are the small metal fasteners that typically are used to hold in the glass.
If you have ever changed out the frame on any pictures, then chances are you have seen these before.
When you have removed all of the glass, glazing compound, and fasteners, it is time to prepare the wooden frame for replacement.
Do this by using the paint primer on any and all bare wood that was exposed when you were removing the glazing compound. If you are pressed for time, then you may wish to use a fast-drying primer. The primer's purpose is to keep the wood from absorbing the oils that are in the replacement glazing compound.
After the primer has dried, it is time to prepare the windowpane for a tight seal.
You do this by applying a thin stream of caulk or a thin coat of glazing compound along the window frame perimeter.If you are using glazing compound, press it into place with your putty knife.
Now you are going to place the glass pane into the frame, pressing the glass into the sealant just firmly enough to make the material bead up slightly.
Ensure that the glass stays in place by using your glazing points.
Start placing the glazing points about two inches from each of the corners, using two or three on each of the corners. You are going to want to use as many of these fasteners as you can because you do not want to have more than eight inches between each.
Press each fastener into the frame using your putty knife.
After you have placed the glass into the frame, use some of the glazing compound to finish that seal you started earlier.
Roll the compound in your hands to form a thin rope about 3/8" in diameter and press in the corners formed by the glass and wood.
Take your putty knife and press the caulk firmly into the wood, making a beveled angle which projects above the wood, using a single continuous motion. There may be some excess compound that needs to be scraped off with your putty knife.
If you are find yourself needing to scrape off the material, be careful not to disturb the compound.
It is going to take about a week to allow the glazing compound to completely dry, so keep an eye out to make sure that there are no leaks if there is any inclement weather.
You also do not want to paint the trim until after the caulking material has been dried completely.
Prior to painting, affix tape on the glass around the frame. This makes sure that there is not going to be any paint left on the glass, other than a very thin line on the edge of the glass to help maintain the seal.
We have some helpful videos to help you do the job right.
Mr. Fix-It
_________________________
What Ceiling Fixture is Best for Your House ?

The right ceiling fixture can have a huge impact on the general feel and look of a room.
This effect makes the ceiling fixture almost as important of a choice as choosing the paint, furniture, or general decorations that you may plan to have in that room.
Typically when choosing ceiling fixtures, you want to make sure that you choose one that you don't notice. This may sound kind of contrary to what was just said, but it is true.
Think of any movie that you may have seen.
In the good movies, you don't really notice the score or soundtrack since its purpose is to enhance the movie itself. Likewise, a ceiling fixture's job is to enhance the surrounding area, without drawing undo attention to itself.
In order to begin choosing ceiling fixtures that will work for your particular room, you need to know the different options that you have.
Listed below are is a little bit of information about the general categories of ceiling fixtures, some examples for them, and what they do.
The next time that you are choosing ceiling fixtures, keep this information in mind to ensure that you choose the best possible one for your room.
Pendant lights

Pendant light ceiling fixtures are those types of fixtures that hang down, and provide a little more decoration to a room. For example, chandeliers are a type of pendant light fixture.
These light fixtures are typically designed to have a minimum of five or more light bulbs, and to help draw the eyes upwards from a tabletop.
When choosing these kinds of lights, size is always important, so keep in mind this simple ratio: 2 inches of width for every foot of room width.
Some other examples of pendant lights are shades and lanterns, which are both used to help add a little extra light to narrower spaces, or work spaces.
Typically these light fixtures should be spaced about 6 1/2 feet above the floor so that people can walk under them. Also, make sure that they appear to be centered in the available space.
Track lights

Track lights are ceiling fixtures that can be used to provide both general lighting, as well as accent lighting.
There are four general types of track lighting that you can choose from.
The first is low-voltage gimbal ring lighting that is a type of halogen lighting that can provide an intense, narrow beam of light.
Similar to this is the low-voltage bell lighting system.
Both of these are more appropriate for accent lighting, particularly since these light fixtures generally require a special dimmer switch to operate.
For more general lighting, you should use around-back cylinder or gimbal ring system. These are both incandescent lamps, which will provide a broad intense beam of light.
Flush fixtures

Perhaps the single most traditional form of ceiling fixture, flush fixtures are found in just about every home in the United States.
The reason for this is that a single flush fixture can, when placed in the center of a ceiling, easily produce enough light to illuminate a fairly large room.
A standard flush ceiling fixture can light a room that is 12 feet by 12 feet, with an 8 foot ceiling. There are a few flush fixtures that can be used to emulate the accent light effects of track lighting, though they are still limited in their mobility.
We have some video help.
Mr. Fix-It
___________________________
A Hot Tub Needs
"T.L.C"
to
Avoid Big Maintenance Bucks !

While a hot tub can be a wonderful thing to have, it can also be a huge drain on your finances hiring someone to clean and maintain it for you.
Rather, all you need to do is learn how to maintain your own hot tub.
Do that by simply following these easy steps, and you will have a perfectly working (and crystal clear) hot tub in no time.
1. Periodically check your chemical levels.
Without periodically checking the chemical levels in your hot tub, you can find yourself in a world of hurt.
For example, if you get into water that has an improper chemical balance, you can seriously hurt yourself.
You can purchase a chemical testing kit from your local pool store. All you really need to do is follow the instructions on the back as given by the manufacturer.
The test results will tell you if there is any need to make any change to your chemical levels, or if you even need to change the chemicals that you use in your hot tub.
2. Get any scum diagnosed.
Periodically, you may find some scum in your hot tub water. When this happens, before you blindly try adding some chemicals to your hot tub you need to see what kind of scum you have.
The reason for this is that the scum may actually be indicative of another problem that you will need to fix.
Once you have tested the chemical levels in your water, take a sample of your water into your local pool store, and have it tested. The will be able to tell you what caused the problem.
3. Purchase proper chemicals or seek further help.
Once you know what the prescription for your hot tub is, simply purchase the proper chemicals necessary to treat it. Or, if there is another problem that is the cause, seek professional help to get it repaired.
If you attempt to do your own repairs, and do them wrong, then you may find yourself with a hot tub that doesn't work at all.
4. Apply the chemicals that you purchased.
Once you get the new chemicals home that you purchased, it is time to apply them. Simply follow the directions that come with the chemicals as printed.
By following the directions as they are printed, then you reduce the risk of causing damage to your hot tub.
After allowing the chemicals to work for the proper amount of time indicated by the manufacturer's directions, test the water again, as described in the first step.
5. Check for a clean filter.
Periodically check to make sure that your filter is clean. The purpose of a filter is to clean your water after all, and an unclean filter is a leading cause for scummy water.
If the filter is not clean, then you need to replace the filter.
6. Clean exterior.
The final step that you should take when maintaining your hot tub is to clean the exterior.
Doing this will ensure that you have a hut tub that looks its, as well as ensuring that your hot tub will last for years to come.
Here are some helpful videos.
Mr. Fix-It
______________________________
Installing a New Floor?
How to Remove the Old One

While most people may like to think that floor removal is one of the easiest parts of any major renovation project, the truth is that it is also one of the more important ones.
If the removal isn't done properly, you can end up making more work for yourself, and wasting a whole bunch of money.
That is why you should always keep in mind the basic guidelines.
With these guidelines in hand, you should have no problem at all getting the job done the right way the first time you do the work.
Just follow these steps.
1. What's your budget?
Simply removing some flooring will cost you some money. Often this money is spent through hiring others to do the work for you, or getting the proper tools, or by purchasing the new materials to replace those that you have removed, to name just a few reasons.
This means that you should ensure that you have enough funds to complete the project before you start.
2. Who will do the work?
Another thing that you need to consider is who will be doing the actual work of floor removal.
It may be a bit more expensive to have someone else do the work for you, but there are a couple of benefits that you get.
If you hire a professional, then you are more likely to be pleased with the results.
If you are going to do the work yourself, you need to make sure that you are up to all that it will entail.
3. Identify the flooring type.
Not all flooring materials can be removed in the same manner.
Each flooring type will require that you use different tools.
An example of this can be found when looking at marble flooring, tile flooring, and wood flooring. Each of them have their own specific methods for removal, and if you use the same methods for removing the wood that you would the tile, you can end up causing some serious damage.
4. Set aside some time.
If you will be doing the work yourself, you need to be aware that it isn't necessarily a quick job. It is one that will take time, and that you will need to be dedicated to completing once you start.
5. Decide on how far you will go.
Before you begin ripping out the flooring, you need to also decide on how far down you will be going.
Are you just going to be removing the top layer, or are you going to be removing the sub-flooring as well?
The further down you go, the more work you need to accomplish to not only remove it, but replace it as well.
Here are some helpful videos.
Mr. Fix-It
_____________________________
Your Driveway Look Like This?

Have you ever noticed how much a driveway can say about a home?
Even for the best maintained home, if your driveway isn't up to snuff then the rest of the home will tend to look dirty and old as well.
Maintaining driveways is usually a task that will take a weekend to do, but it is something that every home owner should do.
Here are the steps to make your driveway look like new !
1. Assess what needs to be done.
Part of maintaining driveways is assessing what needs to be done. This means that you will need to take a serious and straight forward look at your driveway and ascertain what type of shape it is in.
If it is simply dirty, then all you need to do is a little cleaning; however, if it is more than that, you will need to do some repair work.
2. Clean any spills.
When maintaining your driveway the biggest thing that you will need to do is clean any spills that may have happened on it.
Some of the most typical types of spills you can find on a driveway are going to be things like oil, fuel, or other petroleum based stains.
While somewhat messy, they are pretty simple to clean.
Grind some kitty litter into each of the spills, and then sweep up the used kitty litter.
Repeat the process as necessary until the spill has been removed.
3. Sweep and wash the driveway.
Part of maintaining your driveway is also periodically cleaning it. This means that you should at least on a monthly basis sweep the entire driveway.
Doing this will allow you to get the vast majority of the large dirt and grime that can make a driveway look dirty.
After you have swept the driveway, you should also wash it and rinse it.
The easiest way to do this is with a power washer.
The extra pressure that such a tool can provide will help get rid of any ground in dirt, algae, or other grime that can discolor your driveway.
4. Regular maintenance.
Over time all driveways will get cracks, divots, and other problems that will need to be repaired.
While you can do this yourself, it is usually better to get a professional to do it for you. The reason for this is that to repair such things like a crack or a pothole in your driveway, you will need to work with hot materials that can seriously hurt you.
While it may be more expensive, hiring a professional will save you from possibly hurting yourself, and ensuring that you get the job done right the first time.
Videos? Of course !
Mr. Fix-It
__________________________
Did You Know there is a Right Way
to
Opening a Paint Can ?

Opening a paint can safely is an important skill to have, if not for yourself, then for the world around you. For example, if you happen to be careless when opening a paint can you can very easily damage yourself (or someone near you) rather seriously.
Even if you don't damage yourself or someone else, you can easily end up spilling paint all over the floor, walls, or (in cases of really exuberant openings) the ceiling.
It's not all that hard to open a paint can safely, as long as you remember to follow a few simple steps.
1. Prepare the area.
Before you begin opening your paint cans, you really need to prepare the area you will be working in, and opening the cans in, properly.
This rather simple step is more so that if you accidentally spill the paint, it won't get on anything important.
The best way to prepare the area is by placing down drop cloths.
2. Get the right tool.
You can use a wide variety of tools to open a paint can, as given by the perennial favorite (and wrong choice) of the flat tipped screwdriver.
Ideally you will want to use a specialized tool, which can be bought at most home improvement stores, and all paint stores.
That tool is, imaginatively enough, called a paint can opening tool.
In addition, you will also want to have a sharp knife, razor blade, or even old pair of scissors on hand just in case.
3. Take a look at the can.
When you have prepared the area, and have the proper tools, you need to take a careful look at the paint can.
The typical paint can is going to be either in the quart or one gallon sizes, and as such often have a metallic lid.
If you have a larger paint can (such as five gallon buckets) you will find that the lids are typically going to be made out of plastic.
You need to know which you have so that you will know the proper method for opening.
4. Carefully insert the tool.
If you have a metallic paint can, you need to carefully insert the paint can opening tool into the space between the lid and the edge of the paint can.
Carefully begin prying the can open.
For a plastic bucket, you will have noticed that there is a plastic strip that runs its way around the bucket that holds it all together.
This will need to be removed. With it removed, you can then begin inserting the paint can opening tool, and again prying the bucket open.
5. Work your way around the can.
Once you have lifted a part of the can or bucket open, you need to repeat the process all the way around the can.
While some cans will allow you to get simply pop off the lid once you have broken the initial seal, many times the can will be stubborn.
Work your way around the can slowly and carefully to ensure that you get it open properly.
6. Lift off the lid.
Once you have broken the seal around the lid of the can properly, you should be able to lift the lid off.
Do this very carefully so that you don't get any paint on your hands, and set it aside paint side up.
Setting the paint side up will ensure that the lid doesn't accidentally spread paint around, create a "puddle" that you can track to other places, and won't stick the lid to the drop cloth.
We have a couple videos for you.
Mr. Fix-It
_____________________________
Replacing a Water Heater
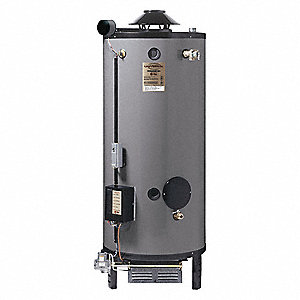
Since water heaters tend to last about five to seven years here in the Nevada sunshine, chances are that you will need to replace your water heater at least a few times.
While you could call a professional to install your water heater, you might be surprised to know how simple it is to do the job yourself.
If you have telltale signs that your gas water heater needs to be replaced...
...no hot water in the tap and water leaking from the water heater...
..then follow these steps to replace your gas water heater:
1. Turn off both the gas and water supplies at the main valves.
Then, turn on a hot water faucet at a tap to allow air into the water lines, attach a garden hose to the drain valve and completely empty the tank.
2. Disconnect the gas and water lines using a wrench, and then detach the gas exhaust from the flue hat.
Have someone help you remove the old water heater and set the new one into place, making sure that it is level, and then connect the flue hat to the exhaust vent.
THIS IS THE MOST DANGEROUS PART OF THE JOB. IF YOU AND A FRIEND ARE NOT UP TO HEAVY LIFTING...CALL A PRO !
3. Following the instructions that came with your new water heater, install the heat trap fittings.
The fittings are directional, and usually have arrows showing the correct direction for installation.
Blue fittings are for cold water, and red fittings are for hot water.
4. Install the water line connections and then connect the gas supply line.
Turn on the gas and water supply valves, turn on the water tank, and then turn on more hot water faucets to bleed air from the system.
5. Light the pilot light and turn the control knob until you hear the burner ignite.
Set the temperature of the water heater.
Don't forget to turn off the hot water faucets that you turned on earlier.
You might need to have Teflon pipe tape and pipe joint compound to help make solid fittings and prevent leaks, so make sure that you have those items and all of your tools on hand before you begin.
It's also wise to cover the floor with a tarp.
We have some helpful videos.
Mr. Fix-It
__________________________
Using a Vacuum Cleaner
for
Unclogging a Bathroom Sink
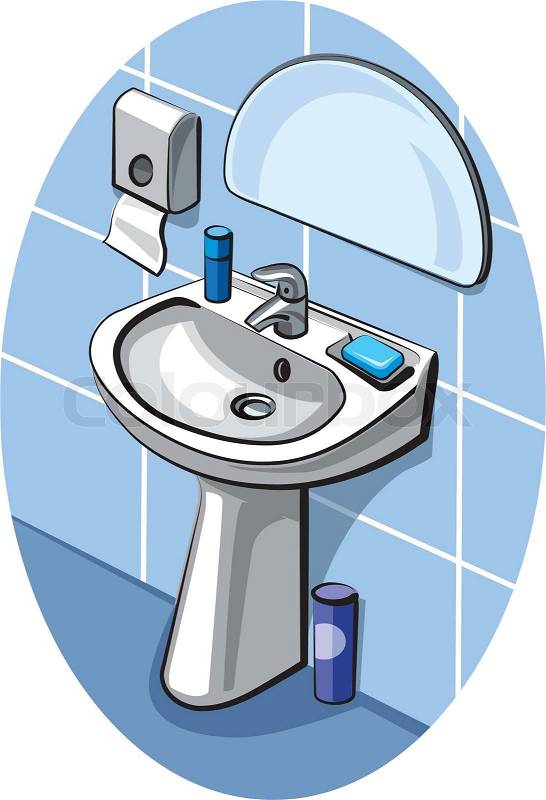
A bathroom sink can be more difficult to unclog than a kitchen sink.
Why?
The layout is a little different from that of your kitchen sink, not to mention the layout of the bathroom itself being different from that of a kitchen.
Set up your wet/dry vacuum in the bathroom if you can.
If you cannot, then set it up as close as you possibly can.
Be sure that you have set up the vacuum as directed by the instructions that came with the vacuum or as told by the rental agent.
You want to make sure, whenever you use any type of power tool that you follow all the instructions. This is for your safety, as well as ensuring that you do not damage the tool so that you can get your deposit back.
Also, ensure that you have some old towels or sheets that you can use for cleanup if you need them.
It may be a good idea to lay some sheets or drop cloths under the vacuum to catch any blowback if it happens.
Before actually trying to unclog the bathroom sink, you'll need to make sure that you remove the drain stopper from the sink.
Different types of sinks have different types of drain stoppers.
Some of them lift right out while others may need to be unscrewed.
Examine your sink and figure out how to remove the stopper.
If you don't, you won't be able to unclog the drain as easily.
You'll also want to see if your bathroom sink has an overflow outlet.
Usually this type of outlet is near the front of the sink and is used as a "spillway" in case you try to overfill the sink.
This overflow goes directly to the drain, so you are going to need to block it in some way.
Try using some duct tape to cover the overflow. You can apply a couple of pieces, as long as the sink to which you are applying the tape is clean and dry.
You are now ready to unclog the sink by following these steps.
1. Hook the hose of the vacuum into the "blow" or "exhaust" position and stick the hose into the drain, forming as tight of a seal as you can.
You are going to use the positive air pressure from the vacuum in an attempt to break up the clog in the drain.
You are going to initially hear a high-pitched hum or whine from the vacuum as the air pressure is generated to break up the clog.
When the blockage has been broken up, you are going to hear a distinct change in the sound generated by the vacuum's motor.
2. There may be blowback from the air pressure, which can lead to a mess, so be prepared to clean up any dirt and gunk with old towels.
3. If there doesn't seem to be any change in the drain's water flow, then you are going to want to switch the air hose to the suck position.
By switching the position of the hose back and forth several times, you simulate the action of a plunger, but with greater force.
4. Another benefit from using the suck position is that all of the mess gets sucked up into the holding canister of the vacuum.
This leads to less mess and a much easier clean up, as long as you do not spill the canister.
5. When the drain is unclogged, remove any tape you placed on the overflow and replace your sink stopper.
Your bathroom sink should now drain as good as new.
Watch how its done !
Mr. Fix-It
_______________________________
Something for the Man Cave
The Home Theater System

Ah, the home theater!
For many men, this is the "Holy Grail" of home improvement projects.
We men seem to want it all, and we want it now!
One thing though, does anyone really know what to get to accomplish that "man cave must have"?
There are two things that a person can do when faced with this situation.
The first option you have is that you can go to the local electronics store and say "I've got money to spend," and watch the sales associates get into a big brawl over who get's your commission.
While highly entertaining, this method can lead to you spending more and getting more system than you need (which does not make for a happy spouse when you get home).
The second option is to plan ahead and use these guidelines to help reach that wonderful state where you will accomplish three objectives:
Getting...
...what you want.
... what you can afford.
...a happy spouse !
1. Finances
As with any home improvement project, the first thing that you need to do is decide how much you can afford to spend on this project.
Considering how much many systems, let alone individual components can go for, you really want to determine how much you can afford.
You don't want to end up too far in debt when you are done, since in the long run that is not going to make either you or your spouse happy.
2. Location
Before rushing out and getting the system of your dreams, determine which room in your home you are going to be using as a home theater.
Are you going to be using a specific room solely as a dedicated home theater, or are you going to be using one that is more along the lines of a combination family room and TV room, and how big is it?
Discuss what you want with your spouse and get their input.
After all, even if they said "It's up to you," they are still going to have to live with the results and it's usually best to get their input before you unilaterally decide.
3. TV
How big of a viewing experience do you want?
Many people may want to go with the largest and most impressive flat screen HDTV that they can find.
While it is true that such systems can provide superior viewing experiences, the larger you get, the more expensive you get.
4. Components / System
There are bonuses and drawbacks to going with either components or a system.
Systems are great for larger rooms and for large-screen TVs; however, by going with the individual components you are going to ensure that you have a truly customizable home theater system.
5. Audition
Since most electronic stores have some type of return policy, keep all the receipts and packaging until you are certain you are pleased with the outcome.
If you do not like the way that one component interacts with others then simply take it back and use it for in-store credit to find one that you do like.
Here are some helpful videos to design that special place.
Mr. Fix-It
_________________________
Thinking About Refinishing
Your
Kitchen Cabinets ?

When it comes to refinishing kitchen cabinets chances are that the single most difficult part is finding the time. To properly refinish your kitchen cabinets you are more than likely going to need to spend an entire weekend...or longer... working on it.
Despite this, refinishing your kitchen cabinets is something anyone can do.
Here are the steps you should follow:
1. Prepare.
The first thing that you are going to need to do is prepare your work area.
For your work, you are going to want a place that is well ventilated for when you are working with the stripping compounds and stains.
In addition, you are going to want a location that is able to be dust free for when everything is drying.
A garage is the best place for this task.
2. Remove.
Next, you are going to want to remove all your cabinets and the associated hardware. If you have limited space, then take only the ones that you are going to be working on at that time.
After you have taken the cabinetry into your work area, remove any and all hardware and set in one location, preferably in a plastic bag so that the do not get stained or painted by accident.
3. Clean.
Completely remove all the dirt and grime from your cabinets. In some cases this just means dusting, but in others you are going to have to use some elbow grease to help remove the caked in dirt and grime.
Thoroughly clean and remove all the dirt and grime, since if you try to apply the stain over this junk, all you are going to do is create a bigger mess.
4. Strip/Sand.
Once you have completely cleaned the cabinets it is time to remove the old stain.
There are a couple of different ways that you could do this.
The first is that you can try removing the old stain and sealer by sanding it off. This method is a little more time consuming and labor intensive, but it often provides the best results.
The other method is to use stripping compounds. The stripping compound that you should use depends on what type of finish your cabinets had on it.
5. Apply Sanding Sealer.
Whether you have sanded or stripped the previous varnish, if you want a truly professional appearance then you should apply something called sanding sealer.
What this material does is similar in nature to a paint primer. This material enables the stain to be absorbed by the wood in an even manner, eliminating the often uneven appearance that goes with novice staining.
Apply the material and let it dry, and then lightly sand with a very fine grit of sand paper (roughly 220 grit or better) to help smooth out any rough streaks that may have been left.
You want to use only enough pressure to be able to hold the paper to the wood.
After you have chosen the proper stain for your cabinets ( there are several different kinds of stains, all of which provide excellent results), you are ready to actually begin.
When you are applying the stains, be sure that you allow each coat to dry completely before you add the next coat.
With each additional coat that you add, the color is going to darken significantly as it dries.
7. Finish.
As the name implies, the finish is the final step in this process.
There are several different types of finish that you can use.
Before you apply any of them, be sure that you are familiar with how the final results are going to look, as well as the manufacturer's instructions.
Simply apply the finish as instructed, and allow to dry.
All that you have left to do now is to reassemble your cabinets, and you are done.
Need some video help?
Mr. Fix-It
_________________________


Working with Electricity Requires

OK, be honest...does your garage look like this?

Overhead

Since everything is outside of arms reach, it is a little more difficult to get to...a good thing...

Through the use of peg boards, and similar material, you can literally hang your items on the garage walls, allowing you to organize, clean, and decorate all at the same time.
Books Sitting Around Looking for a Home?
Why Not Build a Bookcase?
Everyone knows just how useful a bookcase can be; after all we use them in just about every room of our homes.
They can be used to store books, collections, knick-knacks, and all kinds of things.
Just one thing though, they can be a little expensive.
Instead of paying an arm and a leg for a good quality shelf, or decent price for a piece of garbage, why not make your own?
It's surprisingly easy; all you need to do is follow these simple directions.
Materials:
Tape measure
Paper
Pencil
Carpenter's level
1/4 inch plywood or peg board cut to dimensions needed
Lumber, 1/2 inch to 3/4 inch thick (your choice)
Hand saw
Hammer
Large box of 4d finishing nails
Drill with screw head (Philips and regular) attachment
Minimum of 24 screws #8, 2 inches long
Sandpaper
Wood filler
Stain or paint
Paint brush
Procedure:
1. Draw a plan.
The best way to get a great bookcase is to actually draw up the plans. This is actually fairly easy to do, simply draw out a sketch of what you would like the bookcase to look like on piece of paper.
After you have drawn out the sketch, begin to place the dimensions that you want for your bookcase. For example if you wanted to have a case that was 5 feet tall, by 3 feet wide, by 1 foot deep, then you will need to mark it down appropriately.
By the way, if you will be using these dimensions, this will be roughly a four-shelf unit.
2. Get materials.
Go to your local home improvement center or store and purchase the materials needed for this project.
Simply give the dimensions that you will be using to the people in the lumber yard, and they can cut the wood to size for you. This is easier than measuring everything out yourself, and doing your own cutting.
If you will be doing your own cutting, be sure that you get enough lumber to complete the project.
...and make sure that you also get a 5 foot by 3 foot piece of plywood or peg board for the backing of your bookcase.
3. Layout pieces.
Once you get home with all your materials, it is time to lay everything out.
The simplest way to do this is to lay out all the pieces according to your blueprint. This will allow you to know exactly where everything is going to be going, and you will have all the materials right at hand.
Keep in mind though that you will want to set aside the paint/stain that you will be using since you don't want to spill anything.
If you did not get your lumber precut, then this is the time to cut everything to size.
Be sure that you double-check all measurements prior to cutting, since you want to avoid making any mistakes.
4. Assemble.
Begin assembling everything together.
Have someone help hold everything in place as you screw the pieces together.
You want to use screws since they will hold up to longer use and abuse than simply using nails.
As you assemble everything, use a carpenter's level to ensure that you have all the pieces nice and straight.
Take your time as you do this, and avoid rushing. Rushing leads to mistakes.
As you are attaching each "shelf" be sure that you use at least two screws on each side, preferably use three to give added strength and support to the unit.
5. Sand.
Once you have assembled everything, you should sand the unit so it is nice and smooth. You don't want to receive any splinters when you use the bookcase.
You will want to keep sanding until everything is nice and smooth to the touch.
The best way to test this is to use a soft piece of cloth, and drag it over the unit and check for any snags.
Fill in any holes or depressions with wood fill and sand again to ensure everything is completely smooth.
6. Paint or stain.
Apply your paint or stain according to the manufacturers directions.
Be sure that you allow enough time for the unit to dry between each coating. Paint and stain usually darkens as it dries, so you will want to make sure you have reached the color you want and avoid over staining.
Congratulations, you have a new bookcase !
All that you have left to do is to begin filing it up with your books, knick-knacks, odds and ends, or whatever else you wish.
Once you have finished filling the bookcase up, it is time to show it off to your friends and family.
Need some videos?
Want one, but don't want to build it yourself?
Call the Sun City Anthem Woodchips Club....
...they do the best quality work imaginable at a price that is more than reasonable !
Their website is:
Their phone number is (702) 614-5818.
Mr. Fix-It
_______________________
Locating Wall Studs
Knowing the proper methods for finding wall studs can come in exceptionally handy in a variety of situations.
The first scenario that you may need to find a wall stud is something as simple as hanging a picture.
Secondly, finding wall studs would be helpful if you wanted to do some electrical work.
A third reason that you may want to find some wall studs would be if you were going to be doing some renovations or remodeling.
Finding wall studs
1. Use the proper tools.
Perhaps the simplest and easiest method for finding walls studs is to use a tool designed expressly for that purpose.
How ? Simply by turning a stud finder on, and running it over the wall.
On most models when a stud is detected, you will be able to hear a solid tone and a small light bulb will light up.
2. Look for clues.
If you look closely on most walls, or in the right light and angle, you can find some slightly raised nail heads.
These nail heads are indicators of a stud since they are what is anchoring the drywall to the studs themselves.
That being said, this method can be fairly difficult if the wall was mudded properly prior to painting.
3. Start at a window or corner.
Two places that you are guaranteed to find a stud is at a window or corner of a wall.
According to the building codes in most cities in the United States, you will find a stud spaced every 16 or 24 inches from these points.
Simply measure out that far, and you should find the stud that you want.
4. Look for an electrical outlet.
Outlets and light switches, again according to code, are supposed to be mounted to the sides of a stud. This means that if you find one of these, then you have found a stud.
Once again, if you measure 16 or 24 inches away from these places you will find another one.
5. Knock on wood.
Another indicator of where a stud might be is through the use of sound.
Simply knock on the wall, roughly 16 or 24 inches away from a corner, window, or outlet, and see if you can get a solid sound.
If you do, then you have found a stud; however, if it sounds like you are knocking on something hollow then you have only found some unsupported drywall.
Here are some videos.
Here's one using your I-Phone !
Mr. Fix-It
_________________________
Wet/Dry Vacuums
&
Unclogging a Utility Sink
Utility sinks are designed to be used for so many different purposes, is it really surprising that they get clogged so often?
Here is how you can use the perfect power tool to remove that clog and be able to keep the mess to the absolute minimum.
Before starting though, you want to make sure that you have the proper cleanup materials handy, since no matter how much you may try to keep from making a mess, there will be one.
All that you are going to need is some old towels, drop cloths, or sheets.
Spread the drop cloth under the vacuum and around the sink, this is to clean up any potential blowback or spills that come from this process.
Ready for the instructions?
1. Set up your wet/dry vacuum in your utility room as close to the sink as you can.
Make sure that you have set up the vacuum as directed by the instructions that came with the vacuum, or as told by the rental agent.
You want to make sure, whenever you use any type of power tool that you follow all the instructions.
This is for your safety, as well as ensuring that you do not damage the tool so that you can get your deposit back.
2. Hook the hose of the vacuum into the "blow" or "exhaust" position and stick the hose into the drain, forming as tight of a seal as you can.
You are going to use the positive air pressure from the vacuum in an attempt to break up the clog in the drain.
You are going to initially hear a high pitched hum or whine from the vacuum as the air pressure is generated to break up the clog.
When the blockage has been broken up, you are going to hear a distinct change in the sound of the vacuum's motor.
3. There may be a blowback from the air pressure, which can lead to mess.
Be prepared to clean up any dirt and gunk with old towels.
4. If there doesn't seem to be any change in the drain's water flow, then you are going to want to switch the air hose to the suck position.
By switching the position of the hose back and forth several times, you are simulating the action of a plunger, but with greater force.
Another benefit from using the suck position is that all of the mess get's sucked up into the holding canister of the vacuum.
This leads to less mess and a much easier clean up, as long as you do not spill the canister.
Need a video on using or buying the right Wet/Dry Vac ?
Mr. Fix-It
___________________________
Working with Electricity Requires
the right
Electrical Tool Kit
 Have you ever started to work on an electrical project, only to find out that you don't have the proper tools?
Instead of wasting time and money by running around at the last minute, use this list of electrical tool kit necessities to ensure that you are ready.
You can avoid wasting time, while also saving yourself a lot of unnecessary frustration....if you do !
Drywall saw
A small handheld saw, with a pointed tip, that you can use to cut through drywall. Useful for cutting out areas for new outlets and other electrical boxes, as well as running wiring.
Hacksaw
Another small handheld saw, that you can use to either cut large areas of drywall out, or for find tuning your cuts.
Adjustable wrench
This tool can help you tighten bolts, as well as bend items, that may need it.
Long-nose pliers
Pliers with long, tapered noses that you can use to help wrap wiring.
Side-cutting pliers
Also called wire cutters, this tool is used to cut wiring down to its proper size.
Best tool possible for larger wires that you can't cut with other kinds of pliers.
Lineman's pliers
Lineman's pliers are also called combination pliers.
These pliers are typically a hybrid of long-nose and side-cutting pliers.
While not as adept at performing each of those individual tools tasks, it can adequately perform both.
Water-pump pliers
Similar in appearance to channel lock pliers, these are the perfect tool to use to help tighten difficult nuts and bolts.
These pliers are adjustable to be able to fit a variety of nuts and bolts.
Rubber-grip screwdrivers
Preferably, you should have a set of both straight edged, and Philips screwdrivers that have a rubberized grip.
With a rubberized grip, you will have a little more protection against accidental shocks.
Wire-bending screwdriver
A screwdriver that has a small stud or hole that you can use to help bend and attach wires to terminals.
Rotary screwdriver
Screwdriver that has a particularly long shaft, which has two bends in it.
Used to help attach switch plates, light fixtures, and has been designed to operate using only one hand.
Utility knife
Standard heavy duty knife that you can use in a variety of way, from stripping wires to cutting open packages.
Flat pry bar
Particularly useful for large tasks, where you will need to remove trimming or other items that may get in your way.
Hammer
Used to drive nails that will hold electrical boxes, replace trim, and generally hammer nails into things.
Stapler
Hand held stapler that is used to attach wiring to walls, as well as in other creative ways for your electrical projects.
Power drill
Power drills can be used in a variety of ways for electrical projects.
They can be used for everything from screwing cover plates in place, to attaching electrical boxes, to even cutting out openings in your drywall.
The best kind to use will have a 3/8 inch chuck.
Spade bit
Drill bit used to drill through wood joists.
Magnetic sleeve and bit
Tool which attaches to drill, which will create a magnetic force which will hold screws in place so you can work one handed.
Saber saw
Powered saw which you can use to cut out large sections of drywall, or other materials, that need to be removed.
Spiral cutting saw
Another type of cutting implement that you can use with great precision, and in tight areas.
Hole saw
Attached to a power drill, which will allow you to cut a perfectly round hole for light cans, or round electrical boxes.
Conduit reamer
A tool that can be either by itself, or attached to a screwdriver, which will allow you to create a smooth hole for any conduit.
Nut driver
Tool that you can use to tighten nuts and bolts, generally handheld, and operates in much the same way as a ratchet.
Typically looks like a screwdriver.
Fishing bit
A long flexible drill attachment that makes fishing, and running, electrical wires much easier.
Levels
Tool used to make sure that you install your electrical boxes, light switches, and so on square, flush and level to pre-existing construction.
Tape measure
Always useful to help ensure you cut things to their proper length.
Wire stripper/cutter
Tool used to strip and cut wiring.
Combination stripper
Tool used to strip a wide variety of electrical wiring gauges.
Coaxial stripper
Similar to a wire stripper, but designed to work on coaxial cables.
Coaxial crimper
Used to attach the coaxial wiring to connectors.
Armored cable cutter
Tool used to cut through armored, reinforced cables.
GFCI receptacle analyzer
Tool used to test electrical receptacles, and determine whether they work or not.
Voltage detector
Tool utilized to determine whether wiring has any voltage going through it.
Digital multi-tester
Also known as a digital multi-meter, this tool is used to take measurements of electrical currents.
Continuity tester
Tool or item that is used to test whether a electrical path can be established between two points.
Fish tape
Used to help route new wiring through walls or electrical conduits, usually metallic in nature.
Electrical tape
Tape that is used to help prevent any electricity from escaping from a live wire.
Helps prevent burns or fires.
Fiberglass ladder
Ladders are helpful for reaching areas such as a ceiling, and if made of fiberglass it will not conduct any electricity.
As always, we have some videos.
Remember...SAFETY FIRST when it comes to Electricity !
Mr. Fix-It
__________________________
The Garage
Some Storage Ideas
Have you ever started to work on an electrical project, only to find out that you don't have the proper tools?
Instead of wasting time and money by running around at the last minute, use this list of electrical tool kit necessities to ensure that you are ready.
You can avoid wasting time, while also saving yourself a lot of unnecessary frustration....if you do !
Drywall saw
A small handheld saw, with a pointed tip, that you can use to cut through drywall. Useful for cutting out areas for new outlets and other electrical boxes, as well as running wiring.
Hacksaw
Another small handheld saw, that you can use to either cut large areas of drywall out, or for find tuning your cuts.
Adjustable wrench
This tool can help you tighten bolts, as well as bend items, that may need it.
Long-nose pliers
Pliers with long, tapered noses that you can use to help wrap wiring.
Side-cutting pliers
Also called wire cutters, this tool is used to cut wiring down to its proper size.
Best tool possible for larger wires that you can't cut with other kinds of pliers.
Lineman's pliers
Lineman's pliers are also called combination pliers.
These pliers are typically a hybrid of long-nose and side-cutting pliers.
While not as adept at performing each of those individual tools tasks, it can adequately perform both.
Water-pump pliers
Similar in appearance to channel lock pliers, these are the perfect tool to use to help tighten difficult nuts and bolts.
These pliers are adjustable to be able to fit a variety of nuts and bolts.
Rubber-grip screwdrivers
Preferably, you should have a set of both straight edged, and Philips screwdrivers that have a rubberized grip.
With a rubberized grip, you will have a little more protection against accidental shocks.
Wire-bending screwdriver
A screwdriver that has a small stud or hole that you can use to help bend and attach wires to terminals.
Rotary screwdriver
Screwdriver that has a particularly long shaft, which has two bends in it.
Used to help attach switch plates, light fixtures, and has been designed to operate using only one hand.
Utility knife
Standard heavy duty knife that you can use in a variety of way, from stripping wires to cutting open packages.
Flat pry bar
Particularly useful for large tasks, where you will need to remove trimming or other items that may get in your way.
Hammer
Used to drive nails that will hold electrical boxes, replace trim, and generally hammer nails into things.
Stapler
Hand held stapler that is used to attach wiring to walls, as well as in other creative ways for your electrical projects.
Power drill
Power drills can be used in a variety of ways for electrical projects.
They can be used for everything from screwing cover plates in place, to attaching electrical boxes, to even cutting out openings in your drywall.
The best kind to use will have a 3/8 inch chuck.
Spade bit
Drill bit used to drill through wood joists.
Magnetic sleeve and bit
Tool which attaches to drill, which will create a magnetic force which will hold screws in place so you can work one handed.
Saber saw
Powered saw which you can use to cut out large sections of drywall, or other materials, that need to be removed.
Spiral cutting saw
Another type of cutting implement that you can use with great precision, and in tight areas.
Hole saw
Attached to a power drill, which will allow you to cut a perfectly round hole for light cans, or round electrical boxes.
Conduit reamer
A tool that can be either by itself, or attached to a screwdriver, which will allow you to create a smooth hole for any conduit.
Nut driver
Tool that you can use to tighten nuts and bolts, generally handheld, and operates in much the same way as a ratchet.
Typically looks like a screwdriver.
Fishing bit
A long flexible drill attachment that makes fishing, and running, electrical wires much easier.
Levels
Tool used to make sure that you install your electrical boxes, light switches, and so on square, flush and level to pre-existing construction.
Tape measure
Always useful to help ensure you cut things to their proper length.
Wire stripper/cutter
Tool used to strip and cut wiring.
Combination stripper
Tool used to strip a wide variety of electrical wiring gauges.
Coaxial stripper
Similar to a wire stripper, but designed to work on coaxial cables.
Coaxial crimper
Used to attach the coaxial wiring to connectors.
Armored cable cutter
Tool used to cut through armored, reinforced cables.
GFCI receptacle analyzer
Tool used to test electrical receptacles, and determine whether they work or not.
Voltage detector
Tool utilized to determine whether wiring has any voltage going through it.
Digital multi-tester
Also known as a digital multi-meter, this tool is used to take measurements of electrical currents.
Continuity tester
Tool or item that is used to test whether a electrical path can be established between two points.
Fish tape
Used to help route new wiring through walls or electrical conduits, usually metallic in nature.
Electrical tape
Tape that is used to help prevent any electricity from escaping from a live wire.
Helps prevent burns or fires.
Fiberglass ladder
Ladders are helpful for reaching areas such as a ceiling, and if made of fiberglass it will not conduct any electricity.
As always, we have some videos.
Remember...SAFETY FIRST when it comes to Electricity !
Mr. Fix-It
__________________________
The Garage
Some Storage Ideas
OK, be honest...does your garage look like this?
Within the walls of your home, chances are there are two rooms, or areas, that are in an almost constant state of disarray.
One is the laundry room, and the other is without doubt, the garage !
While it usually depends on the day of the week as to which one of these rooms is the single worst in the home, there is no doubt that these are two rooms that are typically in the most need of organizational help.
The stated purpose of a garage is to store and house your car or vehicle.
Unfortunately, this room typically becomes used as an oversized storage unit rather than what it was designed for.
It can often seem to be a losing battle, but there is now some newer "weapons" to use in this ongoing battle.
These new weapons are now known as garage storage systems.
There are 3 basis models or types or storage systems.
Here is a basic rundown of each that you can us.
Cabinets
When someone hears about this kind of unit, they typically think about the kind of cabinets that are found in a bathroom or kitchen.
When it comes to the garage though, there have been some changes in the recent years.
While it is possible to have the traditional cabinets, there is a slight problem with those, since they are not designed to withstand the stresses that come with a garage.
Youn might want to look into some of the new metallic roller cabinets, which are designed to withstand a higher amount of stress, as well as, being able to move around easily when the need arises.
Overhead
Recently there has been an interesting surge in overhead storage units.
These units are designed to raise everything above the head.
Since everything is outside of arms reach, it is a little more difficult to get to...a good thing...
...due to the fact that since everything is a little more difficult to reach, you are not going to be getting into your things as often, and therefore create a more disorganized clutter !
Wall Units
These are not really the typical "built into the wall storage units and cabinets" you might think of !
In fact these units actually make the wall itself into the storage facility.
Through the use of peg boards, and similar material, you can literally hang your items on the garage walls, allowing you to organize, clean, and decorate all at the same time.
We have some videos to give you a few ideas.
Mr. Fix-It
___________________________