
Unclogging a Kitchen Garbage Disposal
 Garbage disposals are a great tool for the kitchen, at least until they get clogged. When this problem arises, many people are faced with an expensive plumbing nightmare.
For those who would prefer to do their own plumbing maintenance, it's good to know that the junk in that disposal can be moved.
In order to do this you'll need to do some actual plumbing work.
Not to fear though, just use these simple steps and you're going to be able to complete the task.
Before beginning any home repair you want to make sure that you know exactly what the problem is !
Garbage disposals are a great tool for the kitchen, at least until they get clogged. When this problem arises, many people are faced with an expensive plumbing nightmare.
For those who would prefer to do their own plumbing maintenance, it's good to know that the junk in that disposal can be moved.
In order to do this you'll need to do some actual plumbing work.
Not to fear though, just use these simple steps and you're going to be able to complete the task.
Before beginning any home repair you want to make sure that you know exactly what the problem is !
When you tun on the switch for the disposal and nothing happens, then you may simply have a short in the electrical system.
In that case, simply reset the disposal unit by pushing the reset button on the unit.
Most units do have them either on the bottom or side of the disposal and they are clearly marked.
If, when you turn on the unit, you hear a humming sound, then the disposal is clogged.
In that event, before you do anything, try running hot water down the drain.
The water needs to be as hot as possible, so boil it before pouring it down the drain. If that does not work, then you are going to need to resort to "real" plumbing.
In order to do any work, you will need to get together your tools.
So...gather together a plunger (sometimes the easiest solution is the simplest), adjustable pliers, old towels, and a large bucket.
You can then follow these steps:
1. Turn off the power to the disposal unit.
Don't assume the power is off; unplug the unit from its power source or turn off the circuit breaker in the electrical panel for your home. This it so avoid any dangerous actions that may happen.
2. Try to use your plunger to clear the clog.
If this works, your job is done.
3. Make sure the water is turned off by using the shut-off value locaed under the sink.
This valve will look like the one used to turn off the water to your toilet or to your sprinklers.
4. Place the large bucket under the sink's pipe bend (the trap).
5. Remove the bolts that hold the disposal unit to the pipe and also remove the pipe's bend.
There will be some mess associated with this part of your job. Don't be surprised when this happens; that's why yo placed the bucket where you did so that you can catch all of the resulting mess.
6. Check the removed pipe and the disposal unit for any obstructions.
If you find any, you can go ahead and remove them.
If you don't then you may have to go ahead and snake the pipe in the wall.
Here are some helpful videos:
Unclogging a Kitchen Garbage Disposal

Garbage disposals are a great tool for the kitchen, at least until they get clogged. When this problem arises, many people are faced with an expensive plumbing nightmare.
When you tun on the switch for the disposal and nothing happens, then you may simply have a short in the electrical system.
3. Make sure the water is turned off by using the shut-off value locaed under the sink.
________________________
Choosing the Right Paint Brush
 Several years ago I decided to paint my living room walls. I found the color of quality paint I wanted on sale at the local hardware store, but the synthetic paint brushes that the salesman recommended were more expensive than the natural bristle brushes on sale.
I rationalized that the natural bristled paint brushes had to be better, than the synthetic, especially since they were on sale.
Three hours into painting the living room, I stopped for the day, washed my brushes in soapy water, and left them on paper towels to dry.
The next morning I noticed that the brushes were not applying paint as smoothly as they had done the day before.
After visiting the hardware store again, and speaking the the "paint expert", I learned that the best brush to use with latex paint is a synthetic brush, since natural bristles absorb water from paint and become softer as you use them.
Choosing a paint brush should therefore NEVER be based on cost.
Consider the following when choosing the correct paint brush for your home project:
1. A good quality brush will have a hardwood handle.
2. Choose brushes that have bristles that vary in length, with "flagged" ends.
 3. Buy the best quality brushes that you can afford since they will do a better job than cheap ones.
4. If you are using oil-based paint, use a paint brush with natural bristles, such as ox hair or hog's hair.
5. Choose a paint brush with synthetic bristles if you are using latex paint.
Consider the surface area that your are working with when choosing a paint brush. If you are painting trim or molding, you need a small brush rather than the large one you would need on a wall.
Experts agree on these tips for completing home painting projects.
1. For walls, use a four inch wall brush.
2. For sash and trim work, use a one and a half inch sash brush and a two inch trim brush.
3. Angled brushes are good for trims and molding.
4. Flat brushes are best for painting up to the edge of corners.
If your painting project involves a large room, or several rooms, keep in mind that because you will be holding the paint brush in your hand for a long period of time, it is best to choose a handle with which you are most comfortable.
A suggestion is that before you buy the brush for the larger project, you hold it in your hand and imagine using it for a long time.
A large handle brush will most likely be better than a skinny handle, such as a trim brush.
Important !
Clean your brush or brushes when your project is completed.
Remember, if you maintain your brushes properly, they will last for years on other painting projects.
We need some videos !
Can't forget the ceiling !
Good luck !
Mr. Fix-It
____________________________
Several years ago I decided to paint my living room walls. I found the color of quality paint I wanted on sale at the local hardware store, but the synthetic paint brushes that the salesman recommended were more expensive than the natural bristle brushes on sale.
I rationalized that the natural bristled paint brushes had to be better, than the synthetic, especially since they were on sale.
Three hours into painting the living room, I stopped for the day, washed my brushes in soapy water, and left them on paper towels to dry.
The next morning I noticed that the brushes were not applying paint as smoothly as they had done the day before.
After visiting the hardware store again, and speaking the the "paint expert", I learned that the best brush to use with latex paint is a synthetic brush, since natural bristles absorb water from paint and become softer as you use them.
Choosing a paint brush should therefore NEVER be based on cost.
Consider the following when choosing the correct paint brush for your home project:
1. A good quality brush will have a hardwood handle.
2. Choose brushes that have bristles that vary in length, with "flagged" ends.
3. Buy the best quality brushes that you can afford since they will do a better job than cheap ones.
4. If you are using oil-based paint, use a paint brush with natural bristles, such as ox hair or hog's hair.
5. Choose a paint brush with synthetic bristles if you are using latex paint.
Consider the surface area that your are working with when choosing a paint brush. If you are painting trim or molding, you need a small brush rather than the large one you would need on a wall.
Experts agree on these tips for completing home painting projects.
1. For walls, use a four inch wall brush.
2. For sash and trim work, use a one and a half inch sash brush and a two inch trim brush.
3. Angled brushes are good for trims and molding.
4. Flat brushes are best for painting up to the edge of corners.
If your painting project involves a large room, or several rooms, keep in mind that because you will be holding the paint brush in your hand for a long period of time, it is best to choose a handle with which you are most comfortable.
A suggestion is that before you buy the brush for the larger project, you hold it in your hand and imagine using it for a long time.
A large handle brush will most likely be better than a skinny handle, such as a trim brush.
Important !
Clean your brush or brushes when your project is completed.
Remember, if you maintain your brushes properly, they will last for years on other painting projects.
We need some videos !
Can't forget the ceiling !
Good luck !
Mr. Fix-It
____________________________
Unclogging a Utility Sink Using a Plunger

Utility sinks seem to get blocked quite a bit more often than the other drains. This could be because of the diverse nature of uses that we subject them to.
With all of the materials that get flushed down a utility sinks drain, it isn't surprising that they can and do get clogged so frequently.
So you are going to want to know how to handle any and all clogs without having to call in a plumber each time, since that can get really expensive pretty quick.
Before you begin, you are going to need to get some basic items from around your house.
These items are going to be a plunger, some towels, and some petroleum jelly.


You are going to need a plunger that has a large suction cup in order to completely cover the entire drain opening in your sink and provide the proper amount of suction needed to remove the blockage in the drain.
Check the water level in the sink.
There needs to be enough water to cover the cup of the plunger.
It's not just the bottom of the cup, but the entire cup.
If there is not enough water to do this, then add some water to whatever is in the sink.
You are going to want to make sure that any and all extra drains are blocked up.
Many sinks have an overflow drain that will need to be blocked.
In order to block this overflow drain, just use a wet rag and stuff it into the hole.
This is going to provide the maximum amount of air or water pressure to be used against the blockage, and have it removed.
After checking the water level and making sure that all other connected secondary drains are blocked, you are ready to begin:
1. Apply some petroleum jelly around the edge of the plunger cup.
This, as mentioned earlier, enables a tighter seal to form when you use the plunger.
2. Place your plunger into the sink around the drain's opening.
You are going to want to angle the plunger so that there is no air under the cup once you have placed it into the water.
3. Utilizing around twenty repetitions thrust the handle up and down repeatedly.
This should remove the blockage, but in the event that normal water flow does not resume immediately, repeat this process a few more times before moving onto a different method.
4. After either removing the blockage, or deciding to use a different method to do so, use the towels to clean up any and all mess made during your project.
That's all there is too it !
It's a fairly easy job.
Watch this video for some additional help.
Mr. Fix-It
__________________________
Utility sinks seem to get blocked quite a bit more often than the other drains. This could be because of the diverse nature of uses that we subject them to.
With all of the materials that get flushed down a utility sinks drain, it isn't surprising that they can and do get clogged so frequently.
So you are going to want to know how to handle any and all clogs without having to call in a plumber each time, since that can get really expensive pretty quick.
Before you begin, you are going to need to get some basic items from around your house.
These items are going to be a plunger, some towels, and some petroleum jelly.
You are going to need a plunger that has a large suction cup in order to completely cover the entire drain opening in your sink and provide the proper amount of suction needed to remove the blockage in the drain.
Check the water level in the sink.
There needs to be enough water to cover the cup of the plunger.
It's not just the bottom of the cup, but the entire cup.
If there is not enough water to do this, then add some water to whatever is in the sink.
You are going to want to make sure that any and all extra drains are blocked up.
Many sinks have an overflow drain that will need to be blocked.
In order to block this overflow drain, just use a wet rag and stuff it into the hole.
This is going to provide the maximum amount of air or water pressure to be used against the blockage, and have it removed.
After checking the water level and making sure that all other connected secondary drains are blocked, you are ready to begin:
1. Apply some petroleum jelly around the edge of the plunger cup.
This, as mentioned earlier, enables a tighter seal to form when you use the plunger.
2. Place your plunger into the sink around the drain's opening.
You are going to want to angle the plunger so that there is no air under the cup once you have placed it into the water.
3. Utilizing around twenty repetitions thrust the handle up and down repeatedly.
This should remove the blockage, but in the event that normal water flow does not resume immediately, repeat this process a few more times before moving onto a different method.
4. After either removing the blockage, or deciding to use a different method to do so, use the towels to clean up any and all mess made during your project.
That's all there is too it !
It's a fairly easy job.
Watch this video for some additional help.
Mr. Fix-It
__________________________
Caulking...15 Tips to doing it Right !

1. Caulk with a Straw
When you need to caulk in a spot that's too tight for a caulk gun, try this:
Cut a sharp angle on the end of a plastic straw, just as you'd cut the spout of a caulk tube. Then fill the straw with caulk using a caulk gun. Fold over one end of the straw and squeeze caulk out the other end.
2. Seal Caulk Spout
Every tube of caulk contains its own spout sealer.
Force enough caulk out of the tube to form a peanut-sized ball.
Then wet your finger and shape the ball to form a cap. The cap will slowly harden and keep the caulk inside soft for weeks.
3. Tape Before Caulking
Apply painter's tape to control your caulk lines.
Apply the caulk, smooth the joint with your finger and immediately remove the tape.
4. Choose the Right Caulk for the Job
The selection in the caulk aisle at home centers is mind-boggling, but actually choosing the right one is pretty simple.
Most of the caulk on store shelves is basically one of four types: elastomeric, polyurethane, latex or silicone.
Here's how to make the right choice:
Siding, windows and doors
Polyurethane is best.
It's paintable. It doesn't shrink. It stays flexible. It adheres better than silicone, and it doesn't attract dust and dirt the way silicone does.
Roofing
Use an elastomeric or rubberized product.
This stuff won't dry out in extreme conditions, and it sticks to everything.
Interior trim
Use latex if you're sealing gaps and nail holes in trim that's going to be painted.
It cleans up easily and dries fast. It's also easy to tool—and cheap.
Kitchen and bath
This is where silicone products shine.
Silicone tools well. It can be purchased with antimicrobial additives, and can be easily removed and replaced when it gets grungy.
5. Choose the Right Caulk Gun
The most expensive gun on the rack isn't necessarily the best.
Look for a gun with a cradle. Tubes seem to fall out of the guns with the rails.

Choose guns with ratchet action rather than friction action and don't consider a gun that doesn't have a hook.
Forget about gun-mounted tube cutters—use a utility knife.
And if all other things are equal, buy the gun with the longer tube poker. Some aren't long enough to work on every kind of tube.
Caulking...15 Tips to doing it Right !
1. Caulk with a Straw
When you need to caulk in a spot that's too tight for a caulk gun, try this:
Cut a sharp angle on the end of a plastic straw, just as you'd cut the spout of a caulk tube. Then fill the straw with caulk using a caulk gun. Fold over one end of the straw and squeeze caulk out the other end.
2. Seal Caulk Spout
Every tube of caulk contains its own spout sealer.
Force enough caulk out of the tube to form a peanut-sized ball.
Then wet your finger and shape the ball to form a cap. The cap will slowly harden and keep the caulk inside soft for weeks.
3. Tape Before Caulking
Apply painter's tape to control your caulk lines.
Apply the caulk, smooth the joint with your finger and immediately remove the tape.
4. Choose the Right Caulk for the Job
The selection in the caulk aisle at home centers is mind-boggling, but actually choosing the right one is pretty simple.
Most of the caulk on store shelves is basically one of four types: elastomeric, polyurethane, latex or silicone.
Here's how to make the right choice:
Siding, windows and doors
Polyurethane is best.
It's paintable. It doesn't shrink. It stays flexible. It adheres better than silicone, and it doesn't attract dust and dirt the way silicone does.
Roofing
Use an elastomeric or rubberized product.
This stuff won't dry out in extreme conditions, and it sticks to everything.
Interior trim
Use latex if you're sealing gaps and nail holes in trim that's going to be painted.
It cleans up easily and dries fast. It's also easy to tool—and cheap.
Kitchen and bath
This is where silicone products shine.
Silicone tools well. It can be purchased with antimicrobial additives, and can be easily removed and replaced when it gets grungy.
5. Choose the Right Caulk Gun
The most expensive gun on the rack isn't necessarily the best.
Look for a gun with a cradle. Tubes seem to fall out of the guns with the rails.
Choose guns with ratchet action rather than friction action and don't consider a gun that doesn't have a hook.
Forget about gun-mounted tube cutters—use a utility knife.
And if all other things are equal, buy the gun with the longer tube poker. Some aren't long enough to work on every kind of tube.
6. Push the Caulk, Don't Pull
Try to push the caulk into the gap rather than drag it over the gap.
This greatly increases the odds the caulk will adhere to both surfaces because it forces caulk into the gap—pulling doesn't.
One exception to this rule is when both surfaces are flush. When caulking flush surfaces, if you try to push the tip too hard, it will skate all over the place, and you'll have a big mess on your hands.
7. Ride the Tip on the Smooth Surface
When one of the surfaces you're caulking is rougher than the other, try to ride the tip on the smoother surface.
If you ride the middle or the rough surface (siding), the caulking will duplicate the bumps, sometimes in an exaggerated way.
8. Cut Tips Off Straight
When one of the surfaces you're caulking is rougher than the other, try to ride the tip on the smoother surface.
If you ride the middle or the rough surface (siding), the caulking will duplicate the bumps, sometimes in an exaggerated way.
8. Cut Tips Off Straight
You probably learned to cut the tip at an angle. That works OK in some situations, but an angled tip limits the position the caulking gun has to be in.
With a straight tip, you can swivel the gun out of the way of obstacles and caulk right up to an inside corner. And if you have various-size gaps to fill, cut the tip small and do the small gaps first, then cut it bigger for the larger gaps.
9. Don't Use Your Wrists
Every golfer knows that the best way to keep a putter moving in a straight line and at a consistent speed is to control it with the upper body. It's the same with caulking. Use your upper body, or even your legs, to move the tube along, not your wrists.
10. Salvage a Wet Tube
The new guy left the case of caulking out in the rain again (it's always the new guy).
Those soggy tubes are now going to split open under pressure.
Before that happens, wrap some duct tape around the tube. You can also salvage tubes with house wrap tape, masking tape, stretch wrap, shipping tape—it all works. Just use whatever's handy.
11. Avoid Globs on Long Runs
When you have a long bead to run and you can't get it done in one shot, don't start again where you left off.
Instead, start at the other end and meet in the middle.
It's hard to continue a bead once you've stopped without creating a glob.
Also try to keep the meeting place somewhere other than eye level.
12. Clean the Spout With a Screw
It seems you can never seal the cut tip of a partial tube well enough.
A plug usually forms in the tip.
Try using a large screw with aggressive threads to remove the plug.
This tip works best with silicone products.
13. Fast Caulking
A common mistake is to cut off too much of the caulk tube tip, leaving a hole that's way too big for most interior caulking work.
When you're filling small cracks to prepare for painting, cut the tip carefully to keep the hole tiny—about 1/16 in. in diameter.
The tiny hole lets out just enough caulk to fill typical small- to medium-size cracks.
For larger cracks, make a second pass or keep a second caulk gun on hand, loaded with a tube that has a slightly bigger hole.
Keep the caulk gun moving quickly along the crack as you squeeze the trigger.
This, combined with the small opening in the tip, will give you a nice caulk joint that needs very little cleanup.
A quick swipe with a dampened fingertip will leave a paint-ready joint.
14. Disguising Caulk on Concrete
If you're caulking concrete, either to fill a crack or to seal it around the edge, you can make the caulk almost invisible.
Simply dust the caulk with dry concrete mix while it's still wet.
When it's dry, brush away the excess, and the caulk will virtually disappear.
15. Reusable Caulk Tube
How often do you have dry caulk stuck in the tip of the tube but know that there's a lot of fresh stuff behind it?
Get to the fresh stuff by first cutting two slits along the tube, on opposite sides, with a sharp utility knife.
Pry out the dried plug of caulk.
Then wrap the tip with duct tape, put the tube back in the gun and use up that caulk.
Here's another helpful video how to use a caulk gun.
https://www.youtube.com/watch?v=FnZmYW-P8wU
Good Luck !
Mr. Fix-It
_______________________
Can Your Front Door be a
"waster" ?
 When I stand in my living room, I can turn around and view the front door about twenty feet away.
During the day, I can see daylight peeking through the bottom, just above the threshold.
During winter, I can feel cold air rushing in not only at the bottom, but by the hinges, as well.
Clearly, it is time to replace the threshold and weather stripping of your front door.
Not only will it save energy costs from literally going out the door, it will also stay warmer in winter, and cooler in summer.
If you suspect that you have a drafty door, the first thing to determine is just where the draft is entering the room.
Light a candle and stand in front of the door, and then move the candle within your hand slowly around the perimeter of your door.
When the flame flickers, then you have found the draft.
Follow these ideas for fixing your drafty door:
1. Weatherproof your doors with vinyl or padding on your doorstop.
Most types of doorstops are often attached directly to the door, sealing against air from egress and ingress, yet still allowing the door to function normally.
You can find doorstops at your home improvement store or hardware store.
Read the instructions of the package and make sure that you have all of the tools you will need to complete the job.
2. Another weatherproofing solution is to use brass or bronze door strips or plates.
The metal can be bent to create a tight fit around the door.
Although they are a bit difficult to install, bronze or brass strips stand up to daily use and last a long time, unlike foam, which can deteriorate over time.
Foam can be so voluminous at first, too, making it difficult to close and open the door.
3. If you need to do something about a sagging wooden threshold, you can install a door sweep, instead of replacing the entire threshold.
When I stand in my living room, I can turn around and view the front door about twenty feet away.
During the day, I can see daylight peeking through the bottom, just above the threshold.
During winter, I can feel cold air rushing in not only at the bottom, but by the hinges, as well.
Clearly, it is time to replace the threshold and weather stripping of your front door.
Not only will it save energy costs from literally going out the door, it will also stay warmer in winter, and cooler in summer.
If you suspect that you have a drafty door, the first thing to determine is just where the draft is entering the room.
Light a candle and stand in front of the door, and then move the candle within your hand slowly around the perimeter of your door.
When the flame flickers, then you have found the draft.
Follow these ideas for fixing your drafty door:
1. Weatherproof your doors with vinyl or padding on your doorstop.
Most types of doorstops are often attached directly to the door, sealing against air from egress and ingress, yet still allowing the door to function normally.
You can find doorstops at your home improvement store or hardware store.
Read the instructions of the package and make sure that you have all of the tools you will need to complete the job.
2. Another weatherproofing solution is to use brass or bronze door strips or plates.
The metal can be bent to create a tight fit around the door.
Although they are a bit difficult to install, bronze or brass strips stand up to daily use and last a long time, unlike foam, which can deteriorate over time.
Foam can be so voluminous at first, too, making it difficult to close and open the door.
3. If you need to do something about a sagging wooden threshold, you can install a door sweep, instead of replacing the entire threshold.
 Door sweeps can be adjusted to cover enough of the threshold to prevent a draft, yet also allow room enough for the door to swing freely.
4. Check at your local home improvement or hardware store if you need to replace your door's weather stripping.
The knowledgeable sales staff should be able to help you answer any questions that you might have, as well as help you choose the correct material for your type of door.
While you're there, you may as well go ahead and look at door replacements.
Storm doors now come in lightweight material, and are great for keeping out drafts.
Here are some helpful videos.
Good luck !
Mr. Fix-It
__________________________
Unclogging a Toilet
Door sweeps can be adjusted to cover enough of the threshold to prevent a draft, yet also allow room enough for the door to swing freely.
4. Check at your local home improvement or hardware store if you need to replace your door's weather stripping.
The knowledgeable sales staff should be able to help you answer any questions that you might have, as well as help you choose the correct material for your type of door.
While you're there, you may as well go ahead and look at door replacements.
Storm doors now come in lightweight material, and are great for keeping out drafts.
Here are some helpful videos.
Good luck !
Mr. Fix-It
__________________________
Unclogging a Toilet

Whether your clogged toilet is completely inhibiting complete draining or just slowing it down, it is important to find and fix the problem promptly so that damage doesn't occur.
There are only a few items you will need, a few skills you will need, and a little courage to easily fix your clogged toilet.
If you're reading this article as your toilet is overflowing, you should first locate the water faucet at the base of the toilet.
The knob is metal and normally shaped like a giant almond; turn this knob forcefully to the left, to stop water from filling the tank, flowing into the bowl, and overflowing onto the floor (and your feet).
Now that the water is stopped, you can begin concentrating on hgow to clear the clog. You may need to take a trip to your local hardward store or you may be able to find the needed items lying around your house.
You will need rubber or latex gloves, a plunger, a hanger, and a bucket.
Before beginning, you may wish to place old towels around the base of the toilet along with a bucket to catch any water that may be displaced in the process of unclogging your toilet.
Put on your latex gloves and get to work !
First, take a look at your toilet bowl; this is the part of the toilet upon which you sit and that collects waste before flushing.
At the bottom of the bowl is the drain, where the waste "disappears" when you flush.
Place the plunger into the bowl, seating it firmly in the drain area.
The purpose of the plunger is to apply pressure to whatever is stuck in the drain, and you need to have that "firm seating" in order to build the pressure.
Now push downward on the plunger's handle.
If you have a good seal between the plunger and the sides of the toilet bowl, the pressure caused when you push is directed into the drain. If you don't have a good seal, you will see lots of bubbles or water (indicated by turbulence) around the edges of the plunger.
When you pull back on the plunger handle, it may feel as though it is sticking to the inside of the toilet. This is natural, and it helps to dislodge whatever is in the drain.
Repeat the pushing / pulling action a few times.
I you are successful in pushing the clog through the drain, your toilet bowl may automatically drain when you remove the plunger, If so, you are done and you can turn the water back on (if you turned it off) and flush the toilet a few times to wash everything down.
If the water in the toilet still didn't drain, you man need to get a bit more "hands on" in our unclogging efforts.
Use a small plastic glass or cup to scoop most of the water from the toilet bowl into the bucket.
(This may be the worst part of your project.) Leave about 2 inches of water in the bottom of the bowl, making sure the drain is completely full of water.
Now examine the drain area.
Do you see anything suck in there?
If so, reach in and pull out whatever it is. You can actually stick your hand down into the drain and feel for any obstructions.
When you can't fee anything else there, repeat the plunging action with the plunger to help you get through the clog.
If you're still not able to unclog the toilet, even after plunging, bailing water, and removing obstructions, it may be time to call in a specialist.
They can use strong equipment (such as a drain snake) to clear any obstructions. They may also need to remove the toilet from the floor to look for obstructions stuck in the toilet itself.
To reduce the chances of clogging your toilet in the future, remember to avoid using excessive amounts of toilet paper, avoid flushing feminine hygiene products, and avoid flushing items too large to fit down the drain of the toilet.
Don't worry...these videos don't go into details as to what caused the clog!
Mr. Fix-It
Can Your Front Door be a
"waster" ?
When I stand in my living room, I can turn around and view the front door about twenty feet away.
During the day, I can see daylight peeking through the bottom, just above the threshold.
During winter, I can feel cold air rushing in not only at the bottom, but by the hinges, as well.
Clearly, it is time to replace the threshold and weather stripping of your front door.
Not only will it save energy costs from literally going out the door, it will also stay warmer in winter, and cooler in summer.
If you suspect that you have a drafty door, the first thing to determine is just where the draft is entering the room.
Light a candle and stand in front of the door, and then move the candle within your hand slowly around the perimeter of your door.
When the flame flickers, then you have found the draft.
Follow these ideas for fixing your drafty door:
1. Weatherproof your doors with vinyl or padding on your doorstop.
Most types of doorstops are often attached directly to the door, sealing against air from egress and ingress, yet still allowing the door to function normally.
You can find doorstops at your home improvement store or hardware store.
Read the instructions of the package and make sure that you have all of the tools you will need to complete the job.
2. Another weatherproofing solution is to use brass or bronze door strips or plates.
The metal can be bent to create a tight fit around the door.
Although they are a bit difficult to install, bronze or brass strips stand up to daily use and last a long time, unlike foam, which can deteriorate over time.
Foam can be so voluminous at first, too, making it difficult to close and open the door.
3. If you need to do something about a sagging wooden threshold, you can install a door sweep, instead of replacing the entire threshold.
Door sweeps can be adjusted to cover enough of the threshold to prevent a draft, yet also allow room enough for the door to swing freely.
4. Check at your local home improvement or hardware store if you need to replace your door's weather stripping.
The knowledgeable sales staff should be able to help you answer any questions that you might have, as well as help you choose the correct material for your type of door.
While you're there, you may as well go ahead and look at door replacements.
Storm doors now come in lightweight material, and are great for keeping out drafts.
Here are some helpful videos.
Good luck !
Mr. Fix-It
__________________________
Unclogging a Toilet
The purpose of the plunger is to apply pressure to whatever is stuck in the drain, and you need to have that "firm seating" in order to build the pressure.
If you have a good seal between the plunger and the sides of the toilet bowl, the pressure caused when you push is directed into the drain. If you don't have a good seal, you will see lots of bubbles or water (indicated by turbulence) around the edges of the plunger.
I you are successful in pushing the clog through the drain, your toilet bowl may automatically drain when you remove the plunger, If so, you are done and you can turn the water back on (if you turned it off) and flush the toilet a few times to wash everything down.
(This may be the worst part of your project.) Leave about 2 inches of water in the bottom of the bowl, making sure the drain is completely full of water.
Do you see anything suck in there?
When you can't fee anything else there, repeat the plunging action with the plunger to help you get through the clog.
___________________________
Removing a Wall

Do you want to make your room a little larger?
Perhaps you want to add a new walk-in closet, or a new window?
Well, if you want to do any of these, or any number of other simple building projects, you will need to first remove a wall.
While you may not need to remove an entire wall, the principles are generally the same.
Here are some simple guidelines that you can use to make sure that you go about removing a wall safely, and without making more work for yourself.
One word of caution that you should pay attention to before you begin.
Do not begin removing a wall without checking to make sure that it is a load bearing wall.
If the wall is indeed a load bearing wall, certain precautions will need to be taken.
The steps and guidelines listed here are based on the assumption that you are not working on a load bearing wall.
Shut off the power
Since you will be cutting into, and removing a wall, you want to make sure that you do not accidentally get electrocuted.
Shut off the power to the room you are working on, and as you come across any electrical lines be careful that you do not damage them.
Remove the trim
Go around the wall, and begin removing the trim.
This is usually the baseboards, door trim, chair rails, and any other pieces that are not specifically part of the wall itself.
The best place to start is usually near a door, and working your way around the room.
Use a hammer and a pry bar to remove the trim from the walls.
If you want to reuse the trim once you are finished, make sure that you do this gently so you do not ruin the trim work, and remove all the nails.
Open your wall
Take a small three pound sledge hammer, or even a regular claw hammer, and make an initial hole in the wall you are going to be removing.
This hole will allow you to begin removing the drywall, and check to ensure that you do not accidentally damage or cut any electrical wiring.
Remove the drywall
Demolition work is already difficult enough as it is, so you don't want to spend a lot of time doing clean up.
Make your job easier by inserting a flat backed garden spade into your initial hole, and using it to "pull" out large sections of the wall.
These pieces will be larger, and easier to clean up, than the smaller pieces that you would get from breaking the wall with a hammer.
Cut and remove studs
Using either a handsaw or a reciprocating saw, begin cutting into the studs of your former wall. This will make removing the studs a lot easier.
Once you have cut the studs at the halfway mark, begin wiggling them out of line. This will help loosen them from the top and bottom plates.
If necessary, use a pry bar to help remove the studs the rest of the way.
Be careful that you do not cut into any studs that you do not want removed.
Remove top and sole plates
After you have removed the studs, you still need to remove the top and bottom plates.
The easiest way to do this is to make two cuts into the top and bottom plates, about three inches apart, and then knocking that piece out.
With this piece gone, the pressure on the remaining pieces has been lessened considerably.
Use a pry bar to remove the remaining pieces of the plates.
Here's some additional video help.
Mr. Fix-It
Perhaps you want to add a new walk-in closet, or a new window?
Well, if you want to do any of these, or any number of other simple building projects, you will need to first remove a wall.
While you may not need to remove an entire wall, the principles are generally the same.
Here are some simple guidelines that you can use to make sure that you go about removing a wall safely, and without making more work for yourself.
One word of caution that you should pay attention to before you begin.
Do not begin removing a wall without checking to make sure that it is a load bearing wall.
If the wall is indeed a load bearing wall, certain precautions will need to be taken.
The steps and guidelines listed here are based on the assumption that you are not working on a load bearing wall.
Shut off the power
Since you will be cutting into, and removing a wall, you want to make sure that you do not accidentally get electrocuted.
Shut off the power to the room you are working on, and as you come across any electrical lines be careful that you do not damage them.
Remove the trim
Go around the wall, and begin removing the trim.
This is usually the baseboards, door trim, chair rails, and any other pieces that are not specifically part of the wall itself.
The best place to start is usually near a door, and working your way around the room.
Use a hammer and a pry bar to remove the trim from the walls.
If you want to reuse the trim once you are finished, make sure that you do this gently so you do not ruin the trim work, and remove all the nails.
Open your wall
Take a small three pound sledge hammer, or even a regular claw hammer, and make an initial hole in the wall you are going to be removing.
This hole will allow you to begin removing the drywall, and check to ensure that you do not accidentally damage or cut any electrical wiring.
This hole will allow you to begin removing the drywall, and check to ensure that you do not accidentally damage or cut any electrical wiring.
Remove the drywall
Demolition work is already difficult enough as it is, so you don't want to spend a lot of time doing clean up.
Make your job easier by inserting a flat backed garden spade into your initial hole, and using it to "pull" out large sections of the wall.
These pieces will be larger, and easier to clean up, than the smaller pieces that you would get from breaking the wall with a hammer.
These pieces will be larger, and easier to clean up, than the smaller pieces that you would get from breaking the wall with a hammer.
Cut and remove studs
Using either a handsaw or a reciprocating saw, begin cutting into the studs of your former wall. This will make removing the studs a lot easier.
Once you have cut the studs at the halfway mark, begin wiggling them out of line. This will help loosen them from the top and bottom plates.
Once you have cut the studs at the halfway mark, begin wiggling them out of line. This will help loosen them from the top and bottom plates.
If necessary, use a pry bar to help remove the studs the rest of the way.
Be careful that you do not cut into any studs that you do not want removed.
Remove top and sole plates
After you have removed the studs, you still need to remove the top and bottom plates.
The easiest way to do this is to make two cuts into the top and bottom plates, about three inches apart, and then knocking that piece out.
With this piece gone, the pressure on the remaining pieces has been lessened considerably.
Use a pry bar to remove the remaining pieces of the plates.
Here's some additional video help.
Mr. Fix-It
_____________________
Choosing the Proper Painting Tools

One of the biggest problems when it comes to painting projects lies in choosing proper painting tools.
The simple fact of the matter is that most people don't know how to go about choosing the right kind of tools, and end up making the whole project a lot more difficult than it really needs to be; however, if you are looking to make the job as easy as possible, then make sure that you keep in mind a few simple guidelines that are designed to help you choose the right tools.
Know your basic tools
The first step in choosing proper painting tools is to know what the basic tools are. These tools are things like the brush, roller, tray, drop cloth, and tape.
Each of these items have several different variations, all of which have their own place and specific purpose.
Keep in mind that regardless of what the painting job is, you will almost invariably need one of each of these basic tools to complete it properly.
Know your job
If you know the job, and what it will entail, then you will more likely be able to pick the correct tool for the job.
For example, if you need to do a little bit of painting in a tight area, you won't want to be using one of those large area brushes or even a roller.
Instead, the tool that you will want to use in t his case is one of those small sponge detail brushes.
Often times, the tools that you should use will most often make the most sense.
Know your limitations
Don't "over think" what you find yourself needing to do.
If you have a feeling that you are not quite ready for a particular job, then don't do it.
Before tackling a job that you are not quite sure about, get some practice.
There are often classes held at local home improvement stores. Usually these classes are free or only require that you pay a little bit of money to cover the cost of materials. Use these classes to help you learn how you perform a specific type of painting.
Know when to use the more advanced tools
There is a time and place to use all tools, and this also includes some of the more advance tools.
As with most tools, the more advanced painting tools are typically powered in some way. Since they are powered, these tools will more than likely have a larger area effect, so only use them for large area jobs, or jobs that you really need to do in a hurry.
Keep in mind though, that if you are using a powered painting tool to complete a job quickly.... that you need to be particularly careful with it.
Otherwise, you can easily find yourself with a huge mess that will take even more time to clean up.
Here are a few helpful videos for you to get started:
Mr. Fix-It
____________________________
Boxing Your Household Goods

Follow these tips for boxing your household goods and you will maximize space, save time and money, and know what items are in which boxes at all times:
1. Invest in a tape gun and the best packing tape you can find.
You can purchase both at your local hardware or home improvement store.
2. Tape the bottom of each box twice; once across the seam where the bottom flaps meet, and once across the width of the box.
3. Use small boxes for heavy items such as books.
The heavier the item, the smaller the box should be.
4. Use towels, socks, and linens to wrap around fragile items, and pack them tightly.
5. Tape the boxes shut with one strip of tape across the seam where the two flaps meet.
6. Use a black marker to mark and number the boxes containing heavy items.
Use a red marker to mark and number the boxes containing fragile items.
Store the "black" boxes on one side of an empty room, such as a guest room, and store the "red" boxes on the other side of the room.
7. Using a black or red marker, number the box on the top and on the side, and write on the box what room it will go to in your new home.
8. Use a clipboard and paper to make a master list of your packed boxes.
Make two columns on your paper; one for a box number, and one to record the contents of the box.
When you stack your packed boxes, make sure that you don't stack heavy boxes on top of lighter ones, or else you may crush the items in the bottom box.
If you have to force the flaps of a box shut, then you are trying to fit too much into a box.
Instead of boxing canned foods, use plastic grocery store bags. That way, you know that anything that is inside of a grocery store bag goes to the kitchen in the new home.
Never use boxes to pack flammable products such as kerosene or gasoline.
Instead of taking clothes from dresser drawers, leave the clothes inside of the dresser and use painter's tape to tape the drawers shut.
Make your moving day less stressful by creating organization out of disarray, knowing that your household goods are packed safely in appropriate boxes.
Here are some videos on packing ideas.
Boxing Your Household Goods
1. Invest in a tape gun and the best packing tape you can find.
You can purchase both at your local hardware or home improvement store.
2. Tape the bottom of each box twice; once across the seam where the bottom flaps meet, and once across the width of the box.
3. Use small boxes for heavy items such as books.
The heavier the item, the smaller the box should be.
4. Use towels, socks, and linens to wrap around fragile items, and pack them tightly.
5. Tape the boxes shut with one strip of tape across the seam where the two flaps meet.
6. Use a black marker to mark and number the boxes containing heavy items.
Use a red marker to mark and number the boxes containing fragile items.
Store the "black" boxes on one side of an empty room, such as a guest room, and store the "red" boxes on the other side of the room.
7. Using a black or red marker, number the box on the top and on the side, and write on the box what room it will go to in your new home.
8. Use a clipboard and paper to make a master list of your packed boxes.
Make two columns on your paper; one for a box number, and one to record the contents of the box.
When you stack your packed boxes, make sure that you don't stack heavy boxes on top of lighter ones, or else you may crush the items in the bottom box.
If you have to force the flaps of a box shut, then you are trying to fit too much into a box.
Instead of boxing canned foods, use plastic grocery store bags. That way, you know that anything that is inside of a grocery store bag goes to the kitchen in the new home.
Never use boxes to pack flammable products such as kerosene or gasoline.
Instead of taking clothes from dresser drawers, leave the clothes inside of the dresser and use painter's tape to tape the drawers shut.
Make your moving day less stressful by creating organization out of disarray, knowing that your household goods are packed safely in appropriate boxes.
Here are some videos on packing ideas.
Choosing Long Lasting Flooring
 Whether you are choosing some rare exotic piece of hardwood flooring or you are going for some simple linoleum, you are going to want it to last for a long time.
Choosing long lasting flooring can be fairly difficult for some people, but that is only because it is more of a matter of personal opinion than something that anyone can actually tell you how to do.
That being said, there are some simple questions that you can ask yourself when looking through your flooring options.
By the time that you answer these questions you should have no problem choosing long lasting flooring.
1. Do you have a budget in mind?
One of the most important things that you will need to think about when choosing long lasting flooring is your budget. The reason for this is that the budget, or amount of money you can spend, on the project will in large part determine what kind of flooring you can get.
Sit down and decide on how much you can reasonably afford to spend on your new flooring, and stay within that budget no matter what.
2. How large is the area you will be flooring?
Think about how large of an area you need to have covered.
Not all flooring material is going to work effectively in all situations, and the size of the room is one of those situations.
Not only will the size of the room effect the overall price that you have to spend, but it can also increase the amount of time you need to spend maintaining your new flooring.
3. Is the flooring water proof or resistant?
There is a big difference between water proof, and water resistant.
A general rule of thumb is that no hardwood floor is ever going to be water proof, while many tiles and stone floors may be.
Take the time to figure out what your flooring might be, so that you know how much care you should take with it when it is installed.
4. How much maintenance will you need to do?
Remember that you will be the one that is required to keep your flooring looking good. The easier it is to maintain your flooring, then the more likely it will last a long time.
Do not choose any flooring that requires extra special care unless you are willing to spend the time necessary keeping it looking good.
Here are some videos to give you some ideas.
Mr. Fix-It
Whether you are choosing some rare exotic piece of hardwood flooring or you are going for some simple linoleum, you are going to want it to last for a long time.
Choosing long lasting flooring can be fairly difficult for some people, but that is only because it is more of a matter of personal opinion than something that anyone can actually tell you how to do.
That being said, there are some simple questions that you can ask yourself when looking through your flooring options.
By the time that you answer these questions you should have no problem choosing long lasting flooring.
1. Do you have a budget in mind?
One of the most important things that you will need to think about when choosing long lasting flooring is your budget. The reason for this is that the budget, or amount of money you can spend, on the project will in large part determine what kind of flooring you can get.
Sit down and decide on how much you can reasonably afford to spend on your new flooring, and stay within that budget no matter what.
2. How large is the area you will be flooring?
Think about how large of an area you need to have covered.
Not all flooring material is going to work effectively in all situations, and the size of the room is one of those situations.
Not only will the size of the room effect the overall price that you have to spend, but it can also increase the amount of time you need to spend maintaining your new flooring.
3. Is the flooring water proof or resistant?
There is a big difference between water proof, and water resistant.
A general rule of thumb is that no hardwood floor is ever going to be water proof, while many tiles and stone floors may be.
Take the time to figure out what your flooring might be, so that you know how much care you should take with it when it is installed.
4. How much maintenance will you need to do?
Remember that you will be the one that is required to keep your flooring looking good. The easier it is to maintain your flooring, then the more likely it will last a long time.
Do not choose any flooring that requires extra special care unless you are willing to spend the time necessary keeping it looking good.
Here are some videos to give you some ideas.
Mr. Fix-It
__________________________
Planning Garage Shelving

Planning garage shelving isn't all that difficult of a project, though it does require that you do some careful thinking and planning.
Use these guidelines to make the whole task of planning as easy as possible. In fact, as you are looking at these guidelines, all you really need to do is write down your answers. By the time you have answered them, all you need to do is look at your written answers, and you have a complete plan worked out.
1. Do you need shelving?
Part of what you need to think about is whether you actually need shelving at all. Many times people have a tendency to think they need something, when they really don't.
Think about your storage needs, and whether you can get rid of some of the things you have, or need to hold on to them.
2. What are the specific needs?
How much work are you going to be doing in the garage?
How much access will you need to the garage, and how much can be set aside for storage usage?
In addition, are you going to be storing household items, paints, chemicals, or other items?Each have different types of storage needs, and should be considered when doing your planning.
3. What is your budget?
Have you thought about how much money you can spend on this project? If not, you can't really begin planning your new shelving without knowing how much you can actually spend.
4. What tools will be used?
Most often tools are usually stored in a garage, so you can create an area that you can do exactly that.
In order to properly plan the shelving that you will need, you should list the tools that you have, and whether they can be stored on a shelf, or if it will need some other kind of storage option.
5. What are your spatial needs?
Take some time to think about how much space you will need, and how much you actually have to work with. This will help you plan out where your shelves should be located, and what area you have available.
A good rule of thumb is to use the largest dimension, and expand from that.
6. Draw it out.
If you can, take the time to draw a rough blue print with all of the previous points in mind.
This will help you finalize your plans, while also giving you something that you can discuss with a home improvement advisor or contractor.
We also have some videos to help you out.
_________________________
Ignoring First Freeze Warning
Can Be Damaging & Costly
to
Pipes

Clear skies and light winds will allow temperatures to plummet overnight prompting the National Weather Service to issue the first FREEZE WARNING for the Las Vegas valley.
Each year people take this lightly...until one day...a pipe suddenly bursts and you find yourself in desperate need of an EXPENSIVE PLUMBER !
The most vulnerable part of your home when we experience a DEEP FREEZE ???
Pipes

Frozen pipes can lead to a big mess.
Here are a few tips on avoiding weather-related disasters at home:
Allow a small trickle of water to run overnight, preferably through a faucet on an outside wall.
Know the locations of your shut-off valves, in case a pipe bursts.
Insulate pipes, especially those close to outside walls, attics or crawl spaces where the chance of freezing is greatest.

Seal air leaks surrounding or near pipes.
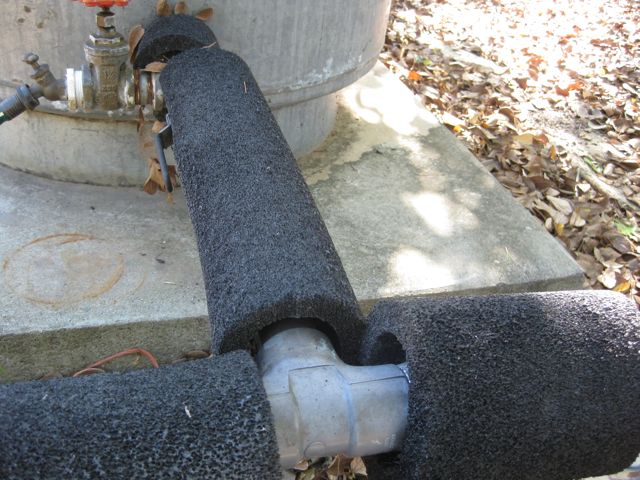
Disconnect all outdoor hoses and turn off water to exterior faucets and sprinkler systems...

...and install outside faucet covers.

Open kitchen and bathroom cabinet doors to allow warmer air to circulate around the plumbing.
Keep heat at 55 degrees F. or higher even when you are out of town.
Don't hesitate to implement these ideas. The "Freeze" is "On" tonight !
Videos?
Mr. Fix-It
From a reader: Lawrence Peterson

Ignoring First Freeze Warning
Clear skies and light winds will allow temperatures to plummet overnight prompting the National Weather Service to issue the first FREEZE WARNING for the Las Vegas valley.
Each year people take this lightly...until one day...a pipe suddenly bursts and you find yourself in desperate need of an EXPENSIVE PLUMBER !
The most vulnerable part of your home when we experience a DEEP FREEZE ???
Frozen pipes can lead to a big mess.
Seal air leaks surrounding or near pipes.
...and install outside faucet covers.
Open kitchen and bathroom cabinet doors to allow warmer air to circulate around the plumbing.
From a reader: Lawrence Peterson

-
Elizabeth BreierDecember 9, 2016 at 7:57 AM
Please make sure you are wrapping water lines and not gas lines. I see this far too often. The water lines are mostly in the garage where the emergency shutoff handles are. Outside are hose bibs and next to the garage - is the gas meter and gas lines. Those don't freeze!
- ____________________________
-
Elizabeth BreierDecember 9, 2016 at 7:57 AMPlease make sure you are wrapping water lines and not gas lines. I see this far too often. The water lines are mostly in the garage where the emergency shutoff handles are. Outside are hose bibs and next to the garage - is the gas meter and gas lines. Those don't freeze!
- ____________________________

Cleaning Your Garage Floor

Garages can see a lot of wear and tear depending on what they are used for.
People can use garages for just about everything under the sun, typically for storage.
There are those out there, though, who use a garage for its intended purpose of storing vehicles.
When this happens—a garage being used for storing vehicles that are either in working order or in the process of being repaired or restored—there tend to be spills, leaks, and stains because of oil or gasoline.
Oil and gas stains may seem to be extremely difficult to remove, but in actuality they are not.
Here is how you can do your own garage stain removal, with out having to go to the expense of using a professional.
Cleaning the garage of oil or gasoline stains is going to be an easy task for any veteran or novice home improvement warrior.
Before starting, you need to make sure that you have all your materials in one place.
To do this little home improvement chore, all that you need is an old deck broom, some kitty litter, and a dust pan.
Once you have gathered all of your materials, choose the largest of the oil spots to remove first.
Also, you need to make sure that you have sufficient time and energy to do this task. You are going to be using quite a bit of elbow grease, so you are probably going to be tired when finished, and depending on how dirty the garage is you may end up working all day.
After choosing where to start, simply pour some of the kitty litter onto the oil spot.
This material is used to absorb the oil or petroleum product, so once you have laid down a nice, fairly thin layer of the kitty litter onto the oil spot, let it sit for a few moments for the oil to be absorbed. If the stain is older, then you do not need to wait for a few minutes.
The next step is to work the kitty litter into the stain.
Do this by using your foot or the broom to grind the kitty litter into the stain.
Feel free to use both, since you are going to get tired.
Once you have used the broom for this task, you do not want to use it inside again, since that could just bring the grease inside.
So be advised, you are going to ruin your broom for any other future job, so only use one that you do not mind dedicating solely to using either outside, in the garage, or that you can throw away.
When you have worked the kitty litter into the stain properly, all that is going to remain is a fine powder.
Simply sweep up the powder and dispose of the mess properly.
Since the EPA has mandated special disposal procedures for oil and petroleum products, be sure that you know what the current laws and procedures are prior to disposal.
You do not want to get into any trouble simply for removing the stains from your garage.
Here are some videos to help you out on this task.
Some alternative methods...
Mr. Fix-It
_______________________
Garages can see a lot of wear and tear depending on what they are used for.
People can use garages for just about everything under the sun, typically for storage.
There are those out there, though, who use a garage for its intended purpose of storing vehicles.
When this happens—a garage being used for storing vehicles that are either in working order or in the process of being repaired or restored—there tend to be spills, leaks, and stains because of oil or gasoline.
Oil and gas stains may seem to be extremely difficult to remove, but in actuality they are not.
Here is how you can do your own garage stain removal, with out having to go to the expense of using a professional.
Cleaning the garage of oil or gasoline stains is going to be an easy task for any veteran or novice home improvement warrior.
Before starting, you need to make sure that you have all your materials in one place.
To do this little home improvement chore, all that you need is an old deck broom, some kitty litter, and a dust pan.
Once you have gathered all of your materials, choose the largest of the oil spots to remove first.
Also, you need to make sure that you have sufficient time and energy to do this task. You are going to be using quite a bit of elbow grease, so you are probably going to be tired when finished, and depending on how dirty the garage is you may end up working all day.
After choosing where to start, simply pour some of the kitty litter onto the oil spot.
This material is used to absorb the oil or petroleum product, so once you have laid down a nice, fairly thin layer of the kitty litter onto the oil spot, let it sit for a few moments for the oil to be absorbed. If the stain is older, then you do not need to wait for a few minutes.
The next step is to work the kitty litter into the stain.
Do this by using your foot or the broom to grind the kitty litter into the stain.
Feel free to use both, since you are going to get tired.
Once you have used the broom for this task, you do not want to use it inside again, since that could just bring the grease inside.
So be advised, you are going to ruin your broom for any other future job, so only use one that you do not mind dedicating solely to using either outside, in the garage, or that you can throw away.
When you have worked the kitty litter into the stain properly, all that is going to remain is a fine powder.
Simply sweep up the powder and dispose of the mess properly.
Since the EPA has mandated special disposal procedures for oil and petroleum products, be sure that you know what the current laws and procedures are prior to disposal.
You do not want to get into any trouble simply for removing the stains from your garage.
Here are some videos to help you out on this task.
Mr. Fix-It
Redecorating Your Bedroom
 Whether you are ready for a big change in your life or a subtle, more natural change, there are some key guidelines for decorating or redecorating a bedroom.
People of all ages consider making changes to the decor of their bedroom.
Follow these guidelines and you will certainly be happy with the outcome of your project.
Your bedroom should be your sanctuary, your place of solace and a place to be yourself. Your room should reflect your personality and encourage aspects of your personality that you may be working on; for example, if you find yourself to be pessimistic, you should consider painting your room yellow or orange to encourage cheerfulness or creativity.
Your first step to redecorating or decorating your bedroom is to pick a theme.
Your theme will help you coordinate the furniture, colors and other various aspects of your decor.
Your theme can be centered around a decade or era (Victorian, contemporary, etc.), a hobby (sports, dance, music), collections (a favorite item or collecting item), or a color.
Pick a theme that reflects you and your interests, but make sure it is a theme that you will be happy with for some time to come. (You don't want to redecorate your bedroom every week or month.)
Once you have picked your theme it is time to begin.
Take a quick inventory of the items you already own and wish to use and an inventory of the items around your home that may come in handy.
This inventory should consist of items that fit within your theme, or that may augment your theme nicely.
Once you have taken an inventory it is time to take a quick trip to the hardware store, flea market, antique shop and home decoration store.
Pick up a batch of paint chips and carry those around with you as you pick out furniture, pictures, picture frames, furniture and other decorative items, such as pillows.
Begin painting your walls and filling in with photos and furniture.
If you do not want to limit yourself to posters and photos for wall decorations, you can try things like old record albums or fabric swatches or samples.
Your sheets should coordinate with the colors and theme of your bedroom.
Organization can really help you alter the appearance and feel or your bedroom.
Separate your personal items according to function (office type items should remain in the desk area, craft items in another area or basket in the room) so that you can easily begin to compartmentalize your living space.
Inexpensive bookshelves and baskets can be purchased at flea markets or stores. Desks can be purchased in old antique shops.
With some new paint, improved organization and a few items that augment your theme you will have a brand new living space that accommodates your personality and your goals.
Here are some additional video ideas that can give you a few ideas how to make that "sanctuary"....you.
__________________________
Planning Storage Shelving

Planning garage shelving isn't all that difficult a project, though it does require that you do some thinking.
Use these guidelines to make the whole task of planning as easy as possible. If fact, as you are looking at these guidelines, all you really need to do is look at your written answers, and you will have a complete plan worked out.
1. Do you need shelving ?
Part of what you need to think about is whether you actually need shelving. Many times people have a tendency to think they need something (such as storage), when they really don't.

Think about your storage needs, and whether you can get rid of some of the things you have.
2. What are the specific needs ?
How much work are you going to be doing in the garage?
How much access will you need to the garage, and how much can be set aside for your storage usage ?
In addition, are you going to be storing household items, paints, chemicals, or other items ?

Each have different types of storage needs, and should be considered when doing your planning.
3. What is your budget ?
Have you thought about how much money you can spend on this project ?
If not, you can't really begin planning your new shelving without knowing how much you can actually spend.
4. What tools will be used ?
Most often tools are stored in a garage, so you should create an area that you can do exactly that.
In order to properly plan the shelving that you will need, you will need to list the tools that you have, and whether it can be stored on a shelf, or if it will need some other type of storage option.
5. What are your spatial needs ?
Take some time to think about how much space you will need, and how much you have to work with. This will help you plan out where you should place your shelves, and what area you have available.
A good rule of thumb is to use the largest dimentions of the items that you will be storing as a base dimension, and expand from that.
6. Draw it out.
If you can, take the time to draw out a rough blue print with all of these previous points in mind.
This will help you finalize your plans, while also giving you something that you can discuss with the home improvement store advisors or your contractor.
We have some videos to help you solve some of the storage needs.
Mr. Fix-It
_________________________
Whether you are ready for a big change in your life or a subtle, more natural change, there are some key guidelines for decorating or redecorating a bedroom.
People of all ages consider making changes to the decor of their bedroom.
Follow these guidelines and you will certainly be happy with the outcome of your project.
Your bedroom should be your sanctuary, your place of solace and a place to be yourself. Your room should reflect your personality and encourage aspects of your personality that you may be working on; for example, if you find yourself to be pessimistic, you should consider painting your room yellow or orange to encourage cheerfulness or creativity.
Your first step to redecorating or decorating your bedroom is to pick a theme.
Your theme will help you coordinate the furniture, colors and other various aspects of your decor.
Your theme can be centered around a decade or era (Victorian, contemporary, etc.), a hobby (sports, dance, music), collections (a favorite item or collecting item), or a color.
Pick a theme that reflects you and your interests, but make sure it is a theme that you will be happy with for some time to come. (You don't want to redecorate your bedroom every week or month.)
Once you have picked your theme it is time to begin.
Take a quick inventory of the items you already own and wish to use and an inventory of the items around your home that may come in handy.
This inventory should consist of items that fit within your theme, or that may augment your theme nicely.
Once you have taken an inventory it is time to take a quick trip to the hardware store, flea market, antique shop and home decoration store.
Pick up a batch of paint chips and carry those around with you as you pick out furniture, pictures, picture frames, furniture and other decorative items, such as pillows.
Begin painting your walls and filling in with photos and furniture.
If you do not want to limit yourself to posters and photos for wall decorations, you can try things like old record albums or fabric swatches or samples.
Your sheets should coordinate with the colors and theme of your bedroom.
Organization can really help you alter the appearance and feel or your bedroom.
Separate your personal items according to function (office type items should remain in the desk area, craft items in another area or basket in the room) so that you can easily begin to compartmentalize your living space.
Inexpensive bookshelves and baskets can be purchased at flea markets or stores. Desks can be purchased in old antique shops.
With some new paint, improved organization and a few items that augment your theme you will have a brand new living space that accommodates your personality and your goals.
Here are some additional video ideas that can give you a few ideas how to make that "sanctuary"....you.
Planning Storage Shelving
Planning garage shelving isn't all that difficult a project, though it does require that you do some thinking.
Use these guidelines to make the whole task of planning as easy as possible. If fact, as you are looking at these guidelines, all you really need to do is look at your written answers, and you will have a complete plan worked out.
1. Do you need shelving ?
Part of what you need to think about is whether you actually need shelving. Many times people have a tendency to think they need something (such as storage), when they really don't.
Think about your storage needs, and whether you can get rid of some of the things you have.
2. What are the specific needs ?
How much work are you going to be doing in the garage?
How much access will you need to the garage, and how much can be set aside for your storage usage ?
In addition, are you going to be storing household items, paints, chemicals, or other items ?
Each have different types of storage needs, and should be considered when doing your planning.
3. What is your budget ?
Have you thought about how much money you can spend on this project ?
If not, you can't really begin planning your new shelving without knowing how much you can actually spend.
If not, you can't really begin planning your new shelving without knowing how much you can actually spend.
4. What tools will be used ?
Most often tools are stored in a garage, so you should create an area that you can do exactly that.
In order to properly plan the shelving that you will need, you will need to list the tools that you have, and whether it can be stored on a shelf, or if it will need some other type of storage option.
5. What are your spatial needs ?
Take some time to think about how much space you will need, and how much you have to work with. This will help you plan out where you should place your shelves, and what area you have available.
A good rule of thumb is to use the largest dimentions of the items that you will be storing as a base dimension, and expand from that.
6. Draw it out.
If you can, take the time to draw out a rough blue print with all of these previous points in mind.
This will help you finalize your plans, while also giving you something that you can discuss with the home improvement store advisors or your contractor.
We have some videos to help you solve some of the storage needs.
Mr. Fix-It
_________________________
R-Values
A Key to Proper Home Insulation

Whether you are looking at decreasing your energy bills while increasing your home energy efficiency, or simply want a warmer home, you need to know what R-values are.
What are R-values?
Simply put, R-values are what is used to measure thermal resistance.
What this means is that R-value is what is used to express how wellcertain materials can hold back, or resist, heat.
In the construction and real estate industries, this term is typically used in association with insulation, and other similar materials.
What is the goal?
Generally speaking, the rule of thumb is that the higher the R-value a home has, then the better off it is. That being said, each part of the home will have a different rating value that you should be aiming for.
Where to find your perfect R-value
Each municipality will have their own R-value ratings that you should adhere to and try to reach. For the most part, you can find the information about such values in the building codes.
That being said, there are some rather good guidelines depending on where one lives in the United States.

Examples of R-values
There are all kinds of materials that are used when building a home or any type of building.
For example, if you are using a cellulose based insulation, you will find that it has an average R-value between 3.2 and 3.8 per inch.
To give you an idea of what kind of insulation you will receive from a bare concrete wall (such as what you can often find in a basement) the R-value is only around R-1.
Now that you know a little more about R-values, and how they work, you can begin ensuring that you have the right rating for your home.
Consider a Proper Home Evaluation
Still confused? Call a pro !
To ensure that your home is getting the most out of the insulation, and to also know whether you have a possible insulation problem, you may want to consider having an actual heating evaluation conducted.
This simple evaluation can tell you where, and what, the problems are.
With that important information in hand you can then go and fix any potential problem, which will help decrease your overall energy bill.
Overall R-value not only varies by location of a building, but by the manner of installation.
Compressed insulation is less effective, as is insulation located in a wall, since heat is lost trough studs and building materials.
Now that you know a little more about R-values, and how they work, you can begin ensuring that you have the right rating for your home.
Need a few videos?
Mr. Fix-It
__________________________
R-Values
A Key to Proper Home Insulation
Whether you are looking at decreasing your energy bills while increasing your home energy efficiency, or simply want a warmer home, you need to know what R-values are.
What are R-values?
Simply put, R-values are what is used to measure thermal resistance.
What this means is that R-value is what is used to express how wellcertain materials can hold back, or resist, heat.
In the construction and real estate industries, this term is typically used in association with insulation, and other similar materials.
What is the goal?
Generally speaking, the rule of thumb is that the higher the R-value a home has, then the better off it is. That being said, each part of the home will have a different rating value that you should be aiming for.
Where to find your perfect R-value
Each municipality will have their own R-value ratings that you should adhere to and try to reach. For the most part, you can find the information about such values in the building codes.
That being said, there are some rather good guidelines depending on where one lives in the United States.
Examples of R-values
There are all kinds of materials that are used when building a home or any type of building.
For example, if you are using a cellulose based insulation, you will find that it has an average R-value between 3.2 and 3.8 per inch.
To give you an idea of what kind of insulation you will receive from a bare concrete wall (such as what you can often find in a basement) the R-value is only around R-1.
Now that you know a little more about R-values, and how they work, you can begin ensuring that you have the right rating for your home.
Consider a Proper Home Evaluation
Still confused? Call a pro !
To ensure that your home is getting the most out of the insulation, and to also know whether you have a possible insulation problem, you may want to consider having an actual heating evaluation conducted.
This simple evaluation can tell you where, and what, the problems are.
With that important information in hand you can then go and fix any potential problem, which will help decrease your overall energy bill.
Overall R-value not only varies by location of a building, but by the manner of installation.
Compressed insulation is less effective, as is insulation located in a wall, since heat is lost trough studs and building materials.
Now that you know a little more about R-values, and how they work, you can begin ensuring that you have the right rating for your home.
Need a few videos?
Mr. Fix-It
__________________________
A Wireless Control Thermostat
The Perfect Option for "Snowbirds" or "Vacationers"
If you're a "snowbird" or frequent traveler, a wireless control thermostat might be just "what the doctor ordered" to regulate home temperatures while you're home is not being occupied.
It works just the same as the programmable thermostat, but can be operated through a smart phone or computer anywhere you can get a signal.
If you leave for vacation, you can remotely adjust the temperature up or down, or just reprogram the thermostat at will.
Or if you are out of town and know that you will be returning home at a particular time, you can get the temperature ready for your arrival.
Or if you forgot to reprogram the unit when you leave...no worry, you can change it from your smart phone.
These require Wi-Fi.
A number of vendors have these units available.
From Marty Winger to Anthem Opinions.
There are also affordable products on the market which consist of a doorbell/camera system which can be connected to your Wi-Fi and you will then be alerted to a doorbell ring from an ‘application’ on your phone. You may then choose to “answer” the doorbell from any location in the world where you have access to internet service. In that way, if you happen to be away from your house, you can still talk to the person with two-way communication, making the person at the door think people are inside the home. This type of system also allows you to do this if you are within your home, eliminating the need for the resident to approach the door to see who is outside.
So here is the problem with this:
Technology is great, isn't it, but those who can describe it but either not use it or think that its an answer....isn't!
The problem spending money on this item doesn't get it. If you are lucky the best you will get is a "picture" of the back of the person. Why you ask, well because from the time the motion trips to the time it captures the image and sends it (the picture) of the person, and then to the server, might take up to 15/20 seconds and you FACE is not there.
A Wireless Control Thermostat
If you're a "snowbird" or frequent traveler, a wireless control thermostat might be just "what the doctor ordered" to regulate home temperatures while you're home is not being occupied.
It works just the same as the programmable thermostat, but can be operated through a smart phone or computer anywhere you can get a signal.
If you leave for vacation, you can remotely adjust the temperature up or down, or just reprogram the thermostat at will.
Or if you are out of town and know that you will be returning home at a particular time, you can get the temperature ready for your arrival.
Or if you forgot to reprogram the unit when you leave...no worry, you can change it from your smart phone.
These require Wi-Fi.
A number of vendors have these units available.
From Marty Winger to Anthem Opinions.
There are also affordable products on the market which consist of a doorbell/camera system which can be connected to your Wi-Fi and you will then be alerted to a doorbell ring from an ‘application’ on your phone. You may then choose to “answer” the doorbell from any location in the world where you have access to internet service. In that way, if you happen to be away from your house, you can still talk to the person with two-way communication, making the person at the door think people are inside the home. This type of system also allows you to do this if you are within your home, eliminating the need for the resident to approach the door to see who is outside.
So here is the problem with this:
Technology is great, isn't it, but those who can describe it but either not use it or think that its an answer....isn't!
The problem spending money on this item doesn't get it. If you are lucky the best you will get is a "picture" of the back of the person. Why you ask, well because from the time the motion trips to the time it captures the image and sends it (the picture) of the person, and then to the server, might take up to 15/20 seconds and you FACE is not there.
_____________________________
Replacing a Thermostat
_____________________________

Do you have a manual dial thermostat ?
If you so, it's time for a change.
One of the best things you can do to improve energy costs is to replace a manual-dial thermostat with a new programmable thermostat.
You will pay less for the electricity consumed.
There are a myriad of advantages to using a programmable thermostat over a manual thermostat. Not only is energy saved, you can also save time in that the thermostat adjusts the pre-set temperature ranges.
It also adjusts the temperature while you sleep and when you're away from home.
Replacing a thermostat is a simple task.
Follow these simple steps and your new thermostat is going to be working in no time:
1. Turn off the power to the heating and air conditioning system.
2. Remove the old thermostat cover.
3. Remove the body of the old thermostat from the cavity of the wall. Before unscrewing the wires, label them.
4. Loosen the screws, remove the wires, and remove the unit.
5. With the new thermostat in hand, follow the directions for installing it.
Basically you'll need to thread the wires into the unit.
Check the thermostat to ensure that it's in a level position before screwing it onto the wall.
6. Insert the screws into the unit according to the manufacturer's directions, tightening as much as you can by hand only.
Now you need to connect the wires to the corresponding screw terminals.
7. When installing a programmable thermostat, you need to remember to put batteries into the battery terminal before you mount the thermostat to its base.
8. Turn the power back on and then snap the faceplate into position.
Whether you're installing a programmable or manual thermostat, be sure to read the instruction manual to determine the proper way to use it.
It is worth mentioning that if, after you remove the face plate of your old thermostat, you discover that there are only two lead wires, you may need to call a professional to install your new thermostat.
Here are some helpful videos.
Mr. Fix-It
____________________________
Hanging Drapery Hardware
 Drapery can be a wonderful addition to any home's decor.
In order to be able to utilize this wonderful tool of home decoration, and to save some money in the process, there are a few things that you are going to have to do on your own.
These few things are to choose, and hang your drapery hardware.
By hanging, I mean to mount the hardware to the wall.
Use these few simple steps and you are going to have drapes that show off your room to the best effect.
When you start any new home improvement task, there is one major step that you need to take before you are ready.
That step is to gather all of your tools and materials. For this task, simply use the list provided here, and you are going to be ready to begin.
Tools and materials:
Curtain
Curtain rod
Drill
Philips screw driver (a "cross top" screw driver)
Step ladder
Tape measure
To begin, you are going to need to measure the window that is going to have drapes.
1. Measure the window width, and length being sure that you add a couple of inches on each side, so that the drapes are going to hang and be displayed properly.
This information is going to also play a role in the choosing of your hardware, and how to hang it.
2. After you have gotten the height and width information, it is time for you to choose your hardware.
Choose something that reflects your personality and taste.
You are also going to want to choose rods that are not too expensive for your budget.
Be sure that you follow the instructions that came with your curtain rods.
There may be times though that either your rods don't come with instructions or you lose them. In the event that you are missing the instructions then just make sure that you have the information that you gathered earlier handy.
That information is going to tell you where you can, or should, place the holes for the curtain rod.
3. When you have made the holes for the curtain rod, you are now ready to go ahead and place the drapes on to the curtain rod and hang according to your tastes.
We have some helpful videos for you.
How to hang a curtain rod (Part One)
How to hang a curtain rod (Part Two)
How to hand drapes at home (from Pottery Barn)
Mr. Fix-It
Hanging Drapery Hardware
Drapery can be a wonderful addition to any home's decor.
In order to be able to utilize this wonderful tool of home decoration, and to save some money in the process, there are a few things that you are going to have to do on your own.
In order to be able to utilize this wonderful tool of home decoration, and to save some money in the process, there are a few things that you are going to have to do on your own.
These few things are to choose, and hang your drapery hardware.
By hanging, I mean to mount the hardware to the wall.
Use these few simple steps and you are going to have drapes that show off your room to the best effect.
When you start any new home improvement task, there is one major step that you need to take before you are ready.
That step is to gather all of your tools and materials. For this task, simply use the list provided here, and you are going to be ready to begin.
Tools and materials:
Curtain
Curtain rod
Drill
Philips screw driver (a "cross top" screw driver)
Step ladder
Tape measure
To begin, you are going to need to measure the window that is going to have drapes.
1. Measure the window width, and length being sure that you add a couple of inches on each side, so that the drapes are going to hang and be displayed properly.
This information is going to also play a role in the choosing of your hardware, and how to hang it.
2. After you have gotten the height and width information, it is time for you to choose your hardware.
Choose something that reflects your personality and taste.
You are also going to want to choose rods that are not too expensive for your budget.
Be sure that you follow the instructions that came with your curtain rods.
There may be times though that either your rods don't come with instructions or you lose them. In the event that you are missing the instructions then just make sure that you have the information that you gathered earlier handy.
That information is going to tell you where you can, or should, place the holes for the curtain rod.
3. When you have made the holes for the curtain rod, you are now ready to go ahead and place the drapes on to the curtain rod and hang according to your tastes.
We have some helpful videos for you.
How to hang a curtain rod (Part One)
How to hang a curtain rod (Part Two)
How to hand drapes at home (from Pottery Barn)
Mr. Fix-It
________________________
Getting a Roofing Estimate
 Getting a damaged roof repaired can't really be done until you have completed one very important step first. That step is to get a roofing estimate.
Getting an estimate is more than simply opening the phone book and picking someone out at random.
To make sure that you get the best possible estimate you need to do a little bit of shopping around. Use these guidelines to help you out.
Contact a Roofer
The first step in getting a roofing estimate is to actually contace a few roofers.
While you can always pick a couple of names out of the phone book, you should also get a couple of recommendations as well. Talk to your friends and family to see if they know of anyone that they had worked with in the past that they would recommend.
Contact your local business bureau and Contractors Board as well. Use this list of names to choose from a few roofers.
Have them Do an Inspection
Contact the first name on your list and schedule an appointment with them.
Have them come over to inspect your roof and see what condition it is in.
While they are inspecting the roof for damage, have them also tell you how much it would cost to repair the roof.
Know the Questions to Ask
Once the roofer has completed the inspection, sit down with them and discuss things.
Part of discussing what is going on is to know what type of questions to ask. Some of the questions that you should ask are things like how many layers of shingles (if you have them) are going to be torn off, what type of damage there is underneath, did the skylights or similar structures show any signs of water damage, and other questions.
In fact, this is the time when you should ask ANY TYOE OF QUESTION that you can think of that is related to getting your roof repaired.
Get a 2nd or 3rd Opinion
After you have finished talking things over with the roofer, get another opinion.
Repeat the process of having them doing the inspection and discussing everything with you.
Do this with a few different roofers to get a good idea of the type of work that you need done, and a decent representation of the costs.
Compare the Costs and Make a Decision
Once you have finished with the last roofer, sit down and begin comparing the different estimates.
This is NOT a decision that needs to be made too quickly; in fact it is one
that should not be made too quickly.
Need some additional advice?
We have some videos.
Mr. Fix-It
Getting a damaged roof repaired can't really be done until you have completed one very important step first. That step is to get a roofing estimate.
Getting an estimate is more than simply opening the phone book and picking someone out at random.
To make sure that you get the best possible estimate you need to do a little bit of shopping around. Use these guidelines to help you out.
Contact a Roofer
The first step in getting a roofing estimate is to actually contace a few roofers.
While you can always pick a couple of names out of the phone book, you should also get a couple of recommendations as well. Talk to your friends and family to see if they know of anyone that they had worked with in the past that they would recommend.
Contact your local business bureau and Contractors Board as well. Use this list of names to choose from a few roofers.
Have them Do an Inspection
Contact the first name on your list and schedule an appointment with them.
Have them come over to inspect your roof and see what condition it is in.
While they are inspecting the roof for damage, have them also tell you how much it would cost to repair the roof.
Know the Questions to Ask
Once the roofer has completed the inspection, sit down with them and discuss things.
Part of discussing what is going on is to know what type of questions to ask. Some of the questions that you should ask are things like how many layers of shingles (if you have them) are going to be torn off, what type of damage there is underneath, did the skylights or similar structures show any signs of water damage, and other questions.
In fact, this is the time when you should ask ANY TYOE OF QUESTION that you can think of that is related to getting your roof repaired.
Get a 2nd or 3rd Opinion
After you have finished talking things over with the roofer, get another opinion.
Repeat the process of having them doing the inspection and discussing everything with you.
Do this with a few different roofers to get a good idea of the type of work that you need done, and a decent representation of the costs.
Compare the Costs and Make a Decision
Once you have finished with the last roofer, sit down and begin comparing the different estimates.
This is NOT a decision that needs to be made too quickly; in fact it is one
that should not be made too quickly.
Need some additional advice?
We have some videos.
Mr. Fix-It
Getting a Roofing Estimate
_____________________
Repairing Damaged Carpet
 If burn marks or worn patches mar your carpet but you don't want to replace it, you can mend the carpet to dramatically improve its appearance.
To fix burn holes...
1. Trim away scorched fibers with a sharp craft knife to expose the backing.
2. Cut matching tufts from a spare piece of carpet or from an area of the carpet that is not normally visible.
3. Spread an appropriate latex adhesive onto the backing and dab it onto the ends of the tufts, then press them into the hole and onto the backing.
4. Let the adhesive dry, then trim and brush the tufts to blend with the pile of the surrounding carpet.
To repair worn patches on carpets that have the pile woven into the backing...
1. Turn the carpet over and mark a square on the backing under the damaged area.
2. Spread latex adhesive over an area that extends one inch in all directions from the backing square.
3. Place a piece of wood under the pile and cut out the marked square from the backing side with a sharp trimming knife.
4. Cut strips of carpet tape (available at a hardware store) two inches longer than the sides of the square, and cover the hole with them.
5. Using the old square of carpet as a template, cut a new square from a spare piece of carpet or from an area that won't show the hole.
6. Make sure the new piece matches the old one in pattern and direction of the pile.
7. Spread adhesive over the back and edges of the new piece, but make sure you don't get it on the tufts.
8. Press the new square into the hole onto the carpet tape strips and tap the edges with a hammer so that they lie flush with the rest of the carpet.
With foam-backed carpet...
1. Cut a square of the worn area from the tufted side.
2. Cut a square slightly larger than the old one from a new piece of carpet.
3. Tack it in place.
4. Carefully cut round the new patch and through the carpet beneath it.
5. Take out the tacks and lift out the new and damaged pieces.
6. Turn the carpet back and stick adhesive tape over the hole.
7. Working from the tufted side again, stick the new piece firmly onto the tape, and lightly hammer the edges flush with the rest of the carpet.
We have a few videos to help you out.
Additional ideas how to fix a burn hole:
Mr. Fix-It
_______________________________
To fix burn holes...
1. Turn the carpet over and mark a square on the backing under the damaged area.
_______________________________
Kitchen Makeovers

Once in a while, you might look at an area of your house and wish that you could change it. Maybe you are tired of the flooring, or think that the colors of the furnishings and walls look dull. It could be the case that parts of the room, such as furniture and carpets, have become worn out over the years and just don't look as nice as they once did.
This problem can become an issue in any part of your home, but in the kitchen it can be especially noticeable.
Most people spend a lot of time in the kitchen preparing food, eating meals, cleaning, and just socializing.
A lot of activity can take place in the kitchen, and there may come a point where this area starts to look dated or worn.
Scratches or stains on the floor and counters, water damage on the cabinets, and beat-up window treatments are just a few of the things you may want to change about the kitchen.
Of course, you may feel that you need to do more than make a couple of changes to the kitchen to get it looking nicer.
Maybe you are interested in doing a whole kitchen makeover to make the area look like new.
Although this project can be time-consuming and potentially costly, a kitchen makeover can be an excellent way to make changes in your home to get just the look you desire for this room.
Kitchen makeovers can involve remodeling the entire kitchen or just replacing parts of it.
What you will do depends on the state of the kitchen and how much you want to change.
Giving your kitchen a makeover doesn't have to cost thousands of dollars if you just want to fix a few things that you can work on yourself.
For example, repainting the walls can give your kitchen an entirely new look without making a drastic change or monetary commitment.
Or, you might want to spend a bit more money and replace old flooring with something fresh.
To really improve the look of the kitchen, however, you might want to do a bit more.
Repainting, refinishing, or replacing the cabinets in your kitchen is a more intense way to make a change.
Replacing old and outdated cabinets is probably the best way to update the look of your kitchen. This step can make a rundown kitchen look modern and new.
Whatever your budget and however much your kitchen needs a new look, there is a makeover method that will work out perfectly for your kitchen.
A kitchen makeover can give this room new life and an exciting fresh appearance.
Here are a few videos to give you an idea how to "refresh" your kitchen.
Mr. Fix-It
____________________________
Once in a while, you might look at an area of your house and wish that you could change it. Maybe you are tired of the flooring, or think that the colors of the furnishings and walls look dull. It could be the case that parts of the room, such as furniture and carpets, have become worn out over the years and just don't look as nice as they once did.
This problem can become an issue in any part of your home, but in the kitchen it can be especially noticeable.
Most people spend a lot of time in the kitchen preparing food, eating meals, cleaning, and just socializing.
A lot of activity can take place in the kitchen, and there may come a point where this area starts to look dated or worn.
Scratches or stains on the floor and counters, water damage on the cabinets, and beat-up window treatments are just a few of the things you may want to change about the kitchen.
Of course, you may feel that you need to do more than make a couple of changes to the kitchen to get it looking nicer.
Maybe you are interested in doing a whole kitchen makeover to make the area look like new.
Although this project can be time-consuming and potentially costly, a kitchen makeover can be an excellent way to make changes in your home to get just the look you desire for this room.
Kitchen makeovers can involve remodeling the entire kitchen or just replacing parts of it.
What you will do depends on the state of the kitchen and how much you want to change.
Giving your kitchen a makeover doesn't have to cost thousands of dollars if you just want to fix a few things that you can work on yourself.
For example, repainting the walls can give your kitchen an entirely new look without making a drastic change or monetary commitment.
Or, you might want to spend a bit more money and replace old flooring with something fresh.
To really improve the look of the kitchen, however, you might want to do a bit more.
Repainting, refinishing, or replacing the cabinets in your kitchen is a more intense way to make a change.
Replacing old and outdated cabinets is probably the best way to update the look of your kitchen. This step can make a rundown kitchen look modern and new.
Whatever your budget and however much your kitchen needs a new look, there is a makeover method that will work out perfectly for your kitchen.
A kitchen makeover can give this room new life and an exciting fresh appearance.
Here are a few videos to give you an idea how to "refresh" your kitchen.
Installing a Handicap Shower

Installing a handicap shower, while relatively easy to do, is a project that will take a lot of hard work and time.
If you do not have the time to do the project yourself, or simply don't want to do the work, I would strongly recommend that you hire a contractor to do the work for you. That way you can be sure that you are getting good solid results, and that it will be done correctly.
However, if you are planning on installing a handicap shower yourself, here's how you do it.
1. Measure the space.
Begin by measuring the space where your tub or shower is currently sitting.
Draw out a rough sketch of the shower area, and write down the measurements that you take next to their corresponding locations.
This will allow you to know what size of shower pan that you need to get.
2. Decide on wall material.
While you are measuring the shower area, decide on what material that you want to have when you are finished.
Some of the common choices are things like porcelain tiles, granite, plastic, fiberglass, and so on.
Considering how much the price can change according to the material that you want to use, make sure that you have enough money for the material that you will be using.
3. Remove the wall.
After you have decided on the material, it is time to take out the existing shower wall.
Start doing this by pulling off the enclosure, or if you have tile, take out the first foot of wall from the tub.
4. Remove the tub and shower.
Remove the current tub or shower.
Be sure that you have first undone, or unloosened the drain.
All you need to do in order to do this is to take two screwdrivers and stick them down to drain.
Cross the screwdrivers, and untwist.
After you have removed the shower or tub, clean everything up.
You will need a properly clean and prepped space to be able to install the new shower pan properly.
5. Install the shower pan.
Once you have the work site prepped, it is time to install your replacement shower pan. There should be a plumbing template on the pan of where your drain should go.
Once you have that lined up, begin installing the pan according to the directions that came with it.
Once installed, be sure that you properly caulk around the drain and the sides of the shower pan.
6. Install handrails.
After you have the shower pan in place, and it is caulked, install any handrails that you have decided to use.
7. Replace the walls.
Replace the walls with your new material.
Ensure that you have properly prepared it to be exposed to water.
Once you have cleaned everything up, you are ready to go!
Congratulations! You have now installed a handicap shower.
Here are some helpful videos.
Converting a
tub into a wheelchair assessable shower.
Redesigning
the bathroom for accessibility.
Installing a grab bar. W
Some ideas for handicap shower
upgrades.
Stay Safe. A fall can
be deadly !
Mir.
Fix-It
__________________________
The Perfect Cabinet, Counters, and Storage
Tool Kit
Here are some helpful videos.
Mir.
Fix-It
__________________________
Installing, repairing, or otherwise working on cabinets, counters,
and other storage items can be a fairly large project; however, just because it
is large doesn't mean that you cannot take care of it yourself.
As long as you have the right
tools, the right materials, and the patience
to get the job done, anyone can install their own cabinetry.
While we cannot provide the right materials, or the patience, we
can provide a list of the right tools.
Below is a list of the basic tools that you
should have in your cabinet, counters, and storage tool kit.
With these tools on hand, you should be able to accomplish just
about any cabinetry related task.
Backsaw
This is typically viewed as your traditional handsaw, and can be
used to help trim materials as needed. Ideally, this type of saw is used for any
delicate work that needs to be accomplished.
Utility Knife
Great general tool that can be used to cut any materials that may
be needed.
Clamp
Clamps are useful items when working on carpentry projects. These
tools can help hold things in place long enough for any adhesive that you may be
using to create a firm bond.
Saber Saw
A saber saw is a great power tool that you can use to help cut
through, and trim down a large variety of materials.
That being said, avoid using saber saws on any type of masonry, or
you could end up damaging the blade, unless you use a specialized blade for
cutting through stone.
Dead-blow Hammer
When installing any type of cabinetry, or countertop you want to be
careful in the final stages.
The best way that you can nudge things into place, without
accidentally damaging the materials themselves
!
Paint Brushes
Most cabinets and storage items will need to be painted when you
have finished installing them. The best way that you can do that is by using a
few paint brushes.
Framing Square
Framing squares are useful items when working with any type of wood
project. They can help you make certain that all corners are at the necessary 90
degrees, and that everything is nice and plumb.
Hole
Saw
Often times you will need to make a circular hole in a countertop,
or even in the back of a cabinet.
A hole saw can help you ensure that you can a perfectly round hold
cut into that material.
Best of all, these items work in conjunction with your
drill.
Plumb Bob
It can be difficult to figure out where the bottom part of a
counter should be in relation to the top cabinets. That is where a plumb bob can
come into play.
With a plumb bob, you can be guaranteed that you will have a
perfectly straight, and positioned base to any
cabinet.
Countersink
bit
A great tool that is used to enlarge the top part of any
hole.
Circular
Saw
A power tool that is used to cut, or rip, large sections of
materials. While it is more ideally suited to work with wood, there are other
types of blades that can be used on other
materials.
Safety Glasses
A necessary safety precaution that should always be employed when
working with power tools.
This item will help prevent any dust, dirt, or debris from flying
into your eyes and causing damage.
Tape Measure
You will need to know how long some items are before you begin
cutting, and that is where a tape measure will come into
play.
Belt
Sander
Once you have your materials assembled, you will need to do a
little bit of sanding. The best way to get this done is to use a belt
sander.
Pry
Bars
Often you will need to do a little bit of demolition work before
you can actually begin. When faced with something like that, pry bars are one of
the best tools that you can use to get the job
done.
Claw
Hammer
Whether you are doing demolition work, or nailing some things
together there couldn't be a better tool to use that a good old fashioned claw
hammer.
Router
Routers are great tools to use if you need to carve some grooves
into your materials, or even to do some
designs.
Drill
Drills are great multipurpose tools.
They can be used to help screw items together, or drill some guide
holes.
Nail Set
If you want to pre-mark some nail holes, or where you want to place
some screws then a nail set will help you out with
that.
Level
Before you finish your project, you will want to make sure that
everything is nice and level.
Ear
Protection
It can be pretty noisy working with power tools, and loud noises
can damage your ears.
Use some ear protection when working with things like a circular
saw, or power miter.
Pneumatic Power
Nailer
Unless you have the strength of Popeye, it can be pretty tiring to
drive nails repeatedly.
One way to cut down that stress, and to help the project move a
little faster is to use a pneumatic power
nailer.
Coping
Saw
Coping saws are useful for making extremely fine detail cuts on
your materials. Be careful when you do this though, since the blade is rather
fragile.
Chalk
Line
It can be a pain to hand draw a straight line, particularly over
large distances. Use a chalk line to help ensure that you have a straight
line.
Sawhorse
You never want to cut things on the ground.
Rather you should use a saw horse to place the materials on so that
you can begin cutting.
Stud
Finder
Unless you are going to be completely removing the wall, you will
need to find some studs to anchor the cabinets to. This is an easy job to do if
you have a stud finder on hand.
Cabinet
Template
It can be fairly difficult to figure out where you should put your
cabinet hardware. If you have a cabinet template then the job isn't difficult at
all.
Miter Box
A miter box is basically a box that will allow you to cut wood or
other materials at a variety of different angles.
In effect, it will help guide the saw to make the proper
cuts.
Combination
Square
Great for detailed work, a combination square will allow you to
make small lines and ensure that they are straight and level at the same
time.
Dust
Mask
It can be dusty work to get your cabinets, counters, or storage
items installed. Protect your lungs by using a dust
mask.
Compass
Before you can begin using a hole saw, you should always use a
compass to create the template for the hole you are
cutting.
Line
Level
A line level is a great tool to use to make sure that you have your
pre-drawn lines nice and level before you begin doing any major
construction.
Caulking
Gun
When installing things like countertops, you will also be
installing some sinks, or other plumbing.
Make sure that you protect everything by using a caulking gun to
administer the caulking.
In addition, you can also use a caulking gun to apply things like
construction adhesive.
Screwdrivers
It can be a little bit difficult to attach things like the hardware
for your cabinets if you don't use some screwdrivers.
Make sure that you have a complete set before you begin
working.
Power Mitersaw
Like the miter box, the power mitersaw will do the same thing.
The main difference is that this tool is a combination of both a
circular saw and a miter box.
There you
go...
You now have the perfect tool box
!
Mr.
Fix-It