

The Best Flowers to Grow in a Dry Climate
Dry soil can often be a problem for those who would like to grow some bulbs in their garden.
After all, while bulbs in general may not like soil that is overly wet, there is a few that don't do all that well in dry soil either.
If you find yourself faced with some dry soil you will need to choose the proper bulbs to grow in it. Here is a list of some of the best bulbs for dry soil that you could grow in your garden.
Tulips

The wonderful thing about tulips is that they will grow quite well in just about any kind of soil type.
That being said, if you are going to plant them in dry soil, you need to wait and plant the bulbs into the soil only after it has rained.
Make sure that the soil is weed and stone free, and has recently been aerated.
On the average, the hole that you will be planting needs to be big enough to fit all of the bulbs (no more than two or three) you are planting in one single group.
A good depth to plant the bulbs to is about twice the length of the bulb itself.
Alliums

These are a truly unique, and beautiful plant that can add a wonderful touch of the fantastic to your garden.
Due to its particular drought and dry condition hardiness, it should be noted that it needs a little extra protection during the winter months.
If the soil gets too much moisture it could lead to bulb rot, so be sure that you have it planted in an area that gets really good drainage.
Anemone

This is a beautiful and delicate looking plant that will bloom quite well in a well drained, lighter soil.
It does require that it be planted in either full or partial sun.
When in bloom they can range in color from white to purple, and work quite well as a cut flower.
Keep in mind that the petals will quickly fade (usually within a week) after having bloomed.
Blackberry Lily
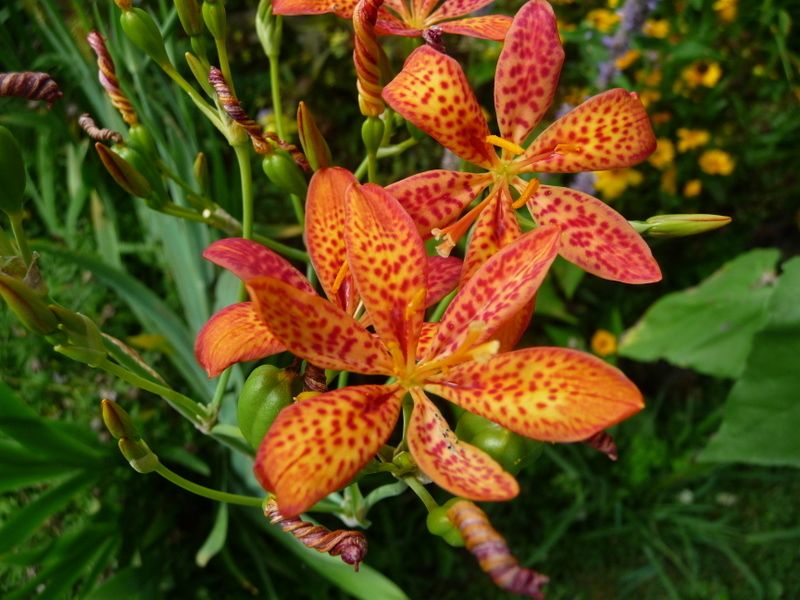
Not your traditional looking lily, it is more known for the clusters of black berries that form when the seeds are ready to open in the fall.
These particular types of lilies are really easy to care for during the summer time, and are extremely easy to grow.
Since these types of flowers are particularly easy to grow, often all you need to do is plant it and you can leave it alone.
Camassia

Camassia is a wonderfully resilient and beautiful bulb plant that can grow in a wide variety of soils.
While it is ideal for dry soil it can also tolerate wet soil.
Keep in mind that it can grow up to four feet tall, and will produce white or blue colored petals.
The Garden Wizard
_____________________
Make an Effective Weed Killer Without Harsh Chemicals

The weed killer that home gardening pros pick up at the store is definitely effective, sometimes even way too effective.
While it might be a quick way to kill weeds, often times it accidentally becomes a quick way to kill all of the flowers and plants around it as well.
Whether someone is sick of accidentally killing their plants, or they want a weed-killing alternative that does not involve all of those harsh chemicals, here is the perfect trick.
Make a homemade weed killer that works wonders by:
combining:
a gallon of white vinegar
a cup of salt
a tablespoon of dish soap

For best results, use the mixture when it is sunny.
_____________________
Salt Stains on Clay Pots...They-re Ugly !

To remove the salt deposits that form on clay pots, combine equal parts white vinegar, rubbing alcohol and water in a spray bottle.
Apply the mixture to the pot and scrub with a plastic brush.

Important: Let the pot dry before you plant anything in it.
https://www.youtube.com/watch?v=QrN0HZY1DTY
____________________
Thinking of Installing Synthetic Turf?
Here's How It's Made
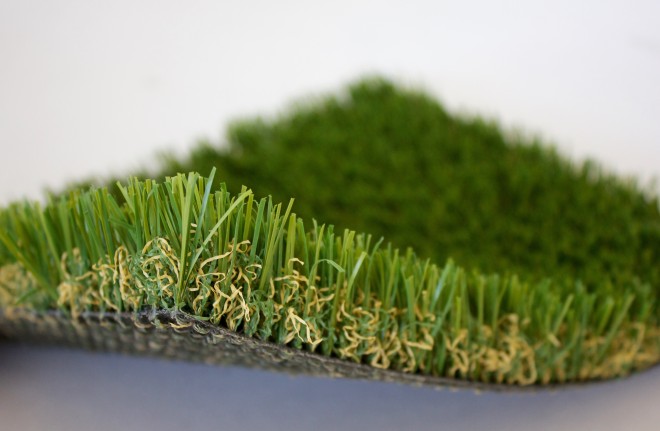
Synthetic turf, also known as “fake grass” was invented in the 1960’s in order to create a more ecological and easy to maintain lawns for those who want to conserve water or want to not have to perform the ongoing maintenance associated with upkeep of a traditional yard.
While there are many different uses for this
type of landscaping and as many motivations for its installation as
there are uses, the manufacturing process that results in the actual
carpeting of synthetic turf that is installed is an interesting
process that most people are completely unfamiliar with.
So how is synthetic turf made?
So how is synthetic turf made?
The
process begins with the combination of clear plastic pellets and
green colored plastic pellets.
The actual color of the final product will depend on the colors of the pellets that are chosen at the start of the process, and different colors are utilized in order to give a more natural appearance in different climates and parts of the country.
While the manufacturing process may have created a fake looking final product in the past, years of perfection of the process have resulted in artificial grass turf that looks and feels just like the real thing today.
These pellets are melted and put through an extruding process where they essentially flow through a metal plate that is punched with tiny holes, creating a plastic thread that is strengthened by stretching and running through cooling water.
These plastic threads are then combined with other types of thread in order to produce a tight weave strand that looks like long blades of grass wound around a large spool.
These
spools are transported to another part of the factory where synthetic
mesh backing of various types is placed into a “tufting” machine.
The plastic spools of green “yarn” feed into what looks like a gigantic sewing machine, where hundreds of stitches are made by pushing the thread through the backing material on one side while knives cut the thread loops on the other.
This produces the look of blades of grass that have been mowed.
After an inspection for evenness by an employee, the sheets of artificial turf are then moved to a portion of the factory where a large roller places an adhesive element onto the back of the mesh, in order to seal it and assure that no strands are loose and able to be removed.
The adhesive is then dried using a drier before it moves to a portion of the factory where hot pins poke holes into the material backing in order to assure proper drainage once installed. The turf is then fluffed by a machine that looks like football cleats rubbing the surface.
The
installation of artificial turf on a landscaping site involves the
installation of a weed barrier and a rubber underlay, which the turf
is then placed over and staked securely through and into the ground.
Sand and green granules may be spread through the installation in order to lift the blades of grass and fluff the final installation, however this is optional and depends on the actual installation goals.
Sand and green granules may be spread through the installation in order to lift the blades of grass and fluff the final installation, however this is optional and depends on the actual installation goals.
_______________________
The Six Inch Rule for Luscious Fruit Trees
If you have a fruit tree or are thinking of placing one on your property, here's a tip Master Gardeners suggest you strongly consider.
Have you heard of the "Rule of Six" when it comes to fruit trees?
Have you heard of the "Rule of Six" when it comes to fruit trees?
This is especially helpful for younger
trees on many levels.
But
first, before I dive into the “why,” let me tell you what it is.
It
is the basic rule of thumb regarding how to thin fruit trees.
Basically, only
have one piece of growing fruit every six inches on each branch. No
more. This is also called “thinning.”
Now
let’s talk about “why” you would want to thin out fruit
trees and why the six-inch rule.
Fruit is heavy.
If you don’t thin your tree, you
could damage or break branches off your tree…then what good would
it be?
If
you leave a lot of fruit in one small growing area, you will get a
lot of small, measly fruit.
If you thin your fruit, the result is
large, luscious, juicy fruit as the tree/branch was able to put
more of it’s productive energy into less fruit, rather than
dividing it’s resources.
A master gardener explained it like this:
“Do you want tiny fruit, with little flesh before reaching the
seed? Or would you rather a nice big round juicy fruit that has a
lot of flesh before reaching the seed?”
Next, thinning prevents "fruit drop" because it is not overbearing, particularly if it's a young tree.
If you don’t thin out your tree, your tree will do it itself by
early fruit drop.
The tree simply cannot handle it.
Fruit drop is
when under ripe, not-to-be-consumed fruits fall prematurely.
Last but not least, thinning helps with the life and health of your tree and future crops.
It
encourages a pattern of healthful growth and production each year!
In the case of a new tree, despite initially having only one-third of the fruit remaining due to the thinning, (which is still a lot for this
young tree), you will hopefully have nicer, big, juicy fruits
abounding and ripening.
Please
note, you don’t have to thin cherry and nut trees, but pretty much
every other fruit tree and the rule of six is a universal, in an easy rule to remember.
In speaking with several master gardeners,
this thinning process is a wise idea each and every year, regardless
of age.
It just makes for better tasting, large fruit!
___________________
Make a Bouquet of Flowers
Last longer by adding
a Cap full of Vodka
___________________________
Planting a New Tree
Hint: Little Trees Can become Big Trees

When planting trees, some don't think ahead of the size the trees will grow up to be.
If you are planting a small tree in your yard, it is very important to realize that the tree is going to get bigger. Depending on the type of tree that you have planted, it can get much bigger, sometimes up to thirty or forty feet tall.
Make sure that you put the small tree in a place where it will have plenty of room to grow, because if the tree gets too big in the wrong spot, you may have to cut down and remove the tree or risk damaging something even more valuable.
Something else you need to keep in mind is that tall trees require long roots.
If you have planted the tree too close to your foundation, the roots can grow their way into the foundation of your house and make your house unstable.
Roots this big also have a tendency to grow their way into water lines and sewage pipes. If roots get into these things, other disasters will ensue.
Nobody wants to deal with floods or toilets that will not flush; two common things to happen if the roots get where they should not be.
Another thing that you should keep in mind about large trees is that they take a lot of water from the ground.
If they are given enough clearance from your house, this should not be a problem, but if the tree is allowed to grow near your home, the roots can dry out the earth and cause subsidence.
Subsidence in the wrong place can lead to broken pavement and a crumbly foundation.
Many surveyors will recommend the removal of high trees near to your property and some insurance companies insist on being made aware of tall tress near your home.
These large trees can lower your property value and make your insurance rates go up.
So just be careful when you decide to plant a tree to plant trees that don't grow too large or to plant large trees far from your house.
_______________________
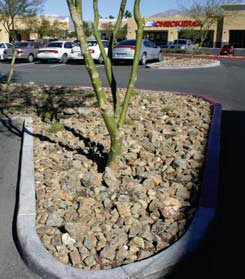
Using Boulders for Beauty

Boulders really do "rock", and winter is a great time to consider boulders for your landscaping beauty.
They bring so much to the landscape and don’t think they get nearly their rightful attention and due.

Granite boulders provide everything (color, shape and texture) for very little money and literally no maintenance once they’re placed.

A strong suggestion though is to go with granite rather than sandstone because sandstone breaks down over time and gets mineral stains pretty easily.
Here’s what you want to do if you find you’re into this whole garden design thing and you have a little time to kill.
Go to a nursery and look at the boulders.
Here a couple of places you might want to check:
GREEN VALLEY LOCATION
South Eastern & Pebble, just north of I-215
8725 S. Eastern Ave.
Las Vegas, NV 89123
(702) 329-9822
South Eastern & Pebble, just north of I-215
8725 S. Eastern Ave.
Las Vegas, NV 89123
(702) 329-9822
There's Parson's Rocks located at 710 W.Sunset Road #110 in Henderson.

There are some really gorgeous rocks out there. Some have cool markings or vibrant colors, some are smooth and some are all jagged, but there’s almost certainly something for everyone at the rock yard.
Now, whether you place the boulder or have somebody else do it, here the crucial part:
Find the ‘face’ of your boulder and make sure it’s turned to where you can see it.
The face is the prettiest side of the boulder, probably the reason that you chose it above all others, so let it shine.
Next you’ll want to bury your new rock into the soil a couple of inches. It doesn’t have to be perfectly even. In fact, it would probably look kind of weird if it was too level.
Your goal is too make it look like that boulder just landed there after a huge earthquake in the time of the dinosaurs and hasn’t budged since.
The Garden Wizard
_______________________
Las Vegas Fall Weather
The Best Time of Year to "Treat" Your Trees & Shrubs

It's fall, the weather will be rapidly changing, and it's the best time of the year to tend to your plants for the coming year.
Those first few days in the lower 90’s are sheer bliss. Then the nights start to cool down more and more, dropping into the 60’s before you know it.
October and November are nothing short of glorious, with crisp, brightly-lit days and evenings just brisk enough for a sweater.
Best of all, you get to rest well at night, smug in the knowledge that for the next few months, the national weather forecasts will predict bitter and unlivable cold for the rest of the world, while you might be sitting under a palm tree and laughing maniacally at your good fortune.
The thing is, it’s pretty darned sweet for your plants, too.
They may not be consciously aware of the fact that summer’s behind us and a mild winter is just around the corner, but there’s no question that the cooler temperatures are a whole lot easier on their systems.
And that’s just part of the reason that for many plants in the low desert, getting them in the ground in October or November is actually a much better option than planting in the springtime.
There are a couple of other very good reasons that some trees and shrubs prefer being planted in the fall.
First, their roots are about to become more active anyway.
Oftentimes, people think plants that lose their leaves in the wintertime look dead, but nothing could be further from the truth.
When they don’t need to expend energy producing leaves and flowers, deciduous trees and shrubs are putting their efforts into developing a nice, healthy root system.
Things may look quiet up top, but there’s a lot going on below the surface.
Getting them planted in the fall means that you’ll have a fairly well-established plant that’s ready to bush out nicely in the spring.
Second, fall planting will allow your new greenery to ease into the summer heat.
For many evergreen plants, our mild winters don’t present much of a challenge. What can be a bit of shock to their systems, however, is our intense summer heat, even for those trees and shrubs that can take a lot of sun once they’re established.
This means that if you’re planting in a spot that gets crazy hot in the summer months, it’s usually best to put your plants in around October, in order to allow them the chance to get settled in before shit starts to get real next June.
So...get going and make sure that next year will be healthy one the beauty that surrounds our homes.
____________________
The Difference Between Cacti and Succulents

Succulents are not cacti and vice versa.
"Cactus" denotes a botanical family.
"Succulent" is a looser term: A number of botanical families contain at least a few succulents.
All cacti are considered to be succulents. That is because succulents are the overarching category; cacti are a sub-group of that category.
This fact begs the question of why popular convention persists in using the somewhat misleading phrase "cacti and succulents," as if they were two different things altogether.
Differences Between Cacti and Succulents
Despite their close relationship, there are some important differences between cacti and succulents:
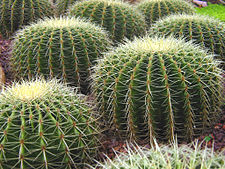
Cacti are distinguished from the rest of the succulents by the rounded indentations along their stems.
These are modified buds called "areoles."
From the areoles spring the spines (usually) for which cacti are best known.
Cactus plants generally have few or no leaves.
A wide variety of non-cactus succulents are native to different regions across the world. By contrast, almost all kinds of cacti are native only to the New World.
A lot of people who are new to the desert (and some who have lived in it their whole lives) assume that these plants are one in the same, but the fact of the matter is that there are a number of differences between the two.
One of the most important things you should know is that cacti can usually take considerably more sun than succulents.
Many succulents actually grow in tropical climates, where the sun is much less harsh than it is in the desert, so one hot afternoon exposed to the heat of the Mojave can easily burn their soft skin.
They also aren’t typically equipped to deal with our occasional below freezing temperatures, so you’ll want to plant them in a protected area or be prepared to throw some burlap or a blanket over them at night in the wintertime.
Some cacti will also need protection from the cold, something that comes as a surprise to a lot of new desert gardeners.
Examples of Succulents That Are Not Cacti
Angelina Stonecrop
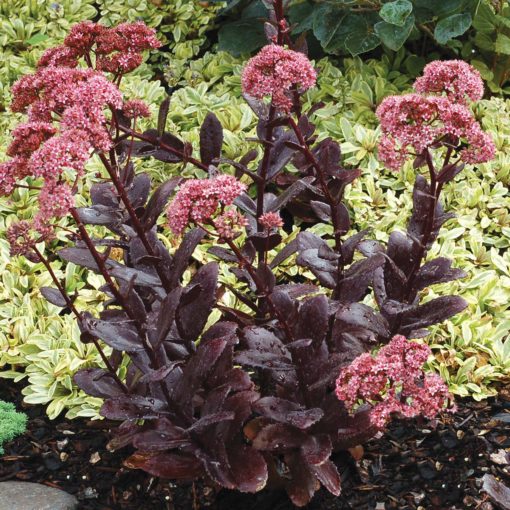
Purple Ice Plant

Hens & Chicks

Aloe Vera
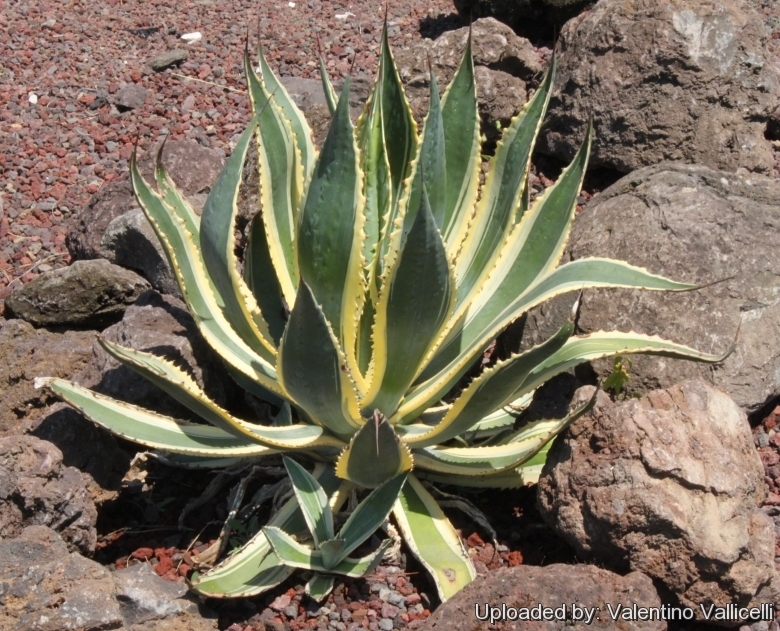
Agave

Moss Rose

Flaming Katy
Examples of Cacti
Before you plant, you should check the USDA Hardiness Zone to determine which would be appropriate.
This is the 2019 guide:

The hens and chicks succulent grows in USDA plant hardiness zones 3 to 11.
Among the cacti, prickly pear has hardiness bragging rights (zones 4 to 10).

Prickly pear grows in clumps reaching 6 to 14 inches tall, with a width of almost twice that. As it matures, it becomes more prostrate in its growth habit. It bears 2-to-3 inch yellow flowers.

The plant may begin blooming in either summer or late spring. The fruit from which the plant derives its name is also called a tuna (Spanish).
The flat, bluish-green vegetative parts are referred to as nopalitos or "pads."
The pads resemble nothing more so than a bunch of spiny beaver tails stuck together.
In fact, the Opuntia basilaris species is called the "Beavertail."

:max_bytes(150000):strip_icc()/GettyImages-529440608-5add6d1e3de4230037c6d021.jpg)
:max_bytes(150000):strip_icc()/ball-cactus--parodia--in-garden-927924804-5adfd2c6ae9ab800372c5fed.jpg)
Avoiding Bee & Wasp Stings

____________________________
Recognizing Common Garden Diseases

Common garden diseases are common for a reason. These diseases are the ones that can be found in most gardens at some point or another. Knowing what these diseases are will help you to prepare to combat them, as well as identify them when they do show up.
Here is a quick list of some of the more common garden disease, what they look like, and even a method of treating them.
Powdery Mildew
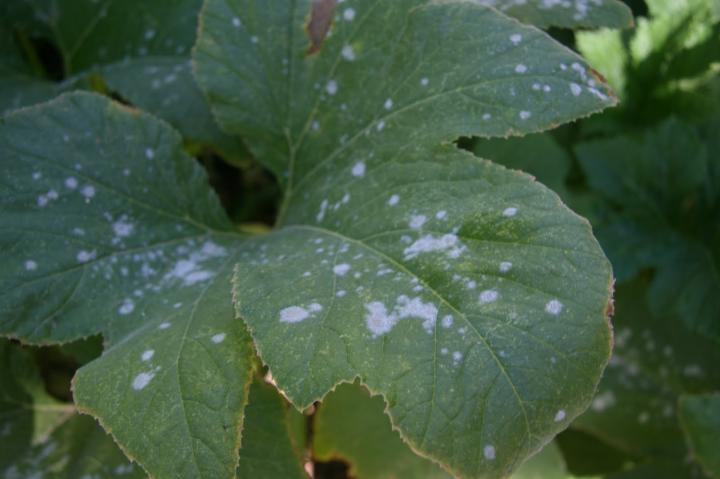
Powdery mildew is actually a type of fungus that can be found on almost all kinds of plants, such as trees, vegetables, flowers, and even fruits.
When it shows up this fungus will typically show up with, believe it or not, powdery white spots.
Since this is a fungus, using fungicide can usually treat it.
When it shows up this fungus will typically show up with, believe it or not, powdery white spots.
Since this is a fungus, using fungicide can usually treat it.
If you don't handle the problem you can easily find entire plants, or simply large sections of the plants, dying off.
Downey Mildew

Downy mildew is another fungus, this one is more often found on vine plants than other kinds.
That being said, it can still be found on most types of plants.
While this type of fungus is fairly similar to powdery mildew, it does have a different look since it will show up as a yellowish green color rather than white.
Treatment is pretty much the same.
Blossom End Rot
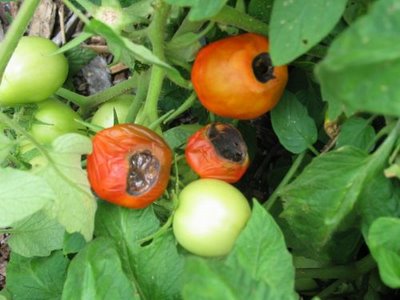
This particular garden disease is exceptionally common with fruits such as tomatoes.
When it appears, it generally shows up around the middle of summer and will have a reddish color.
As the disease progresses, the area that is afflicted will sink in, and eventually end up causing the fruit to fall off the vine.
The best way to deal with this problem is to add a bit of bone meal to the soil, and also applying a bit of fungicide (since the disease is a type of fungus).
Bacterial Blight

Bacterial blight is a disease that is fairly common east of the Rocky Mountains, though it can also be found west if the circumstances are right.
This particular disease commonly affects beans, and shows up as lesions or cuts that look like a burn.
If it is not treated when it first shows up, you can easily find your entire bean crop gone. This is another disease that can be easily treated with the help of fungicide.
While these may be some of the more common garden diseases, they are by no means the entire list. That list would be one that takes up a book.
One thing to keep in mind about garden diseases is that they tend to be more common in some areas than in others.
For regional help, it is always a good idea to talk to your local nursery for some advice.
_________________________
Ridding Yourself of Those Ugly Weeds
Gardening has many wonderful benefits: it can be very relaxing, fun, and you have a beautiful area to look at, or a nice place to grow fruits and vegetables.
Gardening, however, is a lot of work.
You are basically trying to get the earth what you want to do, rather than what it wants to do naturally.
Taming nature is always difficult, especially because of weeds.
A weed is really just any plant that you do not want to grow there, but typically they are fast growing and ugly.
Getting rid of weeds is never easy, but here are a few things that you can try.
The first thing that you need to decide is if you want something to grow where the weeds are growing. If you do not want anything to grow there, the weeds are much easier to handle.
Commercial herbicides such as RoundUp will certainly do the trick.

Commercial organic herbicides will also work, but they usually are not quite as effective at keeping the weeds down.
Many organic herbicides are made out of vinegar, so you can try making your own by mixing vinegar in with dish soap.

If you do not plan on growing anything in that area for a long time, use rock salt and spread it over the area.
You can also mix salt in with water and dish soap to get the same effect, but a little easier time applying it.
Once again, this will kill all plants in the area and leave it infertile for many years, so do not do it if you are planning to grow anything in that area.
If you want to grow things in the area with weeds, your task is much harder.
If you are growing fruits and vegetables, your main option will probably be to remove the weeds by hand.
This is certainly a lot of work, but you do not want to contaminate something that you are going to eat later.
If you have a flower garden, one popular solution is to lay newspapers around your flowers.
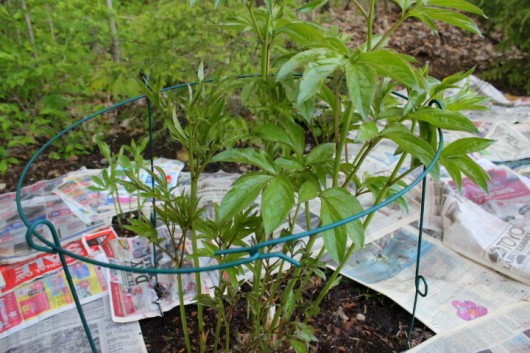
Cover the newspapers with mulch to keep the area looking good.

The weeds will not receive the sunlight they need to grow, but water will still soak through to your flowers.
You probably will want to soak the newspapers before you lay them down to keep them from flying away.
An alternative to this is to use a black plastic tarp and lay it down over the area, but poke holes for you plants to grow.
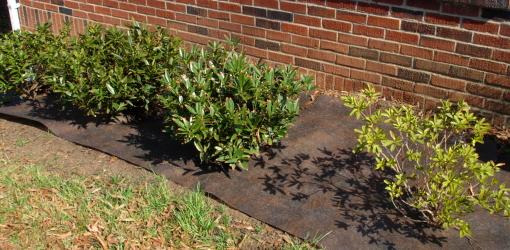
The heat from the sun on the tarp should kill any weeds.
The Garden Wizard
_____________________________
Got Bees ?
Bee
Safety Information
Warmer
weather and increased outdoor activity boosts the possibility of
people encountering bees in Southern Nevada.
Bees
tend to be most active from the spring to the fall, when they are
colonizing and looking to set up hives, according to the Nevada
Department of Agriculture.
A
swarm of bees is generally not harmful unless disturbed. They
are moving from place to place to colonize new hives.
Bee
hives can be dangerous and should be removed by a professional
exterminator using appropriate safety gear and clothing.
If
a hive is found on your private property, it is the
responsibility of the property owner to hire a pest control company
to exterminate the bees.
For
your safety, do not try to destroy a hive yourself.
The
Southern Nevada Pest Control Association keeps a list of licensed
removal services and can be contacted at (702) 385-5853 or via its
website at:
Bee
Safety Tips

1.
If you accidentally encounter bees, do not disturb them.
Remain calm and quietly move away until bees are out of sight.
Remain calm and quietly move away until bees are out of sight.
2.
If bees attack, run away in a straight line and take shelter inside a
car or building as soon as possible.
3.
If under attack, use your arms and hands or shirt to shield your face
and eyes from stings.
Bees
will attack the eyes, nose and mouth.
4.
Do not try to fight the bees.
They
have the advantage of numbers and gift of flight.
Do
not scream.
Do
not swat at bees or wave your arms.
The
more you flail your arms, the madder the bees will get.
5.
Do not jump into water or thick brush, which do not provide adequate
protection.
If
you jump into water, bees will attack you when you come up for air.
6.
After an attack, bees will continue to be agitated by loud or humming
noises such as barking dogs, lawnmowers, weed eaters and flashing
lights.
7.
If you are stung, remove the stinger by scraping it out and washing
the area with soap and water and applying a cold pack to the sting
site.
When
a bee stings, it leaves a stinger in the skin. This kills the bee so
it can’t sting again but the venom remains.
8.
If someone is stung by a bee and becomes dizzy, nauseated or has
difficulty breathing, an allergic reaction to the sting may be
occurring.
This
is a serious medical emergency and 9-1-1 should be called for
immediate medical treatment.
9.
If you are stung more than 10 times, you should seek medical
attention as a precaution. Reaction to bee venom takes several hours,
which may cause you to feel sick later.
Preventing
bee sting incidents

The
best way to avoid a stinging incident is to avoid bee colonies and
prevent them from establishing a hive in your yard.
Listen
for buzzing indicating a nest or swarm of bees.
1.
If you find a swarm or colony, leave it alone and keep your family
and pets away.
Contact
a professional pest control company to remove the bees.
2.
Check around your house and yard every four to six months for any
signs of bees taking up residence.
3.
Wear light-colored clothing when you are outdoors.
Dark
colors can attract bees.
4.
If you are sensitive to bee stings, check with your doctor about bee
sting kits and proper procedures, or if you start having a reaction
to stings such as difficulty breathing call 9-1-1.
5.
When you are outdoors, be aware of your surroundings and keep an eye
out for bees.
6. Don't
panic at the sight of a few bees foraging in the flowers.
Bees
are generally very docile as they go about their work.
Unless
you do something to irritate or threaten bees, they generally will
not bother you.
7.
When working or hiking outdoors, consider carrying a small hand
kerchief or mosquito net device that fits over the head and can be
carried in a pocket.
People
who have been attacked say the worst part is having the bees sting
your face and eyes. Any
impairment to your vision makes escape more difficult.
A
blanket, coat, towel or similar item placed over your head can give
you momentary relief as you run away as fast as possible.
_____________________
Sprinkle, Plant & Kill

The warm weather will sneak up on us this year after the unusual winter we've had, and before we know it, 80 degree temperatures will quickly turn to 90s and the 100s will be here before we know it.
Some dread a long, hot summer, but it presents a challenge to keep your plants and scrubs alive and well.
Here in Henderson we are experiencing steadily warming temperatures. No chance of a late frost.
Spring is decidedly here.
There are three landscaping activities you need to go to as the warm (hot) weather begins.
My suggestion:
Do this NOW.
Sprinkle, Plant and Kill.
Sprinkle

Sprinkle chelated iron onto the soil around the base of all your plants.
Not on the plant. Sprinkle the ground below.
Chelated iron is an orange-colored dust in a convenient shaker can.
The iron is slow release.
You won’t see an immediate “TAH DAH!!” response from your shrubs. The iron is formulated to release slowly .
The purpose of adding iron is to help support your landscape all through the spring and summer months ahead.
This is your spring dusting.
Another dose should be applied in autumn.
Plant

Plant your tomatoes.
Look for a variety that will produce in 90 days or less.
If your tomato plants go now, they should be ready to harvest in late June..
Expect only one harvest.
The weather gets too hot for a tomato plant to flourish further into the summer.
I consistently have folks who correct me and vouch that they have home-grown ‘maters in August.
Don’t count on it, though.
Successfully planting tomato plants in the desert requires some special handling.
Select "leggy" plants.
If the plant is 8 inches tall, it is perfect.
Strip all the leaves from the stem except two or three leaves at the very tip top of the plant.
Dig a deep hole and plant the roots with that long stem attached all the way down into the soil.
Just those tippy-top leaves should be exposed.
Everywhere a leaf was removed, the plant will send out a root.
That extra root system creates an awesome water and nutrient delivery system for your tomatoes.
Water your crop diligently in order to enjoy sweet, tender fruit.
Kill

Kill destructive insects.
If the bugs are already active, shoot them with an insecticide.
Douse the leaves, the stems, and the soil.
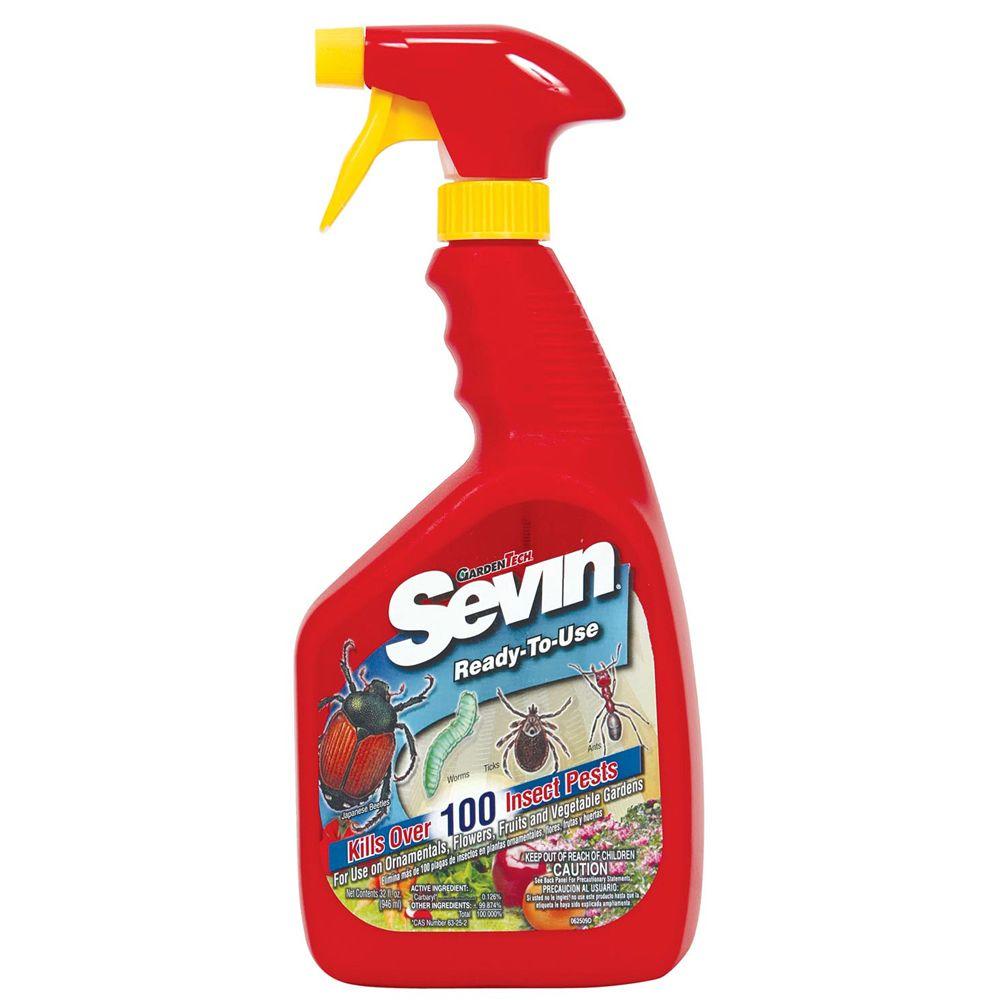
A suggestion is to use Sevin as a pre-emergence measure.
I had Black Widows spinning their webs in the courtyard a couple years ago.
That was disconcerting...
And to my wife, Creepy, too !
A dose of Sevin the next spring encouraged the "ladies" to relocate.
If you are wary of strong chemicals, then try this recipe for an eco-friendly pesticide.
In a spray bottle, mix together:
2 tbsp dish detergent
2 tbsp rubbing alcohol
water
Liberally spray the plants...both sides of the leaves…with the spray.
You can leave it on or wash it away with a good spray from the hose. Your choice. Reapply until the pest activity ceases.
DO NOT KILL BEES....they don't like to die...besides they help your garden !

Bees pollinate. They make those tomato plants you took care in planting, bear tomatoes.
If you locate a hive in your yard, call a bee removal company.
These companies are listed in the yellow pages between Bedspreads and Beer Dispensing.
Enjoy this glorious time of year.
Check out those sunsets.
Look up...and...Smile.
__________________________
6 Steps to Healthy Roses

With Spring not far away, it's time to start thinking about those roses that decorate much of our neighborhood landscaping.
Spring normally comes early here in the Southwest, so it makes sense to do a bit of work to make sure those beautiful " Acts of God" stay that way.
Keep these tips handy !
1. Fertilize

Fertilizing is really so simple but does so much:
Why?
Roses will reach their full size
Roses will produce more flowers
Plants will stay healthy
Plants will resist attacks from disease and pests
You should fertilize new plants about 4 weeks after planting.
Feed older roses in spring when new growth is 6inches in length.
Species roses, old roses and climbers need fertilizing in early spring as buds prepare to open. They will benefit from a second feeding after the first bloom.
2. Water

From early spring to fall water 1 to 2 inches per week all at one time.
Increase your watering to every 4-5 days in very hot and dry conditions.
Soak soil to 16 inches in depth.
3. Weed

Weed when weeds are small, this is so much easier plus they won’t have a chance to go to seed.
Mulch your roses to reduce weeds and retain moisture.
Do not mulch more than 2-4 inches deep.
Do not mound mulch around the base of your roses during the growing season. This encourages disease and pests.
4. Clean

Roses love care and attention. Keeping roses clean helps them to resist disease and insects.
After blooming remove spent flowers (deadhead) so plants will concentrate on making more blooms instead of seed.
Removing spent flowers also produces the second set of blooms faster and plants have stronger stems.
Cut blooms back to the closest 5 leaflets where the stem is thicker (about thickness of a pencil).
Remove twiggy growth to improve air circulation and prevent fungal disease.
Cut all weak growth back to the main stem.
Remove dead litter and leaves from the beds.
5. Protect from Pests & Disease

Use organic methods and products.
Select healthy strong varieties for this specific area.
Ensure at least 6 hours of sun daily, more is better.
Do not over crowd when planting.
Be observant while tending to your roses so you catch problems early before they get carried away.
6. Protect in Winter
Use hardy roses. Check your landscaper or local nursery for advise.
Use a rose cone to mound dirt or mulch around base, remove in spring and work back into the soil.
Climbers can be untied from support, tied together and wrapped in burlap.
Here's a summary.
.jpg)
___________________________
Cacti Should get No Water
from
November through March
from
November through March
Have you been watering your cactus plants this winter?
If so...
STOP
That’s right, you can go for five months without watering this plant.
There are a couple of reasons for letting cacti go dry during the winter months in Vegas and other mild winter areas.
Since a lot of them basically shut down during the colder seasons and take up very little or no water, if you keep putting water on their roots, you’re setting them up for rot.
If, on the other hand, we have a mild winter and a plant remains active, taking water up, its skin becomes plump with moisture.
Then, when we have our inevitable hard freeze in January or February, that internal water freezes and expands, often splitting the skin and damaging the plant beyond repair.
___________________________
Tea Anyone?
How to Grow Your Own !

Have you ever wondered where tea comes from, and if you would be able to grow some tea at home?
Believe it or not tea can be grown at home, just like any other plant. All that is really required is to learn a little bit about the basics before you begin.
Here are a few simple guidelines that are designed to help you begin growing tea at home.
1. Select the plants.
Probably the single biggest challenge to growing tea at home is choosing the tea to grow.
Tea comes from a surprisingly large number of sources. Some great examples that you can use to grow your own tea would be plants such as peppermint, lavender, lemon verbena, and marjoram.

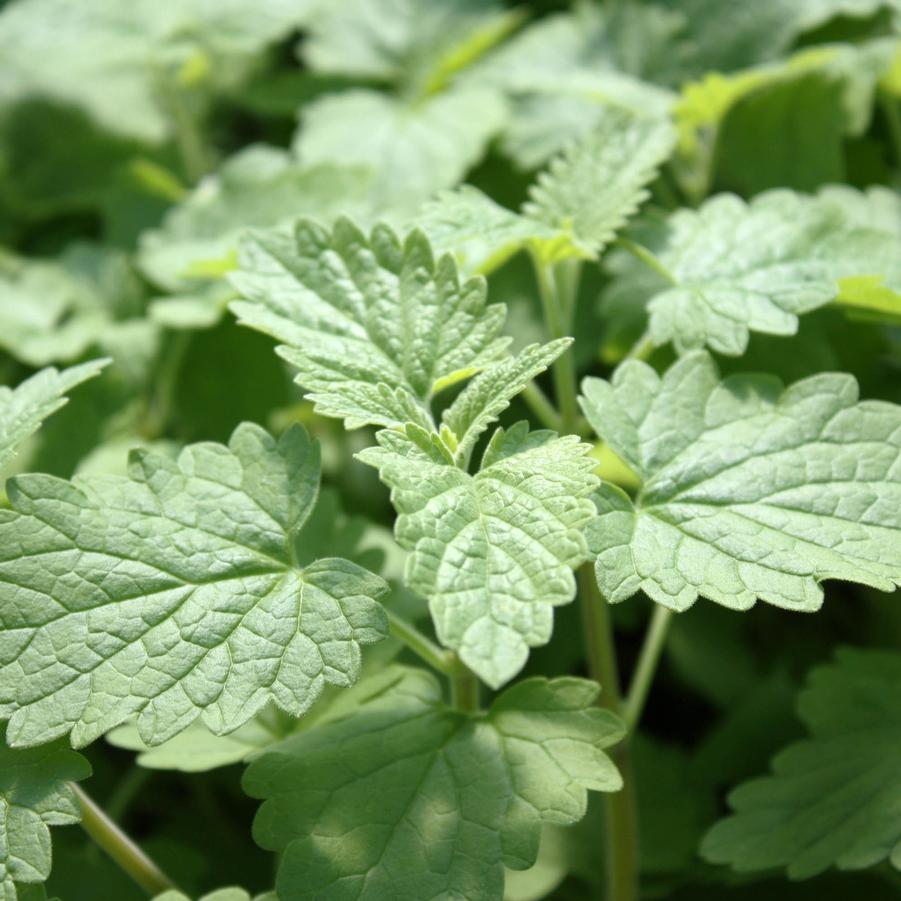
Mint plants
Lavender plant
Lemon Verbena plant
Margoram
All of these are fairly hearty plants which can grow in just about all growing zones.
If you want to grow other kinds of plants for tea, then be sure that you know the proper growing zones and their care before planting them.
2. Start the plants indoors.
When ever you begin growing some plants for tea, you should always start growing them indoors. This will allow you to take better care of them, while also giving them a greater chance at success.
If you will be transferring the plants outside, be sure that you begin the plants a minimum of six weeks prior to their ideal growing season.
This will allow the plant to get a really great start at life before having to face the harsh outdoors environment.
3. Select the location.
Whether you are growing your plants indoors or out, you will need to take some time to select the proper location.
Most plants require at least six hours of direct sunlight, so be sure to choose an area that will give that amount of sunlight.
In addition to this, you should also choose an area that will protect the plant to some extent. For example, if you growing the plants indoors, choose an area that will keep the plant out of direct traffic, but not some place which will allow you to forget about the plant.
4. Maintain the plants.
Once you have started the plant and placed it in its correct location, you will need to maintain it.
This means checking to ensure that weeds, bugs, illness, or some other problem isn't damaging the plant.
You should also be sure that you are feeding the plant properly, as well as watering it regularly.
This also applies if you are growing the plant indoors as well as outdoors.
and
If you still want to use traditional tea bags...don't throw them away !
_____________________
Make Your Own Insecticide
Insects are extremely difficult to deal with, since they are small and tenacious, and many love to eat your plants. It is extremely difficult to get rid of insects without using insecticides, but many insecticides can be hazardous to your plants' health or your own.
Depending on the types of insects you are dealing with, there are various ways to get rid of them.
One more way is found here. It is a natural, homemade insecticide that can kill insects but is not as harmful as using most manufactured insecticides.
If you want to make your own natural insecticide for both house and garden, all you need is two tablespoons of liquid soap and one quart of water.
Just mix the little bit of soap with the water.
You can try to sprinkle the mixture on the plants directly, but it will probably be easier to put the mixture in a spray bottle.
If you use the spray bottle, you should be sure to spray the plants evenly.
If you see any bugs, aim directly at the pests to get the best results.
Liquid soap with water should work well, but if you want to use something a little stronger, look to these great solutions.
For this natural-based alternative, all you will need is a couple of ingredients you can get at any grocery store.
The list of ingredients are as follows:
1 bulb of garlic
1 small onion
1 tablespoon cayenne (red) pepper
2 tablespoons liquid soap
1 quart water
All you need to do to make this environmentally friendly insecticide is first, finely chop the onion and the garlic, and then mix them with the tap water.
Add the cayenne pepper and, after letting the mixture sit for one hour, mix in the soap.
Finally, mix well.
When the foam subsides, strain the mixture into your spray bottle.
You can store the mixture for one to two weeks if you keep it refrigerated.
_________________________
It seems like no matter what some people do, they always end up killing their houseplants.
That is until some plants can be found that are willing to be very forgiving to those who don't exactly have a green thumb.
The following are those that seem to be the lowest maintenance houseplants around; in fact, some of these plants even act as if they thrive off of the lack of general care knowledge that many plants need.
Verbena

This wonderful plant can actually live at temperatures over 86 degrees Fahrenheit for long periods of time.
It will shed off old blooms naturally, so there is little need for picking or trimming.
This particular type of houseplant is also very forgiving in low water situations. That being said, you still need to make sure that the soil remains as damp as possible to ensure that it does the best it can.
New Guinea Impatiens

This particular type of impatiens is a very versatile plant. For example, this plant will continue to grow even if it only receives four to six hours of sun.
This means that it will grow on any side of the house, or even inside the home.
Pretty much as long as the plant is within spitting distance of a window it will be getting enough light to grow well.
Geranium
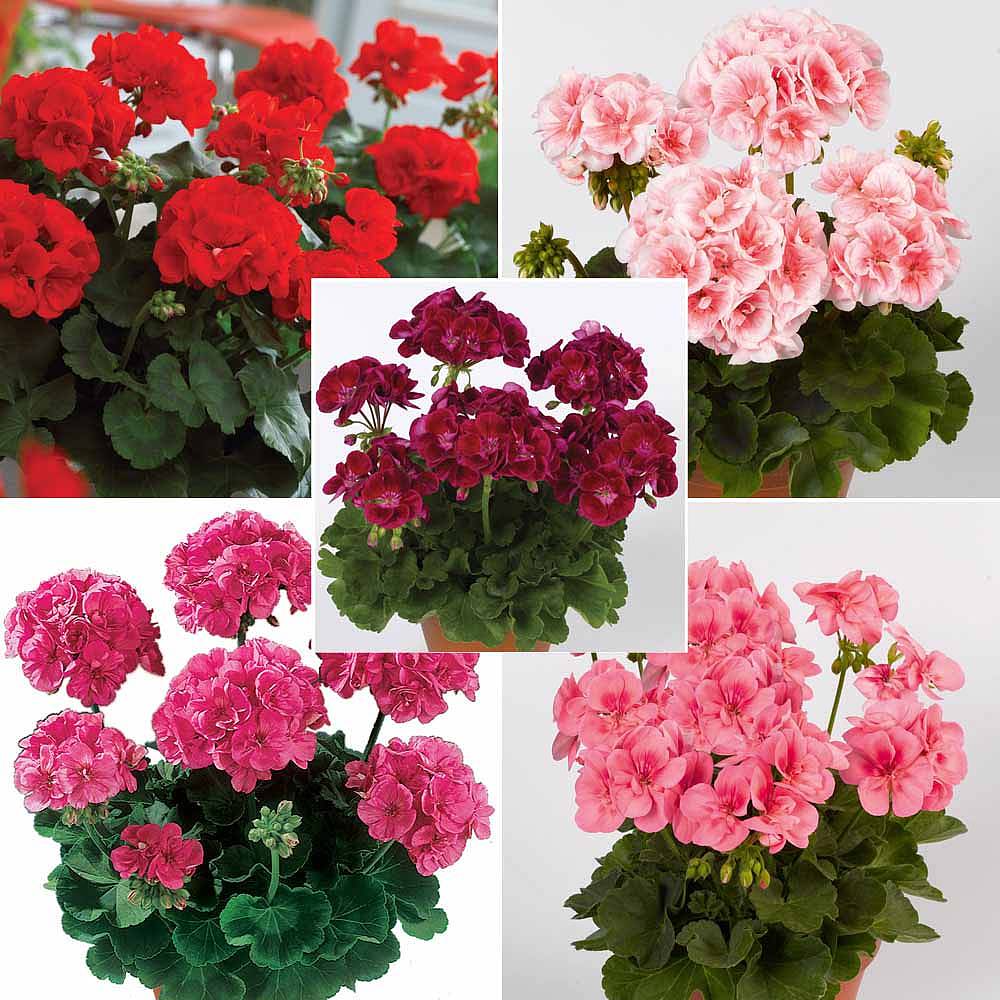
Probably one of the best possible flowers that you can have around the home, inside or out. This beautiful plant comes in dozens of different colors that are really easy to maintain.
When the colorful blooms begin to fade, all you need to do is snip off the fading blooms, which will then encourage the remaining flowers to bloom more.
Euphorbia
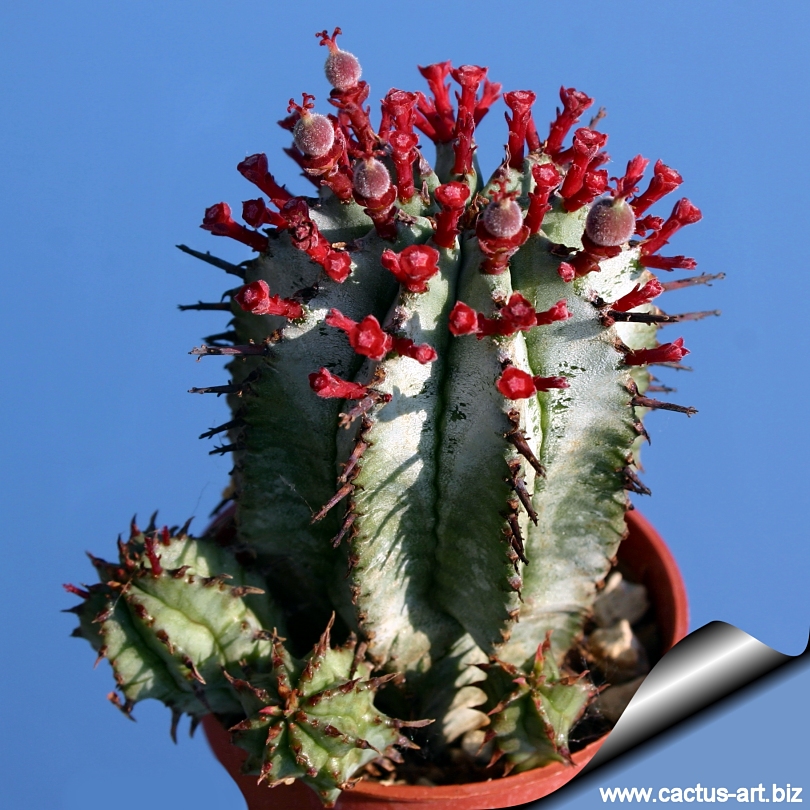
This is one of those wonderful drought resistant plants that has a wonderful green look with delicate looking blossoms.
Euphorbia requires very little care, and is another plant that can shed its own blossoms itself.
Another of the major benefits that this plant provides is that if you happen to have this plant outside it will be left alone by animals.
Sweet Potato Vine

One of the wonderful things about this plant is that it can be planted in anything from partial shade to full sun.
This means that you will have a wide variety of places in which you can place this wonderful ornamental plant.
This plant also grows quickly and will cascade beautifully over the edges of any pots that you plant it in.
Unlike most vines though, it will not grow along trellises or walls, and will continue to thrive even if the temperature stays above 86 degrees Fahrenheit for long periods of time.
_________________________
Shrubs & Security Go Hand in Hand
Shrubs can make a great decoration for your lawn, since they can add color and shape to something that is naturally flat and all one color of grassy green.
Although shrubs are generally a great item from a decoration point of view, they should not be grown everywhere.
One very important thing that you need to consider while you are taking care of this foliage is the home security of using shrubs.
Many people in the world today love their privacy. We go to great measures to insure that no one can see into our house, and sometimes even into our yard.
Unfortunately, these measures can sometimes allow burglars to have easy access to our homes.
Make sure that your shrubs do not create an easy hiding place for burglars, and you should also not have your shrubs covering up windows, since that makes an easy entrance for someone who wants to rob your home.
Another security issue you should consider with your shrubs is if they are blocking exterior lighting.
While good lighting does not guarantee that no one will break into your house, it does act as a deterrent, since your neighbors can easily see what is happening in your yard.
If your shrubs are covering up the lights, then burglars have a great place to sneak through.
Finally, there is one thing that shrubs can do to help your home security.
If you are trying to decide what kind of shrubs to plant, consider thorny shrubs.
Thick, thorny rose bushes act as a great deterrent for sneaking through, and using these bushes on your side could help keep at least part of your house safe.
________________________
Pruning Desert Shrubs in Southern Nevada-Type Climates
Pruning is an important part of landscape maintenance. Pruning may be straightforward and quite simple.
However, poor or incorrect pruning will often lead to serious problems, including premature death of the plant.
REASONS FOR PRUNING
Maintain height and width
Rejuvenate old shrubs
To Remove Damage from cold, heat, and unwanted sprouts.
To provide clearance for vehicles, pedestrians, and windows.
To promote new growth and better health, better flowering, and less yard waste.
To improve landscaping aesthetics.
GOOD PRUNING BEGINS WITH CORRECT PLANT SELECTION AND PLACEMENT
Pruning Desert Shrubs
Pruning shrubs begins long before the clippers are taken out.
It is important to choose the correct plant for the right place.
Never plant a shrub, cactus or ornamental grass that reaches heights above what is desired at mature height.
For example, if a 3-foot shrub is needed in front of a
window, don’t plant one that reaches a height of 15 or 20 feet.
window, don’t plant one that reaches a height of 15 or 20 feet.
If done on a regular basis, most desert plants only take a few minutes to prune.
Poor pruning of shrubs can cause many problems in the landscape.
Long-term pruning into balls and squares produces plants with very little green or live leaves on the outer extremities, while the interior consists mostly of dead leaves and twigs.
When shrubs are incorrectly pruned into balls and squares, live growth is left on the outer edges, and a barren interior is created.

This form of pruning also causes problems when drastic size reduction must be done.
It exposes the old woody interior, and in some cases the shrub does not rejuvenate.
It may take some time for this stark barren interior to be covered with new growth.
Over pruning also creates unnecessary yard waste.
New growth sprouts where the plant was cut.
If a shrub is cut at the same spot over and over again, a live exterior and leafless interior will result.
Correct pruning in a more natural manner is done by reaching into the plant’s interior and pruning off the longest branches to bring the overall plant down to the desired height.
New sprouts will form where the cuts are made.

Pruning into balls and squares can also cause poor plant health.
Leaves produce food for the plant through the process of photosynthesis.
The fewer leaves a plant has, the more it struggles to produce enough food to remain healthy.
This type of pruning also eliminates flower buds.
Many shrubs are planted for their beautiful flowers.
Frequent shearing of shrubs in geometric shapes removes the majority of the potential flowers.
Pruning shrubs into their natural, open shapes not only promotes health, but also produces a better display of flowers.
This is especially true for some desert shrubs such as Leucophyllum (Texas ranger), which has a tendency to spontaneously burst into bloom during rain or high humidity.
Constantly pruning tips of the branches removes most of the leaves and many of the flower buds.

When the correct plants are chosen and planted the proper distance apart, less pruning is required and plants can grow more naturally.
Many times, landscapers will plant closer than is necessary, not taking into account the plant’s mature size.

These shrubs are planted too close.
They will fill in quickly, but will need to be pruned often.
As they grow, half or more will need to be removed to make room.
This is done for many reasons.
More plants can be put, in which raises the price of the job, or an established look can be obtained more quickly.
More plants can be put, in which raises the price of the job, or an established look can be obtained more quickly.
If shrubs reach a mature width of 3 feet, they should be planted 1 ½ to 2 feet apart.
Many times plants that reach a mature width of 4 to 6 feet are planted 18 inches apart.
This may sell more plants and quickly give the impression of an established landscape, but over the long term, it becomes a pruning nightmare. In the end, the solution is to remove a portion of the plant material or redo the entire landscape.
Mulch with organic material and plant annuals until the
shrubs fill in.
shrubs fill in.
Open and natural pruning can take on a semi-formal effect as well as the more natural untamed look.

This Texas ranger produces more flowers than over pruned shrubs because it is pruned open, allowing more green leaves and flower buds to grow.
When the correct plants are chosen, pruning can be kept to a minimum.
These are three-year-old dwarf “Little Ollie” olive shrubs that have never been pruned , and fit nicely into their space.

The rosemary makes a beautiful single foundation plant over 10 feet wide.

It has never been pruned and has been growing in this bed for eight years.
Retrofitting of Old Plantings
This Texas ranger was hedged in a small planting bed for many years.

The solution chosen was to shear it back in width and height, exposing the dead interior.
This is the same hedge one year later. It's back to its original size, taking up too much room in the small planting bed.

On close examination, one would see that this shrub was trying to tell the gardener that it would resprout from its trunk.
The best solution for this plant would have been to prune it to the ground, leaving stumps only a few inches tall.
Many gardeners are afraid to prune plants back so severely.
Not all plants will resprout in the manner of this Texas
ranger.
ranger.
If in doubt, try pruning one inconspicuously planted shrub in the landscape and see if it resprouts. You have nothing to lose.
A shrub pruned to the ground will regrow faster than a newly planted shrub from a container because it already has an established root system, which facilitates faster growth.
Landscape plants such as Lantana should be pruned back to the ground once a year.
This should be done after all danger from frost has past, or the new growth may be killed.
These Lantana are pruned to the ground every year in the first part of March, after all danger of frost is past.
By June, they have almost covered the bed and are blooming.

By August, they are their original size, in full bloom, and have required no pruning during the growing season.

Larger-growing plants, such as this Cordia (Figures 24, 25 and 26), can grow too large for their planting space, so can be cut to the ground every two years.
This Cordia hedge is cut to the ground every two to three years.

Once or twice a year, it receives some selective maintenance pruning.

Choose plants so their natural beauty can be achieved with as little pruning as possible.
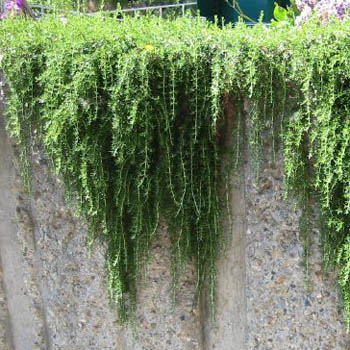
The cascading rosemary provides natural beauty with little or no pruning.
When shrubs are sheared into formal shapes, such as balls and squares, they develop an old woody center with dead leaves and twigs.
Such an interior is a potential fire hazard.
When exposedto fire, it can combust easily, damaging plants in the landscape and possibly nearby buildings.
The interior of this rosemary hedge was full of dead leaves and twigs, unseen before it caught on fire.
The fire burned hot enough to kill other nearby plants.

CONCLUSION
When creating a landscape, select shrubs that will fit the site when planted for years to come.
This limits the amount of pruning that will ultimately be necessary.
Avoid over watering or over fertilizing.
When pruning is unavoidable, use techniques that will maintain plant health.
Incorrect and over pruning makes more work for the gardener, produces unhealthy plants, fills our landfills, and costs more to maintain.
Now...enjoy those beautiful plants !
___________________________
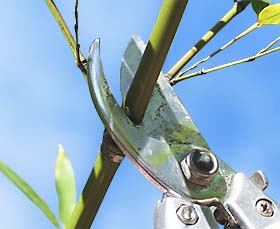
Correctly Pruning Branches & Bushes
When pruning bushes, remember what some arborists call the “4 Ds.”
Start with the dead and damaged branches, because they make the plant look bad, and encourage rot and disease.
Also, cut out wilted, dried or diseased branches as soon as you spot them, to remove disease before it spreads.
“Deranged” includes a broad range of branches that cross (the rubbing wears away the bark), loop down to the ground or simply look out of character with the bush (stick out at an odd angle or grow alongside the trunk).
This pruning also thins out the bush, opening its interior to more light and air, which encourages fuller, healthier growth.
Here are some tips on pruning.
1. Always prune just above a node, the place where a leaf joins a stem.
The node is where dormant buds are located.
:fill(transparent,1)/heading-cut-Sky-Pencil-big-573c84ce3df78c6bb00f15e9.jpg)
These will grow out into new stems.
If you prune just below a node or in between two nodes, you leave a stub.
Never leave a stub.
The section of stem between two nodes, the internode, cannot grow new stems.
All it can do is sit there, become infected, and rot.
A stub is an open invitation to diseases that can kill your plant.
2. Prune to nodes with buds that face away from the center of the plant, and in the direction you want them to grow.
New branches that grow from these buds will grow in the direction the bud is pointing.
If you prune properly new growth develops away from the center of the plant, leaving the center open to air and light. This helps to avoid diseases and pests.
3. Never cut a branch off flush with the trunk or stem.
The place where a branch joins the main trunk or larger branch is usually slightly swollen and is called a collar.

The collar is special tissue that can quickly grow over and seal the wound when you prune off the branch.
Always protect the collar.
4. If you cut any plant for any reason, sterilize your tools before you use them on another plant.
____________________________
Roses...Care for Them
and
They'll be Back Each Year
and
They'll be Back Each Year

MONTHLY CARE OF ROSES
JANUARY
Plant bare root roses this month, but no later than mid February.
Plant container roses anytime except during the heat of summer.
Strip off old leaves from canes prior to pruning to force the bush into dormancy.
Prune roses before they leaf out.
Remove debris from the area and spray with a dormant oil mixed with a pesticide to control over wintering pests on bushes and soil.
FEBRUARY
In mid-February, fertilize roses with a balanced fertilizer.
Add a cup of sulfur, 1/4 cup of magnesium sulfate (Epson salts) and one-half cup of super phosphate to each established rose to stimulate new cane growth and improve bloom quality.
Always water bushes thoroughly before and after fertilizing.
Apply a 3-inch layer of mulch to the rose bed after applying the fertilizer.
MARCH, APRIL, & MAY
Continue to fertilize roses monthly with a balanced rose fertilizer.
Apply iron chelates as needed to correct iron deficiency.
For higher quality blooms, foliar feed with a soluble
fertilizer in early April.
For larger blooms, remove secondary buds below the lead bud on hybrid teas.
For a more uniform bouquet of flowers, on florabunda remove the large center blooms.
Water early in the morning to minimize mildew. If possible, avoid wetting the foliage - use drip or soaker irrigation.
Use a recommended fungicide if the mildew becomes a problem.
Control aphids and thrips with a recommended insecticide.
The big rose display occurs from mid-April through May.
For fresh roses, cut back to where a cane is strong
enough (thickness of a pencil) to support a new
bloom.
Cut just above an outside leaf (five leaflets.)
JUNE, JULY, & AUGUST
Fertilize roses at one half the normal rate.
Yellow leaves indicate iron deficiency - treat with iron chelates.
In June, apply one fourth cup of magnesium sulfate (Epsom salt.)
Apply one cup again at the end of August.
Water deeply once a week or more often if necessary.
Remove faded roses after bloom.
Apply three to four inches of mulch to the rose beds and sprinkle a light application of nitrogen over the covering to hasten decomposition.
Roses produced during the summer are usually half the size of spring and fall roses.
Treat powdery mildew and insect-infested roses with the proper sprays.
Beginning in late August, remove all weak and undesirable canes to the crown or base of the rose.
Reduce the bush’s top growth by one third to stimulate the fall flush of growth.
SEPTEMBER
Return to normal amounts of fertilizer.
Also include one cup soil sulfur and one-half cup
superphosphate per plant.
For higher quality blooms, apply a soluble fertilizer to the foliage every two weeks until buds show color.
Spray to control any insects and diseases.
OCTOBER
With cooler weather and shorter days, lengthen the intervals between irrigations, but do not let the root zone dry out.
Fertilize with a balanced rose fertilizer and one cup of sulfur to spur on blooms before Columbus Day.
The fall bloom cycle begins at the end of the month and continues into December.
Foliar fertilize until buds show color.
Disbud hybrid teas leaving the terminal buds for higher quality blooms.
Remove suckers that rise below the bud union or graft near the soil line.
Cut off spent blooms to stimulate flowering.
NOVEMBER & DECEMBER
Irrigate every two weeks if needed.
This is an excellent time to prepare new rose beds.
Evaluate the roses and discard those that did not perform well to make room for newer varieties.
Have the soil tested if there is a suspected problem or roses have performed poorly.
DO NOT FERTILIZE ROSES IN NOVEMBER, DECEMBER, AND JANUARY.
___________________________
Keeping Your Potted Plants Alive in Winter

Potted plants are a wonderful way to help decorate both the interior and exterior of the home; however, if you have any potted plants then you know just how vulnerable they are to cold weather, and just what kind of damage they can experience.
Protecting potted plants from cold weather isn't all that difficult as long as you are willing to not only keep a few things in mind, but also put forth a little bit of effort.
Here as some helpful ideas.
1. Cover them up.
At the first hint of cold weather, usually accompanied by a frost advisory, cover up your potted plants.
For smaller potted plants this is a really simple craft project. Simply cut off the top of a plastic two liter bottle, take off the cap, and place it over the plants. In effect, this will turn the small potted plants into a terrarium.
For larger potted plants, such as small shrubs, you can simply wrap some blankets, flannel, or even burlap around the pots. This will help protect the roots from the cold and keep things a little warmer.
2. Bring them inside.
Bringing potted plants inside is one of the simplest ways of protecting potted plants from cold weather. This method usually will require a little bit of effort on your part though. The reason for this is that you will want to place something down on the floors, counters, or tables that you are going to store the plants.
Remember that these pots can be a become a bit dirty and grimy if they are stored outside for a majority of the year.
3. Mulch can be a huge help.
There are some potted plants that are simply too big to be able to move easily, and that means that you will not be able to move them indoors.
For cases like this you will want to apply some mulching over the top of the soil in the pots.
In addition, you can also apply a few burlap sacks, blankets, or other types of fabric around the pots to help keep them warm.
If you have the funds available, you can also purchase some heating elements from your local department store or nursery that you can use to help keep the soil warm.
_______________________________
Potted plants are a wonderful way to help decorate both the interior and exterior of the home; however, if you have any potted plants then you know just how vulnerable they are to cold weather, and just what kind of damage they can experience.
Protecting potted plants from cold weather isn't all that difficult as long as you are willing to not only keep a few things in mind, but also put forth a little bit of effort.
Here as some helpful ideas.
At the first hint of cold weather, usually accompanied by a frost advisory, cover up your potted plants.
For smaller potted plants this is a really simple craft project. Simply cut off the top of a plastic two liter bottle, take off the cap, and place it over the plants. In effect, this will turn the small potted plants into a terrarium.
For larger potted plants, such as small shrubs, you can simply wrap some blankets, flannel, or even burlap around the pots. This will help protect the roots from the cold and keep things a little warmer.
Bringing potted plants inside is one of the simplest ways of protecting potted plants from cold weather. This method usually will require a little bit of effort on your part though. The reason for this is that you will want to place something down on the floors, counters, or tables that you are going to store the plants.
Remember that these pots can be a become a bit dirty and grimy if they are stored outside for a majority of the year.
Remember that these pots can be a become a bit dirty and grimy if they are stored outside for a majority of the year.
There are some potted plants that are simply too big to be able to move easily, and that means that you will not be able to move them indoors.
For cases like this you will want to apply some mulching over the top of the soil in the pots.
In addition, you can also apply a few burlap sacks, blankets, or other types of fabric around the pots to help keep them warm.
If you have the funds available, you can also purchase some heating elements from your local department store or nursery that you can use to help keep the soil warm.
_______________________________
The Southern Nevada Water
Authority says...now is the time for "enriching" some of your
landscaping...
The Southern Nevada Water
Authority says...now is the time for "enriching" some of your
landscaping...
Spring Landscape Tips
Plant water-efficient
perennials that will provide explosions of color in the
spring.
If you haven't
already done so, NOW IS THE TIME to consider planting water-efficient
perennials that will provide explosions of early spring
color.
During March and April,
landscape irrigation is limited to three assigned days per
week.
Watering
restrictions also apply
to drip
irrigation.
Sunday is not an optional watering
day.
Make sure you
know your watering
group.
Don't forget to set your irrigation clock ahead an hour now that daylight saving time began on the second Sunday in March.

This also is a great time to check your clock's
batteries.
This also is a great time to check your clock's
batteries.
Check Your System
-
Inspect filter screens for damage. Clean the filter
screens by opening the end of the filter and running water through briefly. Soak
the screens in a 50/50 water and vinegar solution if there is mineral
buildup.
-
Flush the irrigation lines. Find the end cap and briefly
run the system to flush out debris.
-
Check valve boxes for debris buildup or muddy
conditions indicating poor
drainage.
-
Inspect filter screens for damage. Clean the filter screens by opening the end of the filter and running water through briefly. Soak the screens in a 50/50 water and vinegar solution if there is mineral buildup.
-
Flush the irrigation lines. Find the end cap and briefly run the system to flush out debris.
-
Check valve boxes for debris buildup or muddy conditions indicating poor drainage.
Selecting Plants for Spring
Spring is a fine
time to explore what plants work best in your
yard.
First, assess
the function of the area(s) you plan to plant.
Are they used
for recreation, shade, border or entry areas or purely for
decoration?
How much sun,
shade and wind do these areas receive?
Keep in mind the
size your new plants will grow to when mature to avoid placing them too close
together.
Also, group
plants with similar water needs together in your design to make your water use
more efficient and effective for plant health.
Use the Southern
Nevada Water Association Plant Search
tool to help you find the perfect plants
for your yard and create a list of plants you can take to the local nursery on
your next visit.
Choose Desert-Hearty Plants
Select plants
that do well in our desert climate.
Although
nurseries offer a wide variety of plants, you'll have the greatest long-term
success by focusing on hardy, low-water-use
plants.
Select plants
that do well in our desert climate.
Although
nurseries offer a wide variety of plants, you'll have the greatest long-term
success by focusing on hardy, low-water-use
plants.
Some Recommendations
Try some of
these shrubs, trees and plants:
Valentine
Bush

Masses of tubular
red flowers begin blooming in early February and continue into
March.
They like full sun.
Cassia

This shrub's
bright yellow blooms appear from January through March and sporadically the rest
of the year.
Rosemary

A good
companion plant for the cassia, rosemary blooms during the same
periods.
Spanish
Lavender

Expect blue
spikes of color in spring and fall.
Autumn
Sage

Don't let the
name fool you. This hummingbird favorite blooms all year, but most profusely
from October through April.
Sweet
Acacia

Puffy
yellowish-orange flowers perfume the air from February through
April.
Palo
Verde

Count on a
shower of golden-yellow blooms beginning in
March.
Desert
Willow

Native to local
washes, this tree is beloved by hummingbirds and bees and produces clusters of
fragrant orchid-like blossoms, ranging from white to deep
purple.
Texas Mountain
Laurel

This tree's
large purple clusters of wisteria-like flowers looks as good as they
smell.
Chaste
Tree

Long, narrow
spikes of purple flowers cover this shrub-like tree in early
summer.
Try some of
these shrubs, trees and plants:
Valentine
Bush

Masses of tubular
red flowers begin blooming in early February and continue into
March.
They like full sun.
Cassia

This shrub's
bright yellow blooms appear from January through March and sporadically the rest
of the year.
Rosemary

A good
companion plant for the cassia, rosemary blooms during the same
periods.
Spanish Lavender

Expect blue
spikes of color in spring and fall.
Autumn Sage

Don't let the
name fool you. This hummingbird favorite blooms all year, but most profusely
from October through April.
Sweet Acacia

Puffy
yellowish-orange flowers perfume the air from February through
April.
Palo
Verde

Count on a
shower of golden-yellow blooms beginning in
March.
Desert Willow

Native to local
washes, this tree is beloved by hummingbirds and bees and produces clusters of
fragrant orchid-like blossoms, ranging from white to deep
purple.
Texas Mountain
Laurel

This tree's
large purple clusters of wisteria-like flowers looks as good as they
smell.
Chaste Tree

Long, narrow
spikes of purple flowers cover this shrub-like tree in early
summer.
Trees
When buying a
container-grown tree, look for a firm, straight trunk, good
symmetry of branches and foliage free of browning or
disease.
Check the roots:
the soil mix should stay in contact with the roots.
Never buy a container-grown tree with tightly congested roots or
one with thick roots poking through the drainage
holes.
Plenty of small,
fine-white, moist roots that are evenly spread out suggest a healthy
tree.
The
Garden Wizard
_____________________________
Wow beautiful and creative blog it is. This Fall Watering Restrictions blog give many informative ideas.
ReplyDeleteRail Inspection Systems