
Tips...Archives...Page Two


If you like those special trinkets you've accumulated over the years, make sure you...
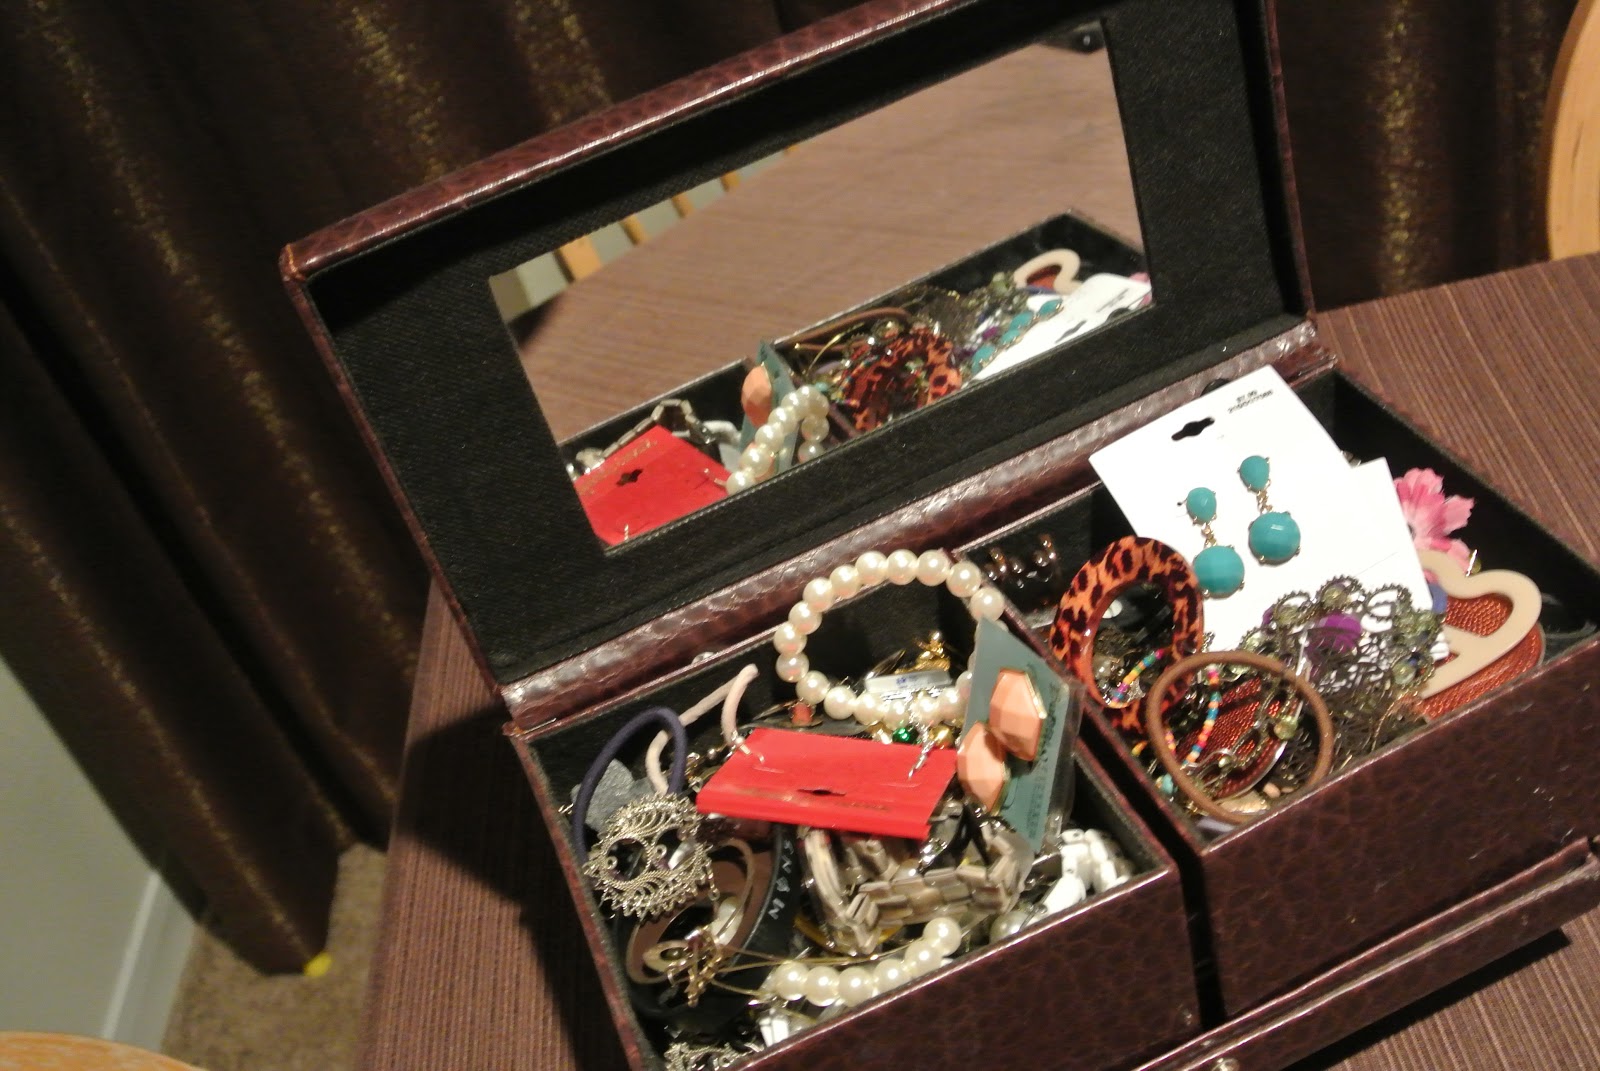
Clean your Jewelry Box
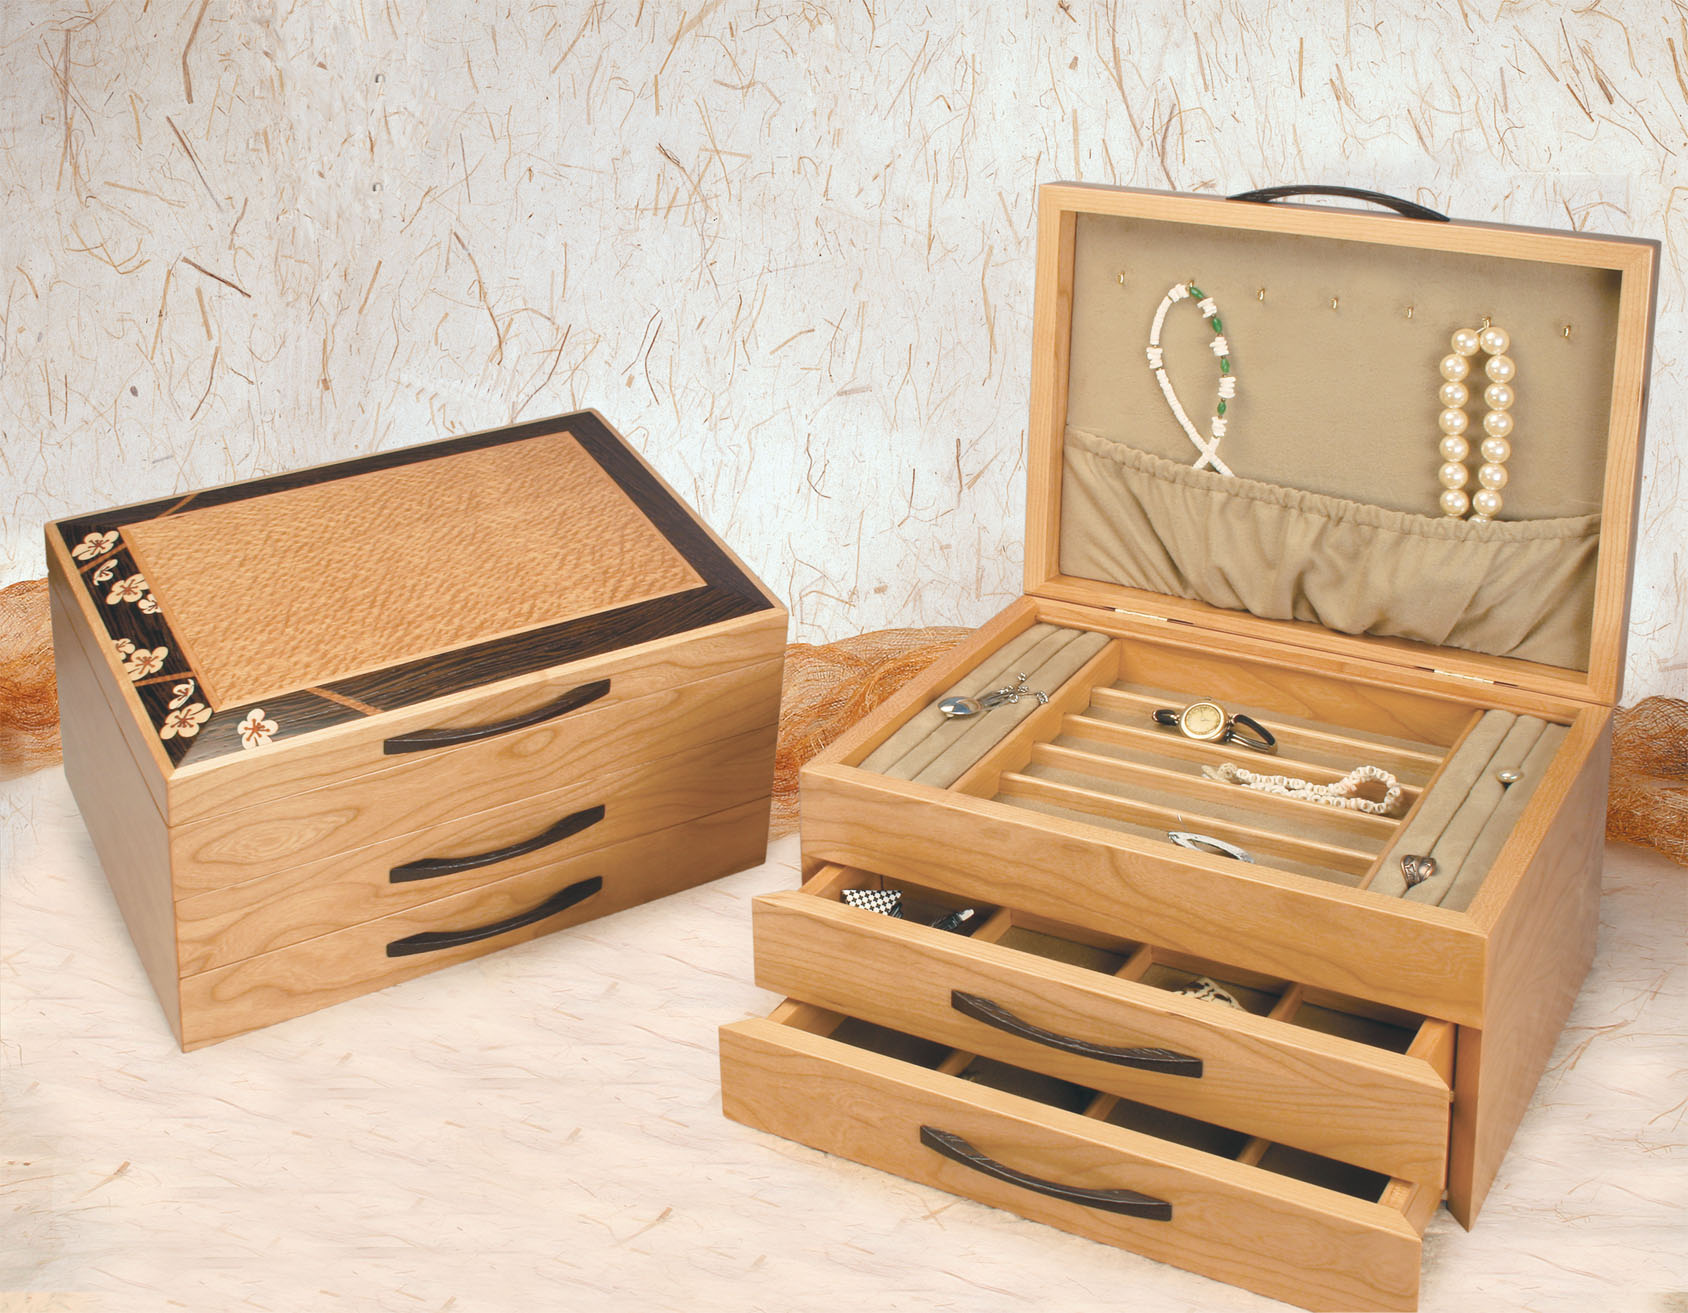
A jewelry box is a great way to store and organize your jewelry, and is a lot better than a shoe box or drawer that you just dump your trinkets in.
A jewelry box allows you to carefully hang and arrange your jewelry pieces and protect them from tangles and other damage.
Over time, your jewelry box might be used often and could become dirty.
Keeping the jewelry box clean on the inside is important for the safety of your jewelry, and making sure the outside stays clean will ensure that it remains beautiful and looks great for many years.
Does yours look like this?
Then read on !
If you have a jewelry box that could use a cleaning, think about these steps before starting the job:
1. First, assess what will need to be cleaned.
Is the box dusty?
What is the condition of the wood?
Is there glass on the box that will need cleaning?
2. Remove all jewelry and put it in a safe place.
You don't want to leave anything inside the box. Otherwise, cleaning products could harm the jewelry, and you won't be able to do a thorough cleaning job with the jewelry in the way.
3. If the jewelry box has a special cushioned compartment for rings, you'll want to get the dirt out of the grooves where the rings are placed.
Get in there with a cotton swab and sweep out any loose dirt.
If there is any dirt on the fabric, wipe it with a damp cloth.
4. Remove lose dirt from all areas and compartments.
Use a cotton swab (perhaps one that has been dampened) and get dirt and dust out of the corners. You can also use a damp cloth to pick up dirt. It may also help to use compressed air on hard-to-reach areas, or try carefully vacuuming with a small vacuum attachment.
5. Many jewelry boxes are made of wood.
To clean it effectively, start with a damp cloth and wipe all over the exterior, picking up dust and dirt, then dry off with a dry cloth.
Another option is to use a dusting product like Endust ...
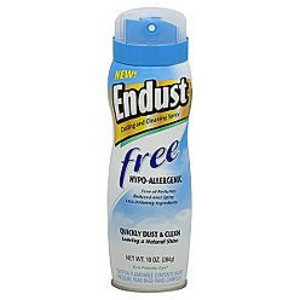
...to pick up dust and loose dirt.
To do this, spray a little of the product on a rag and wipe all over the surface.
6. Often, a jewelry box will have glass on the door or other parts, or perhaps a mirror.
The best cleaning method for this glass is a window cleaner like Windex...
..or a vinegar solution.
Spray carefully onto the glass (or first onto a paper towel) and wipe.
7. Once every part of the jewelry box has been cleaned, replace the jewelry.
Jewelry boxes are useful and beautiful, and when properly cleaned they can keep looking great for years and will effectively protect your jewelry.
Need a new jewelry box? Here's a list of the Top 10 !
________________________
Does Your Flatware Drawer
Look Like This?
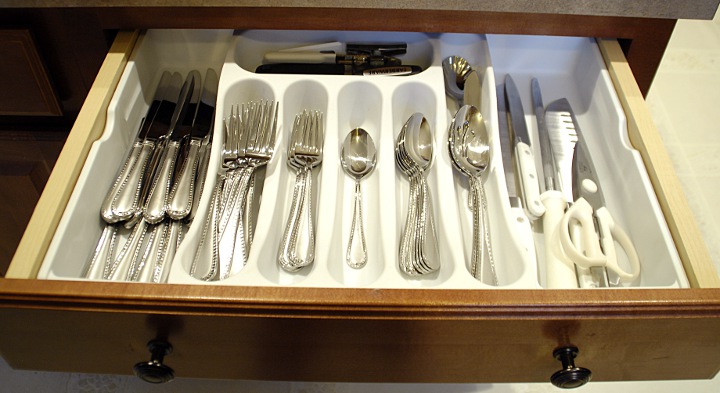
If not....
...when was the last time you cleaned out your flatware drawer?
If yours looks anything to the contrary, there are crumbs and junk at the bottom. You probably have several different styles of flatware that don't fit together. Maybe there's stuff in the drawer that shouldn't be there. Since you use this drawer several times every day, it's important that you find what you need quickly.
To organize your flatware, you'll need a tray with wells or a collection of little bins.
Select something that will fit the shape of your drawer.
Decide how many different compartments you need. Some people only need 3:
...for knives, forks, and spoons.
You may want to divide things further, though: steak knives, soup spoons, baby spoons, chopsticks, different sized utensils, etc.
Once you've found something that has enough compartments and fits your drawer, wash it out with hot, soapy water and let it dry.
Take everything out of the drawer.
Dump the crumbs out over a trash can and wipe the drawer clean.
Fit the tray or compartments into the drawer. If there's extra room in the back of your drawer, roll up a towel and tuck it in to the space to keep the tray from sliding back whenever you close the drawer.
Now it's time to go through the drawer's contents.
You probably have more pieces of flatware than you actually use. I'd recommend keeping just one style of flatware so that it stacks neatly.
Either donate the superfluous pieces or put them somewhere else in case you need them later.
Put measuring spoons and cups in a different place, unless your drawer is large and you have extra compartments for these items.
Don't try to put too many things into this drawer. Saving space is not the important thing; we're going for convenience and organization.
Sanitize the flatware you've chosen to keep, either in hot soapy water or the dishwasher.
When it's dry, put it neatly in the drawer, dividing everything into the proper compartments.
One thing that seems to make this process go quicker is organizing the dirty flatware as it's being loaded into the dishwasher.
Put all the spoons together into one compartment, the forks together, the butter knives, and so on. Then when unloading the dishwasher, it's as easy as grabbing the whole bunch from each compartment and placing it in the drawer.
This also minimizes the handling of clean utensils, which keeps them sanitary.
Some videos for help?
___________________________
Decorating Motif Options

There are as many different methods and styles for decorating a home as there are people in the world.
Different people have different tastes.
What one person finds attractive, another person is going to find absolutely repulsive.
The only person who counts is you in your decorating endeavors.
The best way to succeed is to explore all your options.
Below is a brief description of some different styles for decorating your home.
Cottage

Some would say that this particular style isn't so much a style as a way of life. The reason for this is that this style is actually more a frame of mind.
Since cottages are usually decorated using old, secondhand hand-me downs with no real rules other than consistency.
Be consistent in what you use and how you use it.
When getting the furniture and decorations the primary thing that you are going to want to think about is comfort.
If it is comfortable to you, then go ahead and use it.
Southwest

Surprisingly, southwestern style is another of those design styles that depends so largely on a frame of mind.
When decorating in this style, use things that evoke a feeling of the majesty and splendor that are found in the mesas, plateaus, and deserts of the American Southwest.
Use earthy colors and tones, while sticking to natural materials in the construction of furniture, though a great way to provide accents and highlights is through the use of ironwork.
Country
Country style is, believe it or not, based off of multicultural influences from throughout the world.
When the word "country" is used, most people think of farms.
So, when you are decorating, use things that evoke a feeling of being in a farm setting.
When doing this be consistent in your use of color and to not be afraid of using bright and vibrant colors.
Heartland

The heartland style is very similar in nature to that of the country style, though with a slight difference.
That difference is that everything is toned down just a bit more than it is when using country style.
When deciding to use this style, use the same criteria as you would when decorating with the country style, just keep in mind that subtlety is the key.
Cottage Decorating
Southwest Decorating
Country Decorating
Heartland Decorating
_____________________
Rust & Hard Water Stains
Part of Living in the Southwest USA

As you know, we live in an area that has really hard water, and chances are is most obvious place to notice a stain is in your bathroom.
Tubs and sinks and toilets collect soap scum and hard water deposits very easily and white porcelain doesn't hide any of it.
So...we have some ideas for you to make a part of your regular cleaning routine.
Scrubbing bubbles and a scouring pad—works pretty well to clean up the soap scum, but it does nothing to cut down the hard water deposits that have built up over time, especially around the faucets and drains.
"Hard water" is a broad term that basically means that you have dissolved mineral deposits suspended in your water. Depending on your water source, you hard water deposits can range in color from white, green, rust or black.
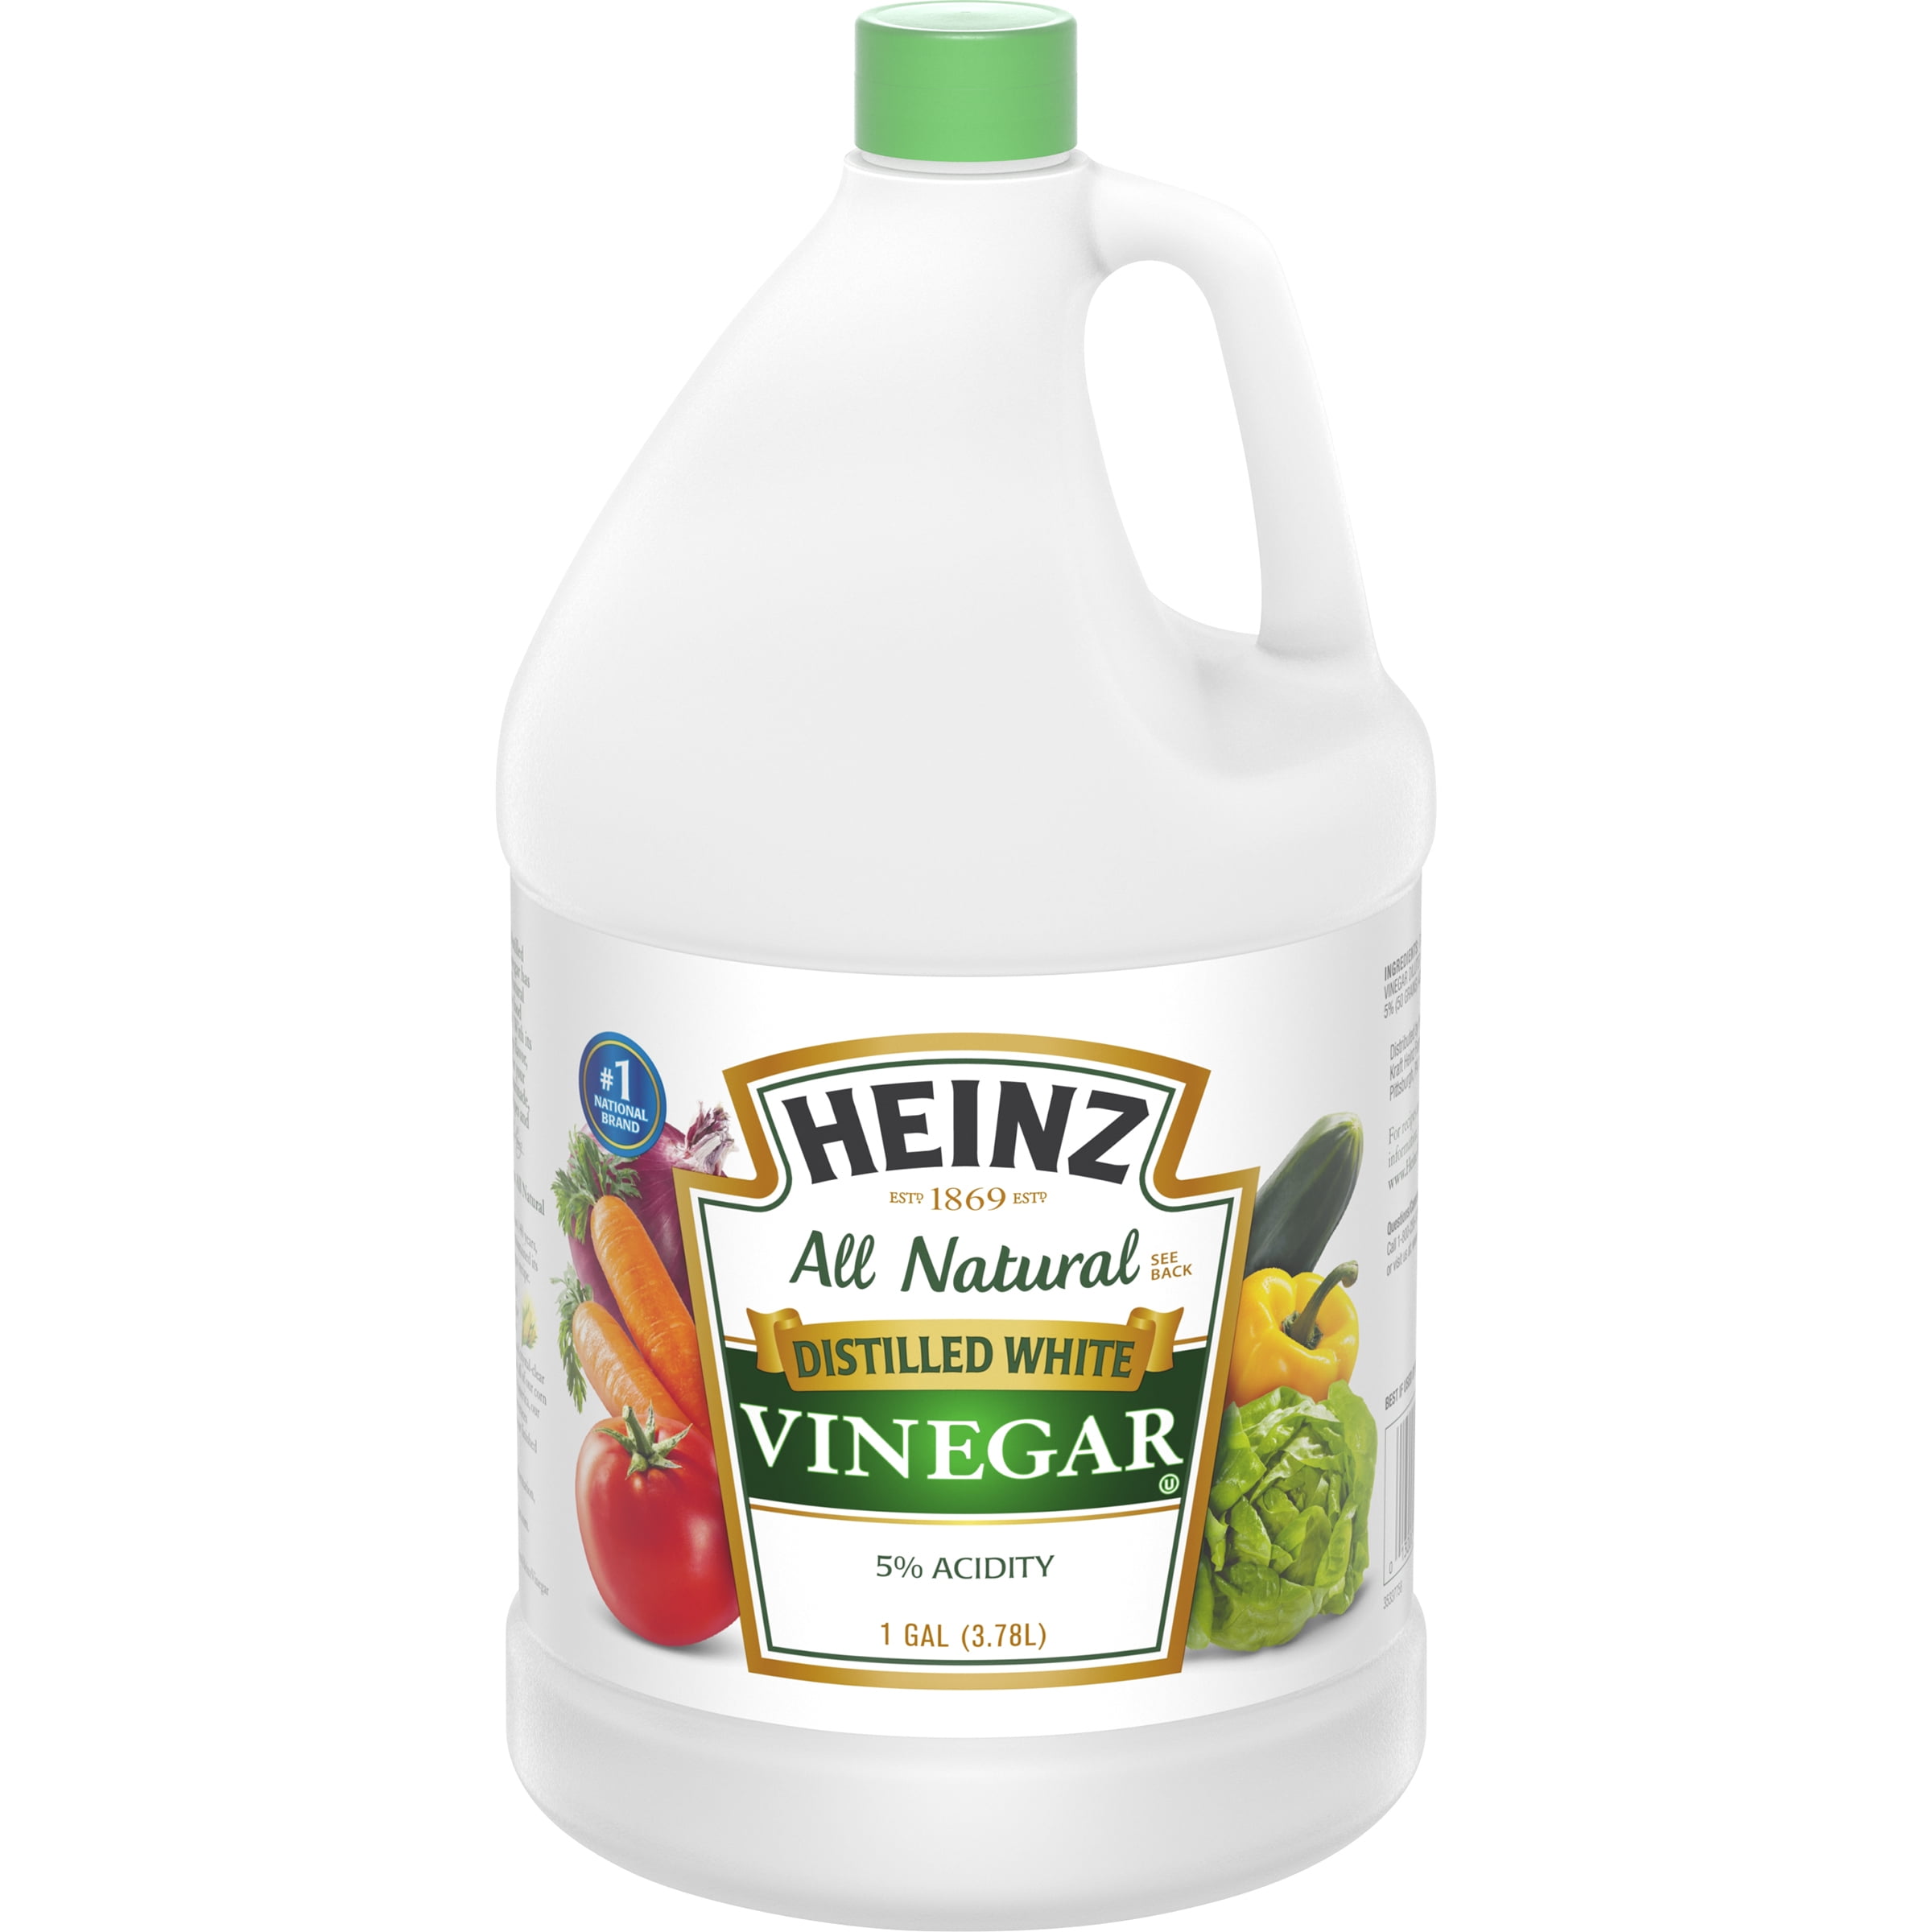
Vinegar makes an excellent cleaner
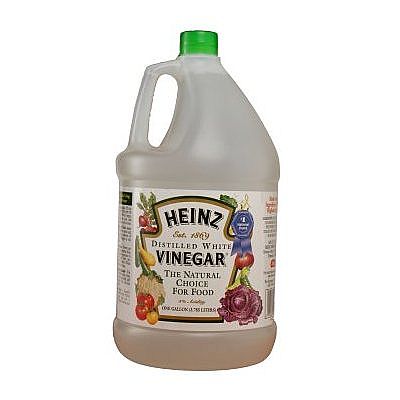
... because it is a weak acid, which means it can usually break down build up without damaging porcelain finishes.
Use it straight from the bottle. Pour a little bit onto a rag and scrub at the hard water deposits, and drape it over a butter knife to work it into the edges where the fixture meets the porcelain.
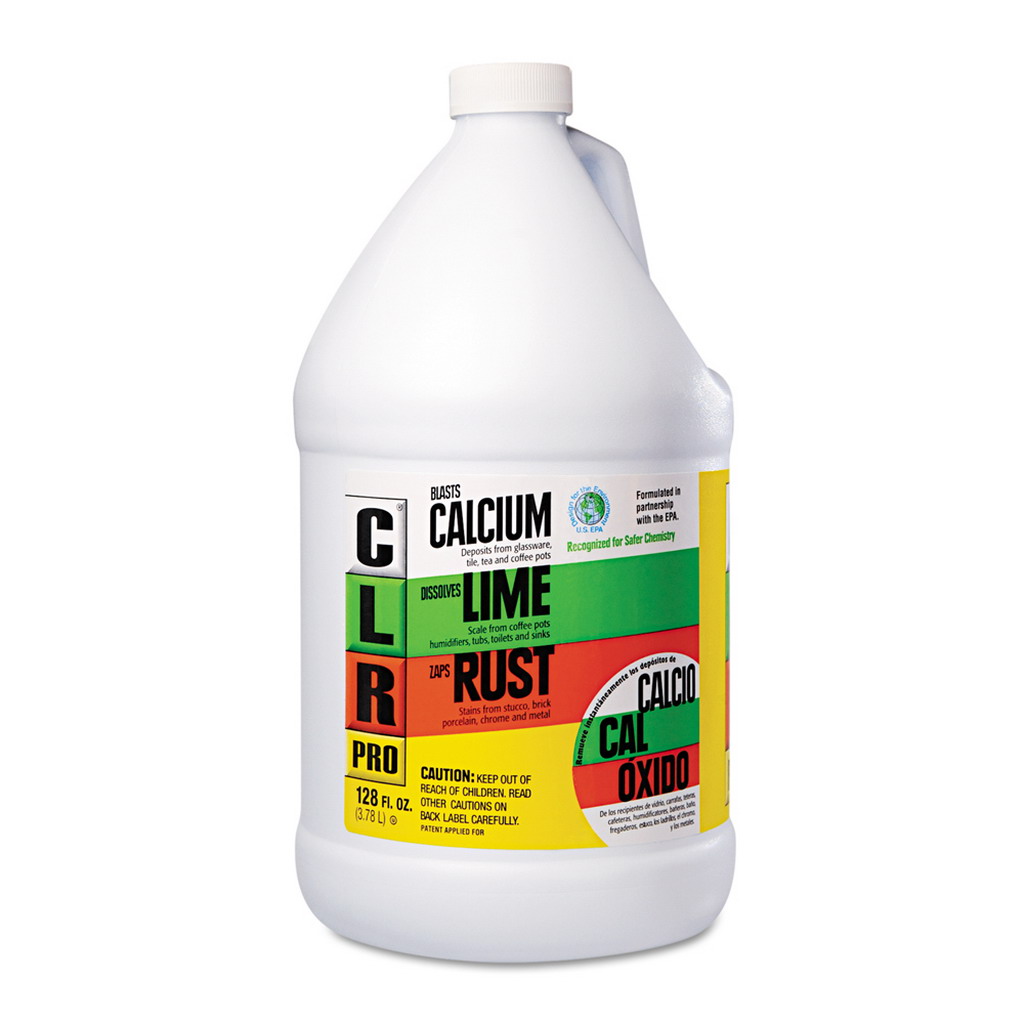
If vinegar is ineffective against your hard water build up, you can try commercial cleaning agents such as CLR (an acid cocktail with gluconic acid being the mineral remover)
or Sno-bol (basically hydrochloric acid)
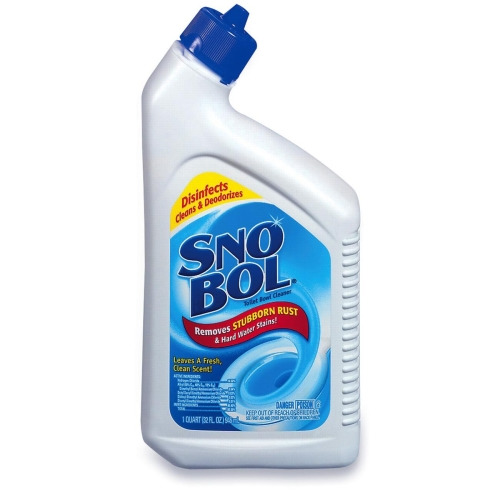
...but you may want to test the stronger cleaning agents on your porcelain to make sure they don't etch the surface.
Also, you will want to use these stronger agents sparingly because extended use will eventually erode your porcelain.
Rust stains are fairly common.
They can be created by everything from bobby pins left in the shower to corrosion from your pipes—and they can be particularly stubborn.
If the previous methods don't remove your or they were too strong for your fixture's finish, try this. then raid your spice and medicine cabinets.
Drizzle a little bit of hydrogen peroxide over the stain and sprinkle it with cream of tartar.
Let it sit for an hour or so until the cream of tartar has absorbed the stain.
Happy cleaning with some videos.
____________________
Getting Rid of Car Grease on Clothing
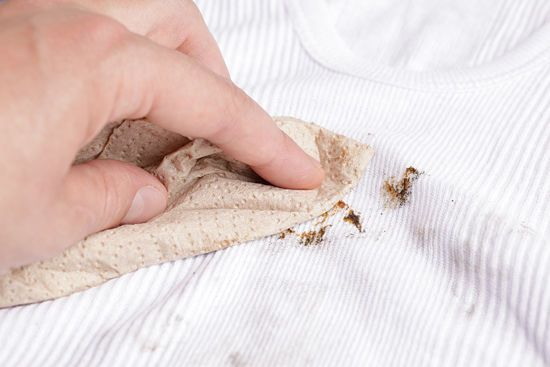
You're driving home and you end up having some kind of mechanical failure. It could be a dead battery, a blown tire, or something else. You pull over to repair the problem, and when you get finished you find yourself covered somehow in car grease.
For many people, about the only readily available solution would be to either throw the clothes away or use them as the future do-it-yourself wardrobe.
For most people, however, it may not be the most reasonable solution to relegate a complete set of clothes to only be worn maybe once a month, if your lucky, let alone throwing them away each and every time you work on a car.
Save those clothes, and quite a bit of money, by using some of these ideas.
GoJo

GoJo is a product made by the same company that makes Purell hand sanitizer.
This product is a hand cleaner that is specially formulated to be gentle on your skin while also removing automotive grease.
Use an old toothbrush and rub a little of the cleaner into the stain and wash as normal on the warmest setting possible for the clothing type.
Simple Green
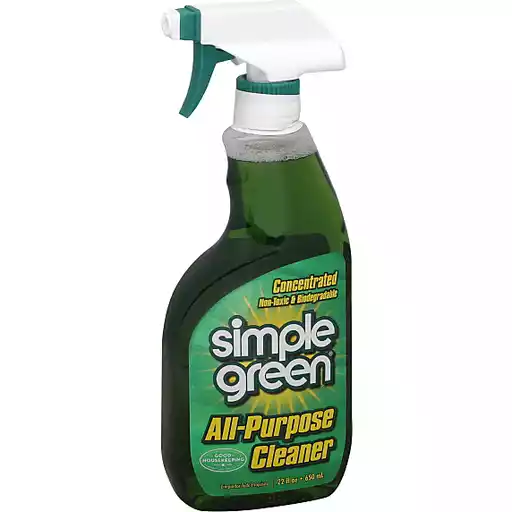
Simple Green is an environmentally safe all-purpose cleaner that can also be used as a laundry pre-treatment solution.
Spray enough of the cleaner onto the stain and agitate lightly using an old toothbrush.
Wash the clothes as normal on the warmest possible setting for the type of clothing you are washing.
Dishwashing detergent
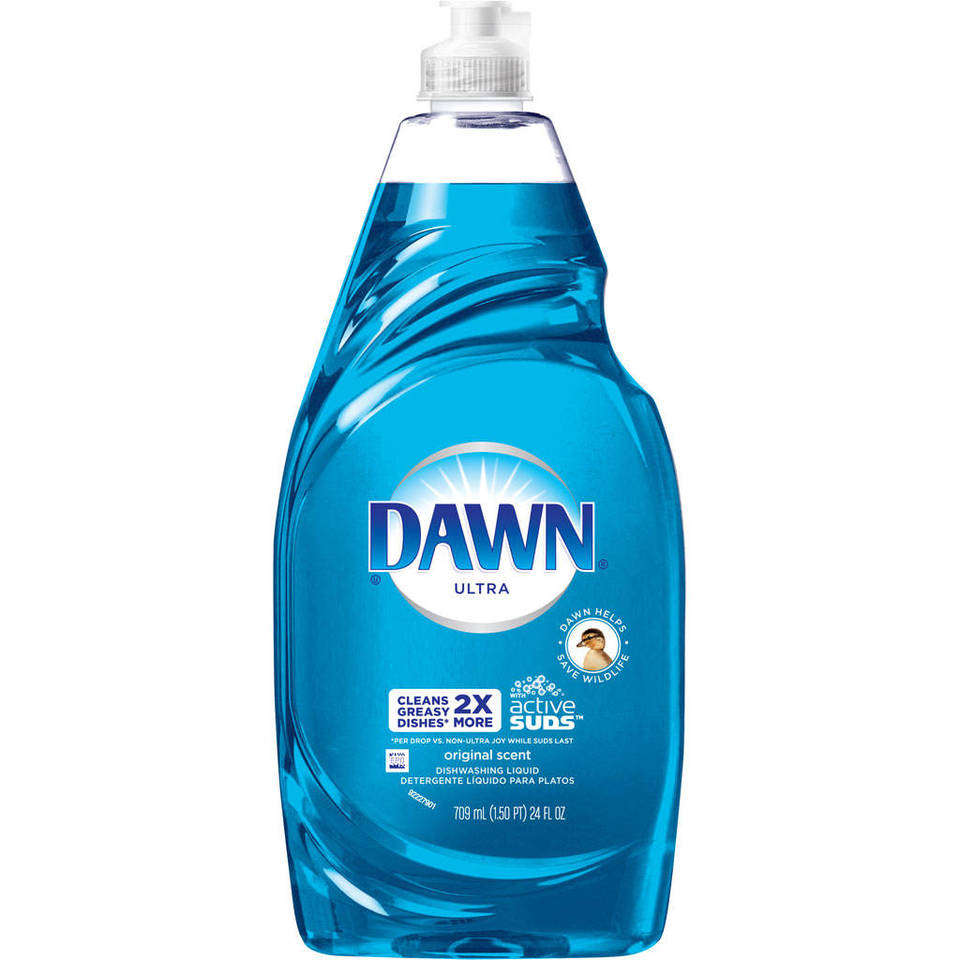
Degreasing dishwashing detergents, such as those similar to Dawn, are a fantastic way of removing car grease stains from your clothing.
Begin by placing some of the detergent directly onto the stain and then allowing it to soak into the fabric for a few minutes prior to washing. This soaking period should take at least ten minutes.
After allowing the detergent to soak into the garment properly, wash your clothes as normal, and just make sure that everything is properly clean prior to drying.
If the stain is not completely removed by this point, repeat the whole process until it is.
WD-40

To remove an old car grease stain that has set into your clothes, try using a little WD-40.
Spray the lubricating solution onto the stained area of your clothing, and let it set for no less than thirty minutes and no more than forty-five (you don't want the stain to dry out again).
After applying the lubricating fluid in such a manner, treat the old grease stain just as if it was new.
Videos? Other Ideas?
____________________
Cutting Corn in Half
The Easy Way

Corn on the Cob is a staple for many meals and breaking a piece of corn in half can be a chore...
...it's messy and often "squirts" when you break with your hands.
We have a much easier way to stop the "squirt" and save the pain in your hands.
All you need is:
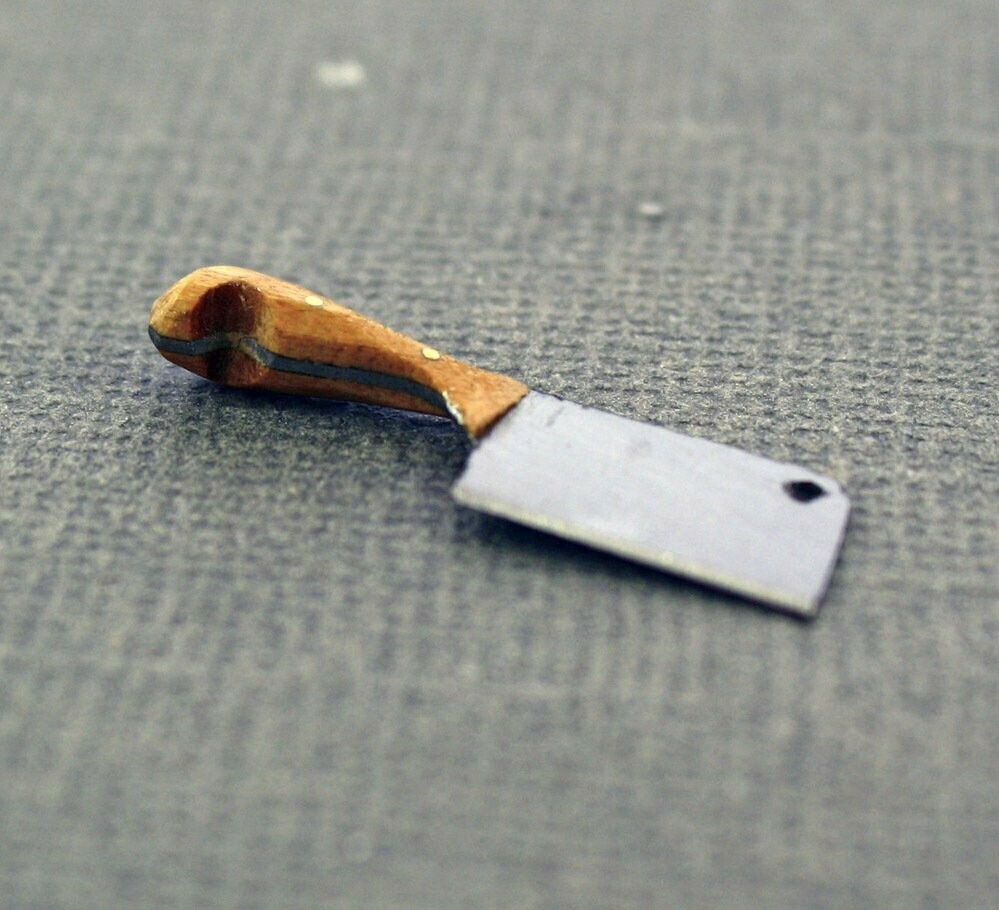
a small miniature meat cleaver
or
large cheese cleaver
or
large cheese cleaver
&
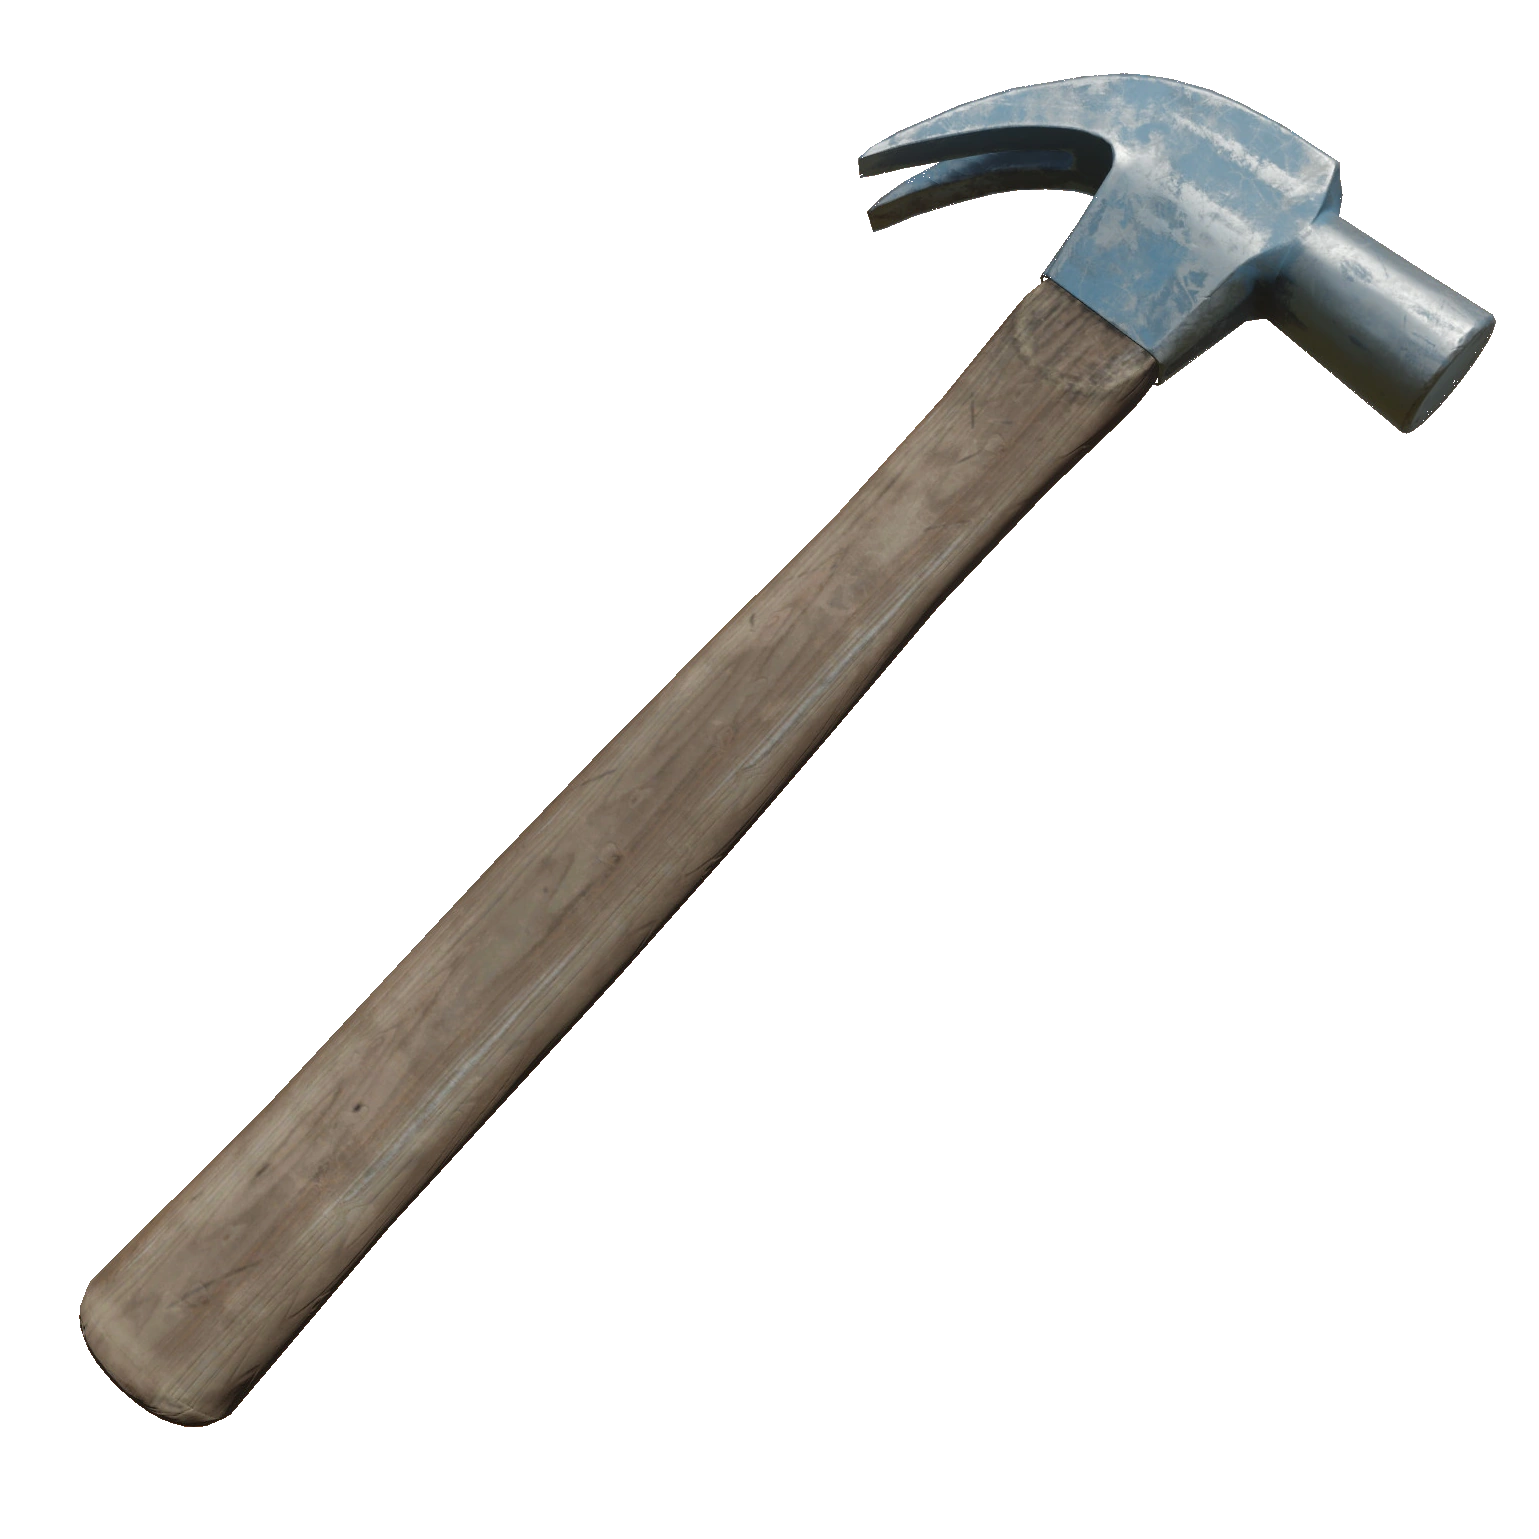
a hammer
_______________________
A Task Many of Us Dread
but
Must Do
Organizing Important Papers
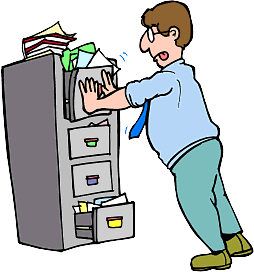
Often, people think that organizing paper files is a task that is to be dreaded.
After all, who really wants to be cooped up sorting through boring old paperwork that you really don't need anymore. That is, until the day that they need to find an important document and can't remember the last place they saw it.
Is this you? Unfortunately, that's me !

Well, instead of waiting till the last minute, and getting stressed out and panicked because you can't find exactly what you are looking for right away, take some time organizing your paper files. You will find it is surprisingly easy.
We have some helpful hints to "endure" this task.
Set aside time
Organizing paper files will take some time. In fact, it will often take a lot of time. To be sure that you get the job done right the first time, and so that you don't lose anything, make sure that you set aside several hours one weekend, or even the entire weekend, where you do nothing but organizing.
This way you will not be as likely to need to stop what you are doing and loose your train of though, and forget where you put that marriage license.
Get the proper supplies
One of the key elements to organizing paper files is to actually have the proper supplies.
In this case this will usually mean things like folders, staples, paperclips, labels, and some kind of storage device like a filing cabinet.
Increasingly, making a digital copy of your paper files is becoming more and more popular, if only for ease of access and size.
If you are thinking of doing that, then you will also need to get a computer and a scanner.
Create a system
Organizing your paper files means that you need to create a filing system.
While everyone may like their system to be usable by everyone else, there is really only one person who really needs to know how to use it, and that is you.
Whatever system you decide on, as long as you know how to use it, will work just fine.
One idea is to create a large "topic" folder, with smaller "substopic" folders included inside it.
For example, you can create a folder, or shelf in a storage cabinet, that says Financial Information, and smaller folders that are broken down by people in your family, and even more so by year and month.
Maintain the system
After you have sorted through all of your information, and implemented the system you have developed, you need to maintain it.
Without proper maintenance you will run the risk of losing your paper files, and at the very least having a mess that needs to be reorganized.
Save your self the long term hassle by doing the work as you go.
Here's a couple of helpful videos:

______________________
A Guide to Arranging Furniture in a Room

There are as many ways to decorate or arrange a room, as there are people and tastes in the world.


A common misconception about couches is that they can simply be placed against the wall.


Even with all of the different possible tastes in the world, there are a few guidelines for arranging a room that any homeowner can use.
Not only are these guidelines designed so that anyone can use them, you can begin using them now.
Use Area Rugs Properly
If you are thinking of using an area rug, then you need to make sure that you are using one that is the proper size. Many people think that area rugs are something that should be used as an accent, when the truth is that they should be used for more than that reason.
Properly sized area rugs are going to be just a little smaller than the area you are working on. For example, if you have a great room, but want to define a specific seating area, then you should use an area rug along with the couches or other furniture to help you.
In the Bedroom
In recent years bedrooms have started to become much more than simply a place to sleep, and frankly that is a trend that should be stopped.
Simply put, a bed should be the focus of your bedroom.
The easiest way to do this is by placing your bed opposite the doors to the room.
Couches Need Space
A common misconception about couches is that they can simply be placed against the wall.
The truth is that even if you are placing a couch alongside a wall, you should leave at least an inch or two between the furniture and the wall.
If you have large windows try centered and facing them. Additionally, to properly arrange a large living area don't be afraid to use couches and other chairs to define several seating areas.
High Curtains Are a Plus
To help create a truly dramatic appearance in a room you can't beat high curtains.
Whenever you use a curtain, it really should be floor to ceiling curtains, as well as at least one foot further on either side of the window.
This simple method of hanging drapes and curtains helps provide the idea that the window dressings are actually a part of the room, rather than an afterthought
.
Accessories are Furniture
When using accessories, do not look at them as accessories.
Rather, accessories should be looked at as another piece of furniture.
This means that you should look at walls the same way that they do with floors.
Do not hang pictures or mirrors too high, and space them properly so that they appear to be a natural part of the room.
Use the same philosophy with every single accessory, whether it is on the floor, wall, or table.
Dressers Shouldn't Stand Alone
Do not place dressers at a weird angle in the corner of the room.
Instead, dressers should either be centered against the wall or paired with another piece of furniture (such as chairs) and then centered.
There is something to remember about guidelines, and that is that they are exactly that...
...guidelines.
This means that there are no hard and fast rules that can be applied in all situations.
Further, these guidelines can also be expanded or limited as much as necessary to achieve the look you want.
Basically, you are the only one that can say whether your room looks good or not. After all, you are the one who will be living in and using that particular room. So make sure you are happy with your results.
______________________
Cabin Fever Setting In?
7 Ways to "Cure" It

Cabin fever is an unavoidable situation we experience when confined indoors for a long period, especially with the latest fear of the Corona virus.
Believe me, I'm married to a woman that at times I believe would rather face a firing squad, than inactivity....
...and watching this dear woman pace from one side of our home to the other looking for things to do, I thought...

...perhaps the time has come to devote an article to curing her dreaded case of "cabin fever".
I'm not a "doomsday" believer; never have been, and never will be, and making in into your 70s with pretty good health, is my definition of:
"it's been a great ride; if it ends tomorrow, at least I went out happy"...
"it's been a great ride; if it ends tomorrow, at least I went out happy"...
... without worrying about something that affects a minuscule percentage of the world's population.
Then again, I have to respect the fears of others, and believing they too have a place in this world, while I'm continuing "life as usual", here are a few ideas for you if you happen to be a "doomsdayer" to help you overcome "cabin fever" with some activities you can enjoy within the confines of your home...
...until of course, you need food (or 100 rolls of toilet paper), and are "forced" to fight the germ ridden crowds in a local grocery store !
So, what exactly is...
Cabin fever, also known as winter blues and in this latest case, "paranoia concern", can affect your health physically and mentally.
Being forced to stay indoors without a ray of sunshine will probably drive the sanity out of you.
Although it affects each person differently, it can occur as fast as two days or as long as 7 days (however, in the case of my wife, Marla, it strikes within hours of the inability to play a slot machine).
Here are some ideas for you to beat cabin fever:
1. Read A Good Book
The most obvious and easiest way to break your boredom is to read.
Read an old favorite. You might also have that one book you’ve been meaning to read but don’t have the time to do so. This is the perfect time to open and read the dust-collecting book!


Find a cozy spot where you can comfortably enjoy your book. May I suggest a hot tub with a bottle of wine or bourbon to assist your relaxation.
2. Invest In A New Hobby
This is the best time to finally start a new hobby you’ve always wanted to try.
Just be sure to purchase your supplies before getting stuck.
Some hobbies you could try indoors include cooking, whittling, wood crafting, or starting your very own indoor garden.
3. Board Games
Playing board games is much more fun and exciting rather than playing on your mobile phones.
It’s a very nice way to bond with your family and friends, the ones you no longer shake hands with in order that they won't pollute your home with germs.
Invest in a good board game like chess, monopoly, or scrabble.
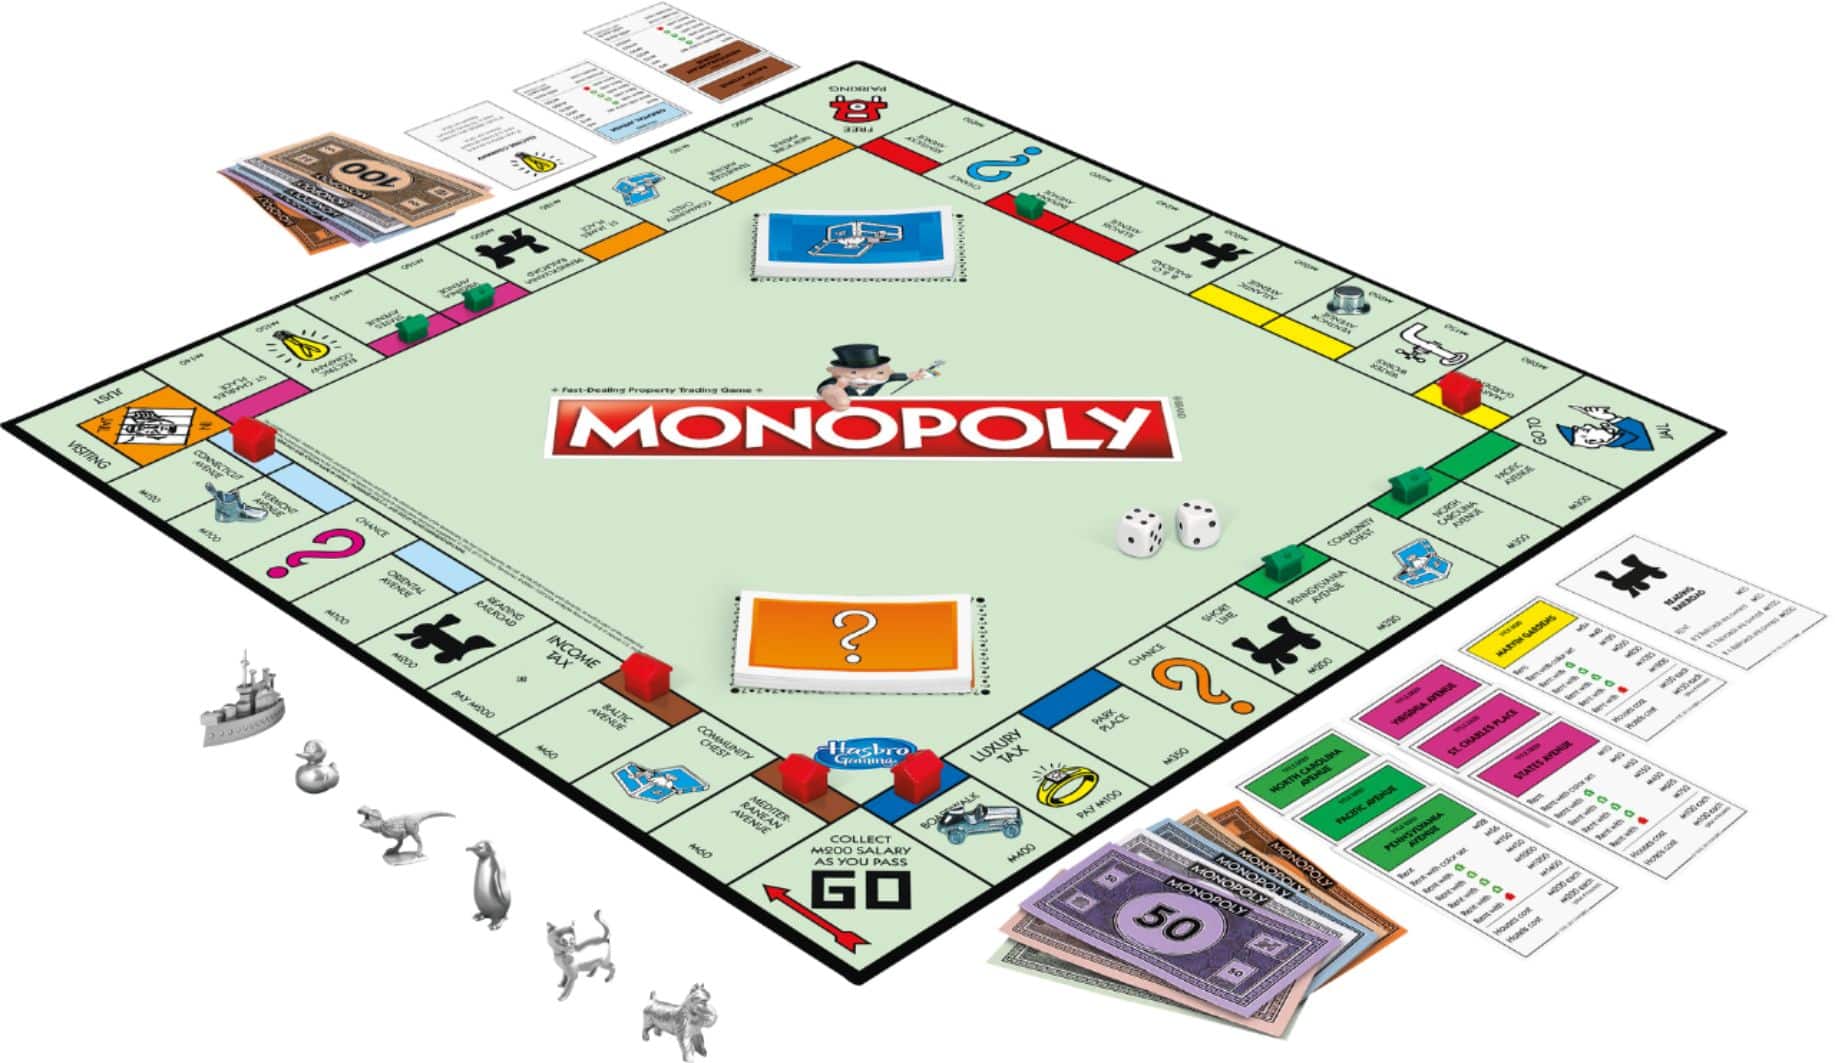
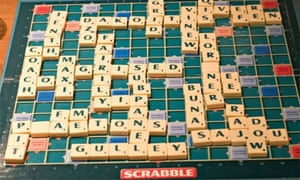
One thing about playing board games is it develops your critical thinking while being entertained.
Caution: If you are a married man, do not allow a spouse to entice you into doing even the smallest jigsaw puzzle, she will likely expect you to join her again; the second time with one having 2,000 pieces.
Caution: If you are a married man, do not allow a spouse to entice you into doing even the smallest jigsaw puzzle, she will likely expect you to join her again; the second time with one having 2,000 pieces.
4. Try A New Recipe
Whether or not you love cooking, staying at home is the perfect way to hone your skills.
Everyone loves a good home-cooked meal.

Impress your friends and family with the new recipe you’ve learned instead of your signature dish you’ve been preparing for them most of the time!
Once again, there is caution in this activity. If you are a married man, your wife will force you to eat what they cook !
Once again, there is caution in this activity. If you are a married man, your wife will force you to eat what they cook !
5. Home Projects
Another way to beat cabin fever is to do some cleaning and rearranging.
If you’ve got nothing better to do and your survival gear that includes such vital necessities as golf clubs needs a little dusting off, get on your feet and start the cleaning!
Perhaps the time has come to clean out the clutter that has probably been collecting dust.
Or...if you're as handy as I am, memorize (Forrest Fetherolf) Mr. Fix-It's phone number. He works for chocolate malt balls.
Or...if you're as handy as I am, memorize (Forrest Fetherolf) Mr. Fix-It's phone number. He works for chocolate malt balls.

There are a lot of projects you can easily do to help you beat cabin fever.
This is also a great way to break a sweat and keep the happy hormones coming.
There's another one we suggest to break a sweat, but we can't mention it !
There's another one we suggest to break a sweat, but we can't mention it !
6. TV Series or Movie Marathon
Watching old classics or new movies with everyone is always a good idea.


You can watch horror or thriller movies to keep the excitement going.
Binge watching on the TV series you’ve failed to follow will also do.
Watching reruns of "Andy, Barney, Aunt Bee, and Opie", "Jerry, George, Kramer, and Elaine", "Ross, Chandler, Joey, Monica, Phoebe, and Rachel", or even a place "Where Everyone Knows Your Name", are still fun to watch.


And make sure you have a fresh batch of homemade popcorn to enjoy it even more.
7. Plan Activities
When stuck indoors, spend time daydreaming about outdoor activities, and think about turning those daydreams into a future travel plan...
You'd be helping unemployed "entertainers".
Anyway, just do it...

... for the perfect getaway once the corona virus "all's clear" is sounded.
________________________
Not Sure How to Decorate Your Home?
Use a Pro !

Have you ever watched one of those television shows where they show a home getting renovated or redecorated and found yourself wishing that you could have a home like that?
The single easiest way to do that is to use an interior decorator.
While many people may think that finding a decorator is hard, it actually couldn't be easier.
In order to find a good decorator, all you need is to follow these simple guidelines.
Budget
Decorators usually don't come cheap, so this means that you need to have a budget firmly in mind before you begin talking to any. Knowing how much money you can spend will help you keep both your desires and those of the decorator realistic.
Take some time to go over all of your finances to figure out how much you can actually afford to pay a decorator or even if you can actually afford one at all.
Come up with a plan
Prior to finding a decorator, it is helpful to come up with a plan. This means that you should have an idea of what you would like to see your home look like.
If at all possible, gather together pictures of other rooms that are similar to what you would like and put together a "portfolio" that you can show to potential decorators.
With a plan in hand, you are less likely to be upset with the decorator's results.
Get reviews
Begin asking around for suggested decorators from friends and family. You never know who may know a good decorator.
However, do not simply take it as a matter of faith that someone's cousin can do a really great job.
Double-check with the Better Business Bureau, as well as ask to see some examples of any work that they have done. This way you can actually see the results before you make your final decision.
Interview prospects
Remember, decorators will be trying to get a job with you. This means that you need to interview them.
Come up with a series of questions that you can ask each of your potential candidates.
You can ask them things like:
"How long have you been doing this?"
"Do you have any examples of previous work?"
"Do you have any references?"
"How much does an average project cost?"
Write down the answers from your interview for later consideration.
Make a decision
After interviewing your potential candidates, it is time to make a decision.
Go over the list of answers and choose the one that you think will best suit your needs, budget, and that you will be able to work well with.
Here's a tip or two from "a pro" !
_________________________
_________________________
Mustard
Great on a Sandwich
Disastrous to Your Clothes

Mustard tastes great on a hamburger, hot dog, or a number of sandwiches, but if you're like many of us, mustard often seems to find a way on shirts and pants...after you take a bite..
When...not if...that happens, you should know how to remove a mustard stain.
Here are some tips you might want to keep in mind.
Unfortunately, mustard contains turmeric, which is a yellow dye. This can make mustard almost impossible to get out of most fabrics.
If your shirt is white and bleach safe...
Add chlorine bleach to the washing machine, and bleach the stain out.
Be sure to check that the stain is gone before putting the stained item in the dryer—once mustard has been in the dryer, the heat will set the stain, and you will probably have a yellow spot on your shirt forever.
If your shirt is not white, and is made out of rayon, silk, or wool, try this:
Scrape as much of the mustard off the top of the stain as possible—if the fabric is strong enough, scrape the surface of the fabric.
Spray the stained area with dry cleaning solvent while scraping.
Once you've scraped off as much of the mustard as possible, spray the remaining mustard spot with dry cleaning solvent until saturated.
Blot the spot with a clean cotton pad, the kind used for makeup removal.
If the stain is still there, rinse the area thoroughly, and try rinsing out the mustard with a vinegar and water solution.
Blot away as much of the stain as possible with vinegar and water.
If this does not work, try a spot remover product and blot again.
Soak the stained area in water and apply a spot remover, leaving the spot remover on for up to 15 minutes before rinsing.
For other fabrics...
Start by spraying on a fabric stain remover product.
Scrape off as much of the mustard stain as possible without touching the fabric.
Rinse the stained area well in tepid water, and then apply a layer of liquid detergent.
Dab at the stain with the liquid detergent.
Rinse the detergent away.
If the stain persists, soak the garment overnight in a sink filled with tepid water with a few squirts of dish detergent mixed in.
On an old or dried stain....
You could also try adding more mustard on top of the stain, letting it sink in, and then soaking the entire area in liquid dish detergent.
Rinse, and then begin working on spot removal.
Another type of product that may work is an enzyme solution, or a cleaning product that says it works on protein-based stains.
Remember to test any cleaning product before using it on a visible area of your garment.
How about some video help?
__________________________
What To Do About
Countertop Stains

Countertop stains are usually destined to remain forever, simply because it never occurs to us that hard countertop materials like granite and marble can be cleaned at all.
However, granite and marble are actually absorbent stones that can soak in all kinds of liquids, from water to oils to fruit juice to gravy.
If you don't clean stained countertops immediately after a spill, you will probably have to work your fingers to the bone to remove the stains once they have hardened and set.
This article provides you with tips on removing stains from countertops once they have set.
The first step in your battle is to prepare a porous solid that will remove most stains without causing any damage to the surface of the countertop.
Preparing a "poultice" is not as heavy-duty as it sounds.
Mostly, a stack of paper towels that make thick wad will suffice.
All you do is dip this wad in whatever liquid you are using to remove the stain.
Once you have the poultice ready, here's what you do for different kinds of stains:
Oil Stains
Oil stains are the most common stain found on countertops, for obvious reasons. You will often find that oil stains result from the spillage of foods like cream, butter, cooking oils, and salad dressing.
A lot of people's first reaction would be to try and rinse the area with water, but water does no good at all, because the stain simply settles in further.
Try this !
1. Blot the stain with clean, dry tissue paper.
2. Wipe the area with a clean cloth soaked in ammonia.
3. Dip your poultice in acetone and wipe the stain clean.
Another option....
1. Cover the stain with a dry powder like cornstarch that absorbs the oily excess.
2. Repeat the application, if the spill is large, and let it sit overnight.
3. The next morning, scrub the area with a detergent solution and hard brush, or you may give it the ammonia treatment mentioned earlier.
Beverage and Organic Stains
Stains from tea, coffee, or soft-drink spills are also a permanent feature of kitchen countertops.
These stains are usually treatable if you soak the poultice in a solution of hydrogen peroxide and a little ammonia and gently wipe the affected area clean.
Rust Stains
Rust stains can form from metallic utensils or other metallic items left too long in one place.
It is better in the case of rust stains to use the commercial rust removers available in hardware stores rather than homemade solutions.
However, rust removers usually contain acidic ingredients that may damage the countertop surface, so don't leave the remover standing for any length of time.
Fruit Juice and Acidic Stains

Fruit juices and even a few soft drinks will form indelible stains and even damage the surface of the countertop if left standing for long.
The best solution:
1. Clean the stain immediately using a clean white cloth or poultice soaked in water.
2. Once the stain sets, you may need to actually re-polish the surface of your counter before it will disappear.
As a general rule, make sure that your stone countertop has a sealed and polished surface that does not allow any stain to settle readily.
Before you use a cleaner on the surface, particularly if it is acidic, first try it on an inconspicuous area of the countertop and see if it causes any damage.
In any case, follow a regular maintenance schedule to avoid the accumulation of grime and dirt, availing the help of a professional maintenance company if necessary.
_________________________
Removing Stains on Woolen Fibers

Dirt and grime set into woolen fabrics faster than they do on any other fabrics.
Woolen carpets are also susceptible to stains and spills.
Before throwing out your wool socks, sweaters, skirts, or pants, consider trying some of the following stain removing processes.
It is crucial to deal with stains quickly to prevent them from setting into the woolen fibers.
Try everything you can before you press your wool garments, because heat makes stains permanent. Before trying any solution, test it in the seam allowance of the garment to make sure it doesn't remove the dye.
Some of the different methods of stain removal from the woolen fabrics are described below.
Chocolate
:max_bytes(150000):strip_icc()/GettyImages-158313493-577e70c13df78cb62c89fc54.jpg)
Chocolate is the most common culprit of staining your favorite wool clothes and your carpets.
1. Scoop off any excess chocolate with a blunt knife or spoon.
2. Make a solution of equal parts soft wool detergent and white vinegar.
3. Add the solution to one quart of warm water.
4. Soak a small piece of cloth in the solution and blot it on the stains.
To prevent it from spreading, blot from the outside of the stain in.
You can also remove chocolate stains by blotting with such materials as mineral turpentine and dry-cleaning fluid.
Gravy/Sauce and Fruit Juice

In order to remove stains caused by gravy, sauces, or fruit juice:
1. Blot up the excess with some dry absorbent cloths, tissues, or colorless paper towels.
2. Soak a piece of soft cloth in lukewarm water and dab the stain, working in an inward direction so that the mark does not spread.
Blotting with lukewarm water will remove most of the stain.
3. Press paper towels, tissues or dry absorbent cloths on the treated area to get rid of the excess moisture.
Burn or Scorch Marks

1. With the help of a firm brush, shake off the burn or scorch marks.
2. Make a solution of hydrogen peroxide and cold water in a one-to-ten ratio.
3. Soak a piece of cloth in the solution and sweep it over the scorch mark in a blotting motion.
4. Stroke the stain inward in order to prevent it from spreading further.
Beer, White Wine, Ice Cream, Urine, Vomit

1. Blot it up using tissues, paper towels, or dry absorbent cloths, applying a little pressure.
2. Make a solution of wool detergent and white vinegar in a 1:1 proportion and dilute the whole thing in one quart of lukewarm water.
3. Soak a little piece of cloth in the solution and lightly blot the stain mark starting from the edge and moving toward the center of the stain.
This motion will help to prevent further spread of the mark. Use only a small amount of solution at a time.
Butter, Cooking Oils, Furniture Polishes, Oil, Grease, and Shoe Polish

If the stains caused by any of the above items:
1. Allow them to dry before you can treat them, then scoop any excess mess off with the help of a blunt instrument.
2. Remove the stain by brushing it with a piece of cloth soaked in a dry-cleaning fluid.
If dry-cleaning fluid fails, repeat the same process with lighter fuel or mineral turpentine.
Make sure that the whole process is carried out in a well-ventilated area.
Paint, Dyes, Make-Up Materials

The stains created on woolen garments by cosmetic products like nail polish and mascara, or resulting from permanent markers and dye, are quite stubborn.
In such cases you should take your wool clothing to the dry cleaner as soon as possible.
If you have makeup, permanent ink, or dye stains in your wool carpet, consult a professional carpet cleaner.
______________________
The Incredible Edible Egg

Bet you didn't know....
Water Can Determine If An Egg Is Still Good.
If you place an egg in a tall glass of water and it sinks, then it is safe to eat because it means that the yolk is still heavy. Egg yolks shrink as they age and this creates air bubbles. If the egg floats, then it is time to throw it out.
Eggs Can Stand.
It is said that during the vernal equinox around March 21when the sun crosses the equator, making day and night equal everywhere, it is possible to stand an egg.
This is due to their high content of cysteine, which helps to break down the cause of the hangover, acetaldehyde. Eggs also help to get rid of the toxins that alcohol leaves behind.
Good Source Of Vitamin D
Vitamin D is generally associated with the sun, but you can get 10 percent of your daily intake by eating an egg.
Eggs have 7 to 17,000 tiny pores on their shells. They also can absorb odors in the fridge, so make sure to keep them in the carton.
Eggs Contain Almost All Essential Vitamins.
Eggs have all the essential vitamins you need except for Vitamin C, and they also contain all the essential proteins and minerals that your body needs.
New Years Needs Eggnog
How to Make Your Own

___________________________
If You Don't Ask...You Don't Get !
Did you know that there are senior discounts available at many of your "eatin' joints"?
All you have to do is ask for them when you order !
Here are some of best!

Discounts on coffee and beverages (55+)

10% discount

10% discount and discounts on drink items
 20% off during breakfast hours and 10% off during lunch/dinner hours

Senior menu with discounted prices

Senior menu as well as 10% off
 10% discount
 Discounted menu prices for 60 and over
 10% discount

Free drink (or 10% at some locations)

10% off for AARP members

10% off for 55 and over
__________________________
Replace it or Reupholster it ?
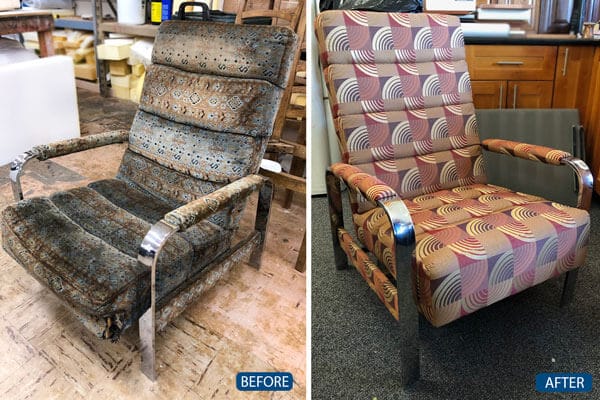
The next time you feel that you need to replace some old and worn out furniture, instead of throwing everything out, and spending thousands of dollars to replace it, ask yourself some simple questions.
The first of these questions needs to be along the lines of should I reupholster my chair?
Reupholstering older furniture is going to not only save you money, but also breathe much needed life into the decor of any room.
Prior to making your final decision, there are a few things that you should ask yourself.
The guidelines below are designed towards helping you determine whether you should in fact reupholster that chair, or whether you should instead concede to the expense of new furniture.
Condition of Fabric
One of the first things that needs to be evaluated is the condition of the fabric on the piece of furniture.
Can it be cleaned? Is it worn, torn or ripped? Is it faded beyond belief?
Does the new piece of furniture have a more durable, or attractive type of fabric?
Is it possible to purchase the same or similar fabric somewhere else?
Condition of Frame
What condition is the frame of the chair or couch in?
Is the frame still fundamentally sound?
Are there excessive cracks or bending?
When sitting down does the piece of furniture creak excessively, or is there noticeable sagging?
The reason that you want to know what condition the frame is in is simply due to the fact that if the frame is shot or beyond repair, then there is no need to attempt reupholstering your furniture.
If you answered yes to these questions, then throwing it out and purchase something new.
Time
How much time do you have to devote to completing the task at hand?
Whether you are planning on purchasing new furniture (which can take up to a month or so for delivery), do your own upholstery work (which means that the time is almost solely up to you) or you have someone else do the work for you (meaning it is up to their schedule)....
... is all going to take some time.
There is going to be a slight variation regardless of which course you decide to take, so be sure that you carefully consider your options.
Expense
Finally, the expense that you shell out is going to depend on which course you take.
On average though, the least expensive option would be to reupholster your chair yourself.
This is because you are not paying for such things like labor or delivery.
Be aware though, that even with this option the cost can get quickly become more than you would expect, depending on the materials that you use.
If you choose the reupholster route...and choose to do it yourself, here are a few videos to assist you.
Have French Chairs?
Part One
Part Two
Part Three
Part Four
Part Five
Part Six
General Upholstering
Good Luck!
_______________________
Removing Tomato Stains
New Years Needs Eggnog
How to Make Your Own
___________________________
If You Don't Ask...You Don't Get !

Did you know that there are senior discounts available at many of your "eatin' joints"?
All you have to do is ask for them when you order !
Here are some of best!
Discounts on coffee and beverages (55+)
10% discount
10% discount and discounts on drink items
20% off during breakfast hours and 10% off during lunch/dinner hours
Senior menu with discounted prices
Senior menu as well as 10% off
10% discount
Discounted menu prices for 60 and over
10% discount
Free drink (or 10% at some locations)
10% off for AARP members
10% off for 55 and over
__________________________
Replace it or Reupholster it ?

Spaghetti tastes great, but it can be a messy food to eat and the spaghetti sauce easily stains.
and...
Plastic ketchup packets are notorious for squirting when being opened.

At some point or other in your life, you will probably get a tomato stain. These red, blotchy stains are ugly and very noticeable.
You probably don't want to throw away a shirt any time you get tomato stains, so here are some tips on getting rid of them:
1. Get to it quick.
The more time a tomato stain has to soak into a fabric, the harder it is to remove.
Don't let a stained shirt sit in the laundry basket for weeks—try to start cleaning the stain as soon as you can.
2. Before you start cleaning the stain, remove any bits and pieces of tomato (or other food).
If you don't, these pieces can actually stain the material as well.
3. As for cleaning the actual stain, you can use cleaners that you probably already have at home, such as lemons and vinegar.
To use a lemon, cut it on half and squeeze the juice on the spot. Then, scrub the spot with the rind of the lemon.
To use vinegar, mix it with water and apply to the stain. Scrub the stain, and it should go away.
Also, normal detergent and water will sometimes get rid of the stain.
4. If these household products aren't getting rid of your stain, you can also use a stain remover.
These cleaners are specifically formulated to get rid of stains and can be found in most supermarkets. To use, follow the directions on the package.
5. After you have scrubbed at the stain, let the material dry in the sun.
The sun acts as a natural bleacher and should help to get rid of the stain. However, the sun can also make darker fabrics fade, so don't leave the material in the sun for too long.
6. After the spot is gone, you will want to wash the material the same way you usually wash it.
This will get rid of the excess lemon, vinegar, or other cleaner that you used.
7. If you still see a spot, repeat these steps.
Don't dry any fabric in the dryer until the spot is gone. The heat from the dryer can permanently seal in the stain.
Try these helpful videos:
_______________________Spaghetti tastes great, but it can be a messy food to eat and the spaghetti sauce easily stains.
and...
Plastic ketchup packets are notorious for squirting when being opened.
At some point or other in your life, you will probably get a tomato stain. These red, blotchy stains are ugly and very noticeable.
You probably don't want to throw away a shirt any time you get tomato stains, so here are some tips on getting rid of them:
1. Get to it quick.
The more time a tomato stain has to soak into a fabric, the harder it is to remove.
Don't let a stained shirt sit in the laundry basket for weeks—try to start cleaning the stain as soon as you can.
2. Before you start cleaning the stain, remove any bits and pieces of tomato (or other food).
If you don't, these pieces can actually stain the material as well.
3. As for cleaning the actual stain, you can use cleaners that you probably already have at home, such as lemons and vinegar.
To use a lemon, cut it on half and squeeze the juice on the spot. Then, scrub the spot with the rind of the lemon.
To use vinegar, mix it with water and apply to the stain. Scrub the stain, and it should go away.
Also, normal detergent and water will sometimes get rid of the stain.
4. If these household products aren't getting rid of your stain, you can also use a stain remover.
These cleaners are specifically formulated to get rid of stains and can be found in most supermarkets. To use, follow the directions on the package.
5. After you have scrubbed at the stain, let the material dry in the sun.
The sun acts as a natural bleacher and should help to get rid of the stain. However, the sun can also make darker fabrics fade, so don't leave the material in the sun for too long.
6. After the spot is gone, you will want to wash the material the same way you usually wash it.
This will get rid of the excess lemon, vinegar, or other cleaner that you used.
7. If you still see a spot, repeat these steps.
Don't dry any fabric in the dryer until the spot is gone. The heat from the dryer can permanently seal in the stain.
Extend the Life of Your Razor Blades
withOld Blue Jeans

Run the razor across old jeans to...
resharpen and...... extend its life.https://www.youtube.com/watch?v=B3Kxiom83Js
________________________
Ideas on How to Store & Organize
Those Old Photos

Many of us have them, but is there a good way to store and organize them for future generations ?
Photographs and negatives are wonderful things, since they help us to remember some of the most wonderful and precious moments in our life.
The largest problem associated with photographs is that there is no real way to store or organize that is inherent to their use.
There are so many different ways to store and organize these mementos, that everyone typically has their own varied way of storing their photographs that is tailored to their personal preferences.
Here are three tips you might wish to consider.
(Any of these methods is more useful than just stuffing photos into a box.)
Write an Autobiography
This does not mean that you should go out and write a novel, but it does mean that you should give something along the lines of a descriptor at the start of your photo albums.
Such an "autobiography," if you will, can answer a whole lot of questions that you are going to have later on.
One suggestion would be to create a sort of table of contents with a list of who, what, and where each picture entails on each page.
Another way of using this same idea would be to place a little card at the bottom of each page listing the same information. It could take longer to do this, but it is going to make your album a true keepsake.
So, while you are putting together your photo album, make sure to write a little story to go along with each of the 1,000 words that come along with each picture.
Preserve and Separate
Not all binders or photo albums are created equal. Some have a type of acid in their pages that can slowly destroy any pictures that are stored.
That being said, acid-free archival binders are the safest place to store your photographs.
So you should always have a few handy.
As you sort through all your loose photos, pull out the best and organize them by theme—like vacations, holidays, and birthdays, or by year.
In effect, what you are going to be doing is to piece your photo life together.
Get Positive with Negative Storage
Probably the single best way to keep all your negatives together, and from getting lost, is to punch holes in the side of the plastic sleeve that they usually come in.
While you are doing this you want to, of course, make sure not to punch holes in the negatives themselves.
Be sure that you label each sleeve with the date and occasion, at a minimum. In fact, I would strongly suggest that you actually write down all of the same information on the sleeve that you write down in the album itself, and for much the same reason.
This way, if you needed to find a specific picture to make a copy at a later date, you are going to have a much easier time of it.
After labeling each sleeve with this information, you are then going to store the plastic sleeves of negatives in a three-ring binder.
How about some video help !
Have Fun !
____________________
The Quickest Way to Slice a Potato
First, cut the potato in half.

Second, grab an apple slicer and run the halves though it.

_______________________
How to Ripen an Avocado in 10 Minutes

Tale as old as time: You’re craving guac, but when you get to the store, there’s a pile of totally unripe avocados taunting you.
Don’t settle for the store-bought stuff--here’s a foolproof trick to making avocados soft and creamy in minutes.
What you need:
A baking sheet, tinfoil, and that hard-as-a-rock avocado.
What you do:
Wrap the whole fruit in tinfoil and set it on the baking sheet.
Pop it in the oven at 200°F for ten minutes, or until the avocado is soft (depending on how hard it is, it could take up to an hour to soften).
Remove it from the oven, then put your soft, ripe avocado into the fridge until it cools.
________________________
A Quick Solution to Chilling White Wine
Freeze the Grapes

___________________________
Cooking and Shucking Corn
in
The Microwave

_______________________
How to Remove Grease Stains
from Clothing
:max_bytes(150000):strip_icc()/Stainonclothing-5bf37cfac9e77c0051095d0e.jpg)
1. Sprinkle corn starch on top of the stain.
2. also use baking powder or baking soda.
3. Once the stain is covered, let the powder sit for 30 minutes.
4. Brush the powder off gently with a clean toothbrush.
5. Next, spray the stain with commercial stain treatment.
6. Place the garment into the washing machine and wash as directed on the label.
See ya later, grease!
Videos ?
________________________
Baking with Bananas
The Fastest Way to Ripen One

__________________________
How to Quickly Peel Potatoes

Gather however many potatoes you want to use and give them a quick rinse. It helps if you choose some that are mostly kinda the same size.

Fill a pot with water and pop them in.
Put the pot on the stove on medium heat, covered, and let them come up to a boil. Boil for however long it takes them to cook.
Half an hour should do it.
Poke them with a fork every once in awhile to see how it’s going.
If you have really big potatoes, you can just cut them in half to cut down the cooking time if you like.
When you think they’re about done, get a big bowl of ice water going.

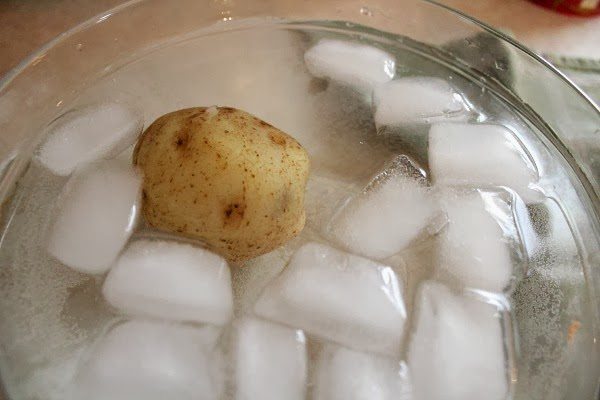
Plunge the potatoes into the ice water (they can all go in together at the same time) and leave them there for about 20 seconds or so. By now, just the outsides will be cool to the touch, but the insides will still be steaming.
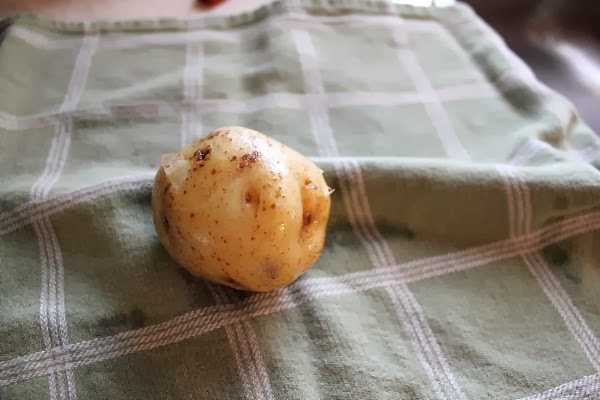
Pull the potatoes out and put them on a clean tea towel. You can use your hands. They won’t burn your fingers.
Use your hands to pull/rub the skins right off. It literally takes about 2 seconds per potato.
There you have it! Perfectly cooked, peeled potatoes, all ready to be mashed or sliced, or whatever you like!
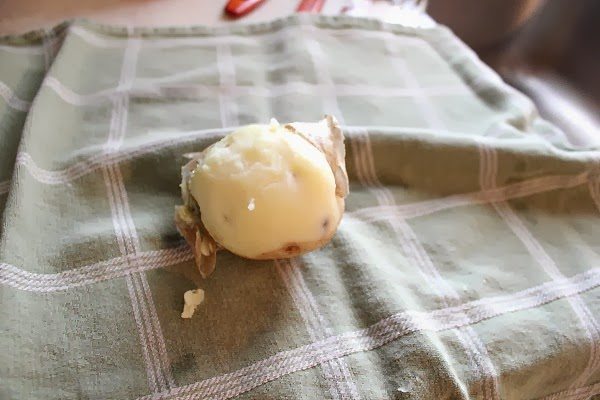
You DO NOT need to wait for the potatoes to cool. They will be cool to the touch almost instantly as soon as you toss them in the ice water (within a few seconds) and the peels can be brushed off with almost zero effort with your finger tips in just a second or two.
So... instead of taking 5-10 minutes to peel a big batch of potatoes, it will take maybe 1-2 minutes AND you won’t have to use that peeler that can be so frustrating.
Once you’re done boiling and brushing the skins off, the potatoes are ready to eat!
Careful though, they might be cool on the outside, but they’re steaming hot on the inside.
And...don't forget the potato skins.
The skins are delicious.
___________________________
The Right Way
to
Hang a Picture
For some reason, it can sometimes be a little difficult hanging pictures so that they look good. While everyone would like to start hanging pictures with style, it is not possible without first understanding the basics of the process.
Listed here are some fairly simple guidelines that you can use to ensure that you are getting the best possible results with your picture hanging endeavors.
As you get more familiar with the guidelines, you will be able to start experimenting more and more.
Have fun, but remember to keep the basic and fundamental guidelines in place.
Never begin until you have a plan
Don't begin hanging any of your pictures until you have some plan in mind. Usually this can be done with the help of a simple piece of paper and a pen or pencil.
Sketch out what you want to do, and where you would like to have your pictures placed.
As you are doing this, make sure that you keep in mind the rest of the guidelines for hanging pictures with style.
Keep things at eye level
Ideally, when you hang pictures, you should hang them at eye level.
This doesn't meant that you hang the bottom or top of the picture at that level, but rather the center of the picture should be placed at eye level.
This level will usually change depending on where you are placing the pictures.
But...remember that they should always be placed at eye level.
For example, when you hang a picture in a hallway, or some other "standing" area, they should be placed at a height of about 54 inches; while in a "sitting" area the pictures should be placed at a height of about 48 inches.
Large, empty spaces aren't good
One of the biggest mistakes that people make when hanging pictures is that they will leave large open spaces between, or around pictures. It's also a waste of space.
Avoid empty space by keeping artwork and pictures proportional to the wall that they are on, as well as ensuring that large spaces are not left open.
Instead of overcrowding a wall with pictures, "mask" the empty space by using a vase or other decorative object or even furniture to help take up the space.
When using furniture, make sure that the pictures are not placed more than a foot above them, or you will find yourself with some noticeable empty space.
Arrange pictures in a design
Try to arrange your pictures in a unified composition that provides an extra element of design.
For example, you can place three separate pictures, which each have a different size of frame, into a general V-pattern.
This same type of pattern can be used in conjunction with pictures, furniture, and other decorative objects as well.
Need some video help?
__________________________
The Easiest Way to Get Rid of a Nasty Bruise !
Using a Banana Peel

Hold a banana over a bruise for 10 to 30 minutes and it will remove the color.
https://www.youtube.com/watch?v=oPx8kEmDmHU
_______________________
13 Ways
to
Make a Manicure Last Longer

______________________
Removing an Egg Shell from a Boiled Egg
Made Easy

Adding a teaspoon of baking soda when you boil eggs and the shell will come off easily.
If you don't have backing soda, try this !

If you don’t have baking soda, then peel away a small hole at the top of the boiled egg and a large one on the bottom.
Finally, put the small hole close to your mouth and blow.
_______________________
Making the Perfect Sandwich
___________________________
Some Tips on Travel Insurance

Looking to purchase a package for an upcoming trip?
Some things to do before buying:
Read up on the several types of coverage.
The five primary types offered are:
Cancellation / Interruption Insurance
Evacuation Insurance
Medical Insurance
Baggage Insurance
Flight Insurance
Consider your trip, yourself and other timely factors when determining what kind of and how much coverage is right for you.
Cancellation insurance
This is the most common kind of coverage found in every comprehensive policy. This covers unforeseen reasons like sickness of you or your traveling partner, weather or carrier issues, and legal obligations (like jury duty).
The exact coverage varies from provider to provider. If you have unforseen complications, a note will be required from your doctor.
Medical insurance
The first thing you need to ask yourself is if you need a plan that covers a pre-existing condition
If so, look for those types of plans.
Most plans cover 24-hour emergency assistance, ambulance costs, hospital services and emergency dental work.
Evacuation insurance
Within medical plans, you can also buy evacuation insurance, which allows for emergency medical evacuation to the nearest appropriate care facility if you are somewhere remote or in a place that cannot appropriately treat a condition.
This is most frequently purchased by people taking adventurous trips in more far-flung destinations.
Baggage insurance
This covers travelers in two instances:
It will reimburse travelers for clothes, medication and other essential items if baggage is delayed in arriving at the destination.
It also covers you if your possessions are lost, stolen or damaged during the trip.
Flight insurance
Both airlines and insurance companies offer this protection solely for difficulties with your flights. Often people purchase flight insurance only for international trips because of the higher cost of fares. This can help travelers save on the fees incurred in the event of a delay or cancellation because of bad weather, mechanical breakdowns or labor strikes.
Read the entire policy before purchasing.
This is not a time you want any surprises. Note that most insurance is sold in packages, so it's important to comb through the inclusions in each to pick the package best tailored for you.
For example, you may not need evacuation insurance in a destination like London or Shanghai because they are such huge cosmopolitan cities, but if you have many connecting flights to get to those destinations, you may want a package that includes baggage insurance.
Think through the practicalities of each trip and make a list of what you think would most likely need to be covered.
Think through the practicalities of each trip and make a list of what you think would most likely need to be covered.
For many Americans with medical insurance, their policies cover care abroad. Before pulling out your credit card, see what coverage you already have.
When the Zika virus first made headlines, many travelers learned the hard way that standard travel insurance policies often do not cover canceling a trip when a traveler is at heightened risk from an outbreak.
If a member of your group is a child, a senior citizen or a woman who may be pregnant, do not purchase any insurance until you know what is and is not covered in the case of infectious diseases.
Compare prices online.
Top sites that compile information and policies include:
It's not advised to purchase from smaller, no-name vendors.
Allianz and AIG Travel Guard are well-known companies with years of experience covering vacations, and you can purchase from them directly.
On sites like InsureMyTrip, they ask for the destination, trip duration, travelers' ages, country of residence and the price of the travel components of the trip before they can give you quotes.
Talk!
Ask around to see if friends or family members have had a good experience with a specific provider. It never hurts to check out travel forums for other perspectives and recommendations as well.
When online, look for people who have taken a similar type of trip -- but remember they likely have completely different circumstances than you.
Weigh the pros and cons of getting insurance through a tour provider.
Many travel companies will offer discounts with packages booked, but that doesn't ensure that what is being provided is the right kind of insurance for you.
It's not uncommon for some packagers to provide more coverage than you need or not enough.
Oftentimes what travelers need is a combination of a few things, and it can be harder to customize that coverage this way.
Purchase your coverage as soon as possible after booking a trip.
This is a good way to get discounts and extra coverage.
Prices will go up the nearer you are to your trip, so the best way to lock in the lowest rates is immediately after booking.
Immediately create paper copies and digital versions of your documentation.
From itineraries to coverage policies, it's wise to save versions of all your travel documents in a safe place online. This way they can be accessed and forwarded while away.
Have a great trip !
-
Robert in NevadaJune 24, 2019 at 10:08 AMI must concur that cancellation insurance is a necessity: 2 years ago we were scheduled to fly to a wedding when I found myself in the hospital....I received a full refund for the airfare (after my surgeon readily filled out the Insurance Company form). The insurance saved us +/- $500 in un-used airfare.

___________________________


Put a single tablespoon of bleach into the detergent holder, and then run a complete cycle.


Time to Clean Your Electric Shaver ?

Chances are pretty good that you have at least one electric razor (or shaver as they are also known) in your home. If you do, then you know exactly how important it is to keep your electric razor clean.
Dissassemble
Clean
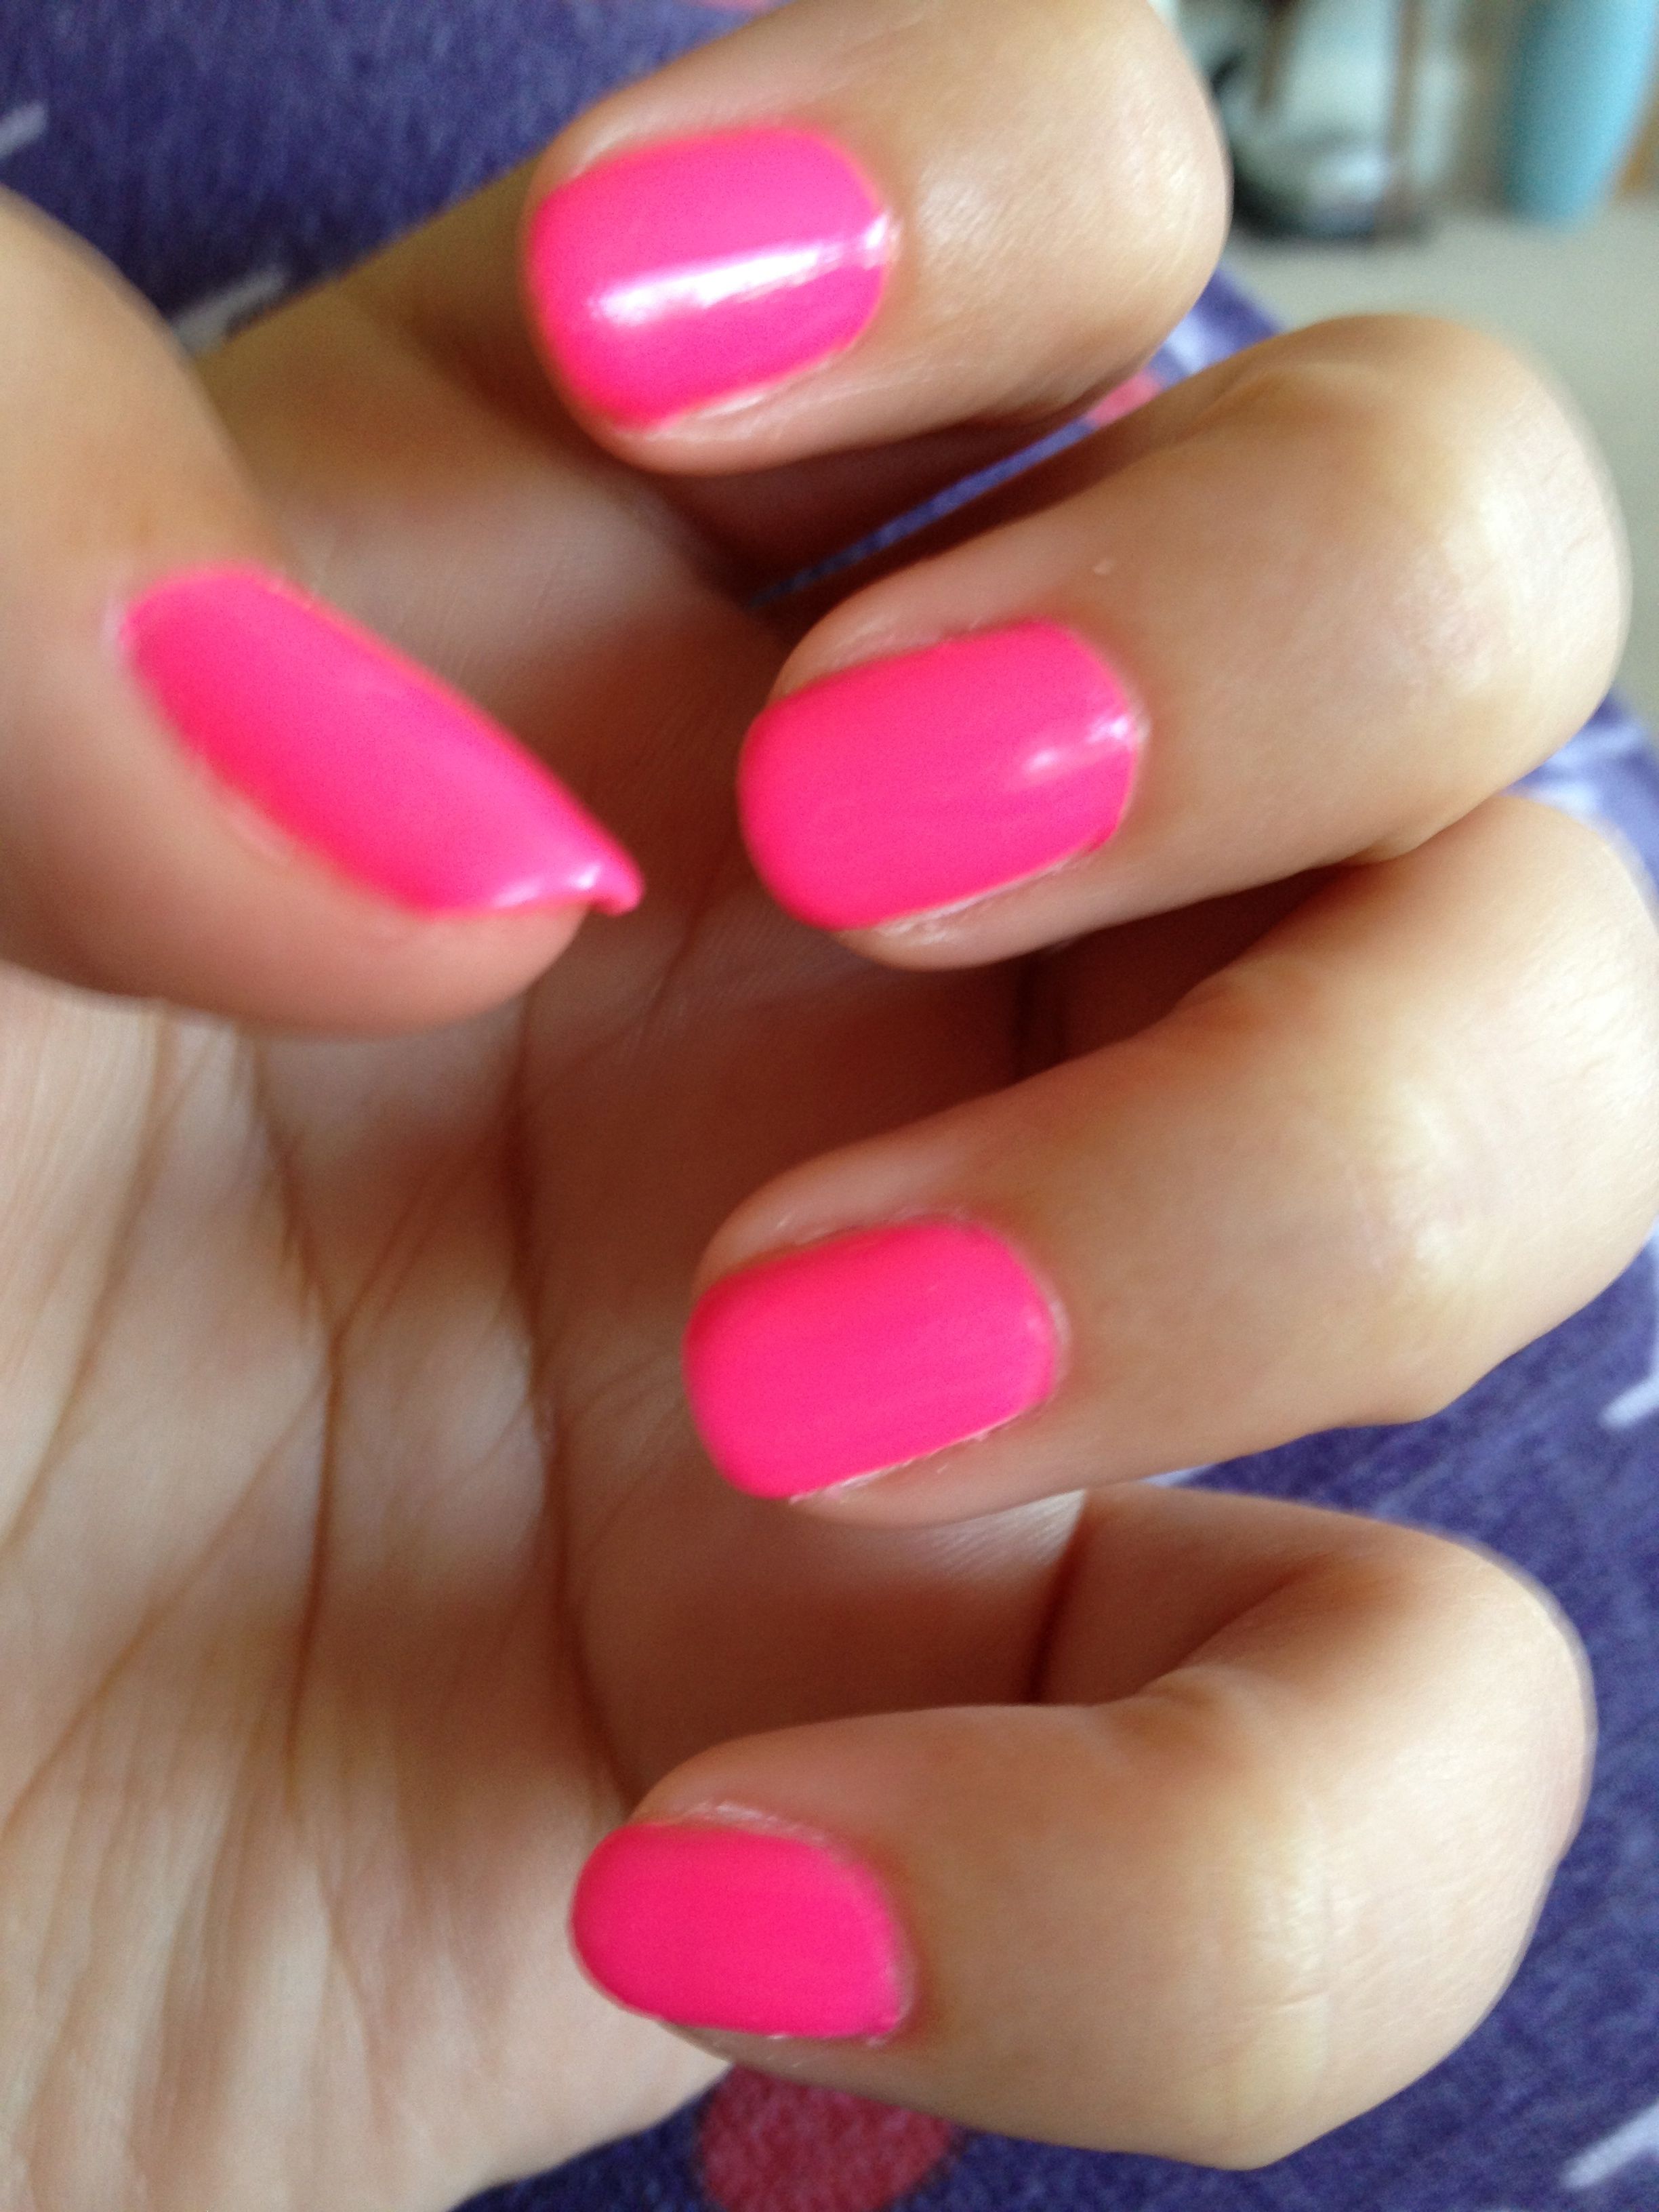
Secrets of Having Beautiful Nails
Throw Rugs


Old Photos: Their Memories Are Priceless

While perusing old photographs, have you ever spilled liquid or food on them...and think that memory is ruined?
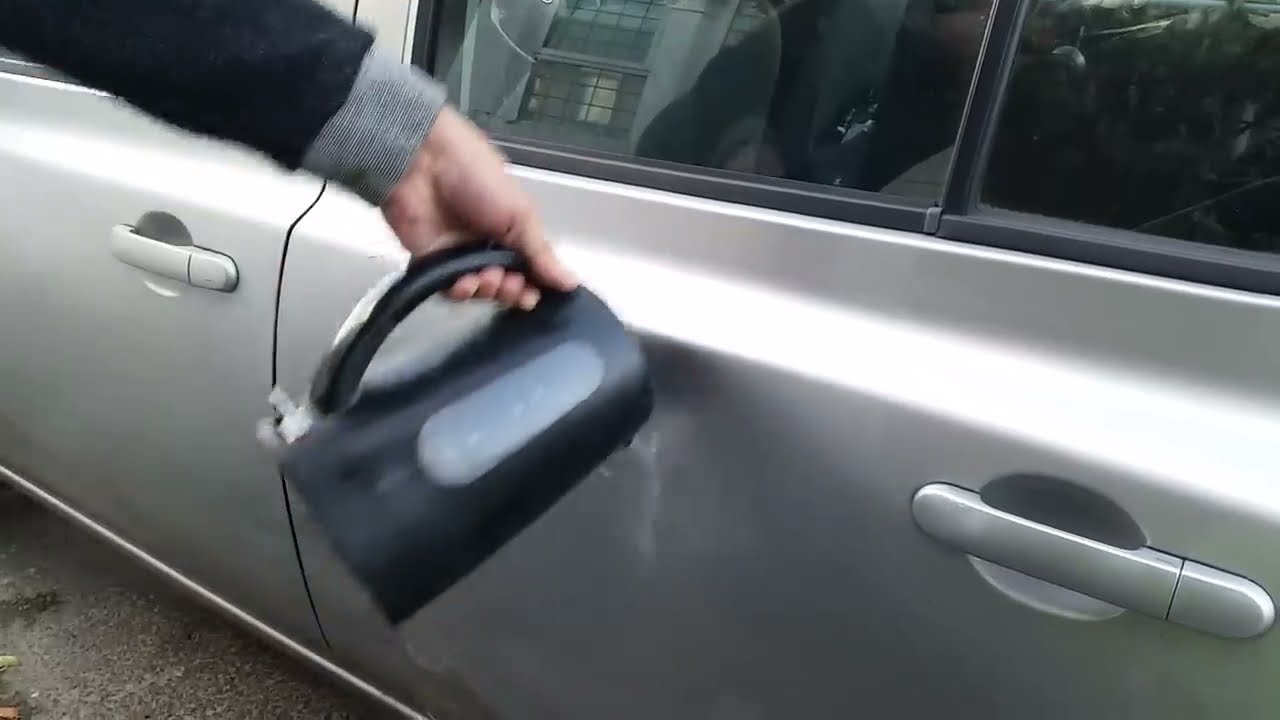
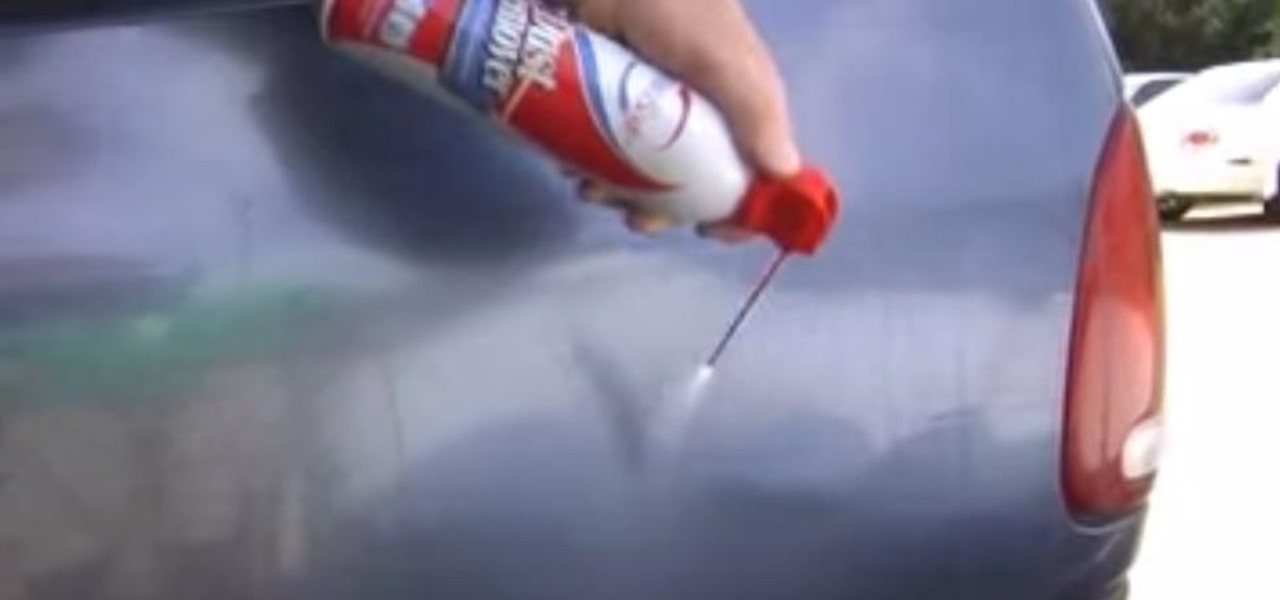
2 Ideas for Fixing a Minor Dent in Your Car


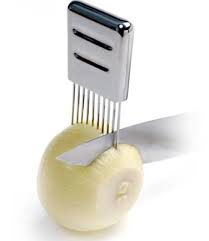
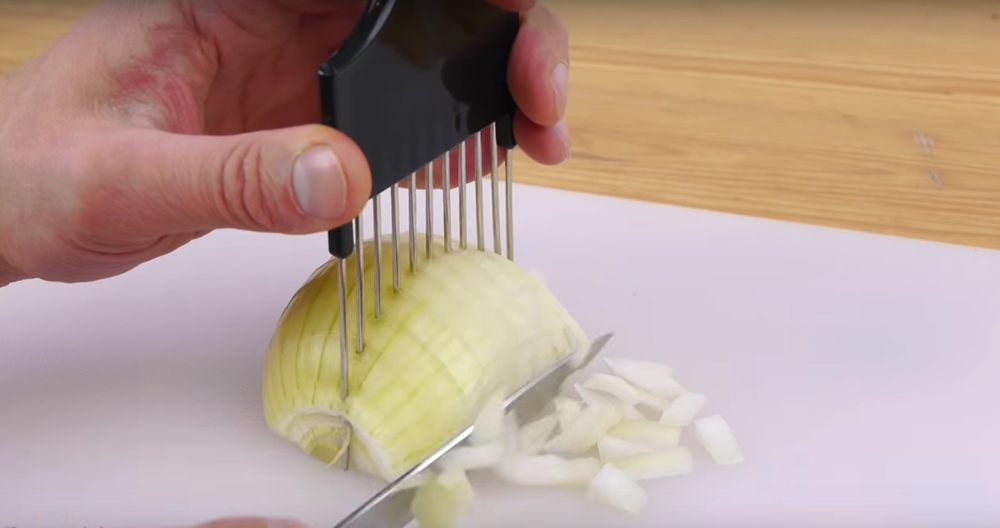
Cutting an Onion

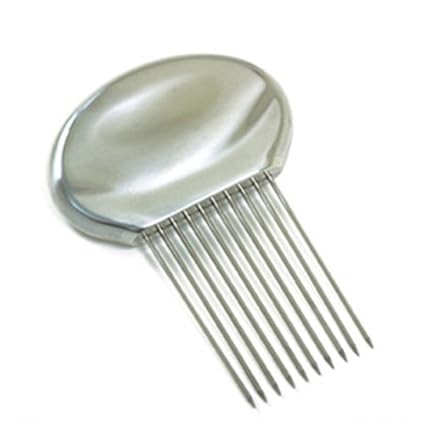
Make sure you choose a strong one with stainless steel picks, because they will need to cut through the onion.

Eight Uses for Coffee Grounds
_____________________________
The Perfect "Cocktail" Addition to a Summer BBQ

Are you still waiting for an IRS refund? Though the Treasury says "the check is in the mail" within a few weeks of electronic filing, that may not always be the case.
If you're still waiting for your refund, there's a website out there that allows you to check the status.
Check it out !
All you need do is fill in a bit of information and you'll get a status !
_____________________
Redecorating Your Bedroom

Whether you are ready for a big change in your life or a subtle, more natural change, there are some key guidelines for decorating or redecorating a bedroom.
People of all ages consider making changes to the decor of their bedroom.
Follow these guidelines and you will certainly be happy with the outcome of your project.
Your bedroom should be your sanctuary, your place of solace and a place to be yourself. Your room should reflect your personality and encourage aspects of your personality that you may be working on; for example, if you find yourself to be pessimistic, you should consider painting your room yellow or orange to encourage cheerfulness or creativity.
Your first step to redecorating or decorating your bedroom is to pick a theme.
Your theme will help you coordinate the furniture, colors and other various aspects of your decor.
Your theme can be centered around a decade or era (Victorian, contemporary, etc.), a hobby (sports, dance, music), collections (a favorite item or collecting item), or a color.
Pick a theme that reflects you and your interests, but make sure it is a theme that you will be happy with for some time to come. (You don't want to redecorate your bedroom every week or month.)
Once you have picked your theme it is time to begin.
Take a quick inventory of the items you already own and wish to use and an inventory of the items around your home that may come in handy.This inventory should consist of items that fit within your theme, or that may augment your theme nicely.
Once you have taken an inventory it is time to take a quick trip to the hardware store, flea market, antique shop and home decoration store.
Pick up a batch of paint chips and carry those around with you as you pick out furniture, pictures, picture frames, furniture and other decorative items, such as pillows.
Begin painting your walls and filling in with photos and furniture.
If you do not want to limit yourself to posters and photos for wall decorations, you can try things like old record albums or fabric swatches or samples.
Your sheets should coordinate with the colors and theme of your bedroom.
Organization can really help you alter the appearance and feel or your bedroom.
Separate your personal items according to function (office type items should remain in the desk area, craft items in another area or basket in the room) so that you can easily begin to compartmentalize your living space.
Inexpensive bookshelves and baskets can be purchased at flea markets or stores. Desks can be purchased in old antique shops.
With some new paint, improved organization and a few items that augment your theme you will have a brand new living space that accommodates your personality and your goals.
Here are some additional video ideas that can give you a few ideas how to make that "sanctuary"....you.
____________________________
Whole Milk or Skim Milk
Some Surprising Facts
-
From Robert Nusser...to...Anthem OpinionsAlso.....what a lot of people don't realize is that whole milk is 3% fat, so you can say that whole milk is 97% fat-free whereas skim milk is 1-2% fat so, therefore, 98-99% fat free; there's only a 1-2% difference between skim milk and whole milk.
___________________________
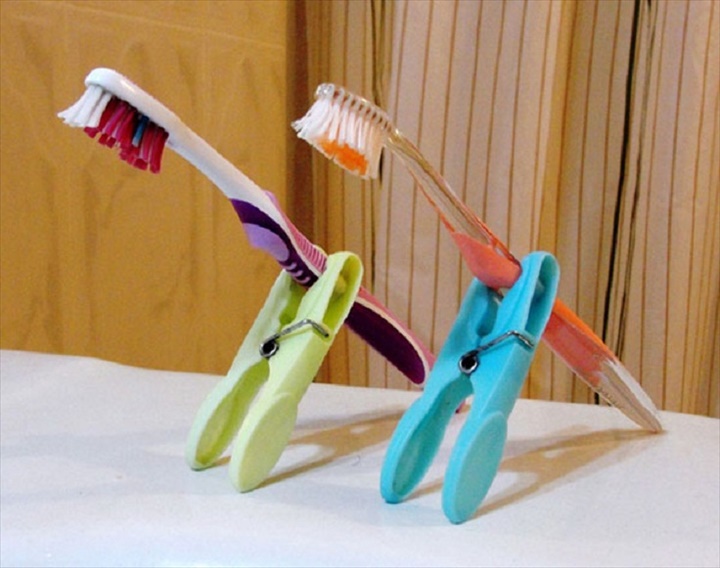
Use Clothes Pins to Prevent a Toothbrush from Touching Dirty Counters When Traveling
_____________________
Spring Cleaning includes
The Patio Furniture
Part of spring cleaning includes cleaning your patio furniture before using it on our back deck.
Since patio furniture can cost quite a bit of money, replacing it every spring would be a foolish waste of money.
Instead, clean your patio furniture following these tips to keep your furniture looking new over many seasons.
Whether your patio furniture is made of wood, aluminum, wicker, plastic, resin, cloth, or stone, you need to find a cleaner that is safe to use for your furniture composition.
Visit your local home improvement store and read the product labels to determine which cleaner will work the best.
Some of the things you might use to clean your patio furniture are:
Large sponges and several rags
A garden hose and a large bucket
Dish detergent or furniture cleaner
Warm water
A broom
A soft scrubber
1. Once you have all of your cleaning gear in a central location, brush your patio furniture completely with a broom.
Make sure that you turn over each piece and brush away all debris including spider webs and cob webs.
2. Once you've brushed your furniture, spray it with your water hose.
If you have furniture with cloth attachments, use your warm water, sponges, and rags to wet the furniture, taking care not to wet the cloth.
3. Apply the furniture cleaner to your wet rags and sponges, and be sure to clean all of the nooks and crannies.
4. Some furniture cleaners require you to dilute their formula with warm water. Always follow the manufacturer's directions.
Wrought iron furniture often requires scouring with a wire brush to remove rust.
5. Once you've removed all of the rust, brush the furniture with your broom and then perhaps apply a cost of gloss spray paint formulated especially for wrought iron furniture.
6. After you've cleaned your furniture with water and cleaner, rinse it by spraying with your water hose, and allow the furniture to air dry.
If you have wicker patio furniture with spots of mold, use a stiff toothbrush and a paste of baking soda and water to remove the mold, and then spray the furniture clean with your water hose.
Be aware that colors in plastic and resin furniture will fade if left in the sun too long.
If you choose to use plastic or resin patio furniture, make sure that you place it in partial shade.
If you don't have shade trees, use a table with an umbrella to shade your furniture.
Video?
___________________________
Oven Cleaning Made Easy
Cleaning the oven is one of the most dreaded of household chores. The time spent scrubbing and scraping at burnt spots can leave almost anyone discouraged, especially since these stubborn spills and splatters are so glued on that it takes some serious dedication to clean them off.
The oven is often neglected because of the inconvenience that cleaning causes, and because it is left dirty for so long the problem only grows worse
.
Here some ideas you can try, however, that can make the chore of cleaning the oven a little less painful.
1. Use the self-cleaning function.
Some ovens, especially newer ones, are able to self clean. When this process is used, the oven heats up to a very high temperature and reduces the spills in the oven to ash.
It is much easier to wipe away the spills after the oven has self-cleaned, but remember that using this function can cause fumes and smoke.
It is a good idea to open the windows in your home while the oven is self-cleaning.
2. Clean spots with oven cleaner.
Most of us have a self-cleaning feature, BUT..
...IF your oven isn't self-cleaning, don't worry.
At your local grocery store, you should be able to find cleaners that are made specifically to tackle the tough baked-on spots in your oven.
The way the cleaner works will depend on the type and brand of cleaner.
Follow the instructions and wear gloves to protect your skin as you clean, since the cleaner may be harsh on skin.
All-purpose cleaners will work, too, but might not have the same effect as a cleaner that is designed especially for ovens.
3. Try natural cleaning techniques.
You can buy natural cleaners for your oven that aren't so harmful to your skin, or you can try making your own.
One alternative that many have found helpful is baking soda.
To do this, sprinkle some of the baking soda on the bottom of your oven and spray lightly with water. Repeat this step for a few hours. Later, scrape out the baking soda and wipe the bottom of the oven with a wet washcloth to remove any residue.
Any of these cleaning methods will leave your oven clean and free of spots left from spills.
If you clean with a non-natural cleaner, remember that the inside of the oven might smell like cleaner you used.
Before cooking with the oven, leave it on a low setting for a little while to get the smell cooked out.
We have a couple of videos for you.
__________________________
Cleaning Your Refrigerator
The Right Way
You've put off cleaning your refrigerator for way too long, haven't you?
If you're like most people, there are some things sitting around in the "ice box" that have been there a while, but the enormity of the task of getting rid of it makes all of us procrastinate on doing so.
You should you have to devote an entire afternoon to the task of cleaning that monster! Who has that kind of time, anyway?
This method is for those who would rather not take each item out of the fridge, put it into a cooler, scrub every surface from top to bottom, and put it all back again (and then not be able to find things for the next few days because they're out of their usual places).
If you don't mind that method, go ahead and keep using it.
But if you're looking for a quicker solution....
All you'll need for this job is a wastebasket and a container of some of those antibacterial cleaning wipes, like Lysol or Clorox brand.
(If you don't have those, some antibacterial cleaning spray and paper towels will work just as well; it's just not as convenient.)
Let's get started using these 6 easy steps:
1. Turn down the temperature so you don't waste power while the door's open.
2. Take all the items out of the very top shelves/compartments in the door and just place them on the floor nearby.
While you're doing this, quickly check the expiration dates on older condiments and toss in the trash if expired.
Scrub the exposed surface of the shelf with a cleaning wipe.
Put everything back where it was.
3. Repeat step 2 with the rest of the door shelves, working down to the bottom.
Don't forget to run the wipe around the rubber seal surrounding the door.
4. Take all the items off the top shelf in the main part of the refrigerator and place them on the floor.
Discard anything old.
If the shelf's really dirty, remove the entire shelf to make it easier to scrub. Otherwise, just run the wipe over the surface. Also wipe the walls around the shelf.
Replace the food.
5. Work your way down each shelf, repeating the process as you go.
When you get to the crisper drawers, remove them, dump out any crumbs, then wipe them out. If there is standing water on the bottom of the fridge, sop it up with paper towels.
6. Very important: Turn the temperature back up.
If you have a problem with unpleasant smells, just keep an open box of baking soda in the fridge. It will absorb the odors.
Now your fridge should be clean and germ-free.
Here are a couple of helpful videos:
__________________
Time to Clean
Your
Dishwasher
If you have had a dishwasher for very long, then you know just how helpful they can be; however, just because they can be helpful in cleaning other things doesn't mean that they don't need to be cleaned themselves.
Here is some information that is designed to show you how to clean a dishwasher properly.
It's not all that difficult, as long as you follow these simple directions.
1. Check the temperature.
Often times, incorrectly setting the temperature on your dishwasher can create all kinds of problems.
Take a quick look at your owner's manual to double check and verify what temperature the machine should be set on for proper cleaning.
Once you have done that, double check to see if your dishwasher is set to the proper temperature, and if it is not then correct that mistake before proceeding.
2. Do a basic scrub down.
Get a large bucket full of warm soapy water, and a soft scrubby sponge or one of those cleaning erasers.
Dip the sponge or the eraser into the bucket and begin scrubbing down the dishwasher, inside and out.
As necessary you need to change out the water to ensure that you get the dishwasher as clean as possible.
3. Add a little bleach.
Put a single tablespoon of bleach into the detergent holder, and then run a complete cycle.
This should help break down and even get rid of any mold buildup that may be in the dishwasher.
In most circumstances this should be the extent of the cleaning efforts that you need to do.
4. Run a cycle with some Tang.
If you happen to have noticed any discoloration or scaling inside your dishwasher, you may need to do a little bit more cleaning.
A fairly effective method for doing this is to add about a half container of Tang to your dishwasher.
The citric acid the drink contains is perfect for removing and cleaning scale deposits.
5. Run another cycle with vinegar.
For dishwashers that have an odor, you can use some vinegar to treat that problem.
Simply fill a coffee cup with some vinegar, and then place it onto the top rack of your dishwasher.
Run a complete cycle, and you should have the odor removed completely.
6. Inspect and repeat.
Take a look at your dishwasher, and see if there is any problems that still remain. If there are, simply repeat steps two through five again, as needed, until you have completely removed all of the dirt, grime, or other issues that may have been in the dishwasher.
Always a video or three !
Good Cleaning !
_______________________
The Kitchen Whisk
Which One Should You Use ?
_____________________________
Got a "Clumping" Cheese Grater That's "Breaking Your Arm" While You Grate Cheese ?
No Reason for It !
Coat a cheese grater with non-stick spray BEFORE using it to help keep cheese from clumping on the grater.
It also makes it a lot easier on your arm while grating.
_____________________
Time to Clean Your Electric Shaver ?
Chances are pretty good that you have at least one electric razor (or shaver as they are also known) in your home. If you do, then you know exactly how important it is to keep your electric razor clean.
Cleaning your electric razor periodically is a vital and often overlooked part of home appliance maintenance.
These types of razors don't work as efficiently, and can actually hurt you if they are not cleaned every once in a while.
Here's how you do it.
Materials
Old soft bristled toothbrush
Shaver lubricant
Electric razor cleaner
Electrical contact cleaner
Procedure
Unplug
Before you even begin cleaning your shaver, you need to make sure that it does not have an active electrical current.
Remember that electricity and water do not mix, so remove any batteries or unplug the cord from the wall.
Inspect
Take a look at your shaver. Make sure that there are no cracks in the case, that the head screen is in good condition, and that any gaskets or seals are in good condition.
Dissassemble
Remove the shaver head screen and begin removing any debris that may be inside there.
Be careful, though, that you don't remove anything that may be needed for proper operation. There are some fairly small and delicate pieces of mechanical equipment under that screen, so lightly tap the head to knock the loose debris out.
Clean
Drop the screen into a small bowl of electric razor cleaner or some warm soapy water.
Either will work, and while you can get the electric razor cleaner at the same place you purchased your razor, the warm soapy water is a lot less expensive.
While the screen is soaking, either use the small brush that came with your razor or an old soft-bristled toothbrush and lightly brush out the debris.
When you have finished that, take some time to look over the electrical connections for any corrosion. If there is any corrosion, then you need to spray a little electrical contact cleaner and scrub clean.
Remove the screen from the cleaning solution and dry.
While the screen is drying, scrub any remaining debris away with your brush and inspect again for any damage to the screen.
Reassemble
Once everything is clean, reassemble your shaver. Do this in the reverse manner that you disassembled it.
Lubricate
After reassembly, spray a little lubricant on the razor screen.
This helps to reduce friction between the blades and the screen, which in turn will provide you with a better shave and reduce razor burn.
Before you shave in the future, take some time to lubricate your shaver.
Test
Finally, there is only one thing to do is test the razor.
Simply turn it on and make sure it works properly. If it turns on, then go ahead and shave.
There you have it. Take care of it, and it will last for years.
Need a video?
Here's how to clean and sharpen the blades !
_________________________
Secrets of Having Beautiful Nails
(Just for you Ladies)
___________________
Throw Rugs
There's a Right Way to Clean Them
Many people use throw rugs as a way to add color and decoration to a home; however, throw rugs can also be practical, in that they provide protection.
Most of us have hard laminate or tile flooring in our kitchen, so we have a cushioned throw rug in front of the sink in order that the person standing there washing dishes or cooking, will have a softer work surface for their feet.
We've also placed throw rugs across thresholds of rooms, and our high traffic areas, to protect the carpeting beneath from wearing thin in those areas.
We've placed our largest throw rugs directly in front of the house entry doors in order to collect dirt that might be tracked into the house from the outside.
Many bathrooms, of course, have throw rugs in front of the bathtubs and sinks, to protect the flooring underneath from becoming slippery and wet after bathing.
It is little wonder with all of the throw rugs we use that we need to clean them often.
Depending upon they type of throw rug you have determines the method in which you clean it.
You could never stuff the largest of my throw rugs into a super-capacity washing machine, because it is far too large, yet very thin throw rugs in other areas of the home cam be washed several at a time.
Follow these guidelines for cleaning the throw rugs that you have in your home:
1. Vacuum your throw rugs at least once a week, especially considering where they are placed.
If you have a throw rug at your entry door, you may need to vacuum it more often. Remember to turn the rug over and vacuum it from that side, as well.
2. Take your rugs outside and shake them vigorously.
3. Check the tag of your rug.
If it is washable, and after you've vacuumed it and shook it outside, wash it in your washing machine on the gentle cycle.
If you wash it on a regular cycle, the higher agitation may strip the rug of needed fibers.
4. Allow your rug to air dry outside or across the railing of a porch or deck, or flat on hot concrete.
If that is not possible, dry your rug in your clothes dryer on the lowest heat setting.
After washing them, if you have stains on your rugs, spot clean them with carpet cleaner or use one part vinegar and three parts water and dab with a sponge.
In between washings, or if you have rugs that you cannot wash due to shrinkage, you can sprinkle baking soda on your throw rug, allow it to sit for thirty minutes, and then vacuum.
Video help?
___________________________
How to Open a Champagne Bottle
Yes, there is a correct way to open a champagne bottle !
1. Chill the bottle.
A bucket of ice on its own won't cut it, but a mixture of ice and water will allow the bottle to be completely submerged.
For extra speedy coolness throw in a handful of salt as well.
It's a sommelier's tip that will turn a wait of a half hour or more to less than 8 minutes.
2. Once the bottle is chilled, and dried if it was submerged in ice water, remove the foil, hold the bottle at a 45 degree angle and twist the bottle from the base, rather than trying to pull up and out on the cork.
While the cork, with cage still intact, is completely covered with your palm, it should gently pop out in your hand without any spillage.
3. Pour twice.
First, fill the glass only halfway to avoid overflow while also chilling the glass.
If serving a group, pour half a glass each and return to the first of the flutes for the second pour.
Here's a couple of helpful videos to make you look like a pro when opening up that bottle for company....or alone with that special person !
___________________________
Old Photos: Their Memories Are Priceless
and
They Need to Be Cleaned Properly
While perusing old photographs, have you ever spilled liquid or food on them...and think that memory is ruined?
Don't panic!
The photo isn't ruined.
There is a way to clean old photographs.
Follow these steps to clean those cherished photographs, and preserve them for future generations:
1. For fresh stains, act quickly. Place the photo in a stream of running water, or in a pan of clean water.
Keep in mind that photographs are processed in liquid, so water will not harm them.
2. Gently hold the photo by the very edge, and swish it back and forth in the water.
3. Using your fingers as a squeegee, remove the excess water from the photo.
4. Inspect the photo for water droplets, and dab at them with paper toweling.
5. Place the photo between paper towels to remove all water.
6. Place the photo on a thick bath towel and then use a hair dryer on the highest heat setting to dry the photo completely, moving the dryer back and forth at least ten inches away from the photo.
Here's a helpful video:
SPECIAL NOTE:
The previous steps are not intended for very old photos, such as ferrotypes.
And never, ever use water or liquid on photograph negatives, as you will completely destroy the image.
It is best to take very old photographs to a professional restoration artist to have them cleaned, but you can enhance and preserve old photographs yourself if you have a computer and a photo editor.
Follow these steps to preserve and enhance your old photographs with a photo editor:
1. Scan your photograph.
2. Choose to import it into your photo editor.
3. With your editor, choose to crop, straighten clear red eye problems, adjust contrast, lighting, color, color temperature, and even sharpen the photo.
4. Save the "cleaned" photos to a folder on your hard drive, and then store the original old photographs in dry, clean conditions at a steady room temperature with little humidity.
Keep original photographs from direct sunlight.
When cleaning old photographs, try to determine the processing used for the particular print.
Water will ruin certain types of prints. Avoid scratching or rubbing photographs while cleaning them, as doing so may etch the print.
Avoid writing with ink on the fronts – or backs – of photographs, as the ink can transfer through to the print.
If you must write on an old photograph, use pencil and write very lightly.
How to do it with Photoshop?
Best tip....if you're unsure in any way...
HAVE A PRO DO IT !
____________________________
Turning a Narrow Hallway in Your Home into
A Work of Art
Many people find dealing with a narrow hallway to be a bit tricky, and don't really know how to appropriately decorate these areas.
That's unfortunate, since these particular areas have a lot of potential that really shouldn't go to waste.
Want to beautify a part of your home and get the most out of those narrow hallways and help spruce up the look of your home?
Just follow a few simple guidelines !
1. Use the right color of paint.
One of the biggest reasons that narrow hallways look, and generally feel fairly claustrophobic is because they have been painted the wrong color.
Instead of going with darker colors and shades,you should use neutrals, pastels, or even bright colors.
By lightening the colors in the hallway you will notice that there appears to be more light in the hallway, and therefore more room.
2. Add a mirror.
As long as you have room, you should hang a mirror at one end of the hallway. It really doesn't matter how tall the mirror is, as long as it is wide enough to leave only a couple of inches on each side of the frame.
When you do hang the mirror make sure that you position it fairly near the ceiling (about three or four inches), and also place a plant of some sort in front of it.
These two items will not only add extra light to the hallway, but also added depth and texture.
All in all, the mirror will help create the illusion of a wider or larger hallway than it normally is.
3. Create a gallery.
Do not let the side walls of the hallway go to waste. Take the opportunity to add a bit of artwork to the hallway, creating an actual private gallery.
This artwork can be professional artwork, something that you have done, pictures of your family, or some other type of decoration.
When you hang them, make sure that they are hung around eye level. Generally speaking this means at your eye level, and six inches both above and below.
To add a little touch of something extra, use frames that contrast with the color you painted your hallway.
4. Furniture can be helpful.
Despite the fact that narrow hallways often look...well, too narrow for furniture you should still consider placing a piece or two into the hallway. There are specially designed pieces of furniture made for narrow locations, such as hallways, that can add a bit of elegance to your area.
Keep in mind that you will want to carefully measure the pieces to ensure that they will not block traffic, or make it too difficult to move around, before you purchase them.
5. Everything in moderation.
As with anything in life, when you are attempting to deal with a narrow hallway, you need to make sure that you do not go overboard. It is entirely too easy to go from creating a decorated area, to an area that is cluttered and claustrophobic. A good general rule of thumb is to keep it as simple as possible.
These are only a few guidelines that you can use to get started on dealing with your narrow hallway. Feel free to experiment, to add other decorating elements, or to take those you don't like out.
In the end, you are the one that will have to live with the way the hallway looks, and only you can decide whether you like it or not.
Some videos?
____________________________
Preventing Brown Sugar Clumps
Prevent brown sugar from clumping by placing a marshmallow
inside the bag.
-
Boy, was this ever TIMELY!!!! My mother-in-law JUST asked me LAST NIGHT about why she kept getting a brown sugar "brick" and what she could do to prevent it. Adding marshmallows to the container was not something I would've thought to use, but I'm definitely going to try it! (And also split the bag of marshmallows with my MIL). Thanks for the tip!!
2 Ideas for Fixing a Minor Dent in Your Car
Hot Water
&
A Plunger
or
A Hairdryer
&
Compressed Air
_________________________
Cutting an Onion
with a Hair Pick
All you’ll need for a perfectly cut onion in a hair pick.
Make sure you choose a strong one with stainless steel picks, because they will need to cut through the onion.
Best of all, you can use this little trick to slice the onion in two different ways!
You can make onion rings or dice your onion with this idea.
Onion Rings
Cut off the top and bottom of your onion and peel, as usual.
Turn the onion on its side and stick the hair pick down through the center of the onion.
Use the hair pick as measurement and cut in between each prong for perfect rings.
Pull the rings apart.
Diced Onion
Cut the onion in half and stick the pick in from the side.
Cut between the prongs in the same way, but then turn it 90 degrees and cut in towards the prongs on both sides.
Simple and a safe way to keep your fingers out of harms way!
__________________________
Adding Keys to a Key Ring
Without Breaking a Fingernail
______________________
A Beautiful Bedroom Needs the
Right Accessories
&
You Can Make Them Yourself !
There are several aspects that can really make a bedroom look unique.
Or course, the colors you use can have a huge impact, such as what color you paint the walls or use for curtains and bedding.
The style of furniture is another important part of a room's look.
Beyond that, though, are the smaller touches that you don't always think about but definitely add to the mood and look of a room:
Accessories
Bedroom accessories can vary greatly but add to the way a room appears overall. You can really change a room with just a few accessories thrown in to help decorate the area.
When you are considering what accessories to place in a bedroom, you should first consider who will be staying in that room. The personality of the room's inhabitant can help guide the decision.
Also, think about any themes or style.
For instance, if you are going for a very contemporary look, an antique lamp or rug probably isn't the best choice to suit the room.
Accessories come in all types, from functional to decorative.
They are items that are not necessarily needed in a room but add flair and visual appeal.
Functional accessories would include lamps, mirrors, rugs, and storage bins.
Posters and paintings, decorative throw pillows, souvenirs, and wall decals are accessories used for purely decorative purposes.
Because a room can quickly begin to look cluttered with too many accessories, you should carefully choose which pieces to display in a room.
Even the nicest accessories can make an area look crowded if they are crammed into too little space.
In smaller bedrooms, limit the use of accessories and try to keep it somewhat simple so that it is not overwhelming. A lamp, a rug, and a few pictures on the wall may be all you need to decorate.
Even if you are dealing with a large space, take care not to create a cluttered look.
A few carefully chosen accessories can really contribute to a room's look and feel.
In a bedroom, it can be particularly important to create a calming space, so consider using accessories in colors or a theme that will help you feel relaxed.
For example, you could create the feeling of sitting near the ocean by using blue tones in your decorating and placing shells or other beach-related trinkets around the room.
There are many possibilities when it comes to accessorizing a bedroom.
Use your imagination and have fun creating the perfect look for your space.
We have a few videos to give you an idea or two !
Be Creative...and...Have Fun
________________________

Have you ever noticed how often people simply stick a picture on the wall, with little or no thought about it, and call it good?
Don't Throw Those Binder Clips Away

Planning is the Key


Removing Corn Husks the Easy Way

How to Cut a Mango


When Was the Last Time You Cleaned Your Doors?


Pitting Cherries the Easy Way

/https://www.thestar.com/content/dam/thestar/life/2017/08/17/the-best-and-worst-ways-to-reheat-leftover-pizza/microwave-pizza.jpg)


____________________________
Remove Fat from Sauces with an Ice Cube
How to Avoid Oil Splat Burns While Cooking
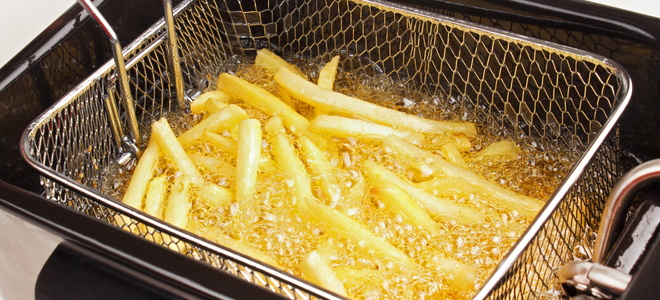
Five Ways to Dry Nail Polish

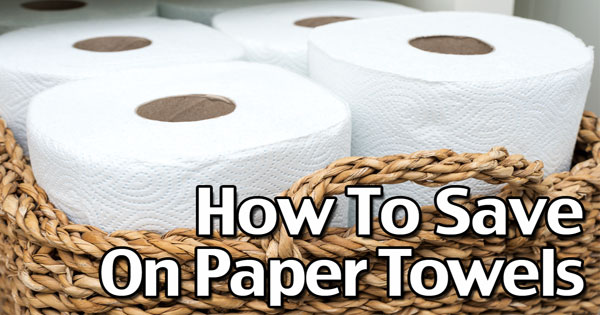
How to Remove Orange Stains from Clothing
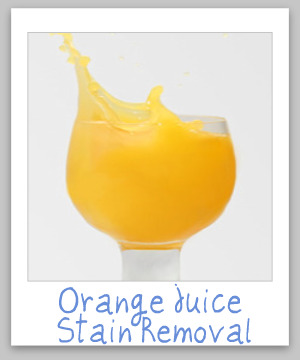
1. Cover the stain in a thin layer of clear dish soap.
Freezer Burn on Ice Cream


...add a tablespoon of salt to each laundry load.


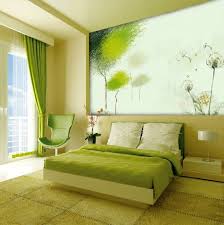
When decorating a bedroom, many people prefer to choose a theme for the room.


Removing Deodorant Stains from Your Clothes
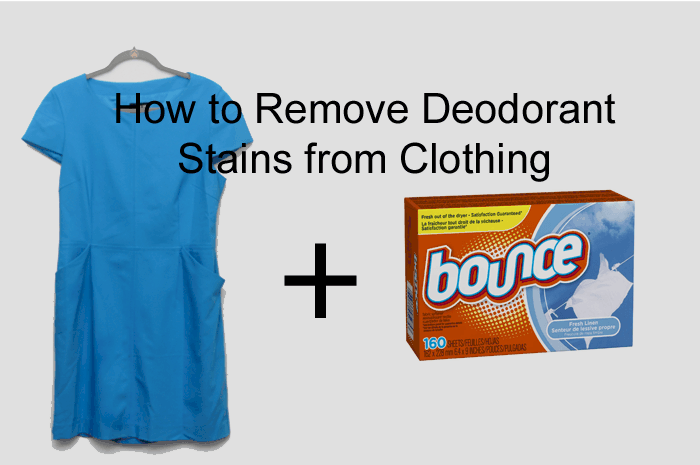

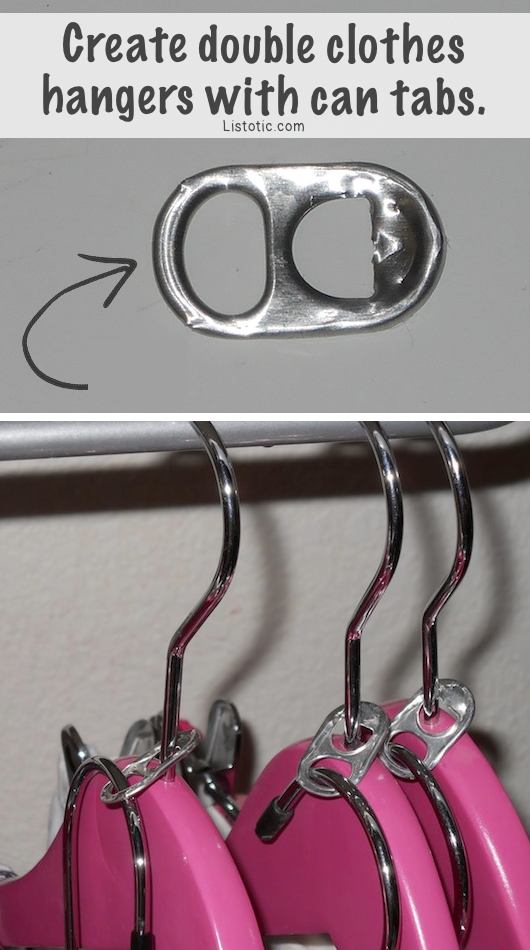
The Right Way
to
Place a Picture on a Wall
Have you ever noticed how often people simply stick a picture on the wall, with little or no thought about it, and call it good?
This really isn't the best way to go about getting your pictures to look their best.
If you are looking to get the most out of your decorating efforts, then you really need to learn the picture hanging do's and don'ts.
With these guidelines firmly in place, you will be well on your way to creating a wonderful home art gallery.
1. Look at it as a whole.
The key to really getting pictures hanging the right way is by learning to look at everything as a whole.
Keep in mind that where you will be placing one picture will affect the placement, and how well everything is viewed overall.
2. Practice.
Before you begin hanging pictures, try practicing the arrangement first. This can be done very easily in one of two ways.
The first is to simply lay out the pictures on the ground, and moving them around until you have them arranged how you would like.
The second is to draw it out (even a rough sketch will do) until you have the arrangement that you like.
Not only is it easier to get the look that you want this way, you can also help reduce the number of holes that you put in your wall.
3. Order is preferable to chaos.
The human mind likes to make order out of chaos, and this works in art as well. What this means is that you should try and arrange your pictures so that there is both a horizontal and vertical element, preferably more than one if you can arrange it.
4. Keep it close, but not too close.
Create groupings for your pictures so that they are close, but not exactly too close.
When there is too much space between groupings it tends to disrupt the flow that you are trying to create.
When possible keep in mind that color, size, and texture of the pictures (as well as the frames) can all effect how the arrangement will look.
Try to strike a balance of all of those elements when creating your groupings.
5. Stick to a band.
One of the classic principles of hanging pictures is that you are supposed to hang them at eye level, except that this has one small problem.
That problem is that not everyone in a home has the same eye level.
To deal with this, determine a happy medium between the people that live in your home.
For example, if you have someone that is six foot two inches tall, and another that is five foot eight inches, then your starting eye level should be at around five foot eleven. From there you can then hang your pictures in a band that can go six to eight inches both above and below this line.
As usual, we have some videos to use as a guide.
__________________________
30 Uses That Will Surprise You
__________________________
Planning is the Key
to
Southwest Home Decorating
Over the recent years there has been such a huge upsurge in the number of people who prefer the southwestern look in home decorating, that entire stores have been set up to cater to this specific style.
Many people, when they decide to decorate in this style, figure that they can simply gather together a random hodgepodge of things that look like they would belong in the southwest.
Unfortunately, this approach to home decoration does not actually work all that well.
If you have decided that you want to go to "southwest home decorating", just be sure that you use these simple guidelines, and you are going to be able to have the perfect decorations for your home.
1. Color
For the southwestern style, you are going to want to use the colors that evoke the feelings and sentiment of the desert.
What this basically means is that you are going to want to use the earth tones and shades.
Use colors such as browns, reads, blues and grays all of which you want to use the paler, dialed down version of the colors.
If you are going to be doing your own painting, you can simply ask a clerk at the home supply store for an example of their earth tone paints, and you are going to get exactly what you want.
If you are going to be doing your own painting, you can simply ask a clerk at the home supply store for an example of their earth tone paints, and you are going to get exactly what you want.
2. Balance
Unlike when a person decorates in other styles, the southwestern style tends to lend itself towards more spartan (or austere) arrangements of the furniture.
While things may seem more "cozy" with more items and furniture around the home, this is exactly what you want to stay away from.
When placing the furniture around the home, think of how wide open the American Southwest is, and arrange your possessions in the same manner.
3. Material
When deciding to decorate you home in the southwestern style, you need to make sure that you choose the materials carefully.
The walls, roof and furniture are going to be playing a huge role in the overall look of your home, and as such you are going to want to use materials such as plaster, stucco and exposed wood.
Try to stick to as "natural" of materials as possible.
4. Accent
Whenever you decorate something, you are going to want to provide some accents to highlight the room and its architecture.
Probably the single most perfect material for this purpose when going for a taste of the southwest is ironwork.
Here are some additional ideas to think about it you...
"Go Southwest"
______________________
Removing Corn Husks the Easy Way
Just place them in the Microwave for a couple of minutes and the husks will come off completely.
How to Cut a Mango
Directions
1. Peel the mango.
2. Cut off the sides of the mango, just around the pit
3. Slice each chunk vertically and then horizontally to get little squares
4. Slice a lime in half and squirt over the cut up mango
5. Drizzle some Tajin over the mango pieces
Preparation trick:
Tajin is a chile salt commonly used for fruit seasoning. Sprinkle some over any fruit to make it super tasty. It's delicious with watermelon, too!
A picture is worth a thousand words.
Here are a few additional ideas...and...methods.
Good Luck !
_____________________
Freeze Leftover Herbs to Keep them Fresh
Chop and freeze in an ice cube tray, with water, stock, or olive oil. The herbs will stay fresh when you need them.
When Was the Last Time You Cleaned Your Doors?
Doors are some of the most touched items that are attached to you home. Every time someone goes in and out of a room, that person has to open and close the door.
If your door is dark, no visible fingerprints will show up, but the dirt will still be there.
Since it is such a high traffic item, it will also be prone to bacteria and viruses that could spread among family and friends.
So next time you are cleaning your house, make sure to make cleaning your doors a priority.
Cleaning a door is not a tedious task. All you need to do is get a bowl of soapy water and a rag.
Dip the rag into the soapy water, and the scrub the door.
If there are really dirty spots that just refuse to come off, try a brush. Using a brush with the soapy water should lift the dirt right out.
Just make sure not to brush so hard that the paint comes off.
While cleaning the doors, make sure to hit in one of the most often missed dirty spots in your entire home—the top edge of the doorframe. I
f you do a white glove test up there, I can almost guarantee you will find tons of dust from years of neglect.
Here's an idea using "Pledge" and a dryer sheet !
One place that you also want to be very careful to clean well is the doorknob and the area where people push on the door to go in.
Since this is where so many hands go, it is a great place for germs do dwell and move from person to person.
Consider getting an antibacterial spray or wipe to clean it down.
The Lysol wipes and sprays work perfectly for this.
__________________________
Pitting Cherries the Easy Way
Place a cherry on the mouth of a an empty bottle and use a chopstick, or thick straw to push it through !
__________________________
Reheating Pizza
Still have some pizza left in the box?
Don't throw it away, here's a way to make it taste as good as it did when you opened the box for the first time.
Don't throw it away, here's a way to make it taste as good as it did when you opened the box for the first time.
Place a cup of water in a microwave and drape the pizza slice(s) with a wet towel. Use a low setting.
______________________
Maybe Not Just Yet !

Running out of room in your car console?
Try this !
It may not be pretty, but it works !
Try this !
It may not be pretty, but it works !
___________________________
Simply crack the egg into a bowl and place a plastic water bottle over the yoke.
Then, gently squeeze the bottle over a slotted spoon.
Remove Fat from Sauces with an Ice Cube
Use ice cubes to remove extra fat from sauces. Wrap ice cubes in a paper towel or thin cloth and skim along the top of the liquid which helps the fat to congeal, making it easy to spoon out as needed
____________________________
How to Avoid Oil Splat Burns While Cooking
Avoid oil splatters by sprinkling salt in a pan while cooking. It helps absorb the moisture that causes the splatter that can burn the cook !
_______________________
Five Ways to Dry Nail Polish
__________________________
Shake
&
Fold
How to Remove Orange Stains from Clothing
1. Cover the stain in a thin layer of clear dish soap.
2. Next, pour some white vinegar on top of the dish soap.
3. Rub the mixture into the stain thoroughly.
4. Finally, rinse the stain out by either soaking it in cold water or running it under the faucet.
Video help for other juice drinks?
-
From Mary Lee Duley...to...Anthem Opinions
Saved my new blouse with the orange juice tip!
And....live margarita recipes.
___________________________
It's Easy to Avoid & Keep it Fresh
Just cover it in waxed paper or cellophane
_________________________
Making The Perfect
Margaritas
The Basic Margarita
The Strawberry Margarita

The Mango Margarita

The Blue Margarita

The Frozen Pink Lemonade Margarita

The Peach Margarita

The Frozen Peach Mint Margarita

__________________________
A Simple Idea to Get Groceries from Your Car to the Kitchen in One Trip
Just place a laundry basket in the trunk of your car, store all of your items in it, and carry it from the car to your kitchen in just one trip !
_______________________
Using a Pencil Eraser to Remove
A Scratch
A Computer Screen

____________________________
To prevent clothes from fading...
...add a tablespoon of salt to each laundry load.
Doing so should keep the colors vibrant !
_____________________________
What Color Should I Paint a Room?

If you've ever visited a hardware store or home improvement store, you've mostly like seen the paint color palette display with thousands of color combinations available.
When selecting room colors, keep it simple and remember that there are truly only seven colors in the paint spectrum, and they are:
Red
Orange
Yellow
Green
Blue
Indigo
Violet
White and black are considered neutrals, not colors, and compliment whatever color scheme you choose.
The paint display of color palettes at the store always provides sample strips of varying degrees of color.
When selecting a paint color for a room, start by choosing three colors from an object in the room. For example, if you use a favorite comforter on your bed, take the matching pillow case with you to the paint store.
Find three of those sample paint strips with the colors of your pillow case, and you will have at least fifteen colors from which to choose to paint your bedroom.
Since each sample paint strip contains six complimentary colors, you may choose to use one color for three bedroom walls, and another hue from that color strip for a fourth wall.
Once you've chosen the colors for your bedroom, you can continue the color scheme into the hallway by choosing another color from the same paint strip.
Taking it a step further, choose one more six-panel paint strip that will compliment the first paint strip, and use that color scheme for the bathroom just off of your bedroom.
The result will be one color scheme for your bedroom, with a complimentary color scheme for your bathroom, and another complimentary color scheme for the hallway to tie the look together.
Colors can create an atmosphere and affect our moods.
Consider the following when selecting room colors; red, orange, and yellow stimulate, while green, blue, indigo, and violet relax.
If you have a study in your home and wish to encourage a relaxing environment for concentrating on desk work, then choose a color scheme with blues or greens.
If you've a playroom, colors from the yellow palette might be appropriate.
In most rooms you can combine neutrals with stimulating or relaxing colors—or both—to create separate environments within your home.
If you have bold furniture colors, choose neutrals for walls and ceilings.
Conversely, if you have bold wall color choices, choose traditional neutral furniture to make a statement.
Sometimes you need relaxation, while other occasions dictate a stimulating environment, such as a party.
Kitchens are a combination room. Choose colors from several color groups for your kitchen area.
Bathrooms are another room that can incorporate stimulating and relaxing color groups.
If you choose yellow for wall paint, choose neutral and bold colors for accents.
We have a 3 Part Series videoed by Ace Hardware that should help you out in your room painting decisions.
____________________________
Like Avocado?
Keeping It Fresh Doesn't Have to Be a Problem
![Amazing hacks avocado lovers needs to know [ARTICLE] - Pulse Live ...](https://ocdn.eu/images/pulscms/YmQ7MDA_/bd4ed3de62ab22a36b18aa772f69e792.jpg)
Extend the life of a cut avocado by storing it in an airtight container...
...with a piece of onion.
The sulfur in the onion will help preserve the avocado freshness.
________________________
Need More Kitchen Storage Space ?
It's All in the Organization

Even after going through and getting rid of stuff, do you still feel like you don't have enough places to store things in your kitchen?
Odds are you have more space than you think.
Follow these few tips and you're sure to find space you never knew you had.
1. Use shelves or hooks.
Wall space is a great place to use as storage. If it's not being used for cupboards, build some shelves or install some hooks. These are great to hang rags on, or store your cookbooks.
Buy a hanging rack to hang over your stove and hook your pans on that, which will free up space in your cupboards for food and bowls and such.
2. Store littler things inside of bigger things.
Seems simple, but people often don't think about it.
Stack smaller pans inside of bigger pans, and then just stack all the lids on top.
Stack glasses inside of each other and plates on top of each other. Just make sure not to stack too high so nothing topples over and breaks.
You don't even have to put the same things together, take a big pan or a big jug and store utensils or measuring cups inside, anything that will fit!
3. Use space under your hanging cabinets.
Install things under your cabinets such as paper towels holders and baskets to hold things in.
If you install one of those electric can openers under your cabinets, you can do away with your manual can opener and free up space in your drawers.
4. Manage your food.
Food that you store in your pantry comes in a wide variety of shapes and sizes, so try and limit those by putting them in plastic containers.
Store your most often used flour, sugar, cereal, and crackers, whatever it may be in store bought containers and stack them on top of each other.
This not only saves space, but it makes your pantry look organized.
Here are a few videos to keep your kitchen is organized.
_____________________________
Opening Stubborn Plastic Blister Packs
with a Can Opener
___________________________
Use a Comb or Clothespin to Hold a Nail when Hammering
__________________________
The Garden Themed Bedroom
There are countless ways that you can personalize a room and make it your own. Everything in a room from the wall color and furniture to the carpet and knick-knacks on a shelf all make the room unique and individualized.
When decorating a bedroom, many people prefer to choose a theme for the room.
Creating a themed room will give everything within that area a sense of unity, and by decorating in a theme you can accomplish a put-together appearance.
Depending on the theme you choose to go with, you will need to consider furniture, paint colors, decorations, window treatments, rugs, and more to go together in a theme.
There are many wonderful bedroom themes to choose from, but one of the most beautiful is the garden theme.
A garden bedroom gives you the feel of being surrounded by plants and flowers in a lovely outdoor setting, and this theme gives your room a fresh and exciting look.
Decorating a garden bedroom doesn't have to be very complicated or expensive, either.
To start your garden bedroom, you will first want to pick which colors you will focus on.
You can use inspiration from the garden to get you started.
Do you want to use colors from a particular flower, a type of tree, or garden leaves?
Popular colors for a garden bedroom include shades of green, pinks, purples, and browns.
Paint the walls a light or neutral tone.
A tan, light peach, or subtle green color can look great as a base to your garden decorating.
If you are feeling artistic, you can paint flowers on the walls or use stick-on decals to decorate.
Choose furniture that looks garden-inspired and elegant for the room.
Decorating with flowers is another option for the garden bedroom.
Take care not to overdo it, though—a ton of fake flowers around the room could end up looking tacky.
Choose a few nice arrangements to display in the room on a shelf or table, and think about using some live plants as well near windows.
You can also choose a floral-pattern bedspread or green, leaf-inspired bedding.
Other garden-like pieces, like a flower-shaped pillow or vines wound around windows or bedposts, can help add to the effect of an outdoor garden atmosphere.
___________________________
The Perfect Marti Gras Cocktails
Hurricane
Ingredients:
2 oz light rum
3 oz dark rum
6 oz passion fruit juice
3 oz dark rum
6 oz passion fruit juice
6 oz orange juice
2 tbsp grenadine
2 orange slices
2 maraschino cherries
Instructions:
In a large liquid measuring cup, mix first 5 ingredients.
Pour over ice filled glass.
Garnish each glass with an orange slice and a maraschino cherry.
Mardi Gras Mango-Rita
Ingredients:
1 cup crushed ice
1 large ripe mango, peeled, pitted and diced
1/2 cup Tequila
2 tablespoons freshly squeezed lime juice (reserve one squeezed lime half to moisten glass rims)
Coarse salt
Instructions:
1 large ripe mango, peeled, pitted and diced
1/2 cup Tequila
2 tablespoons freshly squeezed lime juice (reserve one squeezed lime half to moisten glass rims)
Coarse salt
Instructions:
Combine ice, mango, tequila and lime juice in a blender and puree until smooth.
Moisten rims of 2 margarita glasses with reserved lime half and dip each glass rim in coarse salt.
Pour Mango-rita into margarita glasses.
Peach Bellini
Ingredients:
1.25 oz CÎROC Peach
.25 oz champagne
.25 oz champagne
Instructions:
In a flute glass or champagne, combine peach vodka with champagne of your choosing.
Classic Strawberry Daiquiri
(makes 2 servings)
Ingredients:
4 oz. light rum
1/2 c. fresh strawberries
1/2 c. frozen strawberries
Juice of 1 lime
Lime slices for garnish
1/2 c. fresh strawberries
1/2 c. frozen strawberries
Juice of 1 lime
Lime slices for garnish
Instructions:
Add rum, fresh and frozen strawberries, and lime juice to a blender
and blend until smooth.
Pour into two margarita glasses and garnish with lime slices.
Carnival Cocktail
Ingredients:
.75 oz Vodka
.75 oz Blue Curacao
.75 oz Melon Liqueur (Midori)
.75 oz Peach Schnapps
.75 oz Lime Juice
Top w/ Sprite
.75 oz Blue Curacao
.75 oz Melon Liqueur (Midori)
.75 oz Peach Schnapps
.75 oz Lime Juice
Top w/ Sprite
Instructions:
Combine ingredients except sprite in shaker.
Pour into large glass with ice.
Top with Sprite.
Wiz Fizz
Ingredients:
1.5 oz Aviation Gin
.5 oz Cynar
.75 oz lemon juice
.75 oz vanilla syrup
1 oz heavy cream
1 egg white
Root beer
Nutmeg
.5 oz Cynar
.75 oz lemon juice
.75 oz vanilla syrup
1 oz heavy cream
1 egg white
Root beer
Nutmeg
Instructions:
Shake Gin, Cynar, lemon, vanilla and egg white dry for 30 seconds.
Add in cream and shake again without ice.
Add ice and shake vigorously (for a while).
Pour out drink into a tin and shake again without ice (dry shake).
In a highball glass, add 2 ounces of root beer and pour the drink over the top.
Allow it to settle and pour a bit more root beer on top to make the head of it rise.
Garnish with nutmeg.
Cidre Cherry Pom Pomme
Ingredients:
.5 oz. grenadine
.5 oz. lemon juice
Stella Artois Cidre
Brandied cherry for garnish
Instructions:
.5 oz. lemon juice
Stella Artois Cidre
Brandied cherry for garnish
Instructions:
Mix ½ oz. grenadine and ½ oz. lemon juice.
Shake over ice.
Pour into a highball glass and top with Stella Artois Cidre.
Garnish with a brandied cherry skewer.
Orange & Pineapple Punch
(Makes 4 servings)
Ingredients:
2 cups pineapple juice
2 cups orange juice
4 maraschino cherries, plus 1/2 cup juice
1/2 orange, cut into 4 slices
4 ounces dark rum
2 cups orange juice
4 maraschino cherries, plus 1/2 cup juice
1/2 orange, cut into 4 slices
4 ounces dark rum
Instructions:
In a pitcher, stir together the pineapple juice, orange juice, and cherry juice. Fill a tall glass with ice, pour over the juice mixture, garnish with a cherry and a slice of orange.
For the adults, add 1 ounce dark rum to each drink.
_____________________________
Removing Deodorant Stains from Your Clothes
The Easy Way
_____________________________
Maximizing Closet Space...Using Aluminum Cans
Maximize closet space by looping tabs from soda cans over coat hangers.
Each tab has 2 holes, and as a result, each can be used to hang another hanger.
This is a great way to keep suits and other sets together.
Check out these videos:
____________________________
Fully concur.....organization also results in less daily stress.
Personally I keep virtually ALL files on flash drives; one of those little flash drives can keep an entire file cabinet's worth of paper in digital format.
(just don't forget where you store the flash drive for 'safe keeping')
I even have every tax return I have ever filed dating back to circa 1985.
Yes I am aware that legally you don't need to save the copies of the returns 'forever', but the flash drive takes up no room.
And yes, the secret is to have some sort of system to know where you've stored the files on which flash drive.